Create a Service User
Use the Create Service User action to add a new Service User for automated systems to securely interact with Qualytics.
Permissions
Only users with the Admin role can create Service Users. See the Permissions page for details.
Fields
The service user form contains the following fields:
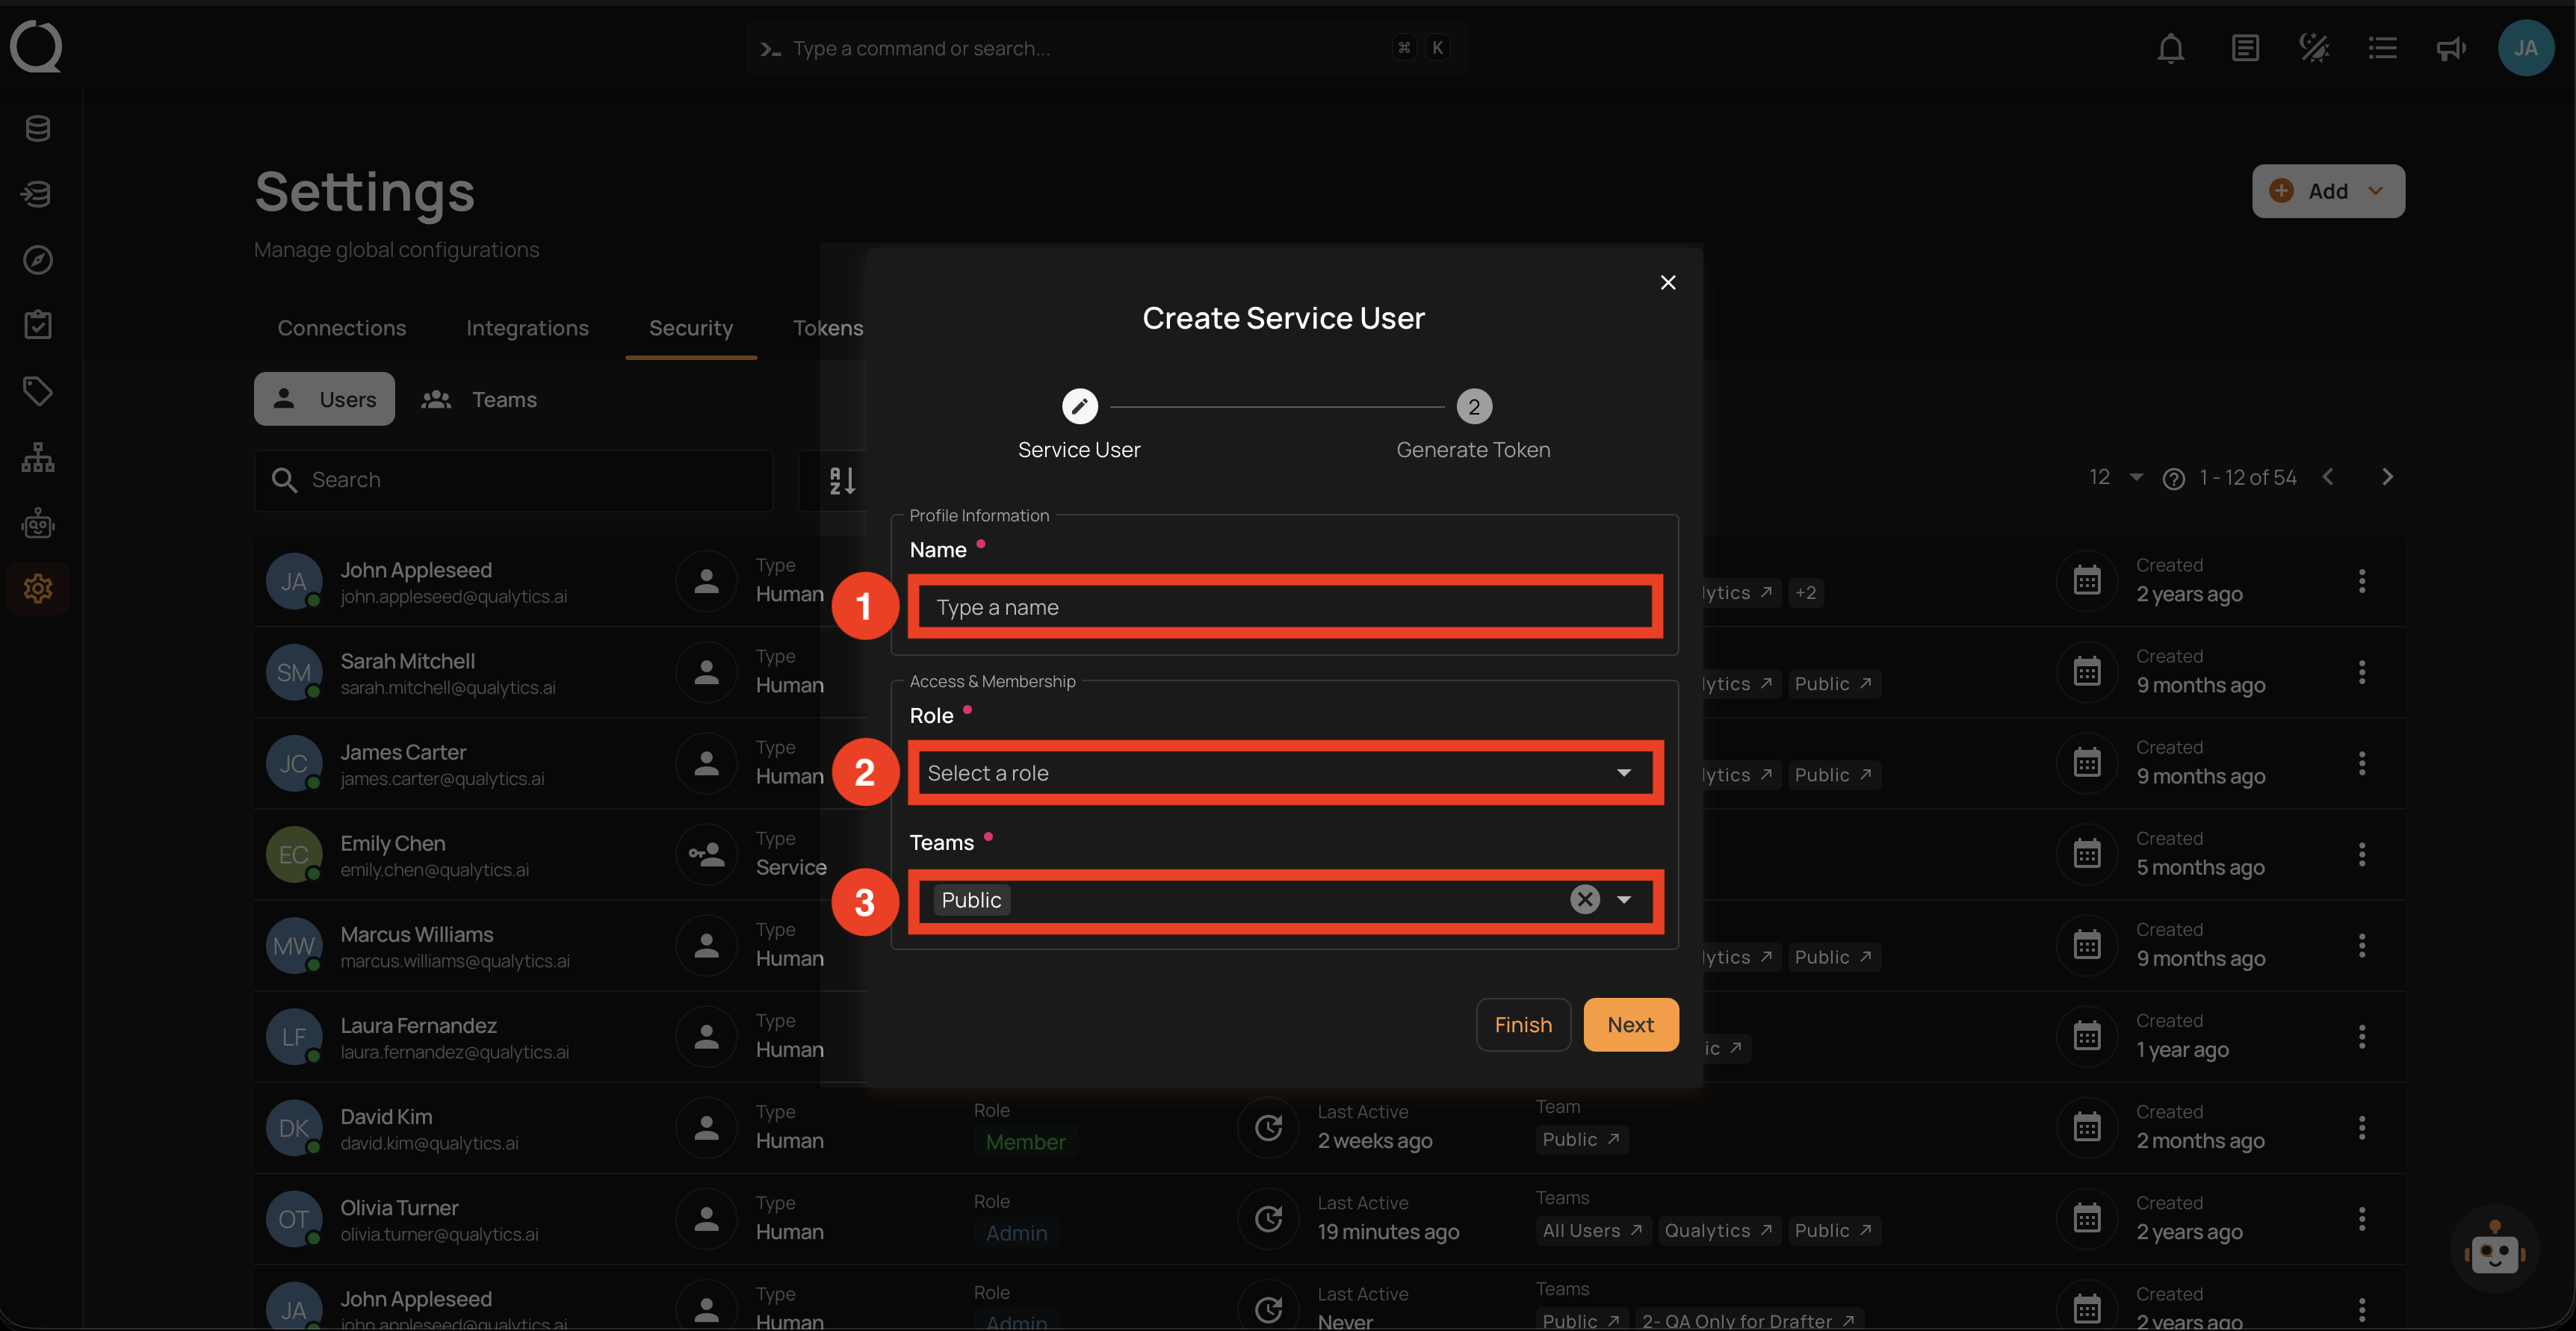
| REF. | FIELD | DESCRIPTION |
|---|---|---|
| 1 | Name | A descriptive name for the Service User (e.g., svc-dbt-cloud, svc-airflow). This becomes the account identifier. |
| 2 | Role | The role assigned to the Service User: Admin, Manager, or Member. Start with the least privileged role needed. |
| 3 | Teams | Teams the Service User should belong to. The Public team is included by default. |
Steps
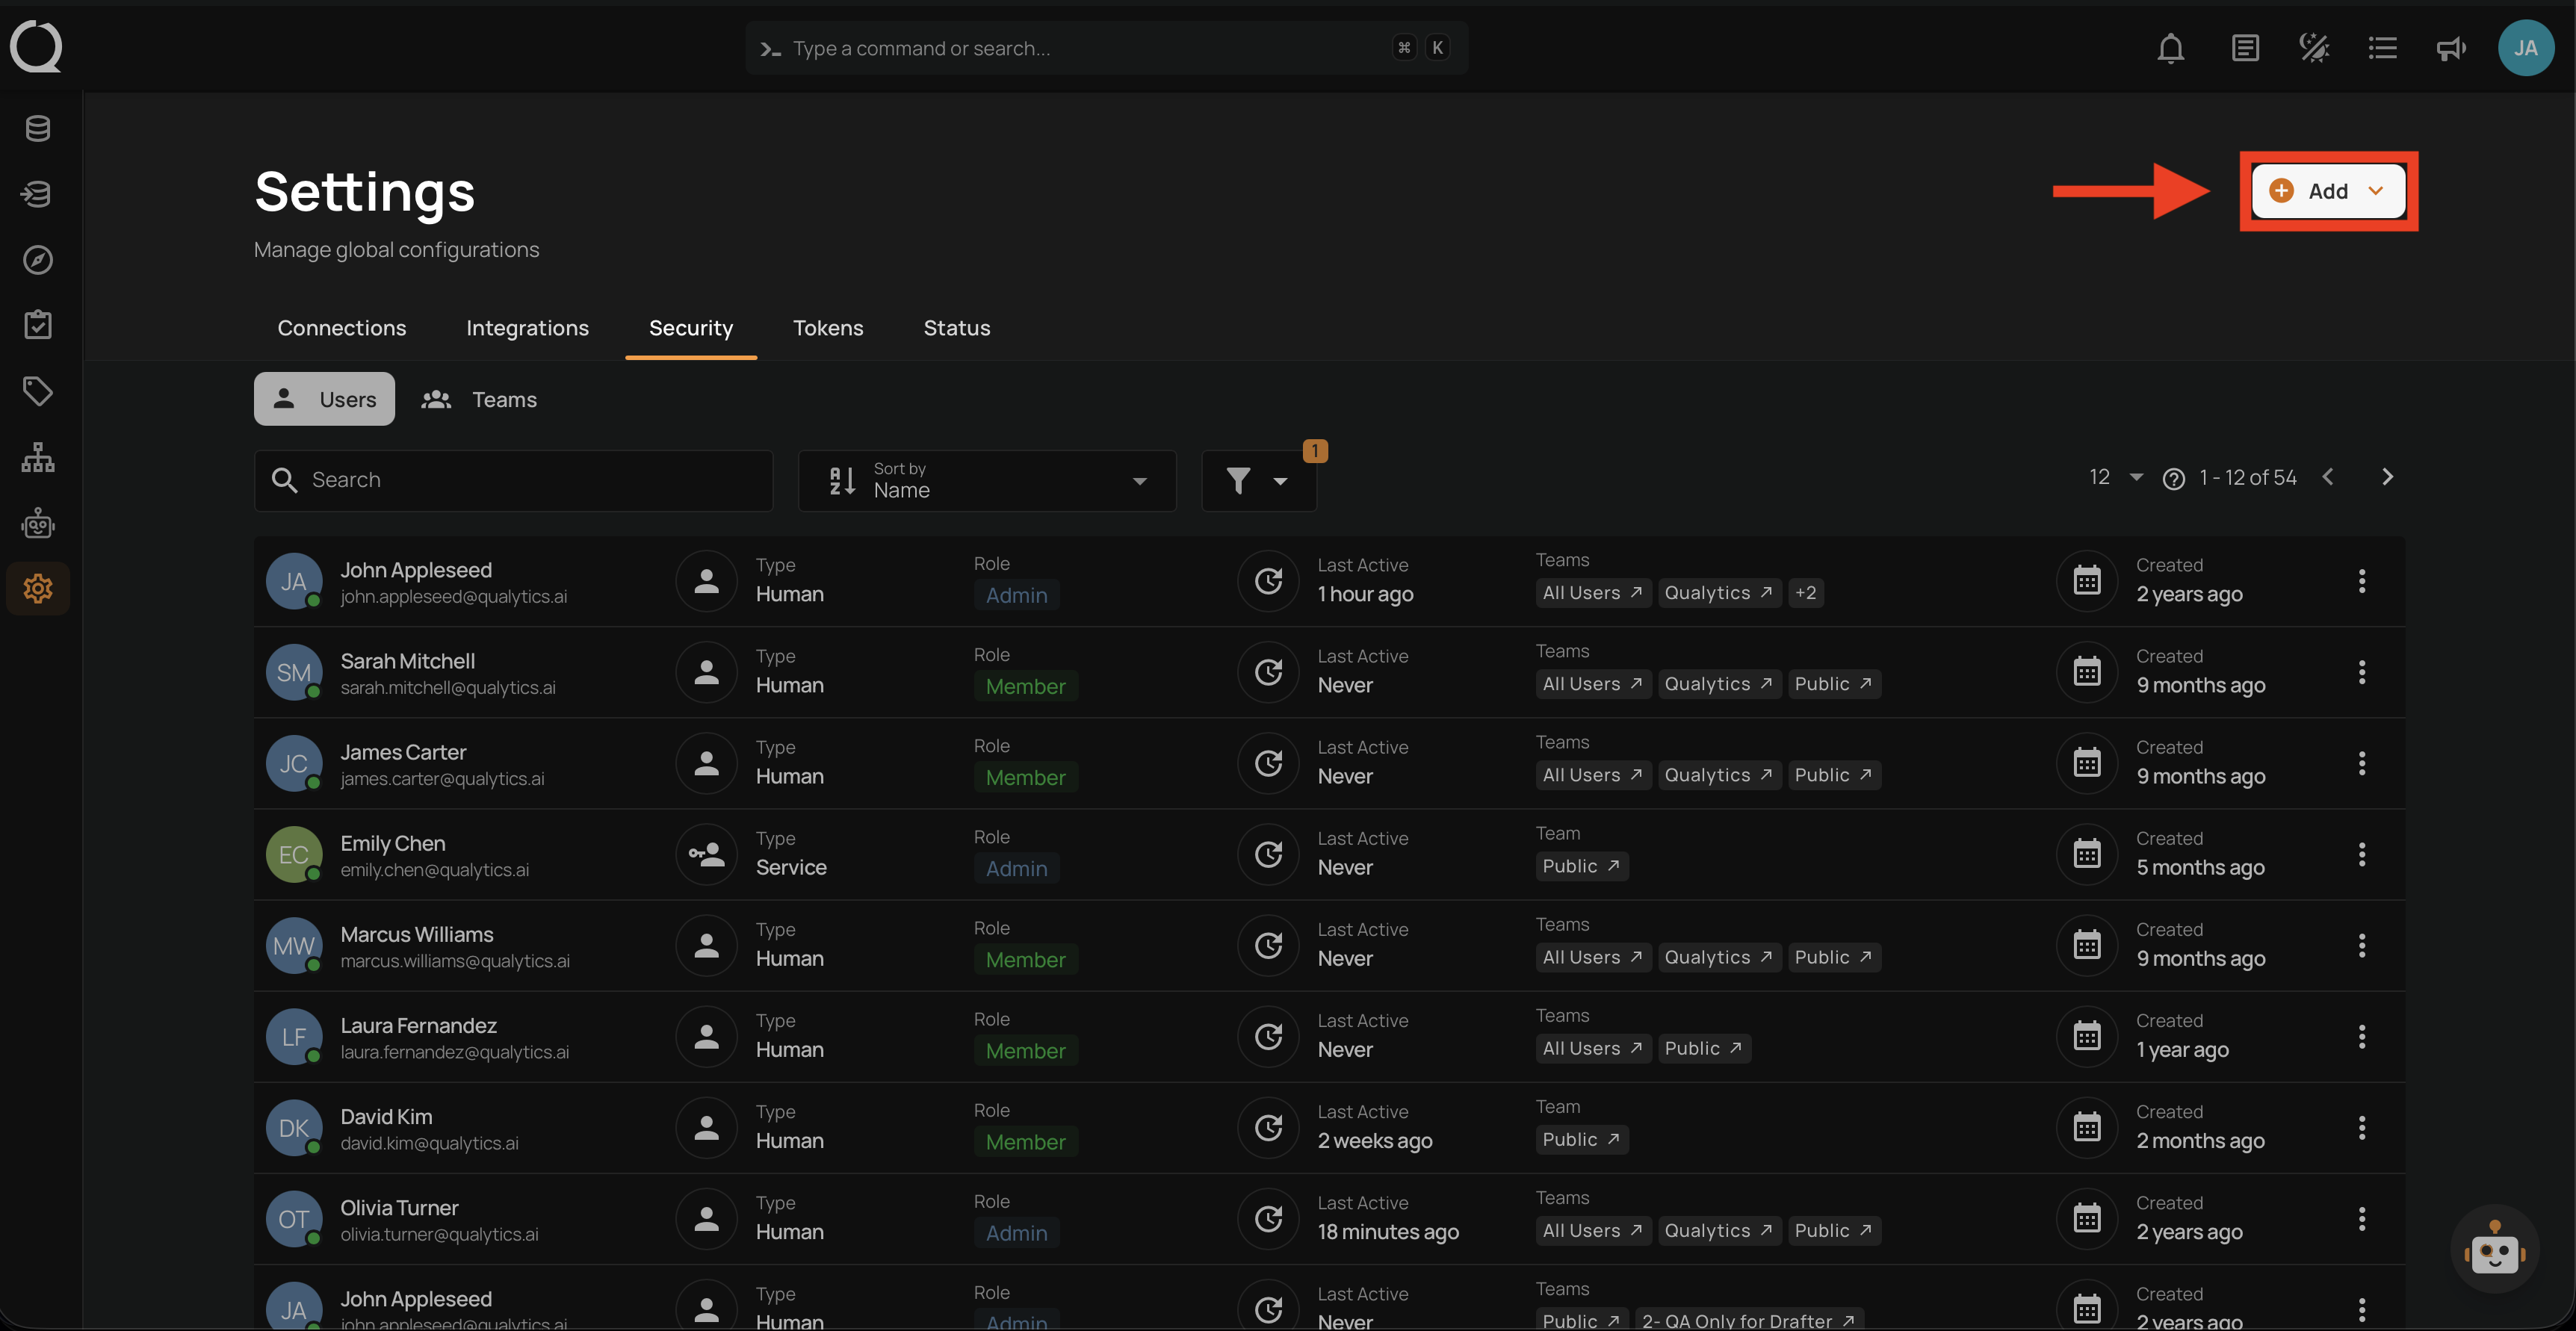
Step 1: In the Security tab, click the Add button in the top right corner.
Step 2: A menu opens with the available options.
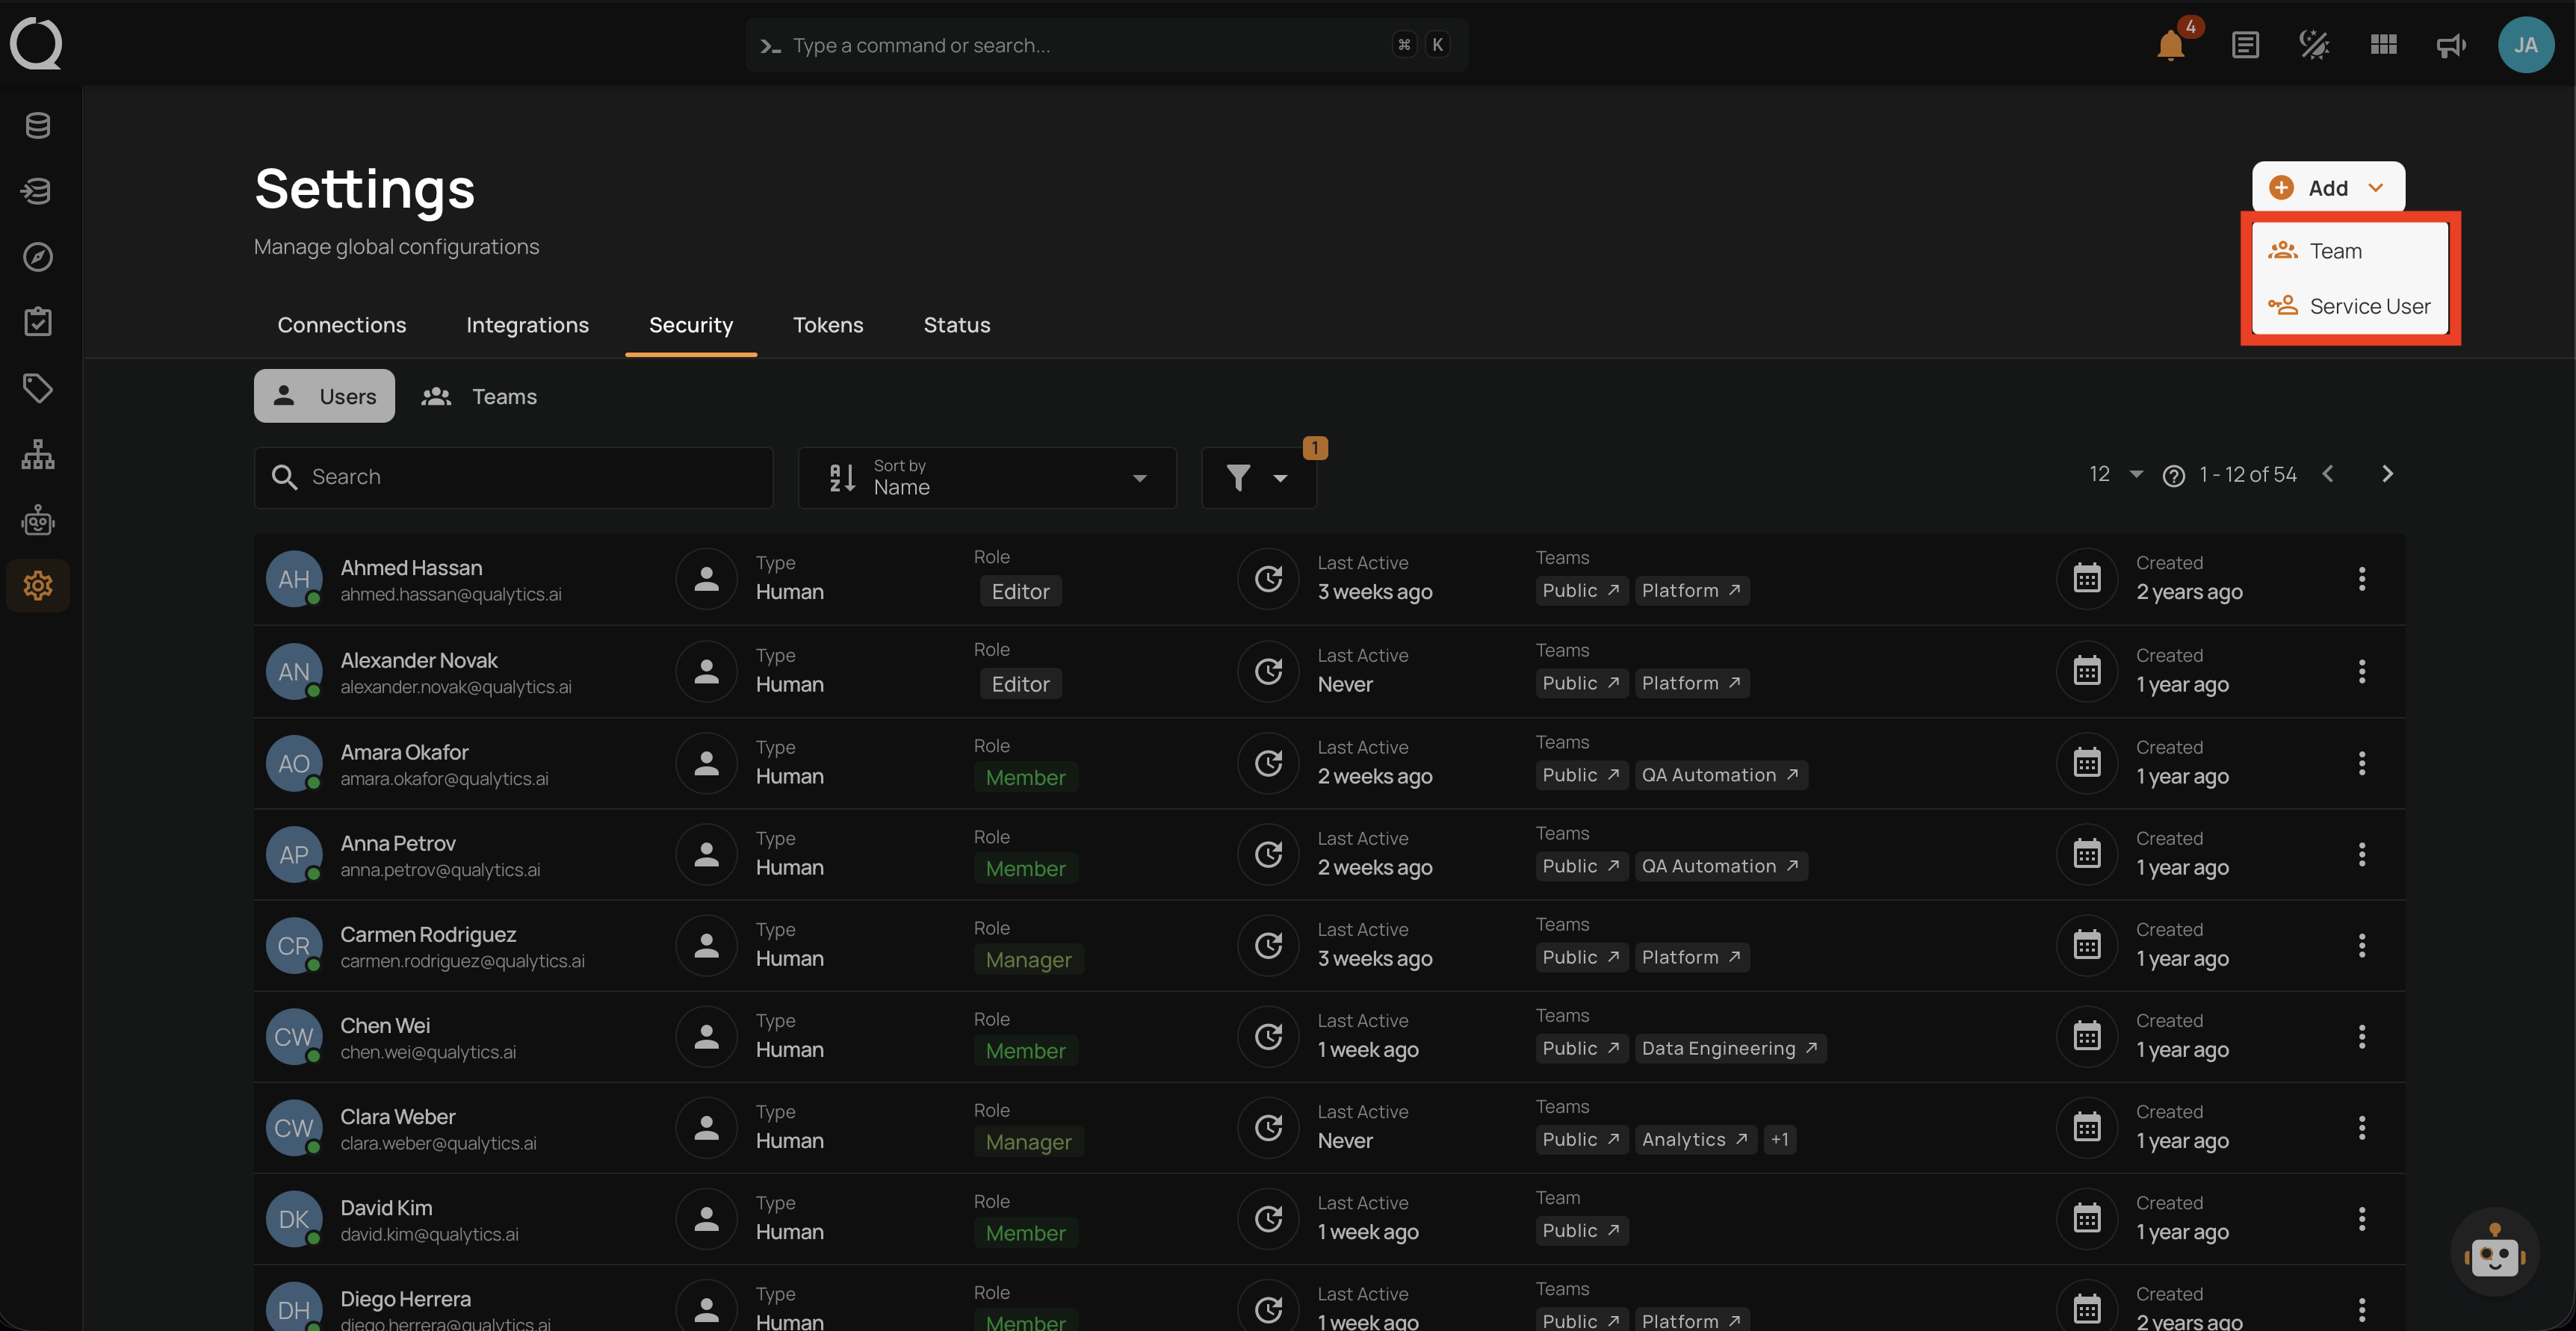
Step 3: Select Service User from the menu.

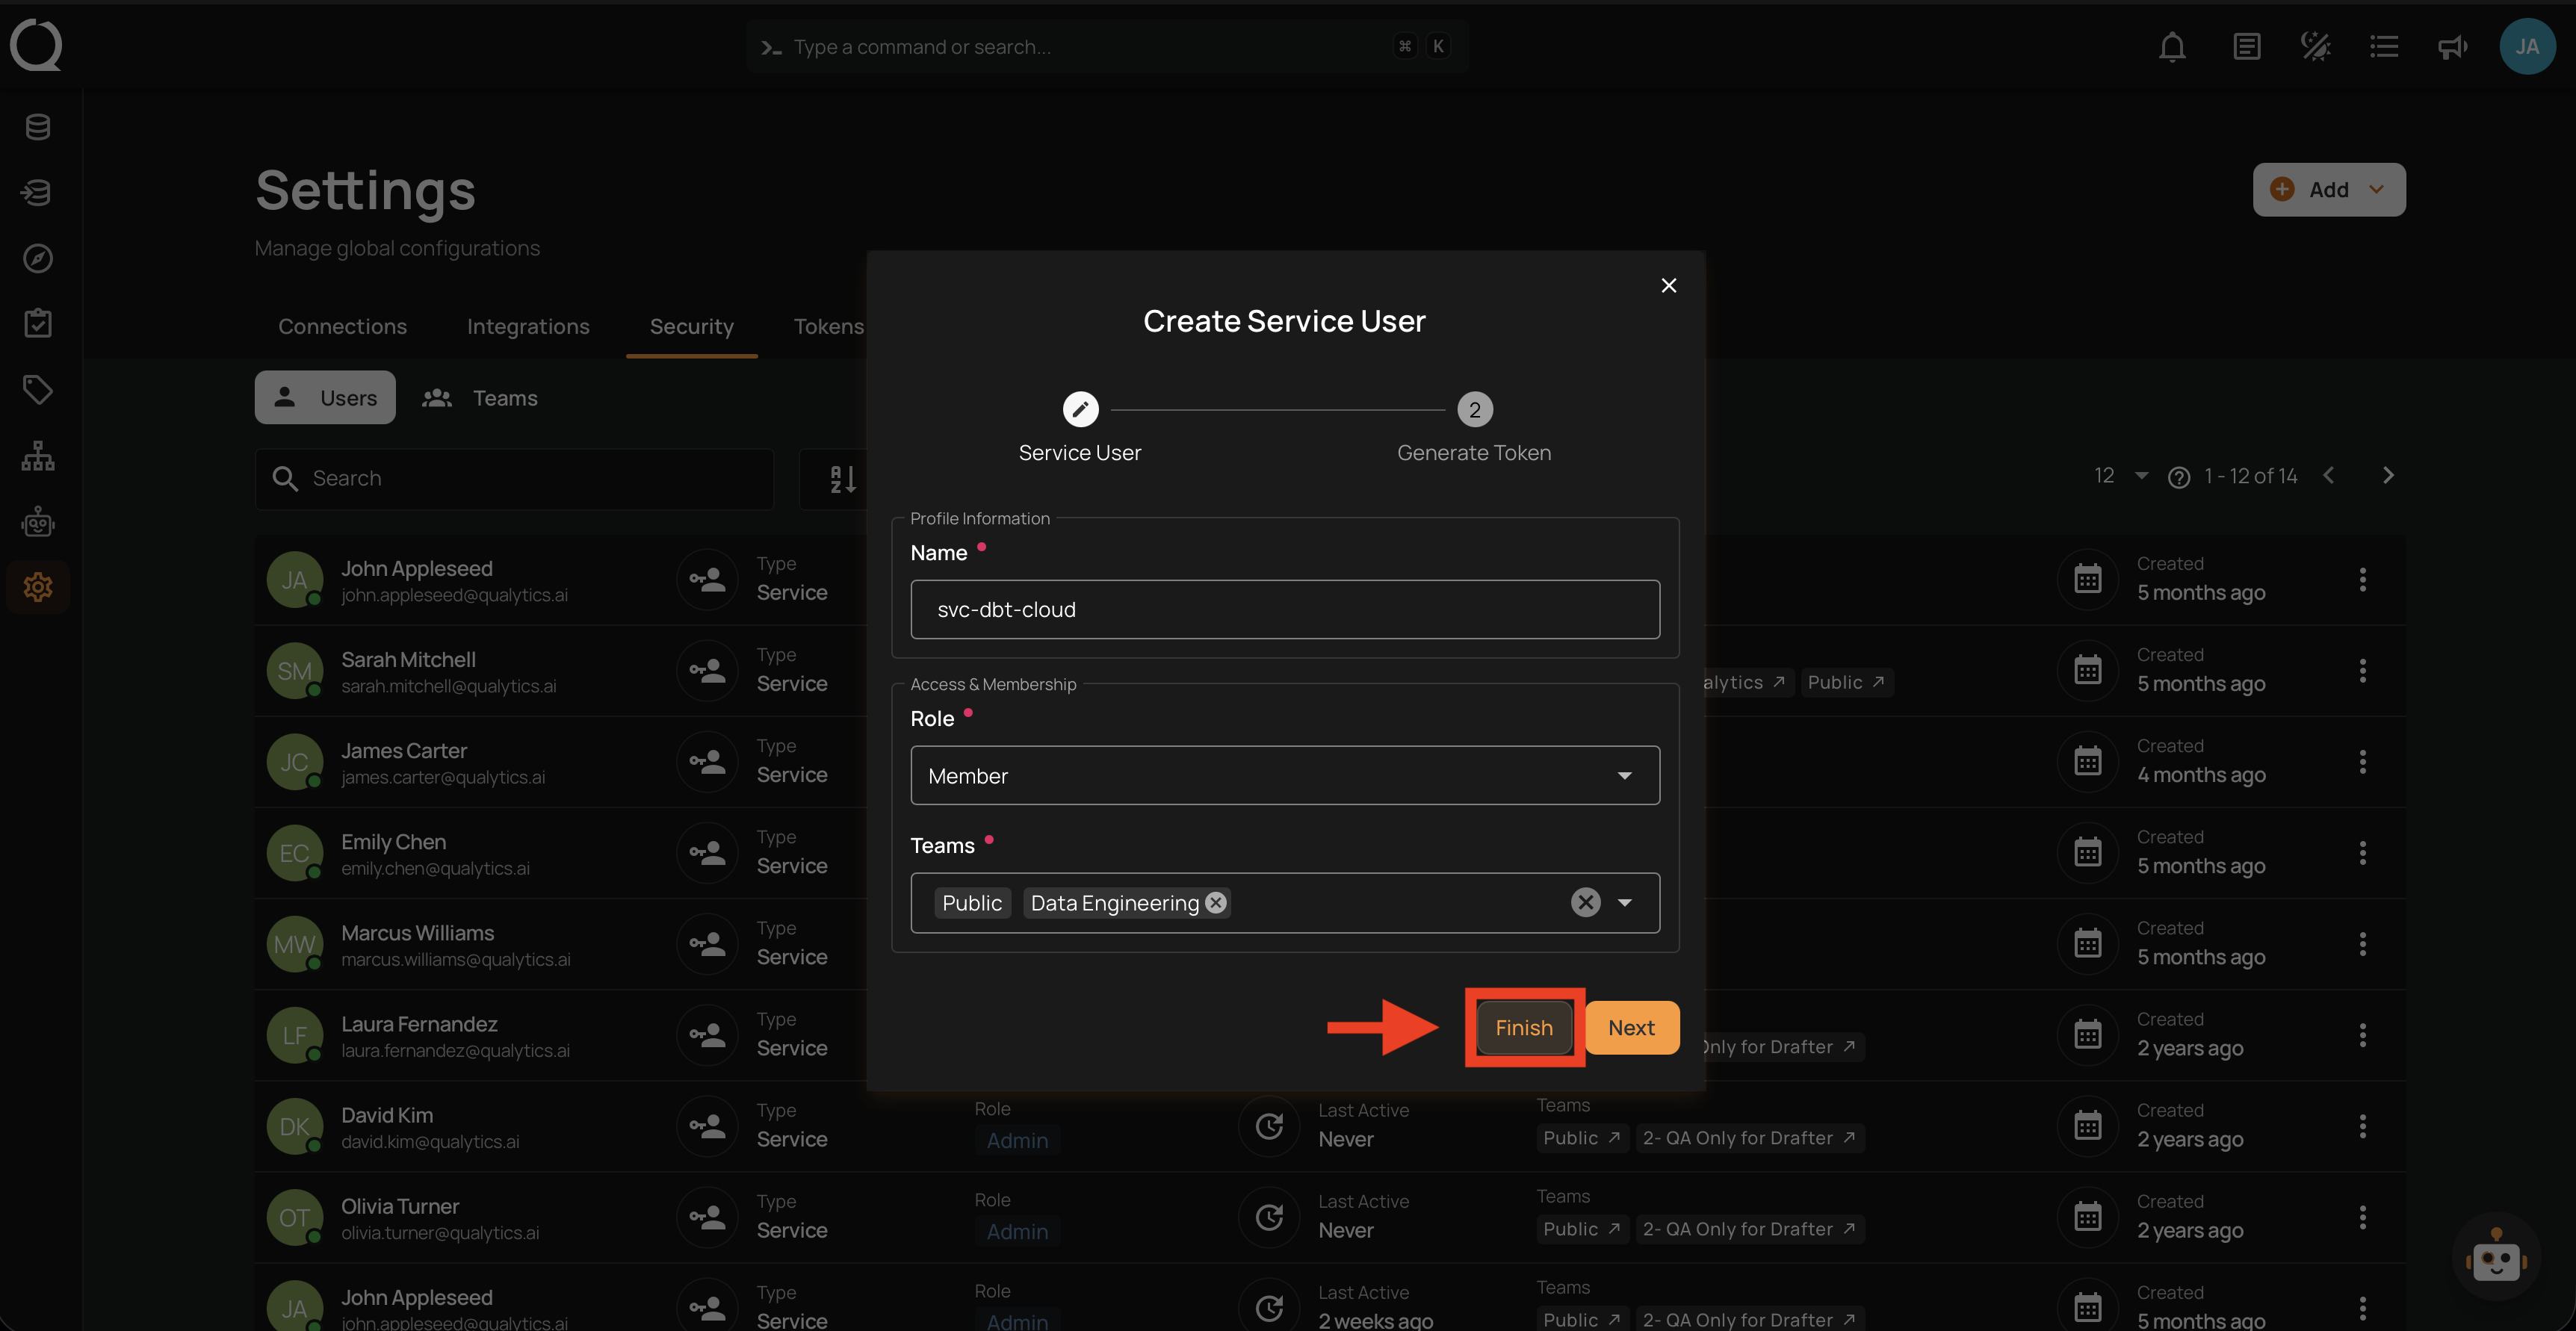
Step 4: Fill in the Service User fields and review your selections.
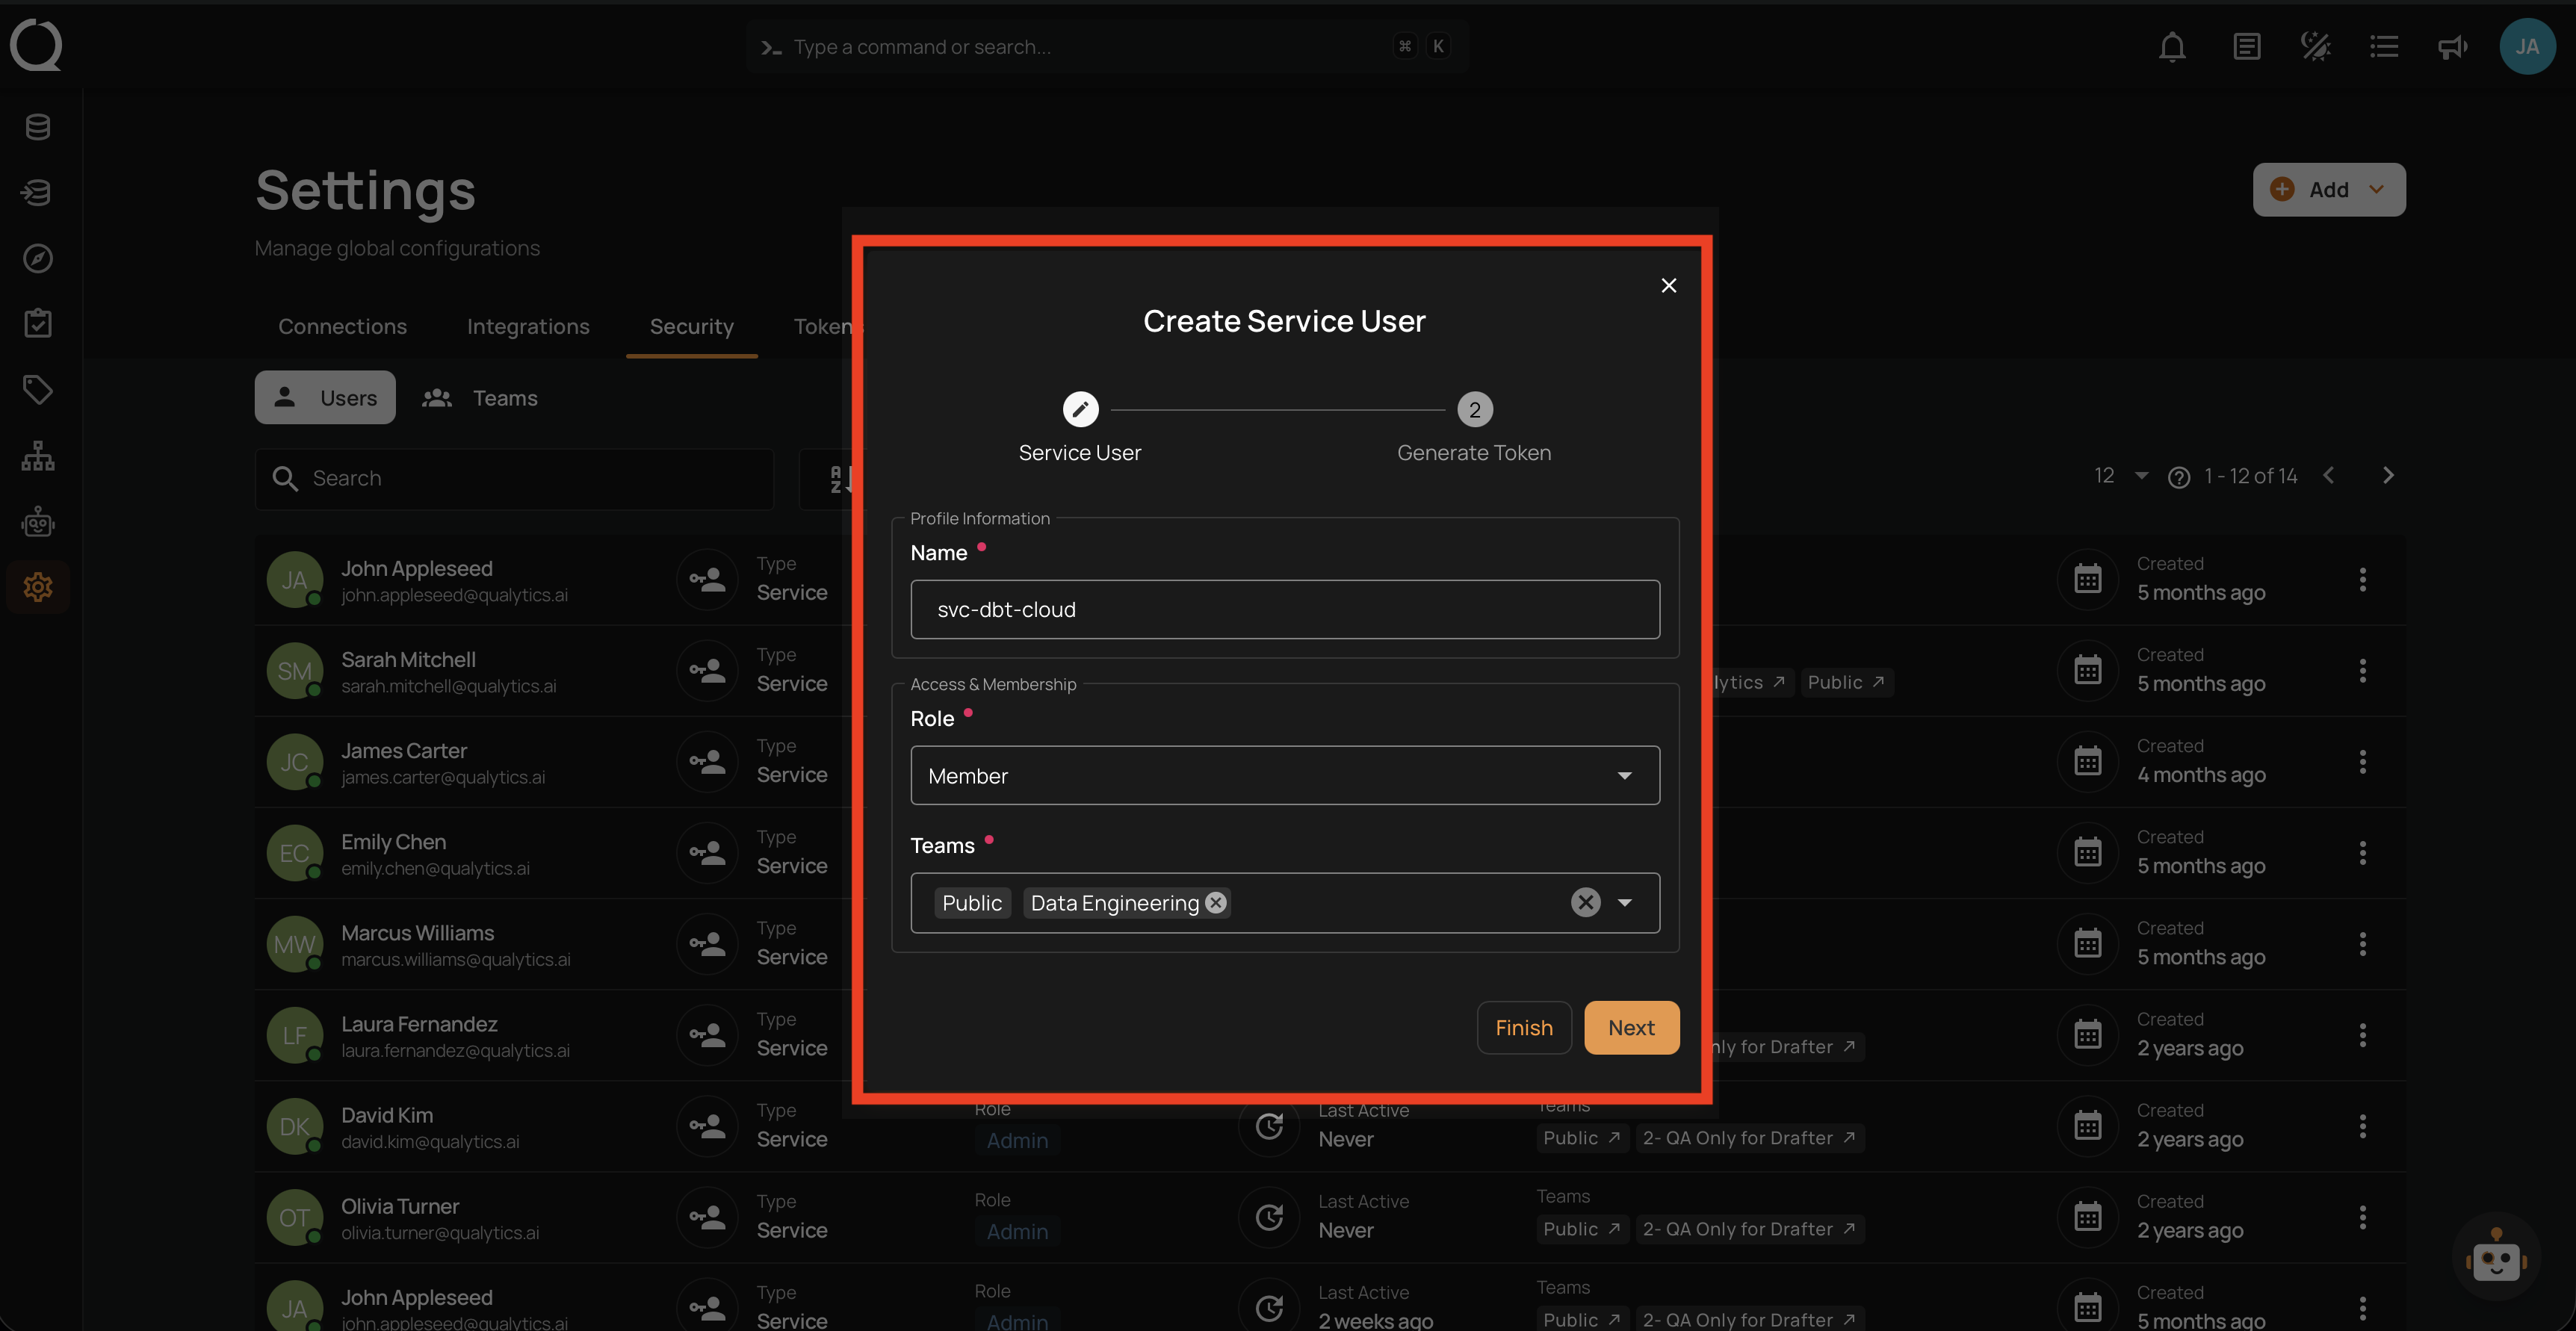
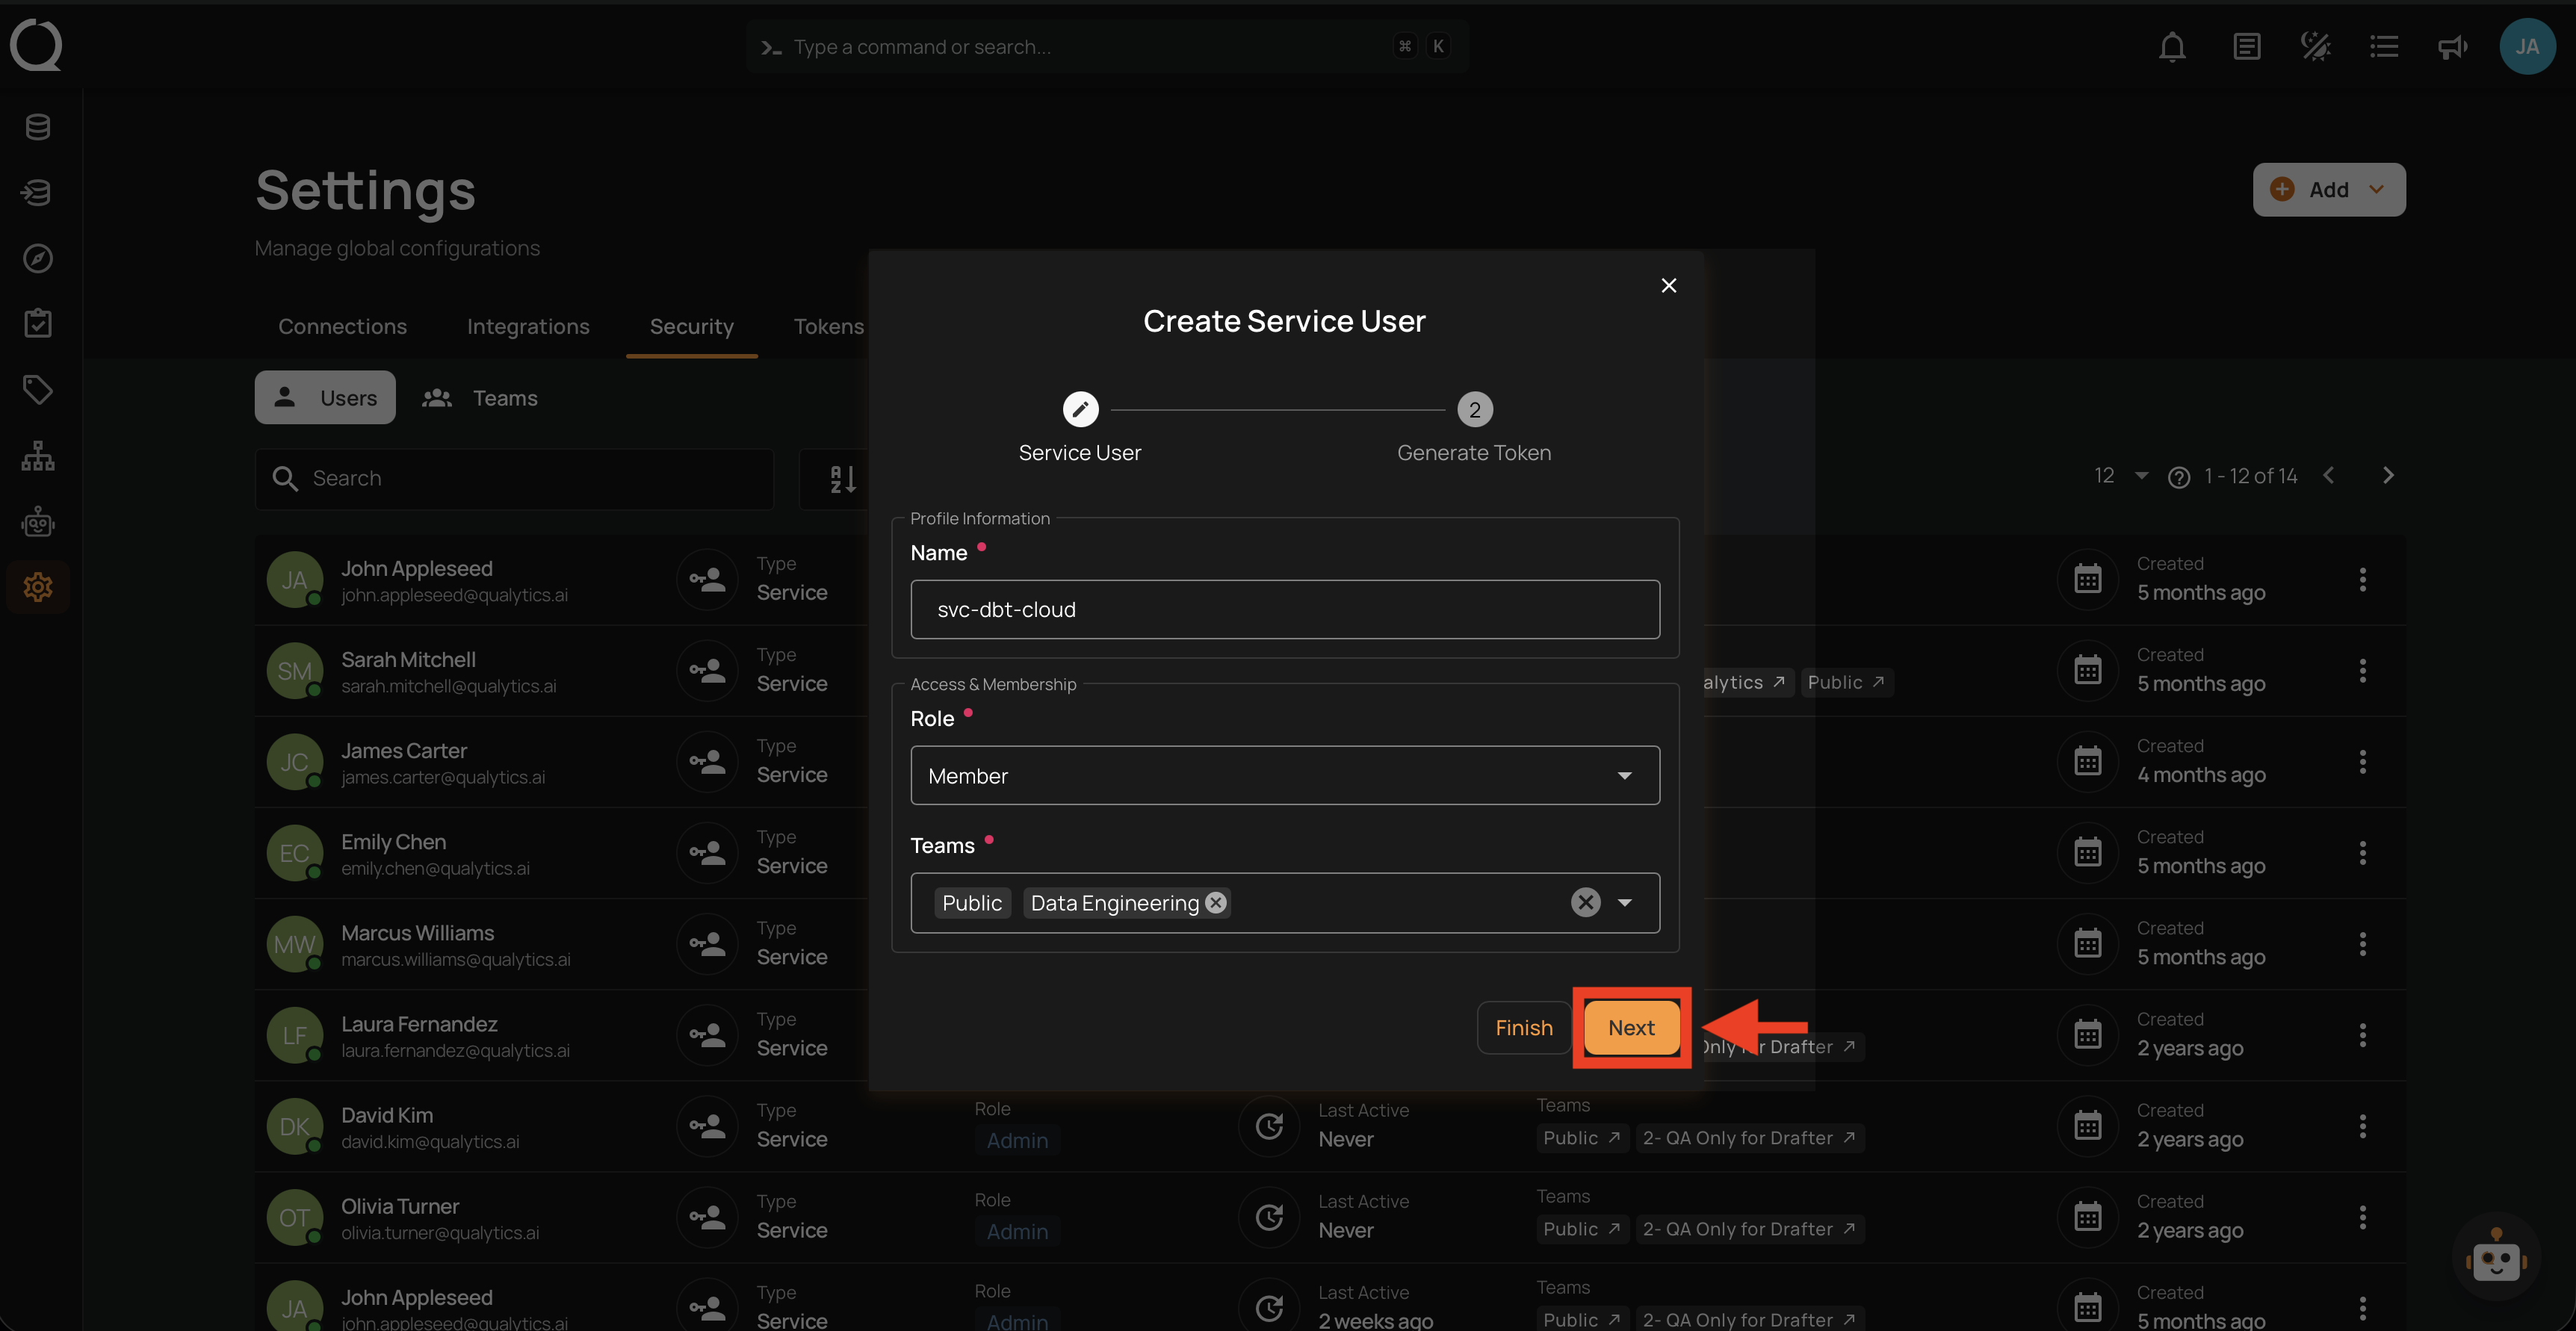
Step 5: Click the Finish button to create the Service User without generating a token, or click Next to also generate a Service Token (see Optional: Generate a Token below).
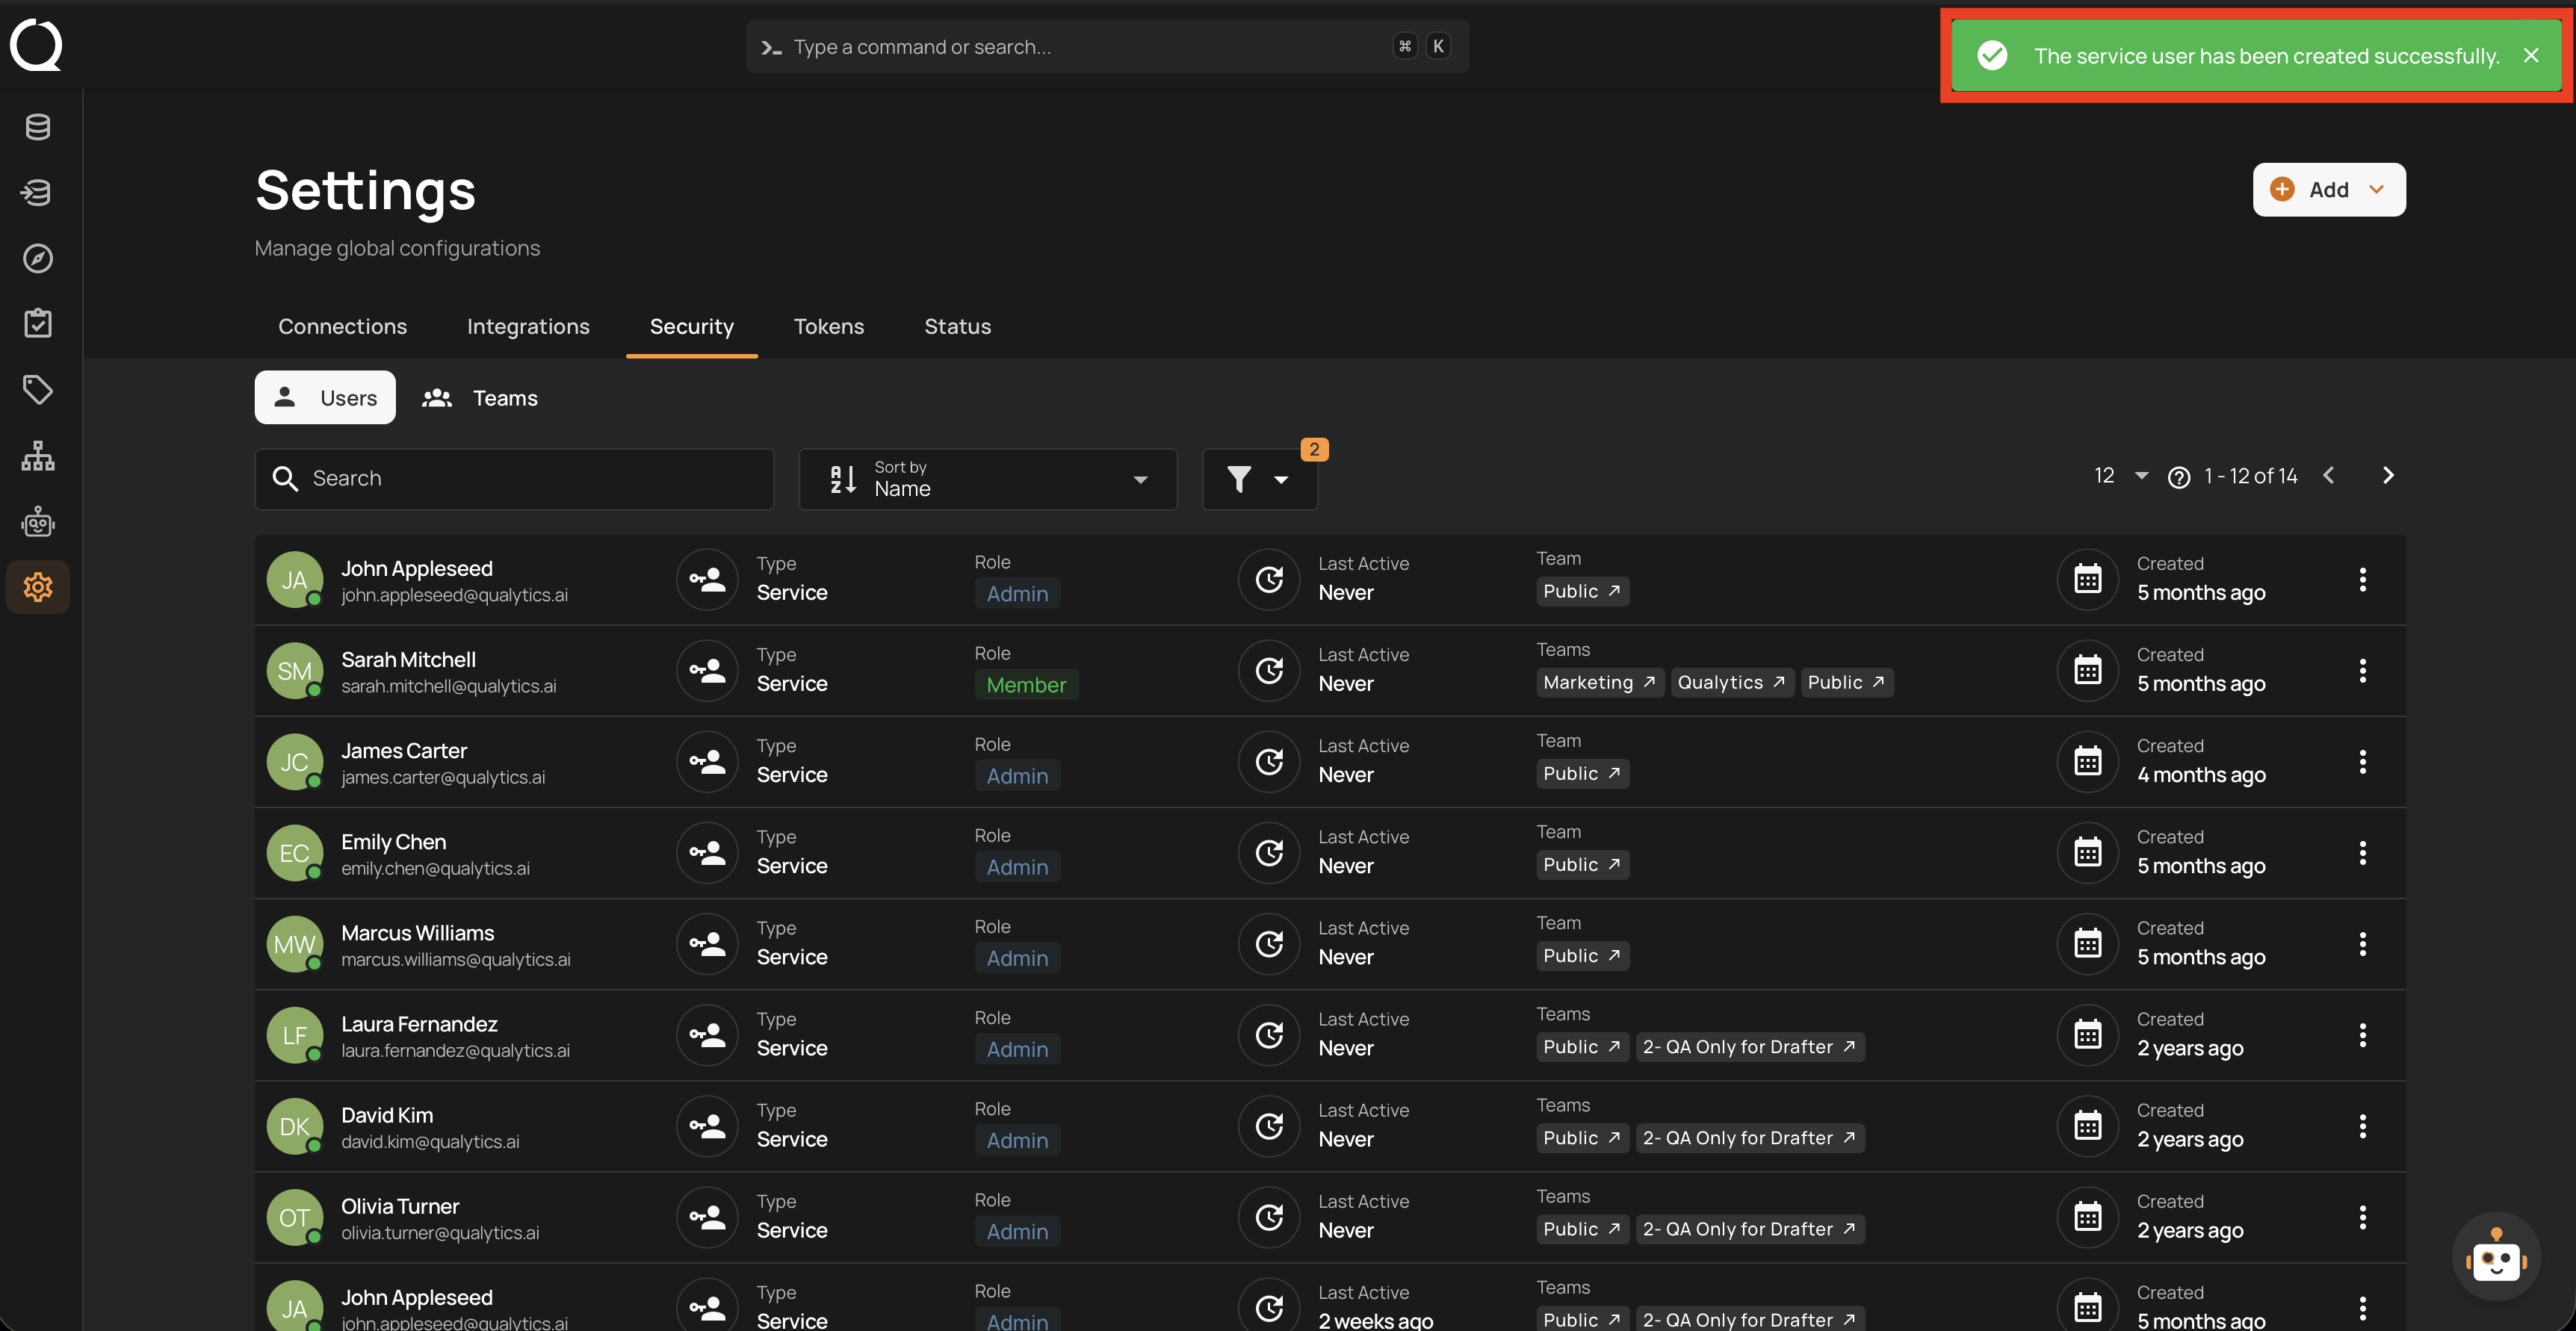
Step 6: A success notification confirms the Service User has been created. The new account appears in the users list with a Service badge.
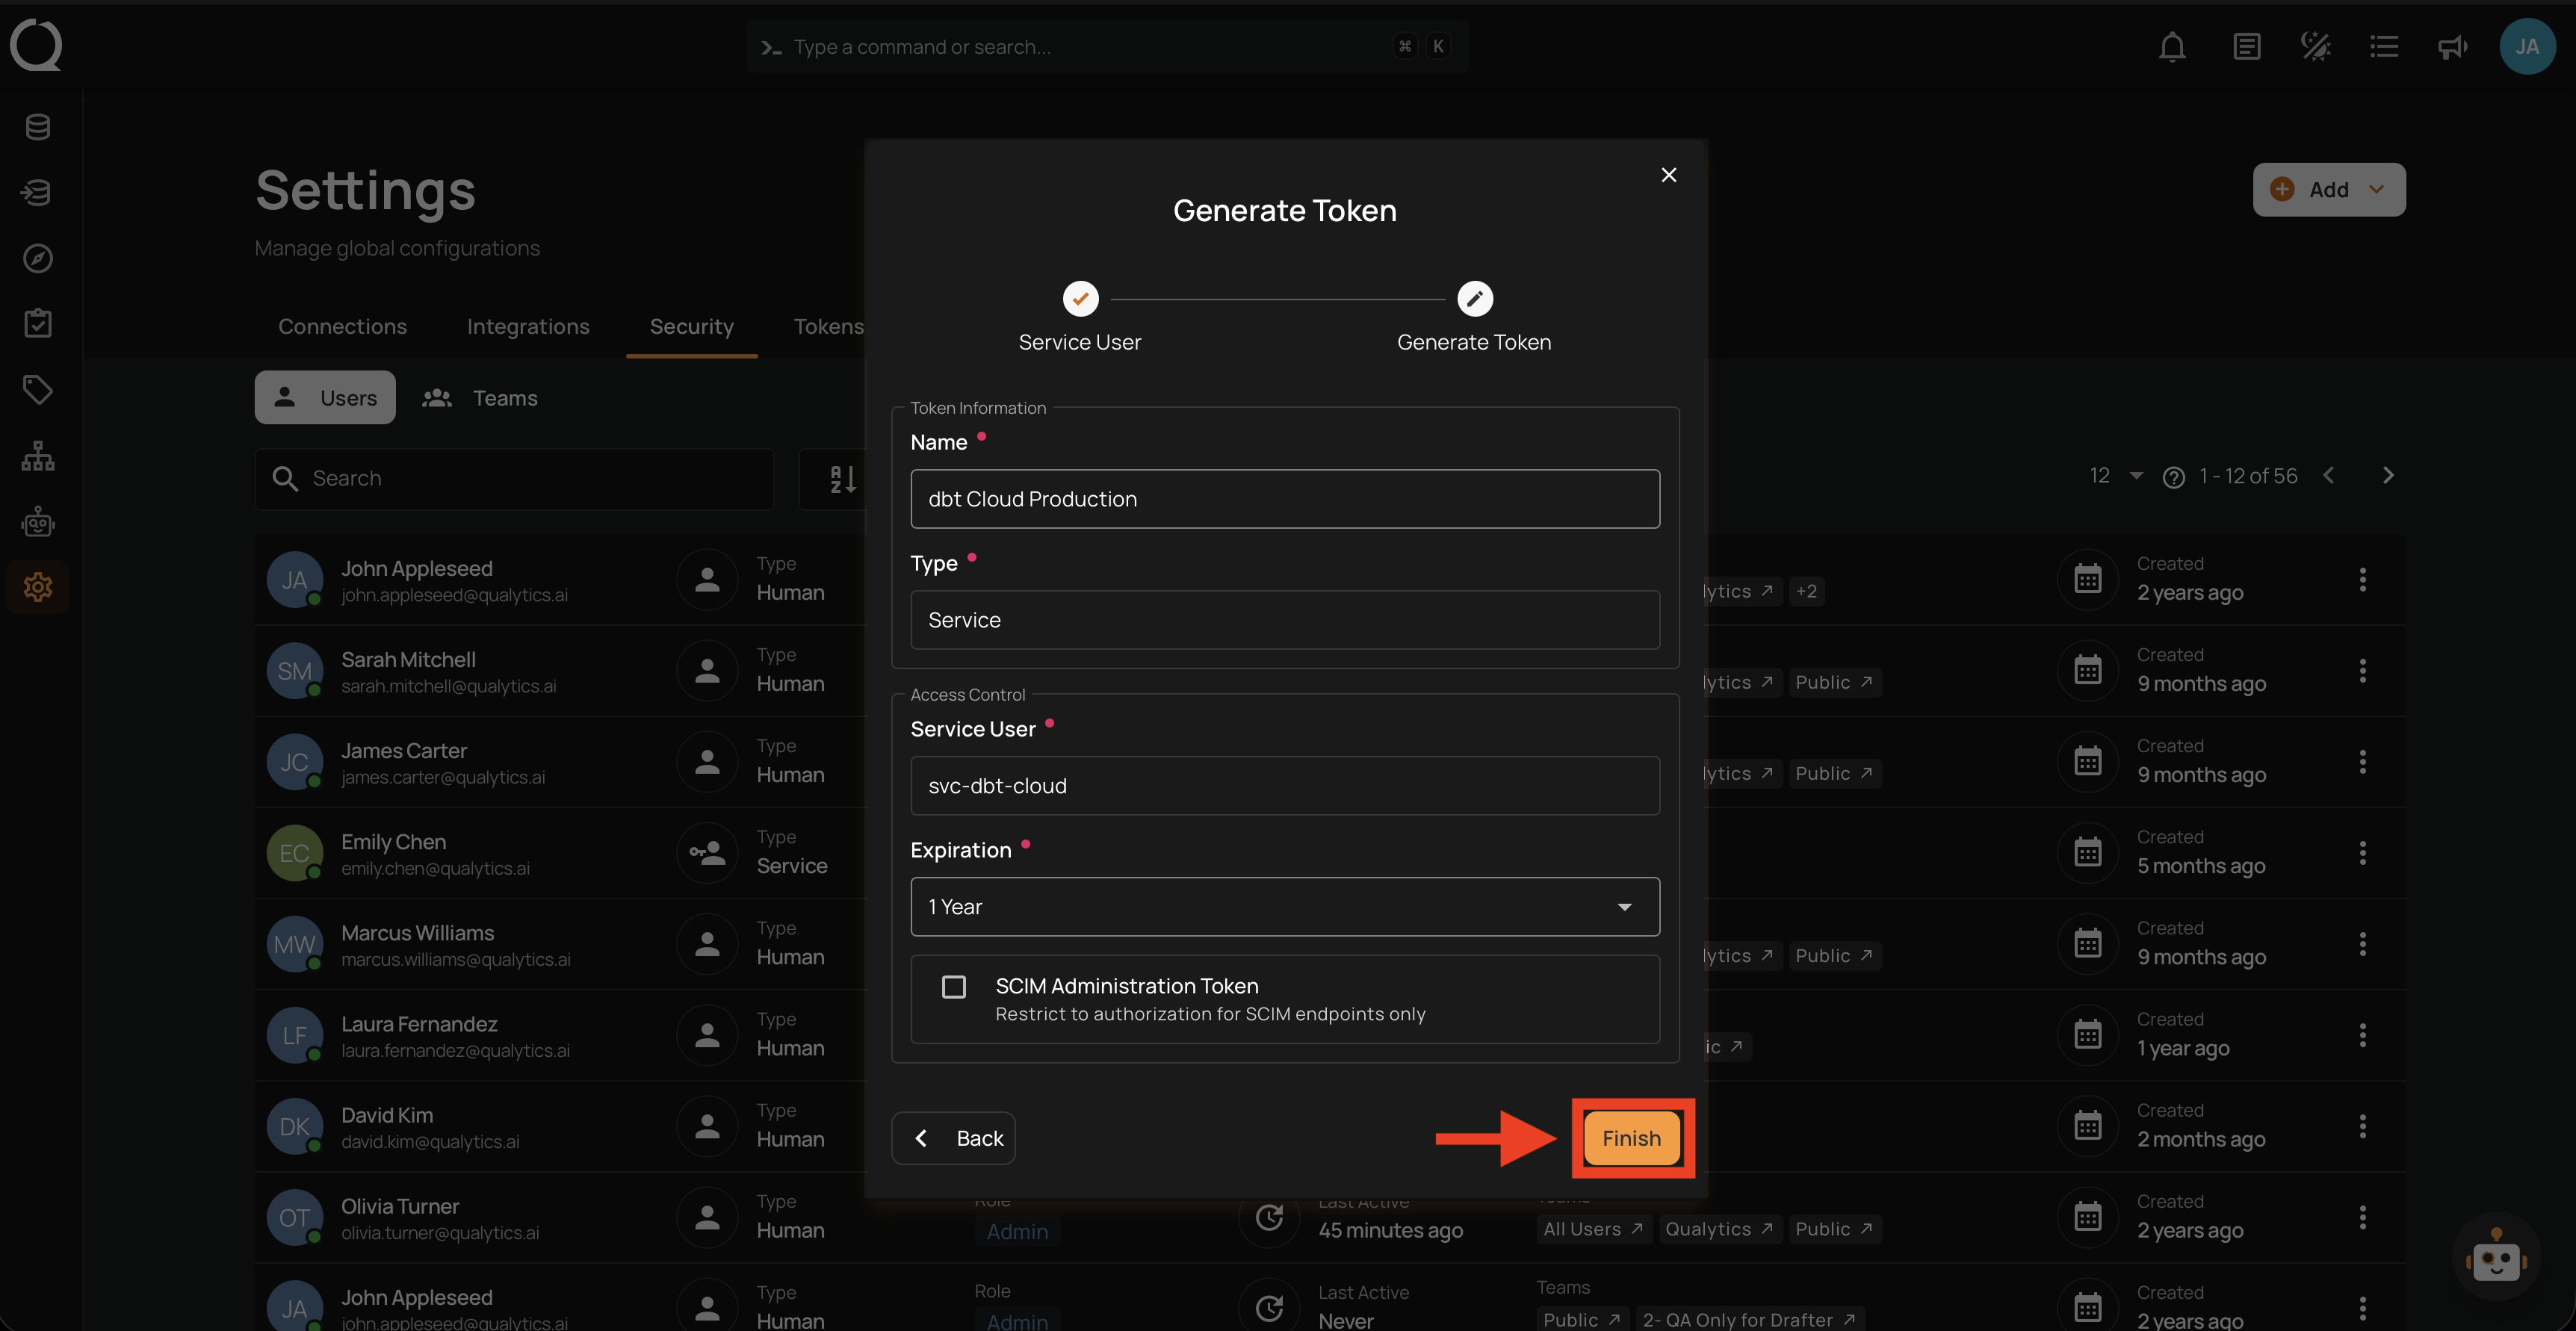
Optional: Generate a Token
You can generate a Service Token during account creation by clicking Next instead of Finish in Step 5.
Step 5 (alternative): Click Next to proceed to the token generation step.
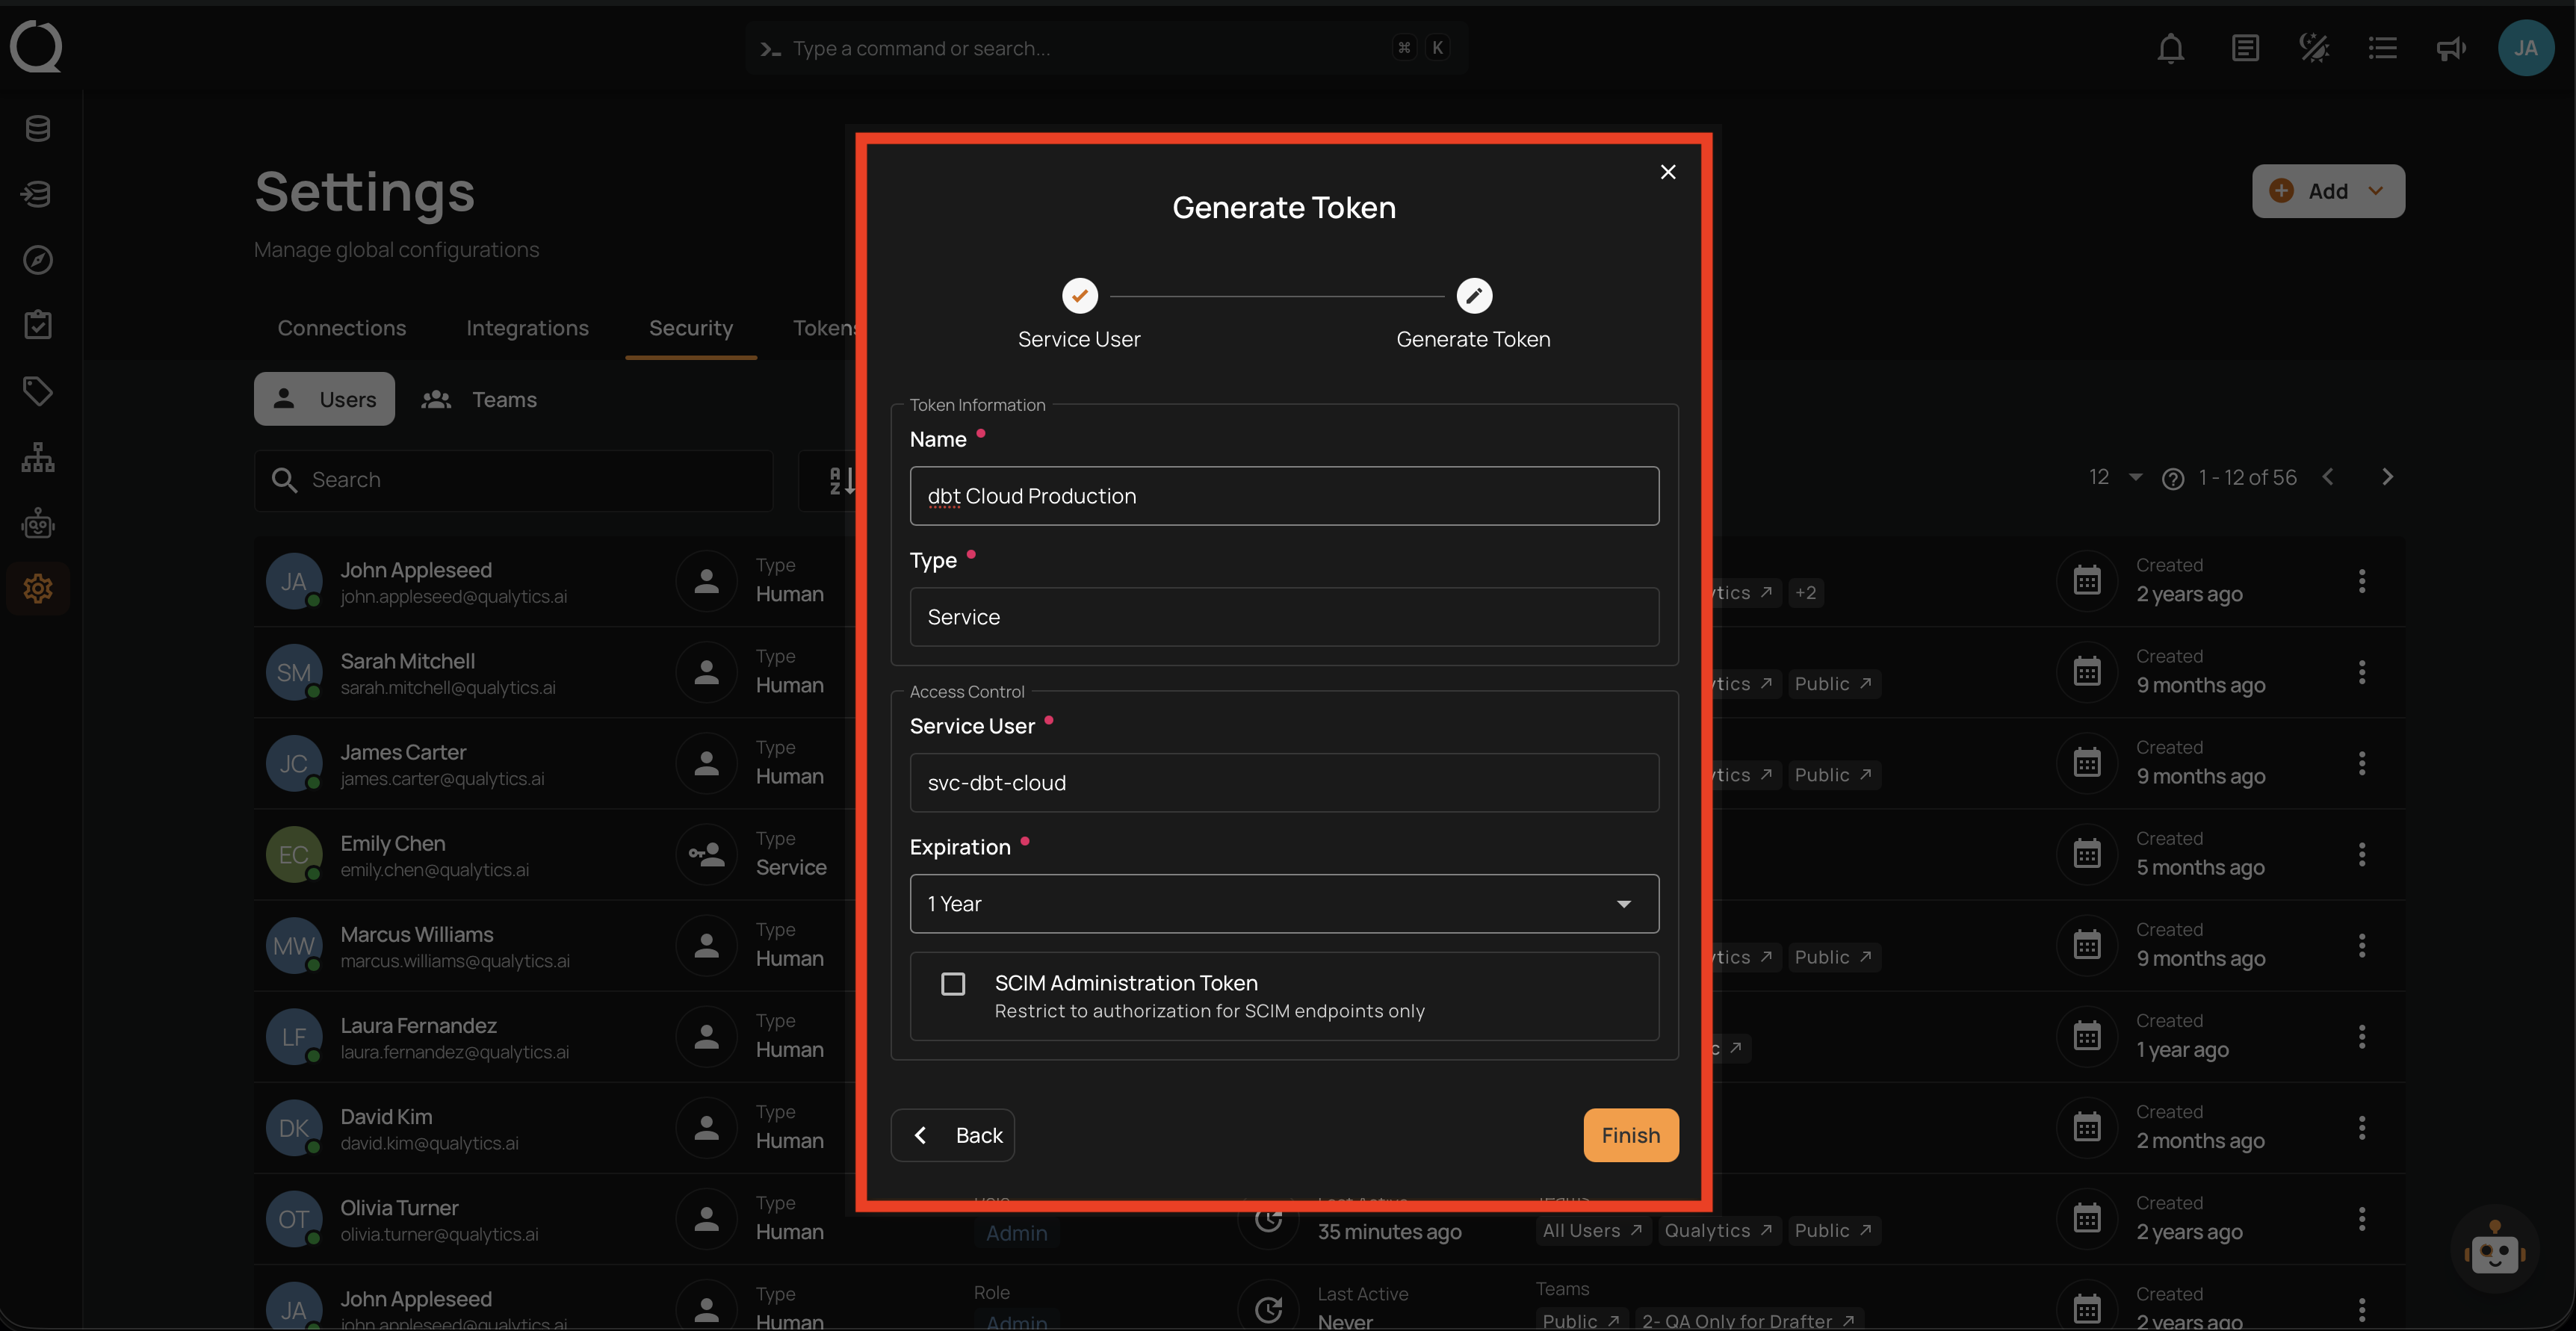
Step 6 (alternative): Fill in the token name and expiration.
Info
For more details on Service Token fields and management, see the Service Token documentation.
Step 7 (alternative): Click Finish to create the Service User and generate the token.
Step 8 (alternative): A modal appears displaying the newly generated token.
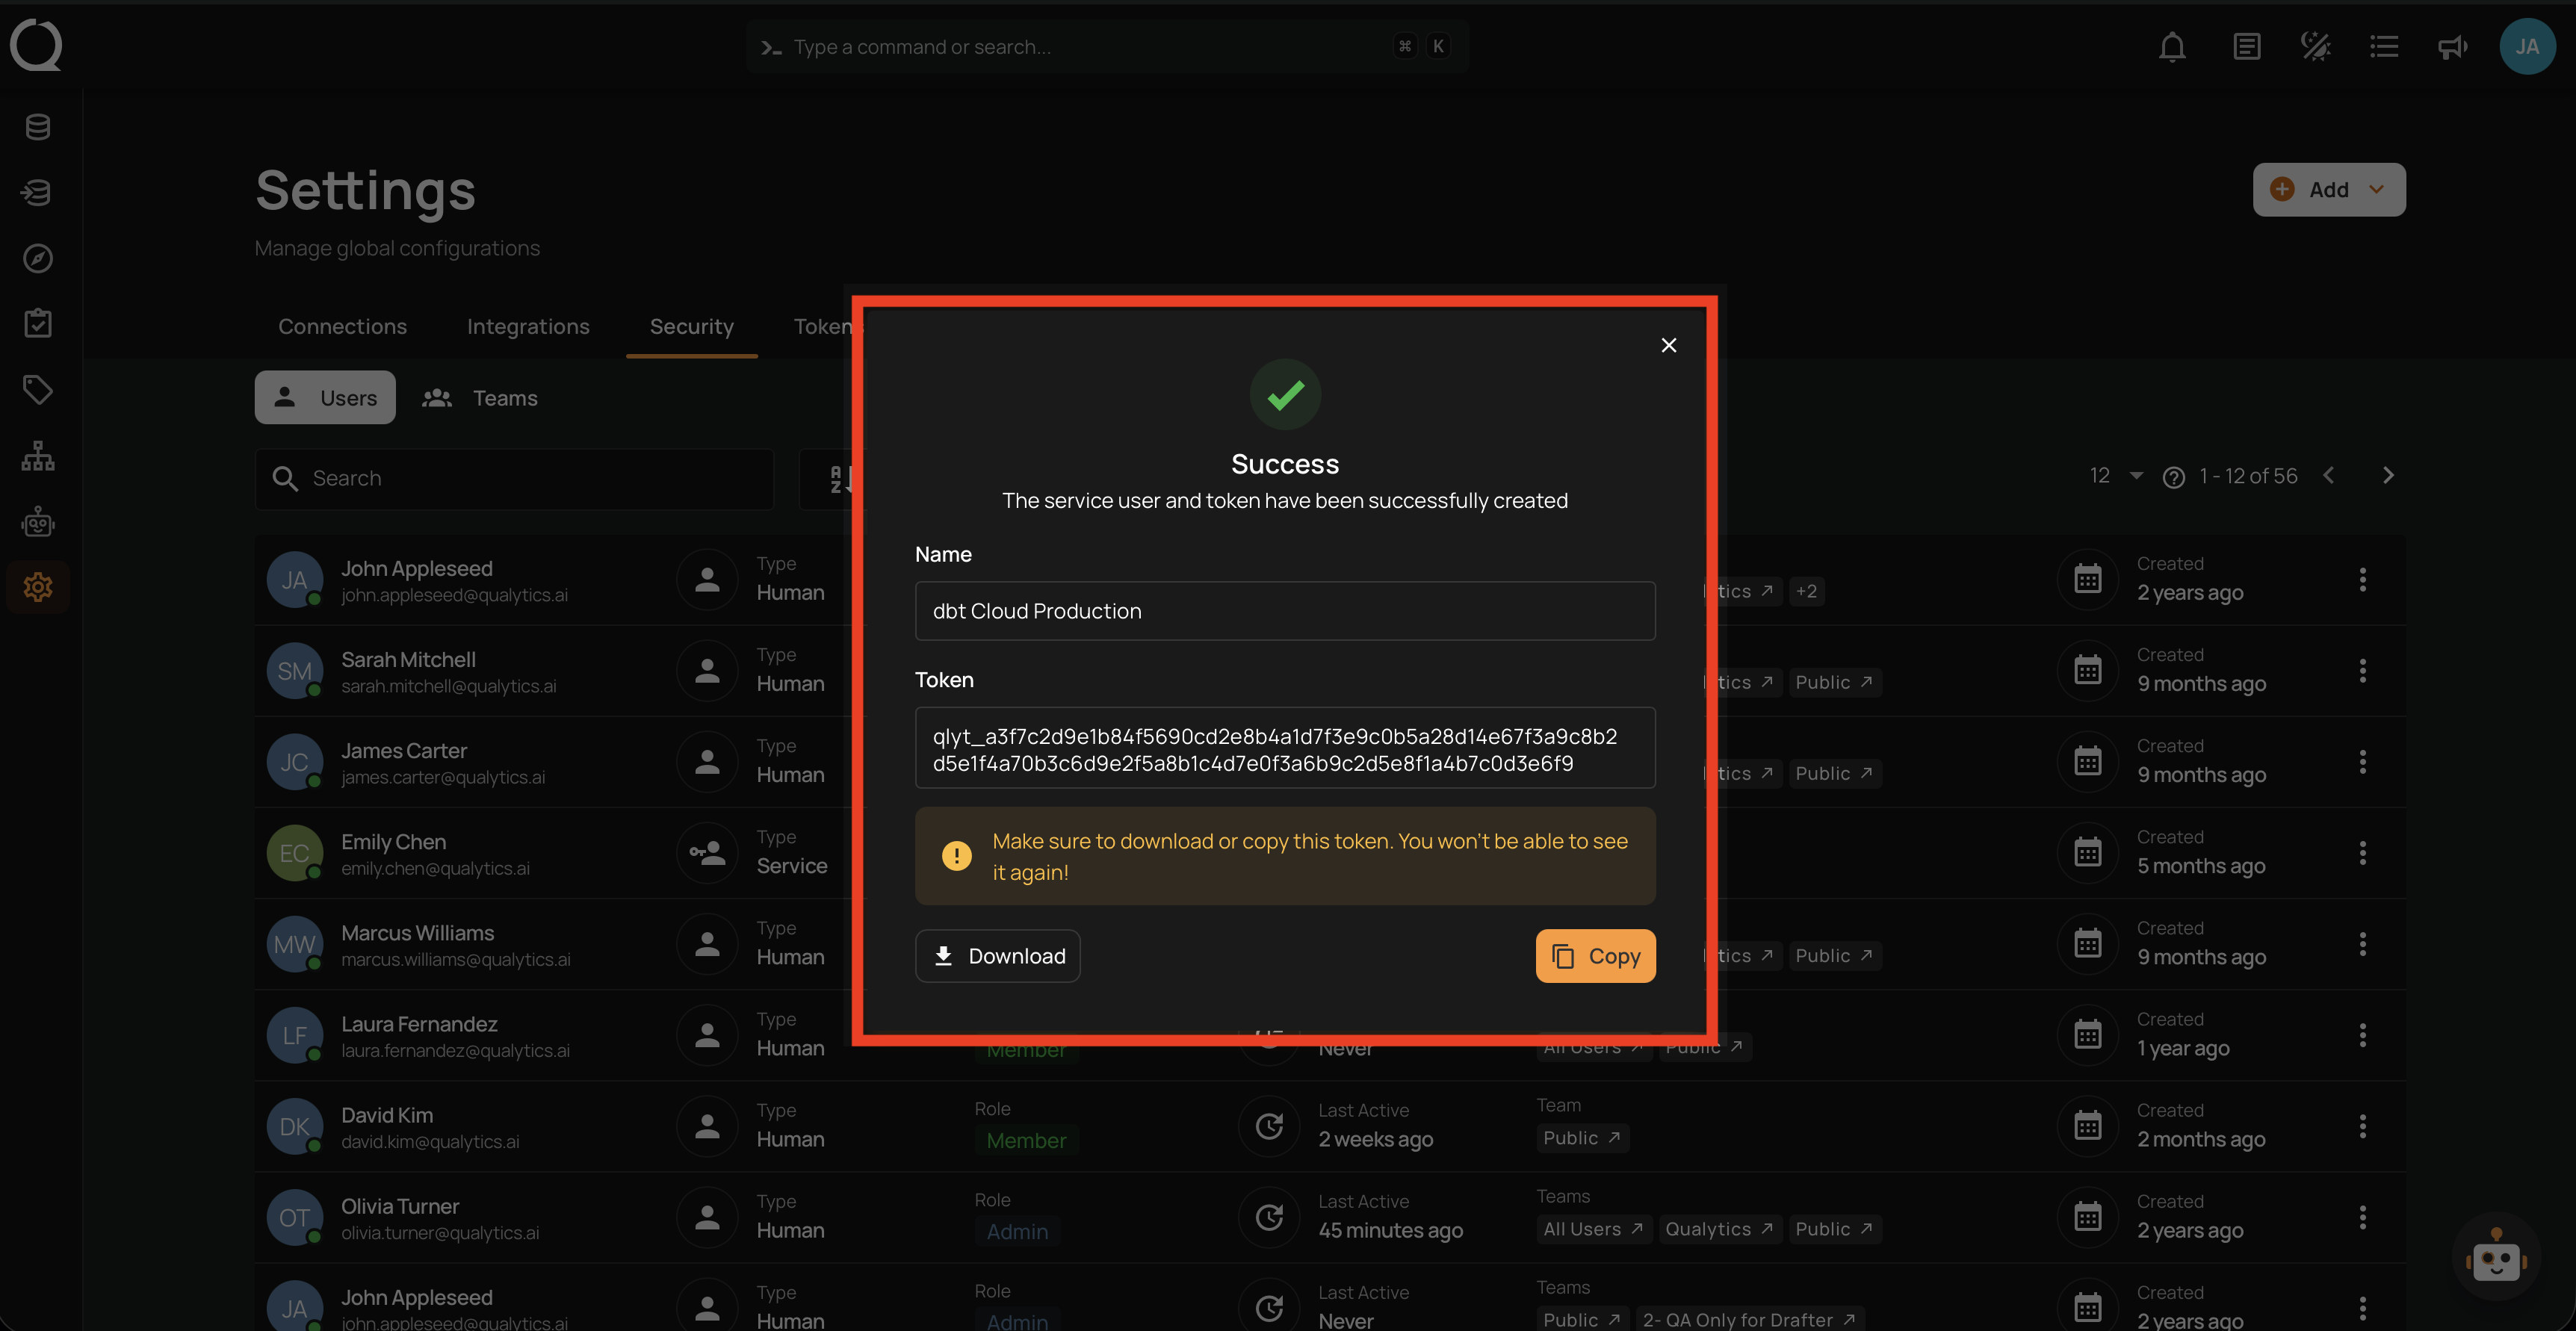
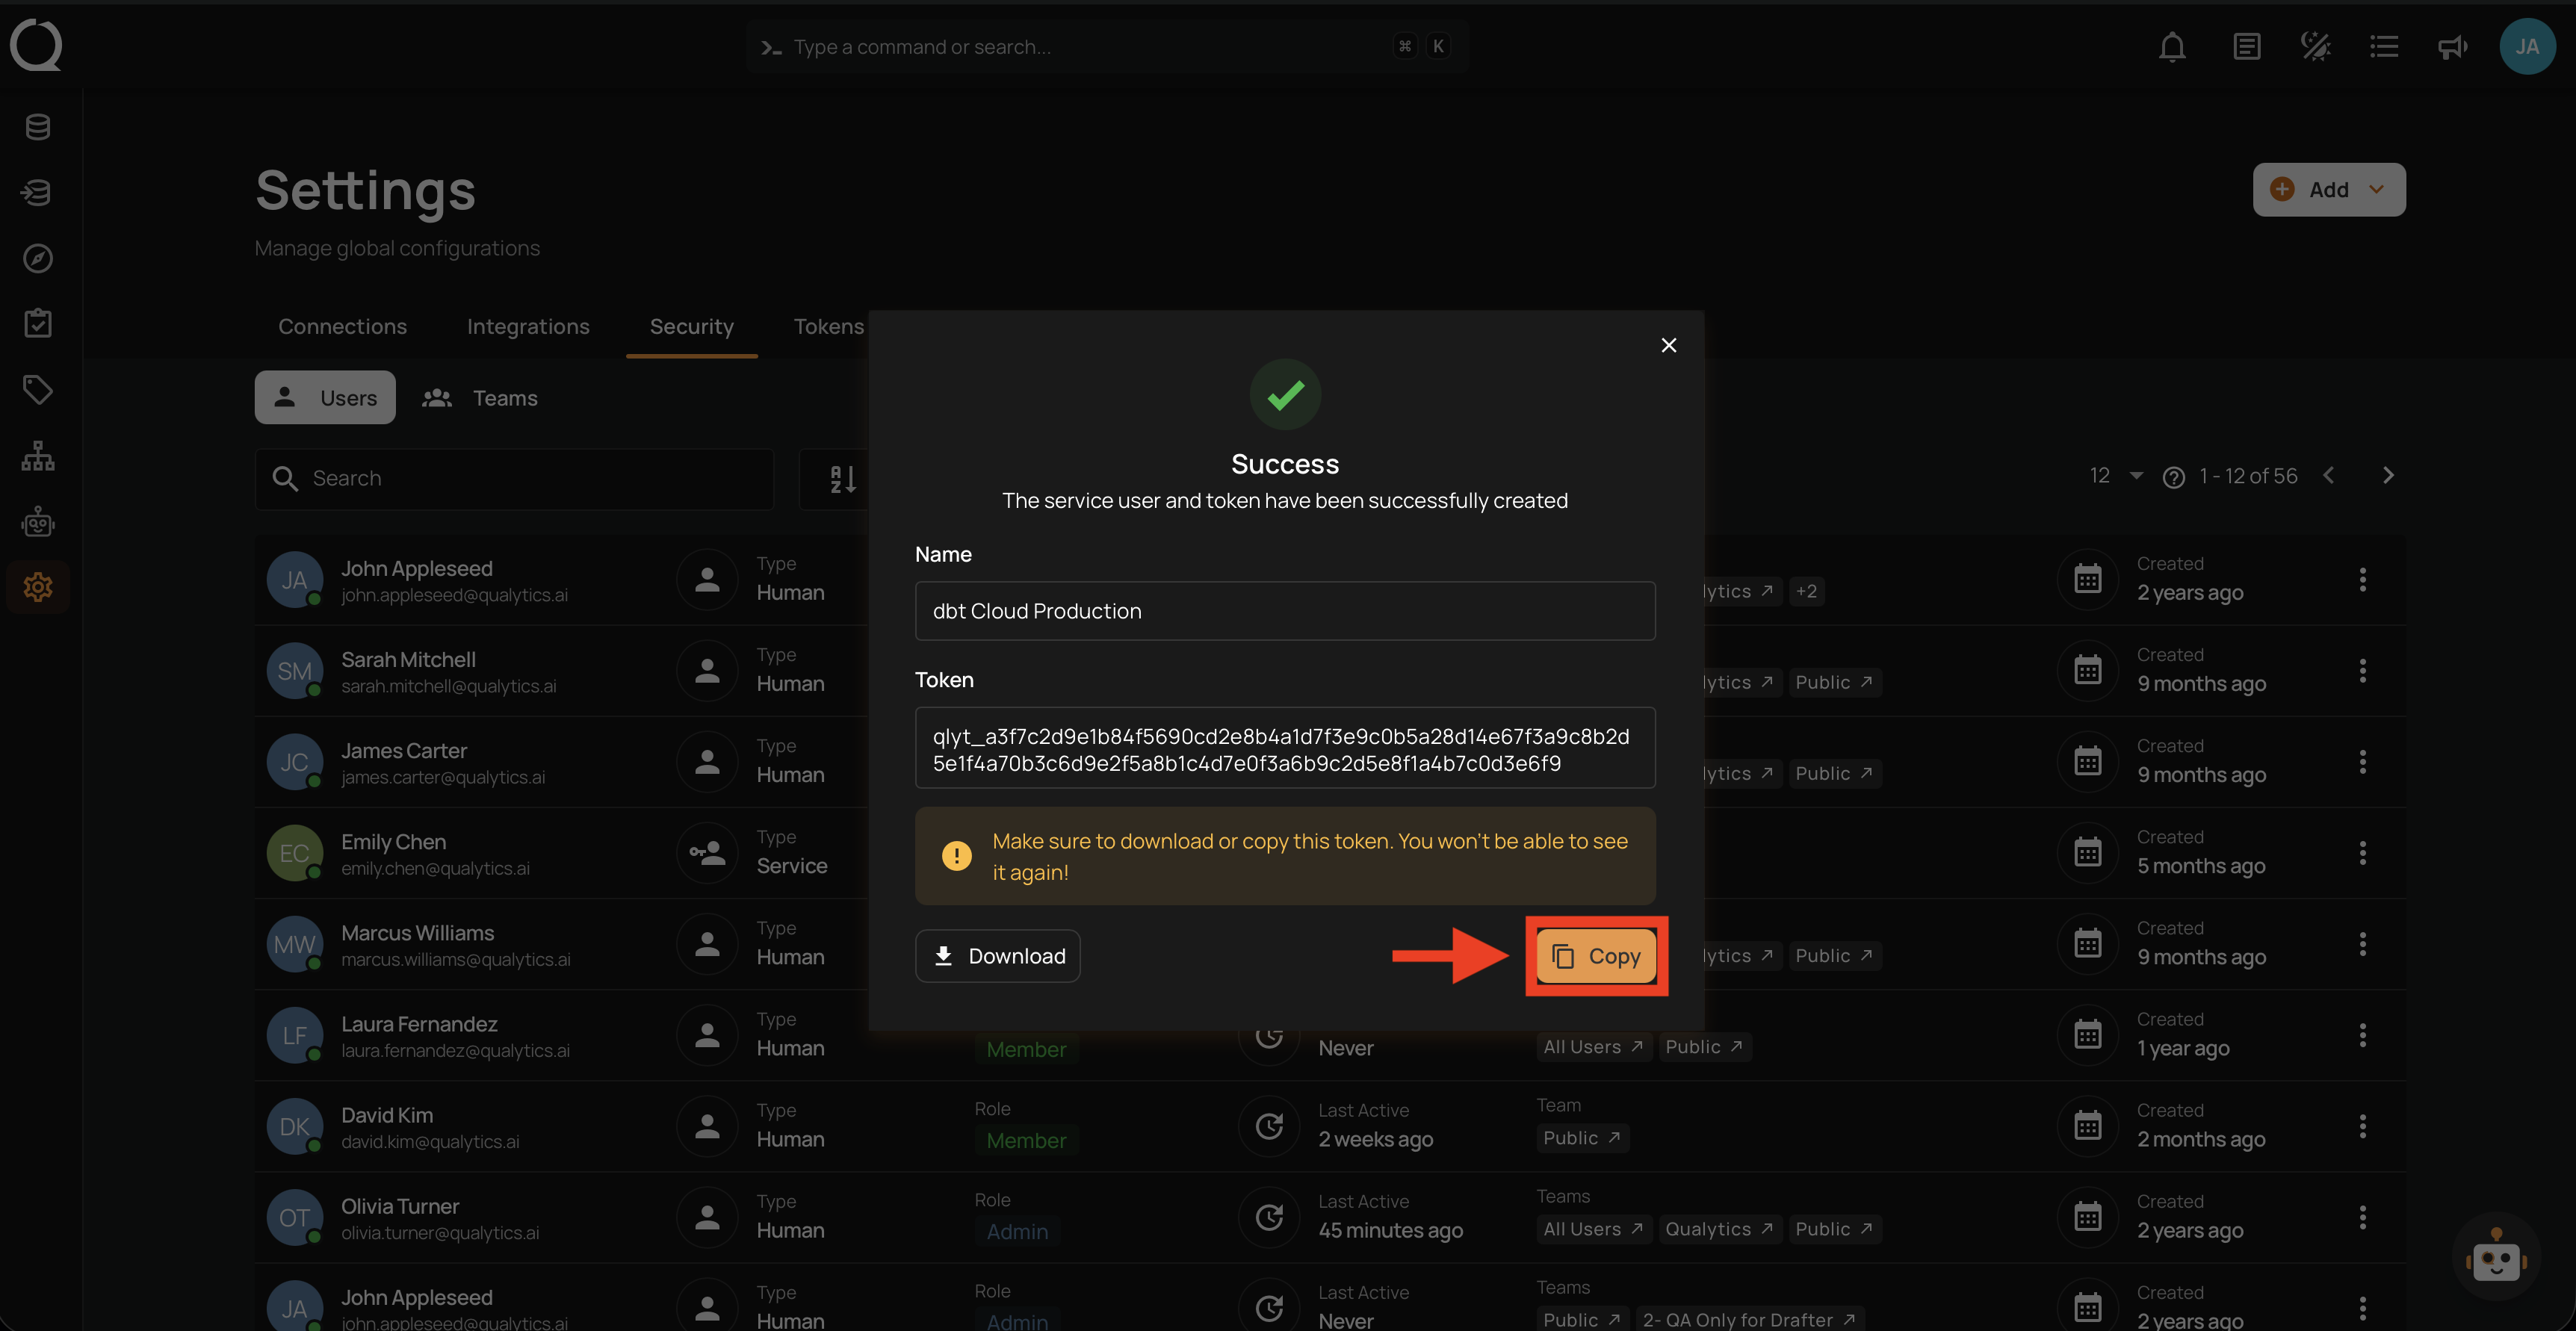
Step 9 (alternative): Save the token using one of the two options:
Click the Copy button to copy the token to your clipboard.
Click the Download button to save the token as a .txt file.
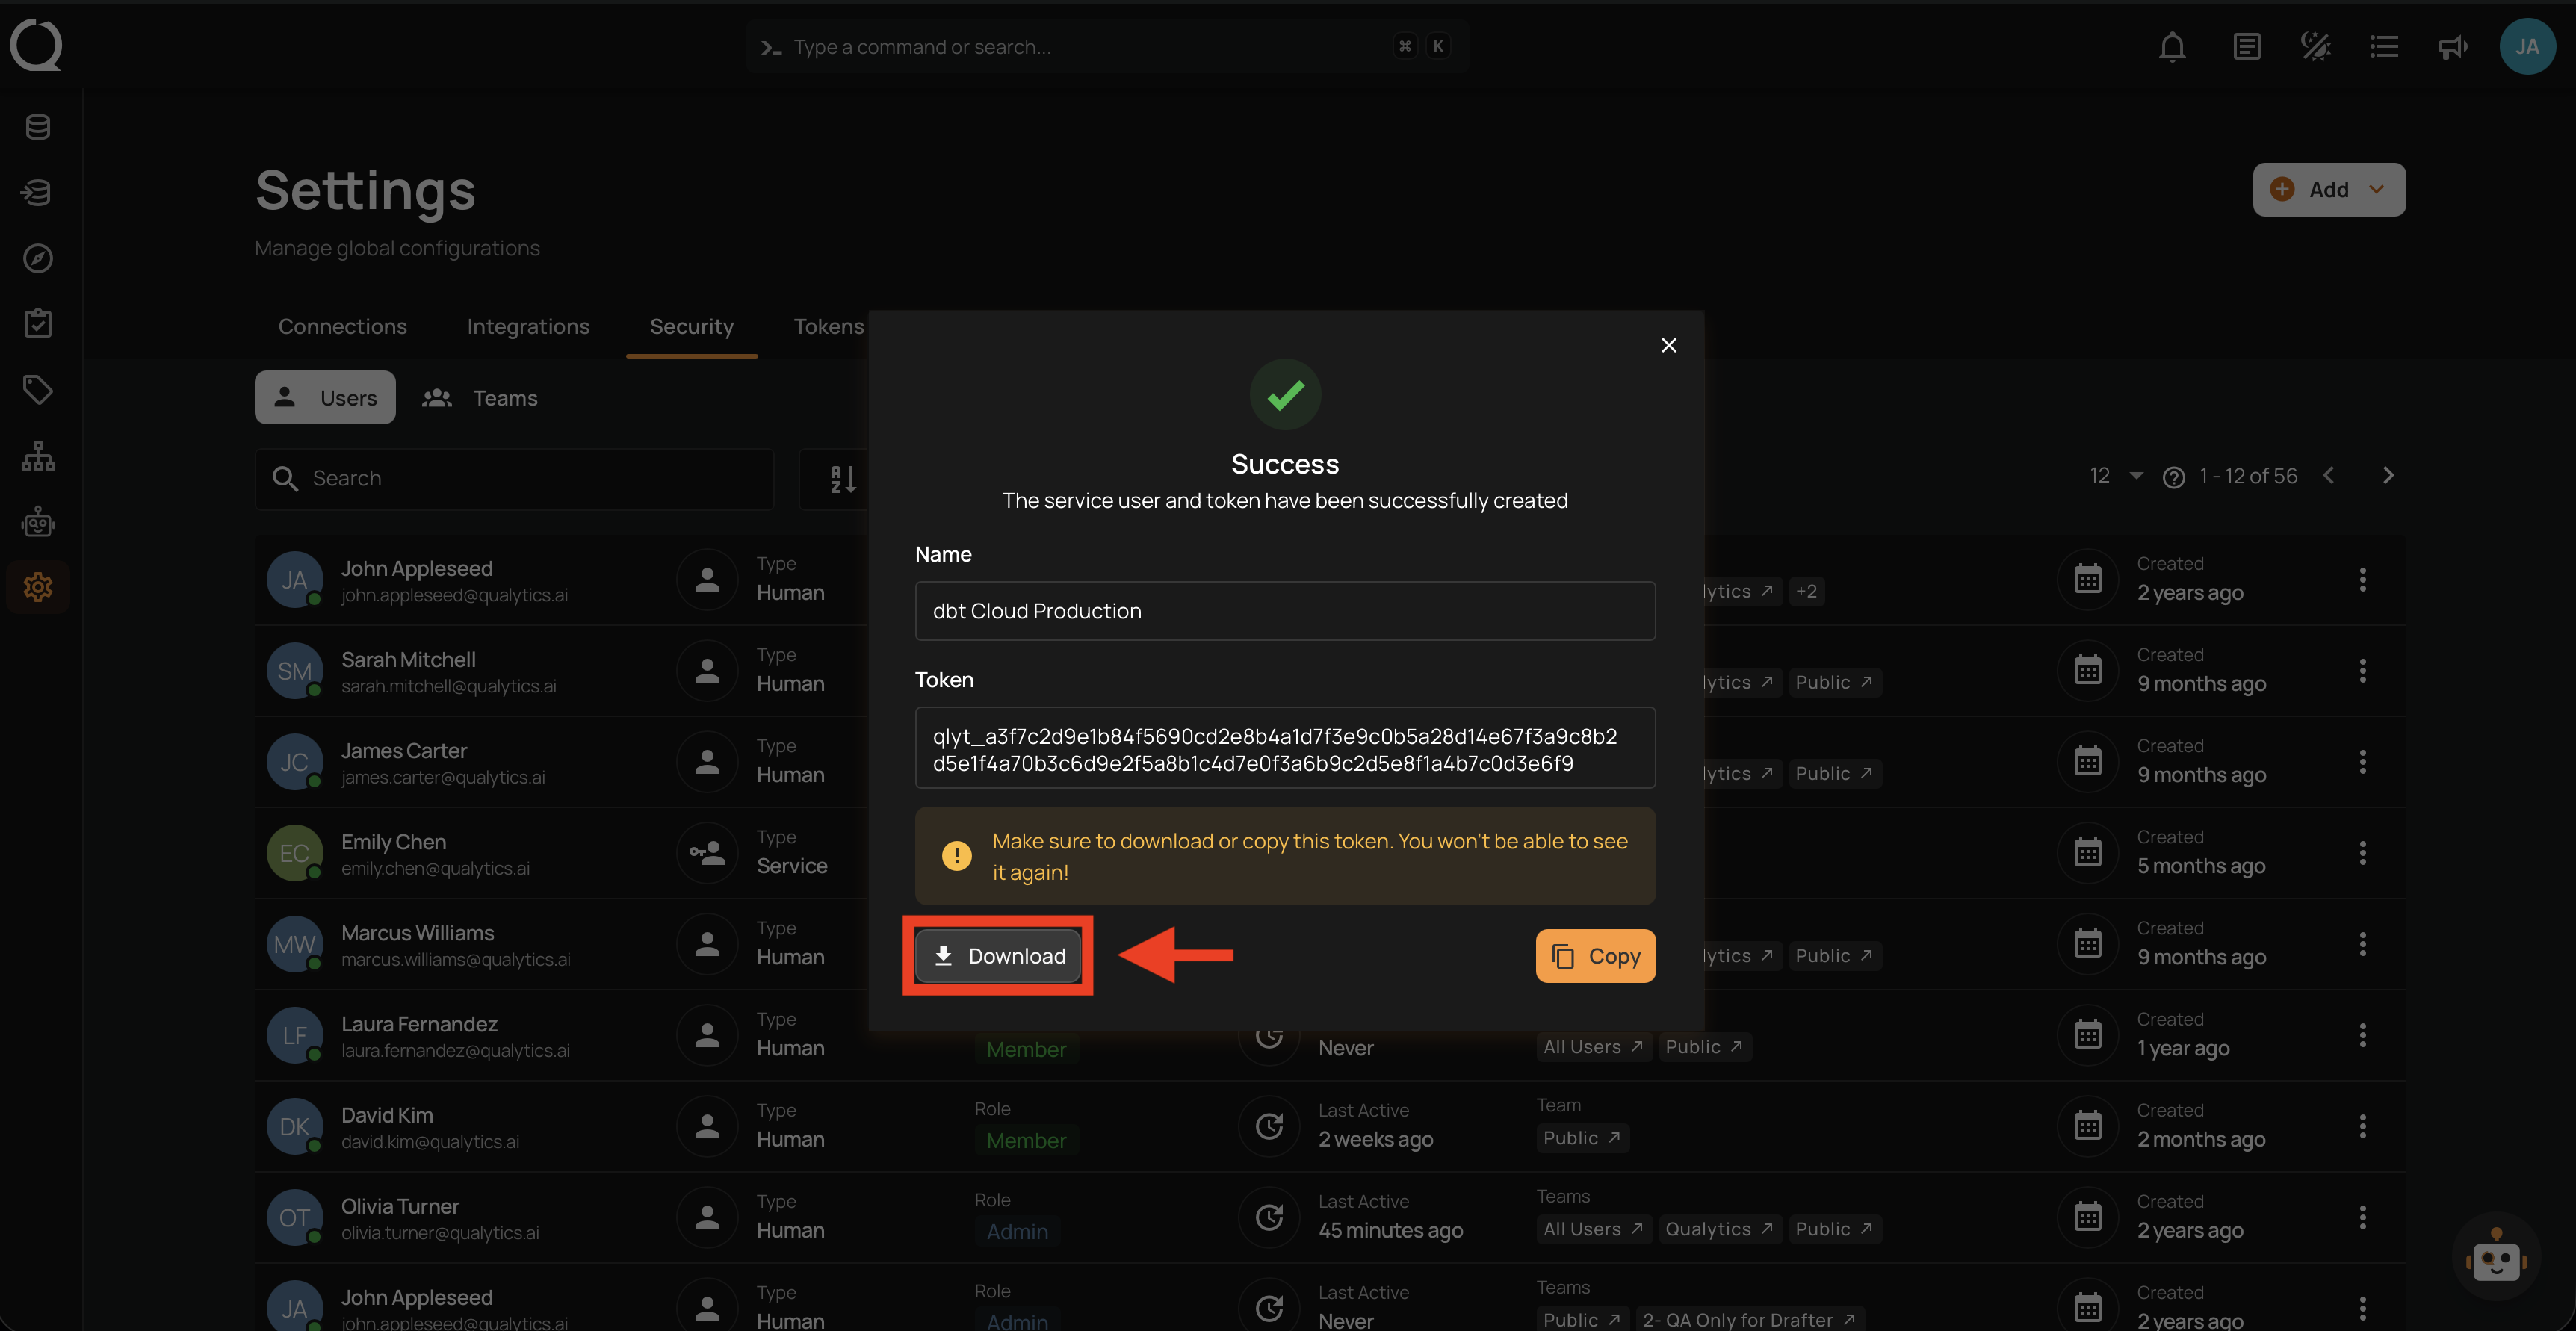
Warning
The token is shown only once. Make sure to copy or download it before closing the modal — it cannot be retrieved later.