Remove Anomaly Assignees
Use this flow when you want to take one or more users off the Assignees list of an anomaly, for example when a teammate is no longer responsible for the issue or when an inherited default assignee does not apply. To add new assignees instead, see Add Anomaly Assignees. To replace the assignee list across many anomalies at once, see Bulk-Assign Anomalies. For how the field behaves in detail, see Deep Dive · Anomaly Assignees. For programmatic access, see the Anomalies API.
You can remove assignees from two places, and the flow is identical because both views use the same user picker. Pick the tab that matches where you start from.
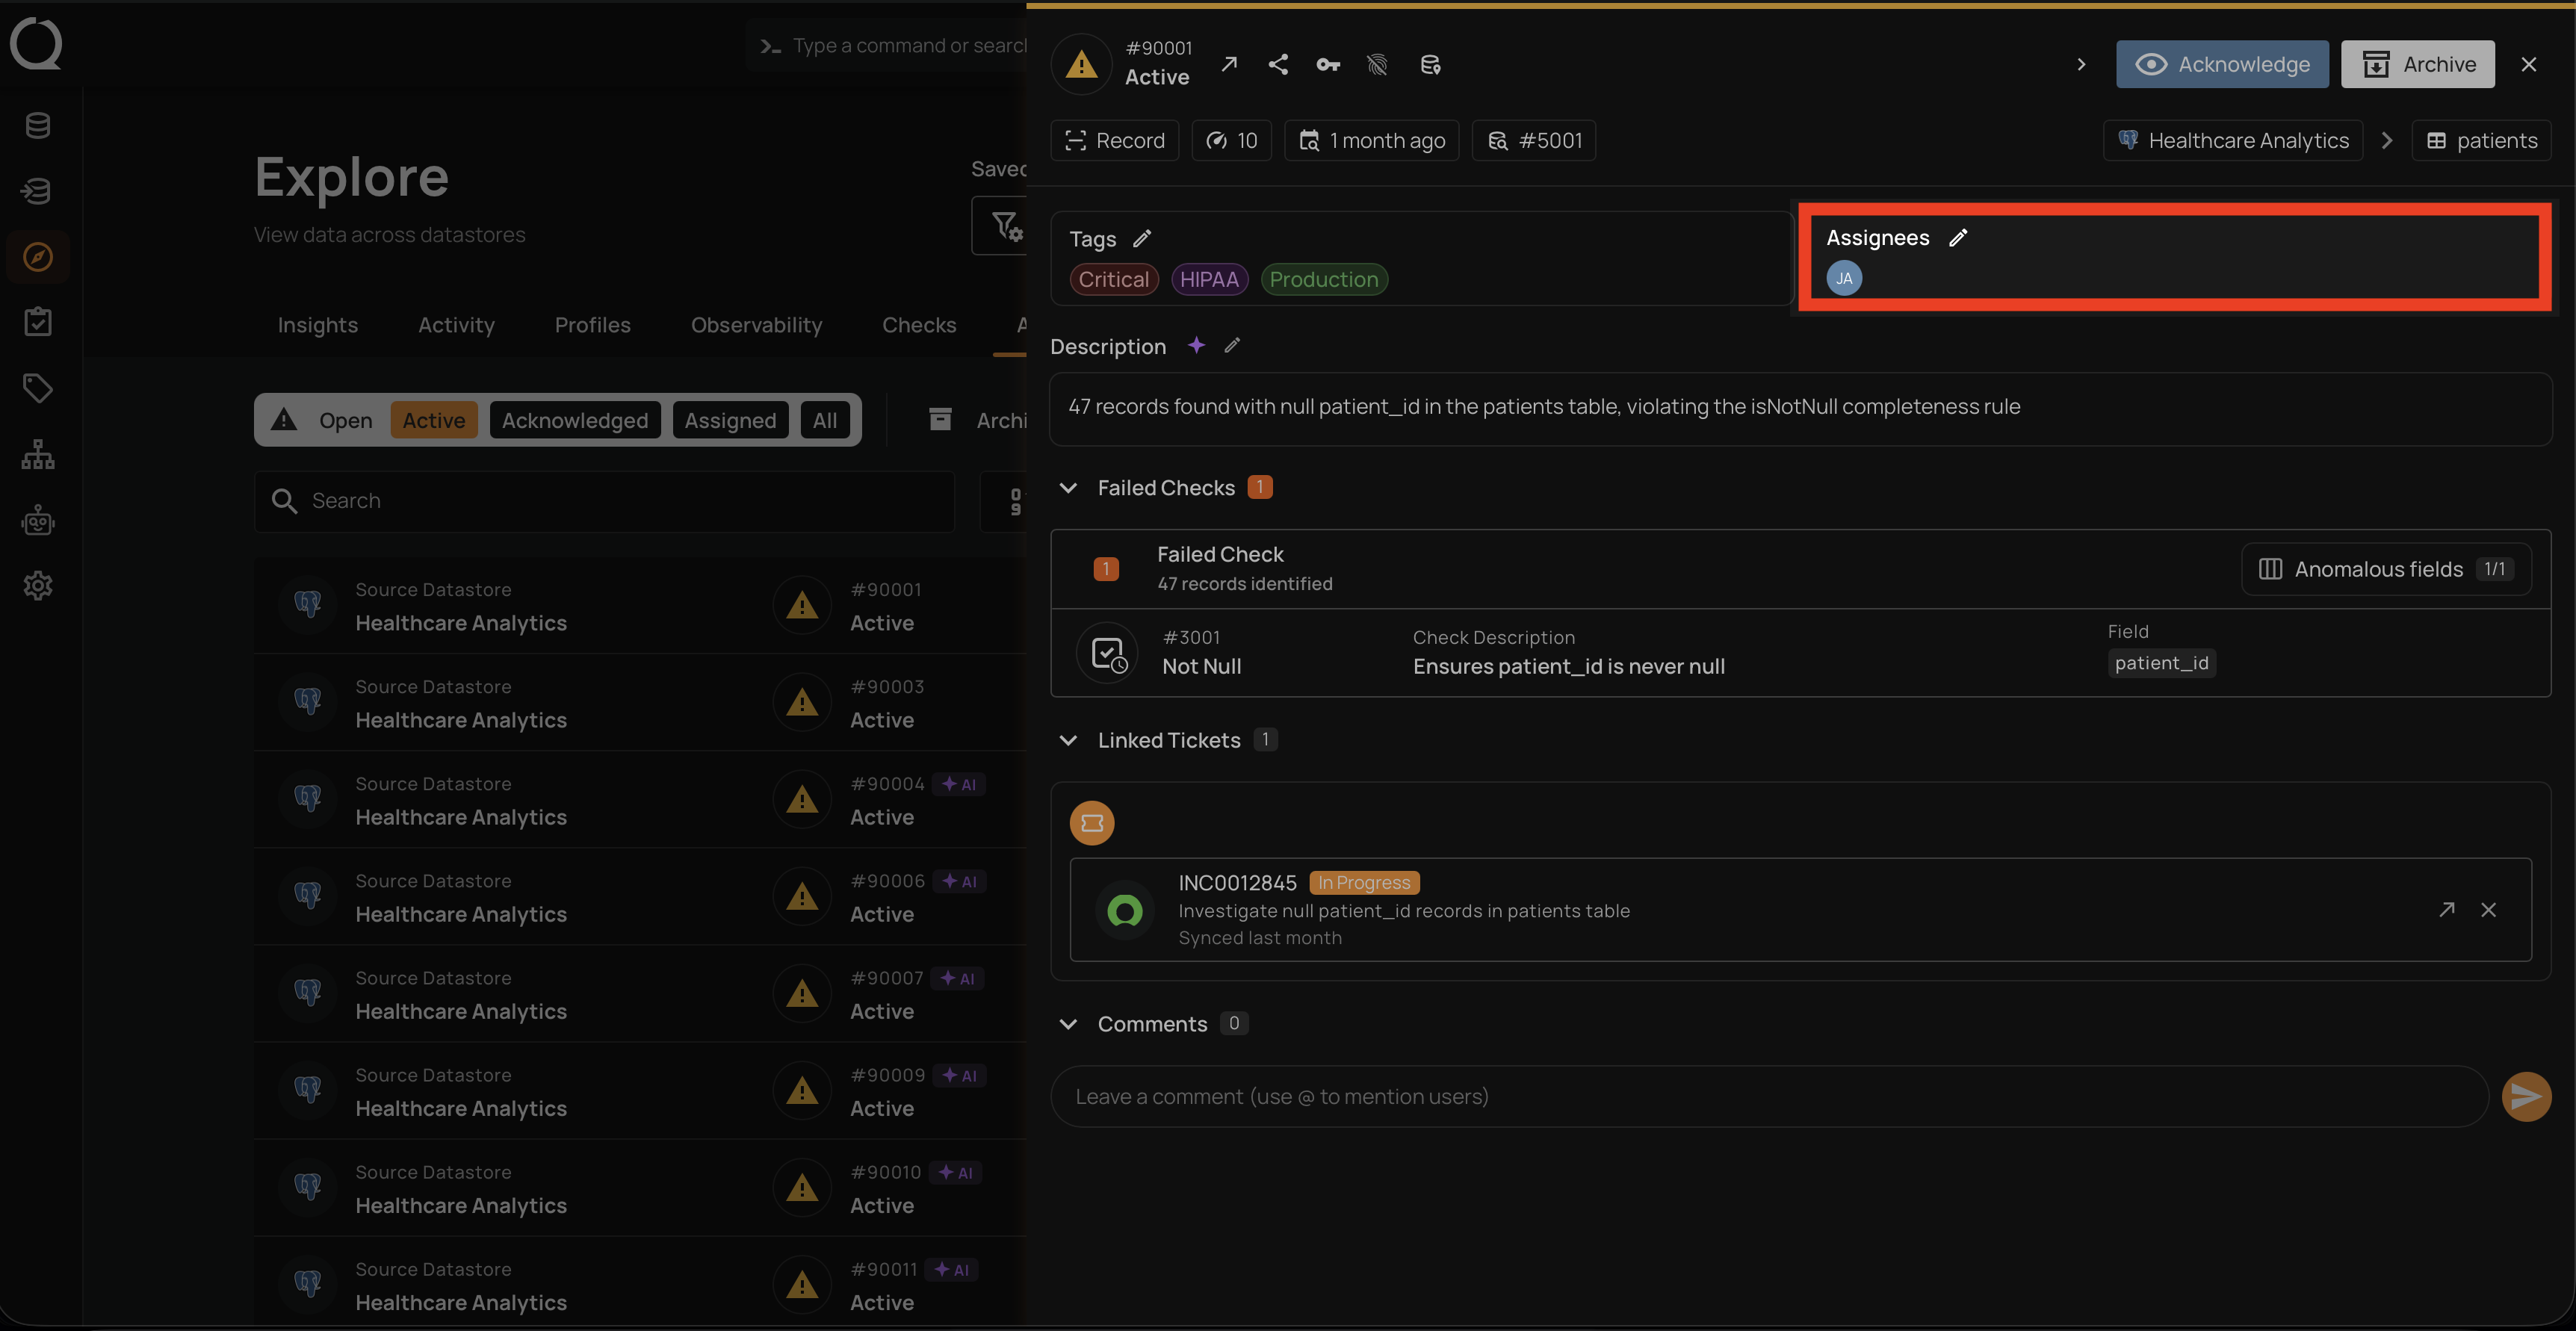
Step 1: Open the anomaly from the per-datastore Anomalies tab. In the Summary section, locate the Assignees field, which lists the users currently assigned as avatars.
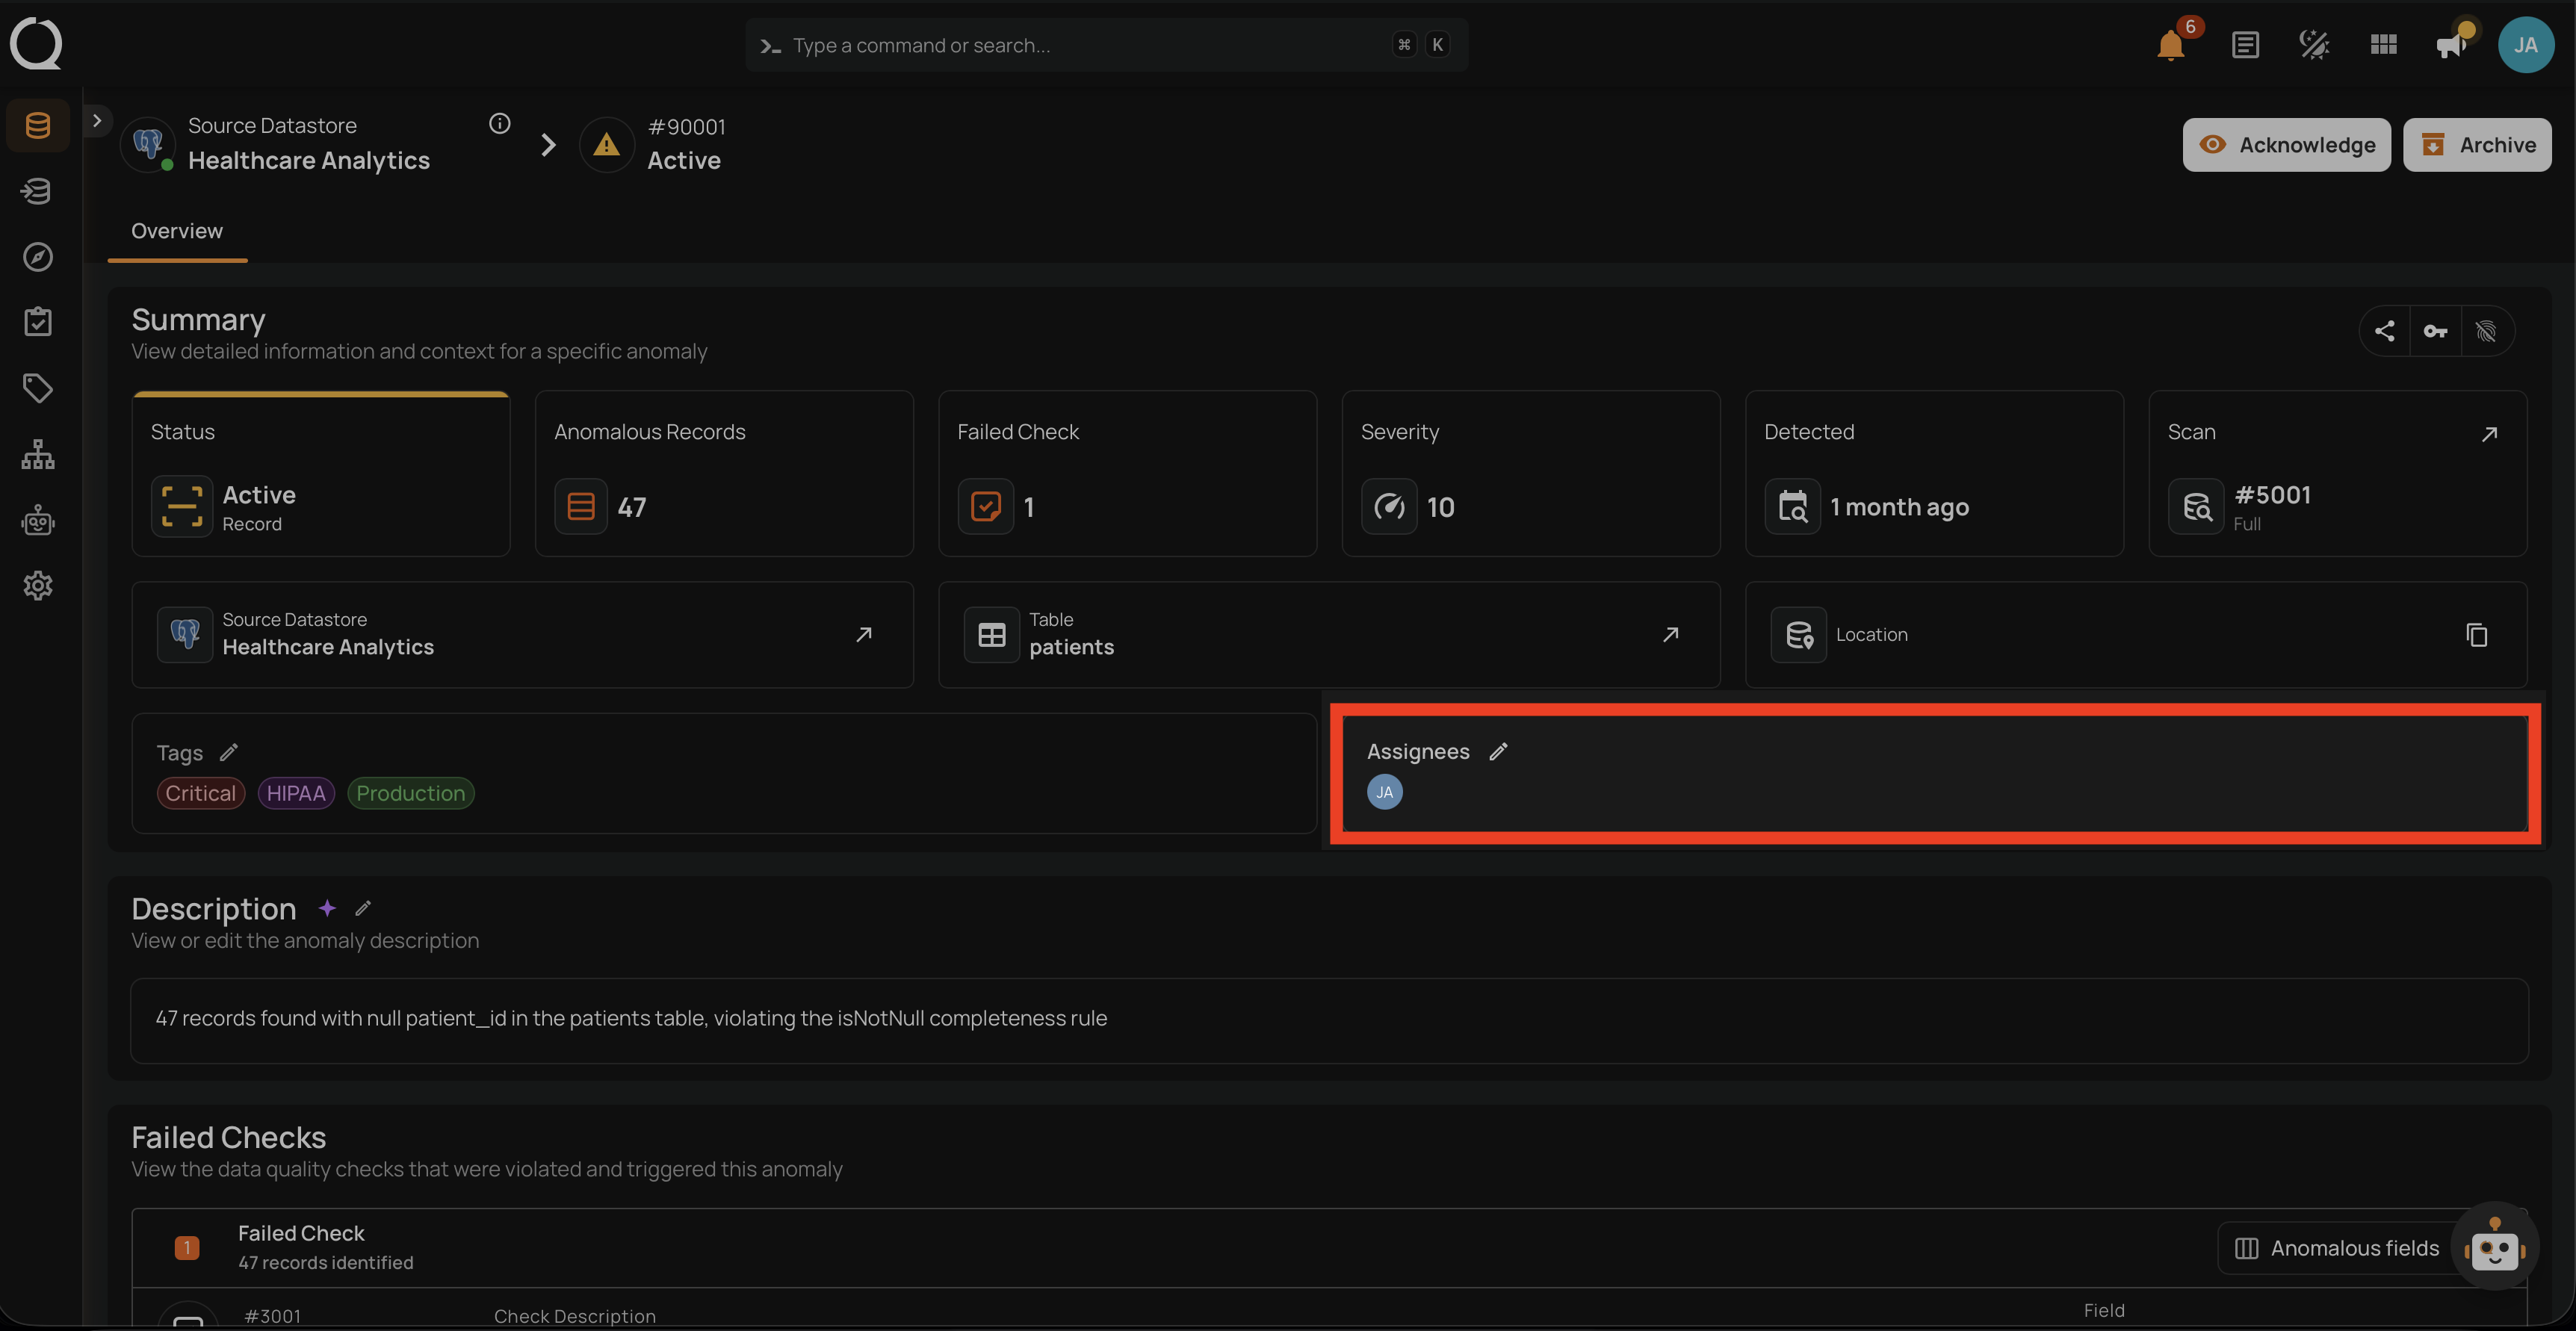
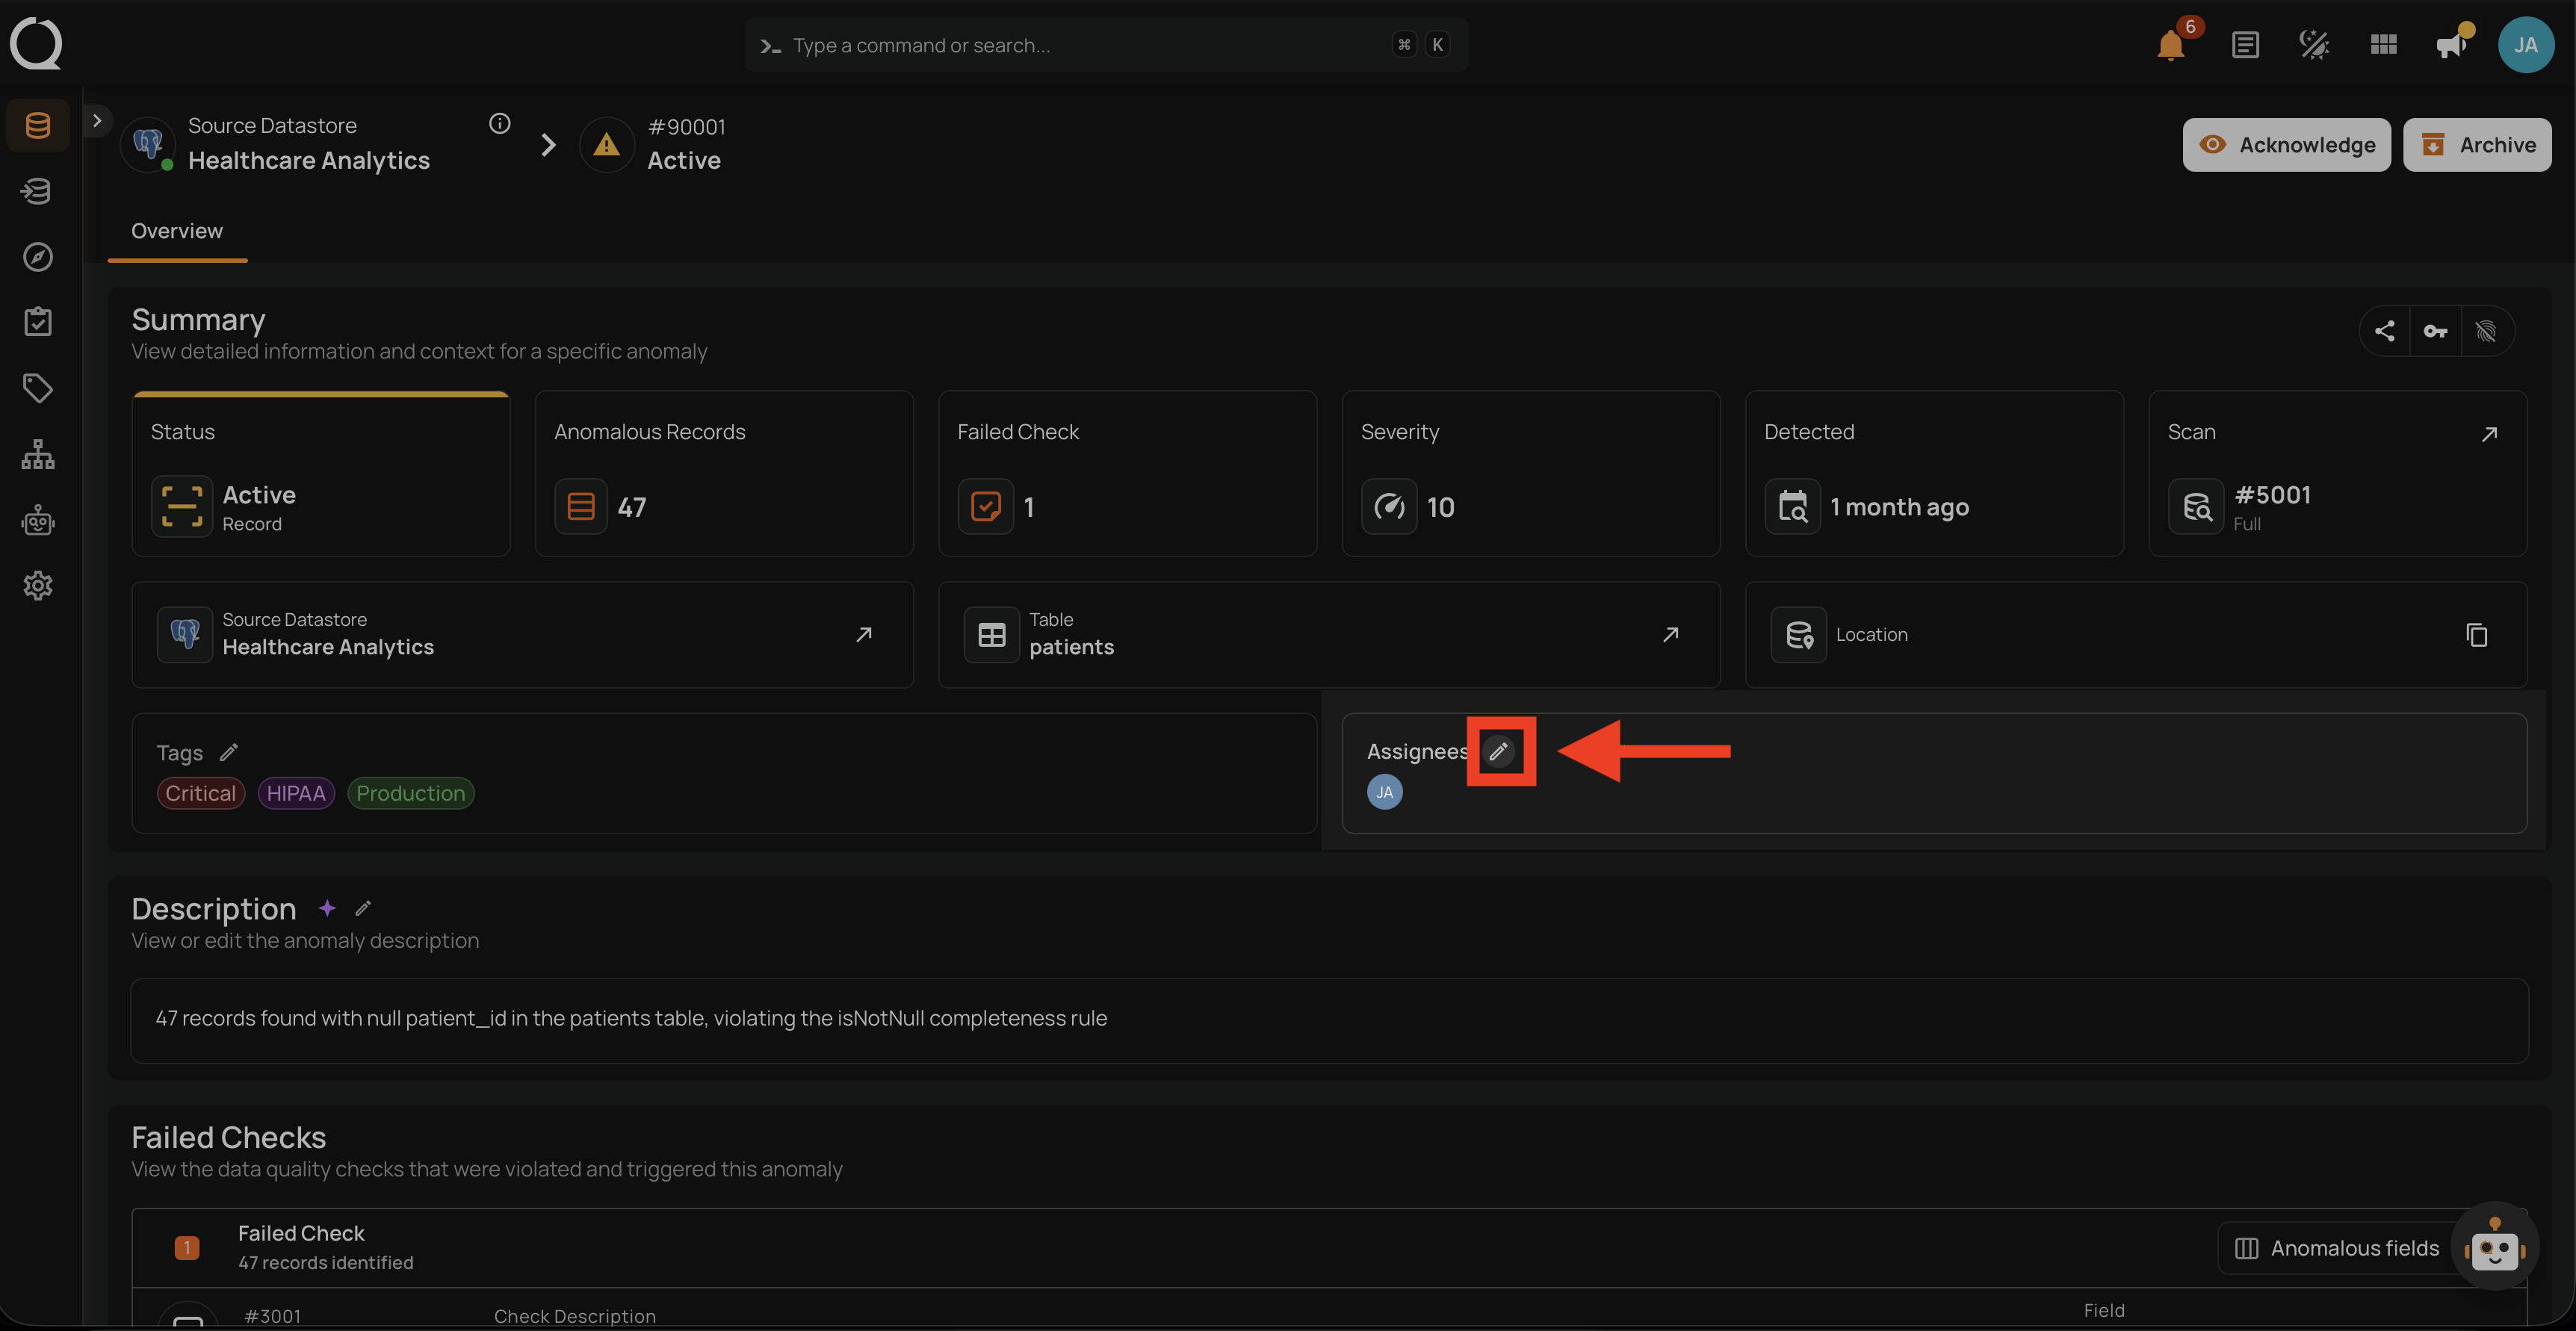
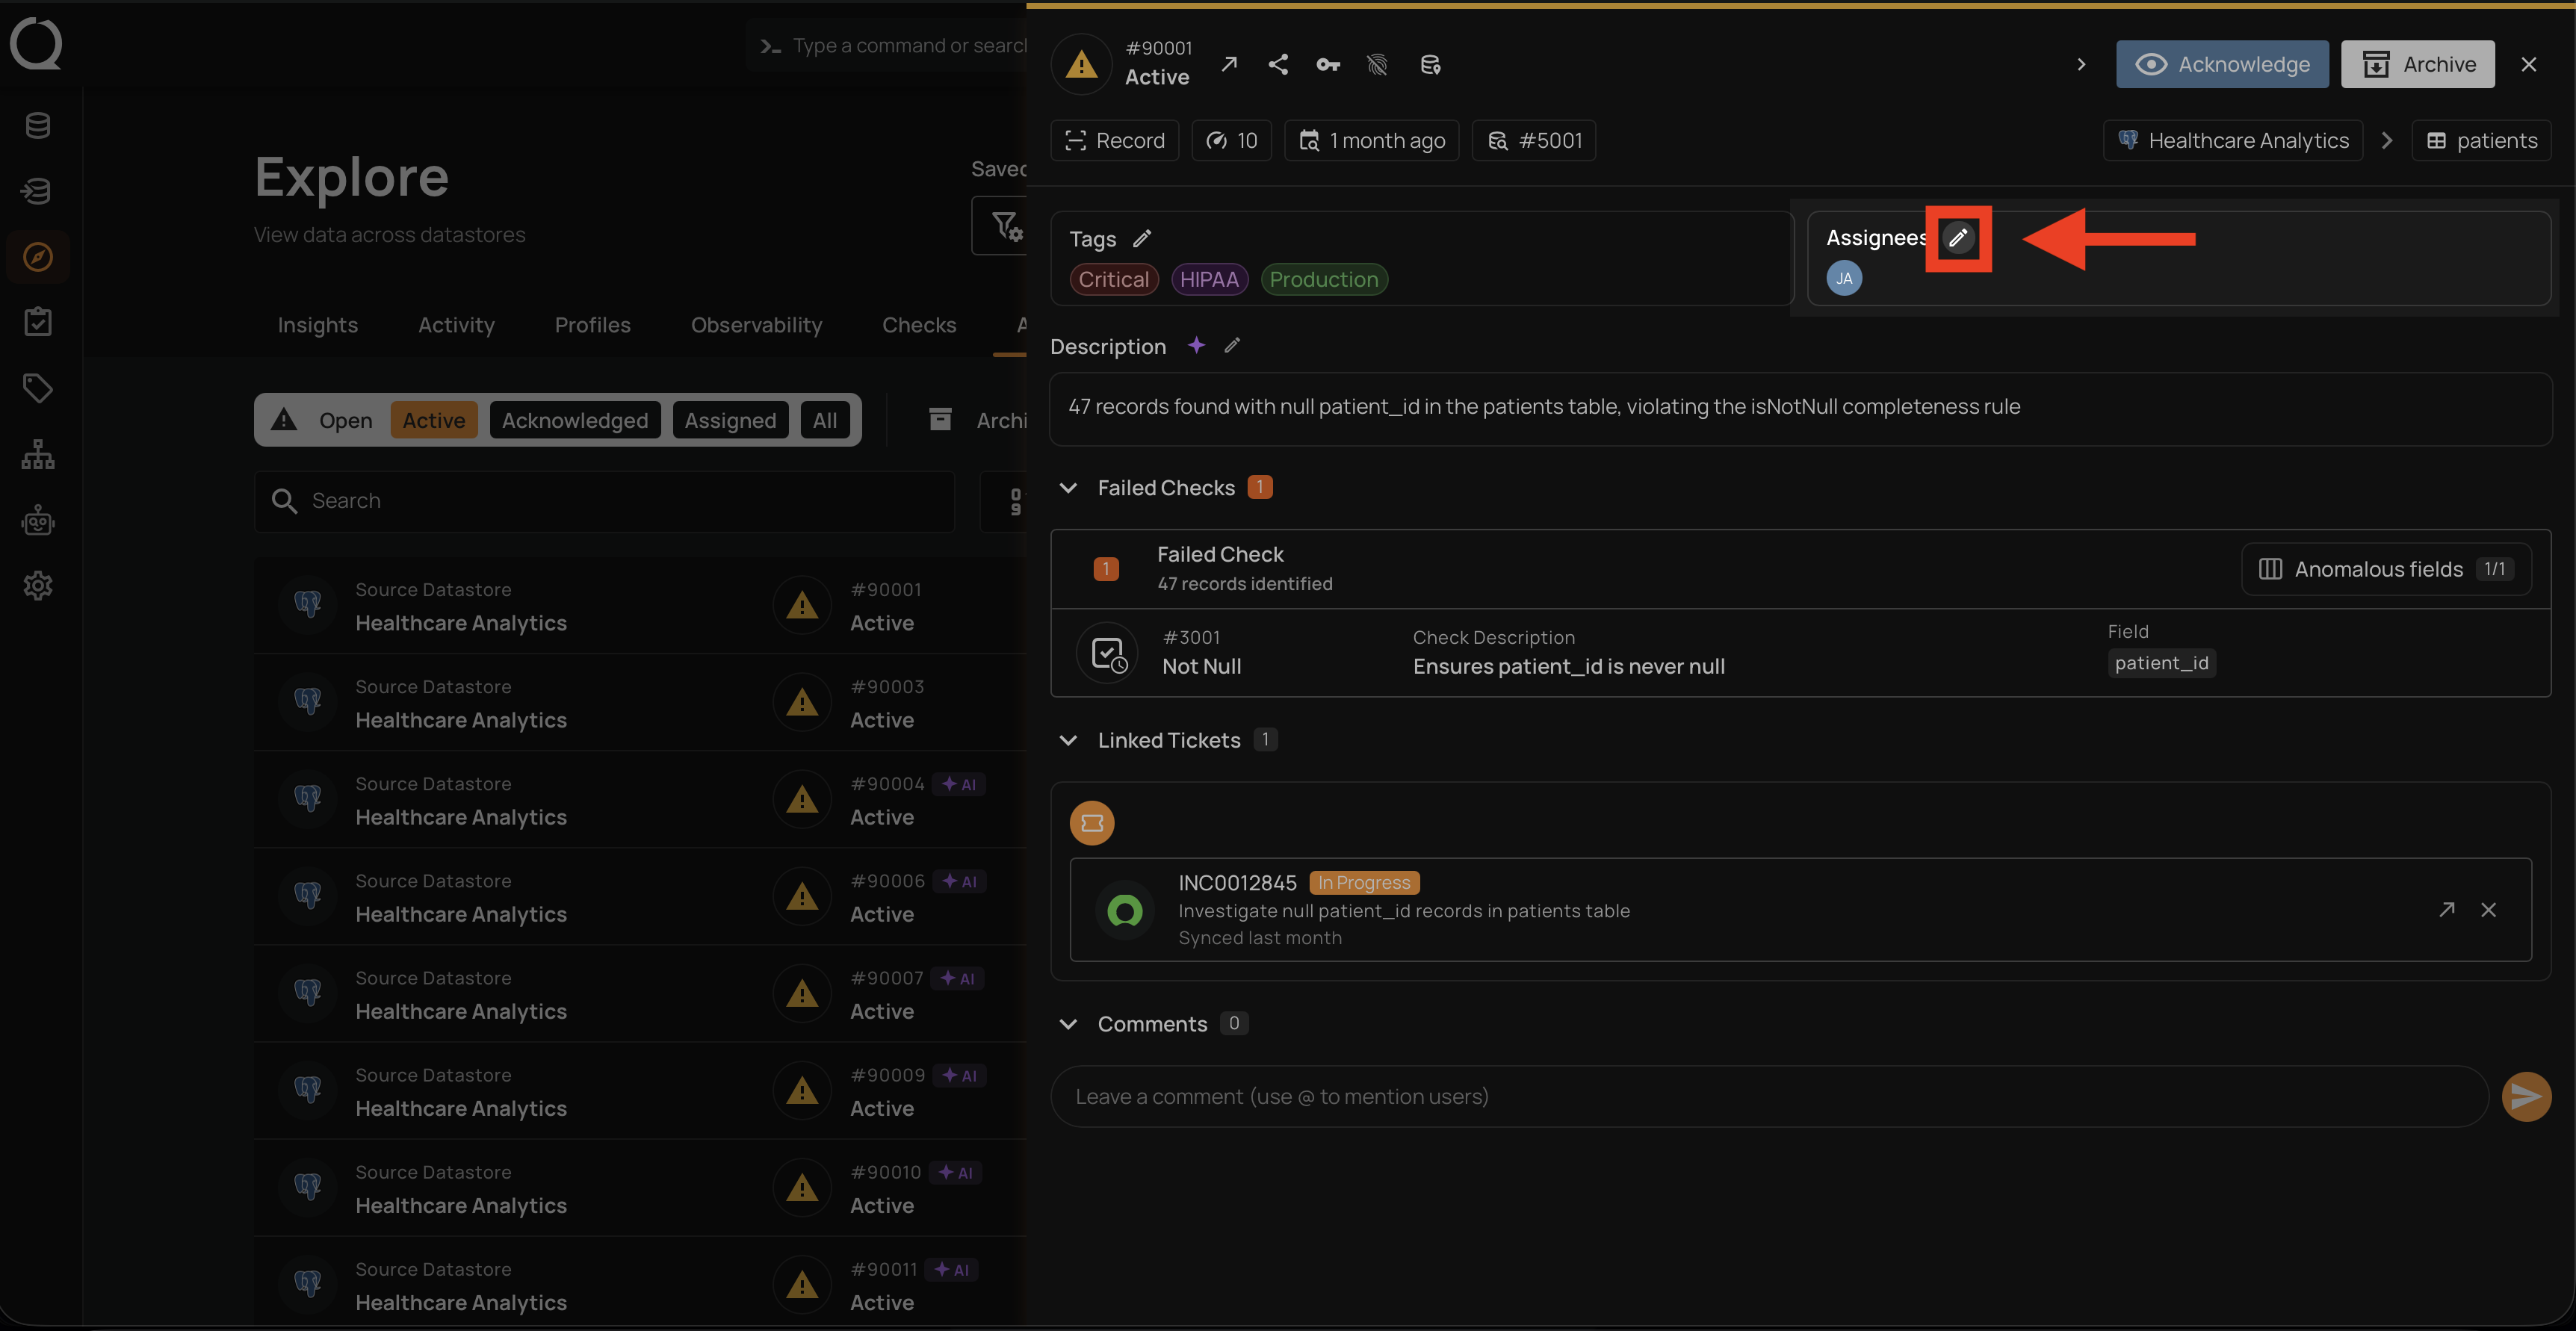
Step 2: Click the Edit button next to the Assignees label to open the user picker.
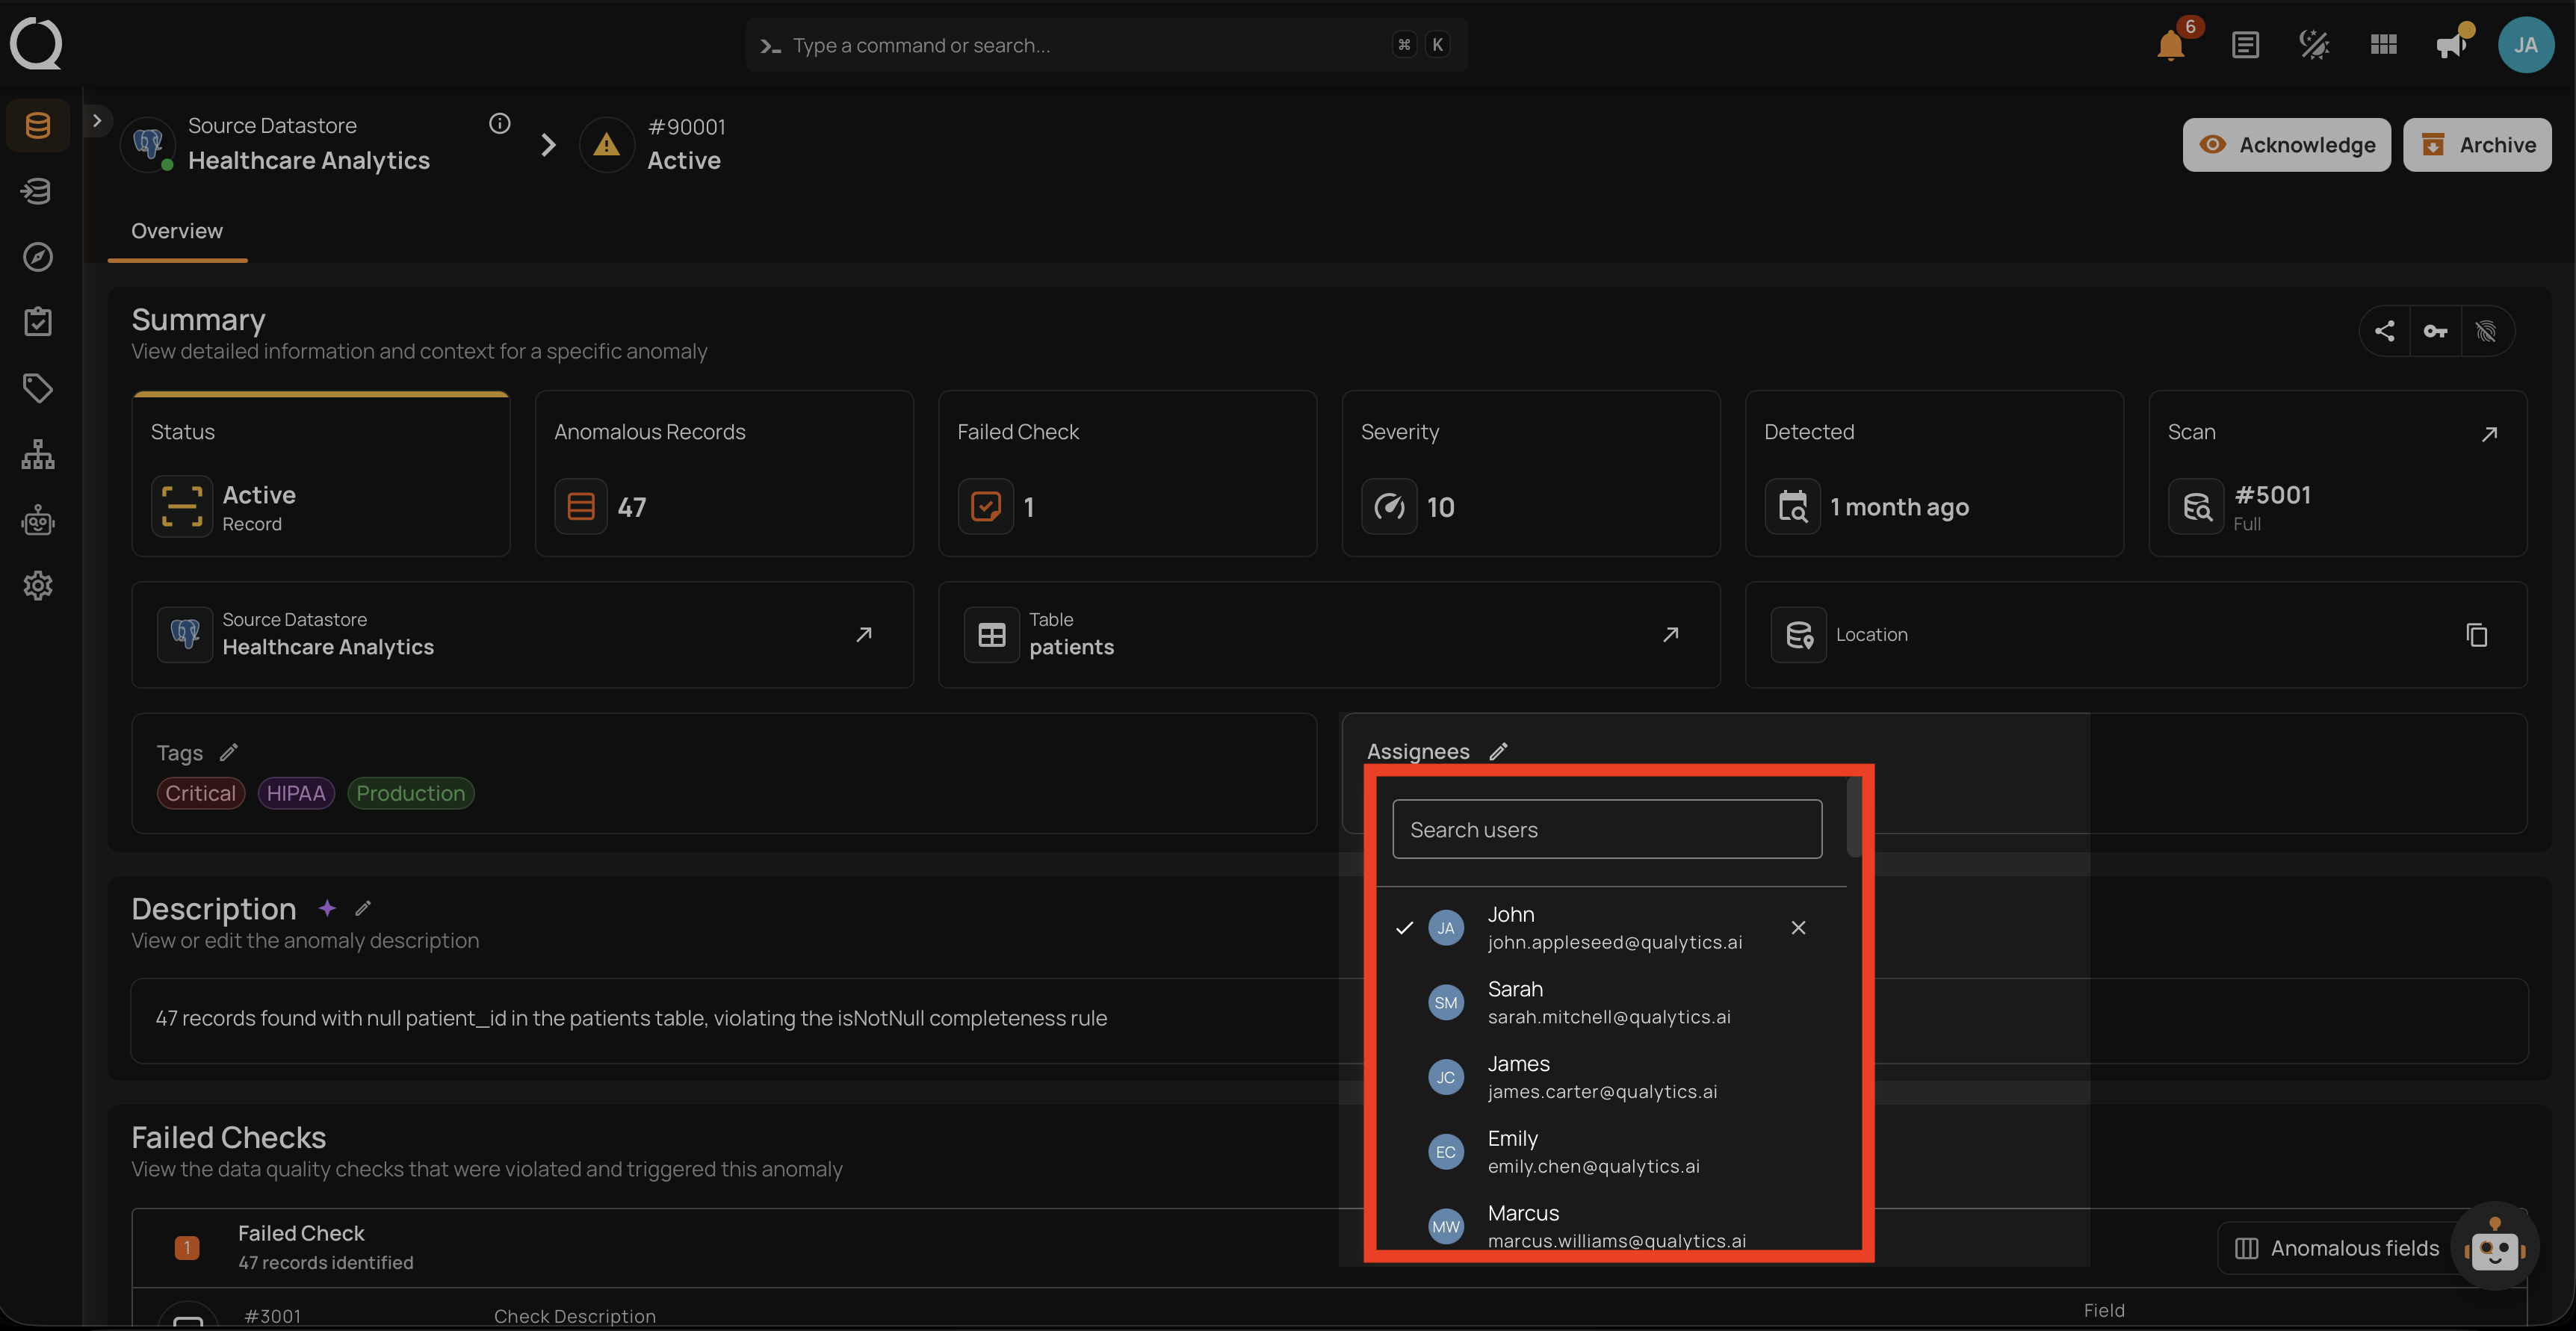
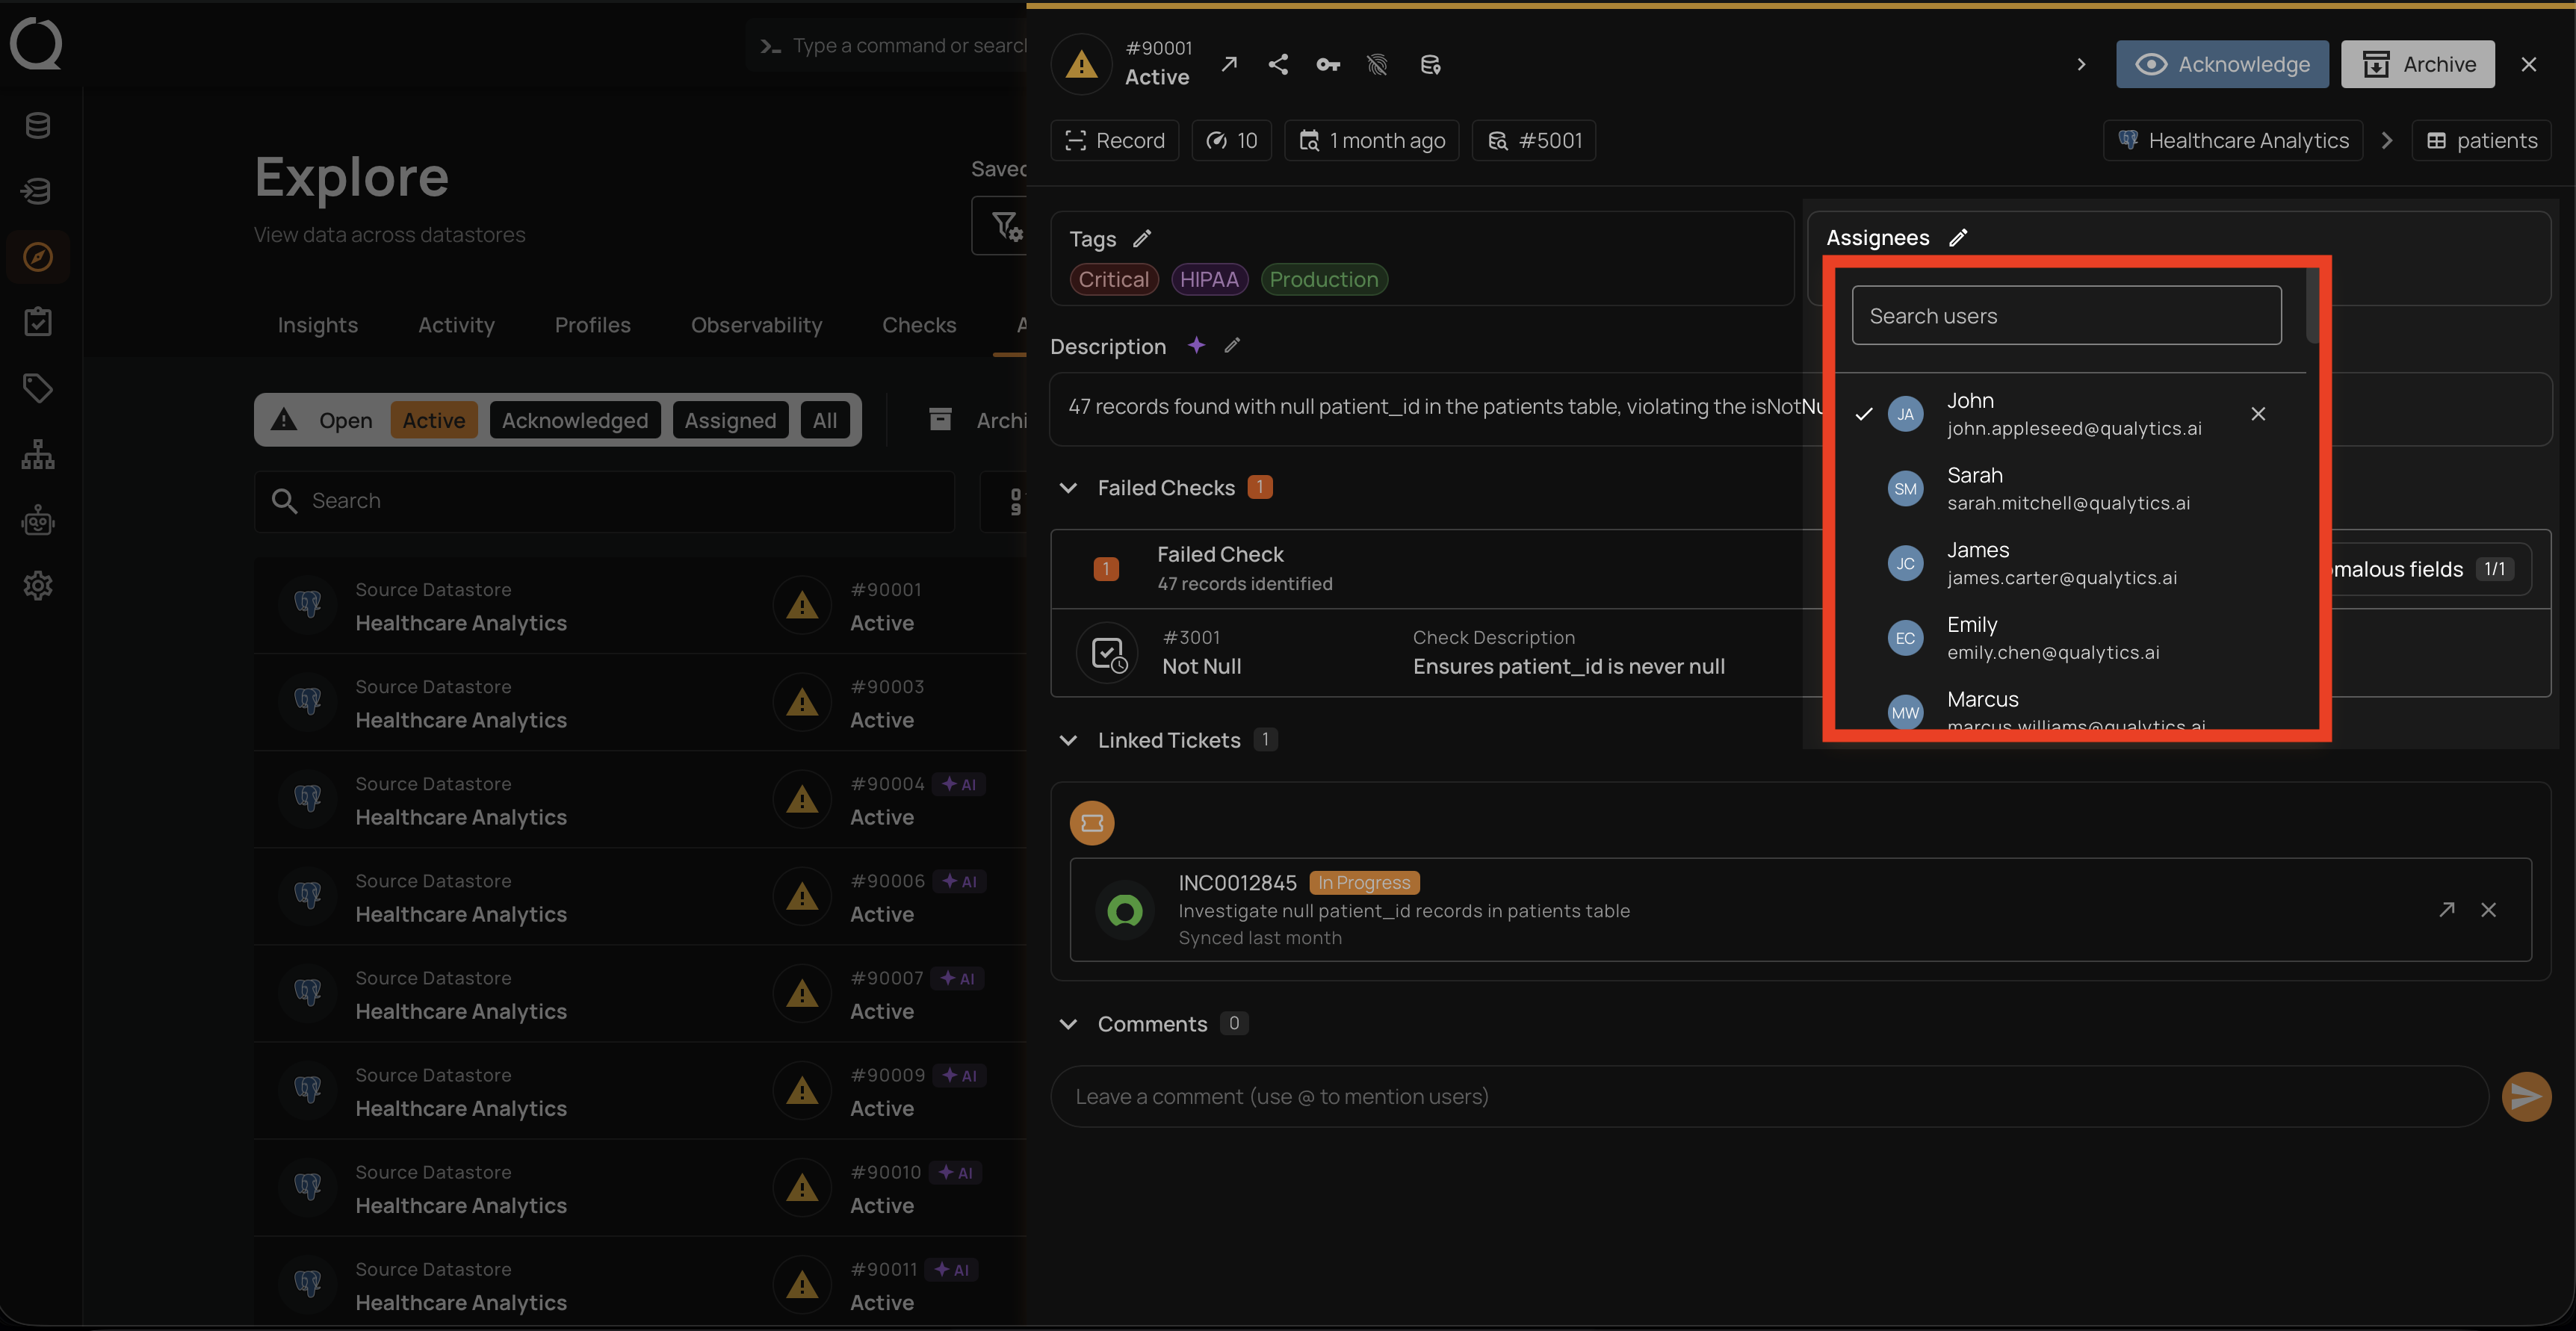
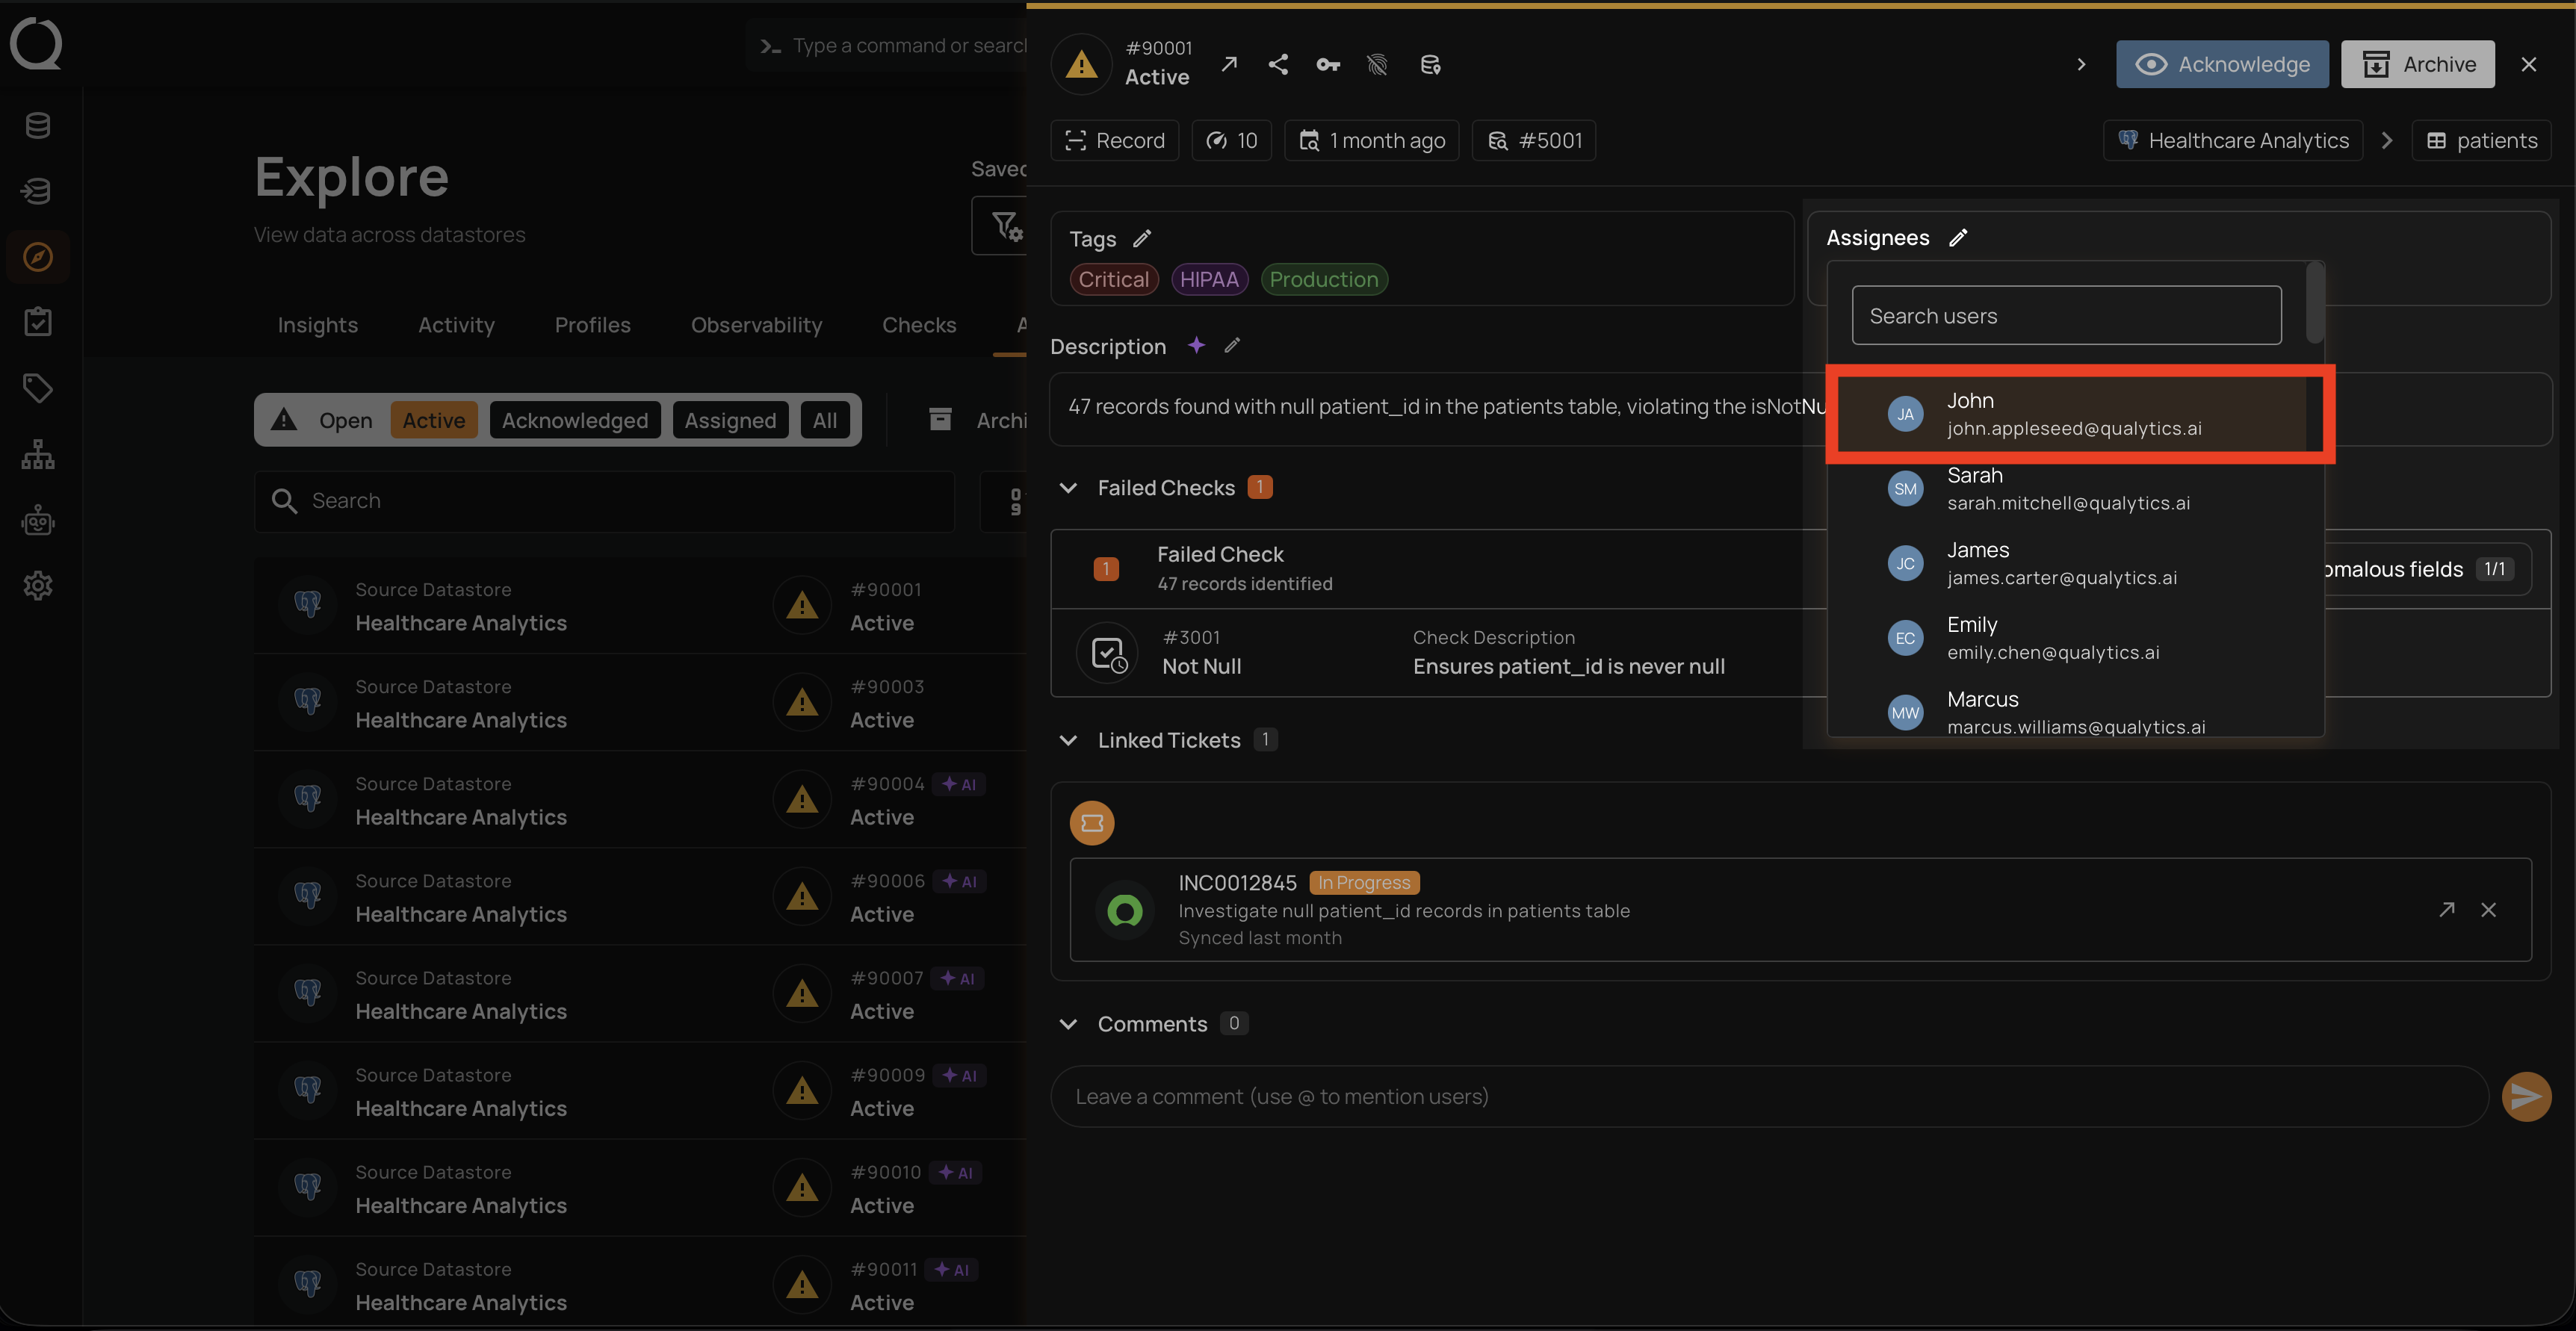
Step 3: The user picker opens. Currently assigned users appear marked with a check icon at the top of the list, and a icon shows on the right of each marked row.
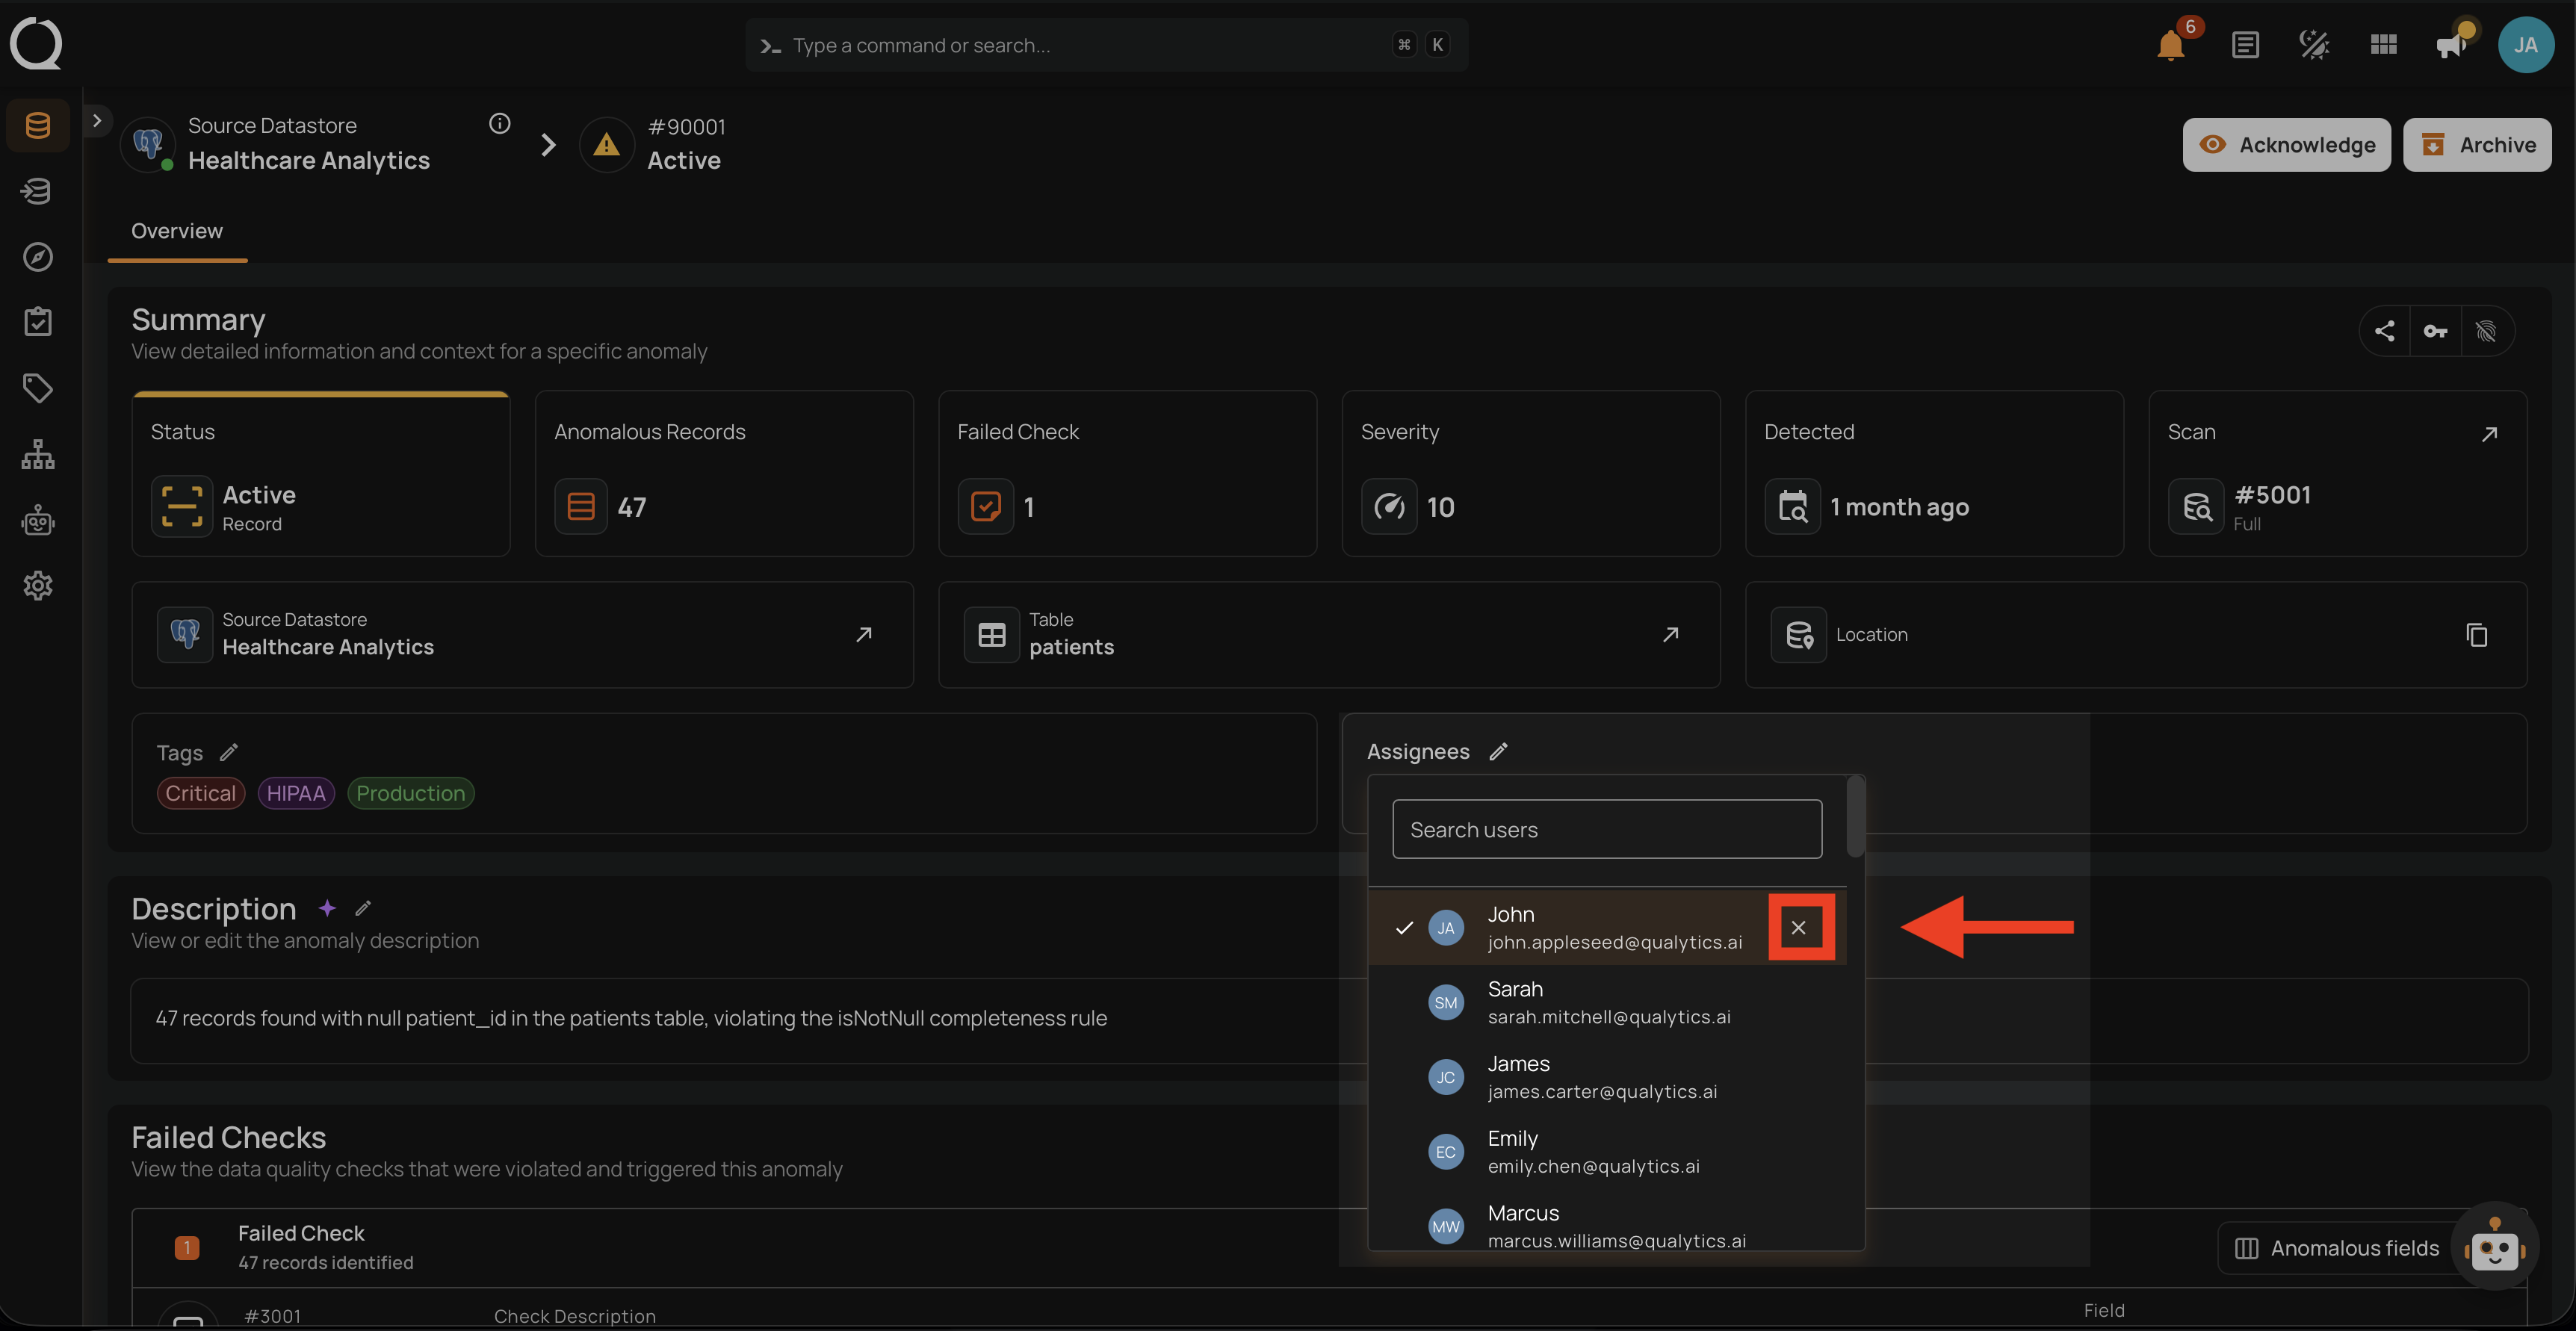
Step 4: For each user you want to remove from the anomaly, click the icon next to their name.
Step 5: The removed users are no longer marked: the check icon and the icon disappear, confirming they are no longer assigned.
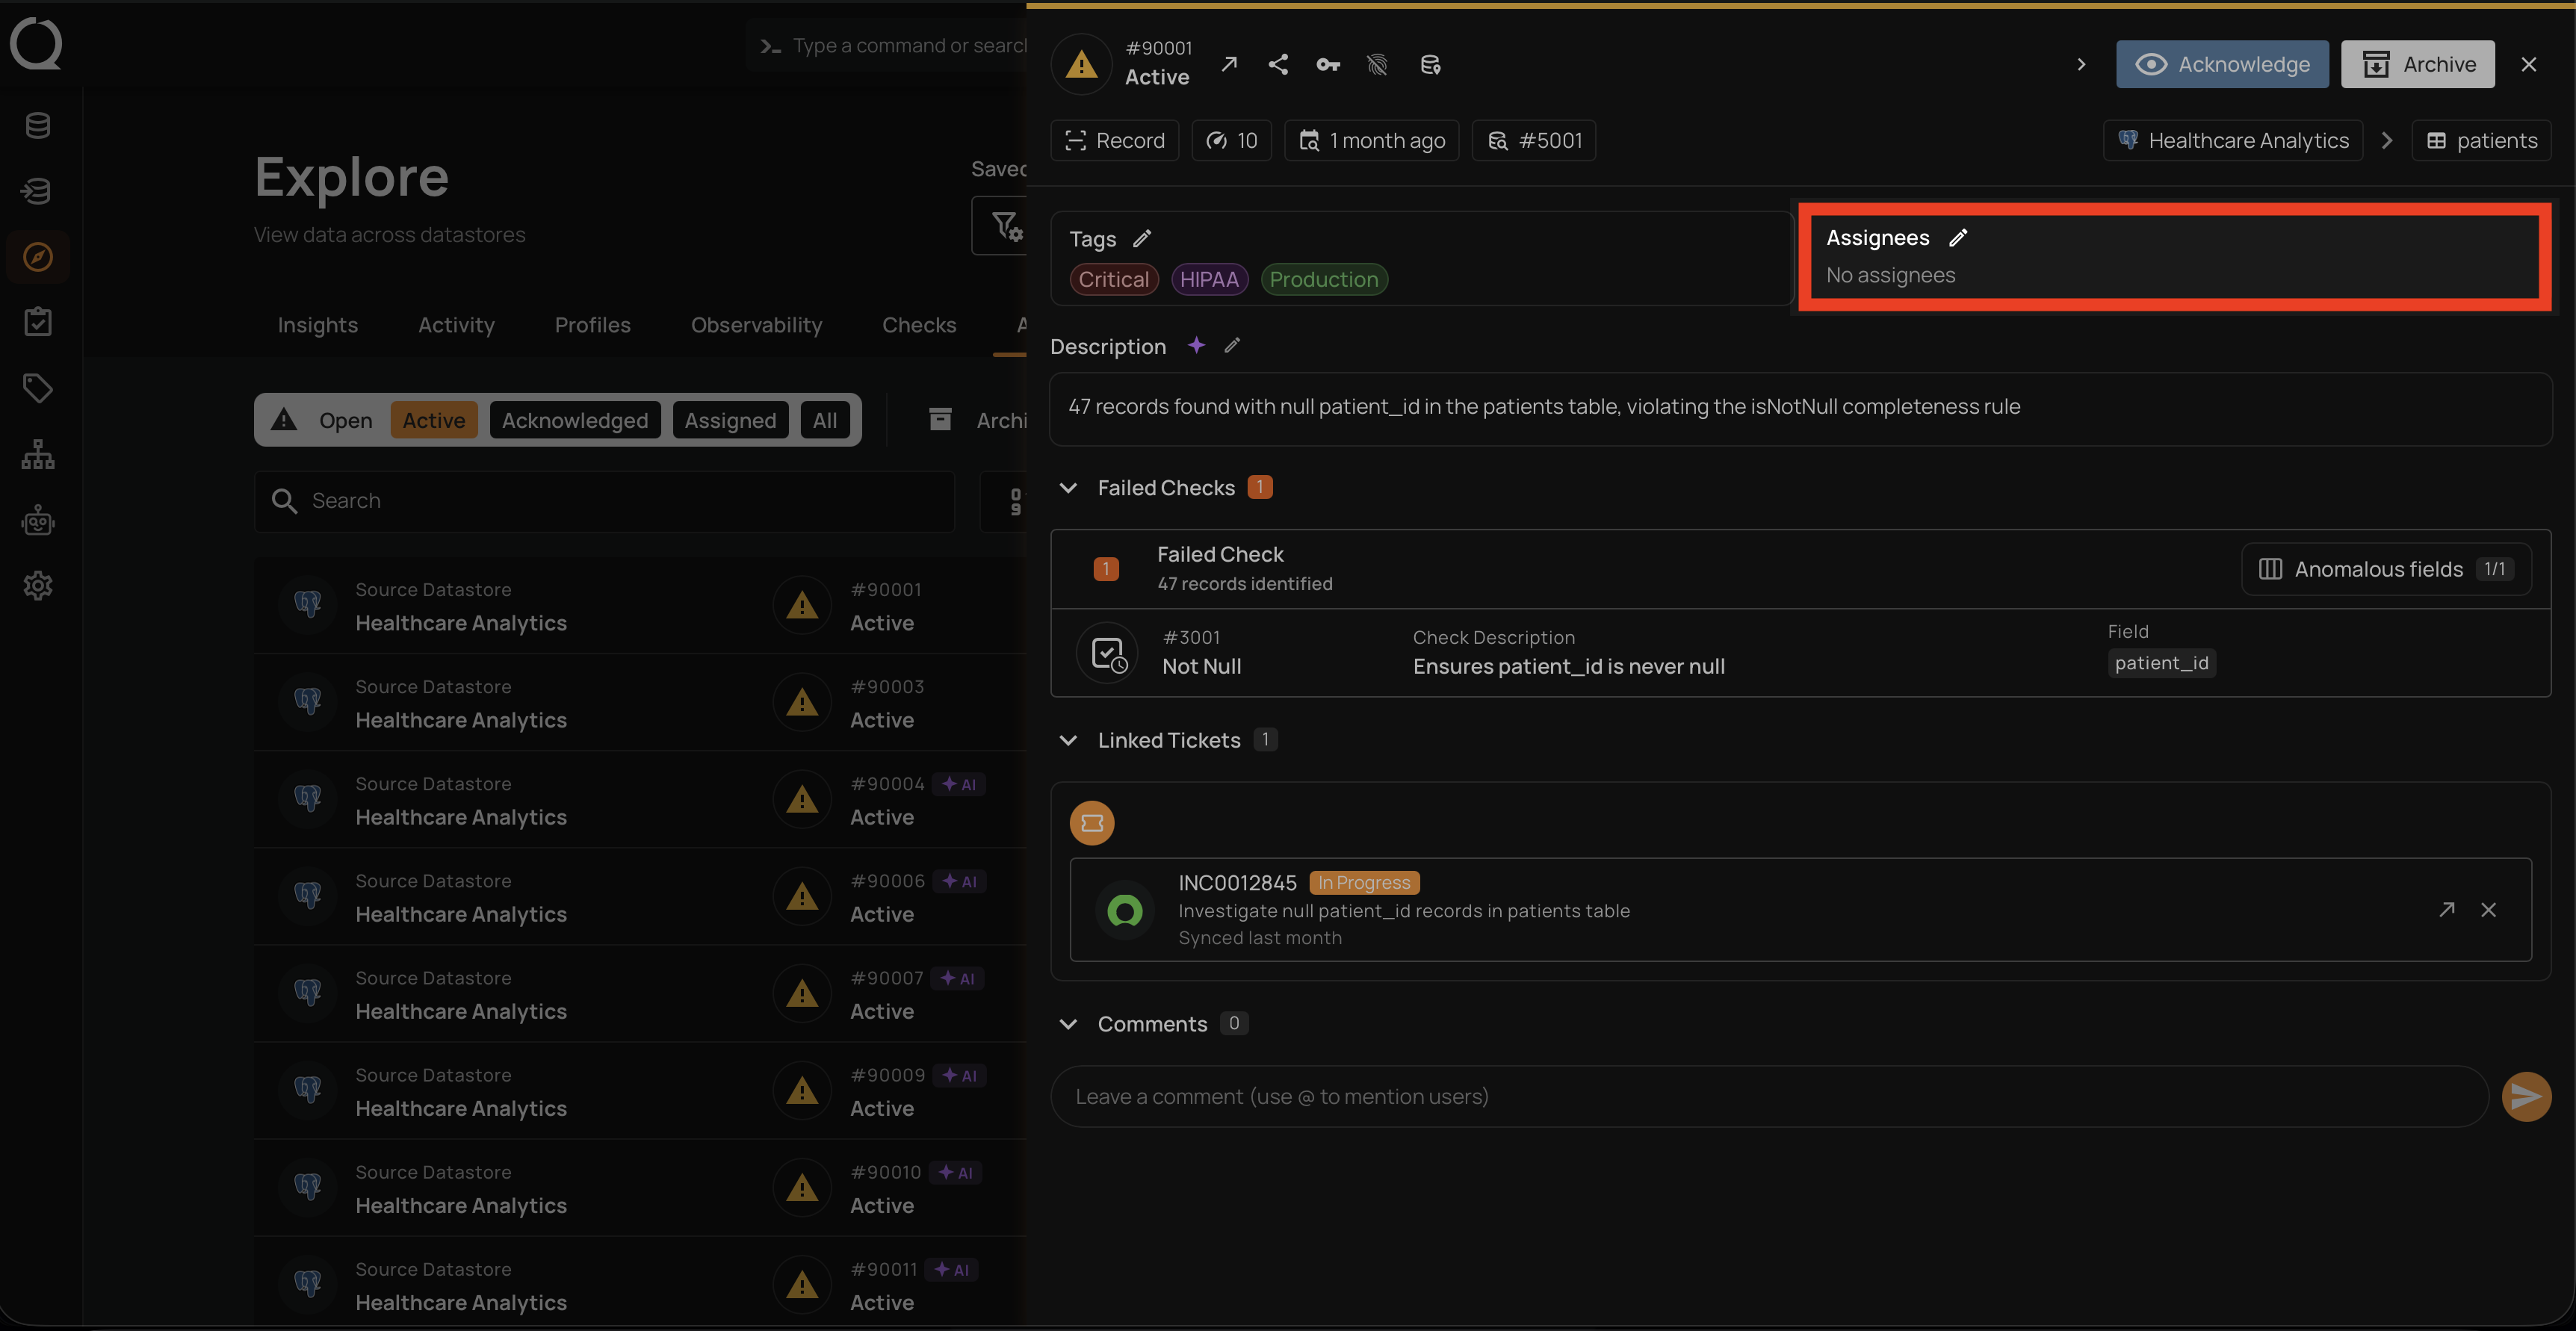
Step 6: Click anywhere outside the picker to close it. The Assignees field updates: it shows the remaining avatars, or No assignees when every user has been removed. The change is recorded in the History section.

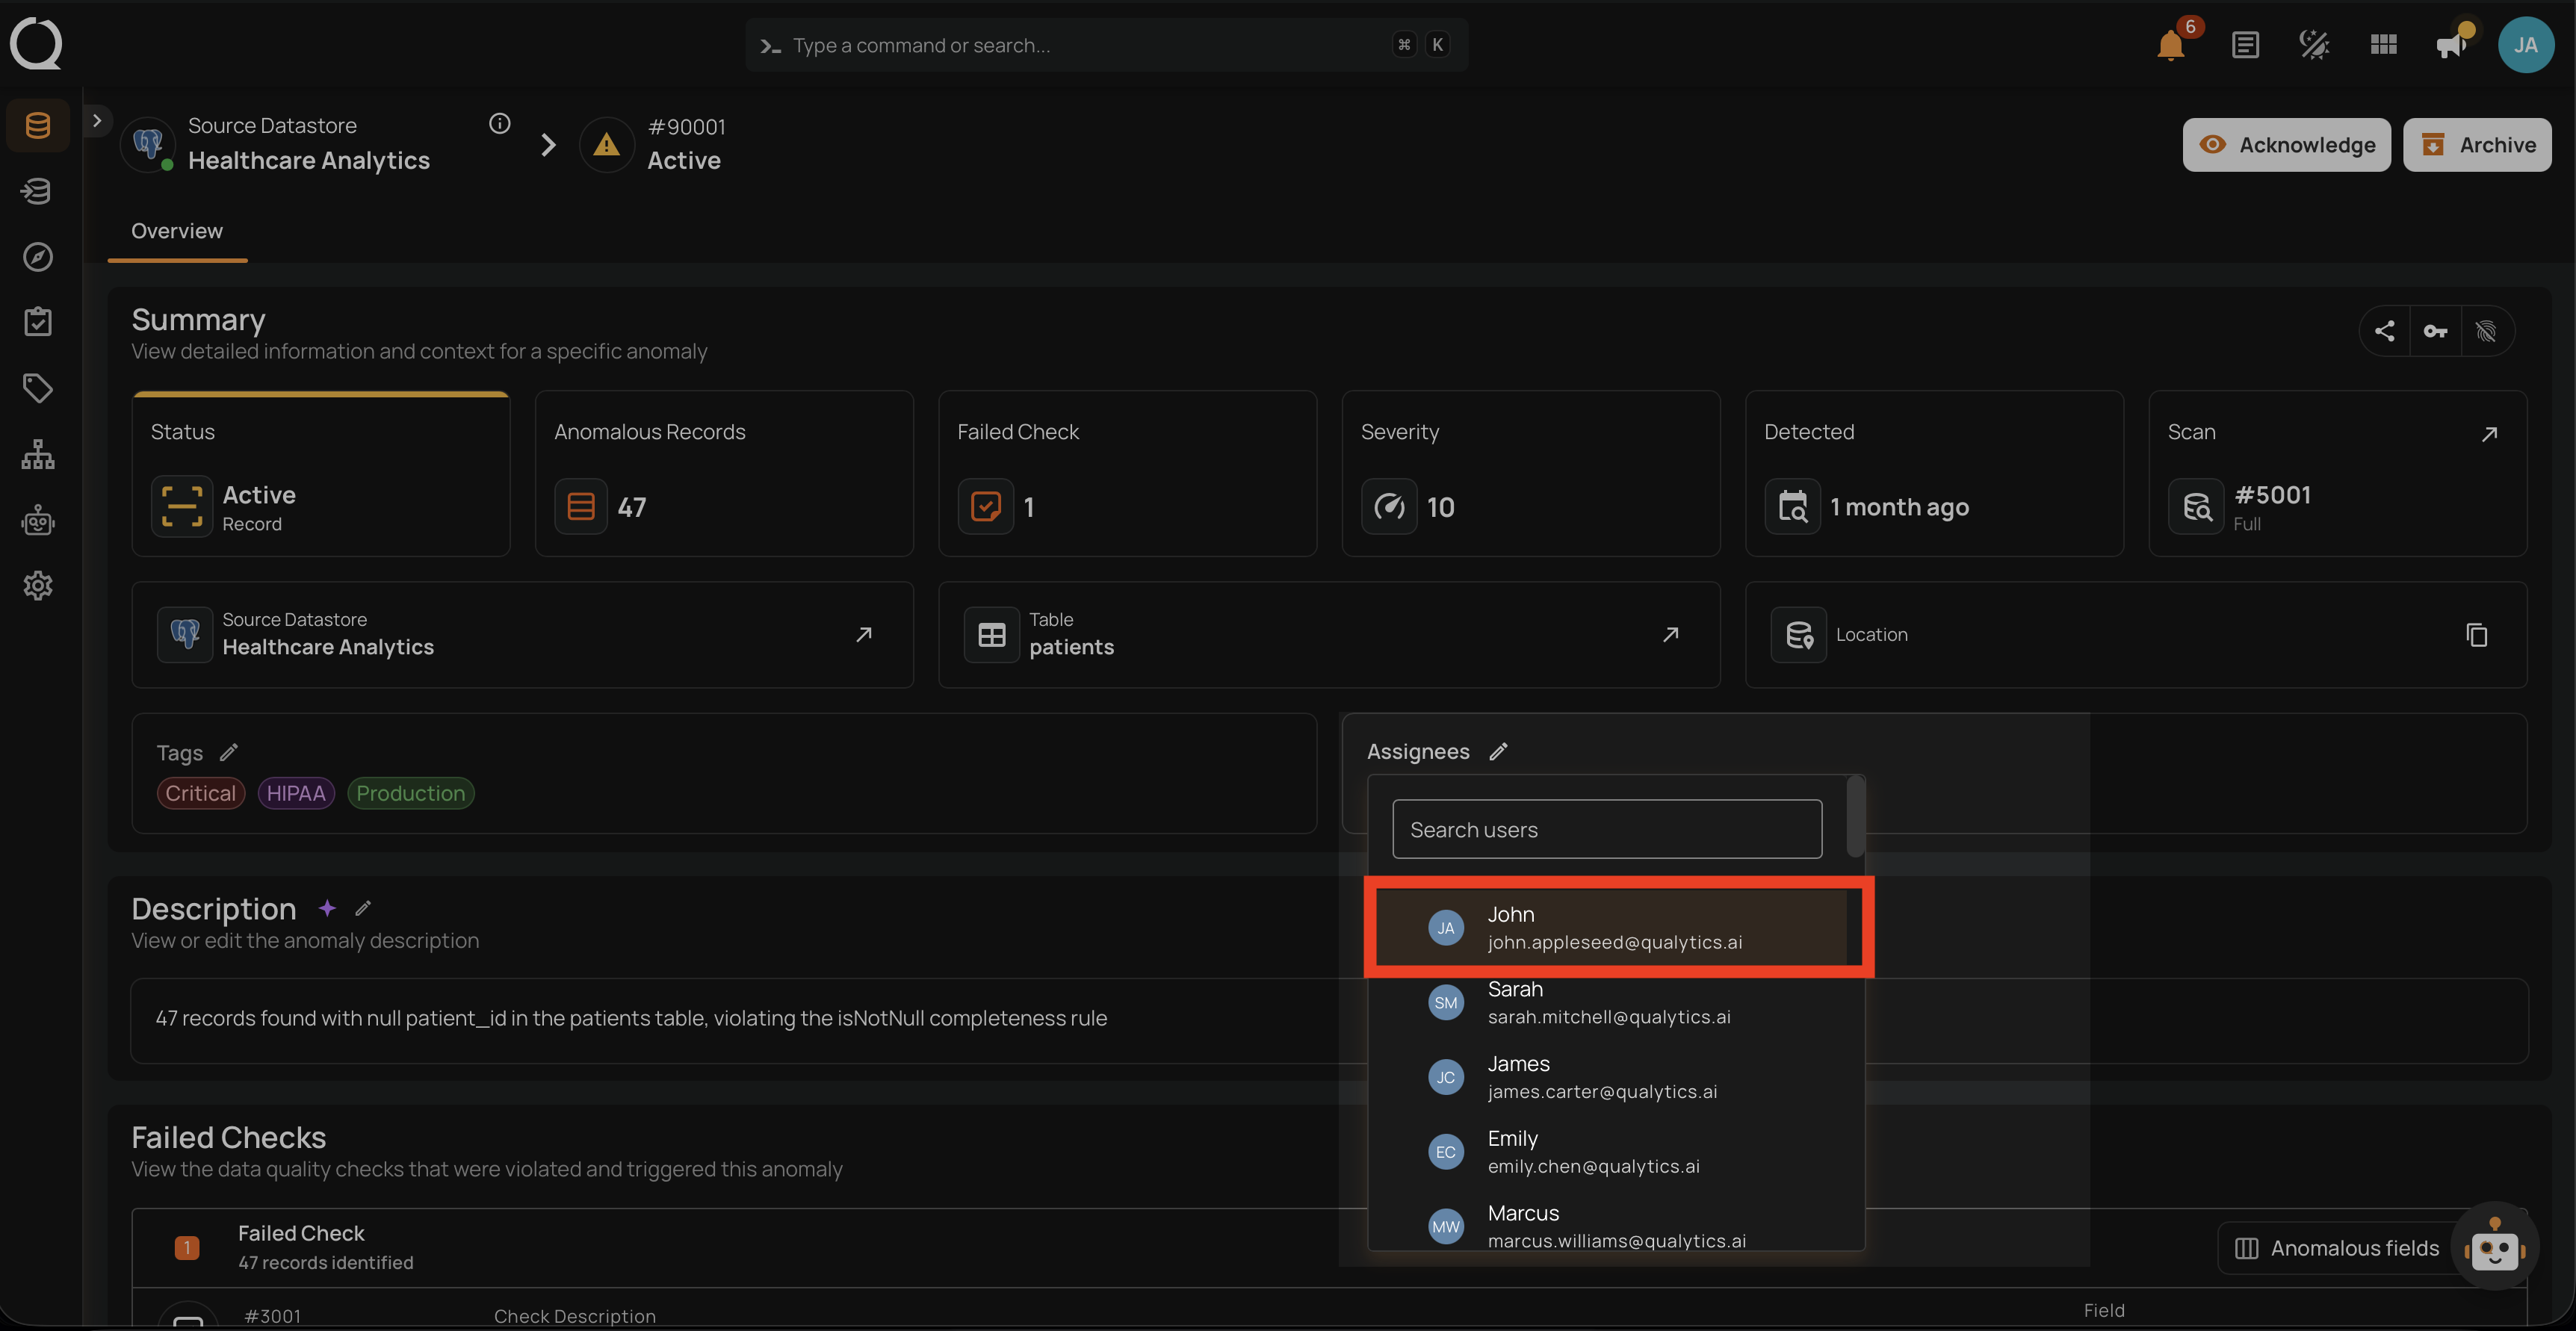
Step 1: Open the anomaly from Explore > Anomalies. In the right-side details panel, locate the Assignees field, which lists the users currently assigned as avatars.
Step 2: Click the Edit button next to the Assignees label to open the user picker.
Step 3: The user picker opens. Currently assigned users appear marked with a check icon at the top of the list, and a icon shows on the right of each marked row.
Step 4: For each user you want to remove from the anomaly, click the icon next to their name.
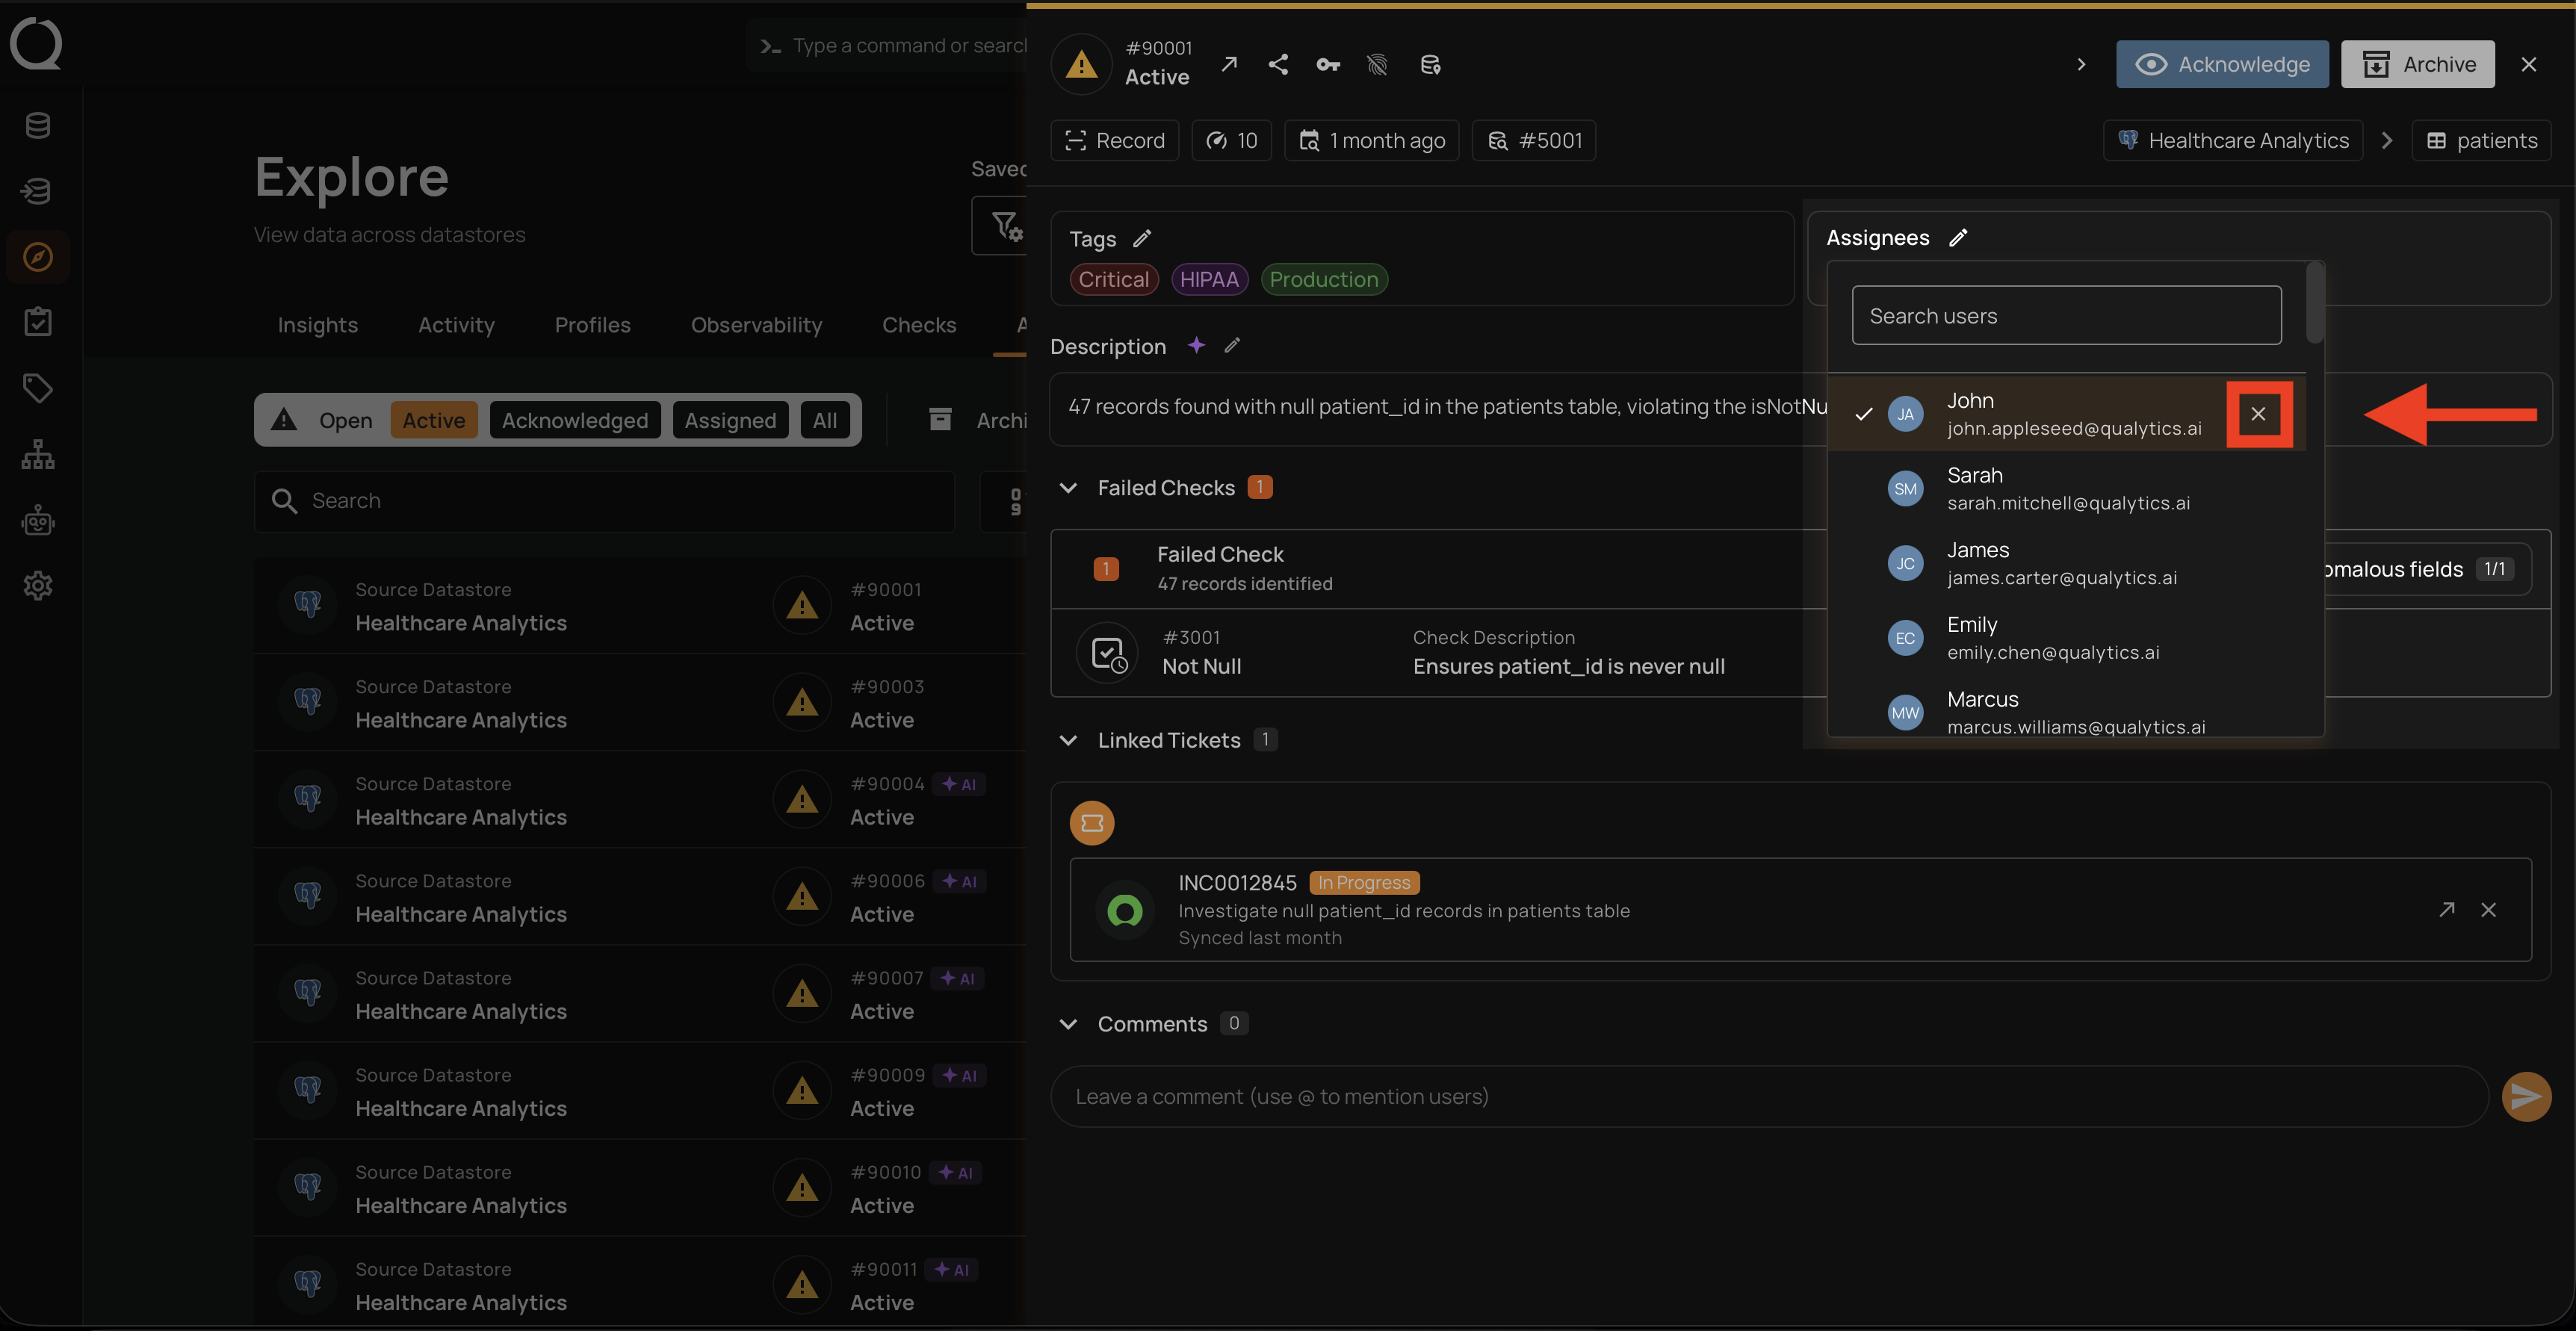
Step 5: The removed users are no longer marked: the check icon and the icon disappear, confirming they are no longer assigned.
Step 6: Click anywhere outside the picker to close it. The Assignees field updates: it shows the remaining avatars, or No assignees when every user has been removed. The change is recorded in the History section.
Removing yourself
To unassign yourself, click the icon next to your own user. The change is recorded in the History section as a self-unassignment.
Info
Removing assignees from an anomaly requires the Author team permission (or higher) on the anomaly's datastore. Archived anomalies cannot have their assignees changed; restore the anomaly first.
Removed assignees are not notified of the change. Only users still on the list at the time of the update receive the in-app notification. See Deep Dive · Anomaly Assignees · Notifications.
Tip
To replace the current assignees with a different set across many anomalies at once, use Bulk-Assign Anomalies. The bulk flow replaces the existing list rather than adding to it.