Select Check Categories
This is Step 2 of 5 in the Scan Operation modal. You decide which categories of quality checks the scan should evaluate against the containers selected in Step 1. The two categories cover different layers of data quality, and how you combine them changes which subsequent steps the modal asks you to fill in.
Open the step
After clicking Next in Step 1, the modal shows the Choose check categories prompt with two checkboxes. Both are checked by default, so unless you uncheck one, the scan evaluates the entire check inventory of the selected containers.
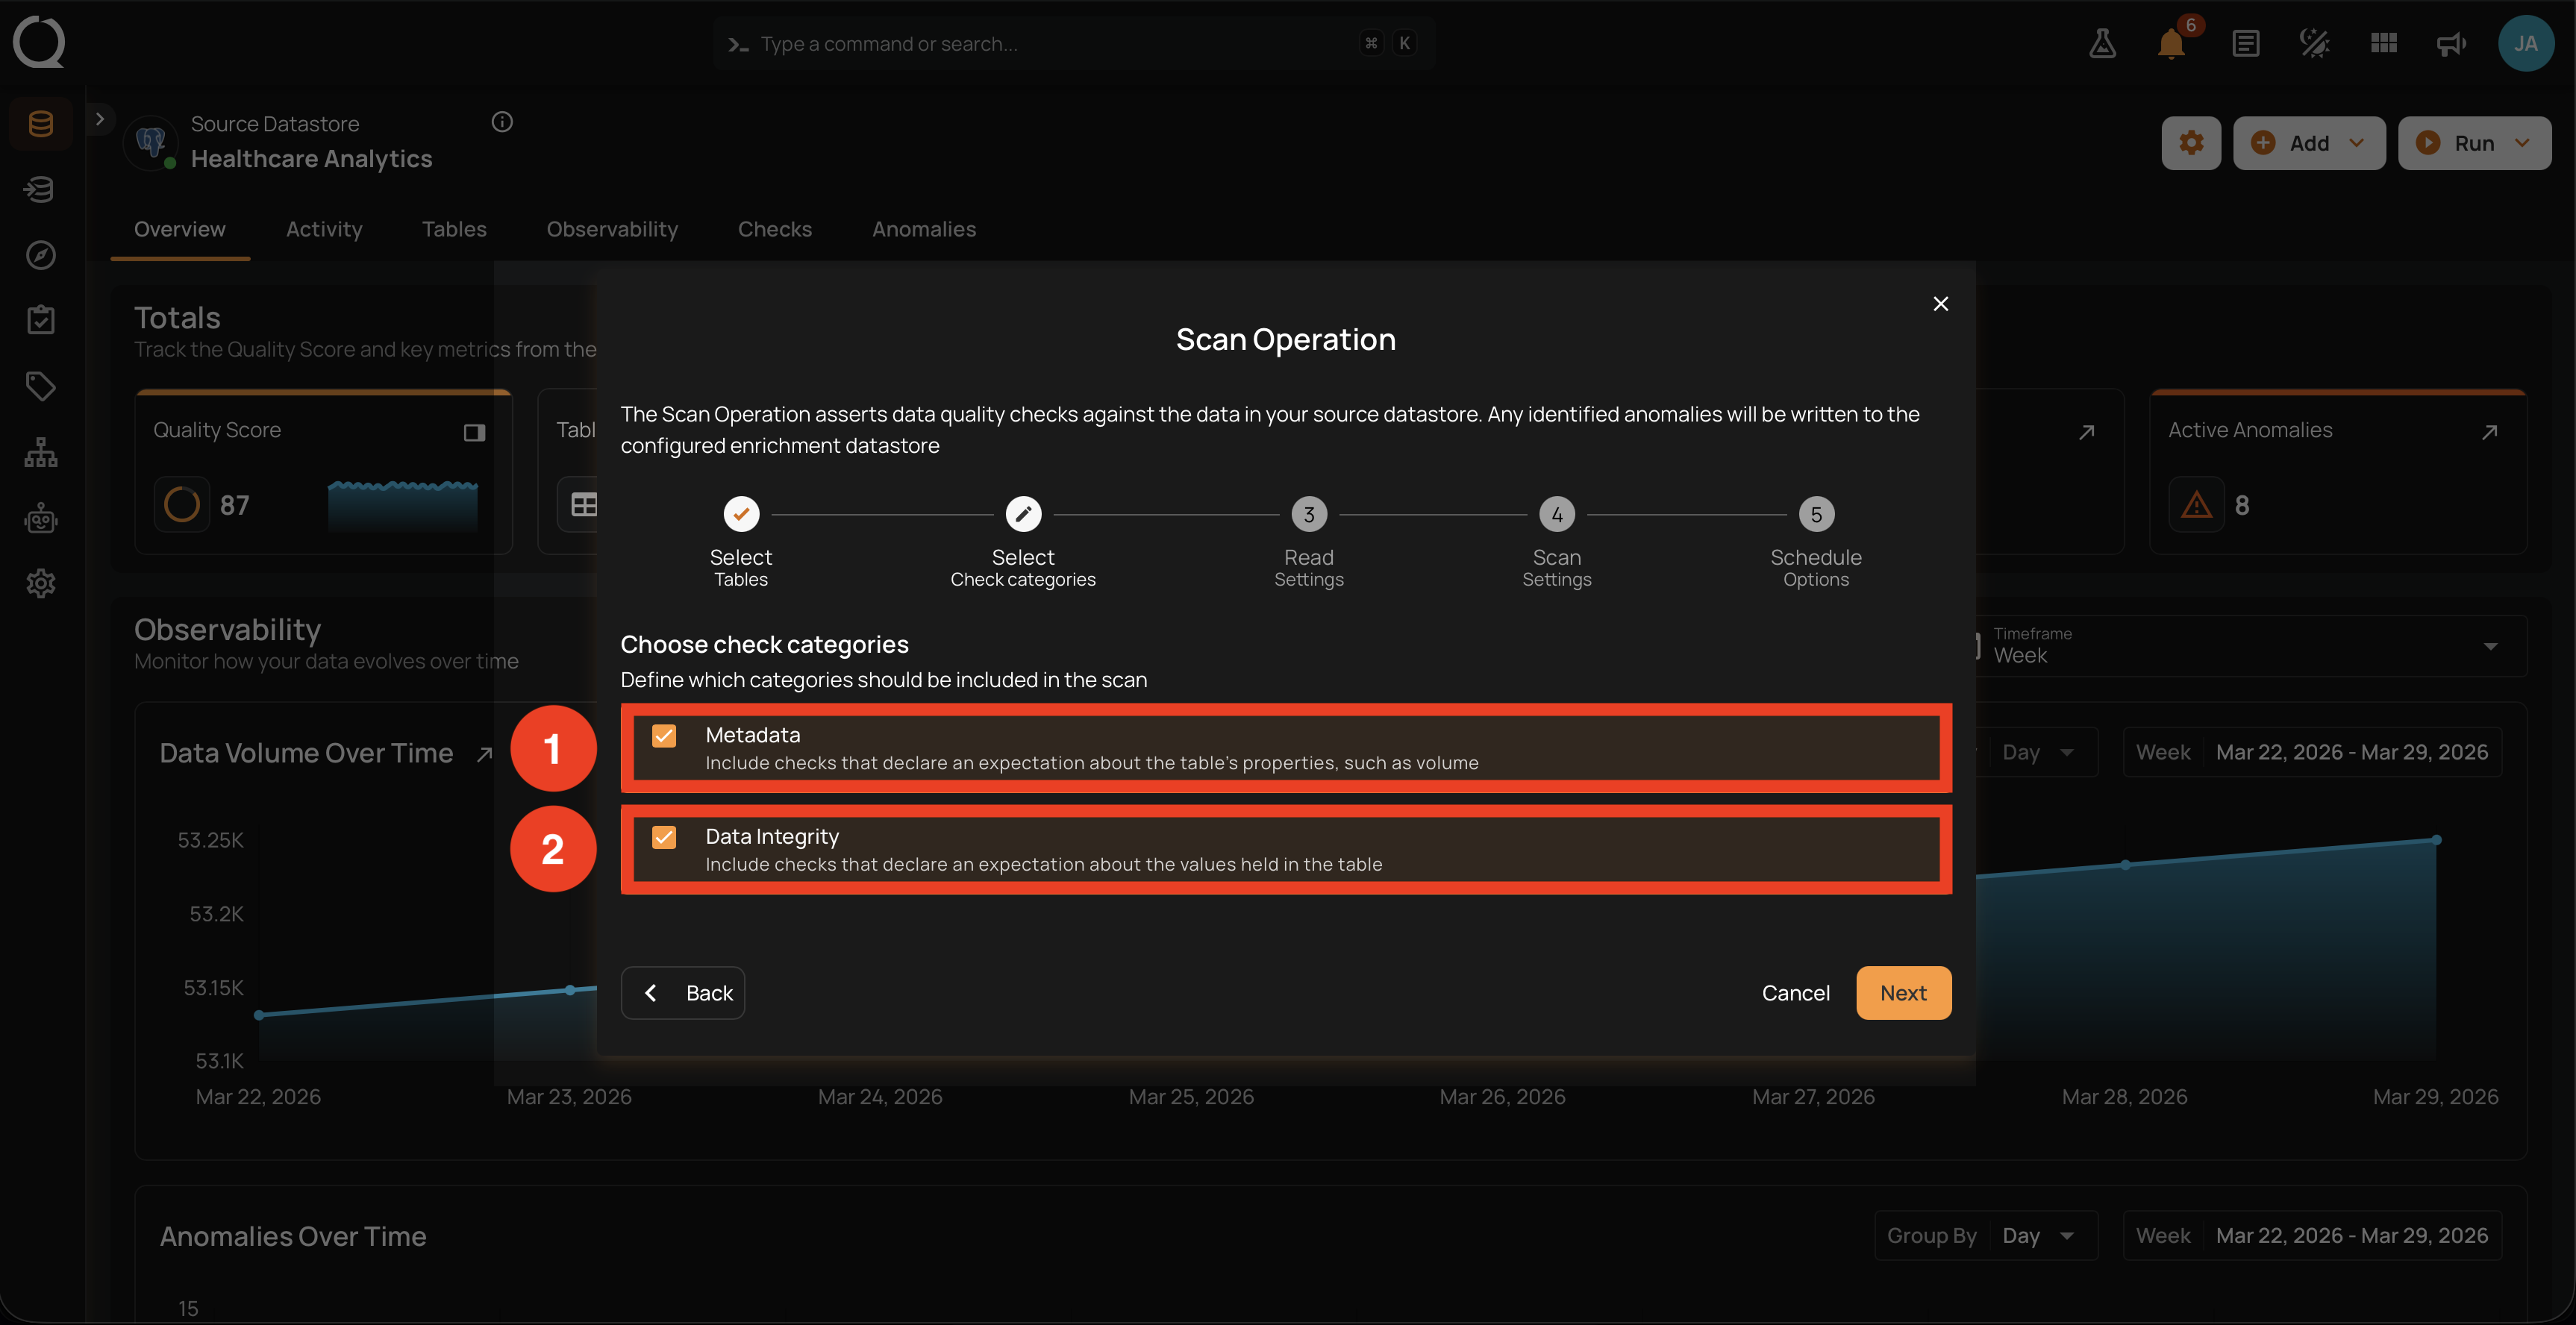
How the selection works
- Both options are independent checkboxes. You can keep both, pick only one, or pick the other, but you cannot proceed with zero categories selected.
- The Next button is disabled when both boxes are cleared, and an inline alert reads "At least one check category must be selected".
- The default state when the modal first opens is both categories checked.
- The label table in the helper text adapts to the container type of the selected datastore: it shows file for DFS datastores, view when the container is a view, and so on. The behavior described below is identical regardless of the container type.
Option 1: Metadata
Selecting Metadata tells the scan to evaluate checks that describe what the dataset itself should look like, without reading the individual records. Two rule families are classified as Metadata:
- Volumetric checks (row counts, partition counts, expected magnitudes).
- Freshness checks (staleness against an expected last-update window).
These checks compare against catalog-level statistics and the most recent table metadata gathered by Sync and Profile. They do not require the platform to read the underlying records.
What changes in the modal when only Metadata is selected
Selecting only Metadata (unchecking Data Integrity) does not remove Step 3 from the stepper. You still navigate through it, but with two changes:
- The Read Settings form is disabled. When you reach Step 3, every field is greyed out and a banner reads "This step is skipped since Metadata checks don't require data to be loaded". There is nothing to fill in, so you just click Next to advance.
- The Read Settings fields are reset. The read strategy, starting threshold, and per-table record limit are cleared so they cannot accidentally affect a Metadata-only scan.
If you later re-enable Data Integrity (still on Step 2), the Step 3 form becomes editable again and you must configure it before proceeding.
When to use Metadata only
- Fast post-load validation when you only need to confirm row counts and freshness after an ETL job finished, without paying for a full data scan.
- High-frequency monitoring on very large tables, where reading the data hourly would be too expensive but catching a sudden drop in row count or a missed refresh is critical.
- Cheapest possible regression check for catalog-level expectations after a schema change.
Option 2: Data Integrity
Selecting Data Integrity tells the scan to evaluate checks that describe what the values inside the records should look like. This category covers every rule type that is not Metadata, including:
- Null and presence rules (Not Null, Any Not Null, Required Values).
- Comparison rules (Equal To, Greater Than, Less Than, Between, and their field-to-field variants).
- Range and length rules (Min Value, Max Value, Min Length, Max Length).
- Uniqueness rules (single-field and composite, including Unique).
- Pattern and content rules (Matches Pattern, Contains Email, Contains Credit Card, Contains SSN, Contains URL, Expected Values).
- Identity and shape rules (Is Type, Is Credit Card, Is Address, Is Replica Of, Distinct Count, Time Distribution Size).
- Cross-container rules (Exists In, Not Exists In, Data Diff, Entity Resolution).
- ML and statistical rules (Predicted By, Metric, Sum).
- Date-related rules (After Date, Before Date Time, Not Future).
For the canonical list of rule types, see Rule Types Overview.
What happens in the modal when Data Integrity is selected
Whenever Data Integrity is checked (alone or with Metadata), Step 3 (Read Settings) is enabled. The scan needs to read records to evaluate per-row checks, so the read strategy, starting threshold, and record limit must be configured.
When to use Data Integrity
- Standard quality validation across data values, covering missing fields, out-of-range values, broken patterns, and so on.
- Targeted re-runs after editing per-field checks or after a backfill that may have introduced bad values.
- Compliance scans that need to verify PII detection rules (Contains Email, Contains SSN, and similar) against actual content.
Both categories together (default)
Keeping both checkboxes checked is the most thorough configuration: every check authored or AI Managed (inferred) against the selected containers is evaluated, regardless of rule type. This is the default for new scans and is the right choice for nightly comprehensive runs.
When both are selected, the modal flow is the full five steps: Read Settings (Step 3) is enabled and required.
AI Managed (inferred) checks follow the same filter
The category selection is applied identically to authored checks and to AI Managed (inferred) checks. There is no separate toggle for inferred checks: they are evaluated when their rule type matches one of the selected categories, and skipped when it does not. A scan with only Metadata selected still runs inferred Volumetric and Freshness checks; a scan with only Data Integrity still runs inferred value-level checks.
Continue to the next step
Click Next to advance to Read Settings. What you do on that page depends on the current category selection:
- Both categories or Data Integrity only: configure the read strategy, the optional starting threshold, and the per-table record limit.
- Metadata only: the Read Settings form is disabled and a banner says "This step is skipped since Metadata checks don't require data to be loaded". Click Next again to skip through to Scan Settings without configuring anything.
The Back button returns you to Select Tables, unless the modal was opened from a container's detail page (in that case, the entry point was implicitly Step 2 and Back is disabled).
Examples
Insurance company: nightly comprehensive validation: A property insurance company scans its claims warehouse every night at 02:00 UTC. They keep both categories checked so that claims, policies, and adjudications get row-count and freshness checks (Metadata) plus content-level checks (Data Integrity), all in one operation. Pairing this with a Full read strategy and Auto Resolve clears stale anomalies that were fixed during the day.
Logistics company: hourly volume sanity check: A logistics provider ingests shipment_events from carrier APIs every two hours. Between Data Integrity scans (which run nightly), they schedule a separate Metadata-only scan hourly. The scan only checks that the expected ~25K rows landed and that the freshness window is met. Each run finishes in seconds because no records are read, and the team is alerted within an hour if the ingestion pipeline stalls.
Healthcare reference data: content audit only: A clinical data team manages a small reference table icd10_codes (~70K rows, refreshed quarterly with each WHO update). Row counts and freshness do not matter (the team controls the upload). They scan with Data Integrity only to validate that each code follows the regex pattern and that description is never null, ignoring volumetric checks that would not add signal.
Bank: HIPAA-style compliance sweep on PII tables: A bank tagged customer_pii on customers, cardholder_data, and kyc_documents. The compliance team scans on that tag weekly with both categories checked: Metadata catches volumetric drift (an unexpected drop in kyc_documents could signal a deletion bug), while Data Integrity runs Contains Email, Contains SSN, and pattern checks for credit card numbers across the same tables in one run.
Where to go next
-
Read Settings
Pick Incremental or Full, set an optional starting threshold, and the record limit.
-
Scan Settings
Anomaly Options (including Auto Resolve), record-anomaly limits, and source examples.
-
Schedule Options
Set up a recurring run, or skip this step and use Run Now.
-
Select Tables
Choose the containers to scan: All, Specific, or by Tag.