Bulk-Edit Tags
Use this flow when you want to apply the same set of tags to many anomalies at once. To add tags on a single anomaly from its details view, see Add Tags. To take a tag off an anomaly, see Remove Tags. For the platform-level tag catalog, see Tags. For programmatic access, see the Anomalies API.
Info
Bulk-editing tags requires the Author team permission (or higher) on the datastore of every selected anomaly. Archived anomalies cannot have their tags changed; restore them first.
You can launch a bulk edit from two places, and the flow is identical because both lists use the same selection toolbar and Bulk Edit Anomalies modal. Pick the tab that matches where you start from.
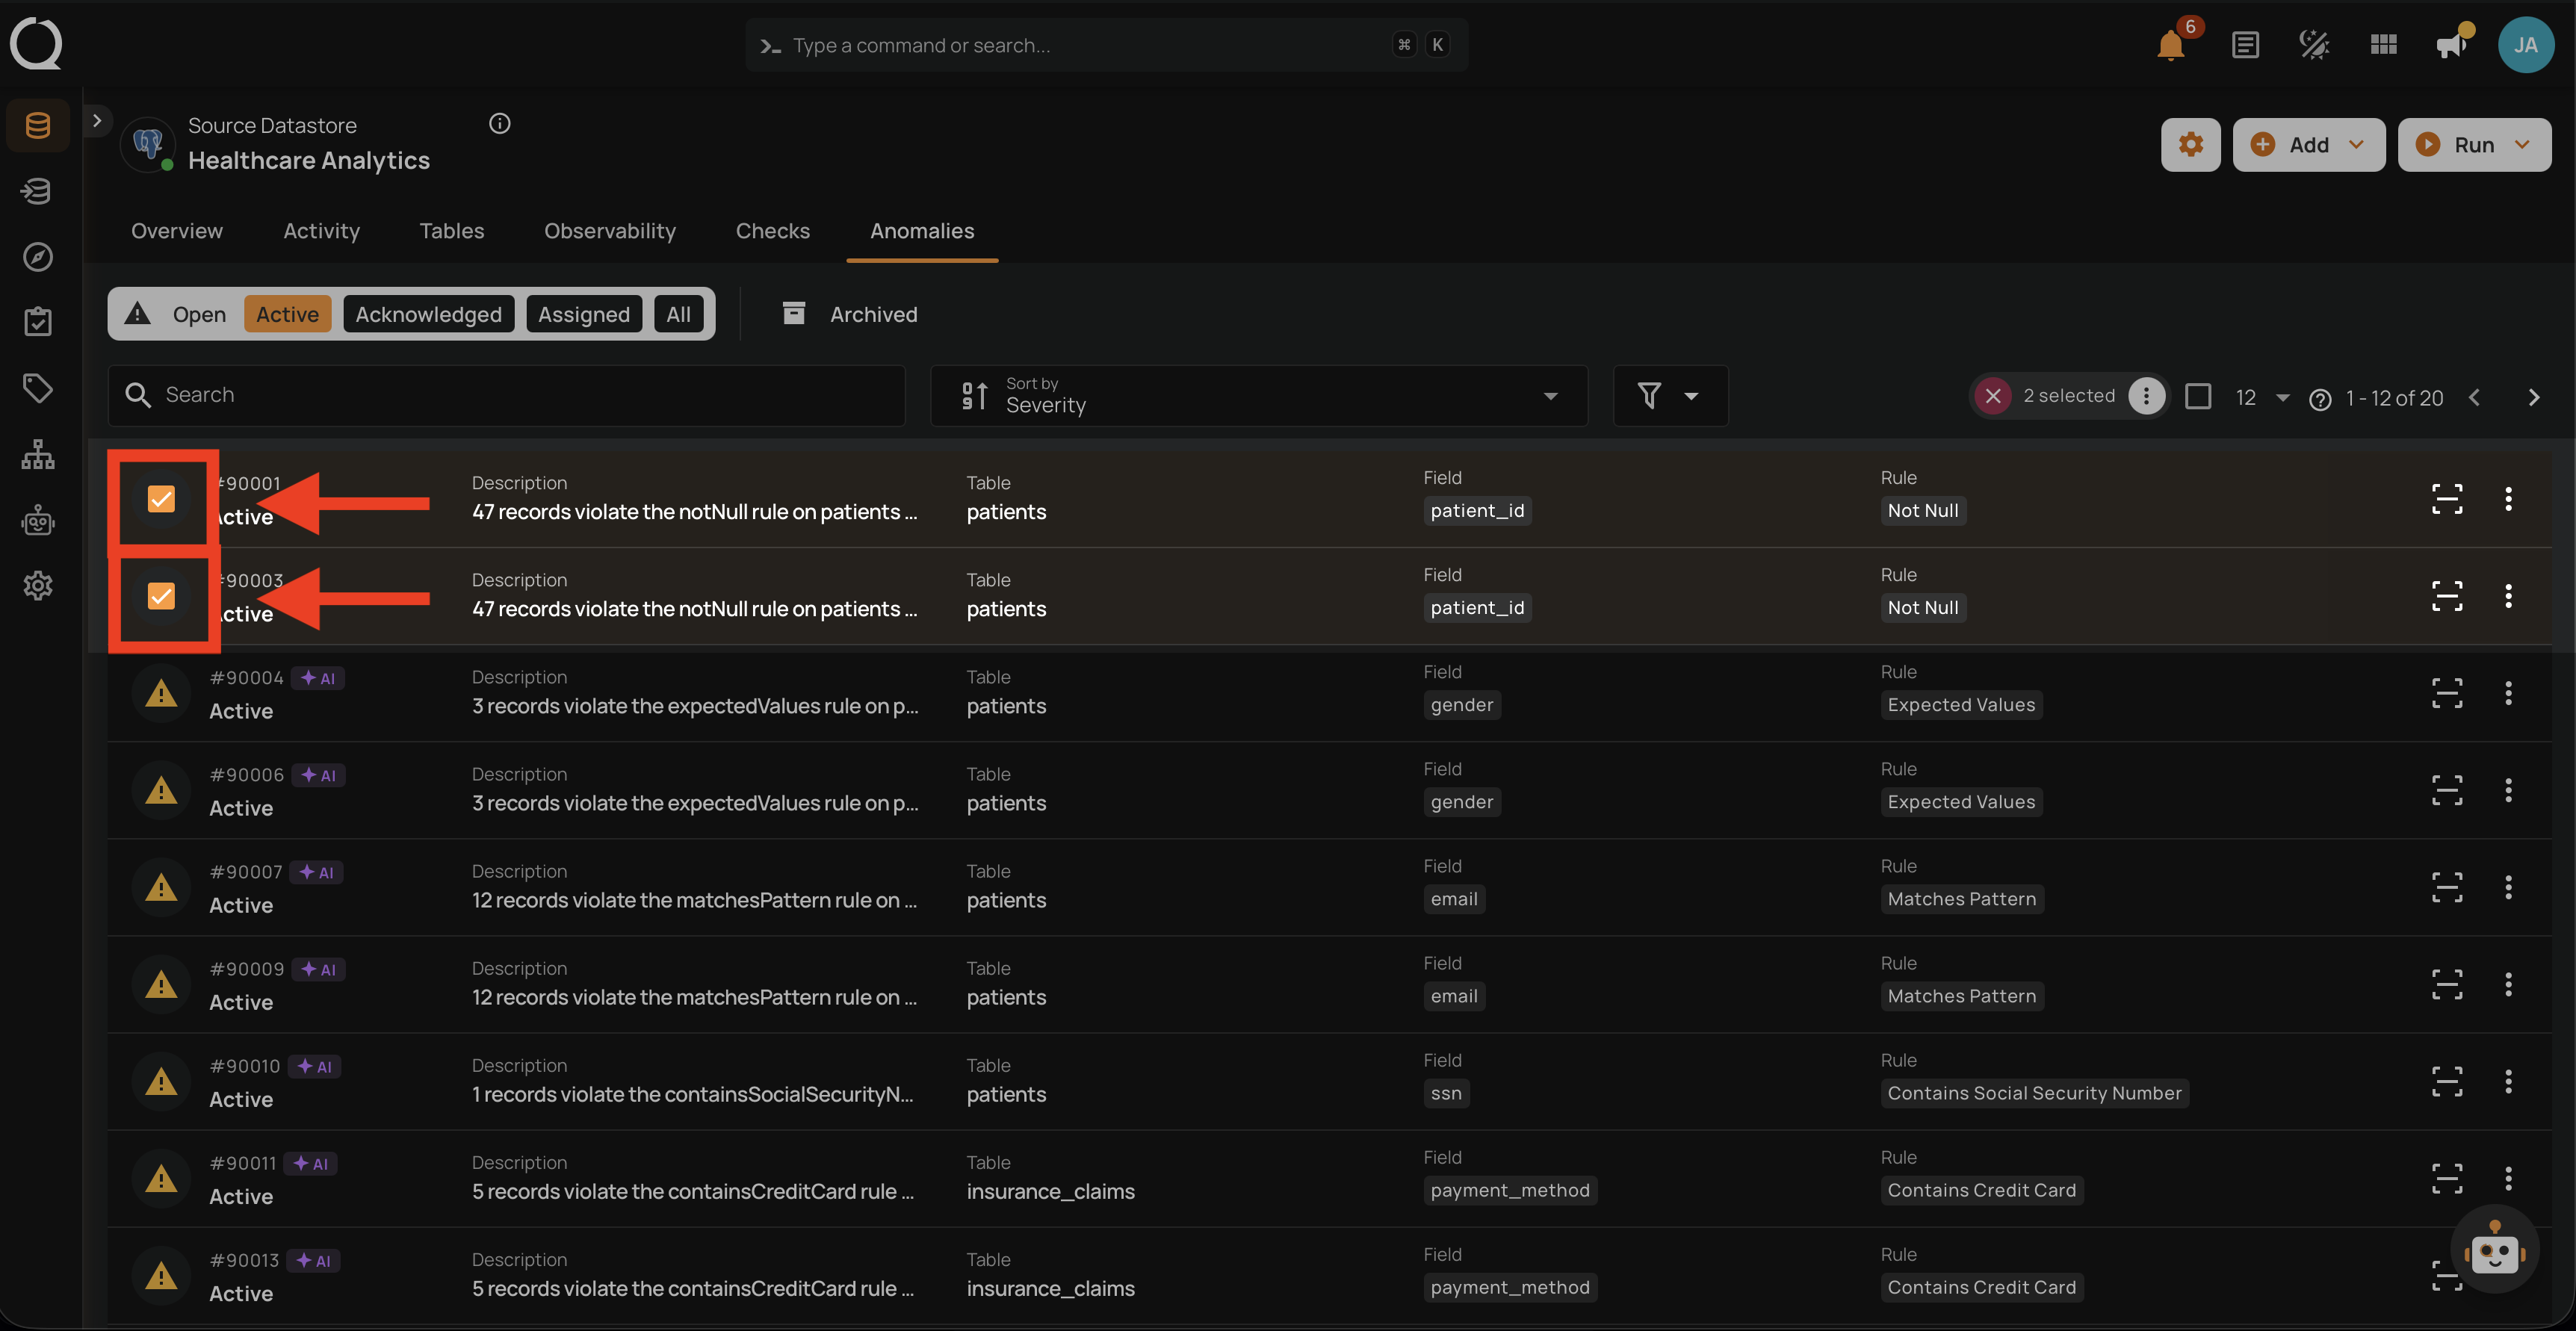
Step 1: Open the source datastore and go to the Anomalies tab. You see the list of anomalies for that datastore.

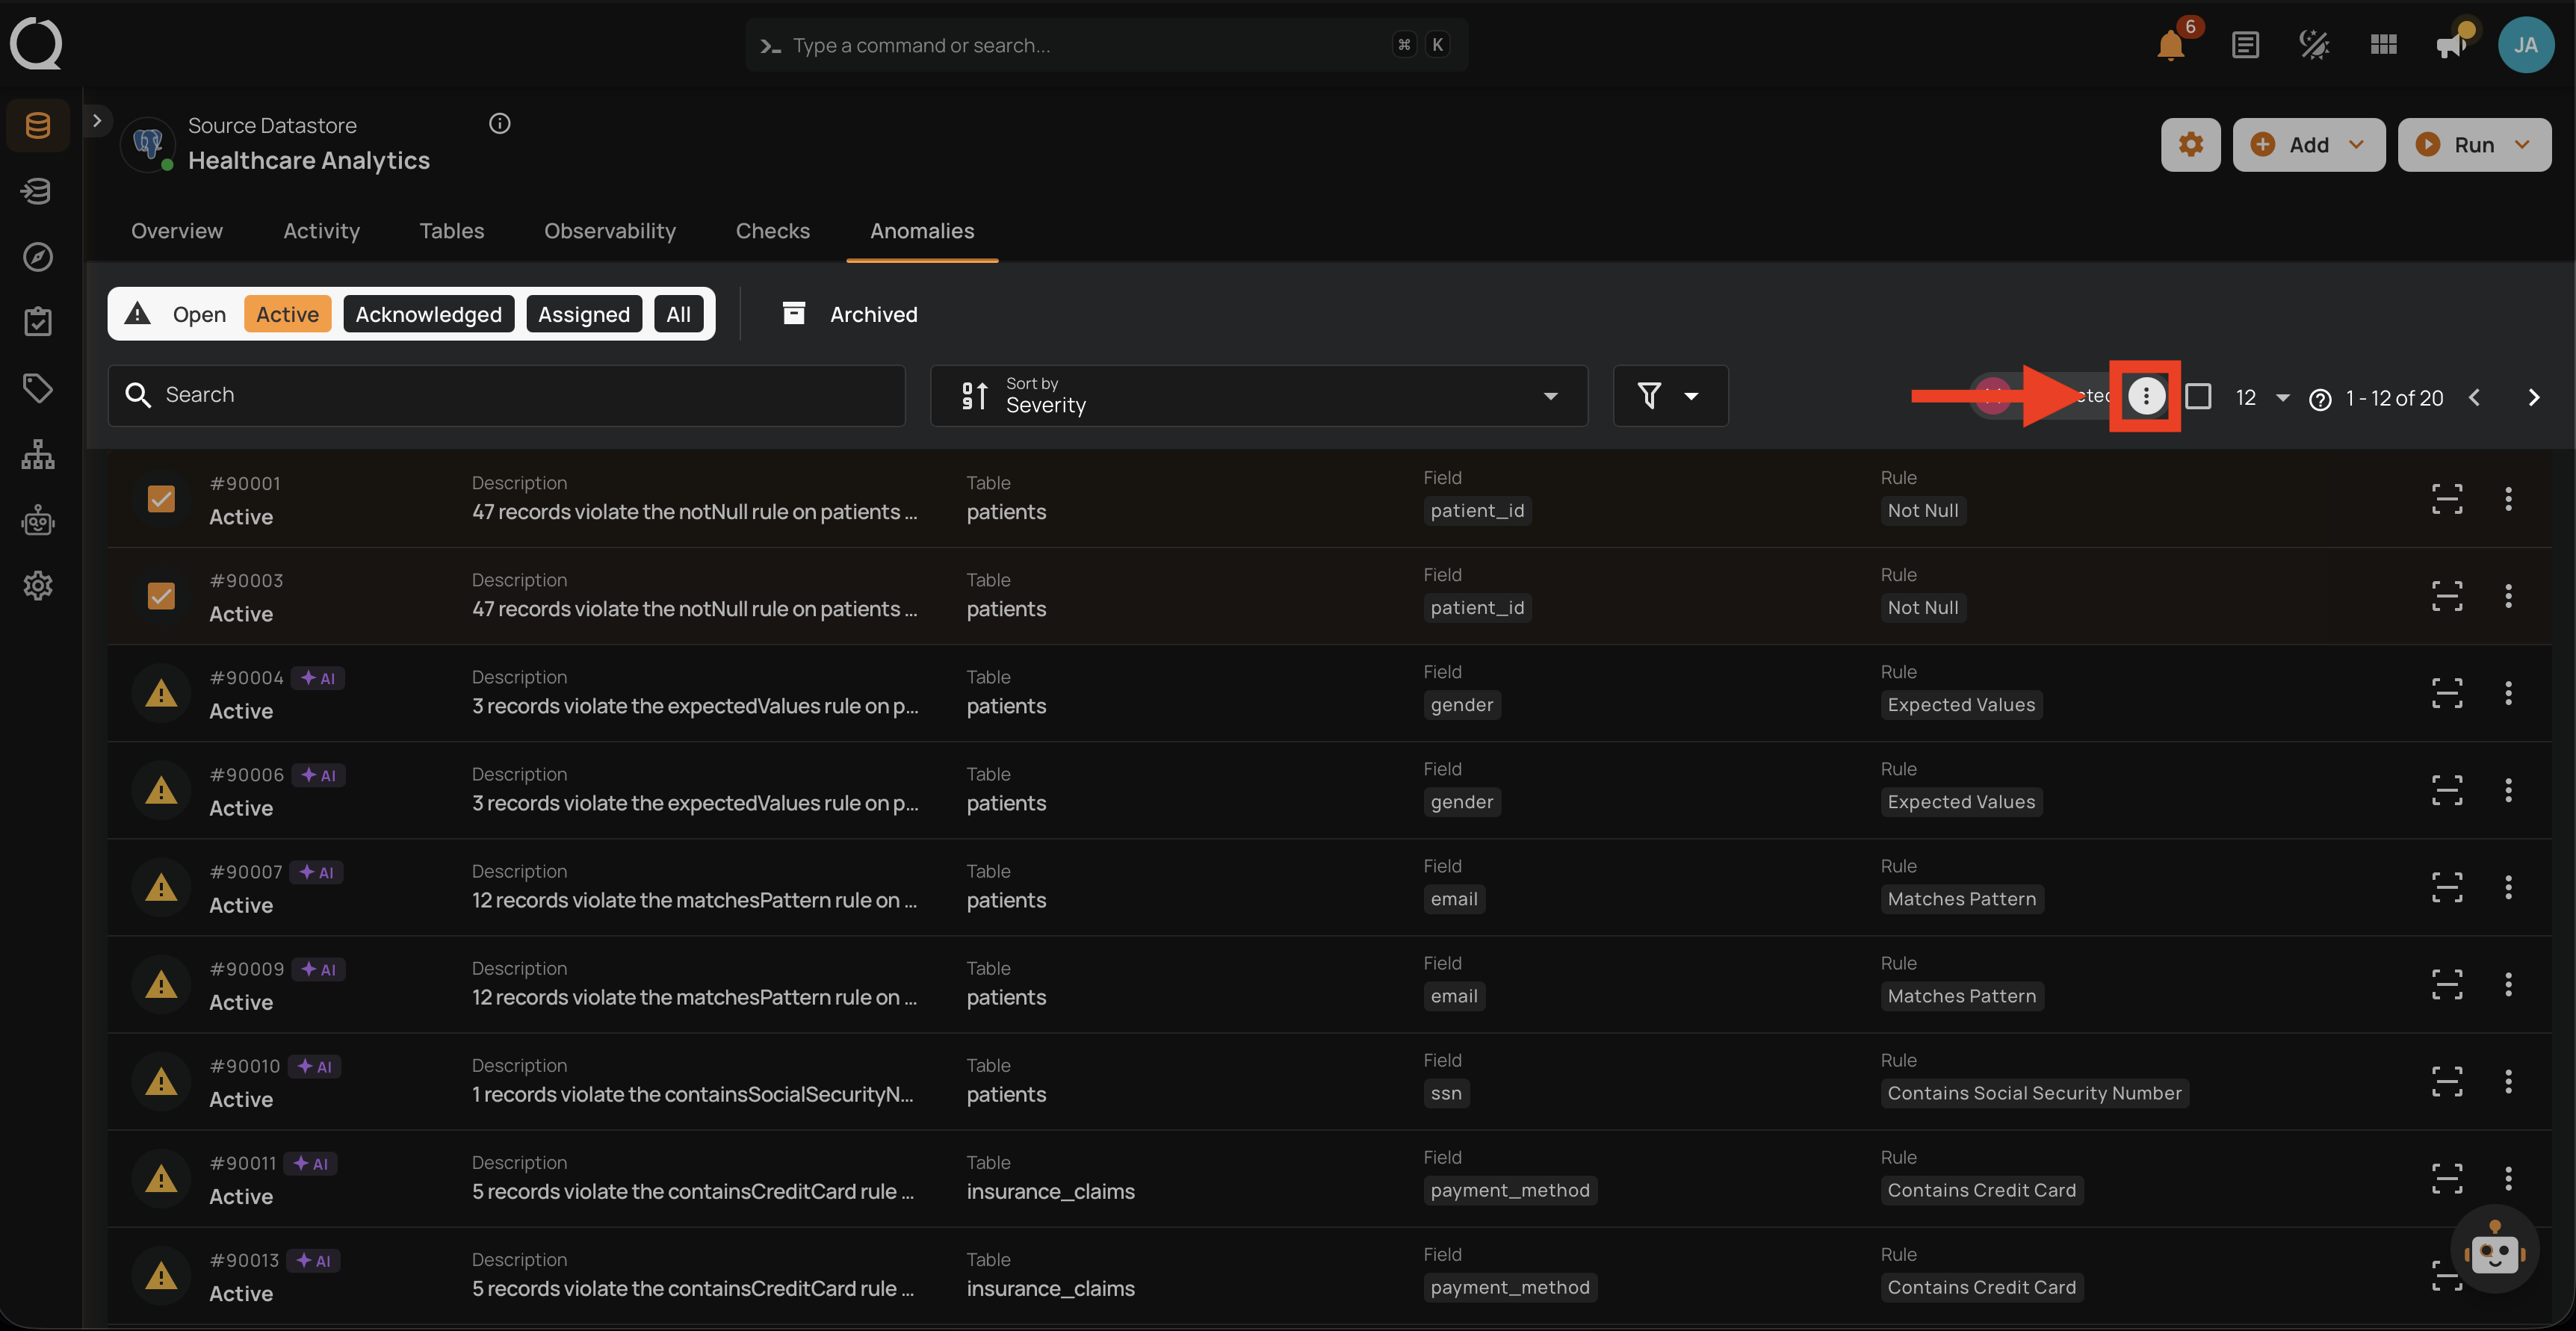
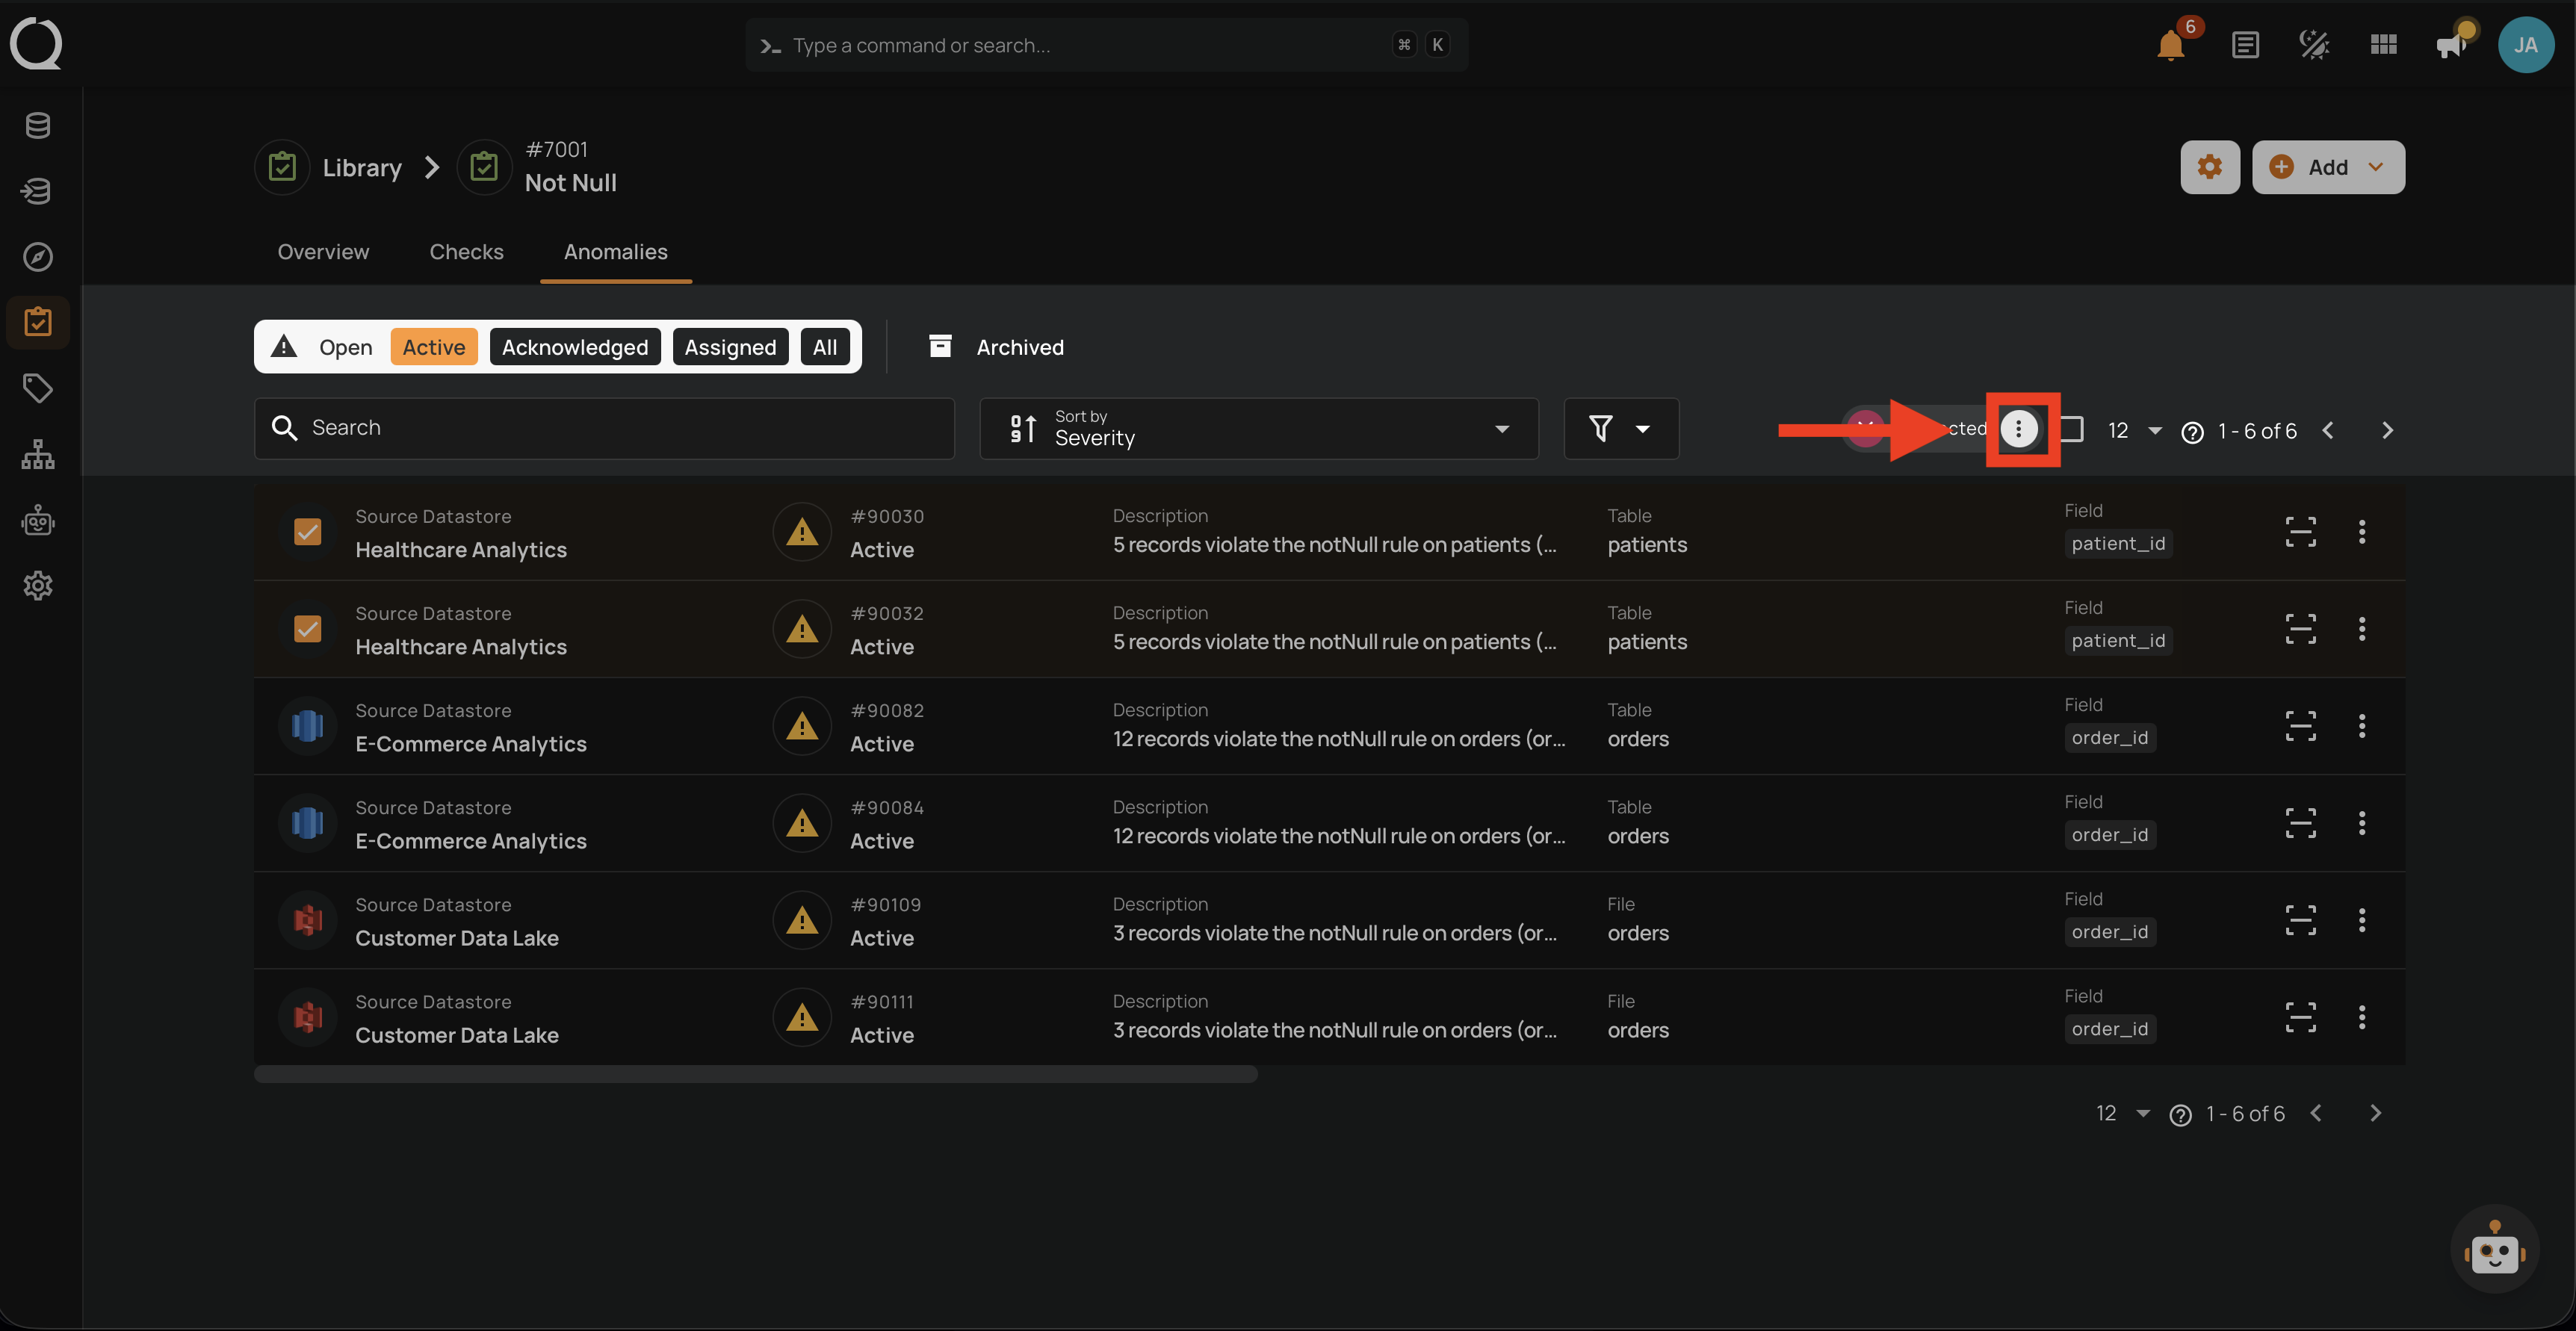
Step 2: Hover over each anomaly you want to include and click the checkbox on the left of the row. The selected rows stay highlighted and the top of the list switches into a selection toolbar showing the count (for example, 2 selected).
Step 3: Click the Bulk menu button in the selection toolbar.
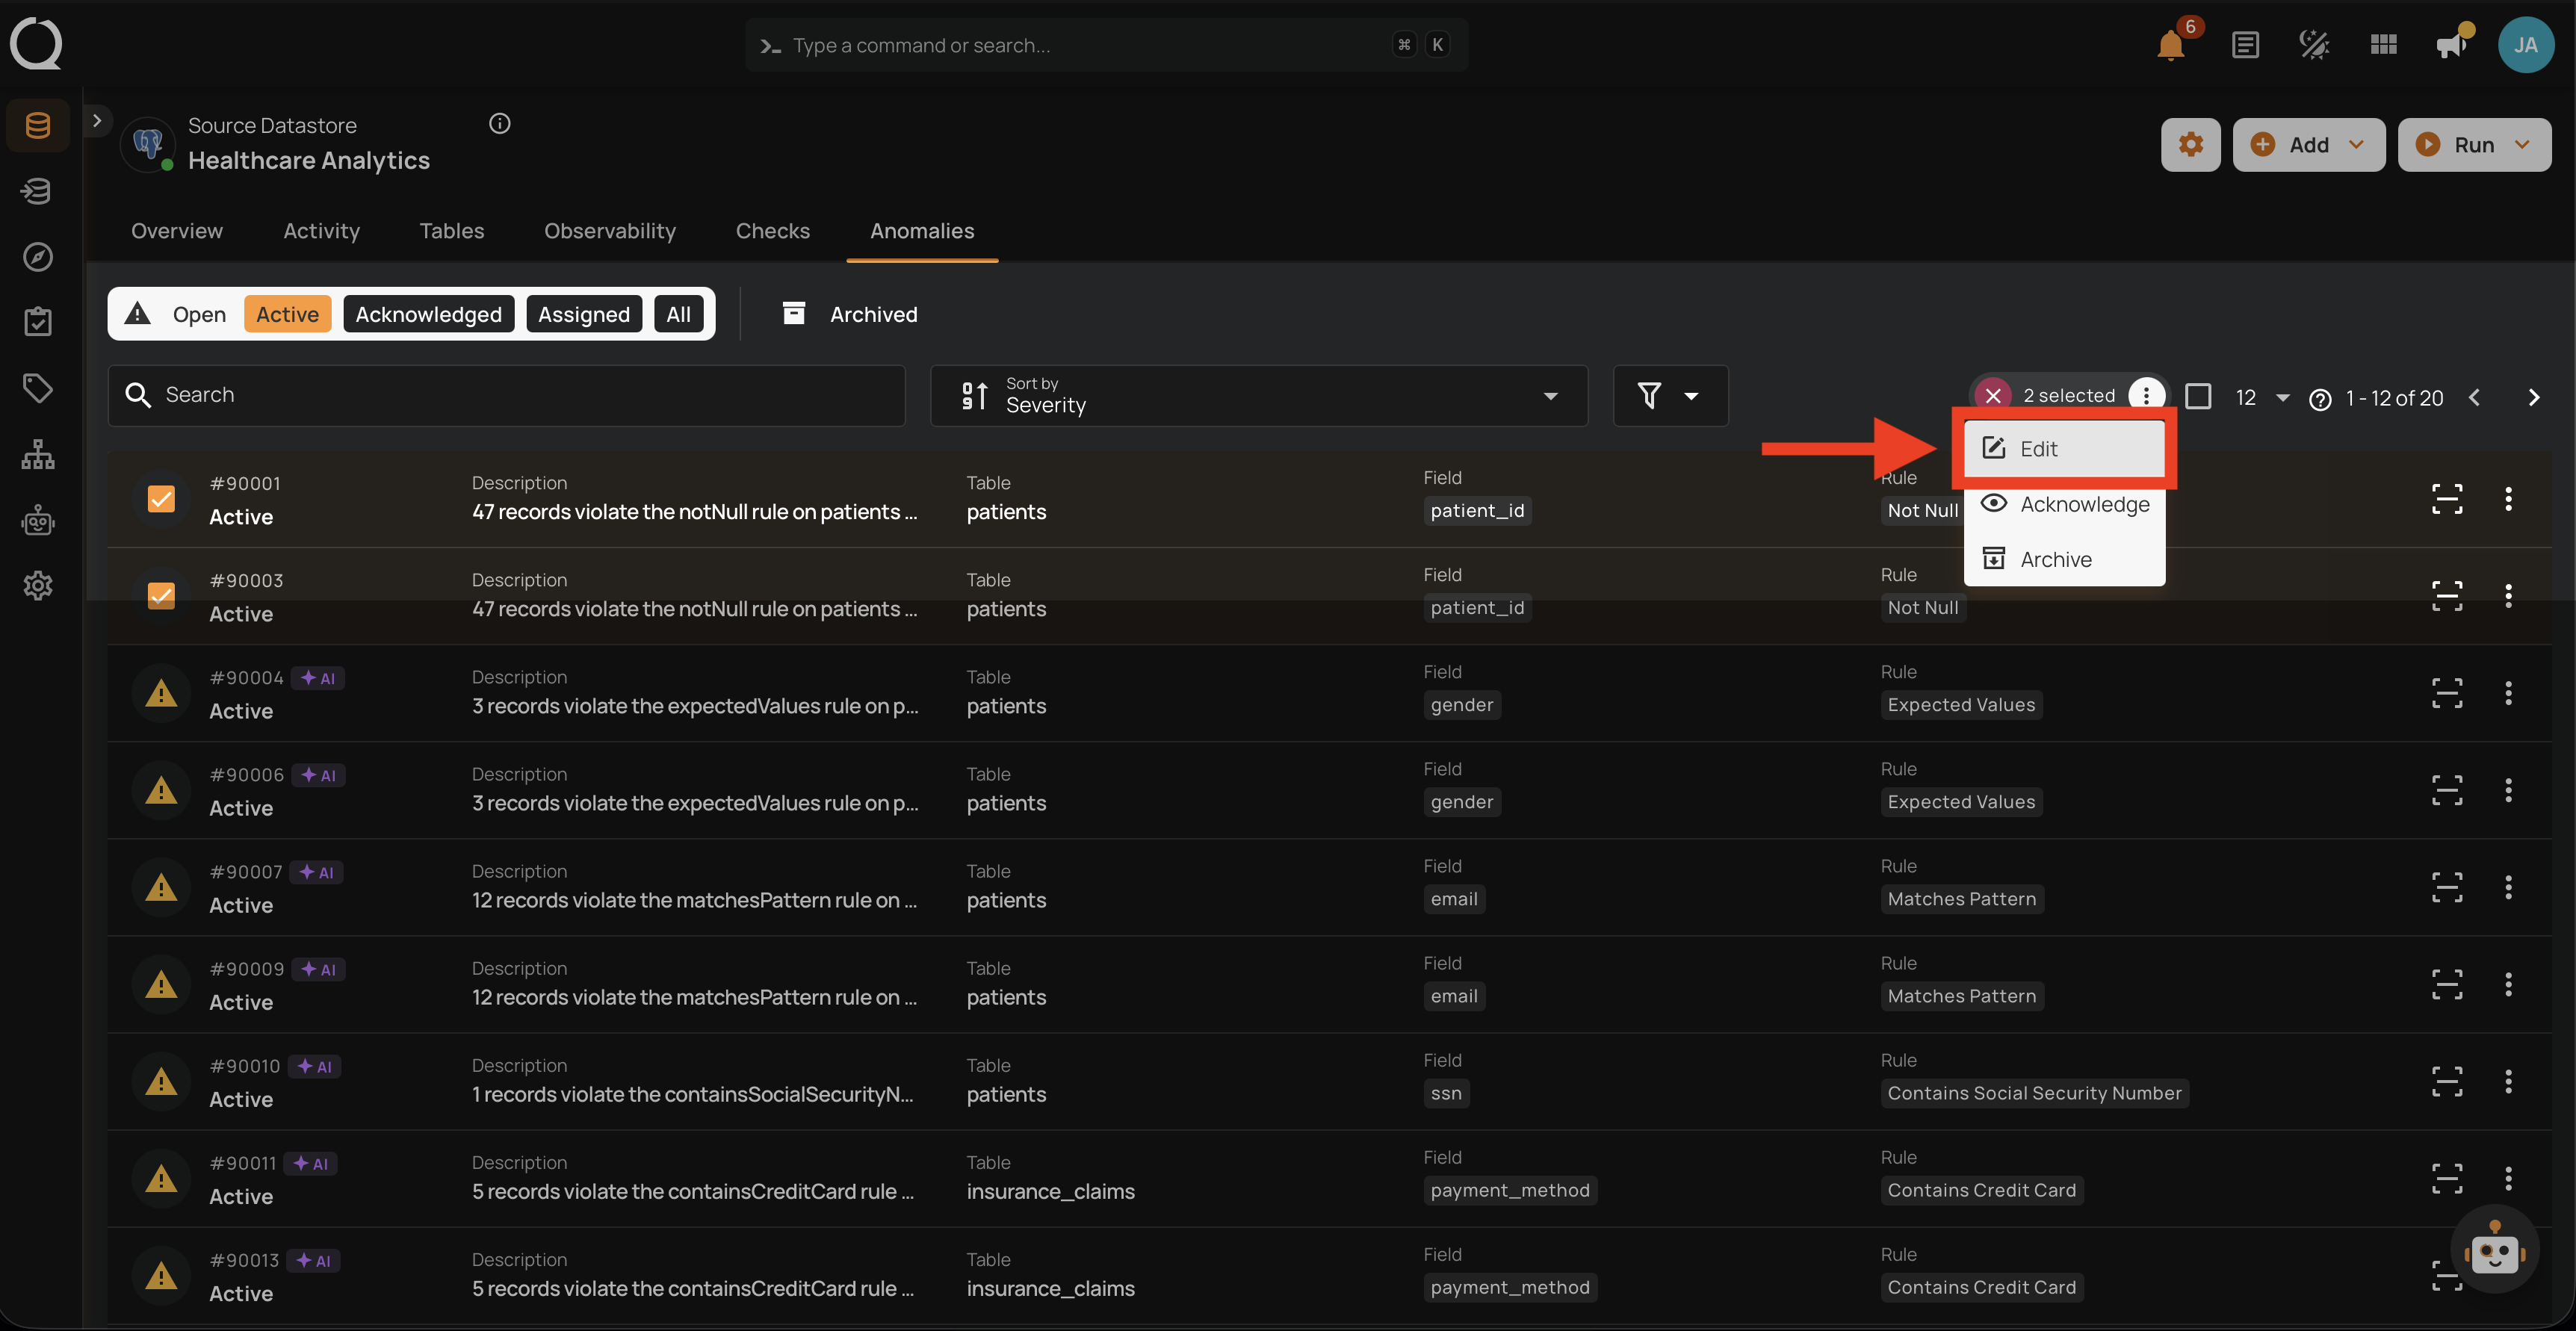
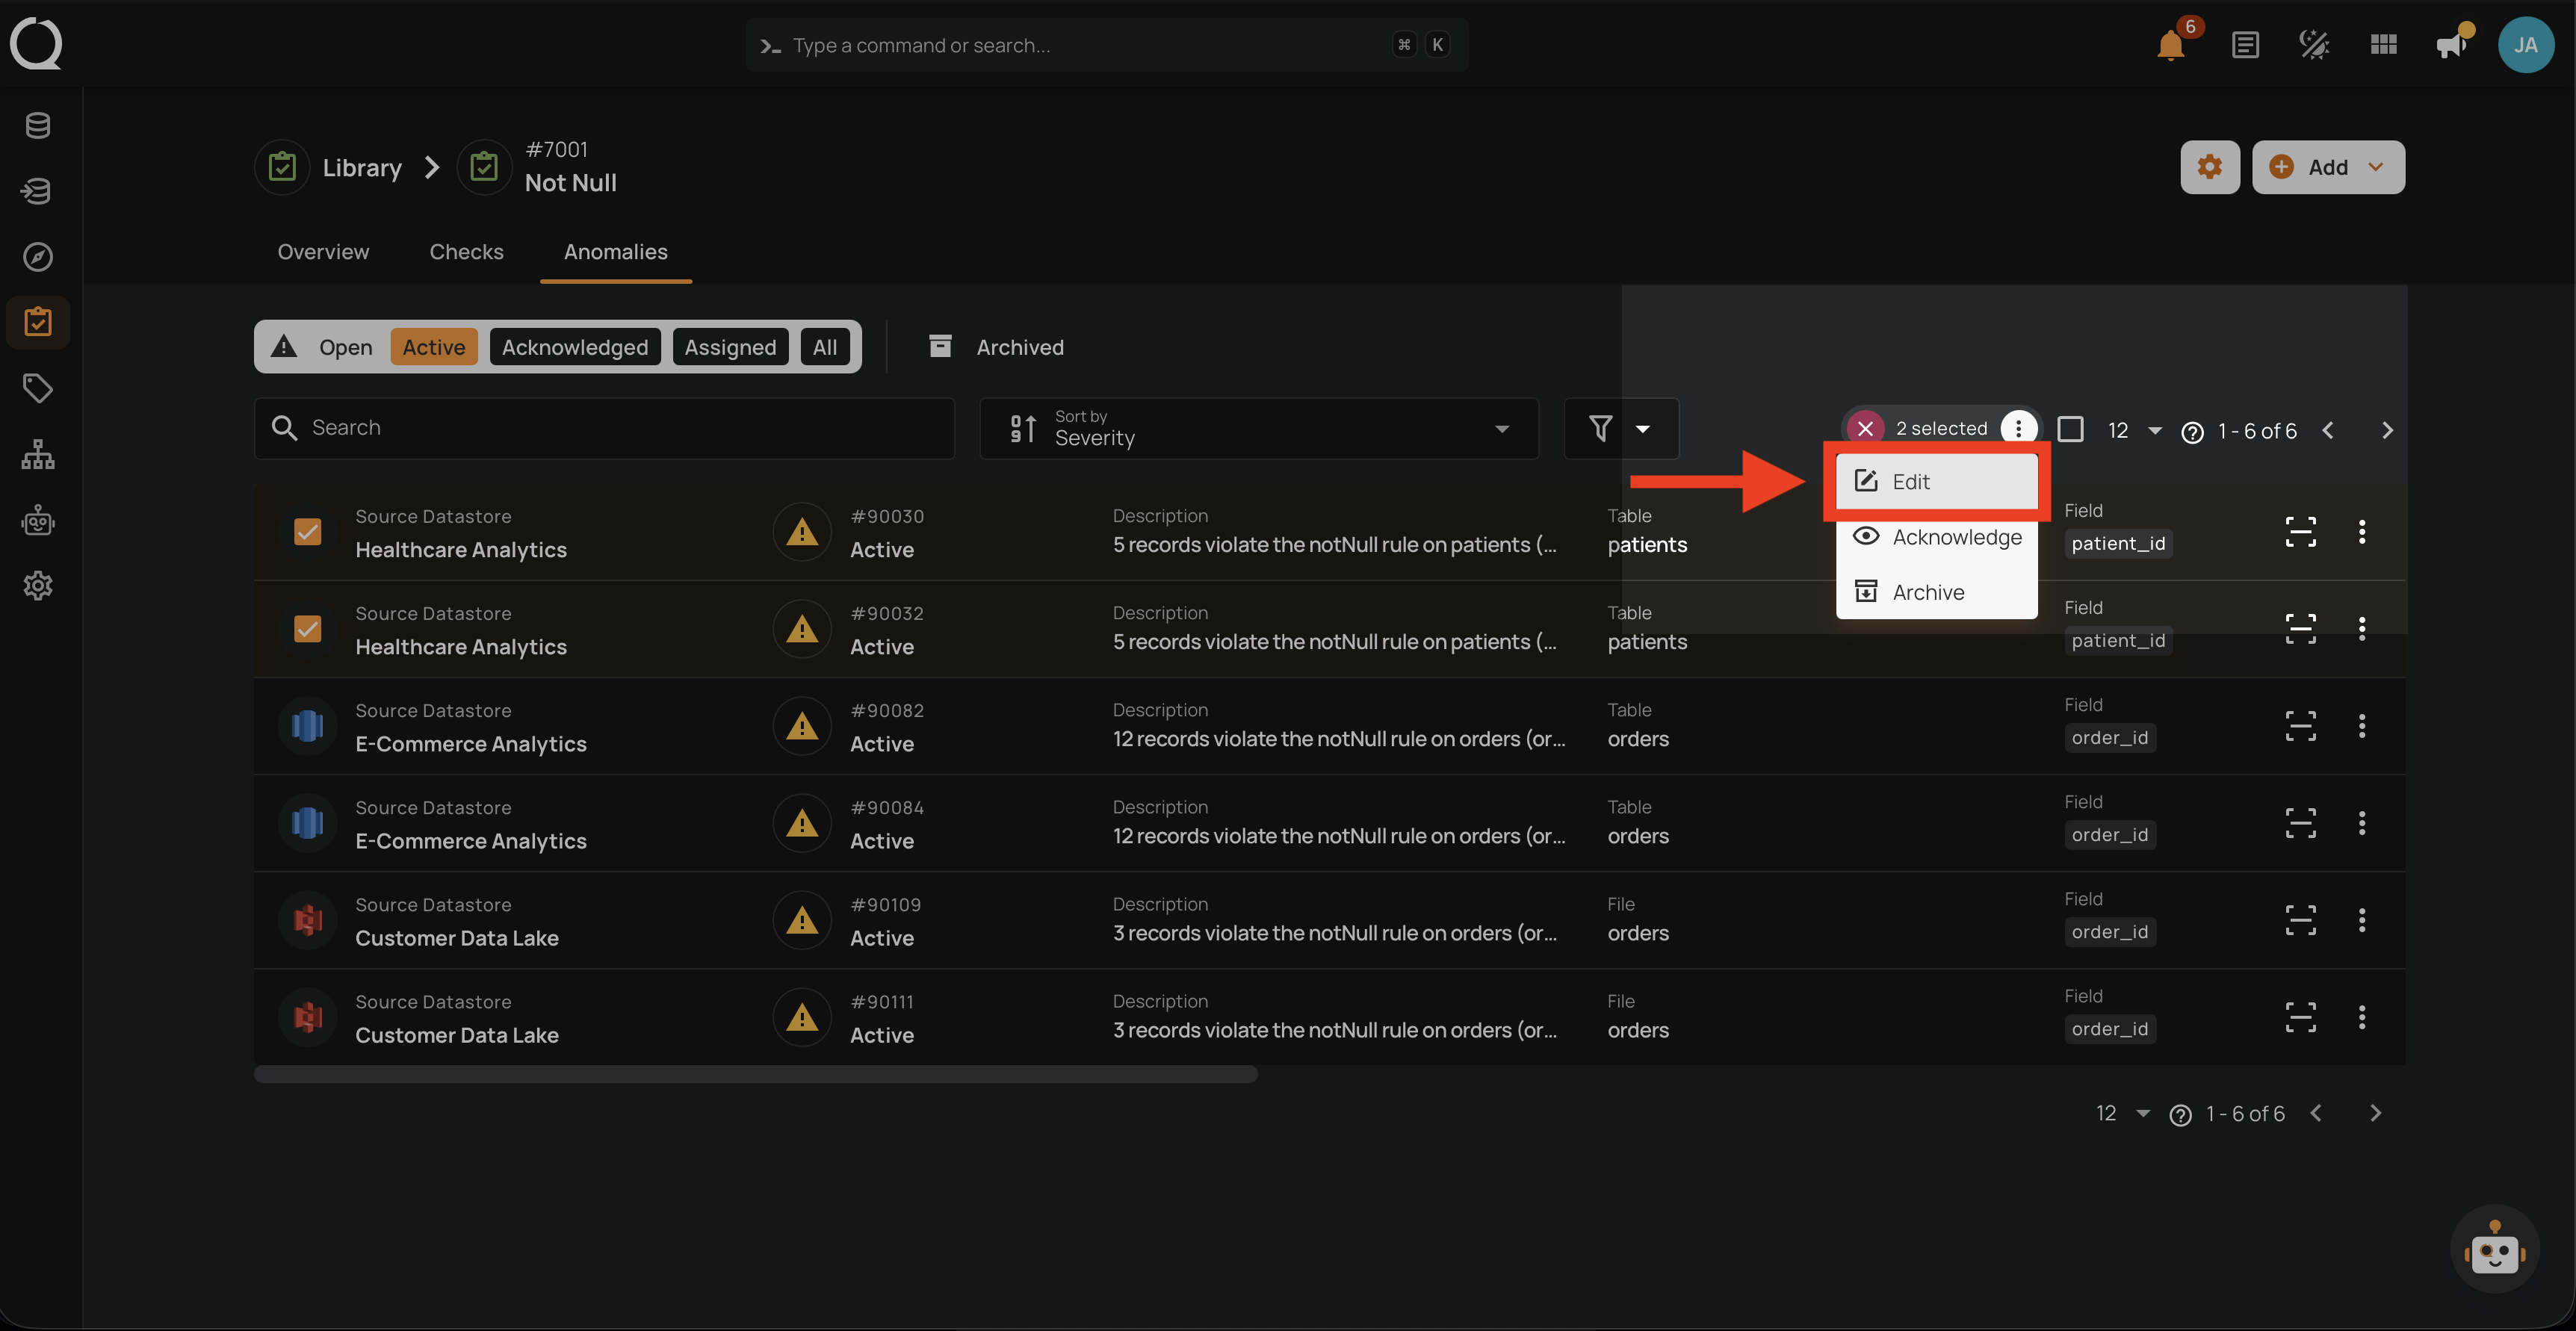
Step 4: A menu opens showing the bulk actions available: Edit, Acknowledge, and Archive.
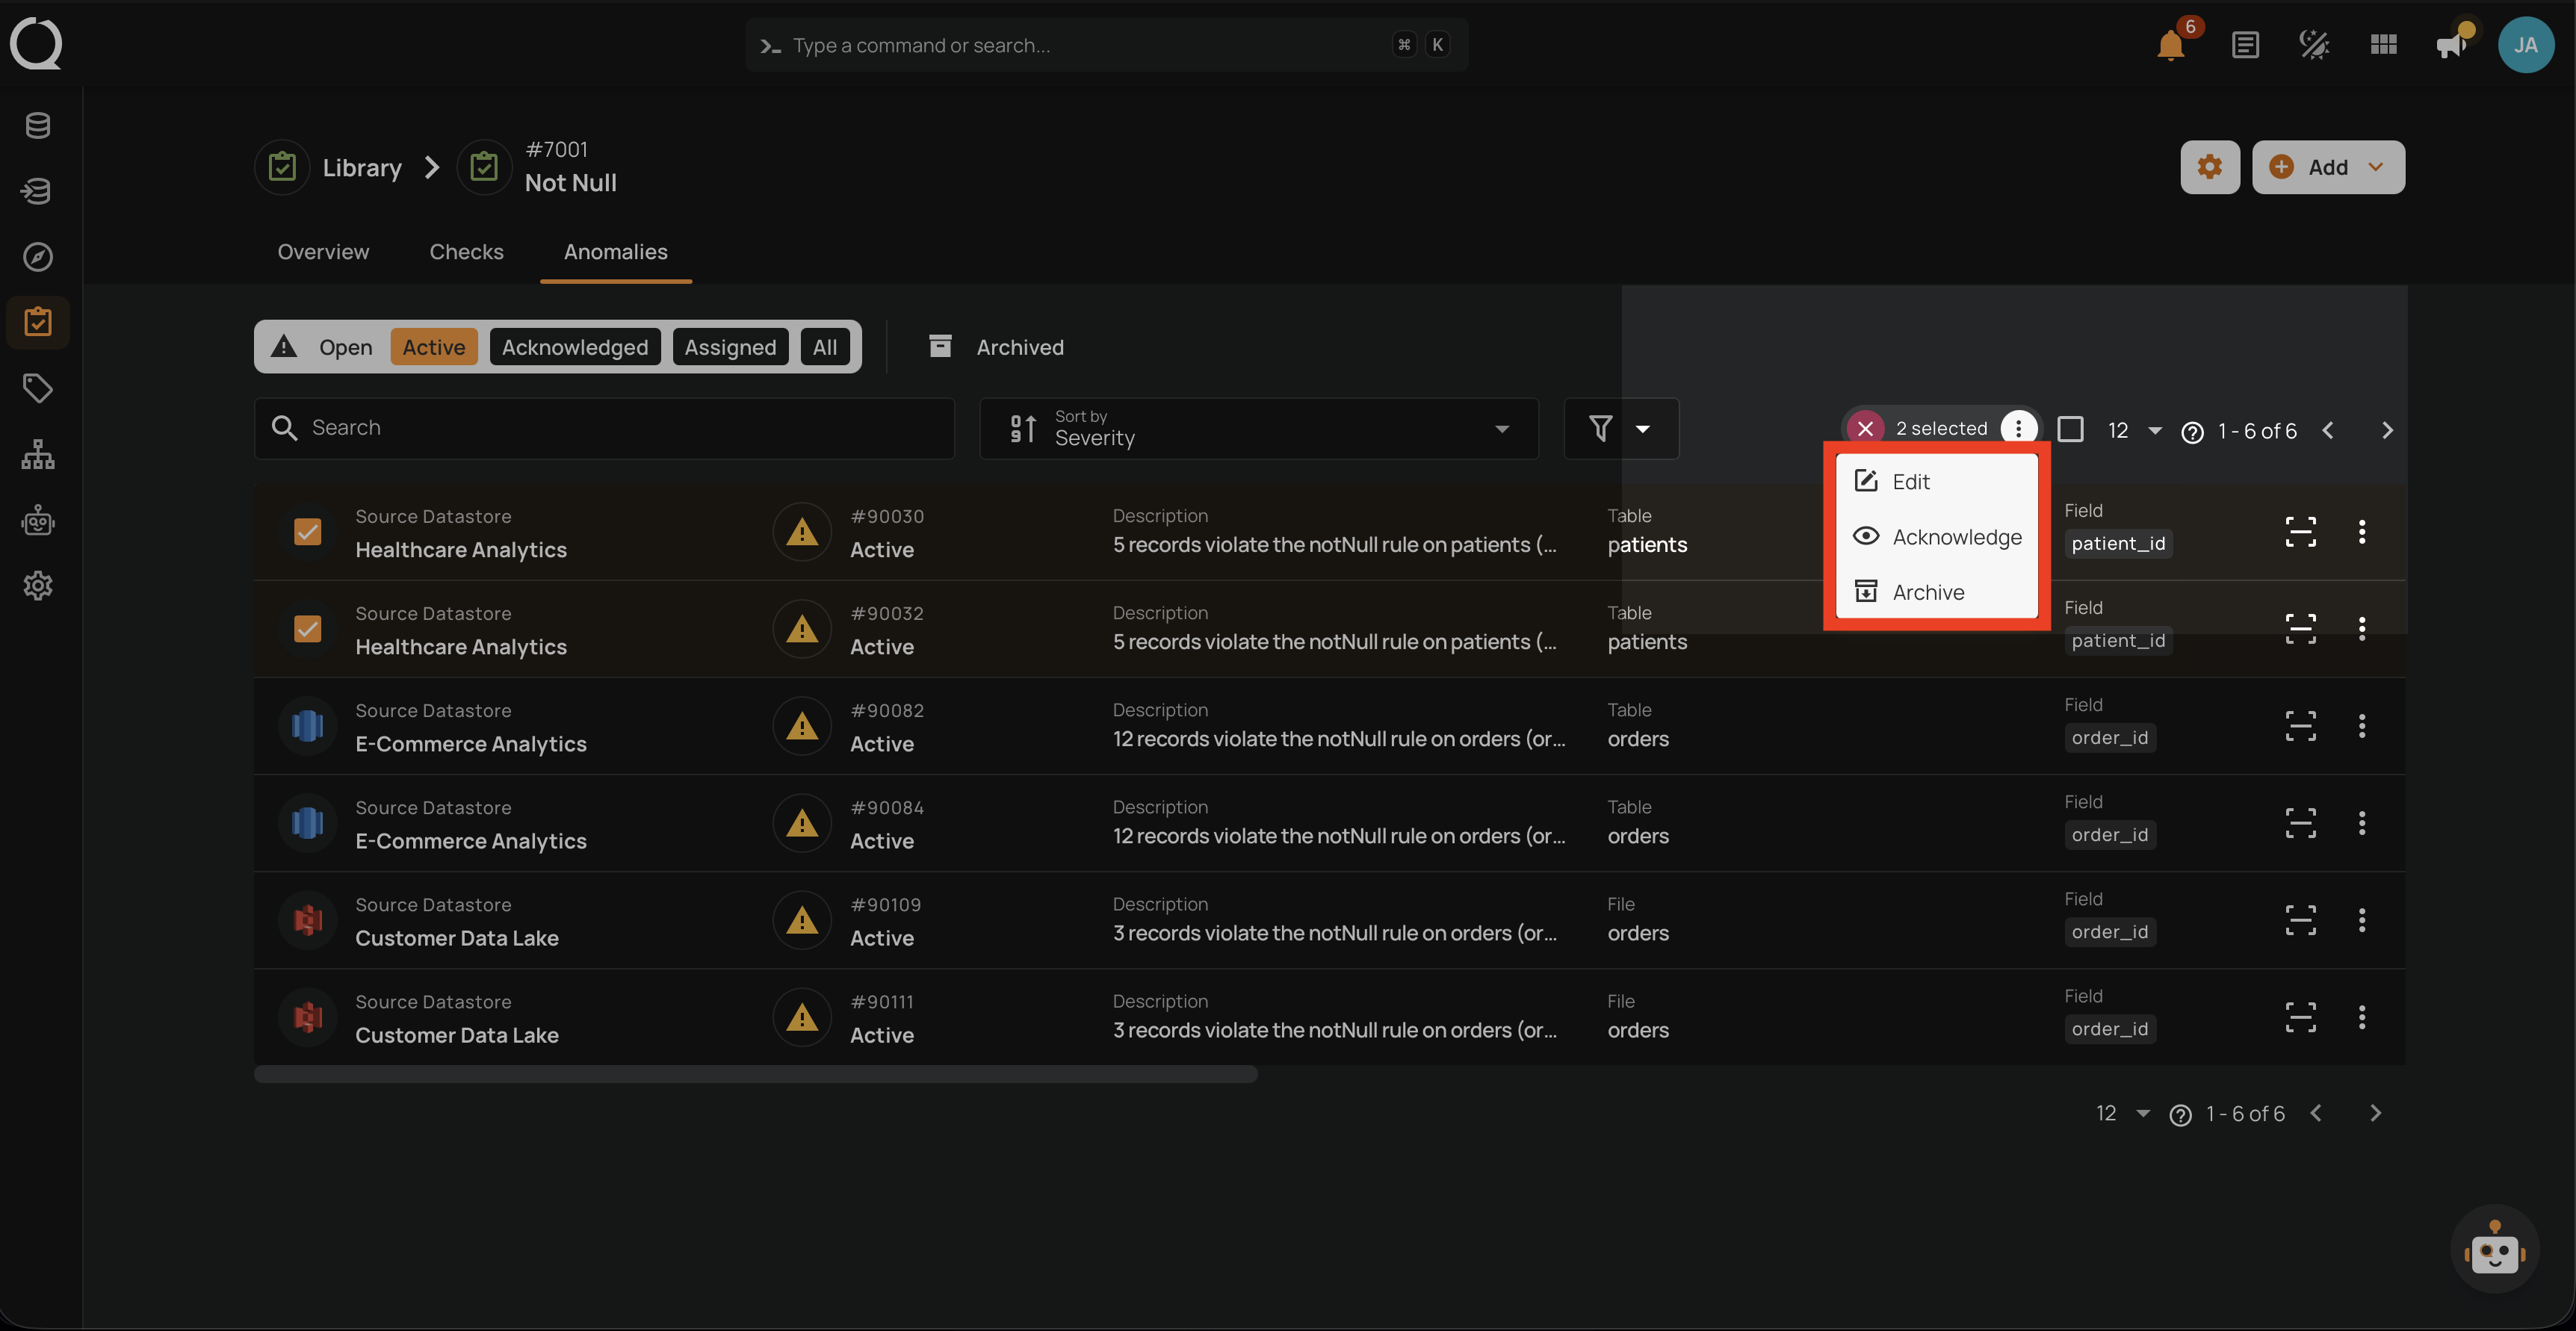
Step 5: Click Edit from the menu.
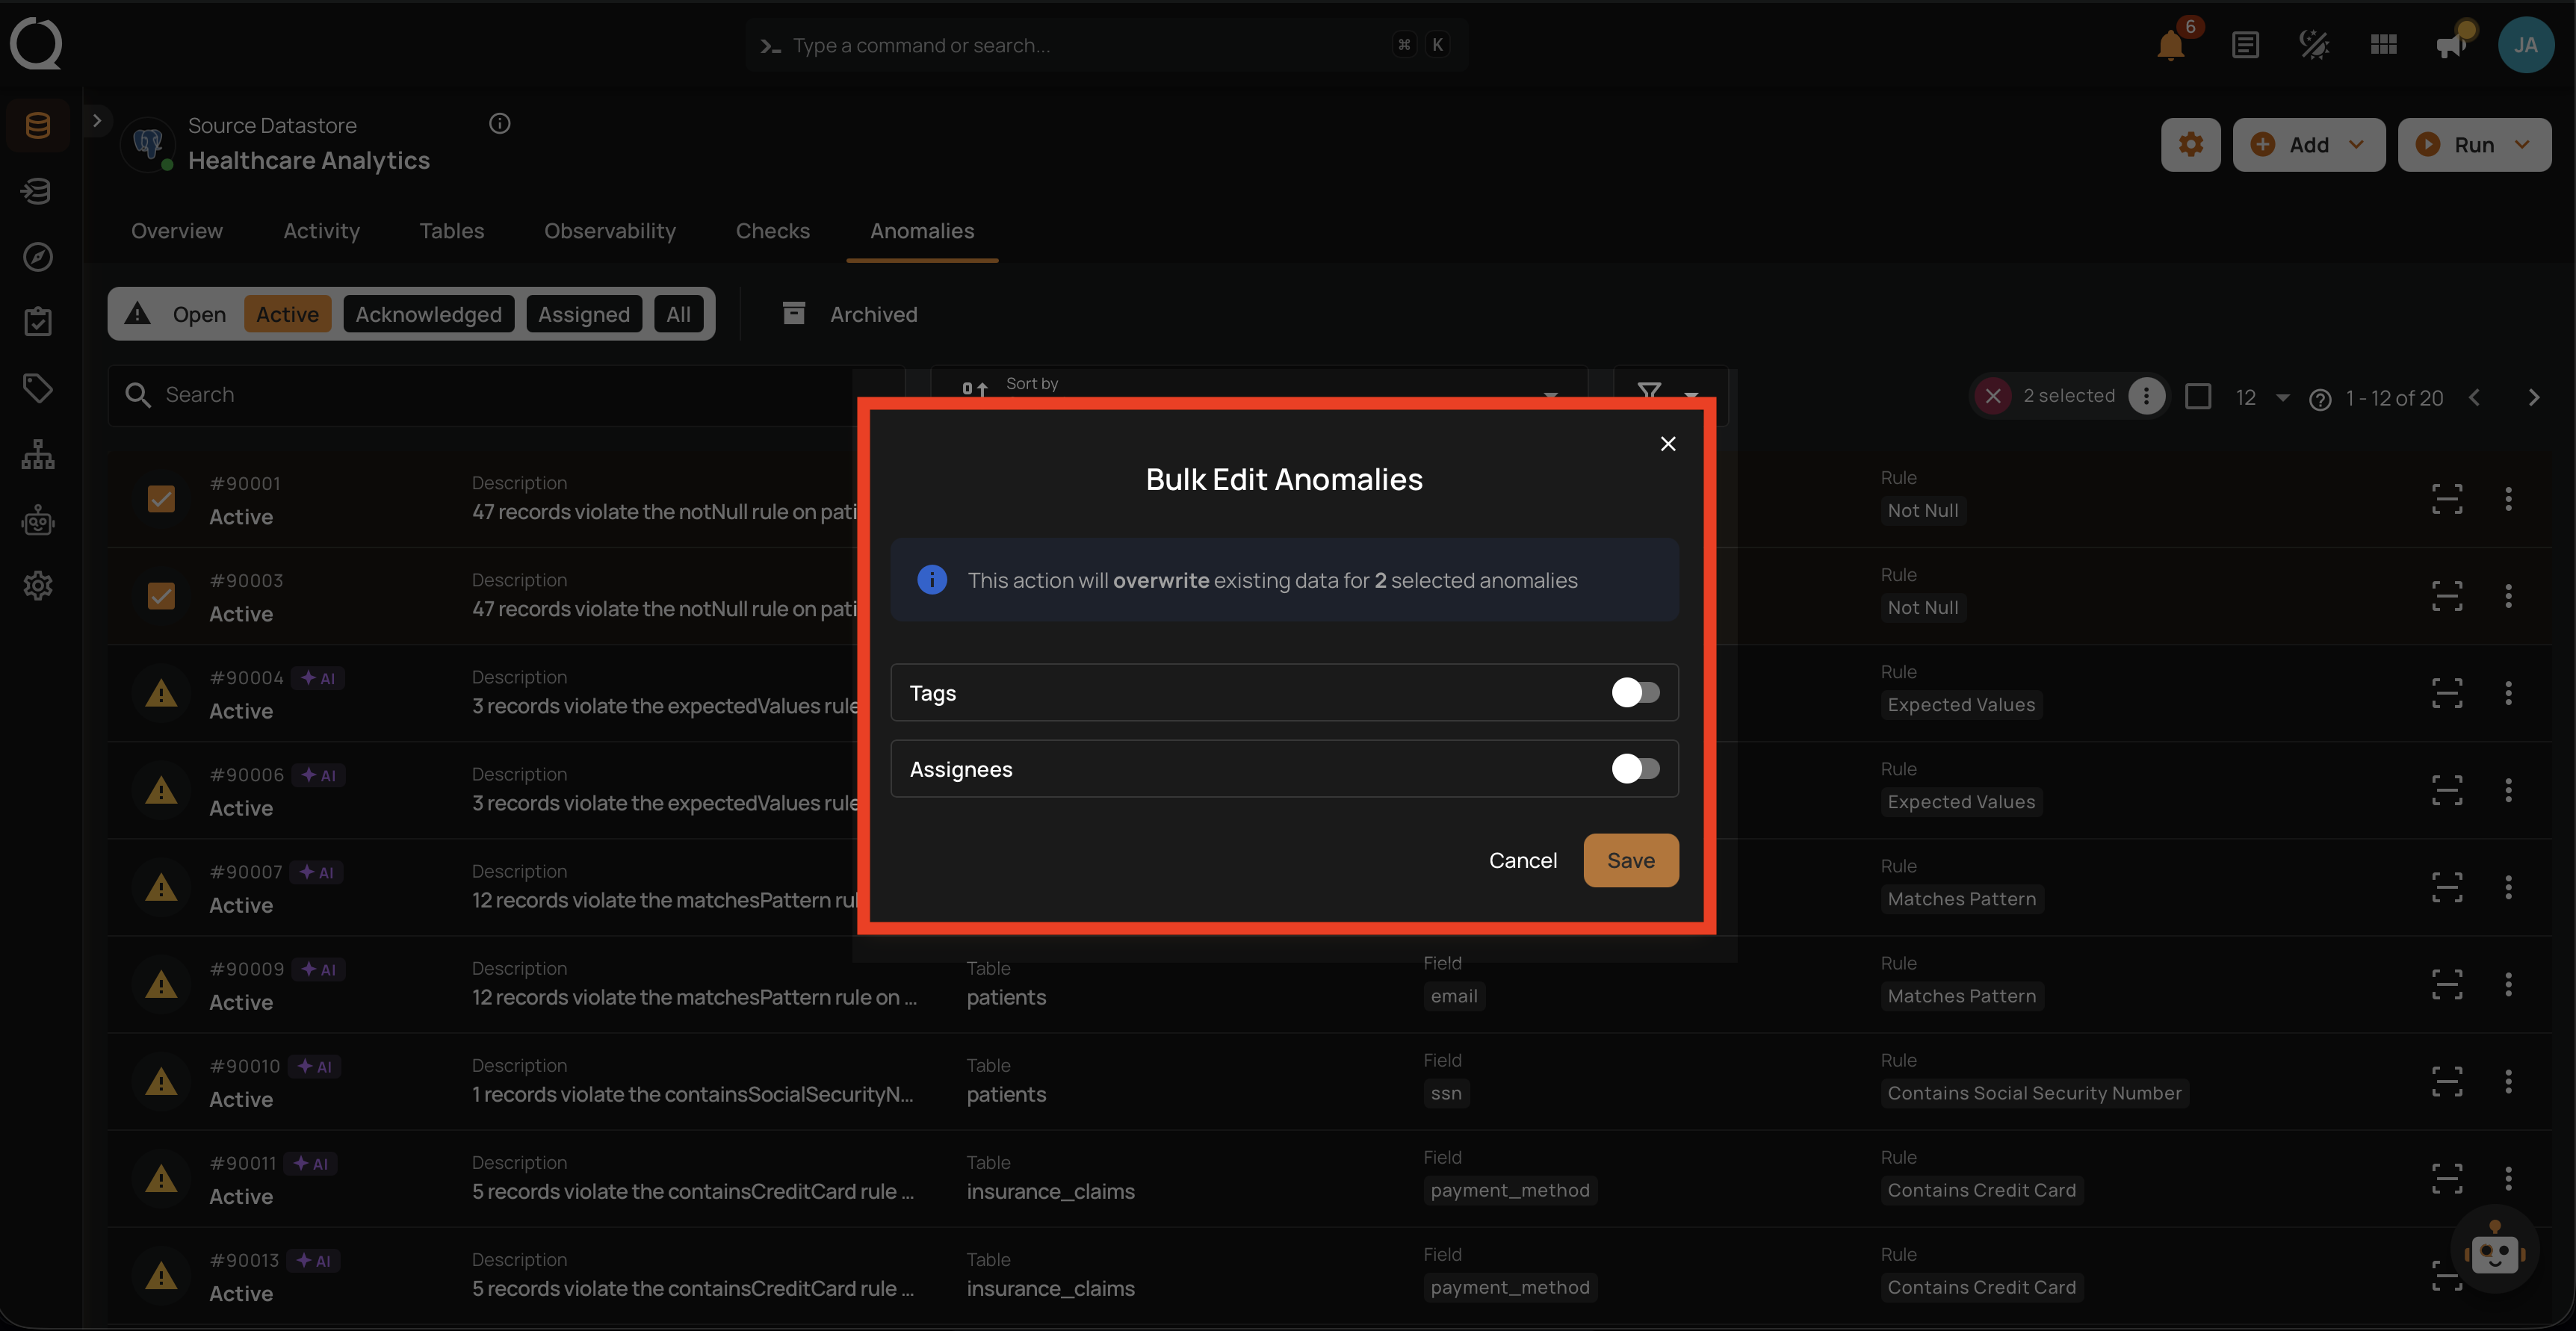
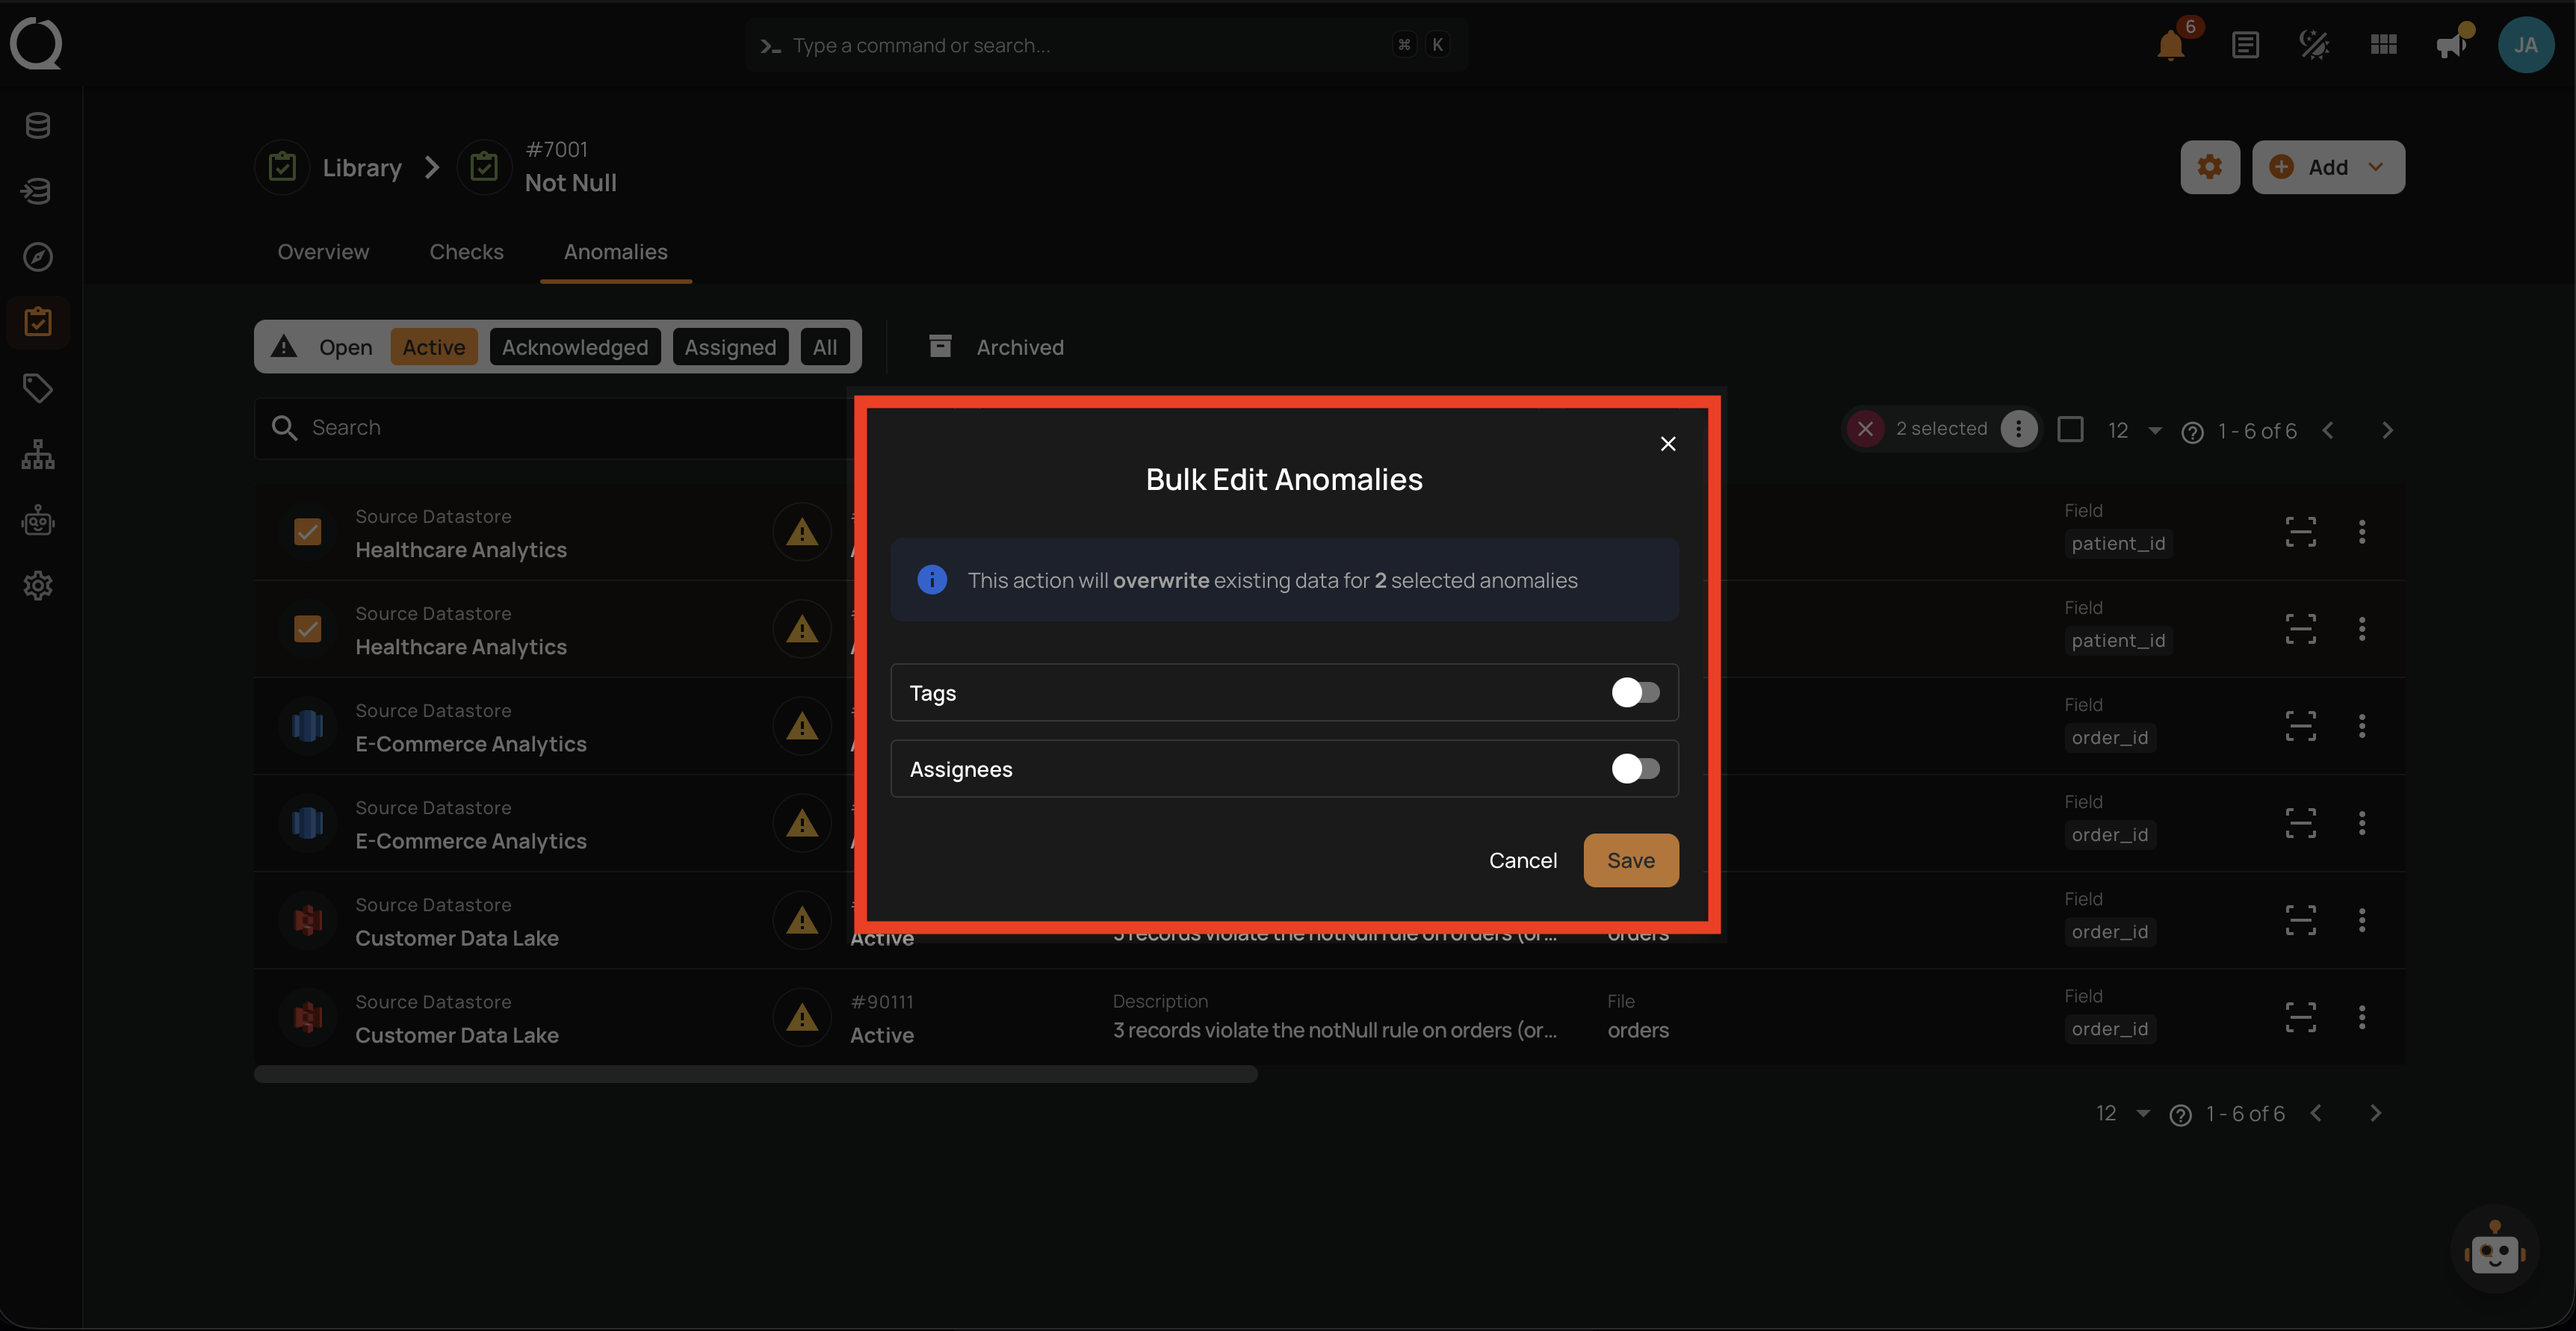
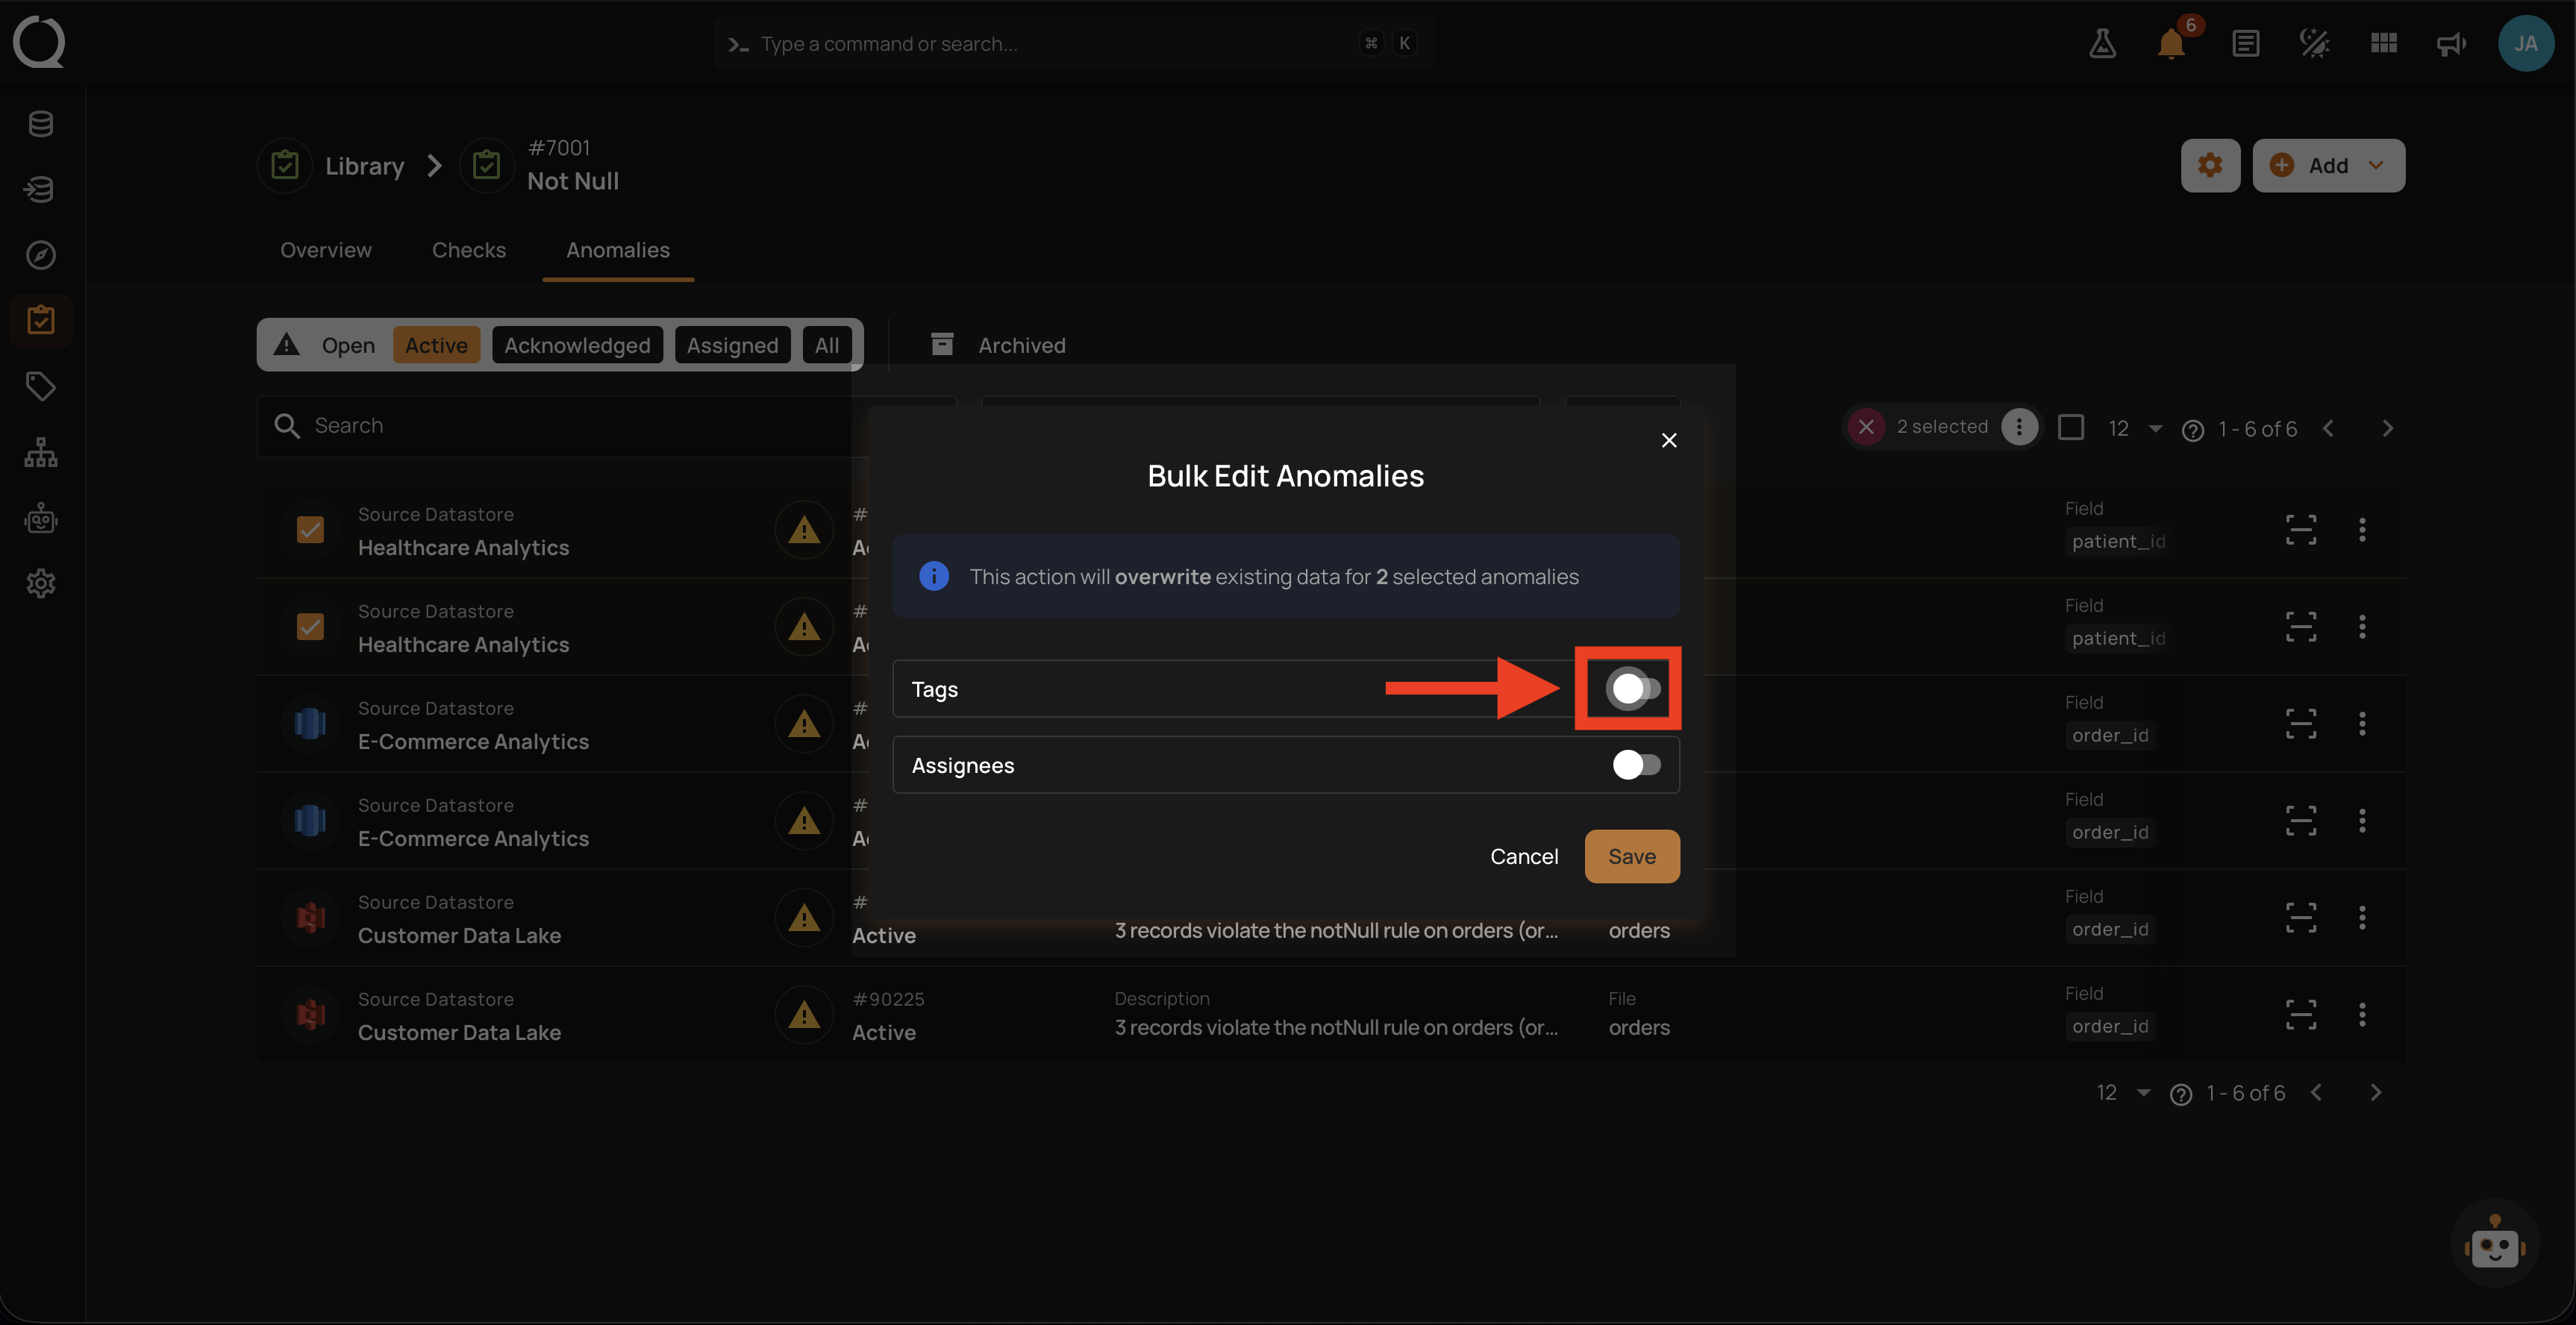
Step 6: The Bulk Edit Anomalies modal opens. It shows the count of selected anomalies, a notice that the action will overwrite existing data, and Tags and Assignees toggles (both off by default).
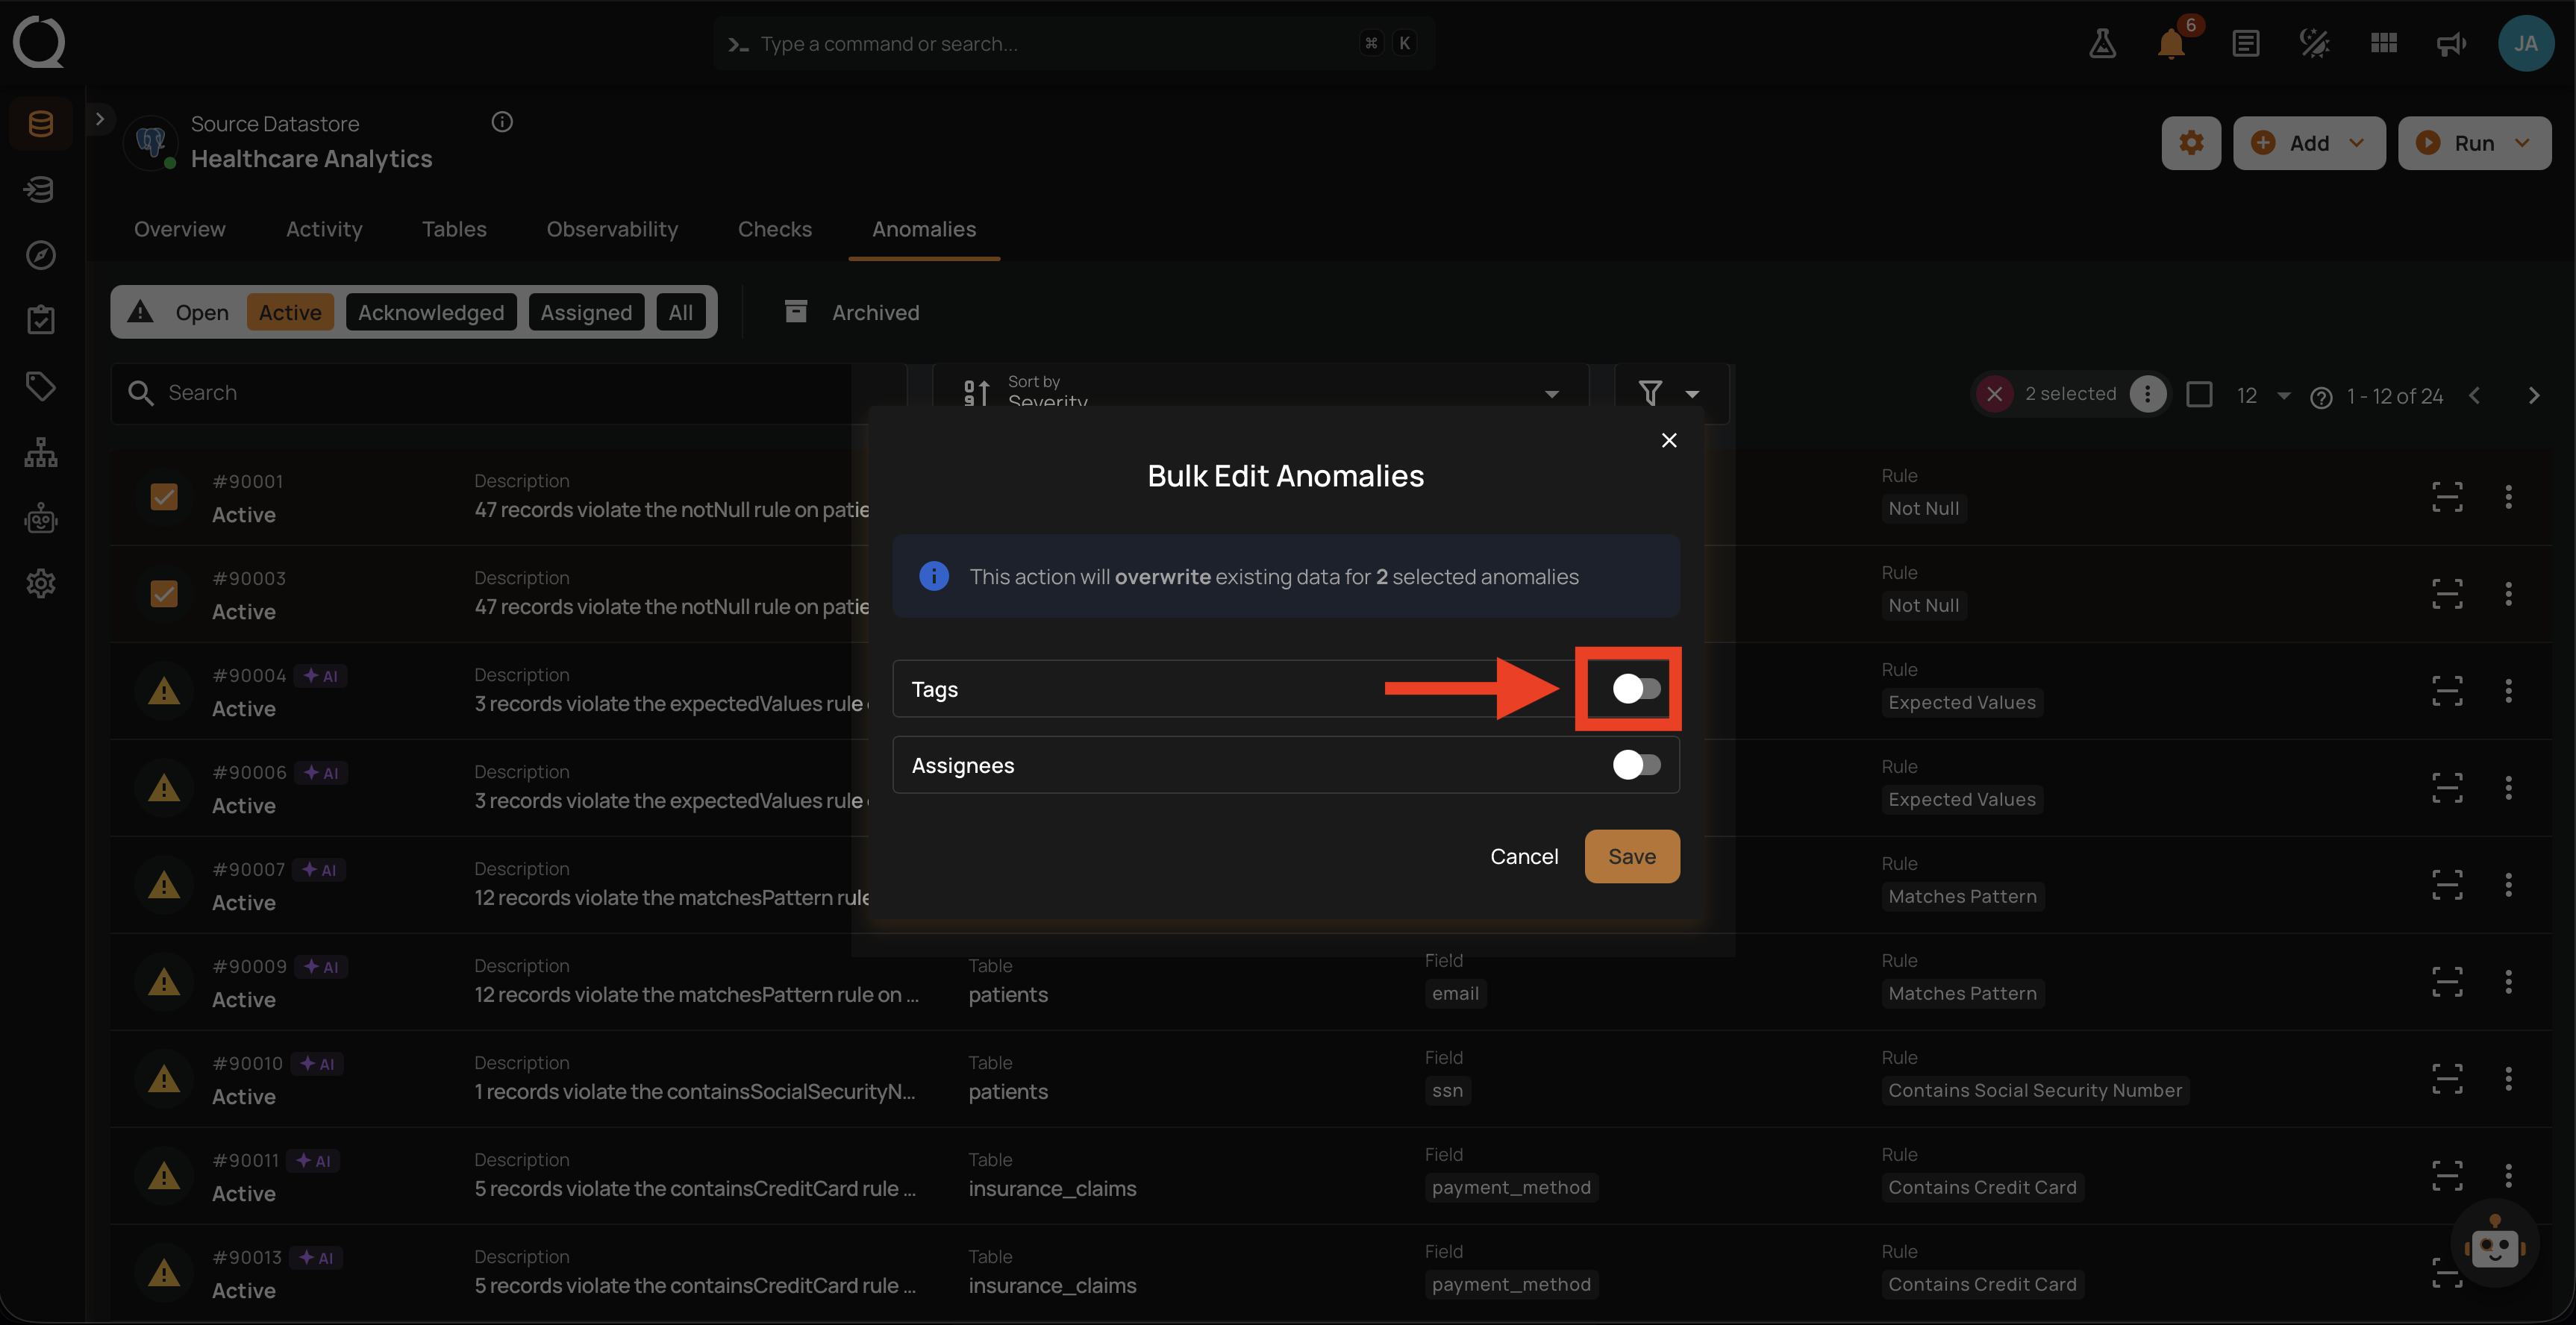
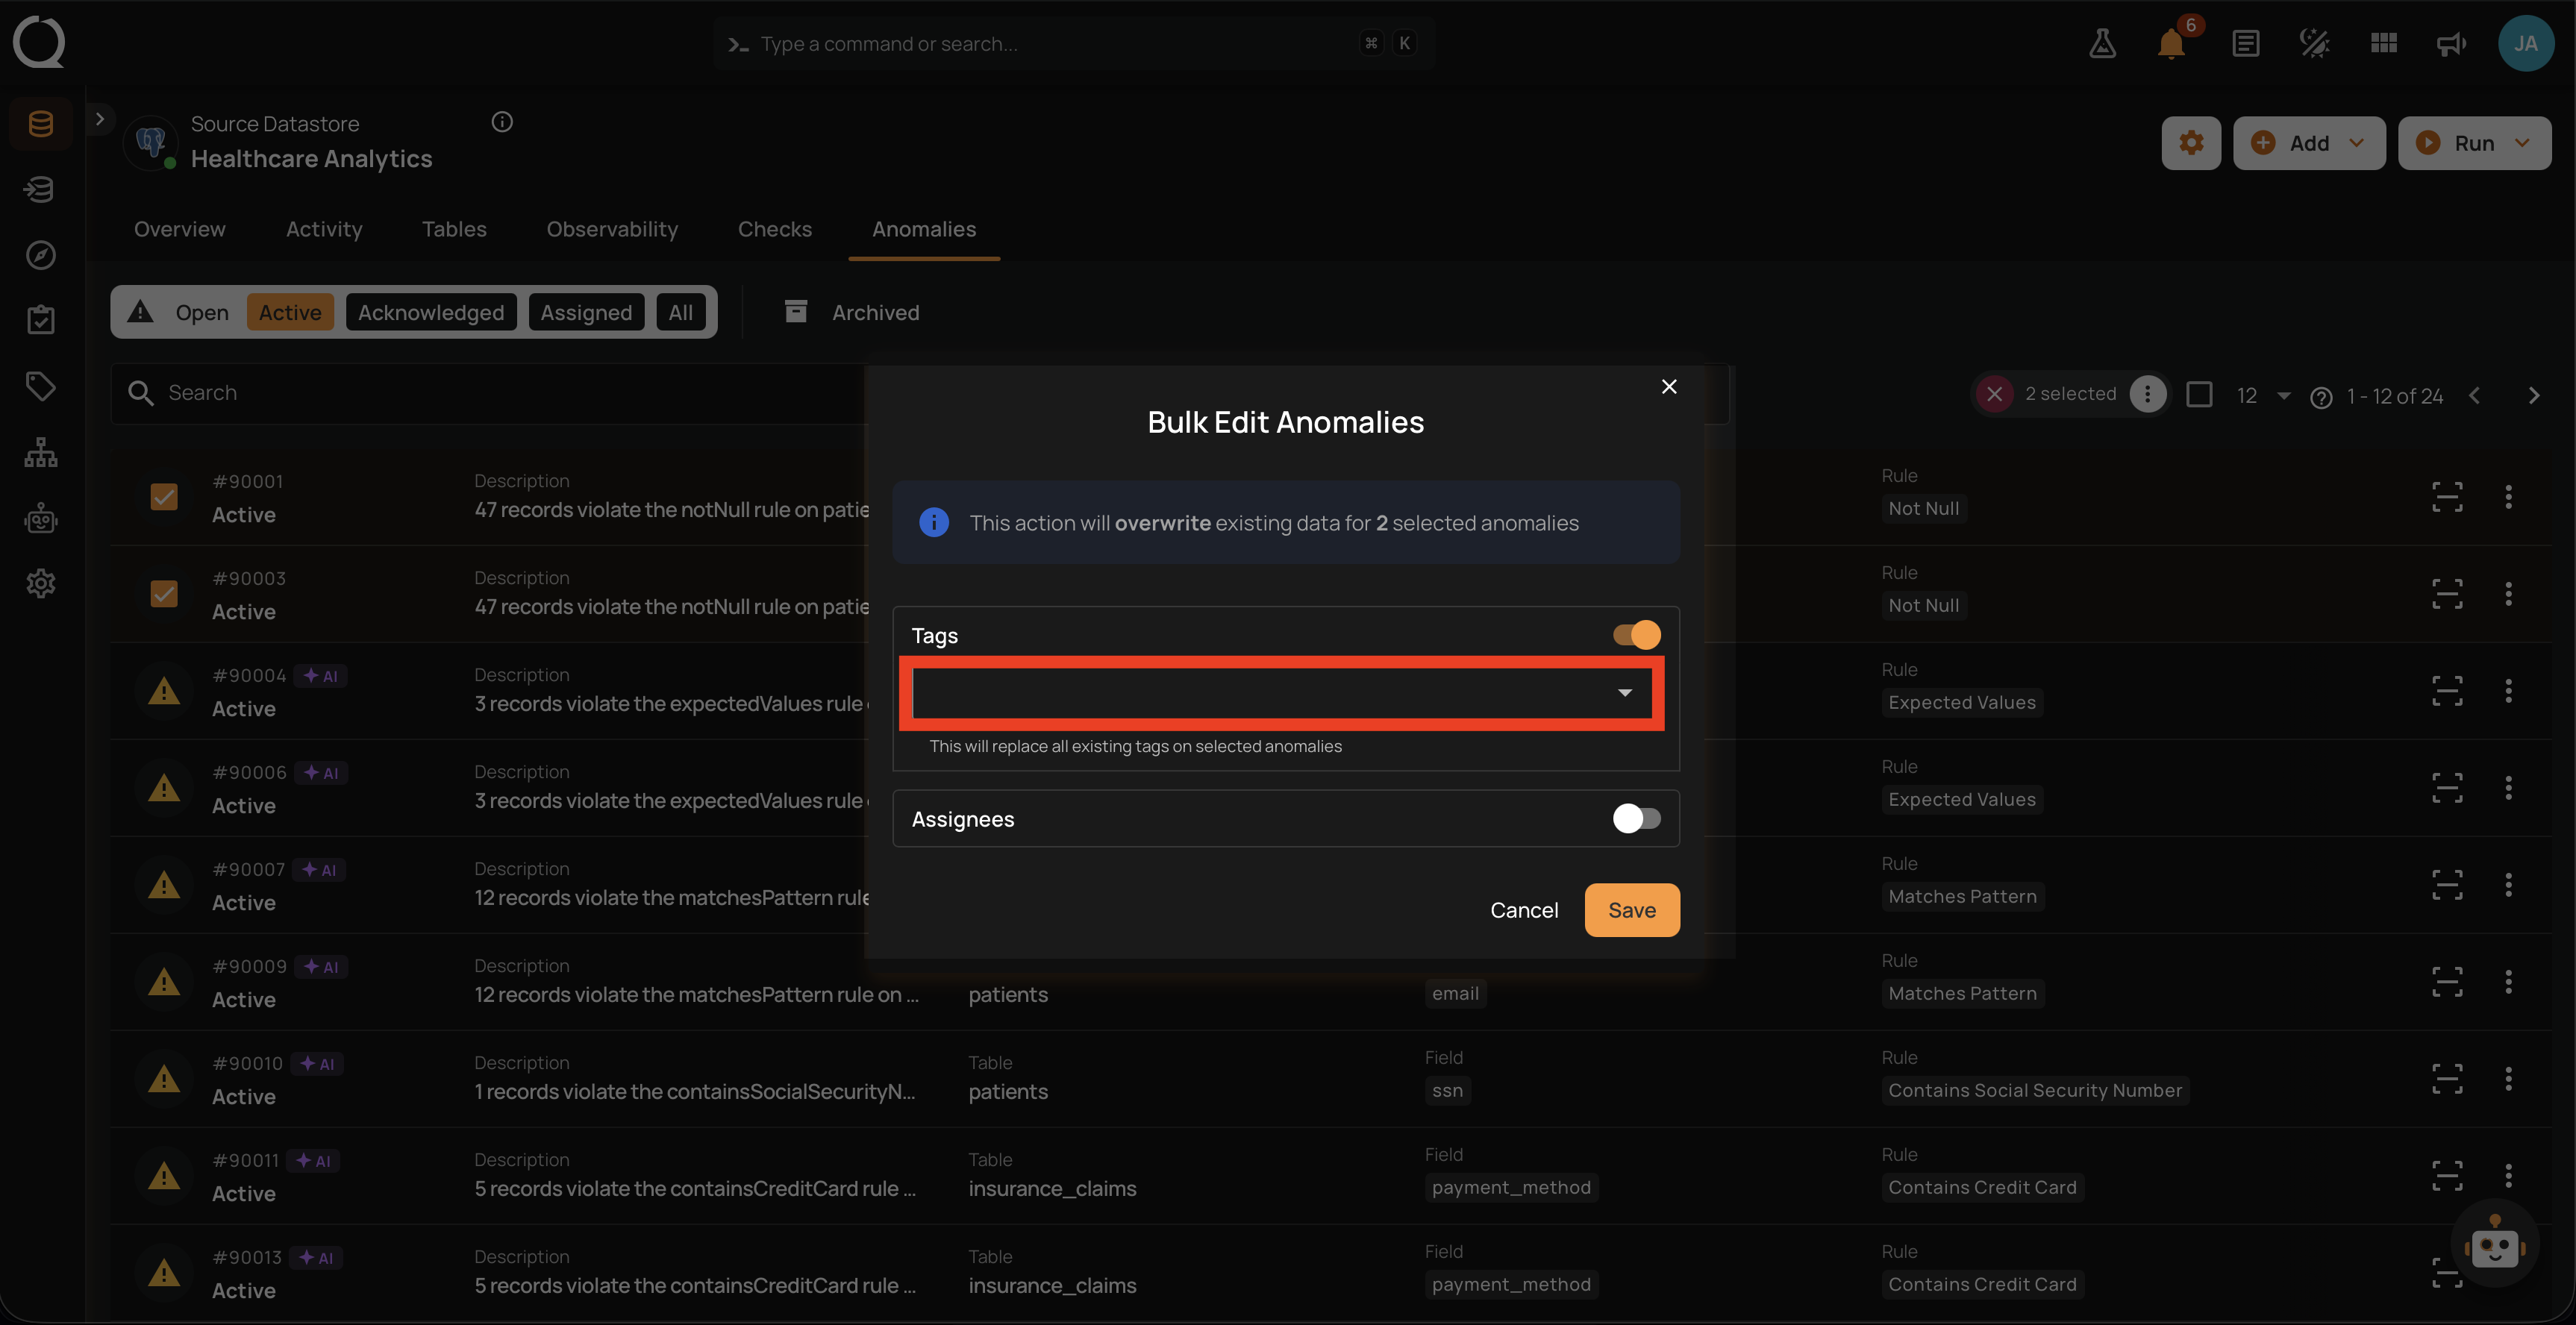
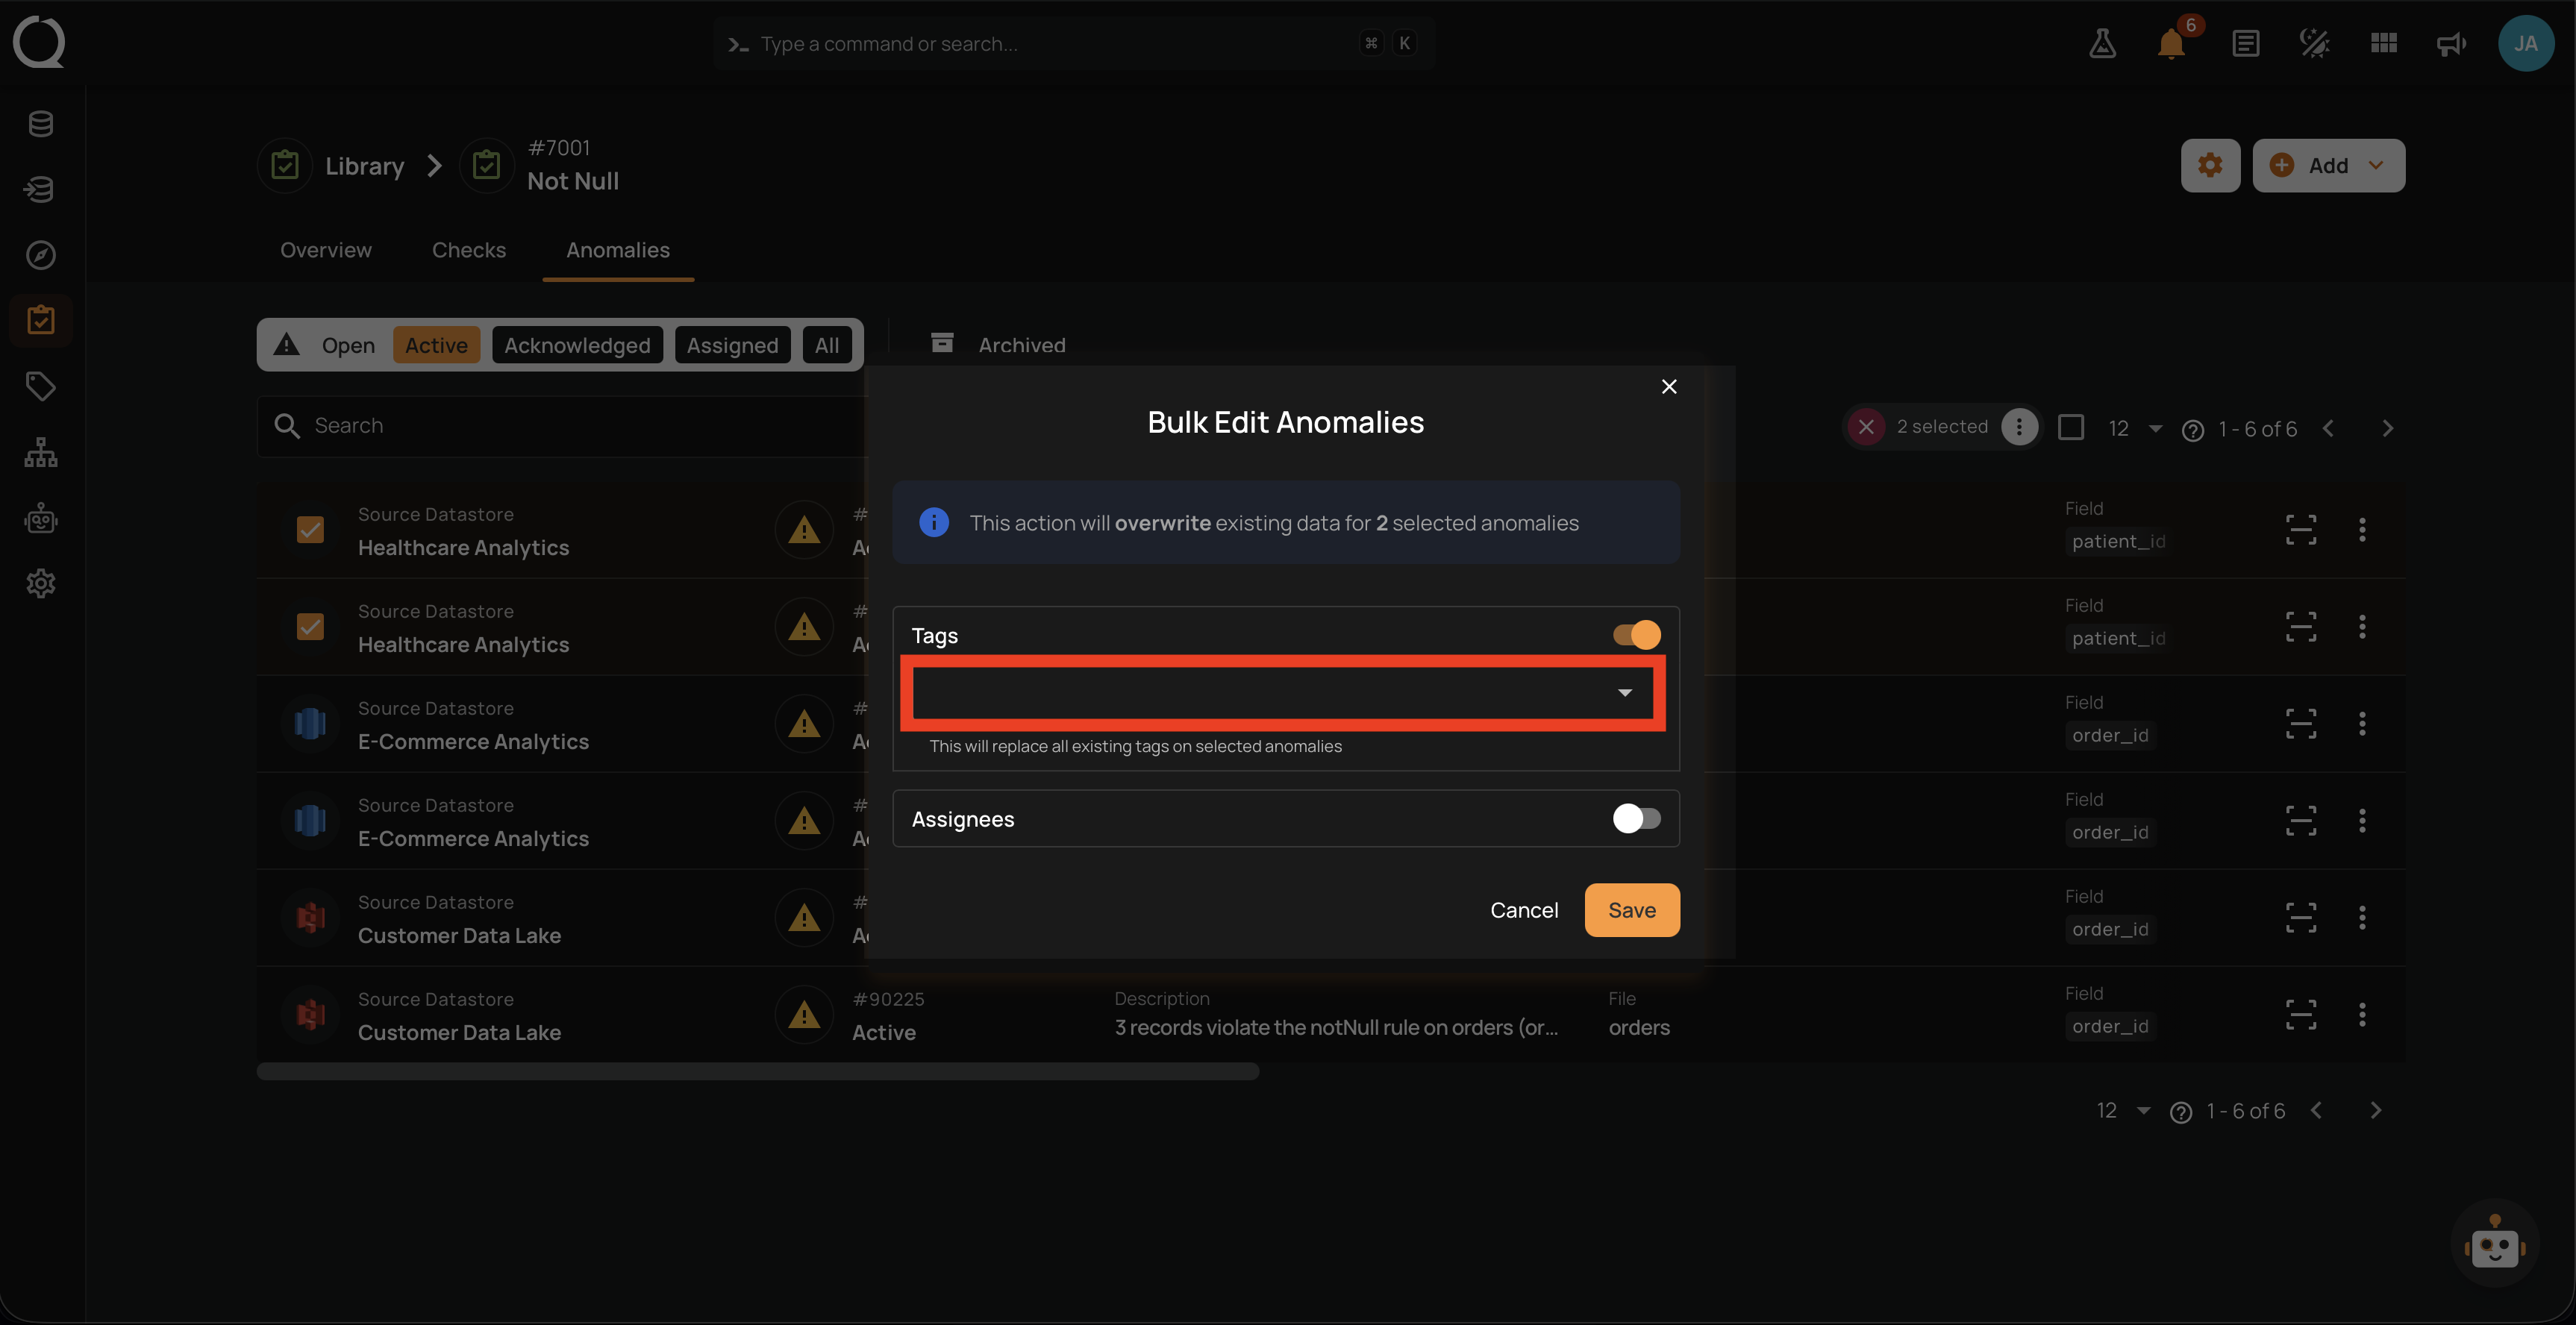
Step 7: Turn on the Tags toggle. A Select tags field appears below the toggle.
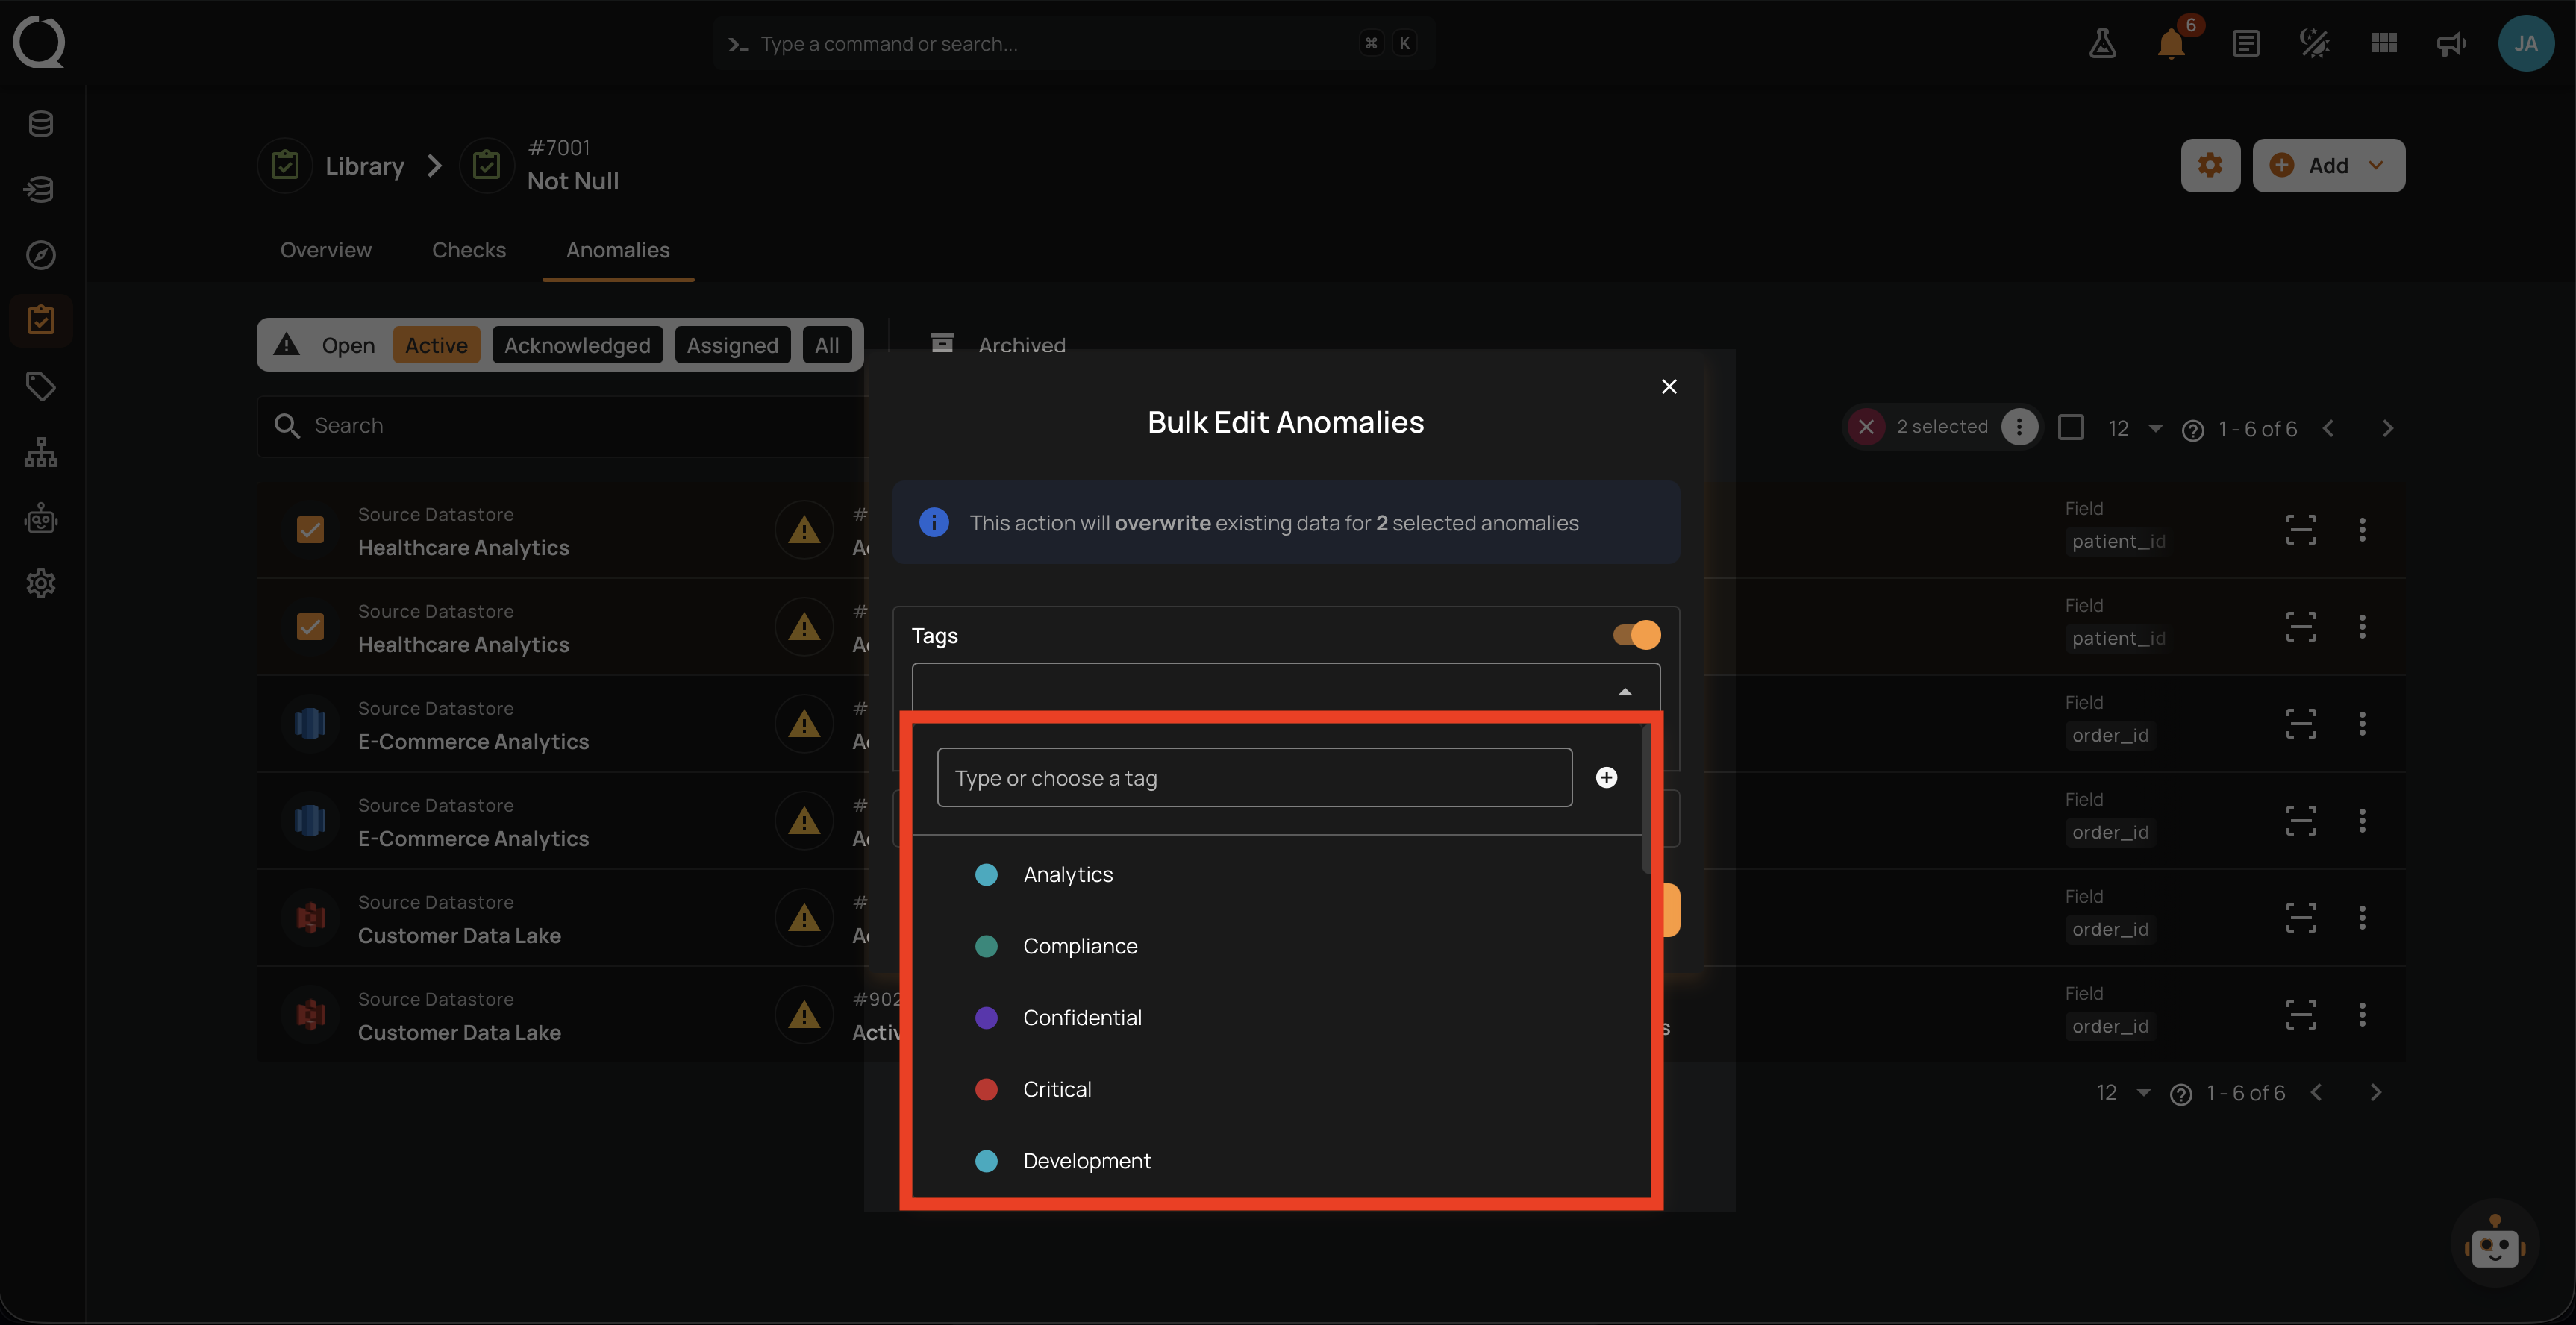
Step 8: Click the Select tags field to open the tag dropdown.
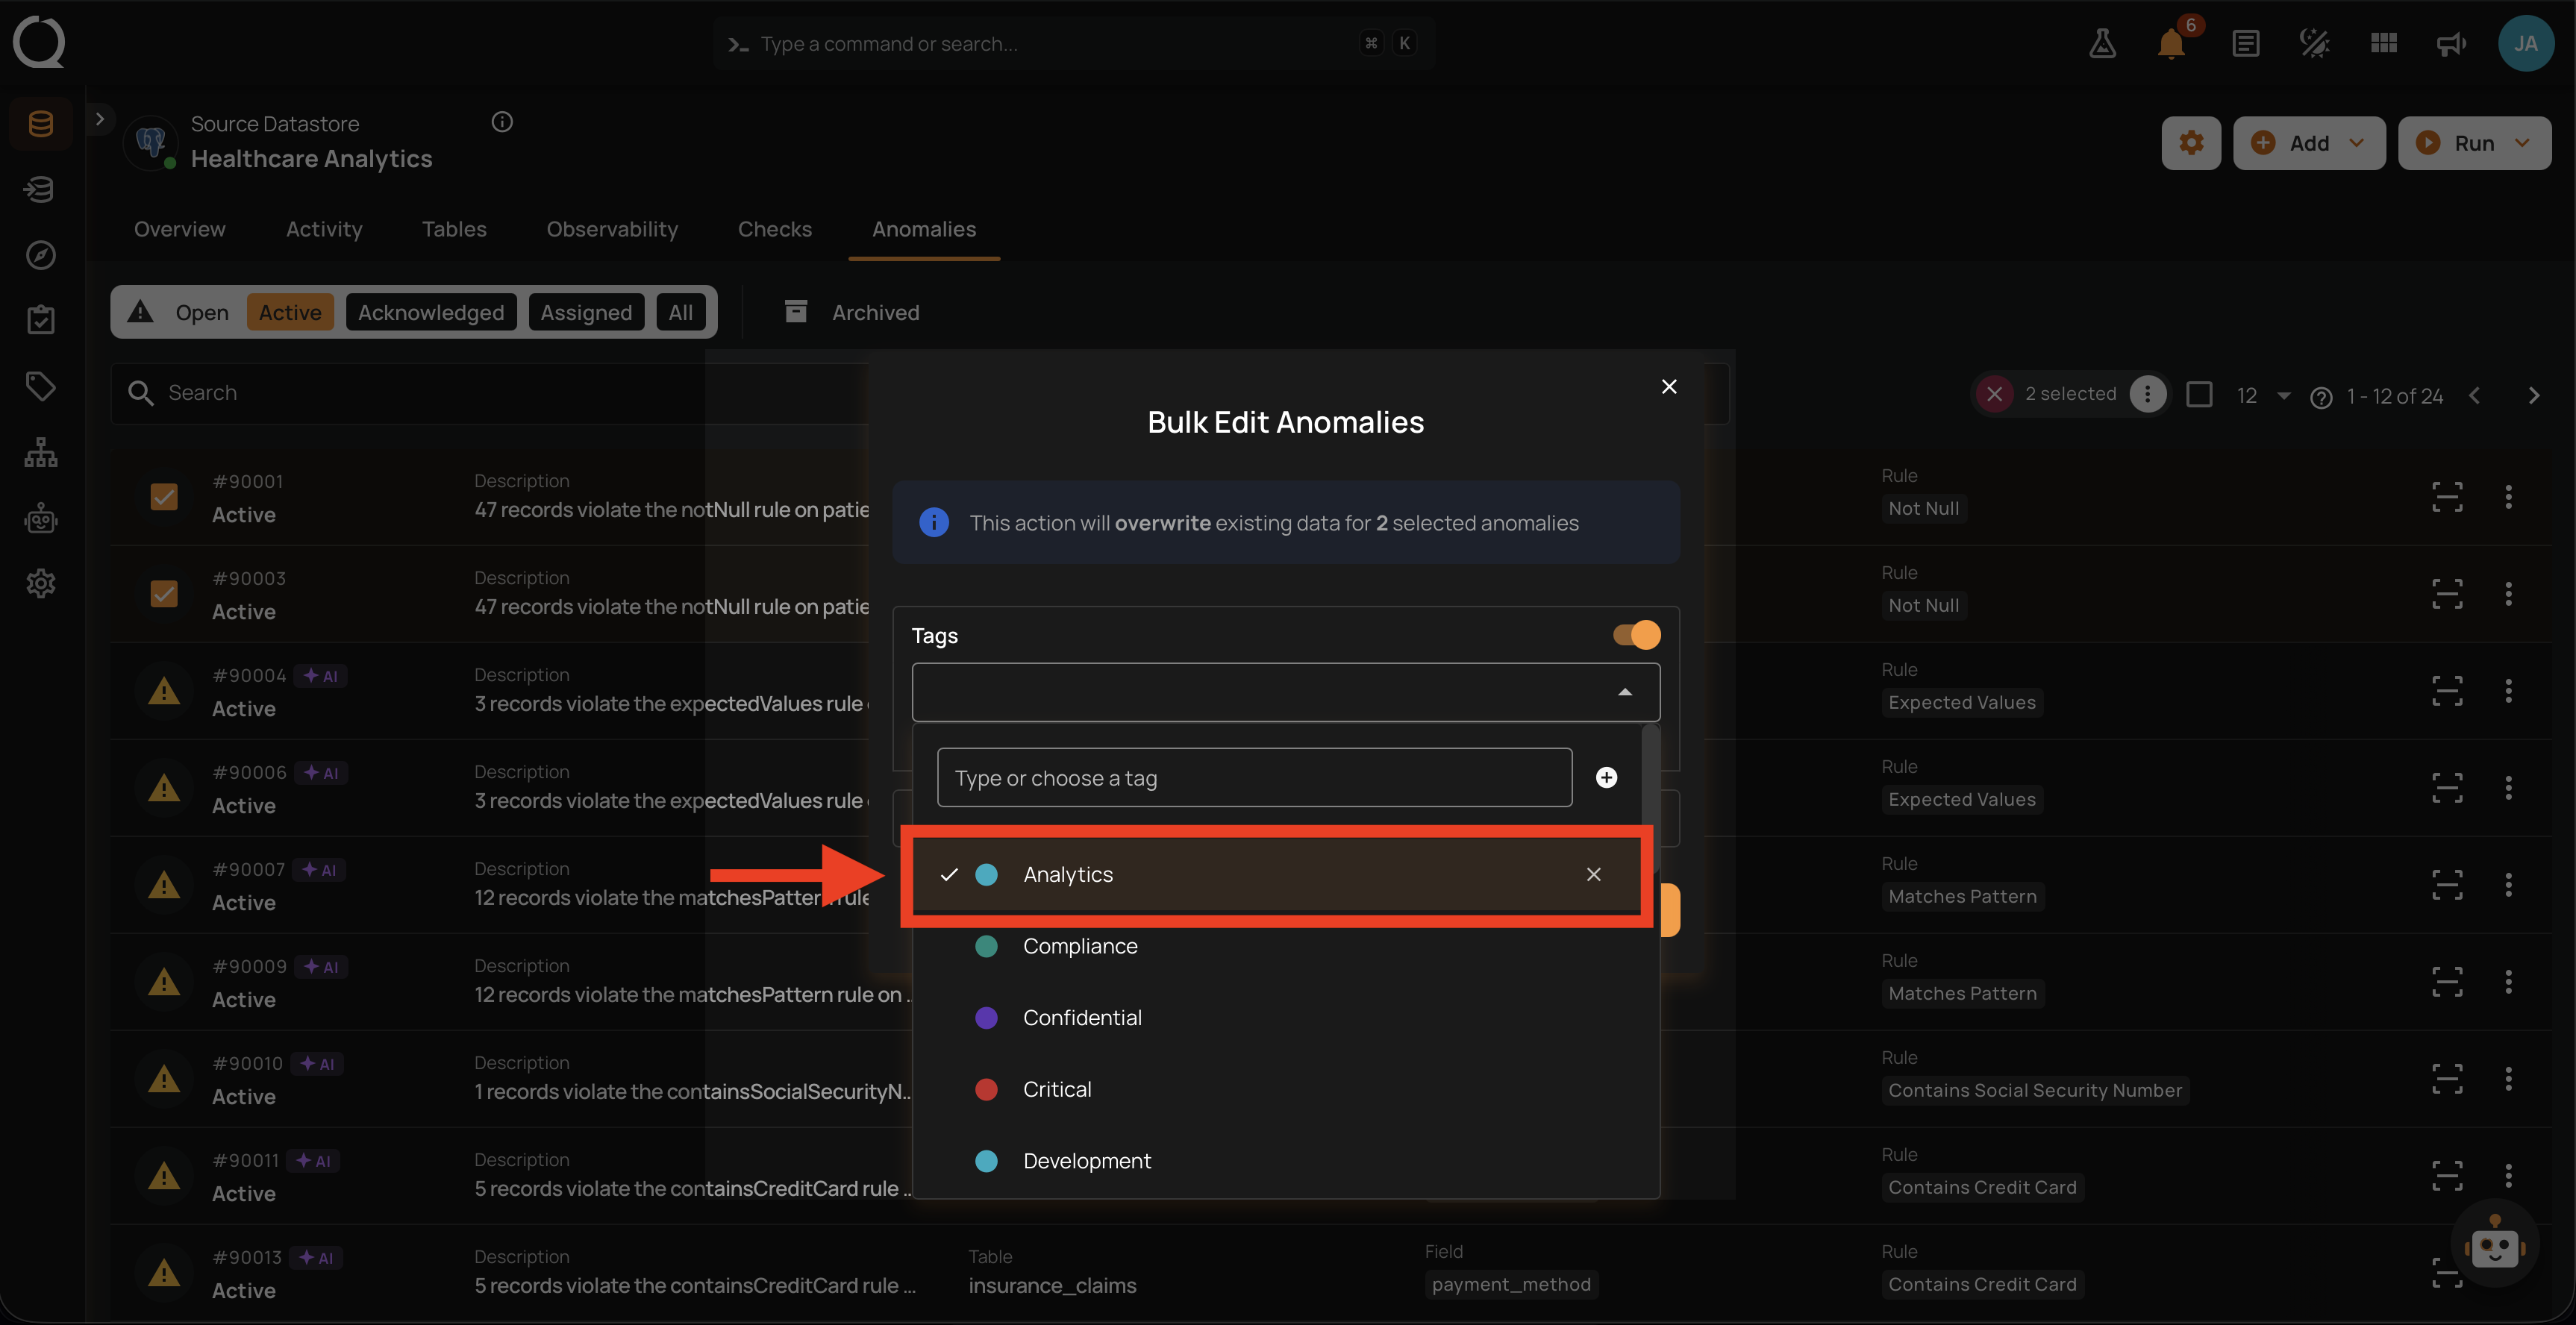
Step 9: The dropdown opens, listing every tag from the platform catalog.
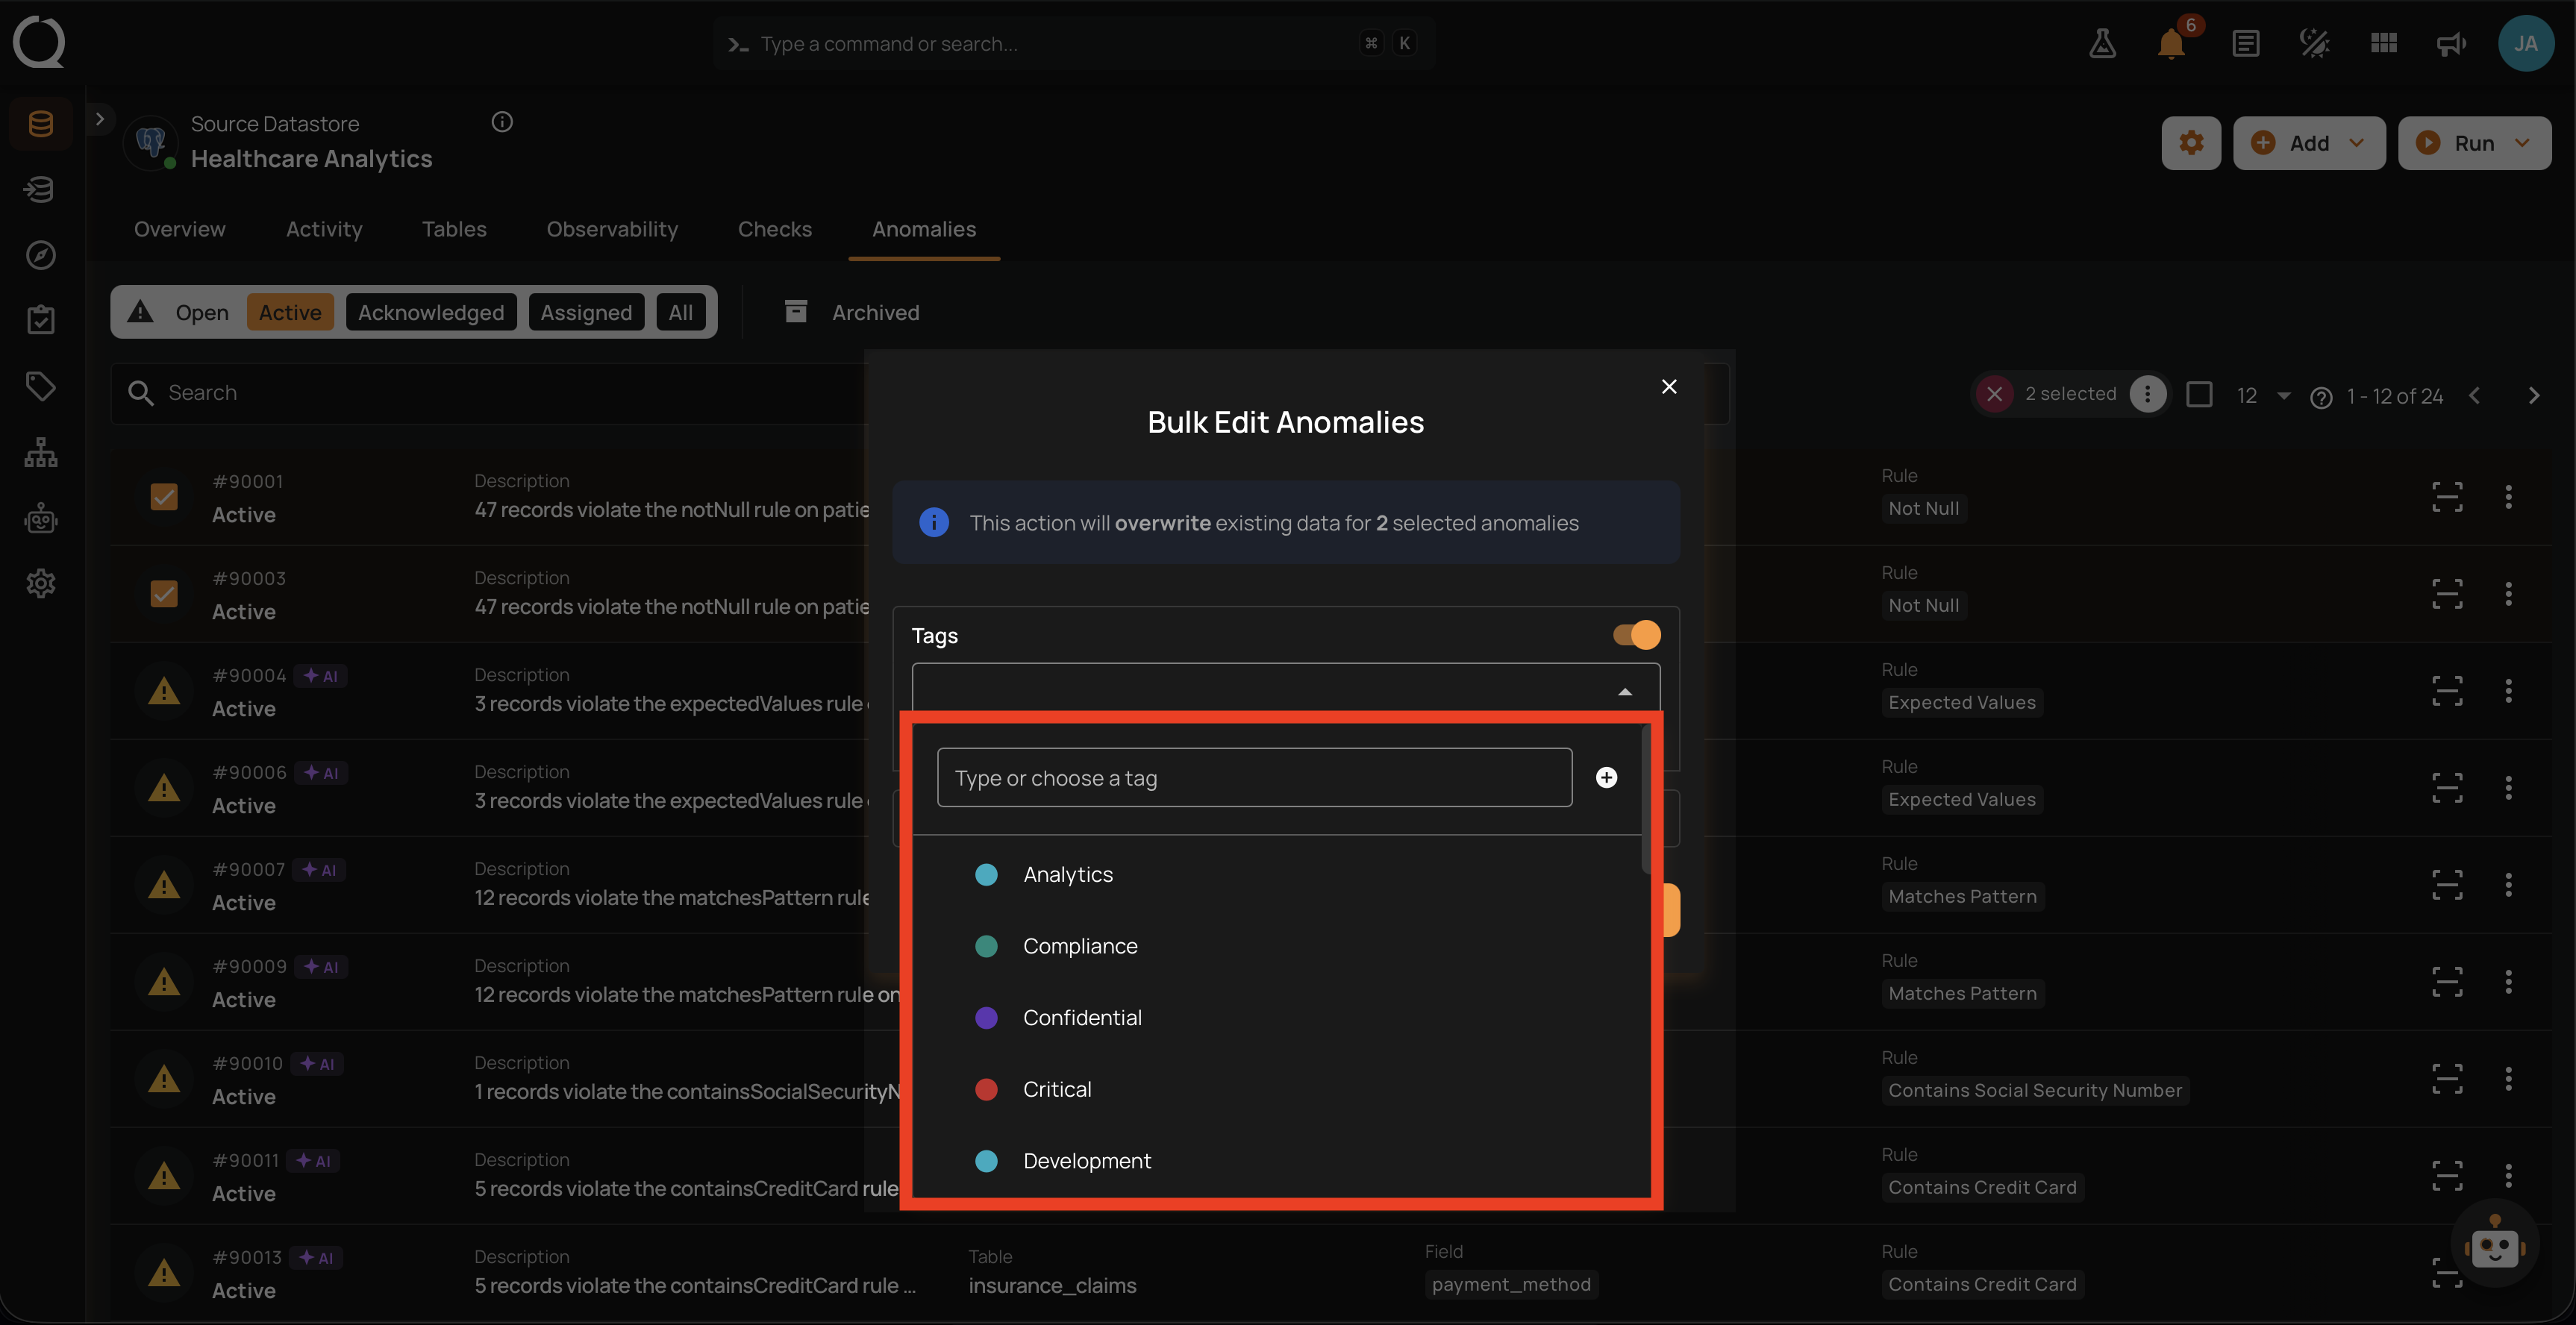
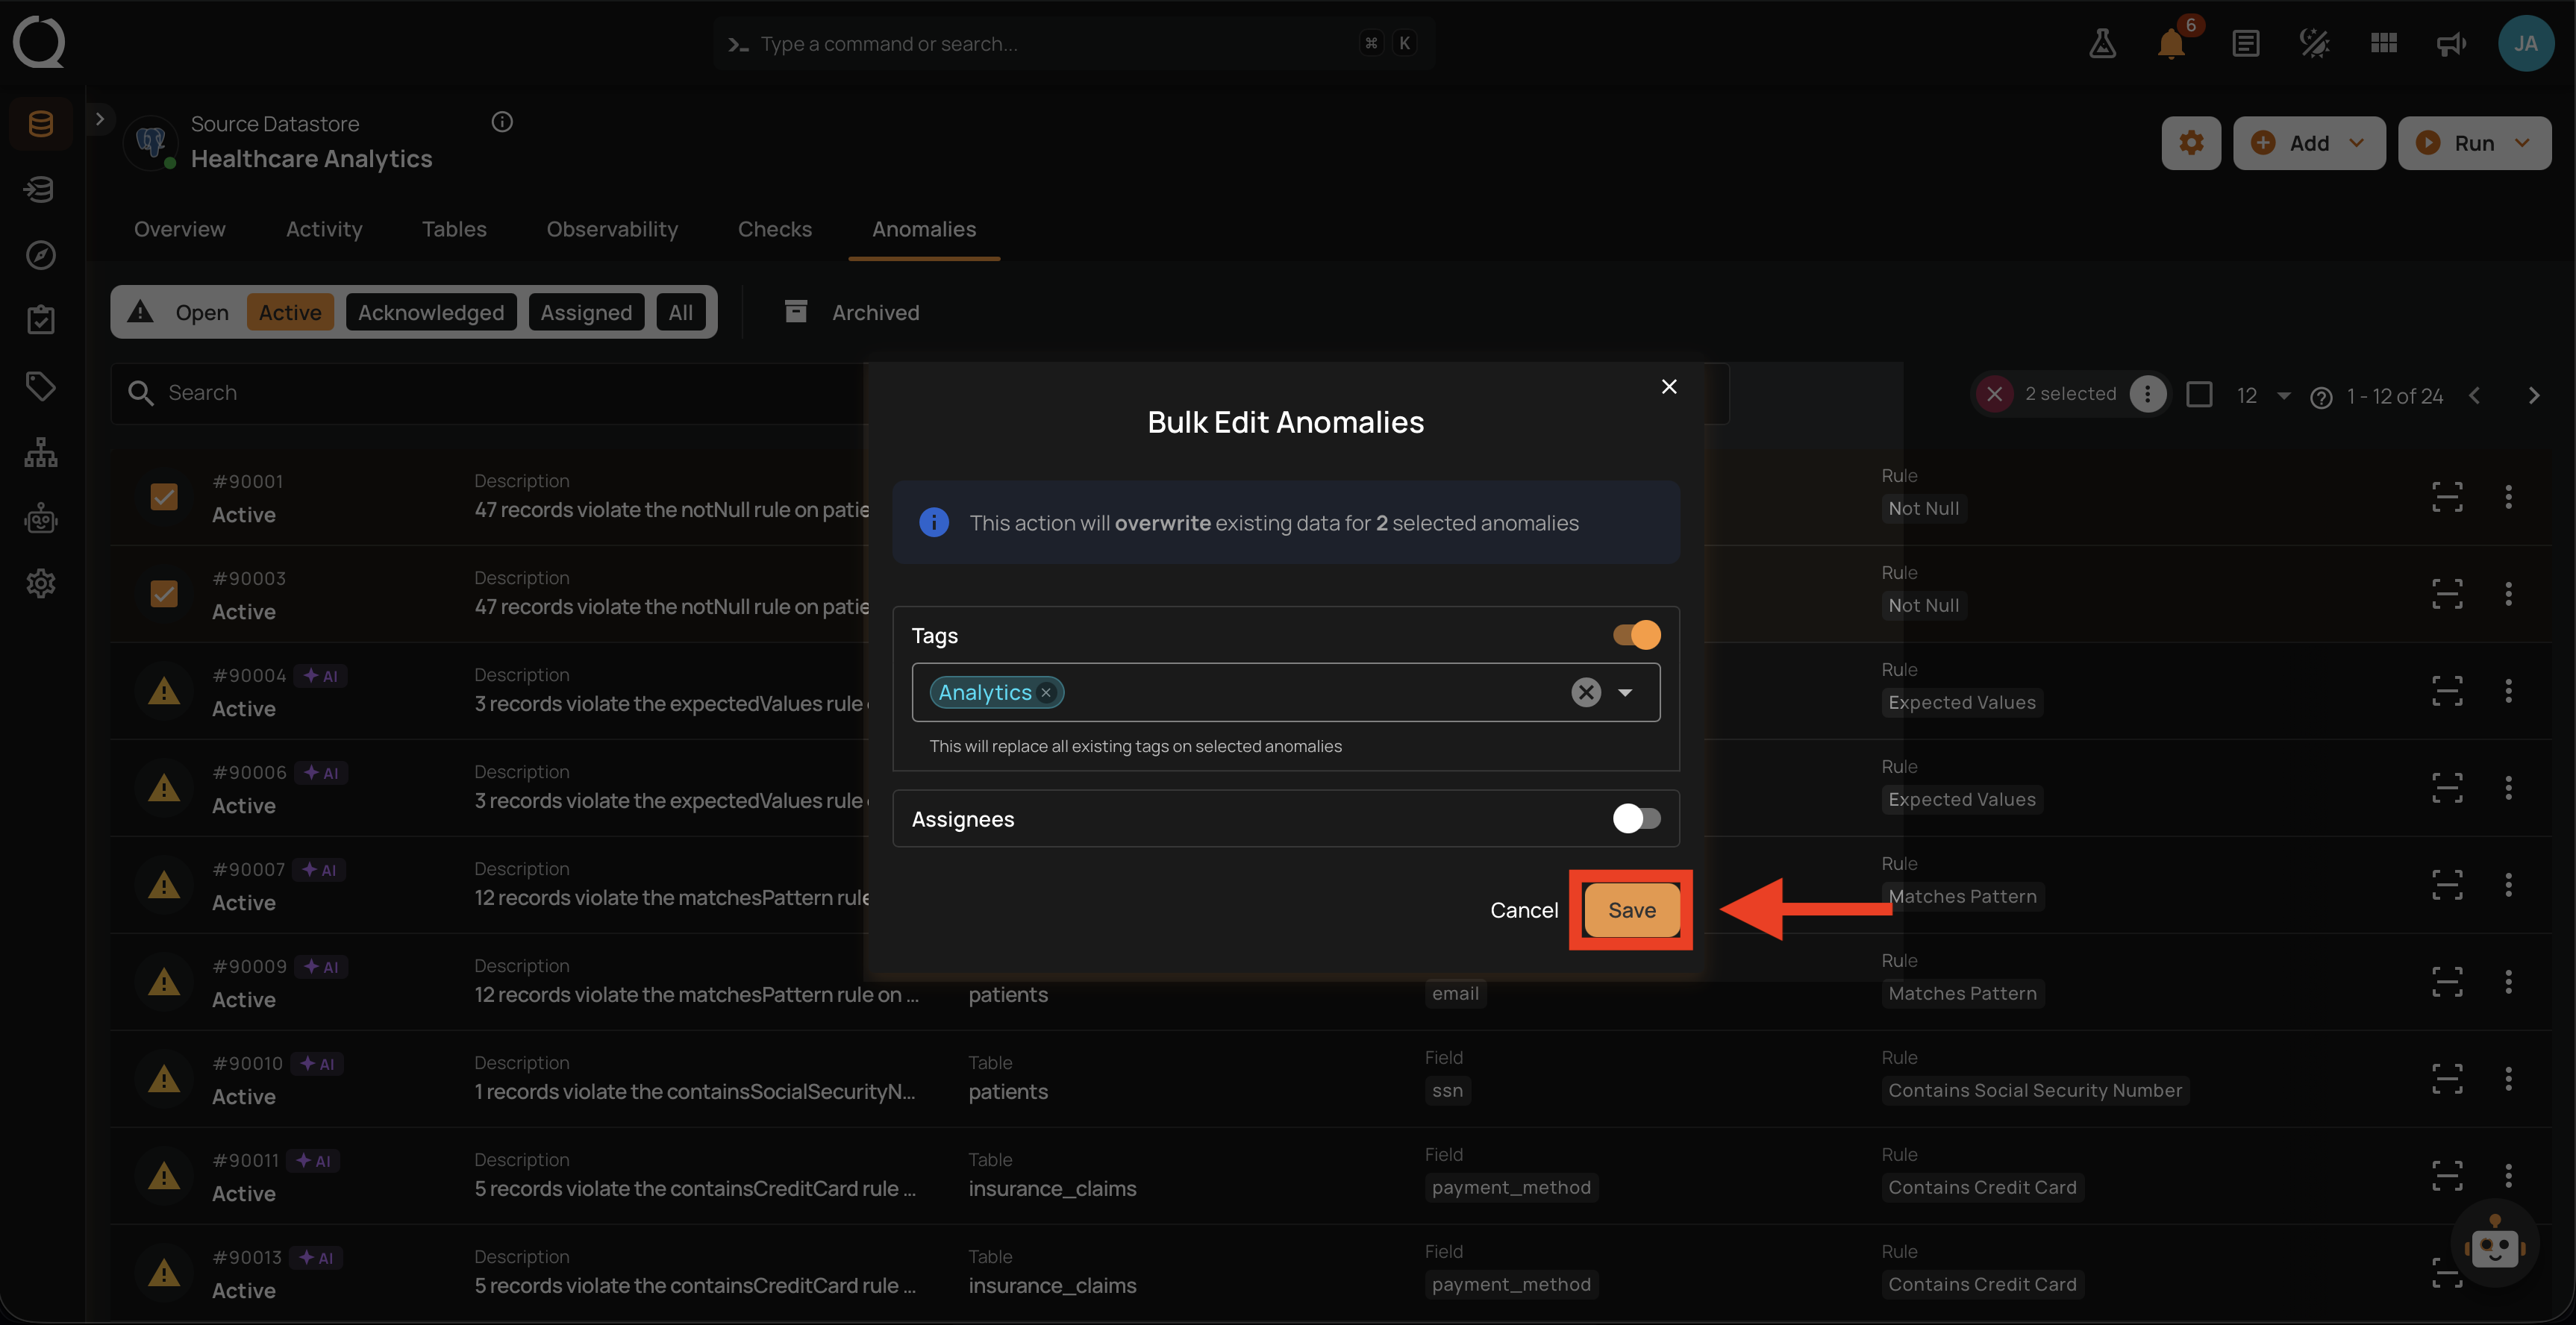
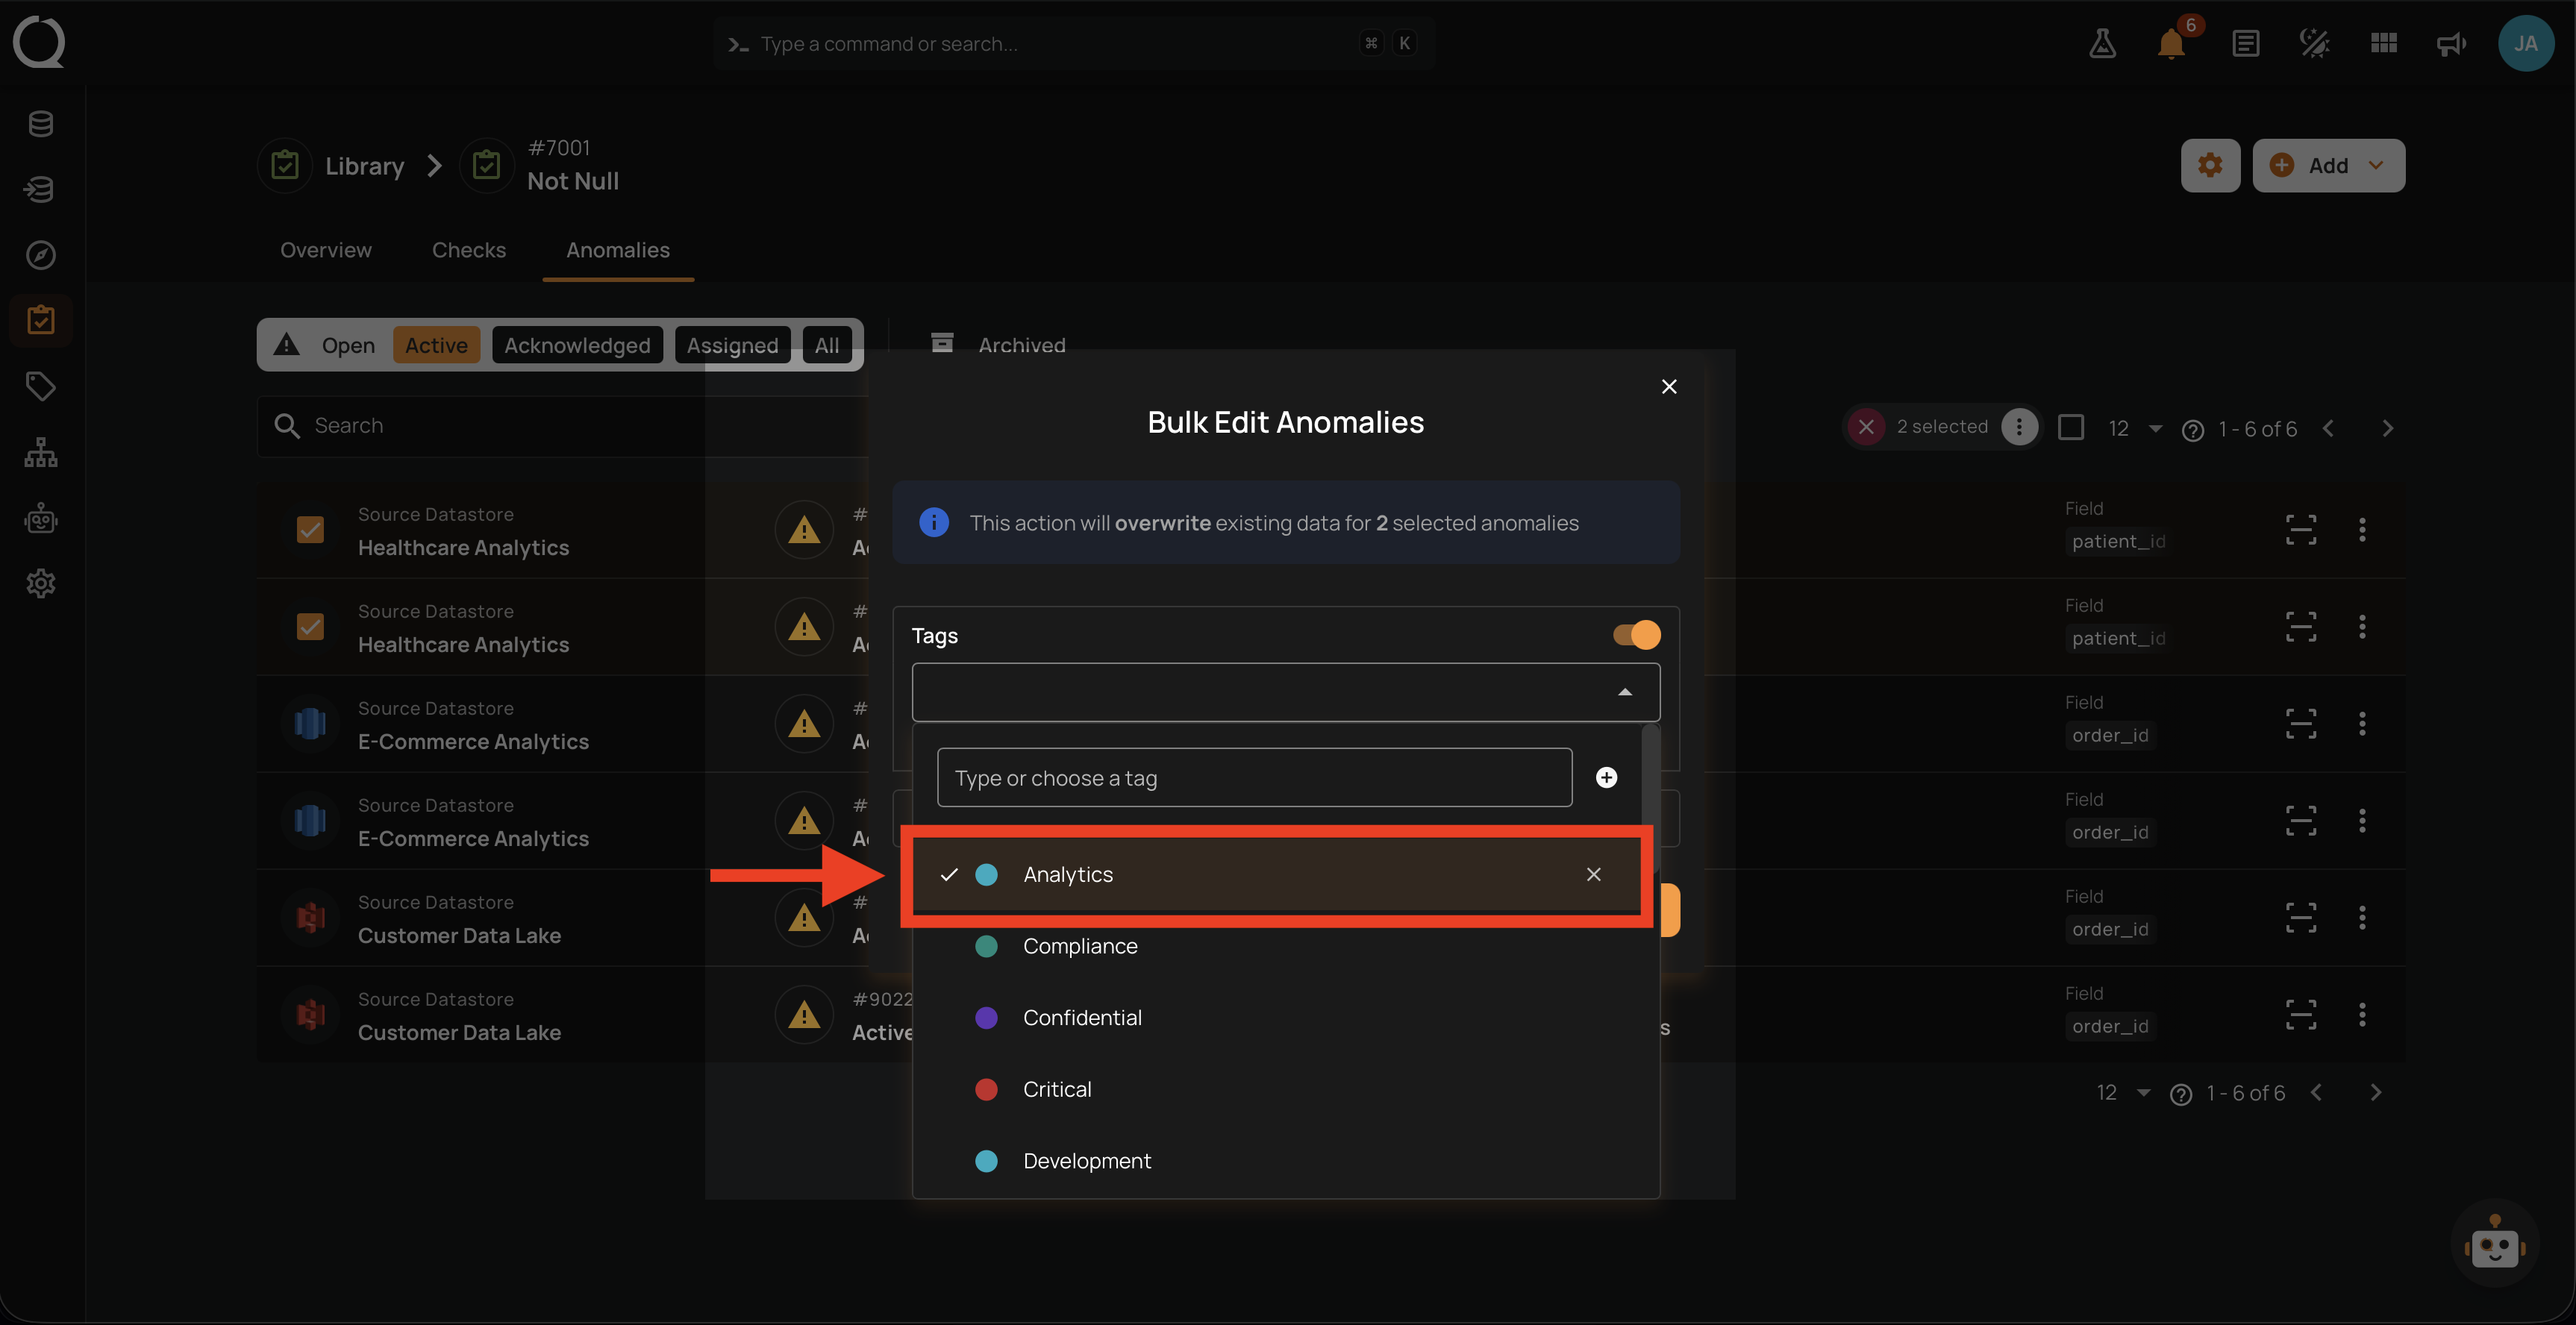
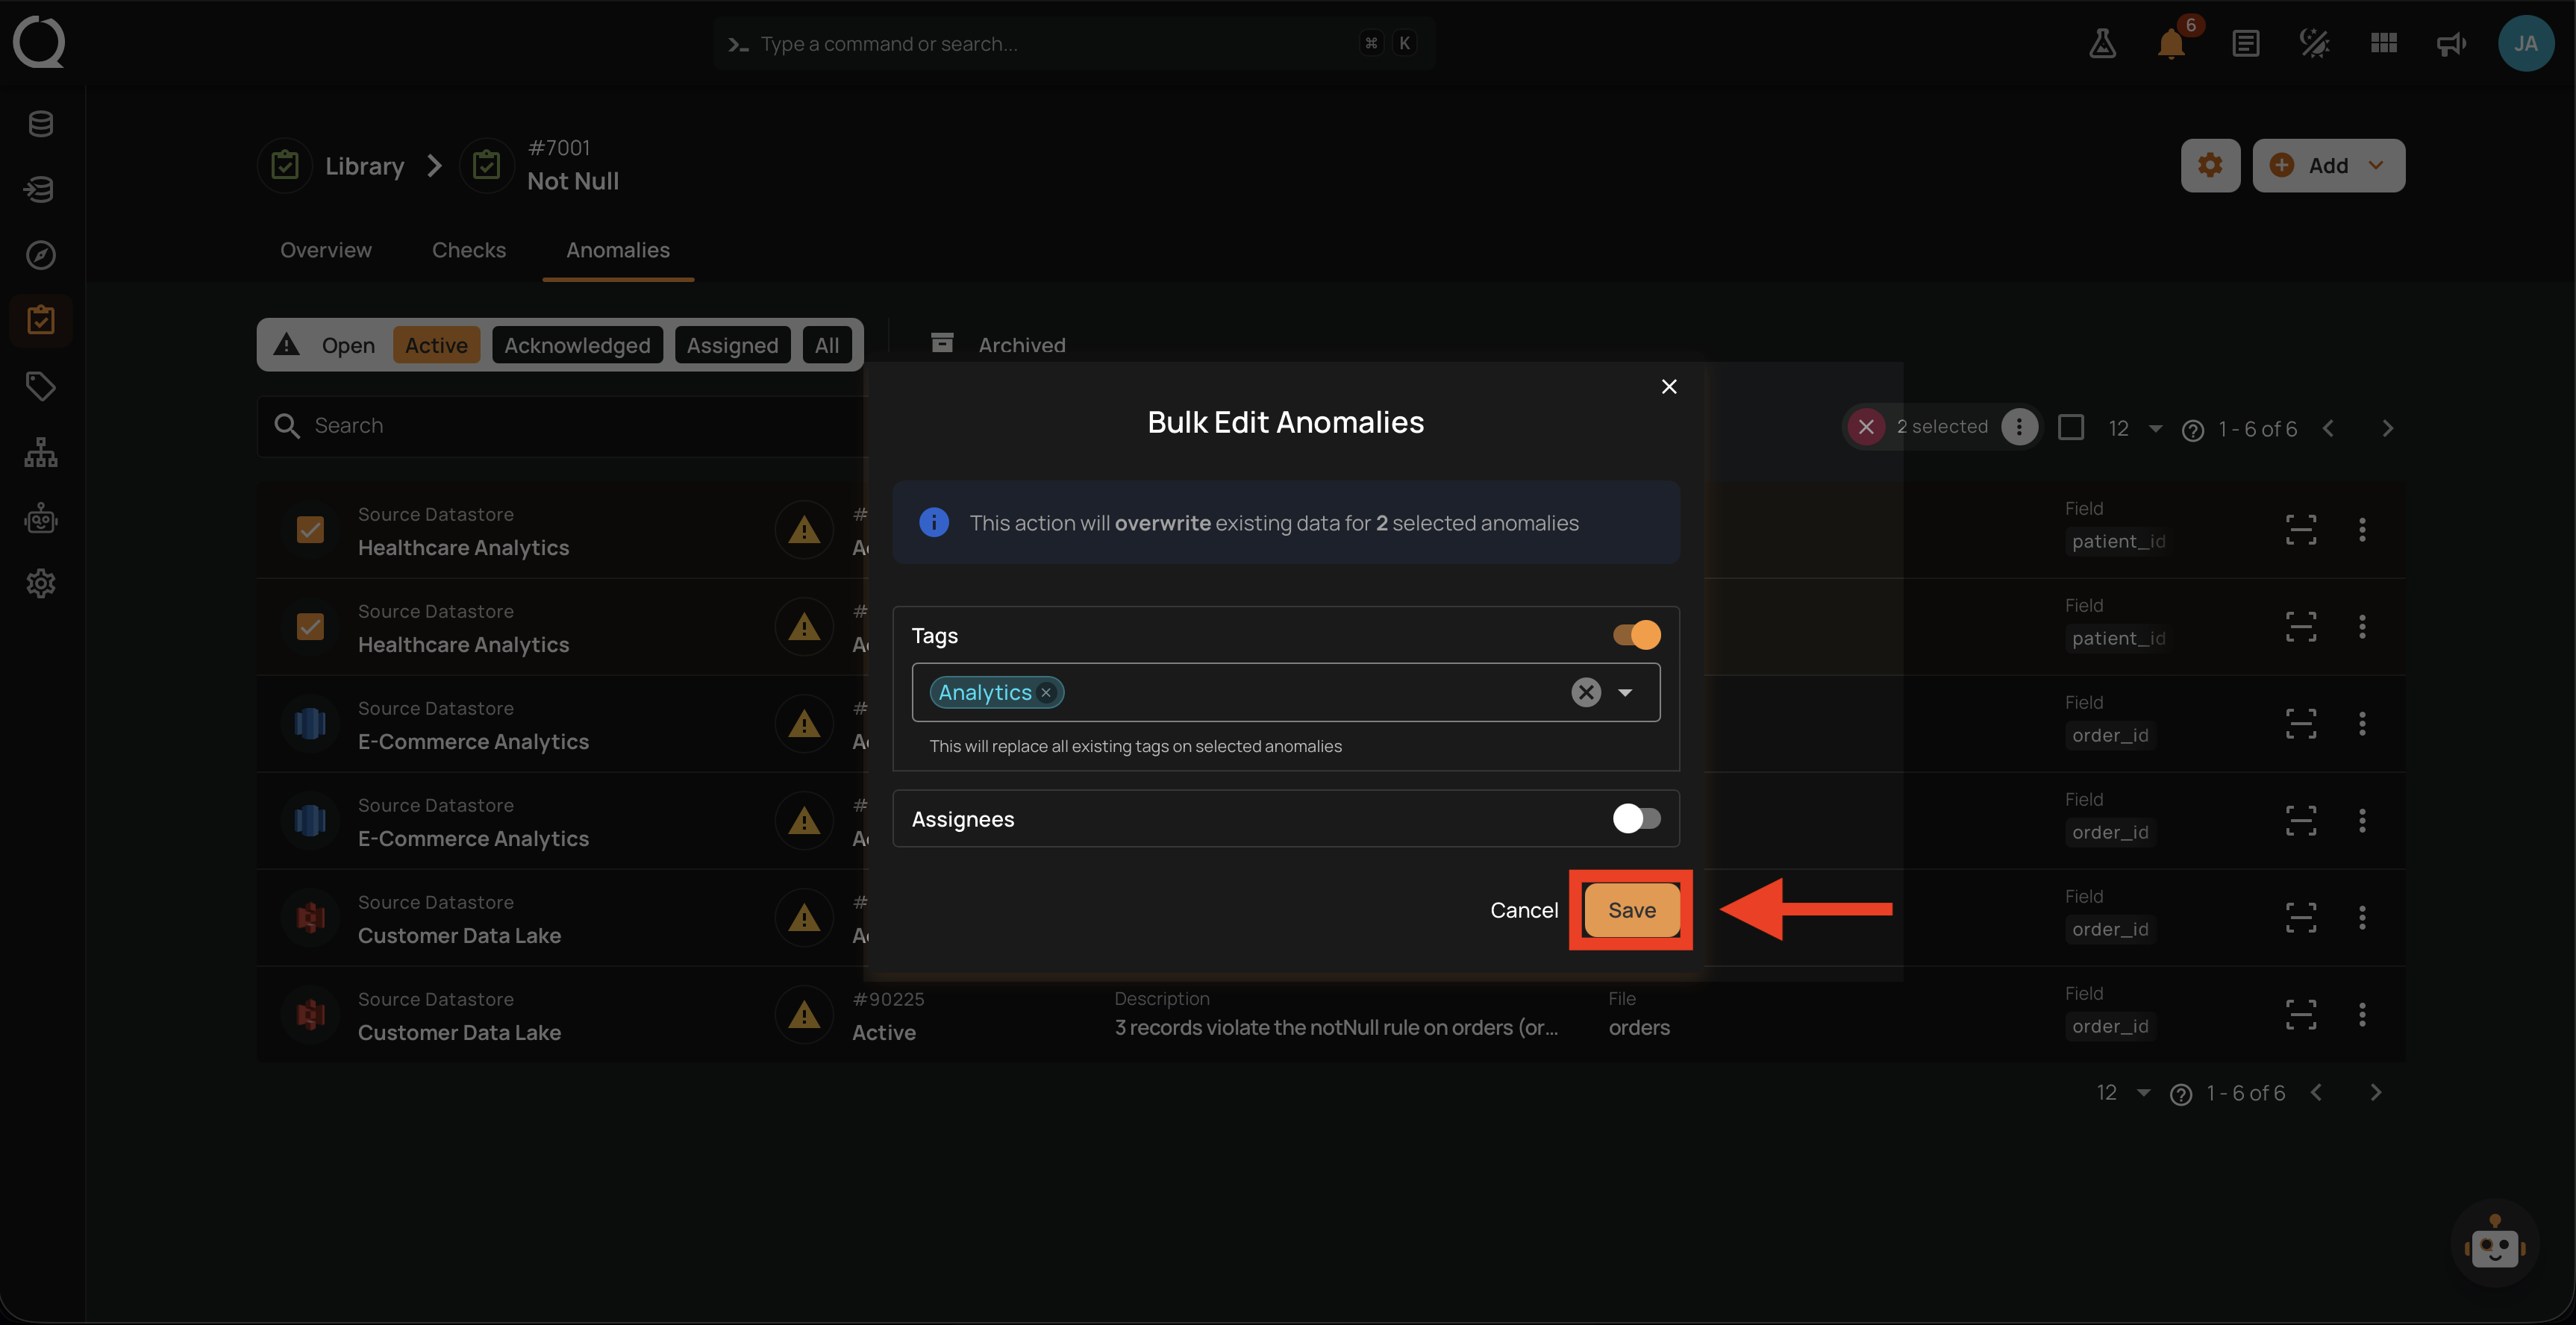
Step 10: Click the checkbox next to each tag you want to apply. Selected tags appear as chips inside the Select tags field.
Step 11: Click the Save button to apply the change. Every selected anomaly is updated with the new tags, and the current assignees of each anomaly (except yourself) receive an in-app notification. See Deep Dive · Anomaly Assignees · Notifications.
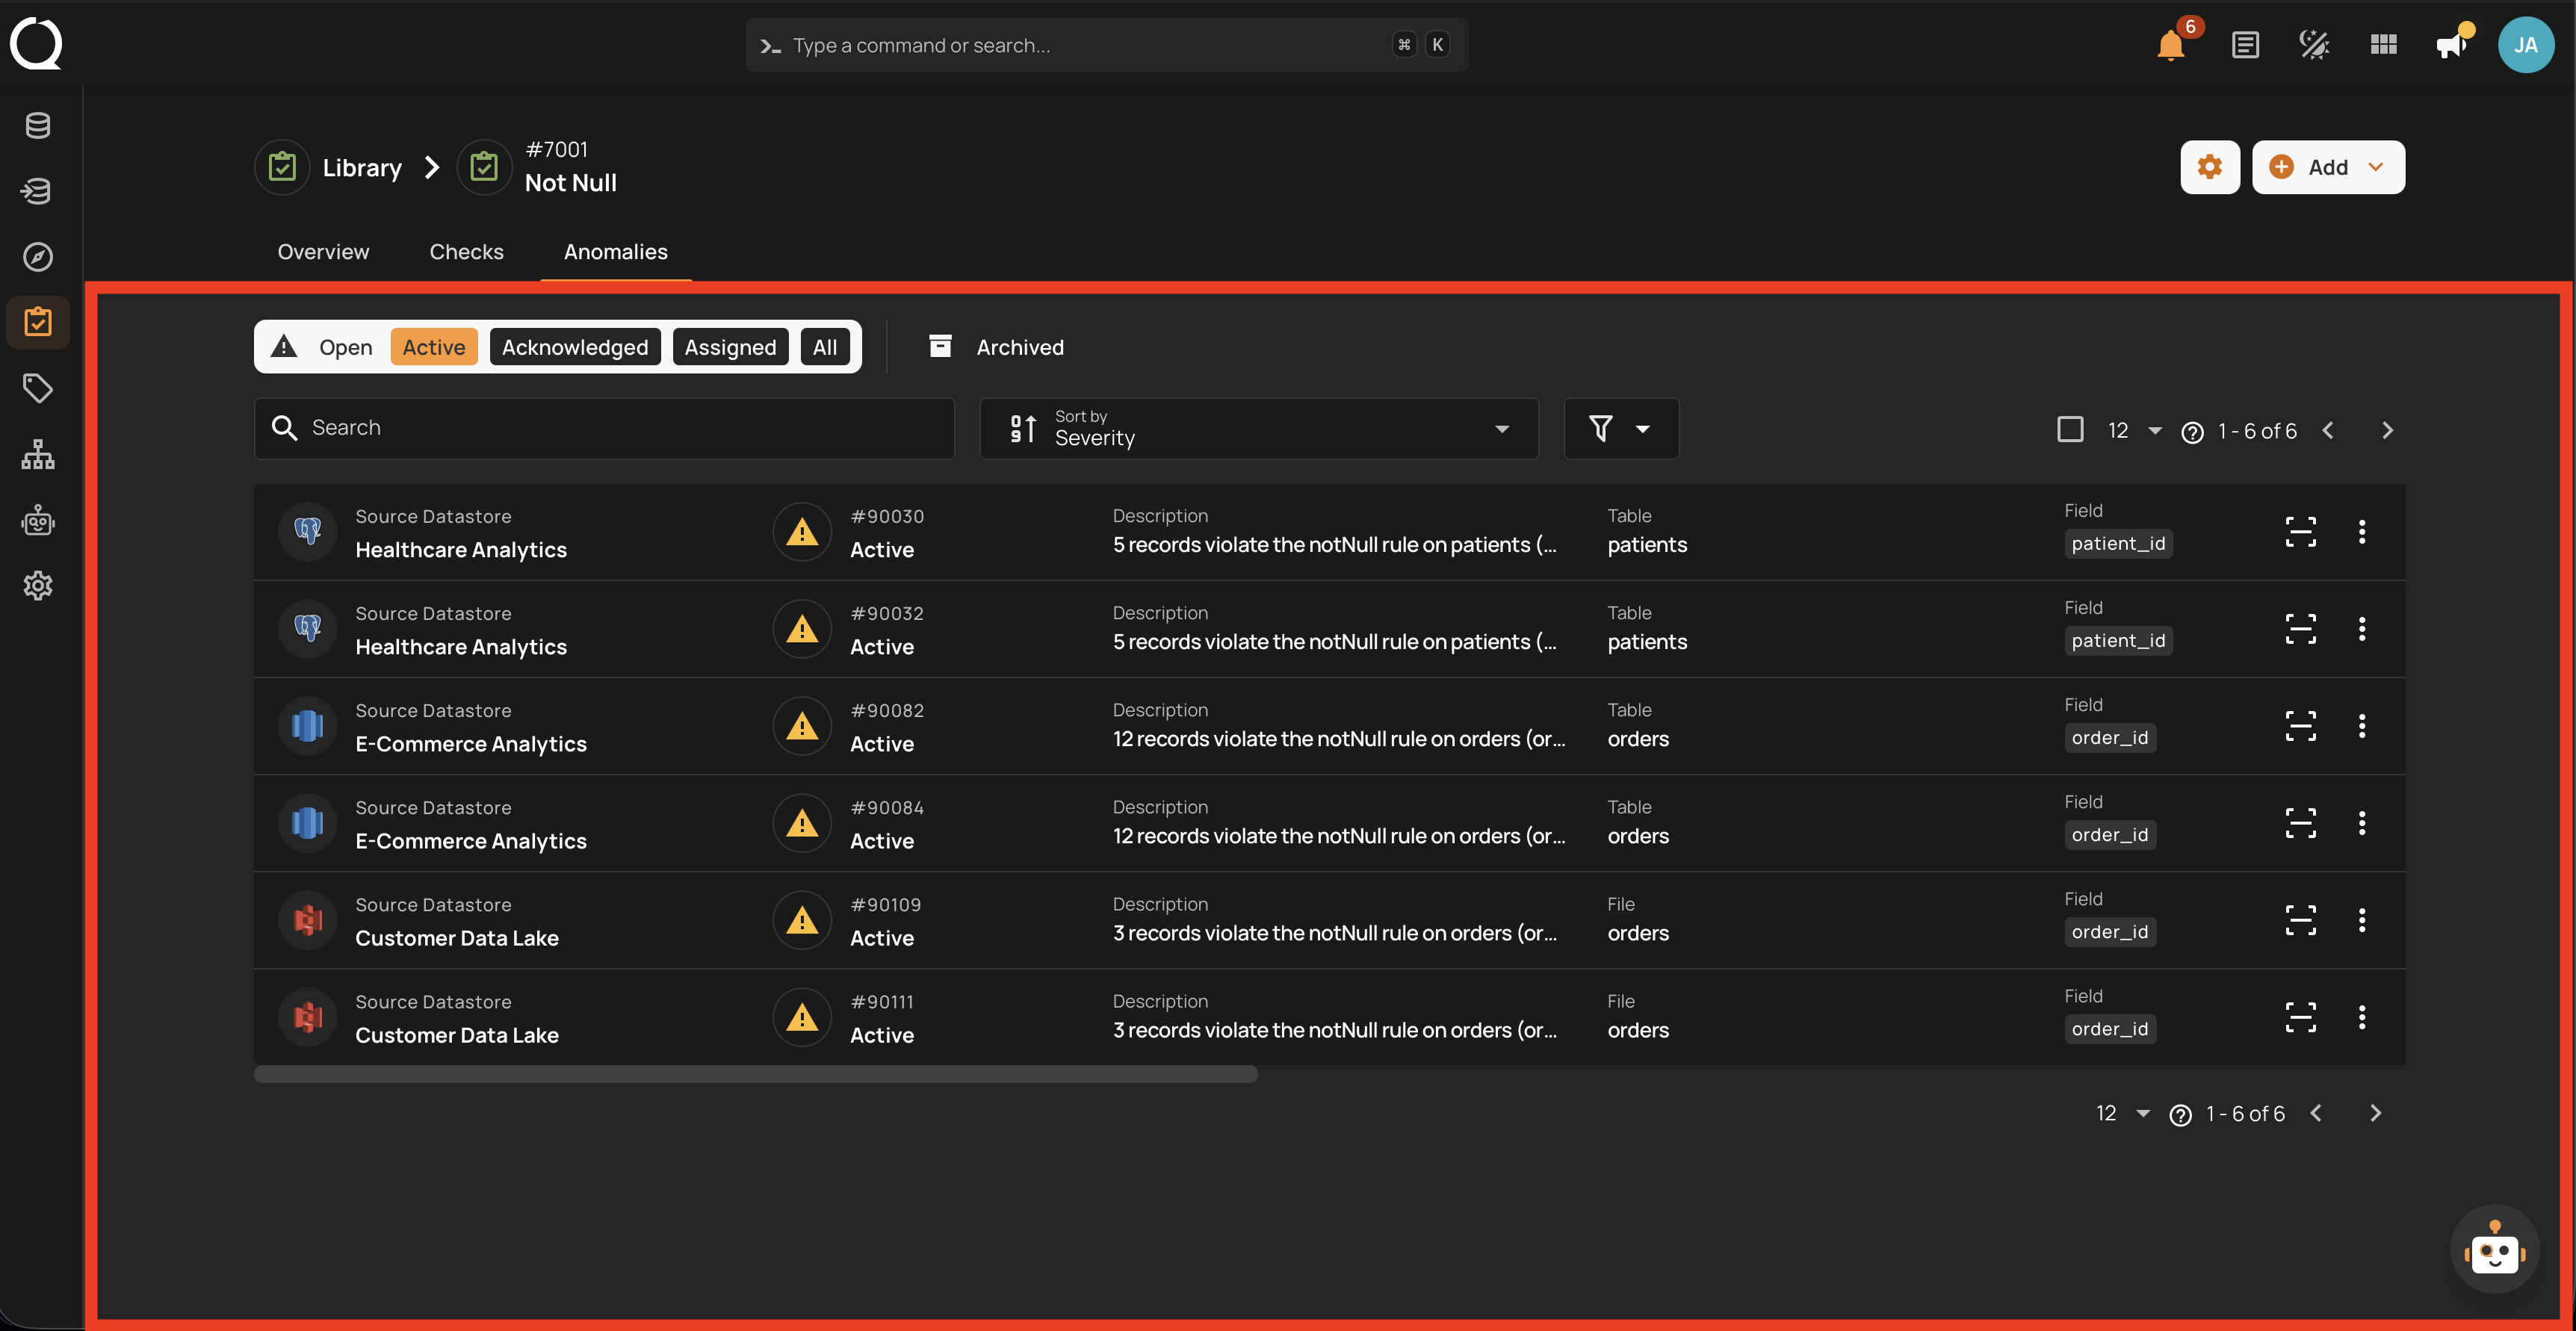
Step 1: Open the check template and go to its Anomalies tab. You see the list of anomalies generated by that specific check.
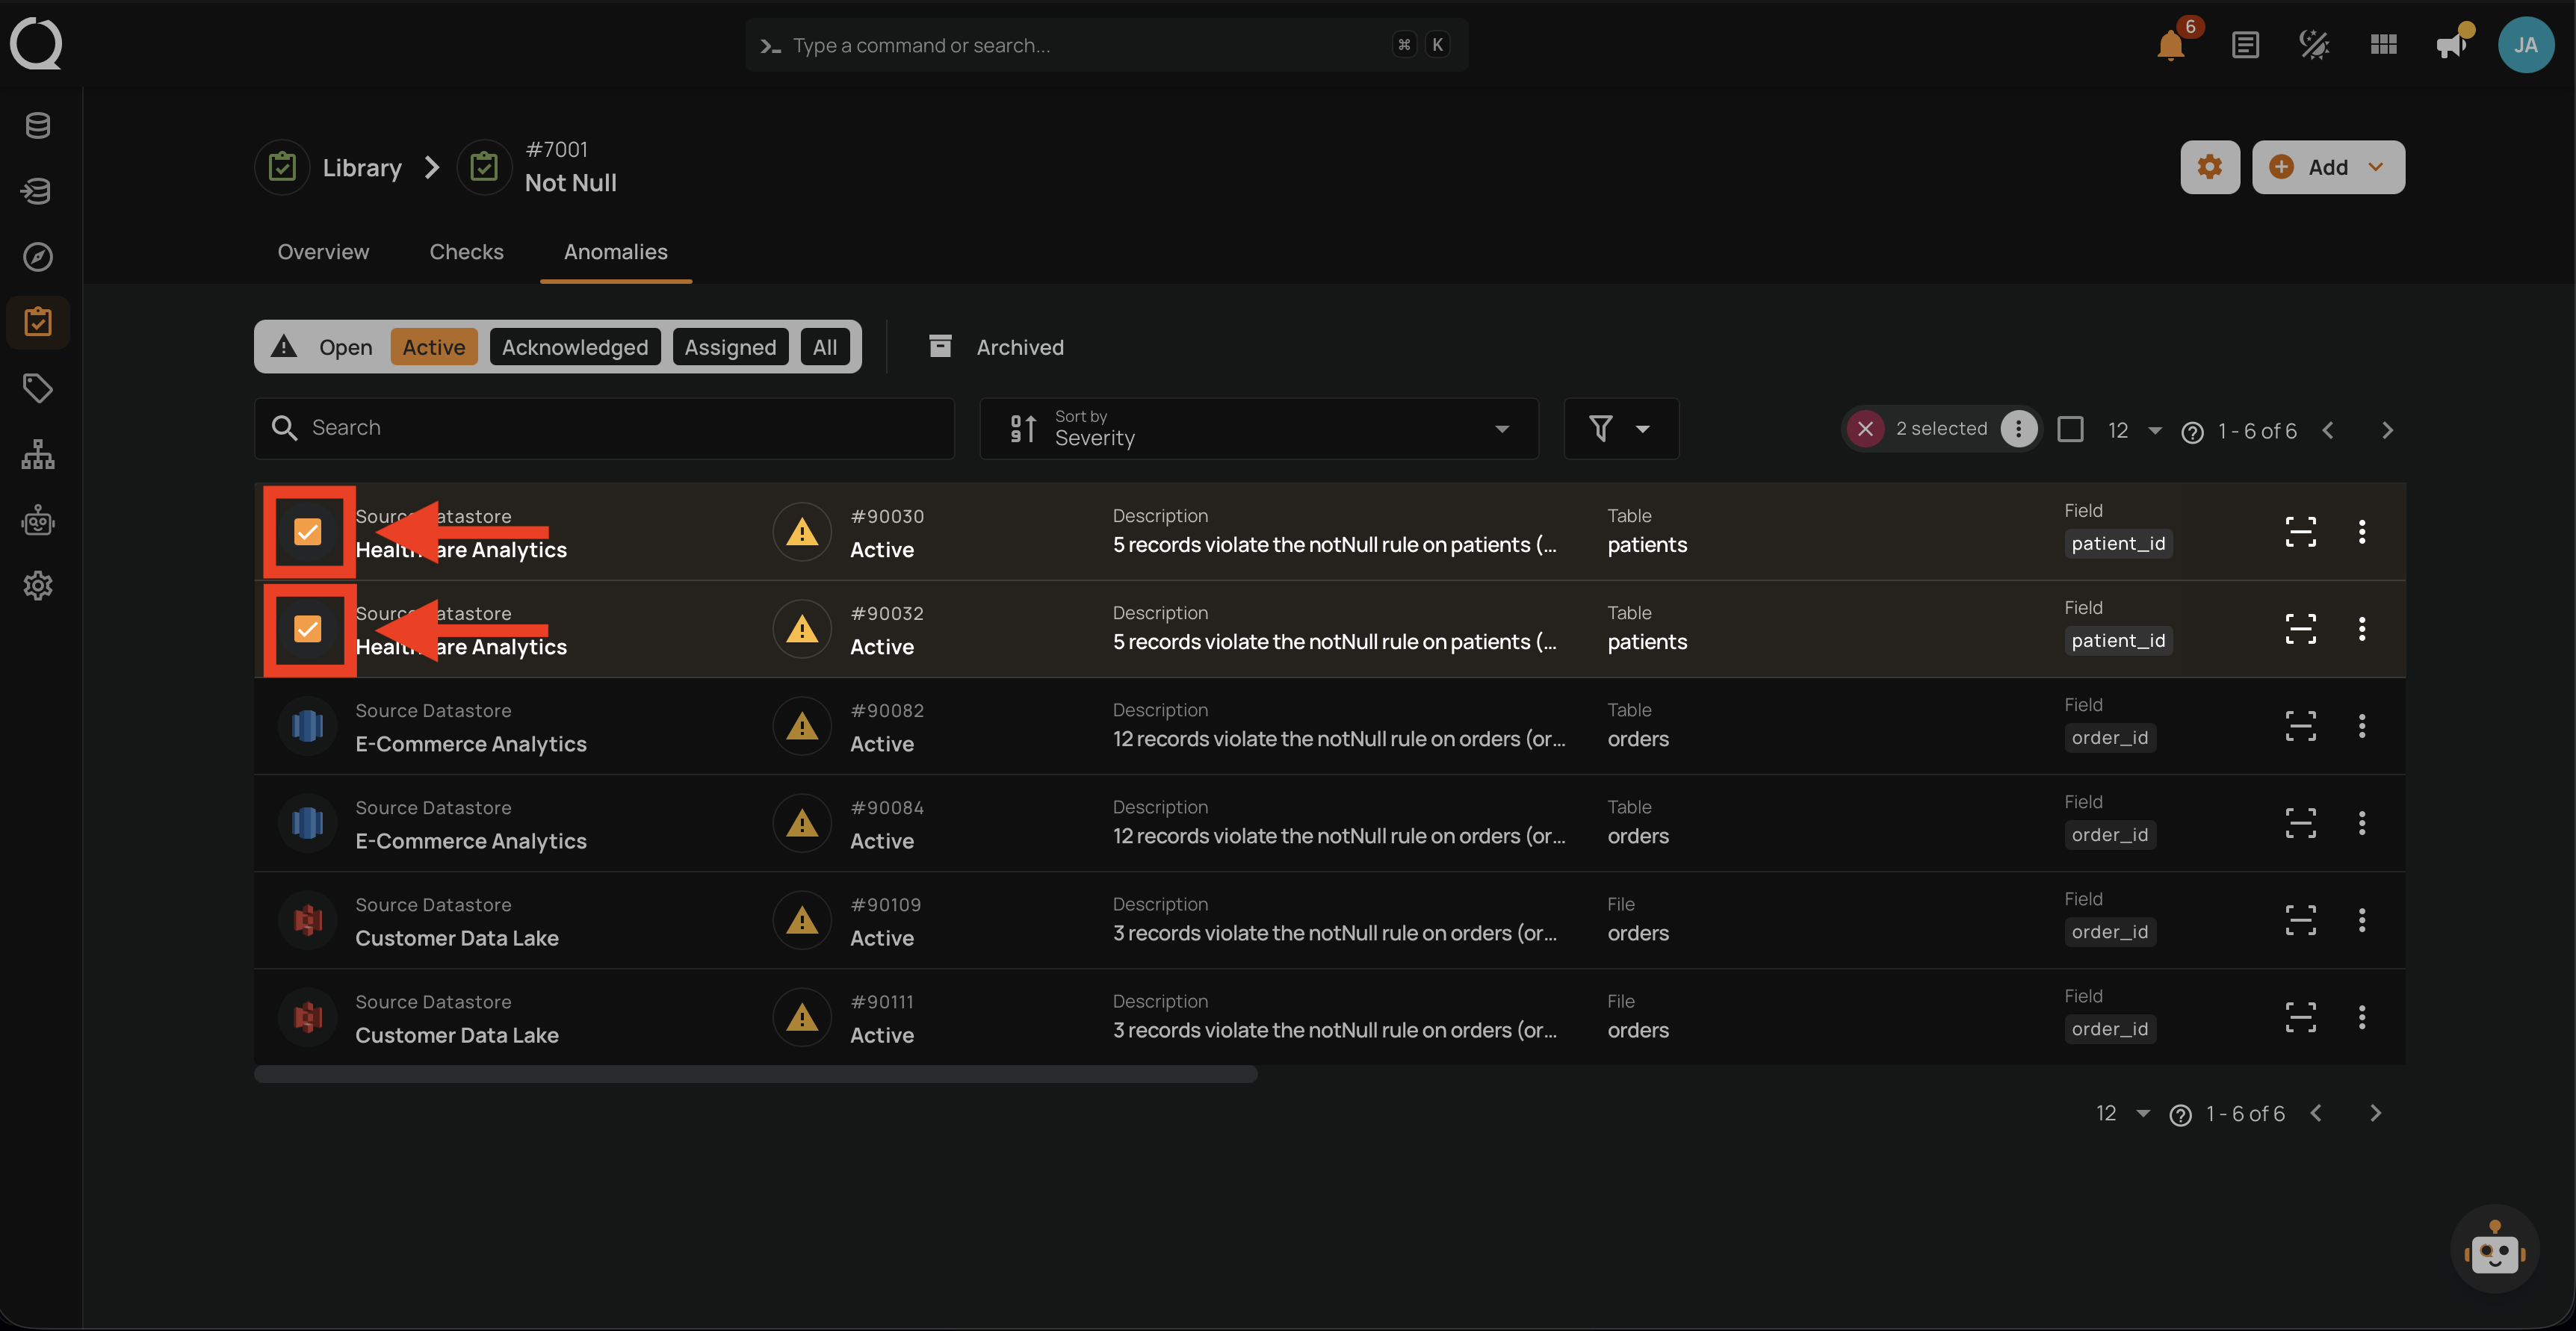
Step 2: Hover over each anomaly you want to include and click the checkbox on the left of the row. The selected rows stay highlighted and the top of the list switches into a selection toolbar showing the count (for example, 2 selected).
Step 3: Click the Bulk menu button in the selection toolbar.
Step 4: A menu opens showing the bulk actions available: Edit, Acknowledge, and Archive.

Step 5: Click Edit from the menu.
Step 6: The Bulk Edit Anomalies modal opens. It shows the count of selected anomalies, a notice that the action will overwrite existing data, and Tags and Assignees toggles (both off by default).
Step 7: Turn on the Tags toggle. A Select tags field appears below the toggle.
Step 8: Click the Select tags field to open the tag dropdown.
Step 9: The dropdown opens, listing every tag from the platform catalog.
Step 10: Click the checkbox next to each tag you want to apply. Selected tags appear as chips inside the Select tags field.
Step 11: Click the Save button to apply the change. Every selected anomaly is updated with the new tags, and the current assignees of each anomaly (except yourself) receive an in-app notification. See Deep Dive · Anomaly Assignees · Notifications.
Bulk edit replaces existing tags
Bulk edit overwrites the tags of each selected anomaly with the new set. It does not add to existing tags. To preserve previous tags on a specific anomaly, open it individually via Add Tags.
Tip
The Bulk Edit Anomalies modal also exposes an Assignees toggle. Turn both toggles on if you want to change tags and assignees in the same operation. See Bulk-Assign Anomalies.