Promote Computed Fields
Computed field promotion copies computed field definitions from a source container to a destination container. The destination can be on the same or a different datastore. This page documents the bulk workflow triggered from the source container's Settings > Promote > Computed Fields menu.
Prerequisites
- The user has Editor team permission on both the source and the destination container.
- The source container has at least one computed field.
- The destination container has all the source fields referenced by the computed field definitions, and those fields are in an eligible status (not excluded or missing).
Where to Trigger
The flow described on this page starts from the source container and operates in bulk. A single computed field can also be promoted from its context menu — that flow skips the selection step and goes directly to the destination settings.
What Happens During Promotion
- Dependency auto-inclusion: When the selected computed fields reference other computed fields — either explicitly via
source_fieldsor implicitly inside a custom expression — the platform expands the selection to include every transitive parent. Selecting a single nested computed field may therefore pull in multiple ancestor fields. Dependencies are processed parents-first so each field's inputs exist on the destination by the time it is created. If the dependency graph contains a cycle, the request is rejected with a422error before any work is enqueued. - Matching: For each source computed field (including auto-included dependencies), the platform first looks for a previous promotion to the same destination container (see Entity Matching). If no previous promotion is found, it falls back to name matching — looking for a computed field with the same name on the destination.
- Source field resolution: The source fields of the computed field definition are resolved by name on the destination container. All referenced source fields must exist and be in an eligible status (Active or Masked). If any source field is missing or excluded, the promotion fails for that computed field.
- Name collision detection: If a regular (non-computed) field with the same name already exists on the destination, the promotion fails for that computed field.
- Comparison: If a match is found, the platform compares the source and destination definitions:
- Identical: The computed field is skipped (no changes needed).
- Different: The destination computed field is updated with the source definition.
- No match: A new computed field is created at the destination.
- Rename propagation: If a previously promoted computed field has been renamed at the source, the destination field name is updated to match.
- Field reactivation: If a previously excluded destination computed field is being re-promoted, it is reactivated to Active status.
- Tag assignment: Only the additional tags you specify in the promotion are applied to the destination computed field. Source field tags are not carried over.
- Result recording: A promote result is recorded linking the source field to the destination field, so future re-promotions can find this destination directly.
- Slim profile: After all fields are promoted, a slim profile runs on the destination container to generate field metadata for the new computed fields.
After Promotion
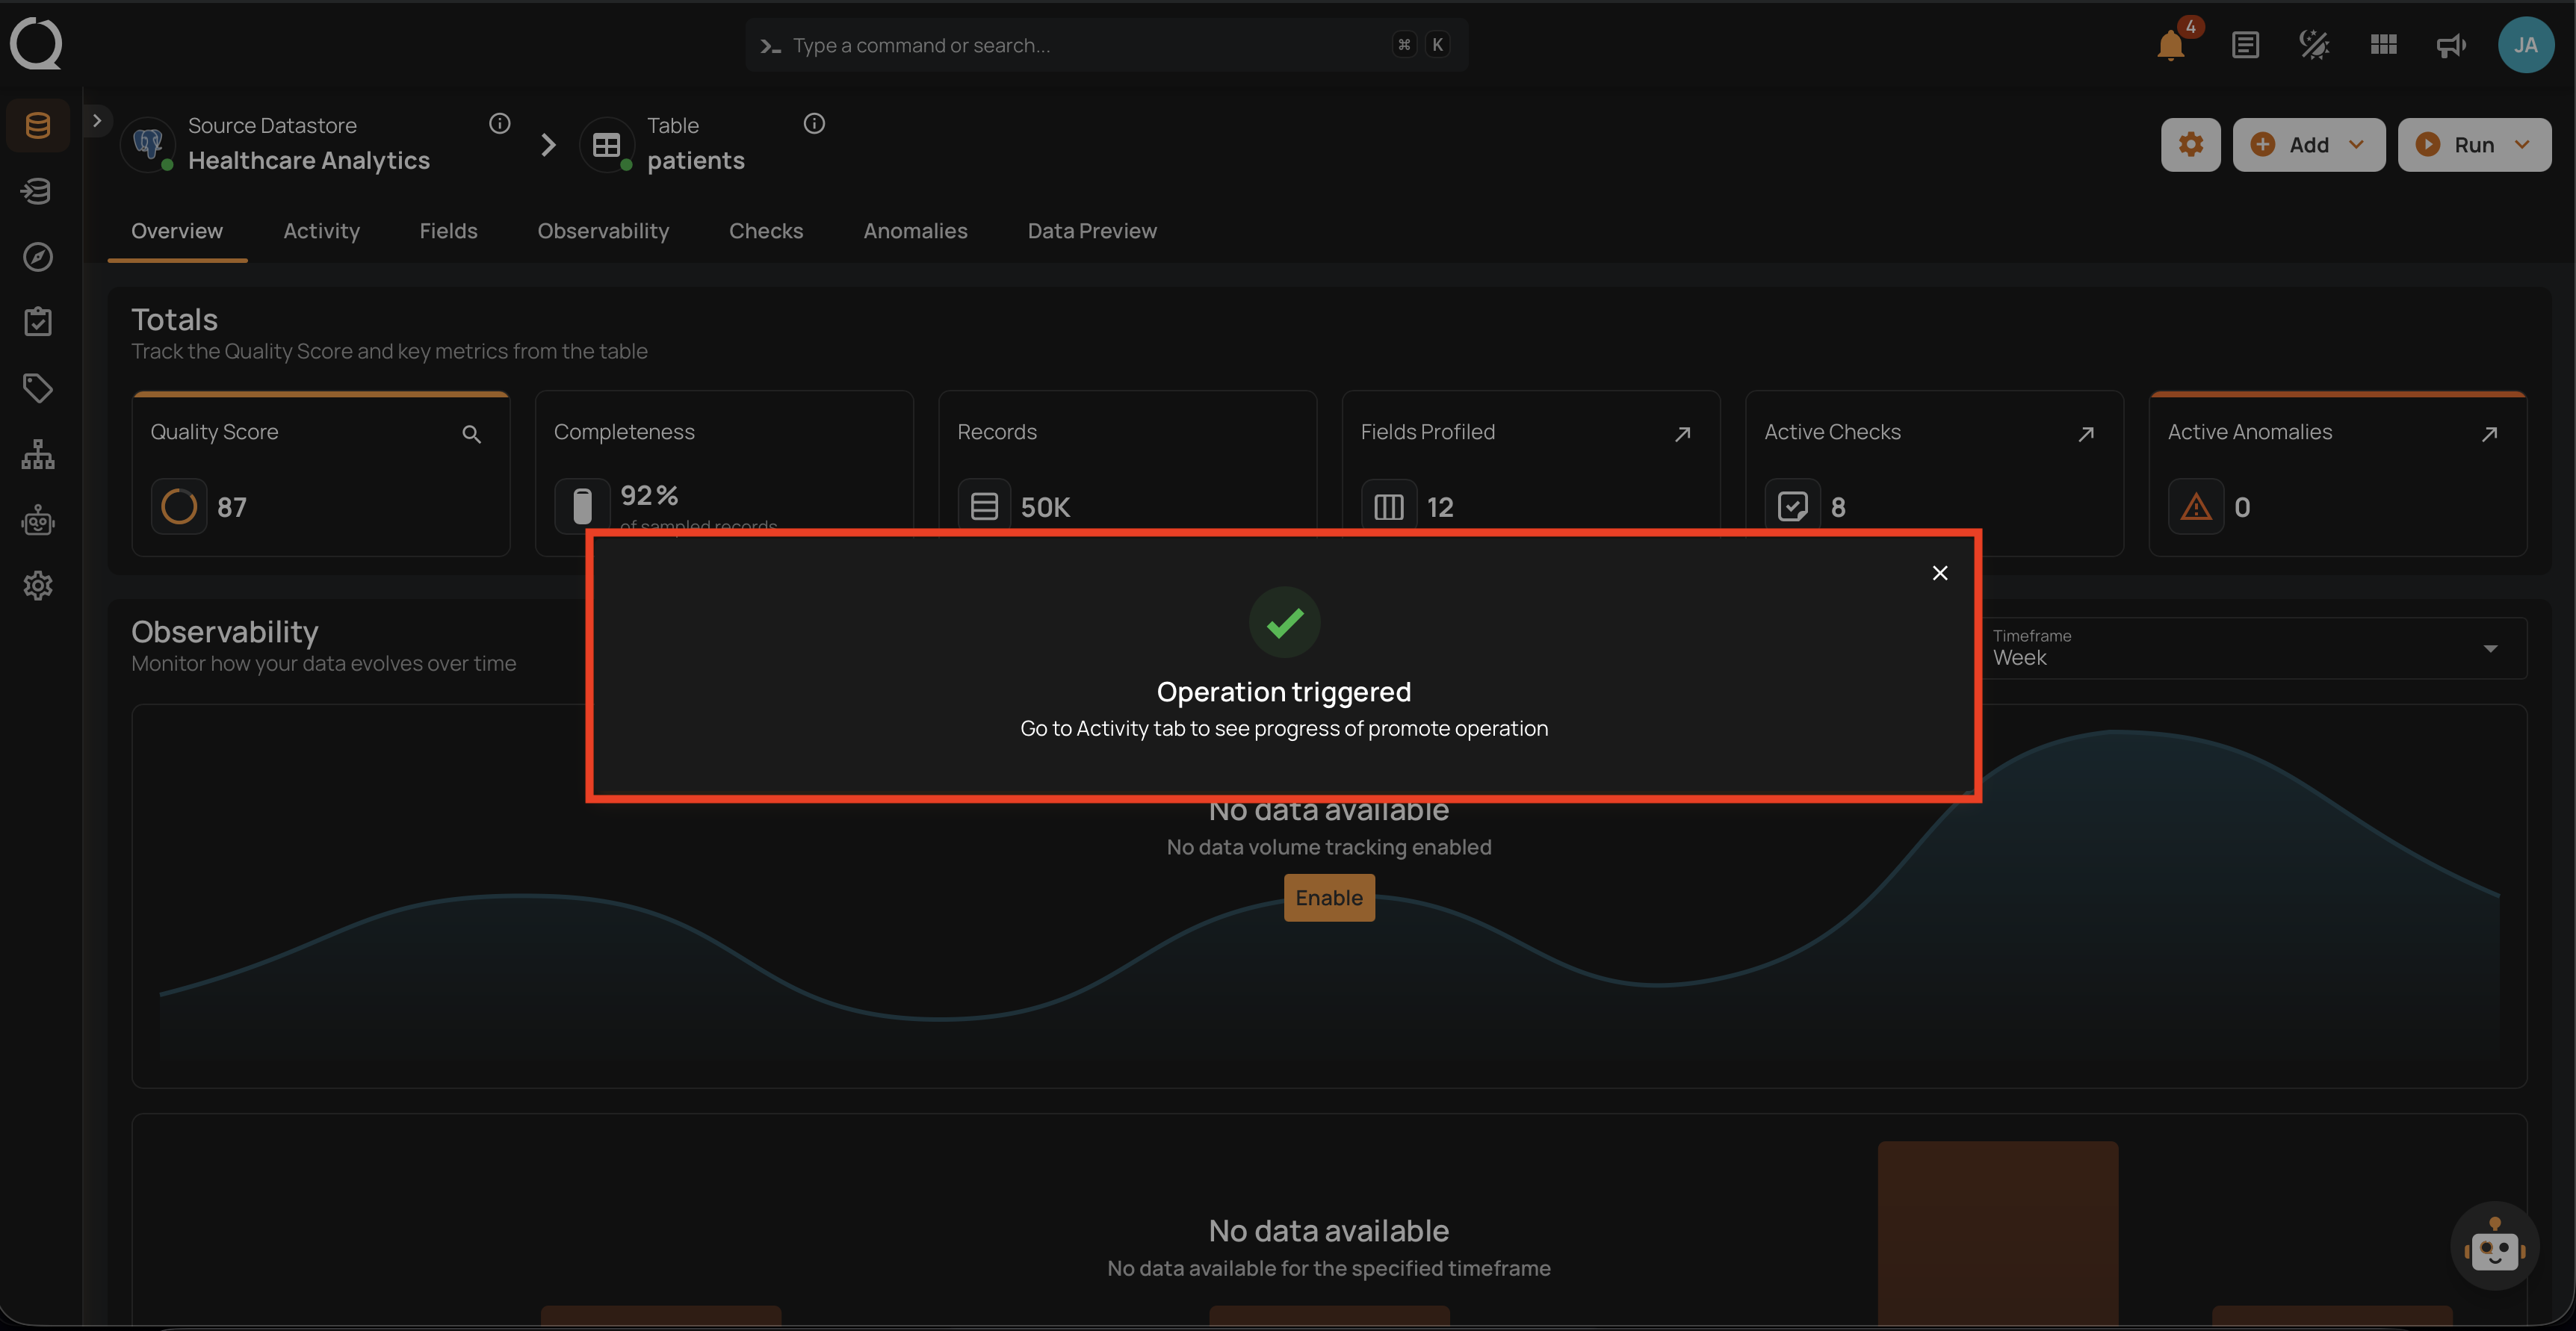
- The operation runs asynchronously. Monitor its progress from the Activity page.
- Review per-field results to verify each field's outcome — created, updated, skipped, or failed.
- The slim profile runs automatically — no manual action is needed to generate metadata for the promoted fields.
Slim profile failure marks all fields as failed
The slim profile is invoked during each computed field's iteration. If it fails for a given field, that field is marked as failed. For consistent failures (for example, the destination's partition column doesn't exist or the platform cannot read the destination), every field in the operation will hit the same error and end up failed. You can re-run the promotion once the underlying issue is resolved; the second attempt finds any entities that did succeed previously and updates them in place rather than creating duplicates.
Fields
Select Computed Fields
The first step of the modal — choose how to pick which computed fields to promote.
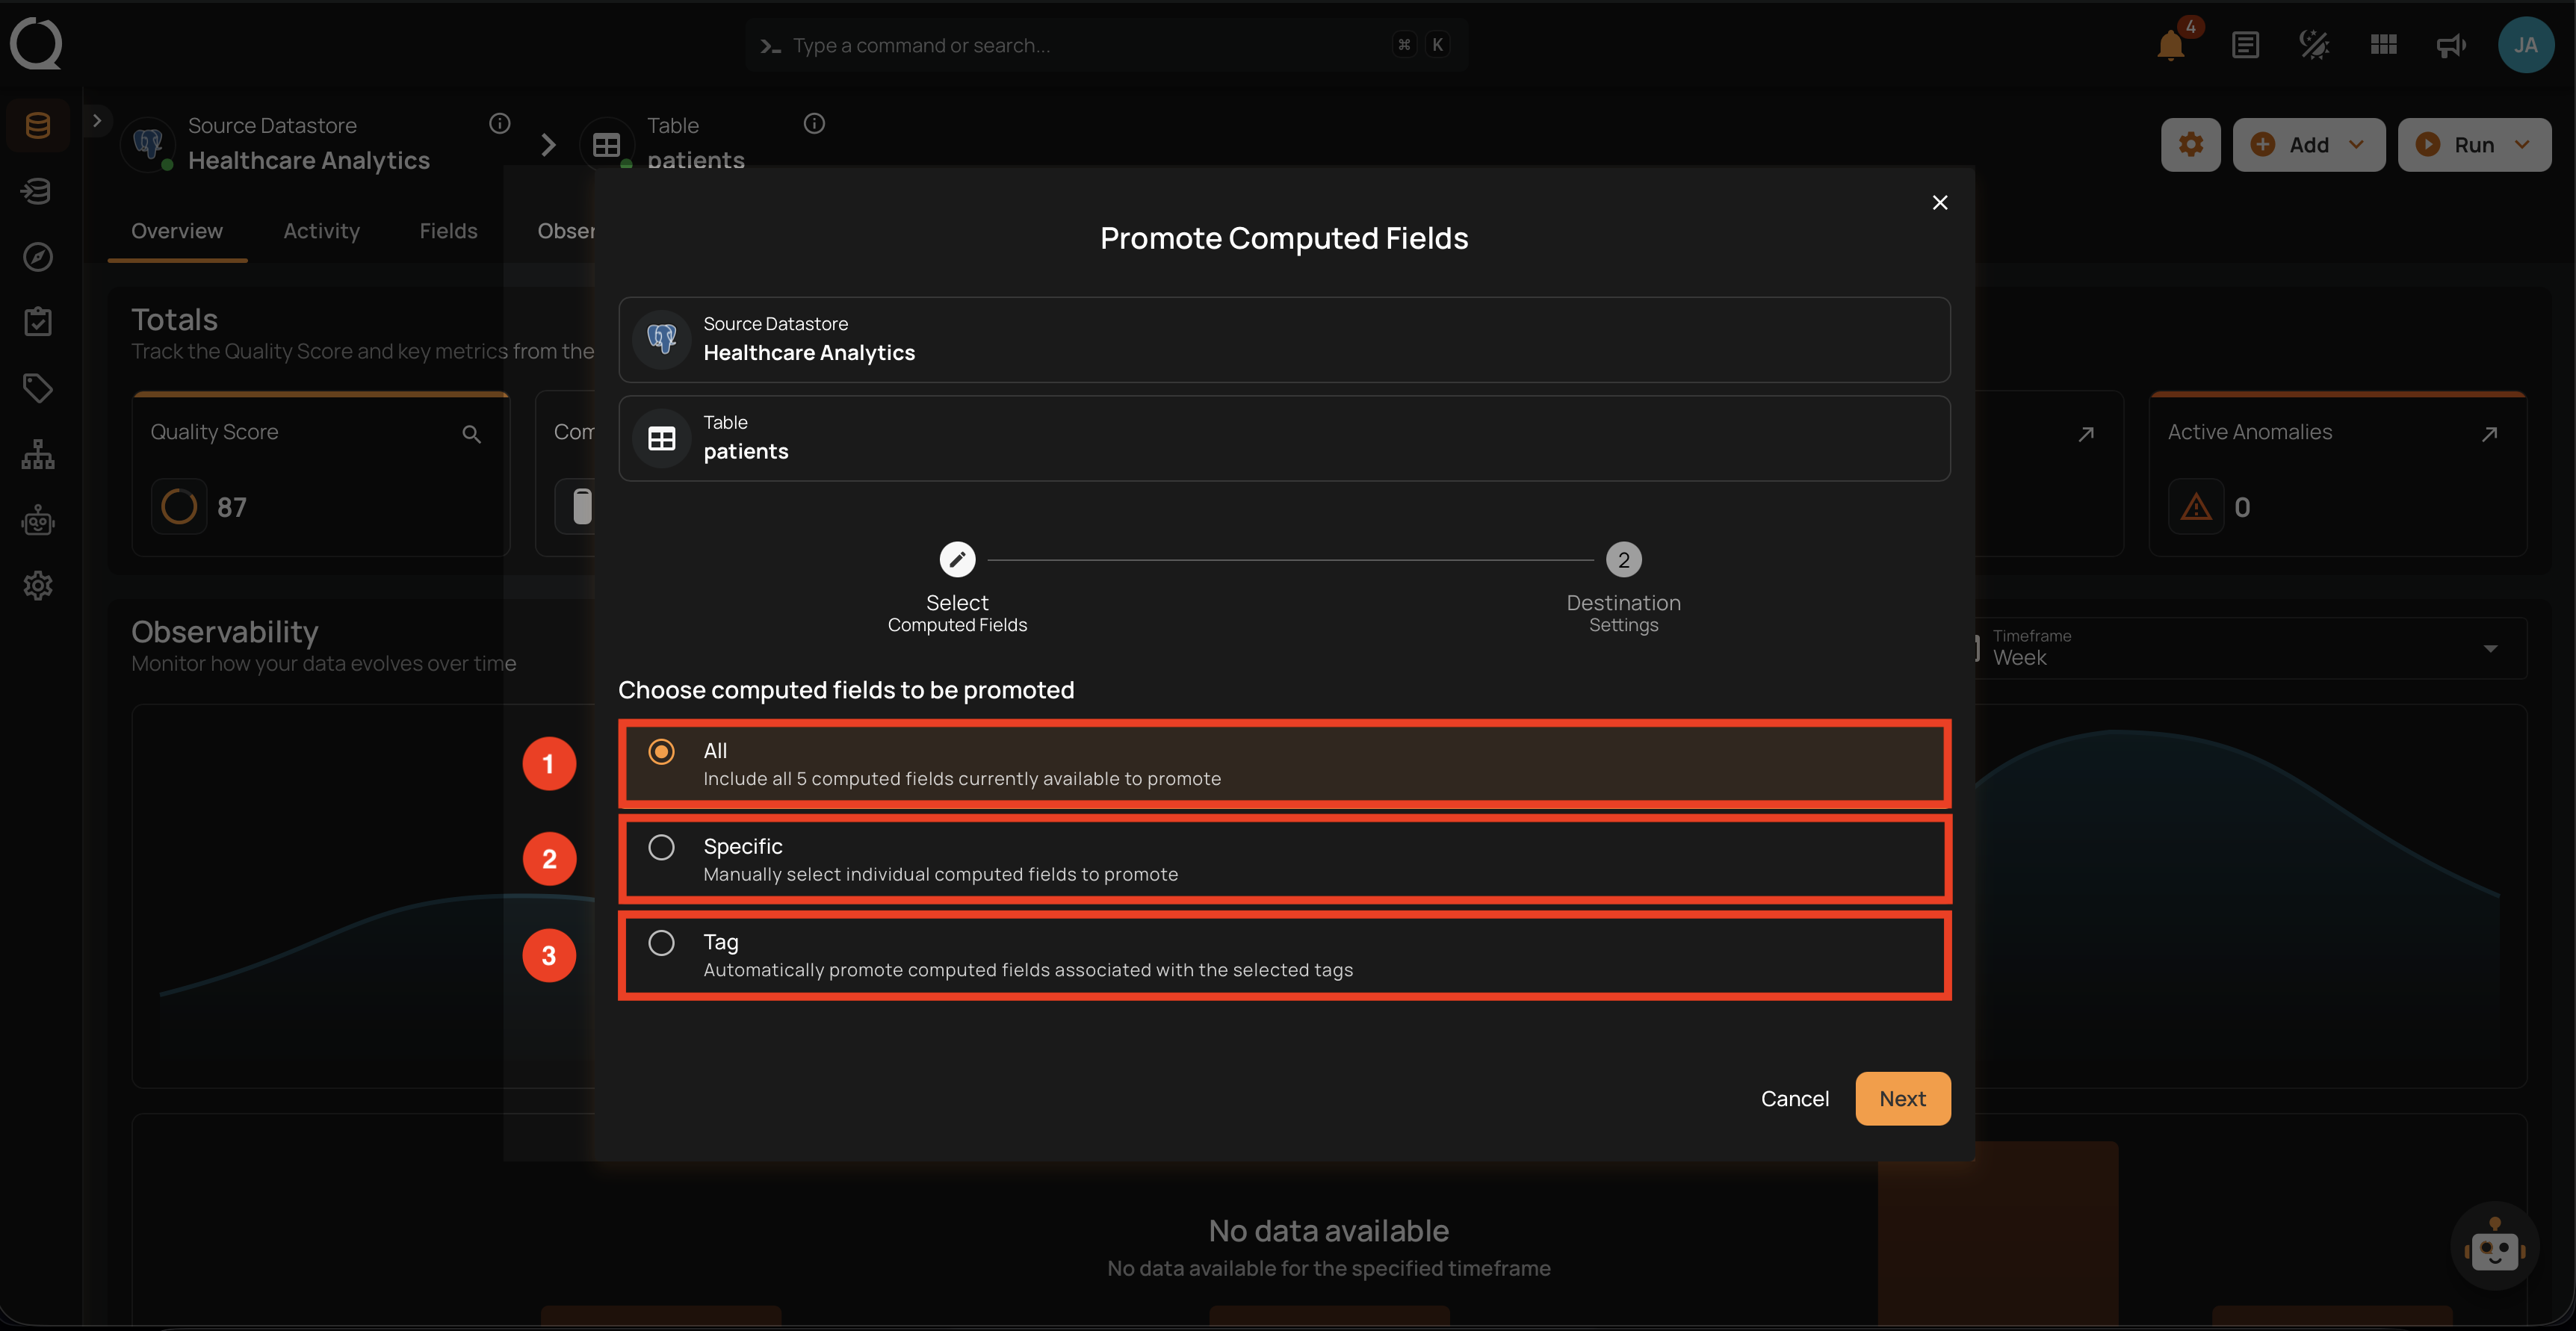
| REF. | FIELD | DESCRIPTION |
|---|---|---|
| 1 | All | Include every computed field on the source container. The total count is displayed. |
| 2 | Specific | Hand-pick individual computed fields from a paginated list. Use the search field to filter by name; rows show type, ID, name, transformation, and source field count. |
| 3 | Tag | Include every computed field associated with one or more selected tags. |
Destination Setup
The second step of the modal — configure where the selected computed fields should be promoted to.
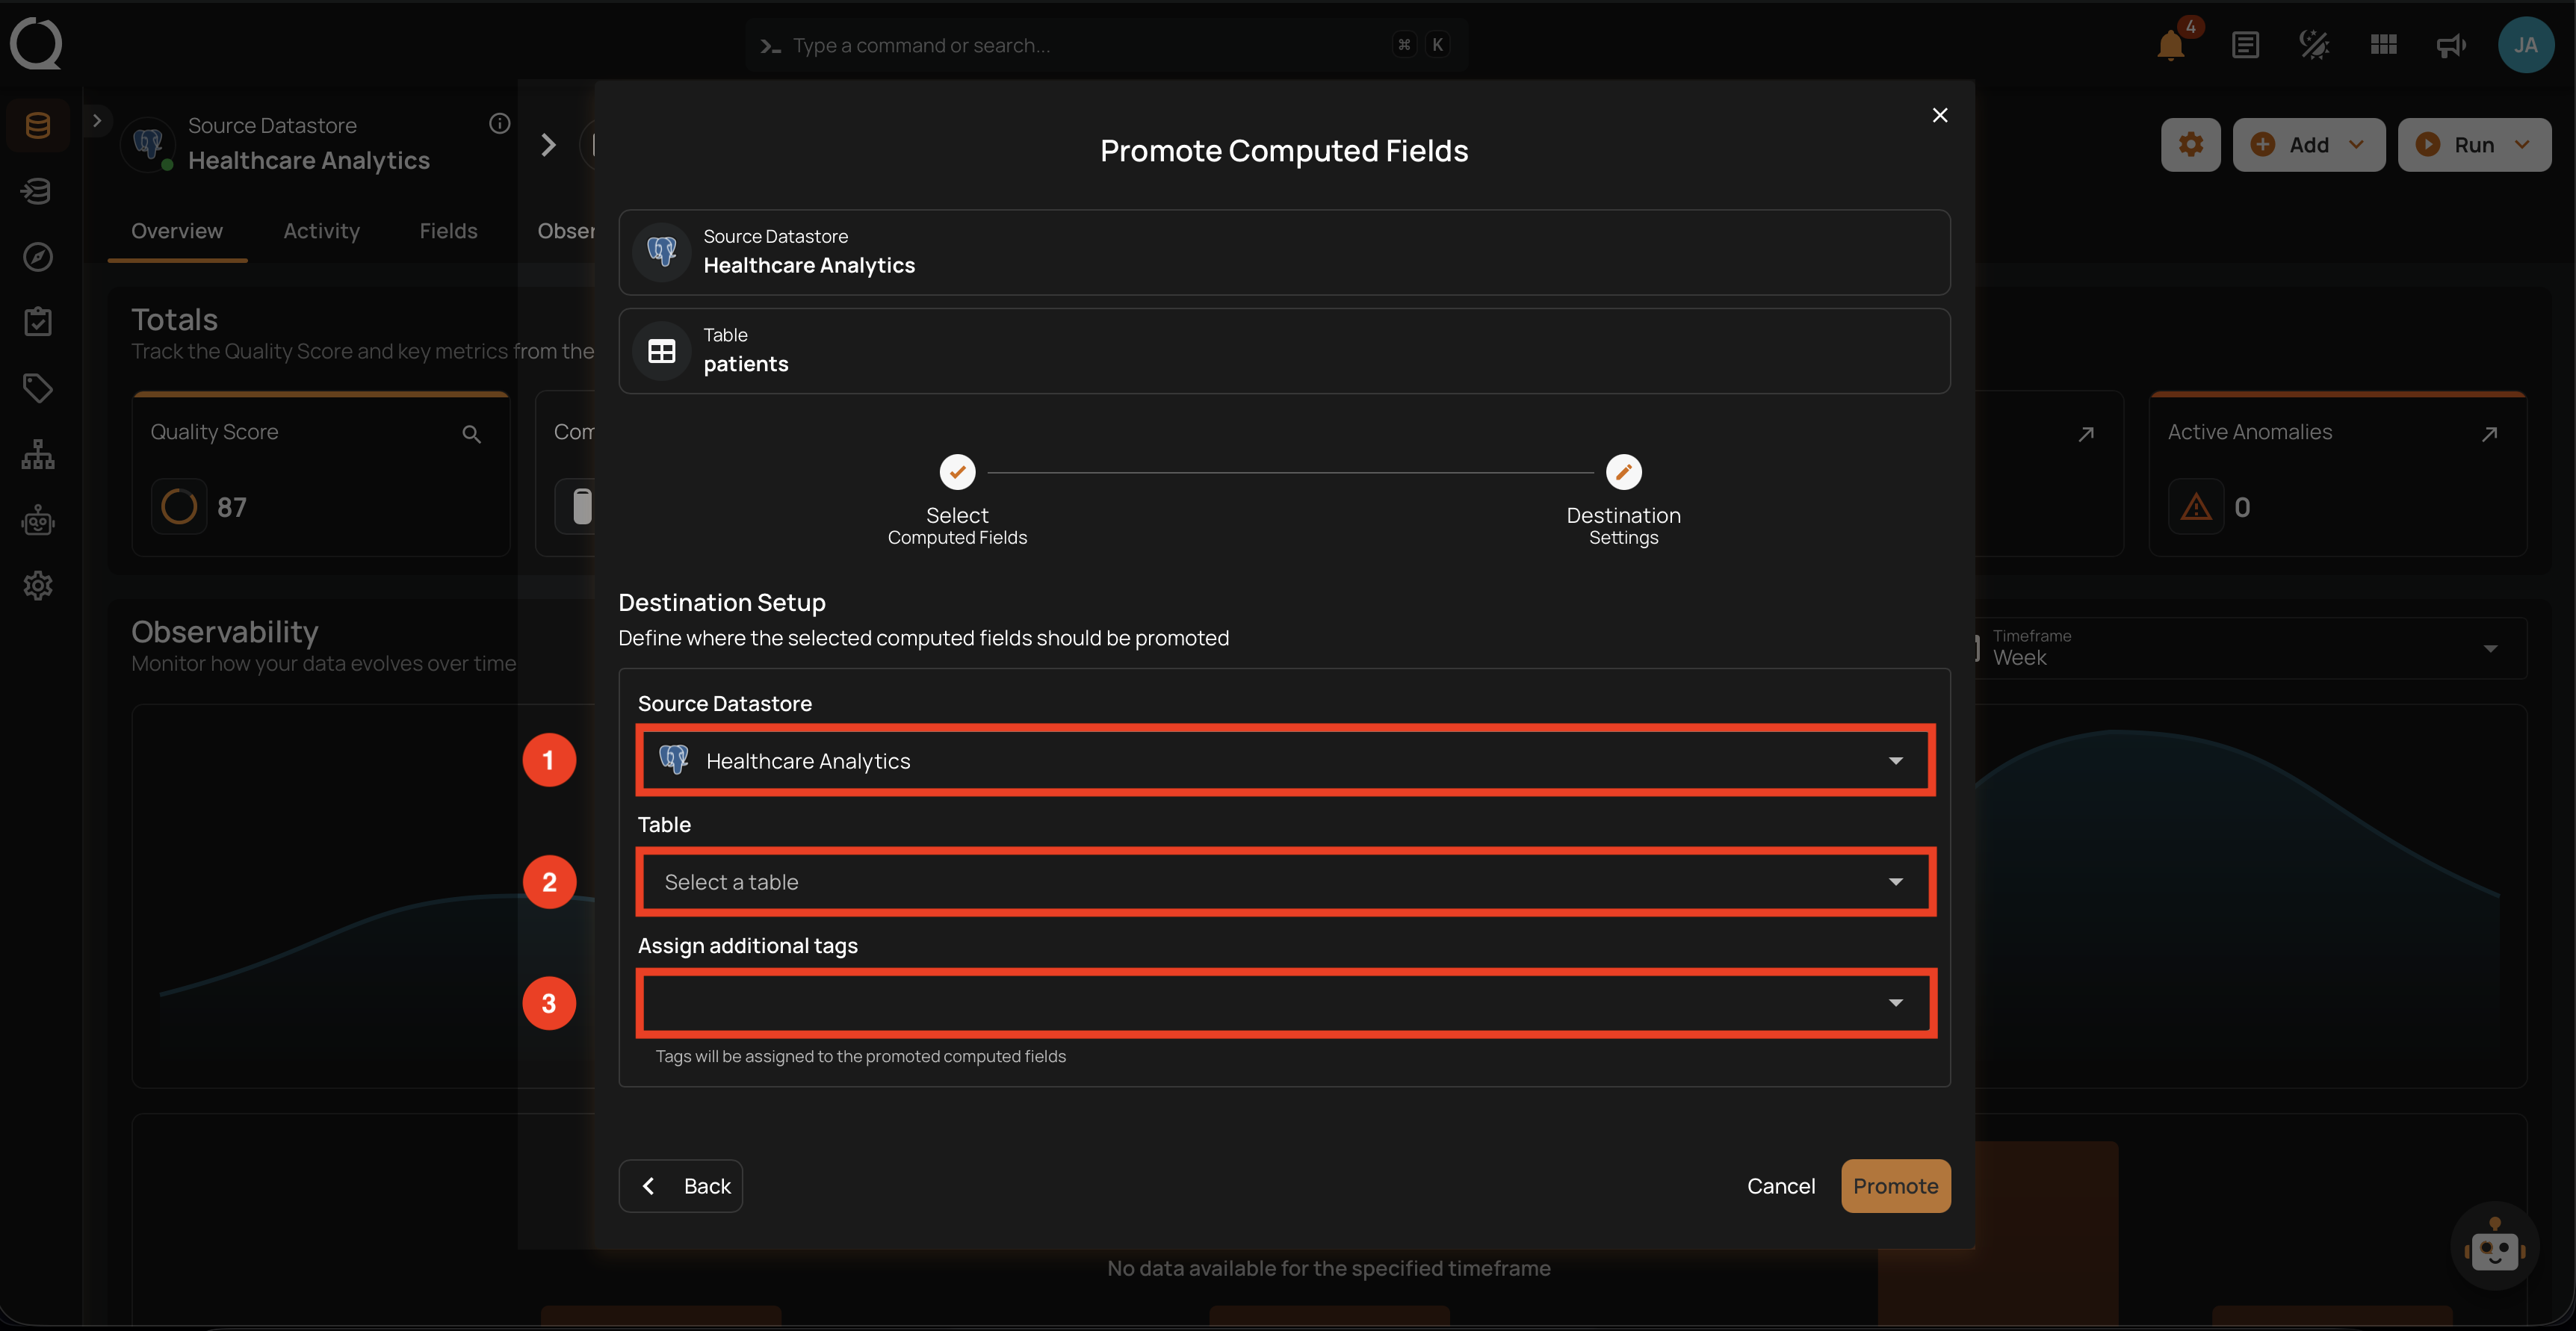
| REF. | FIELD | DESCRIPTION |
|---|---|---|
| 1 | Destination Datastore | The datastore where the promoted computed fields will land. Any datastore in your deployment is available. |
| 2 | Table | The destination container (table) within the selected datastore. Use the search field to filter by name. |
| 3 | Assign additional tags | Optional tags applied to the promoted computed fields at the destination. Source field tags are not inherited — only the tags listed here are applied. |
Steps
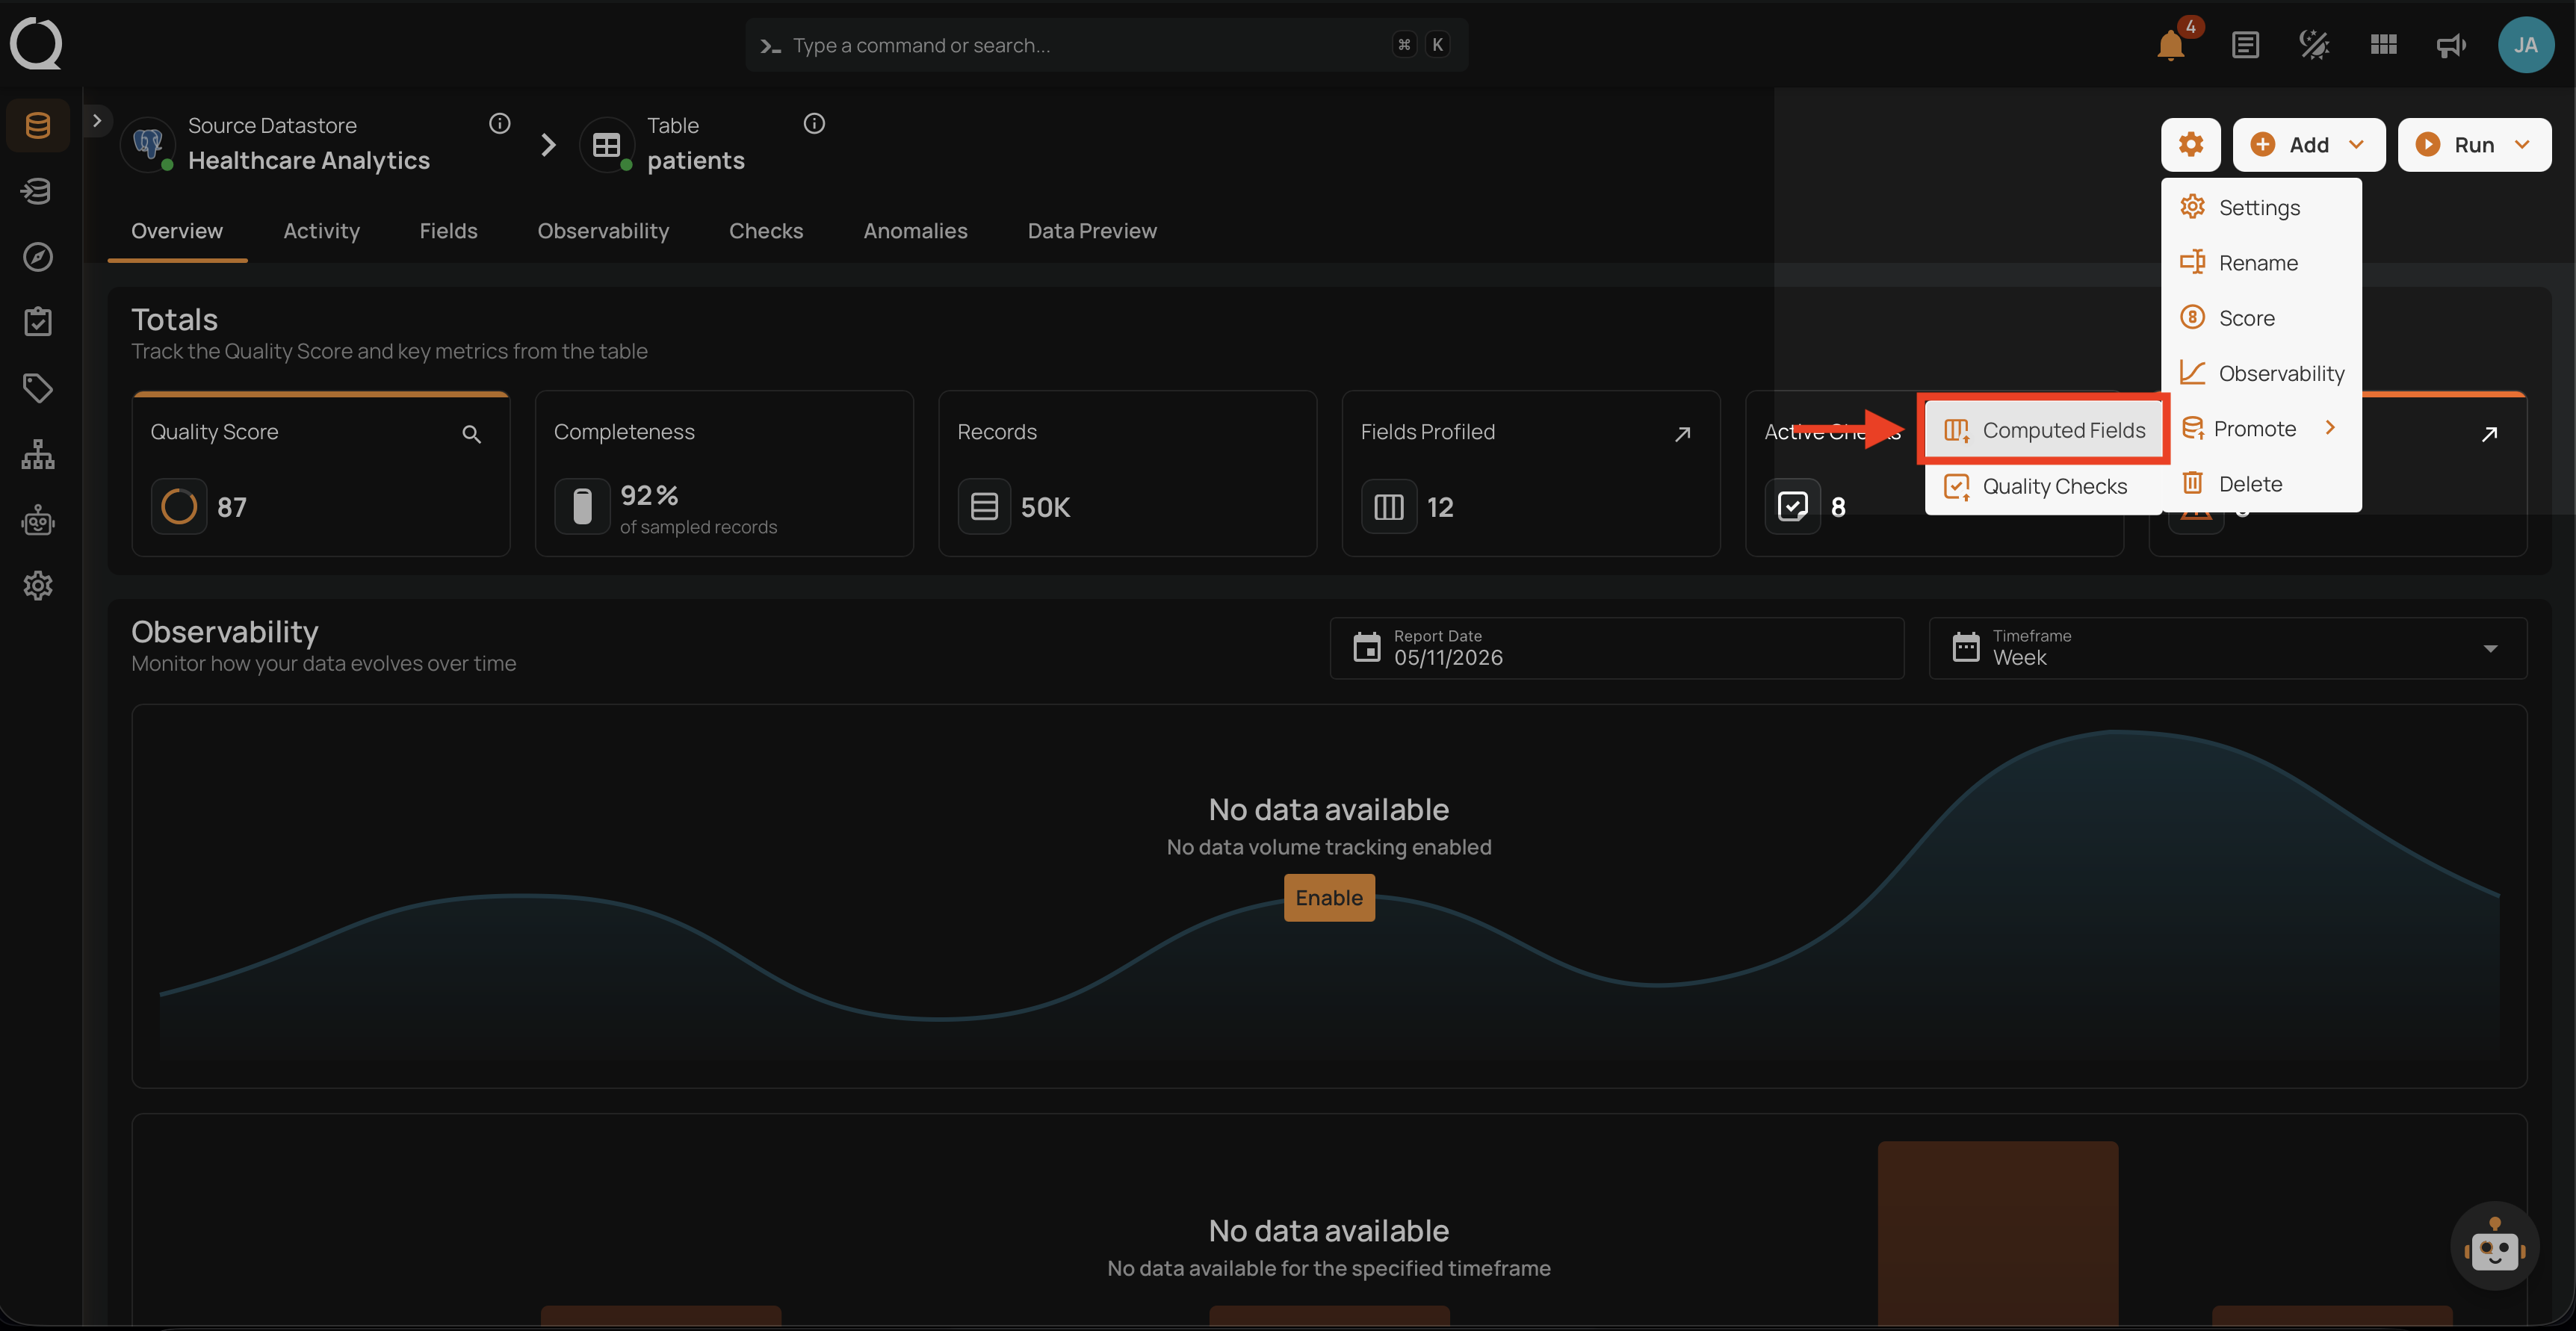
Step 1: Open the source container overview and click the Settings gear icon in the top-right corner.

Step 2: The settings menu opens, listing the available actions for the container.
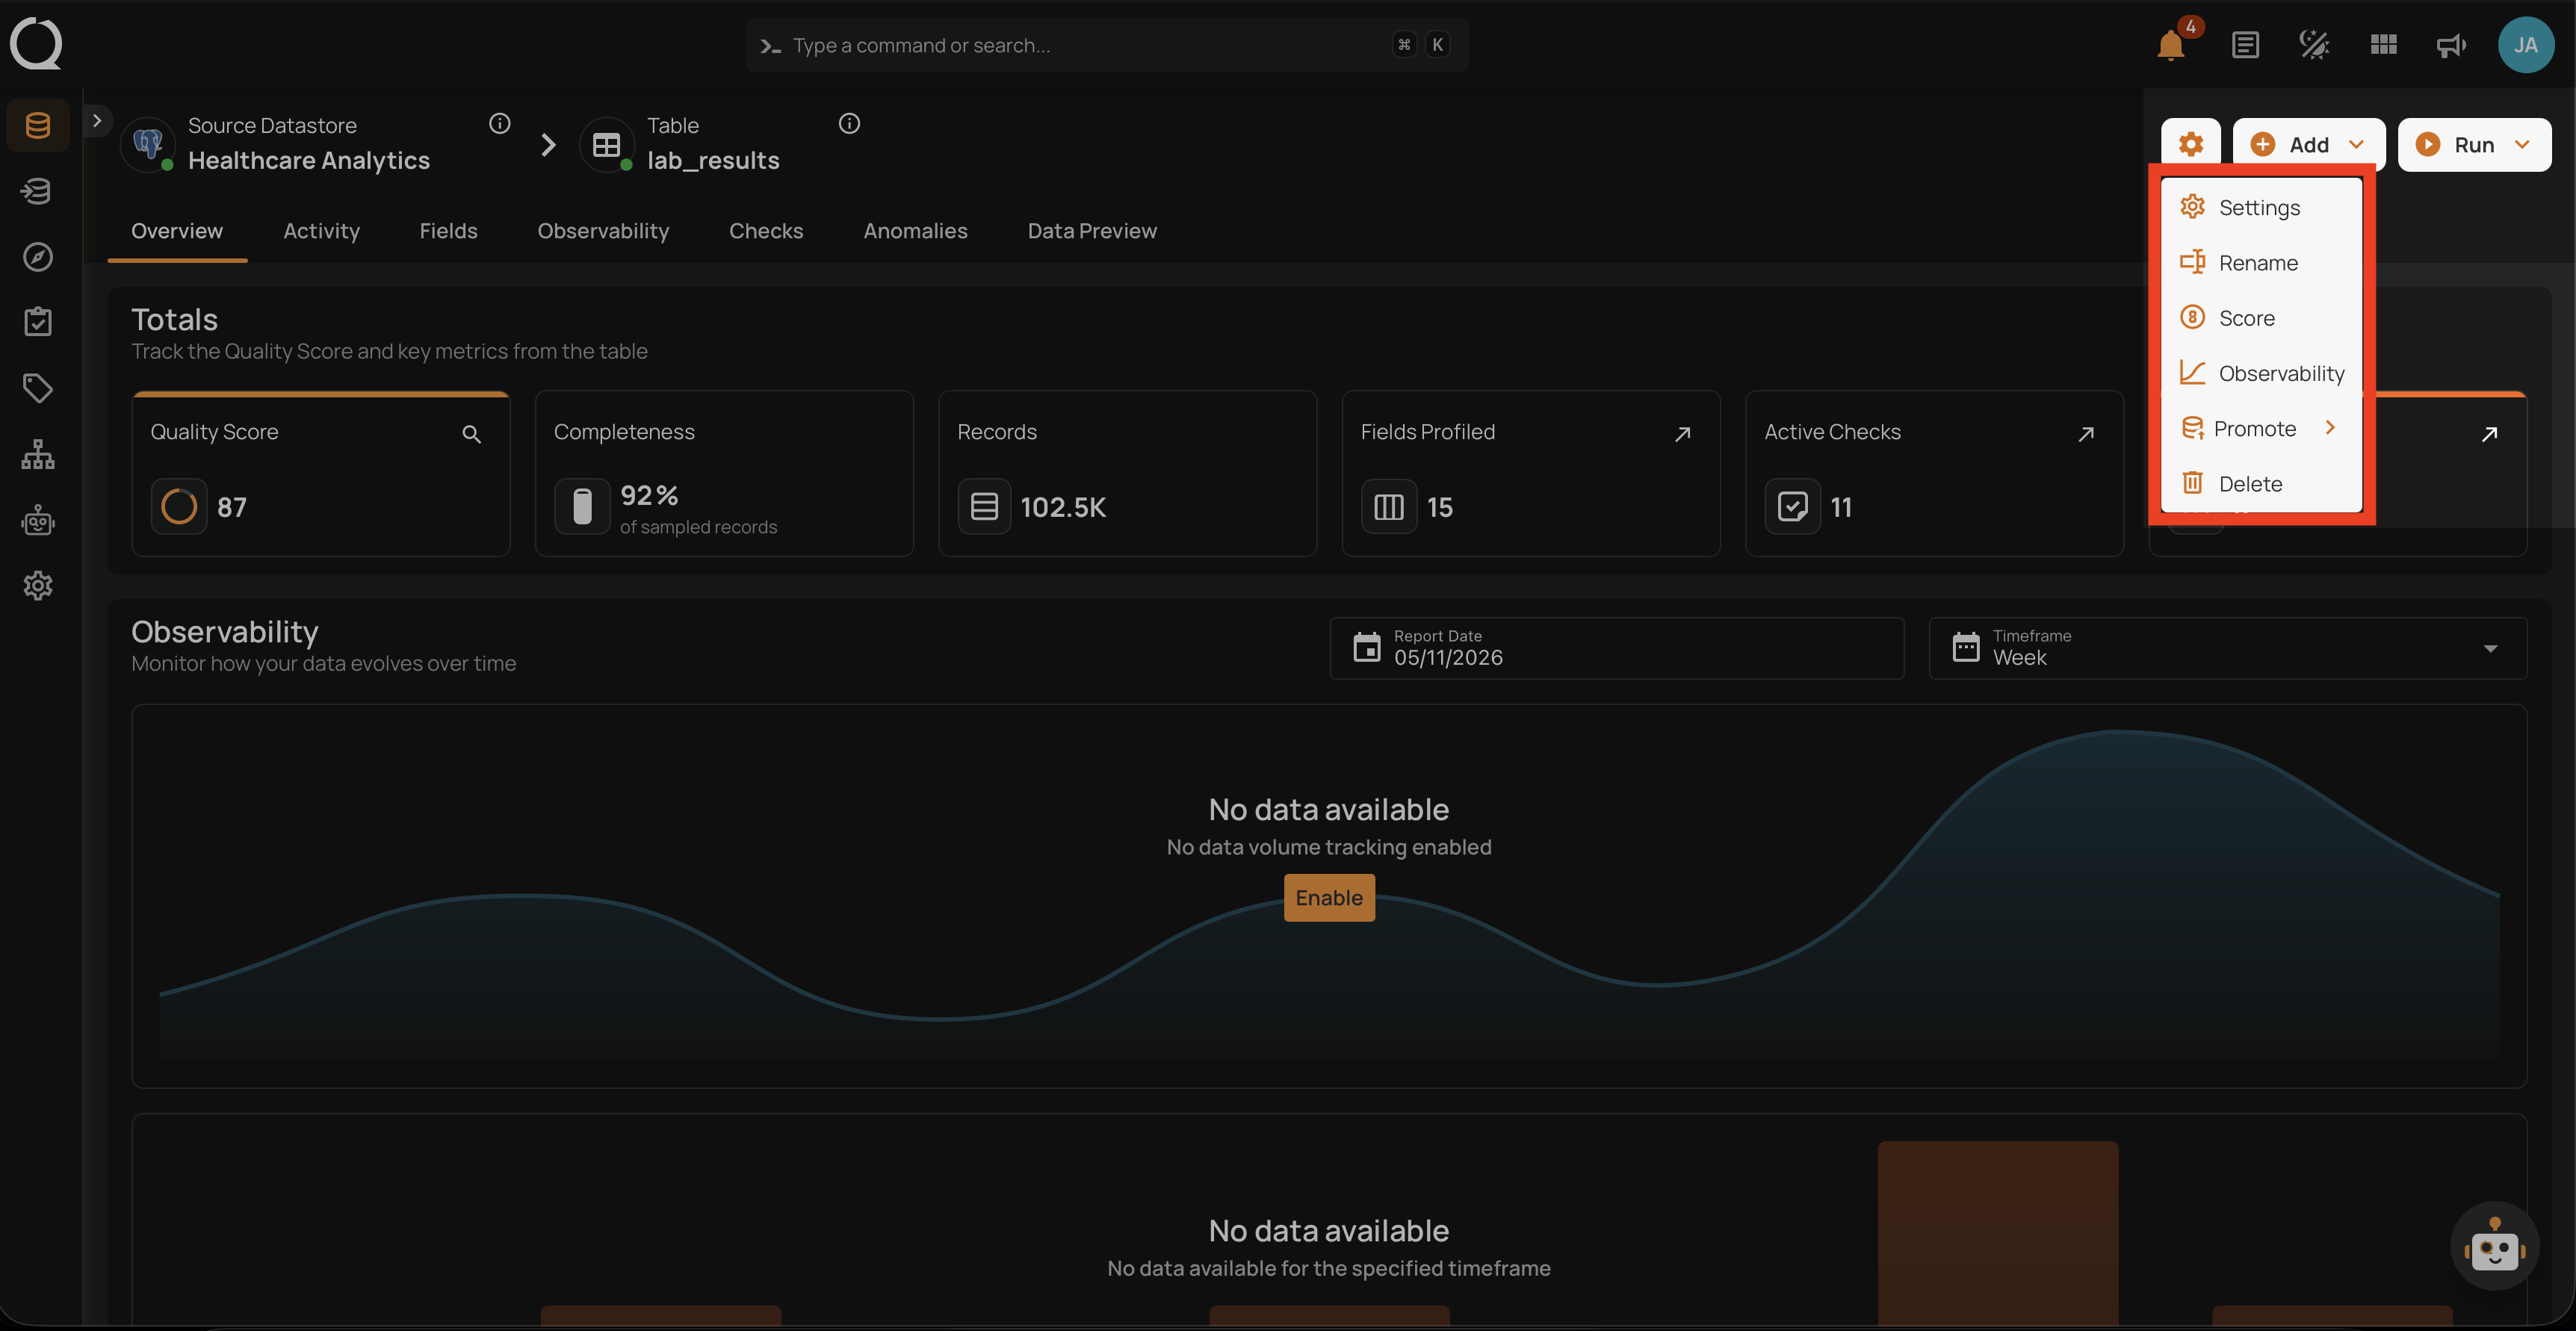
Step 3: Click Promote to reveal the submenu.
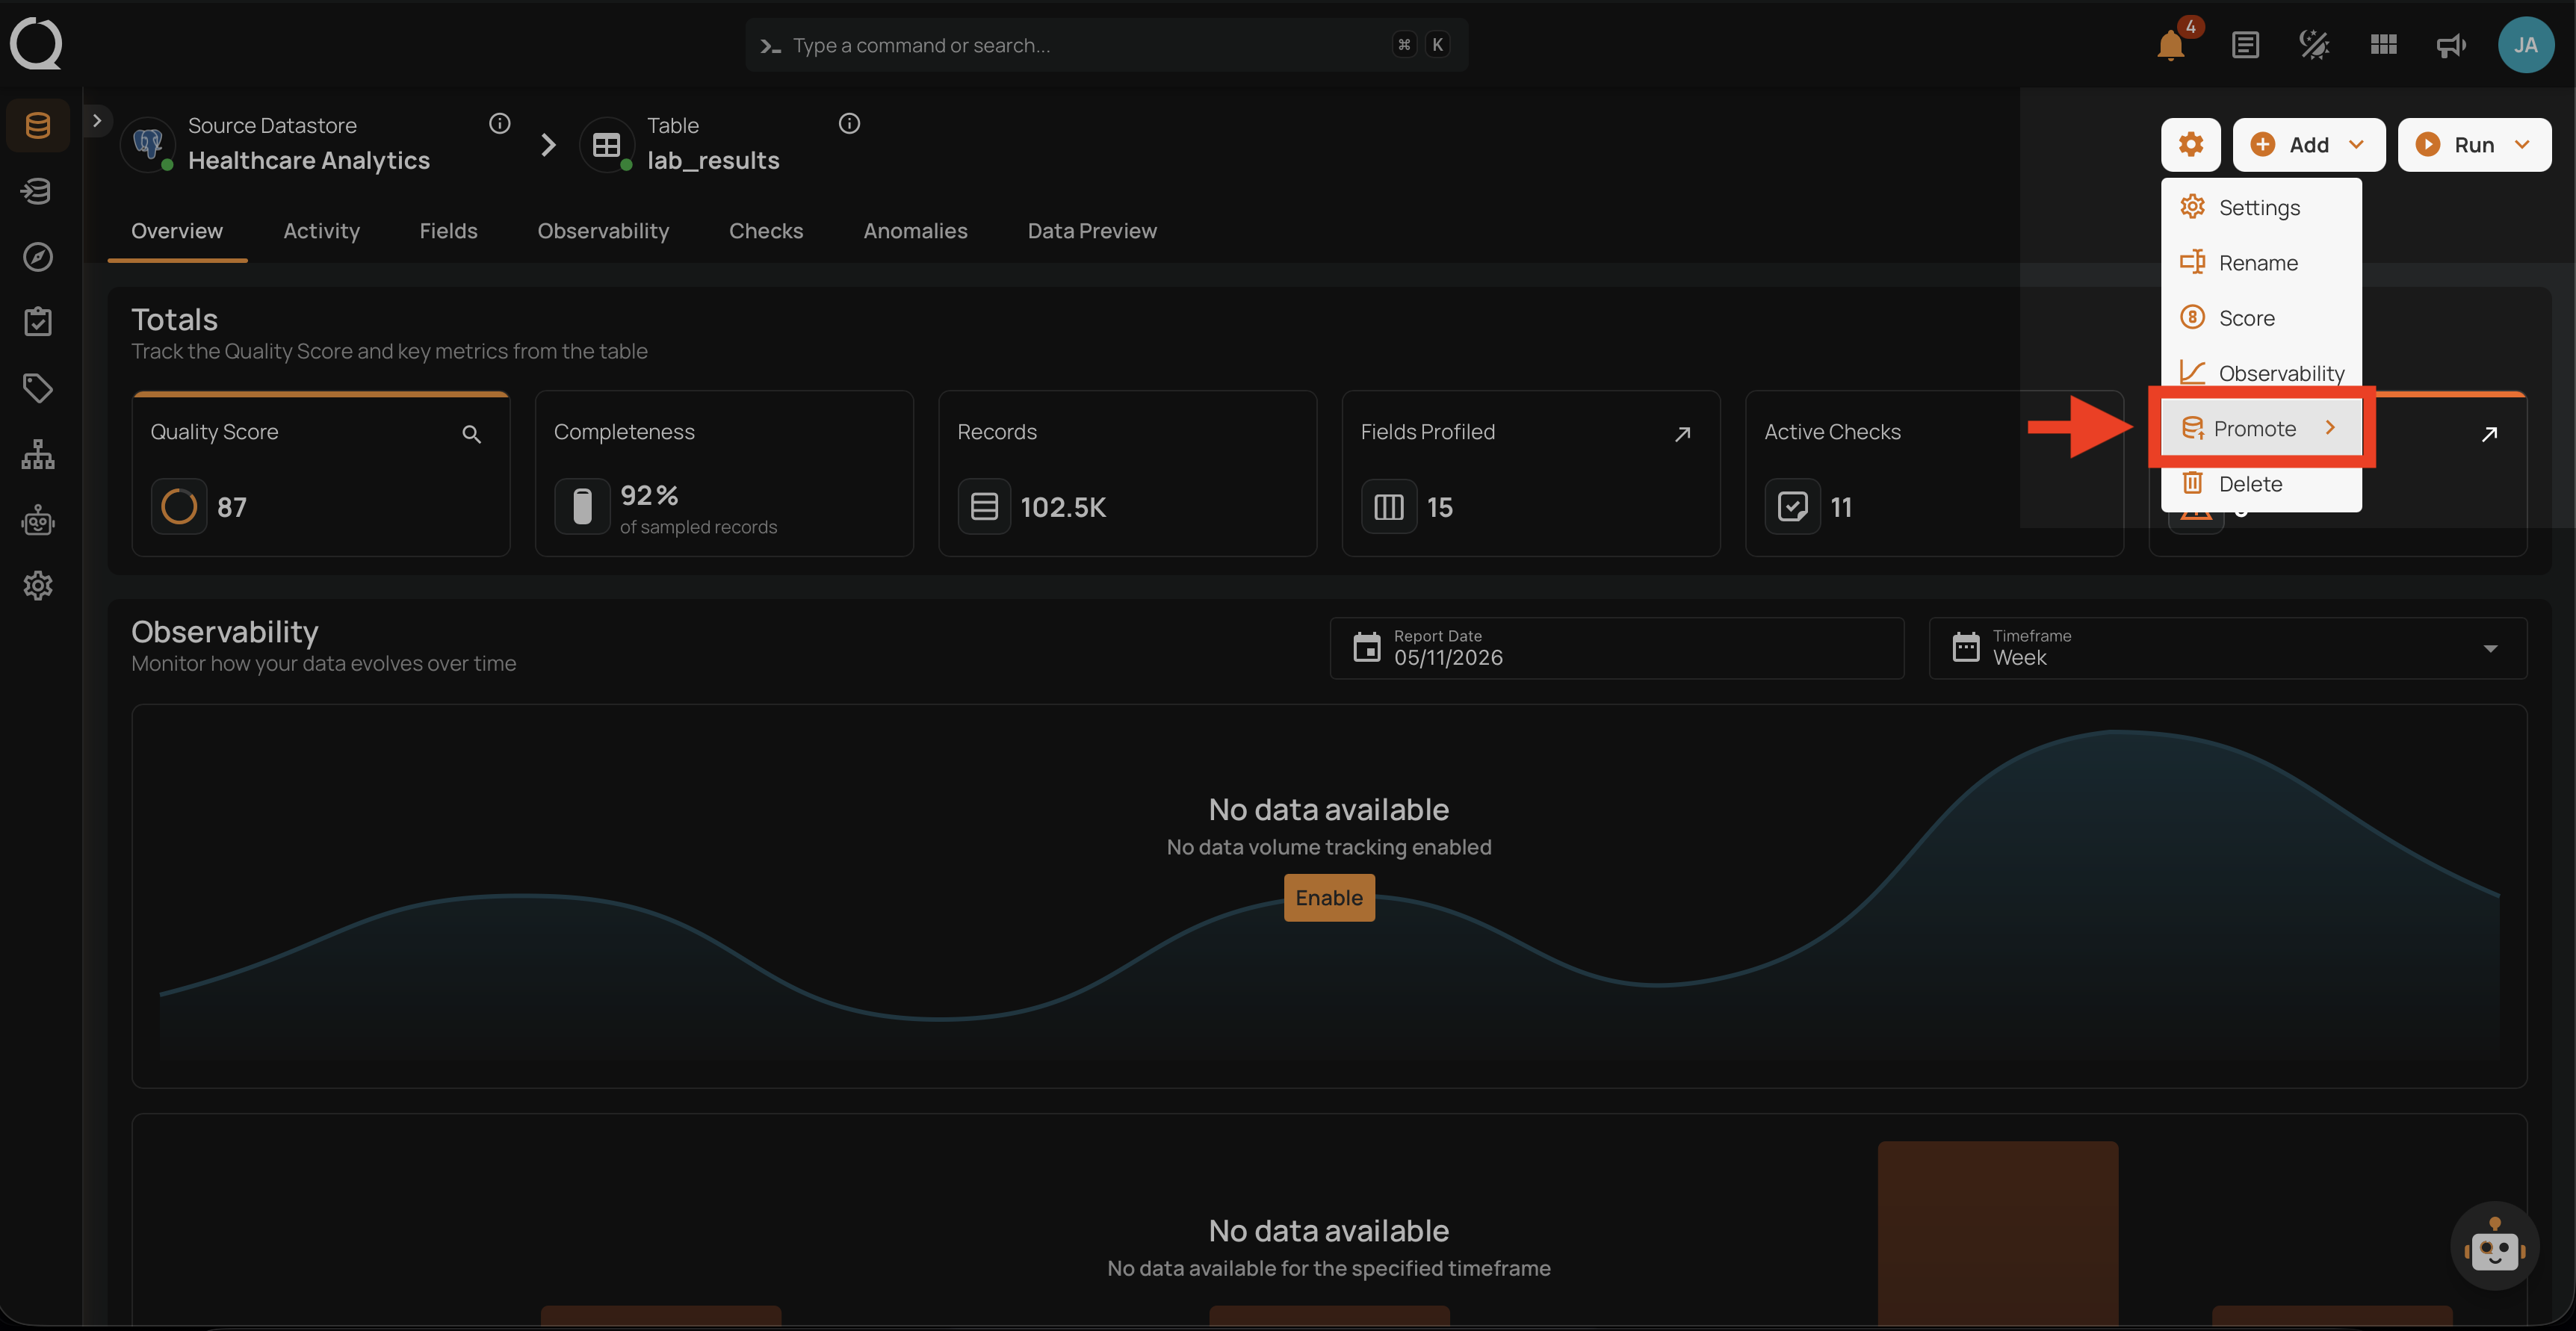
Step 4: The Promote submenu opens, showing the entity types available for promotion.
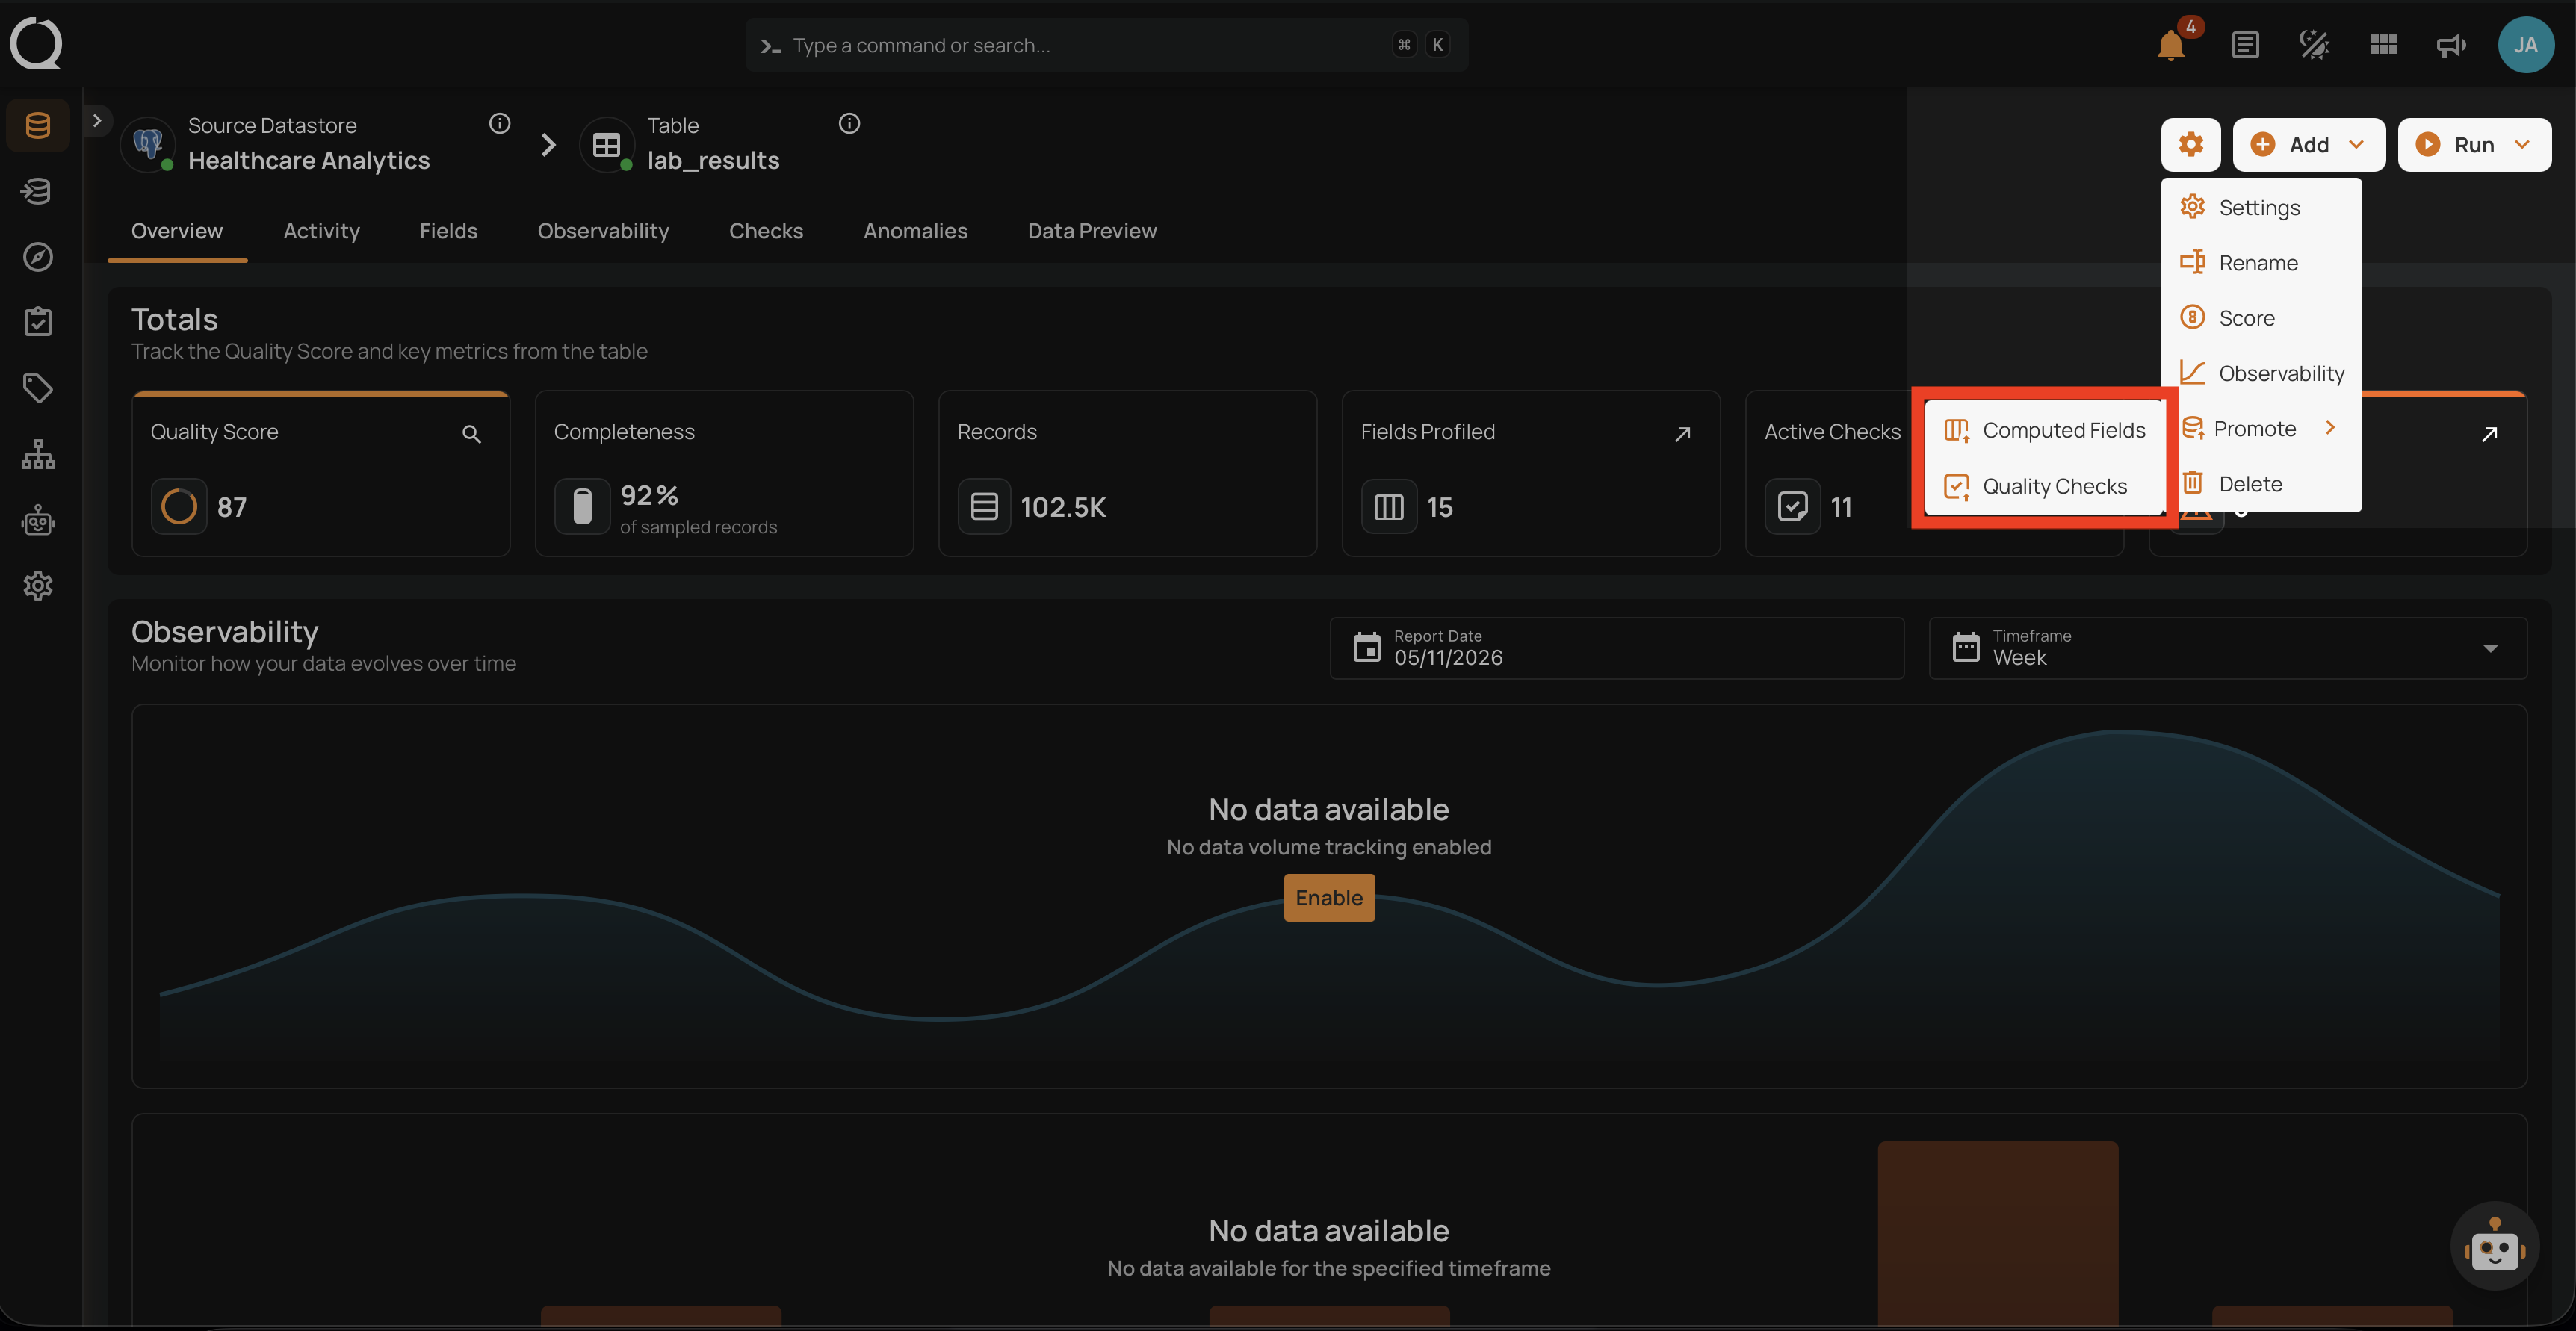
Step 5: Click Computed Fields to open the promotion modal.
Step 6: The Promote Computed Fields modal opens at the Select Computed Fields step.
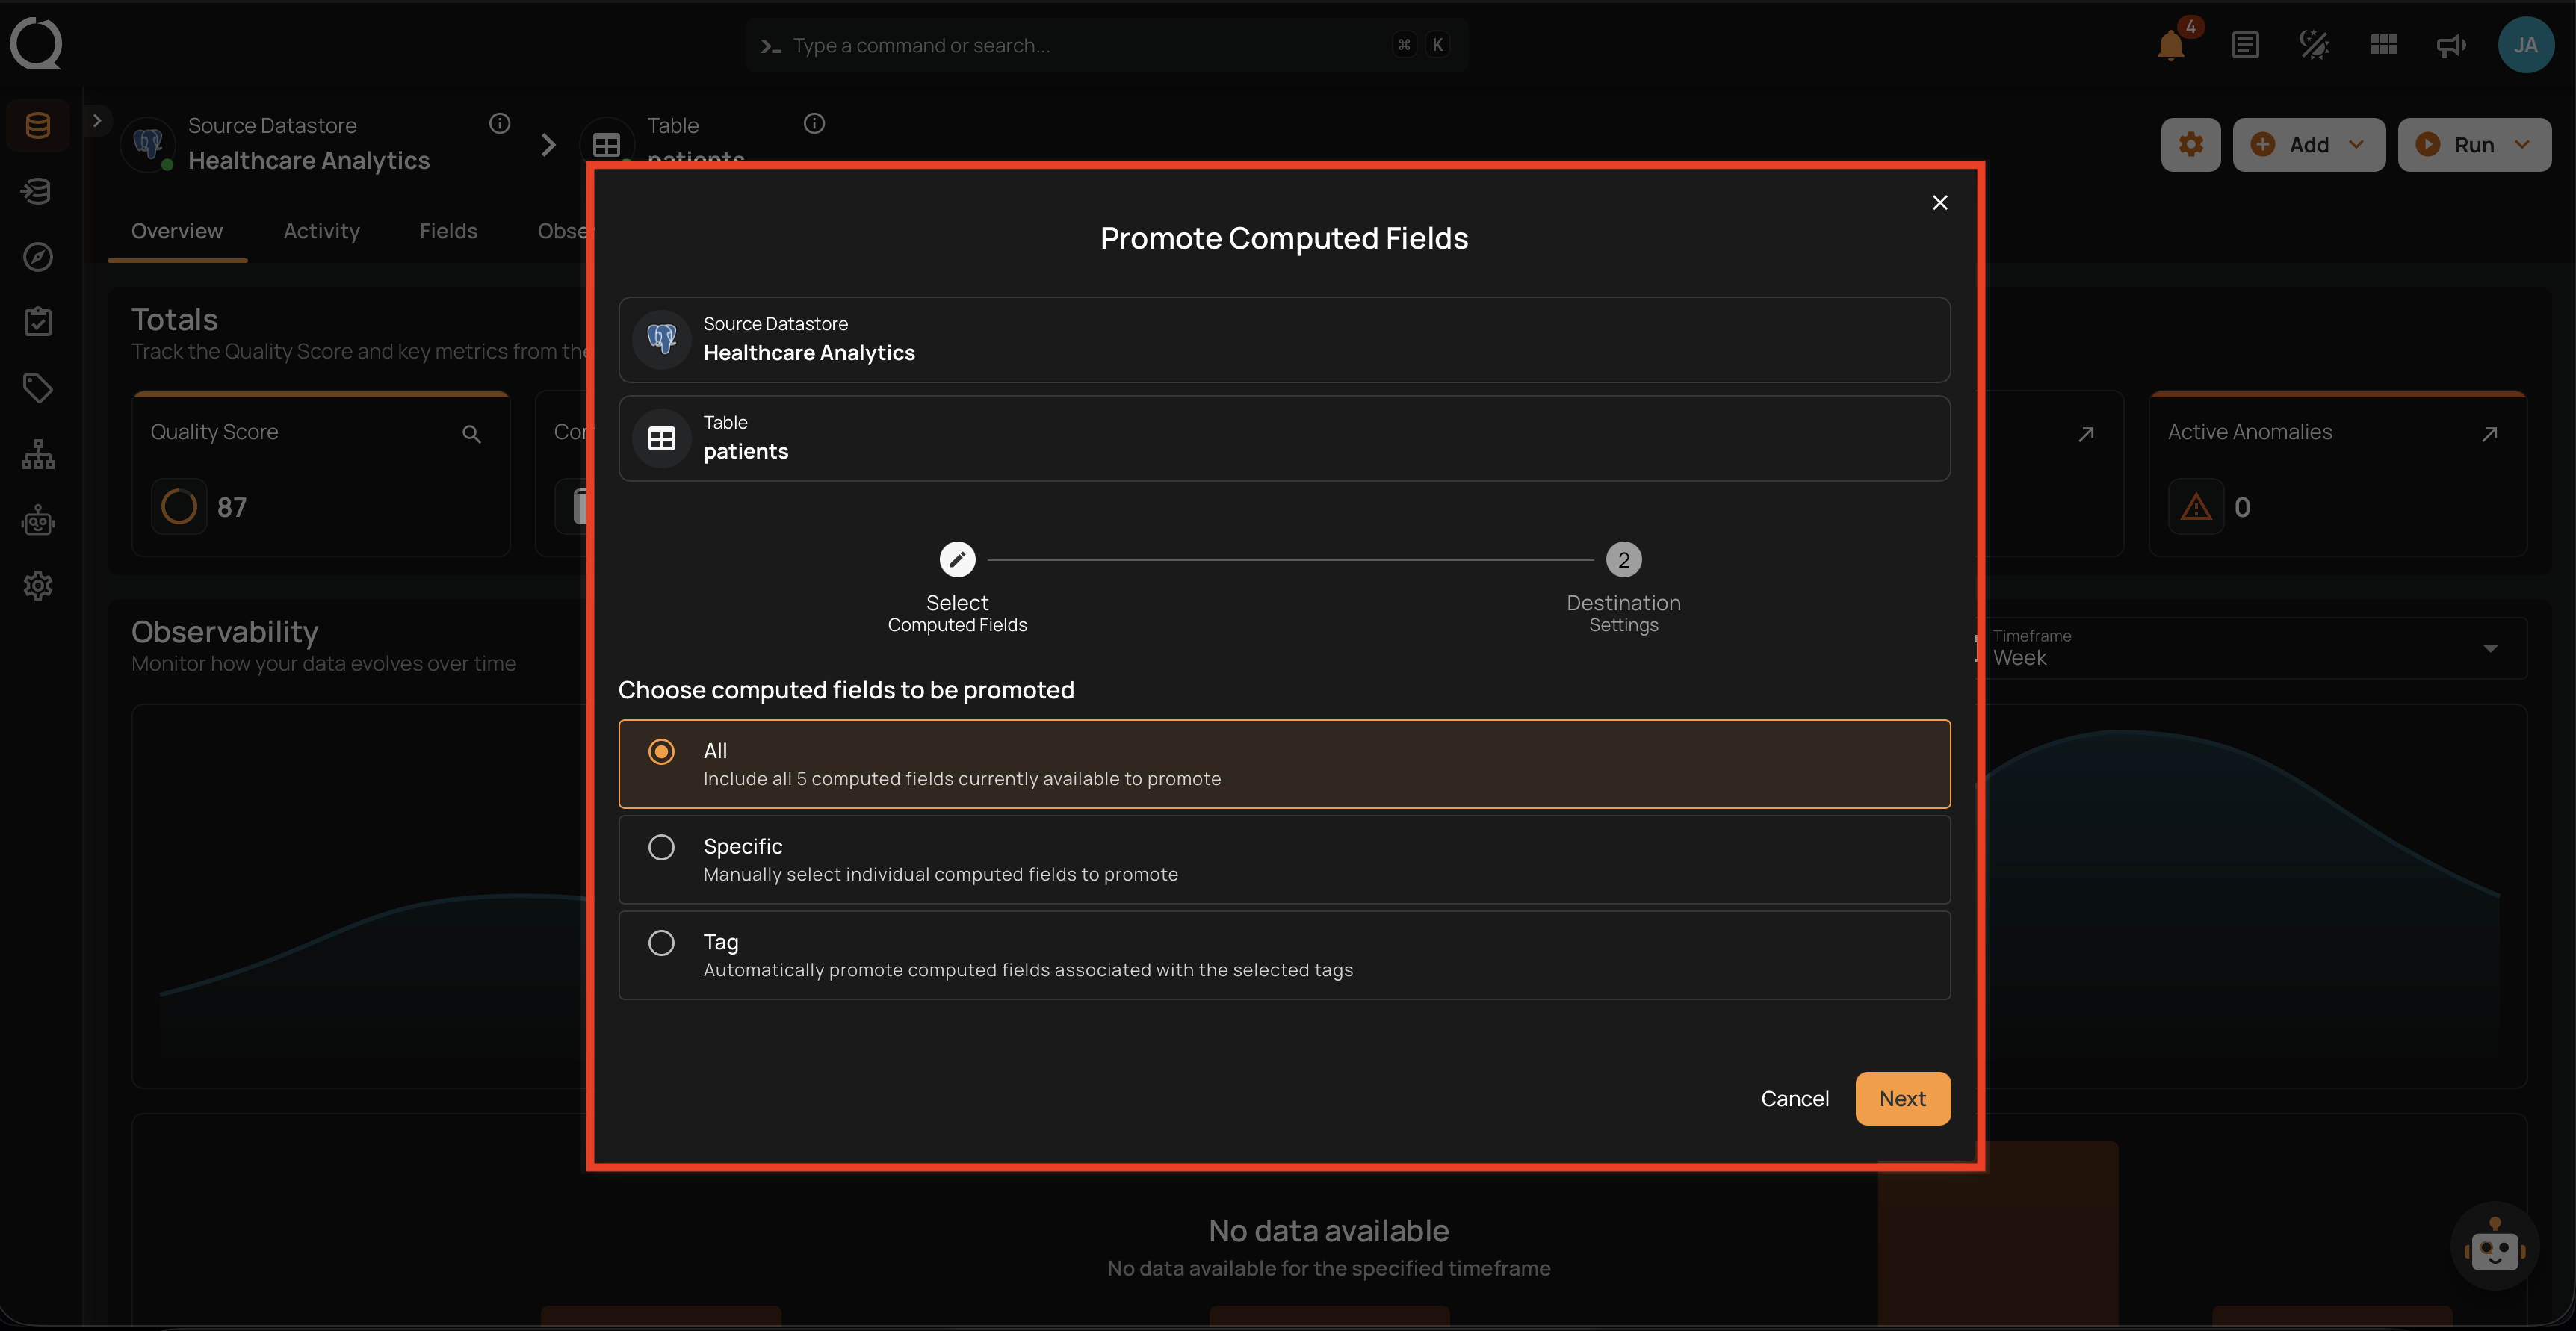
Step 7: Choose All, Specific, or Tag (see Select Computed Fields for the field reference), then click Next to proceed.

Step 8: The second stage of the form opens — the Destination Settings step.
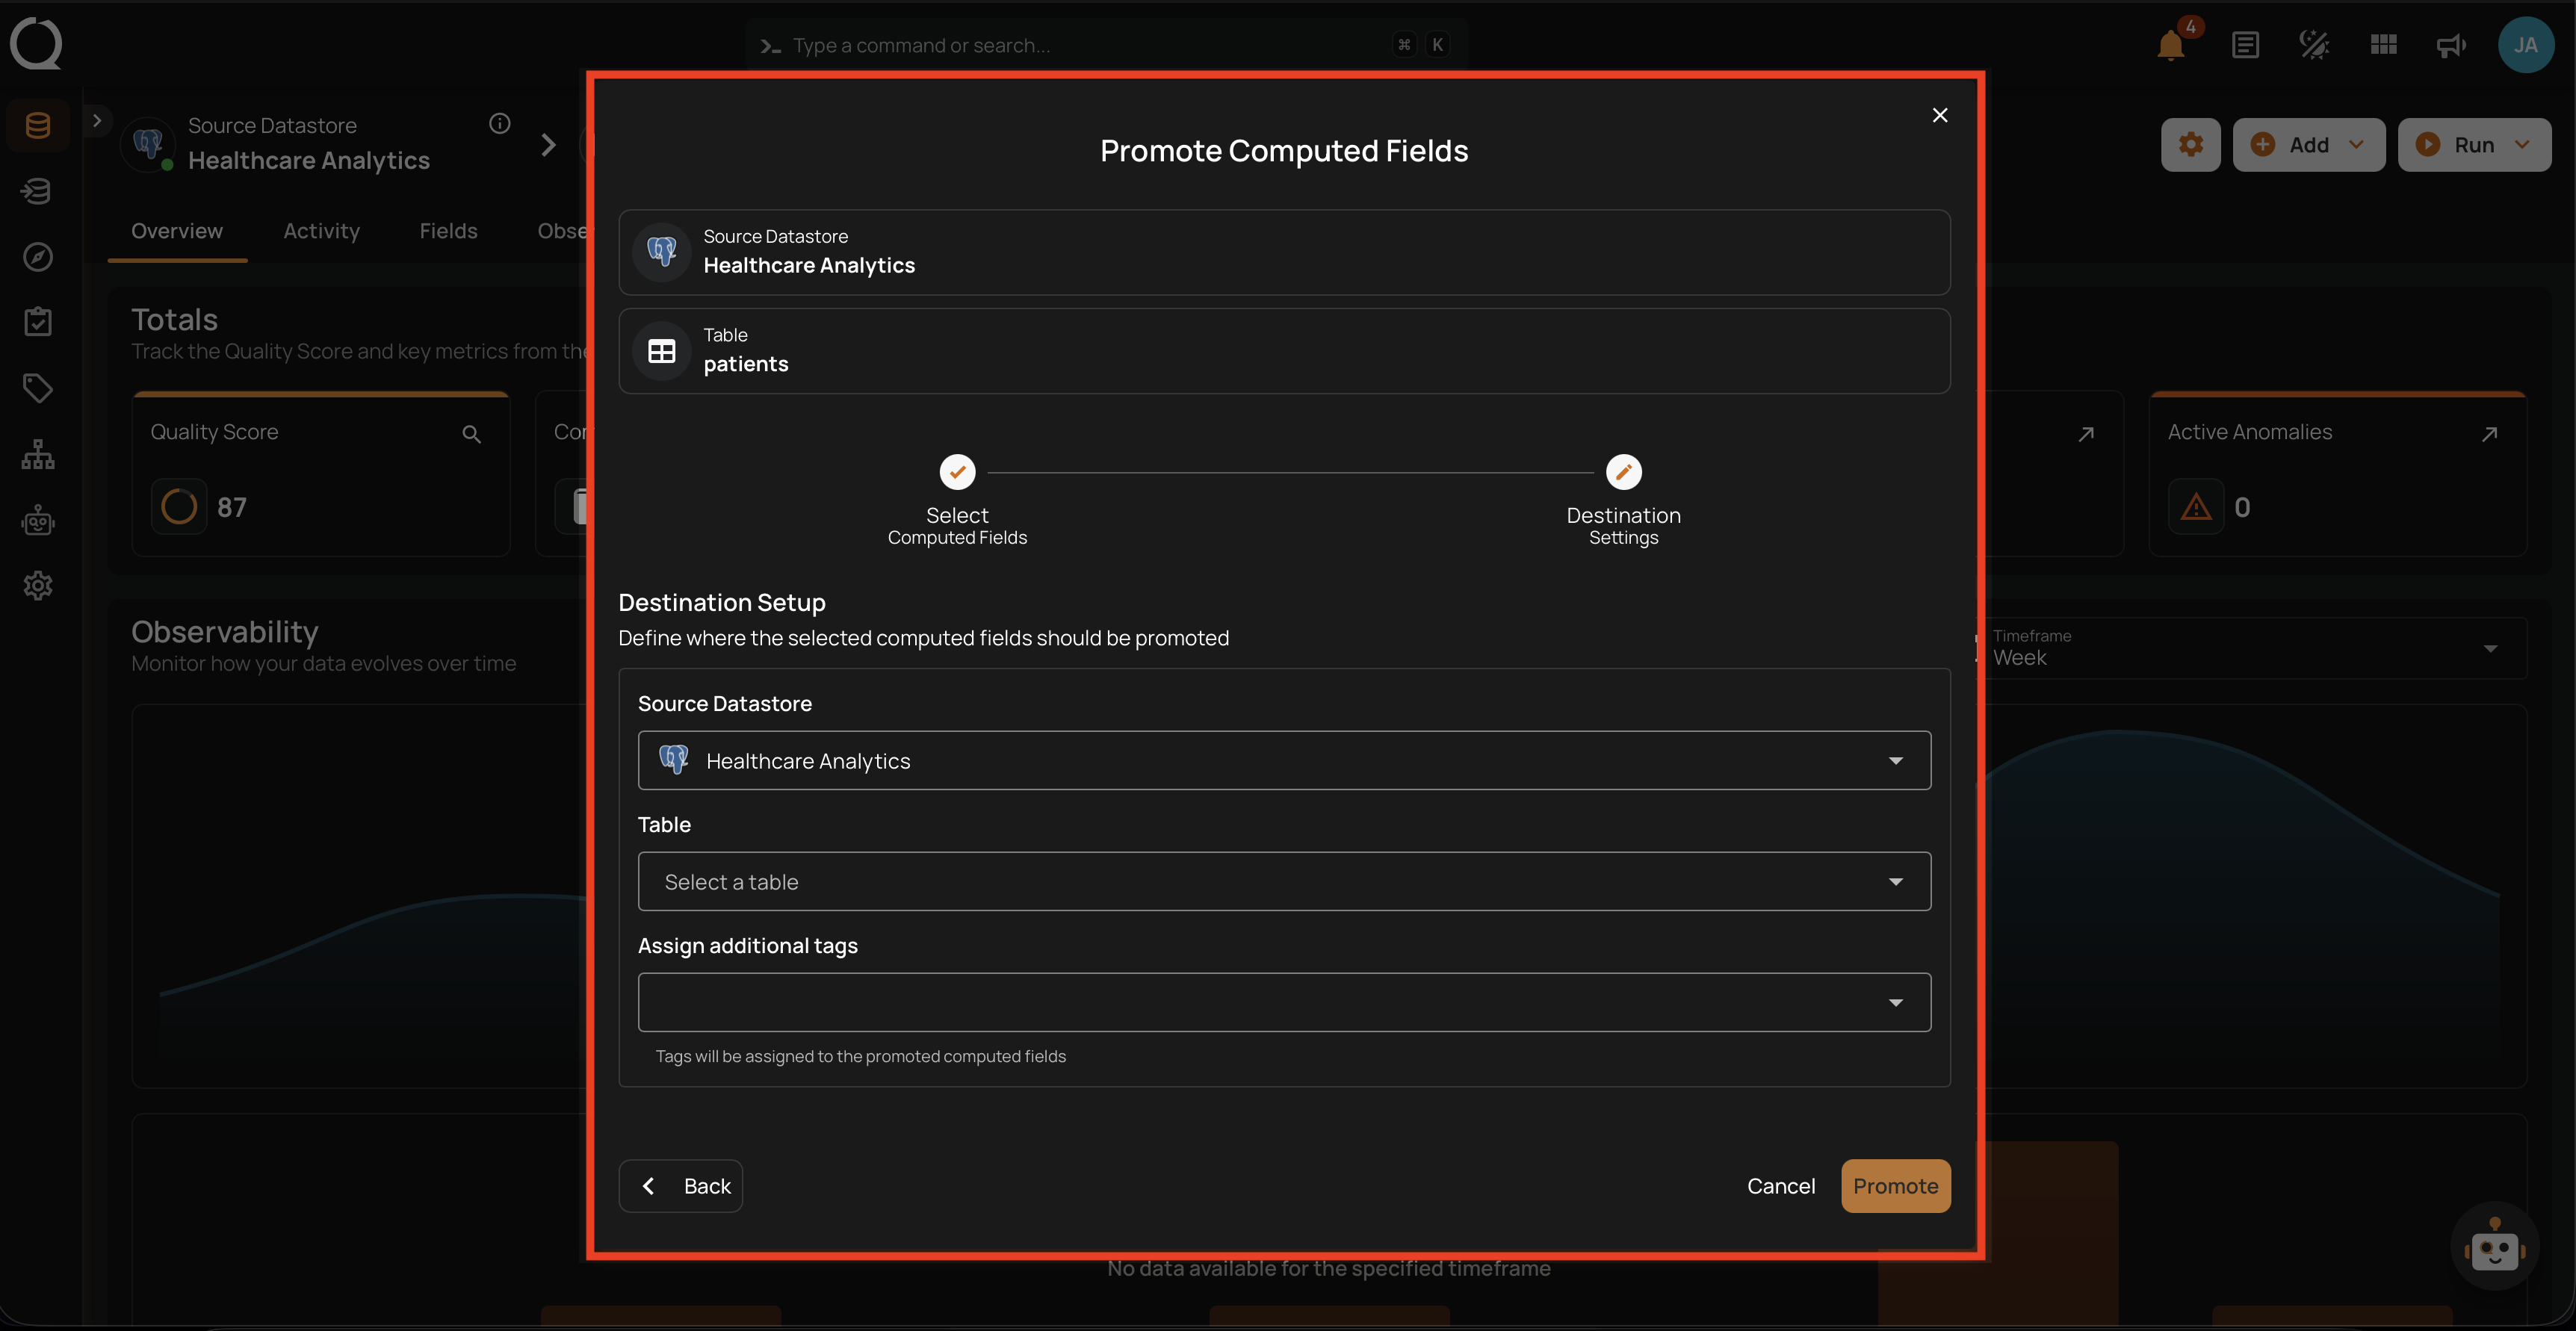
Step 9: Fill in the destination datastore, table, and optional tags (see Destination Setup for the field reference). Click Promote to start the operation.

Step 10: A confirmation toast appears — the operation has been queued. Track progress on the Activity tab and review per-field results once the operation completes.