Bulk Change Check Owner
Use this flow when you want to apply the same owner to many quality checks at once. To change the owner on a single check from its Edit form, see Change Check Owner. For how the field behaves in detail, see How It Works. For programmatic access, see the Ownership API.
Info
Bulk-editing the owner requires the Author team permission (or higher) on the datastore of every selected check. The new owner must have at least the Drafter team permission on the same datastore.
You can launch a bulk owner change from two places, and the flow is identical because both views use the same Bulk Edit Checks modal. Pick the tab that matches where you start from.
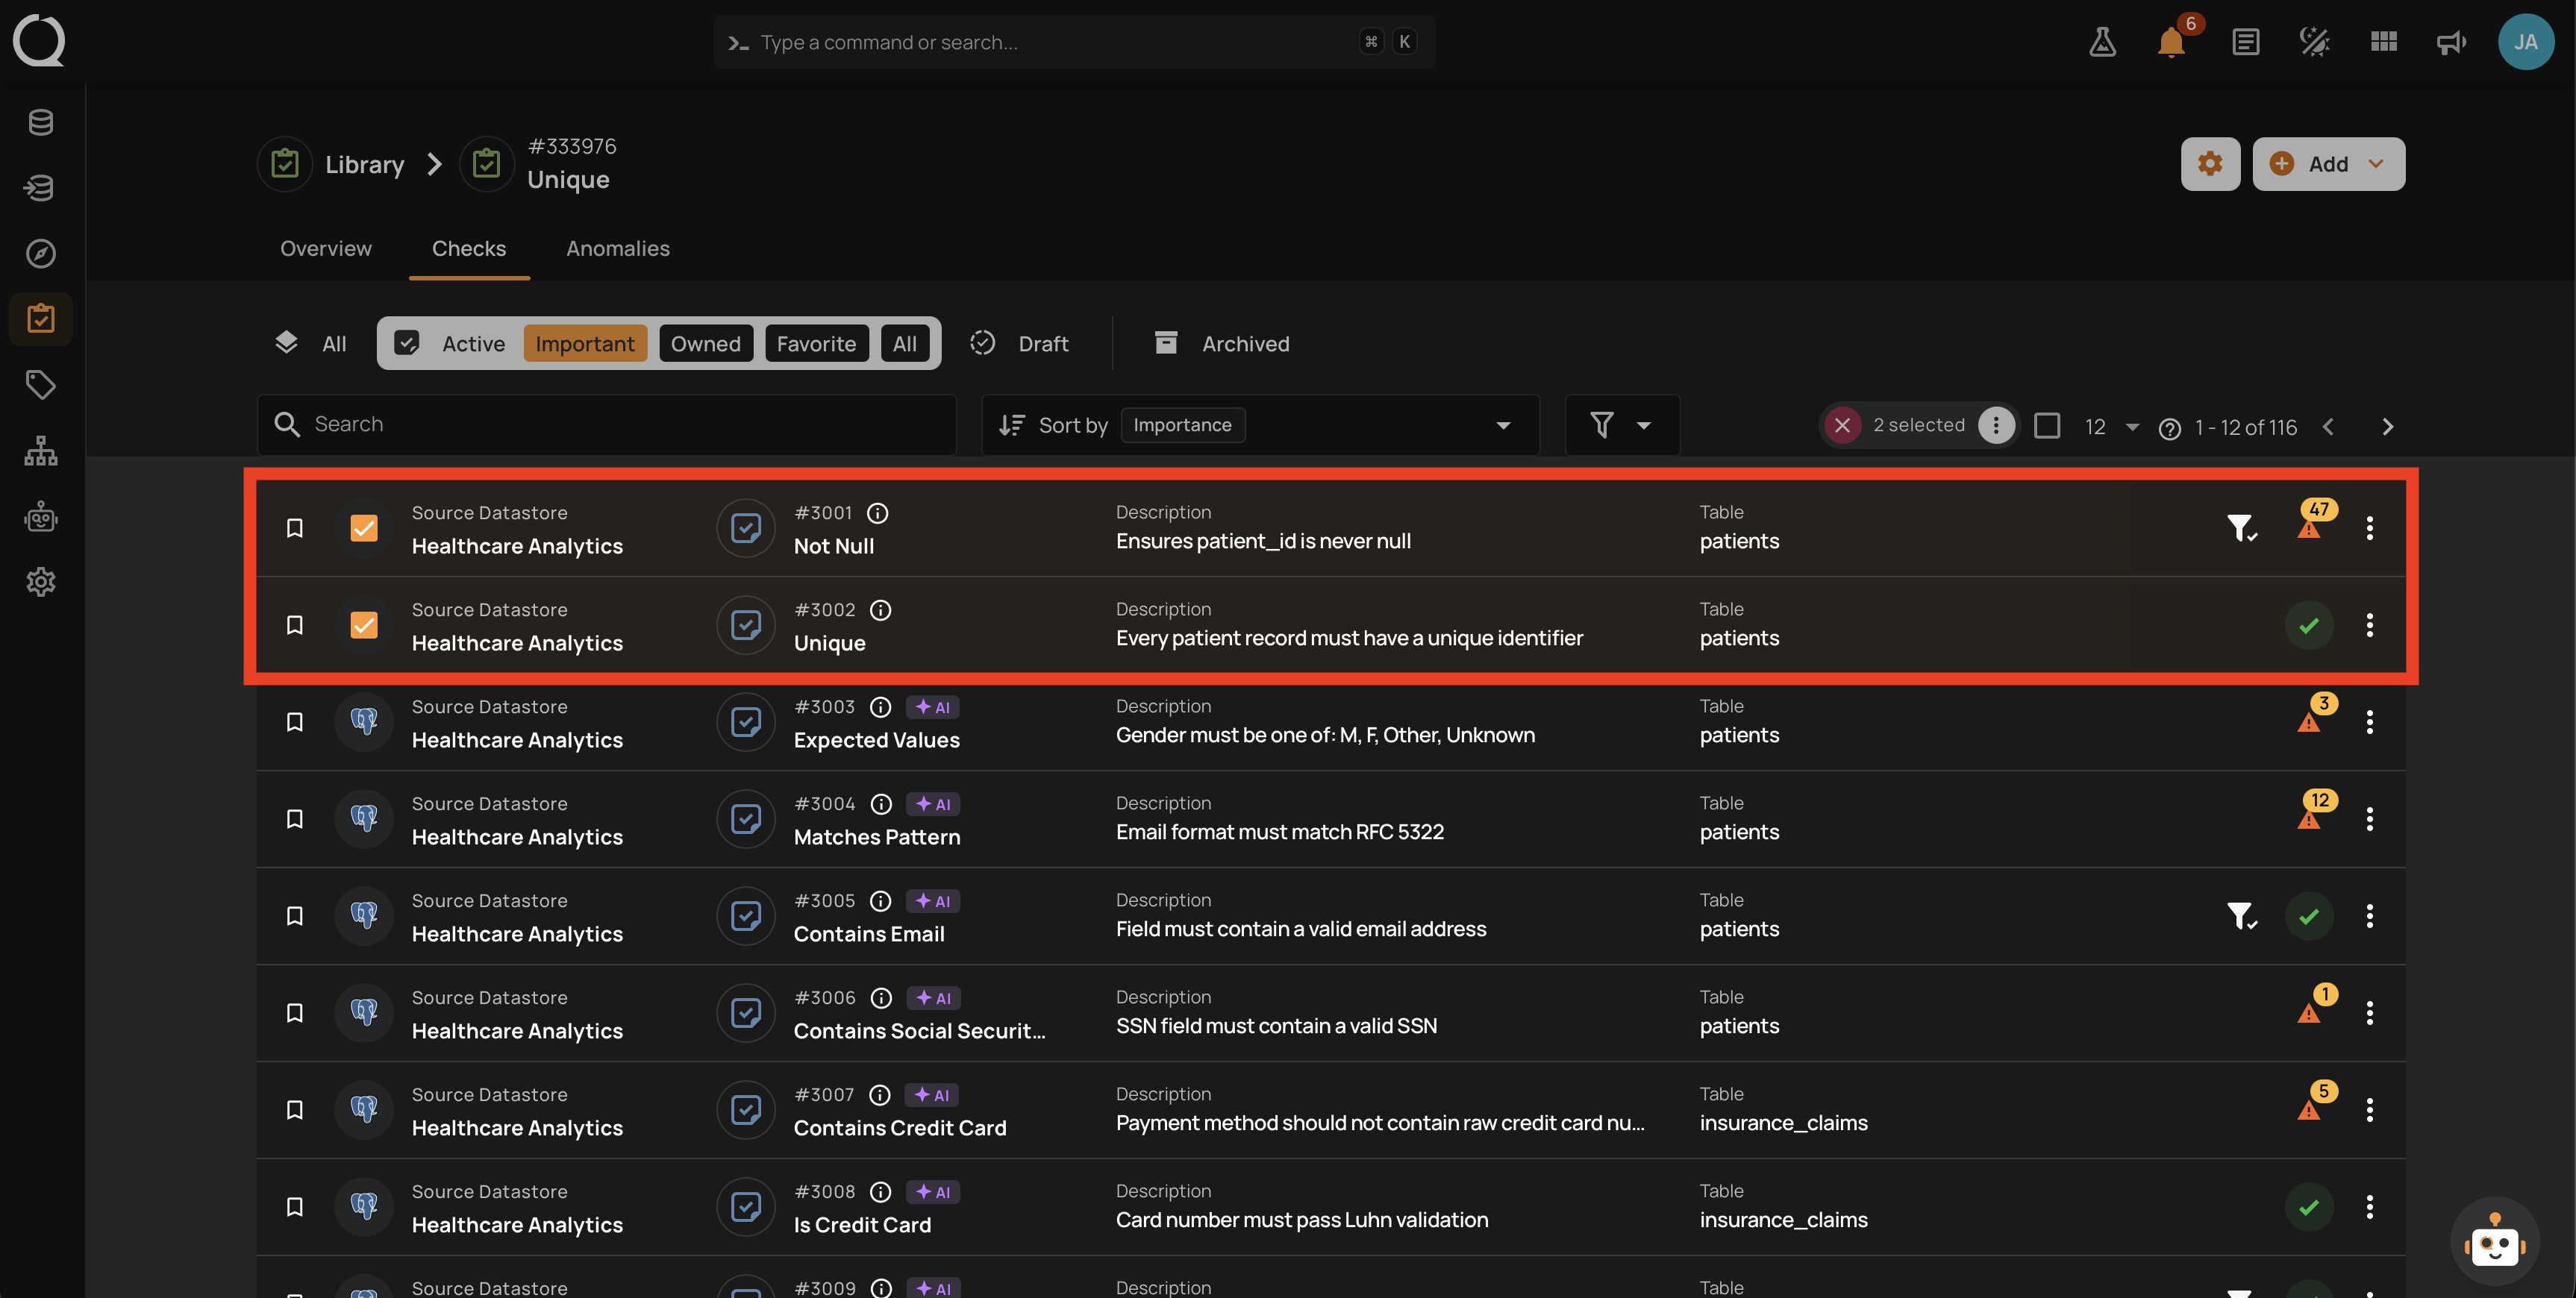
Step 1: Open the source datastore and go to the Quality Checks tab. You see the list of checks for that datastore.

Step 2: Hover each check row and click the checkbox on the left to select it. The selected rows stay highlighted and a counter showing the count (for example, 2 selected) appears at the top of the list.
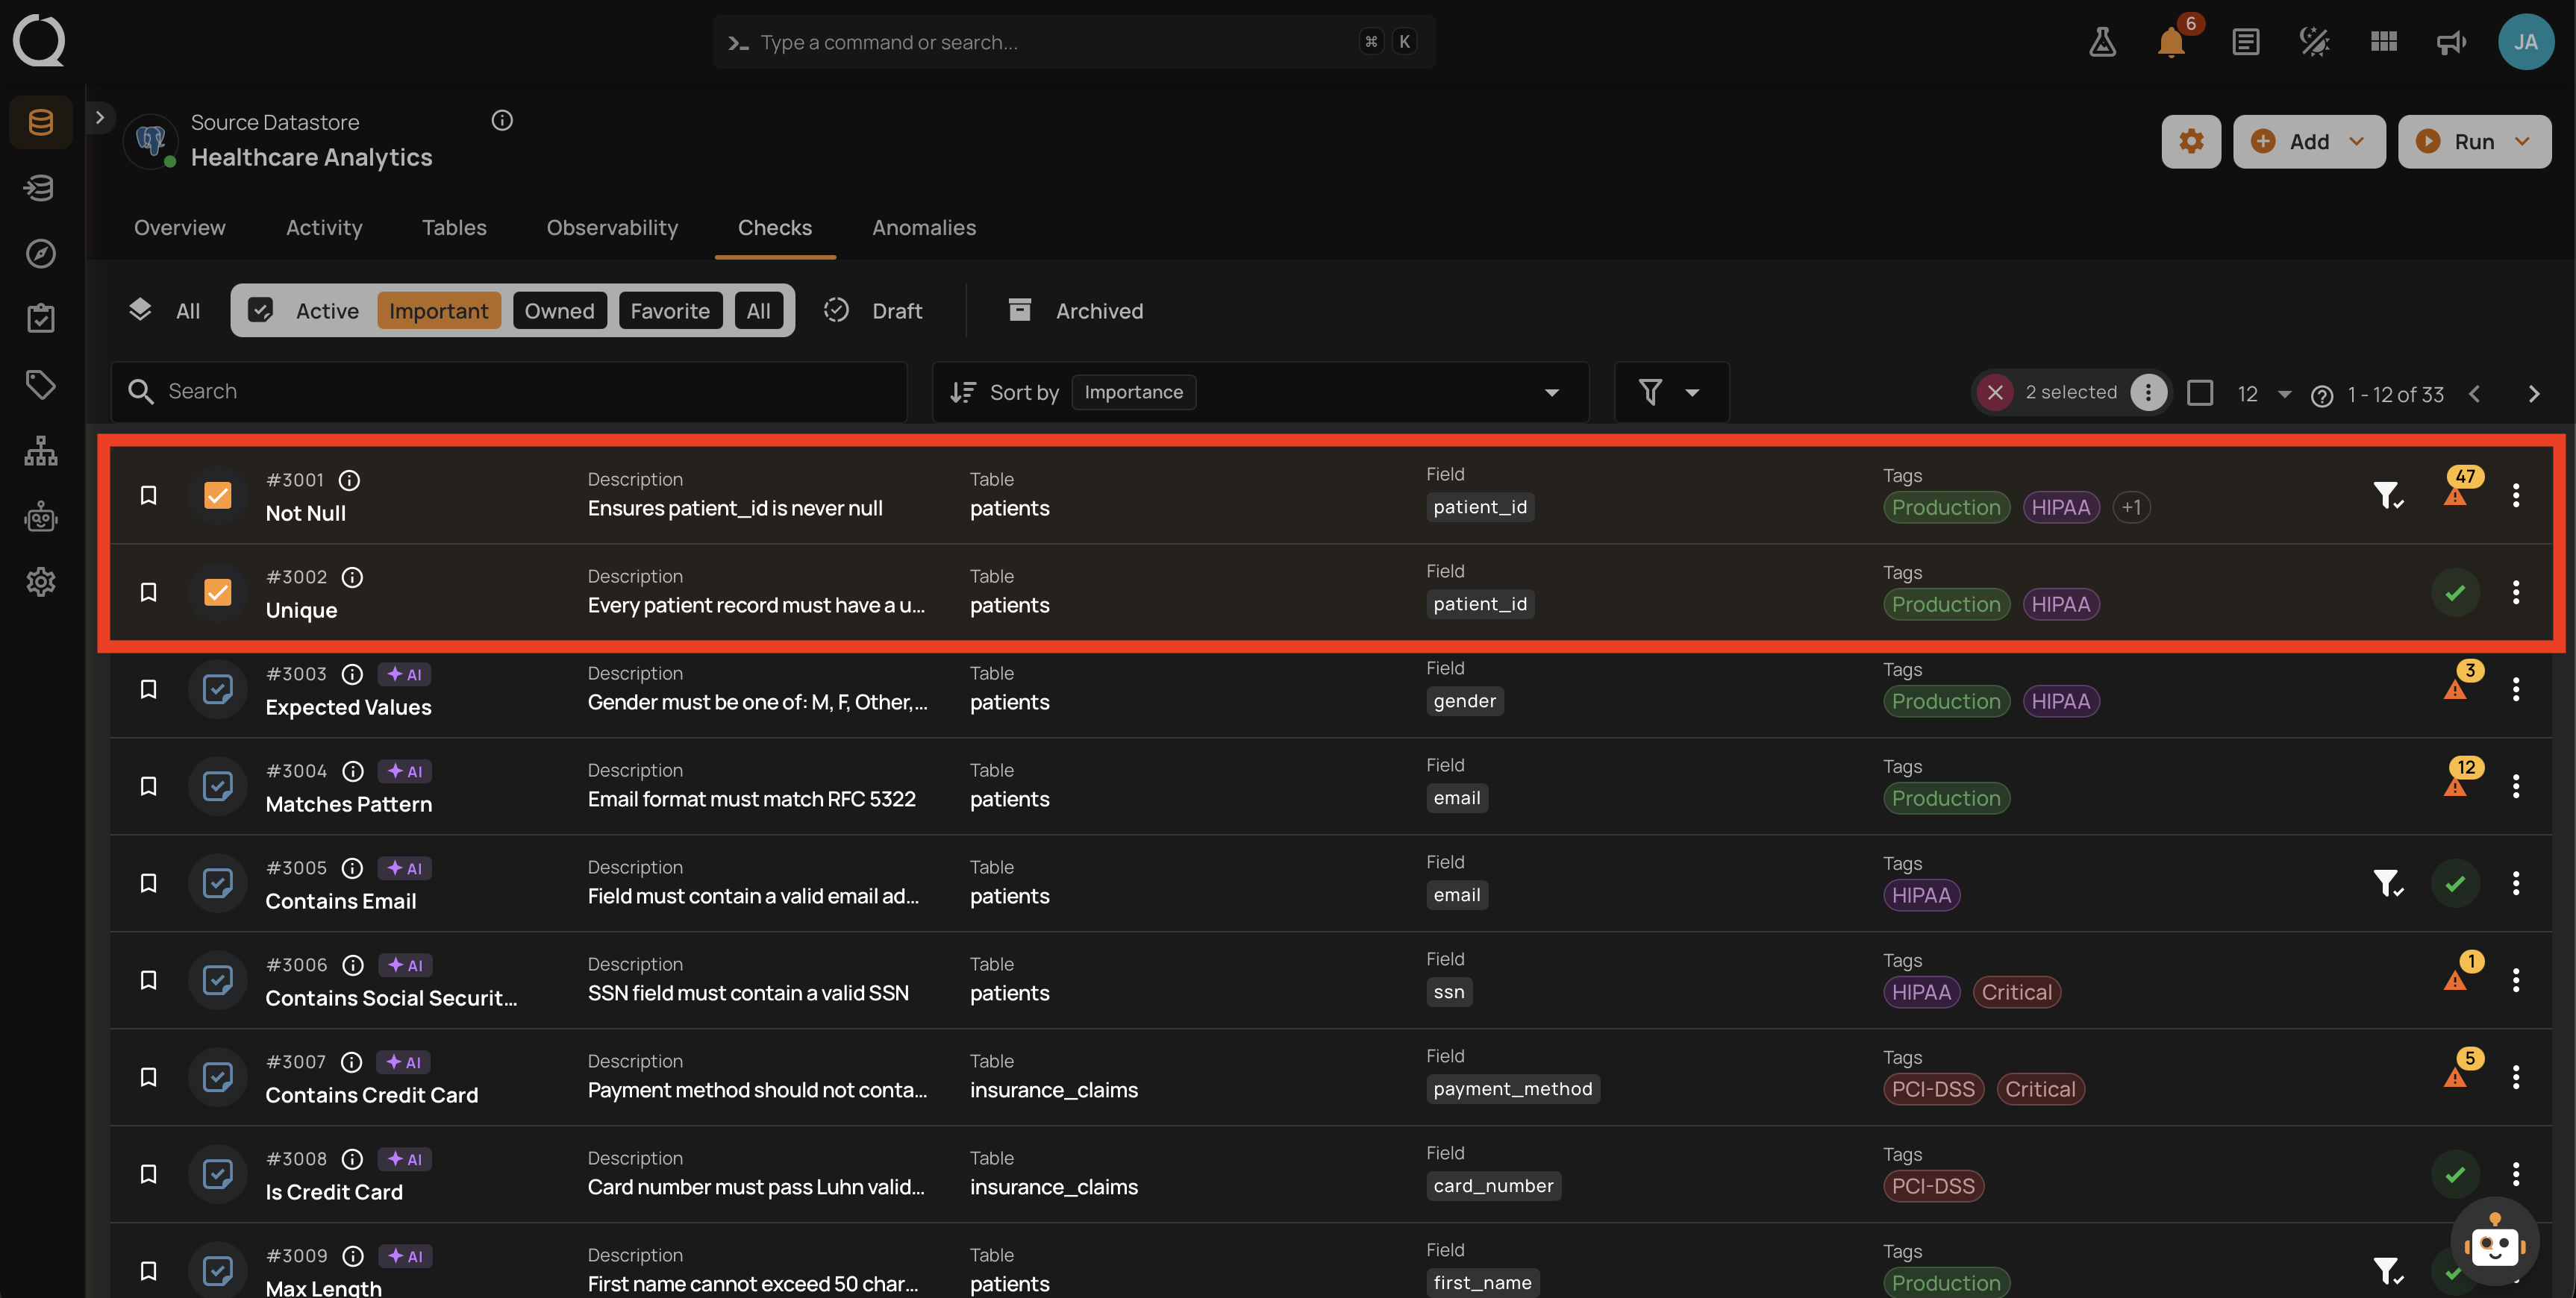
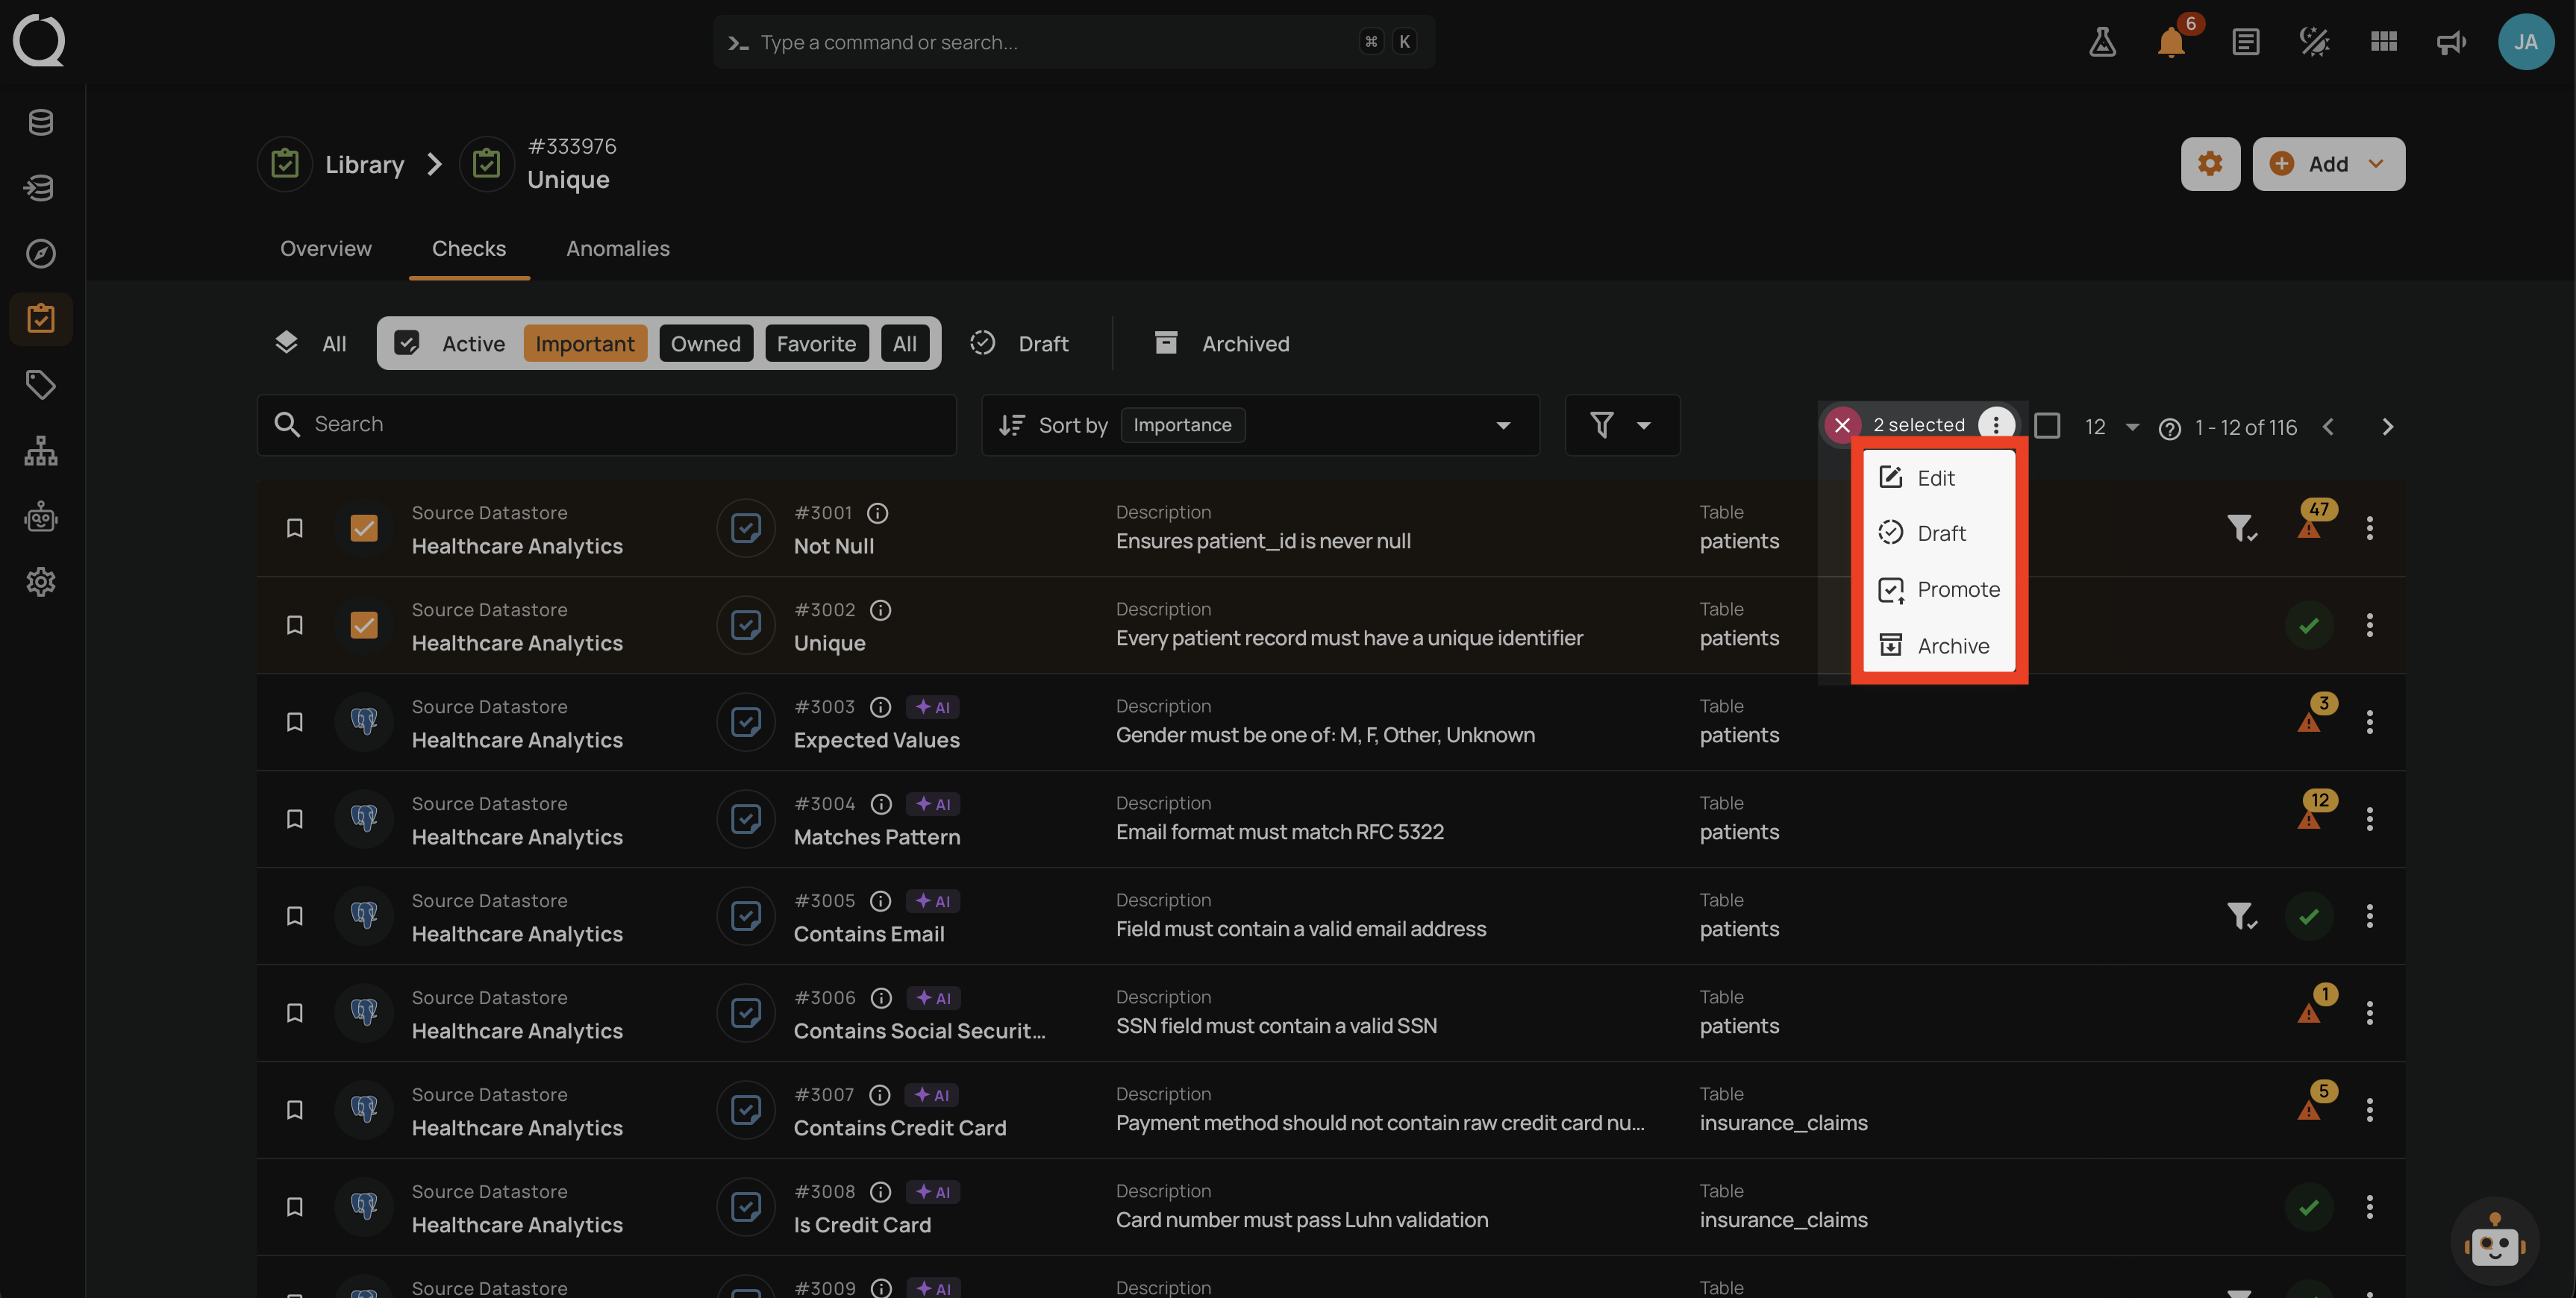
Step 3: Click the Bulk menu button next to the N selected counter.
![]()
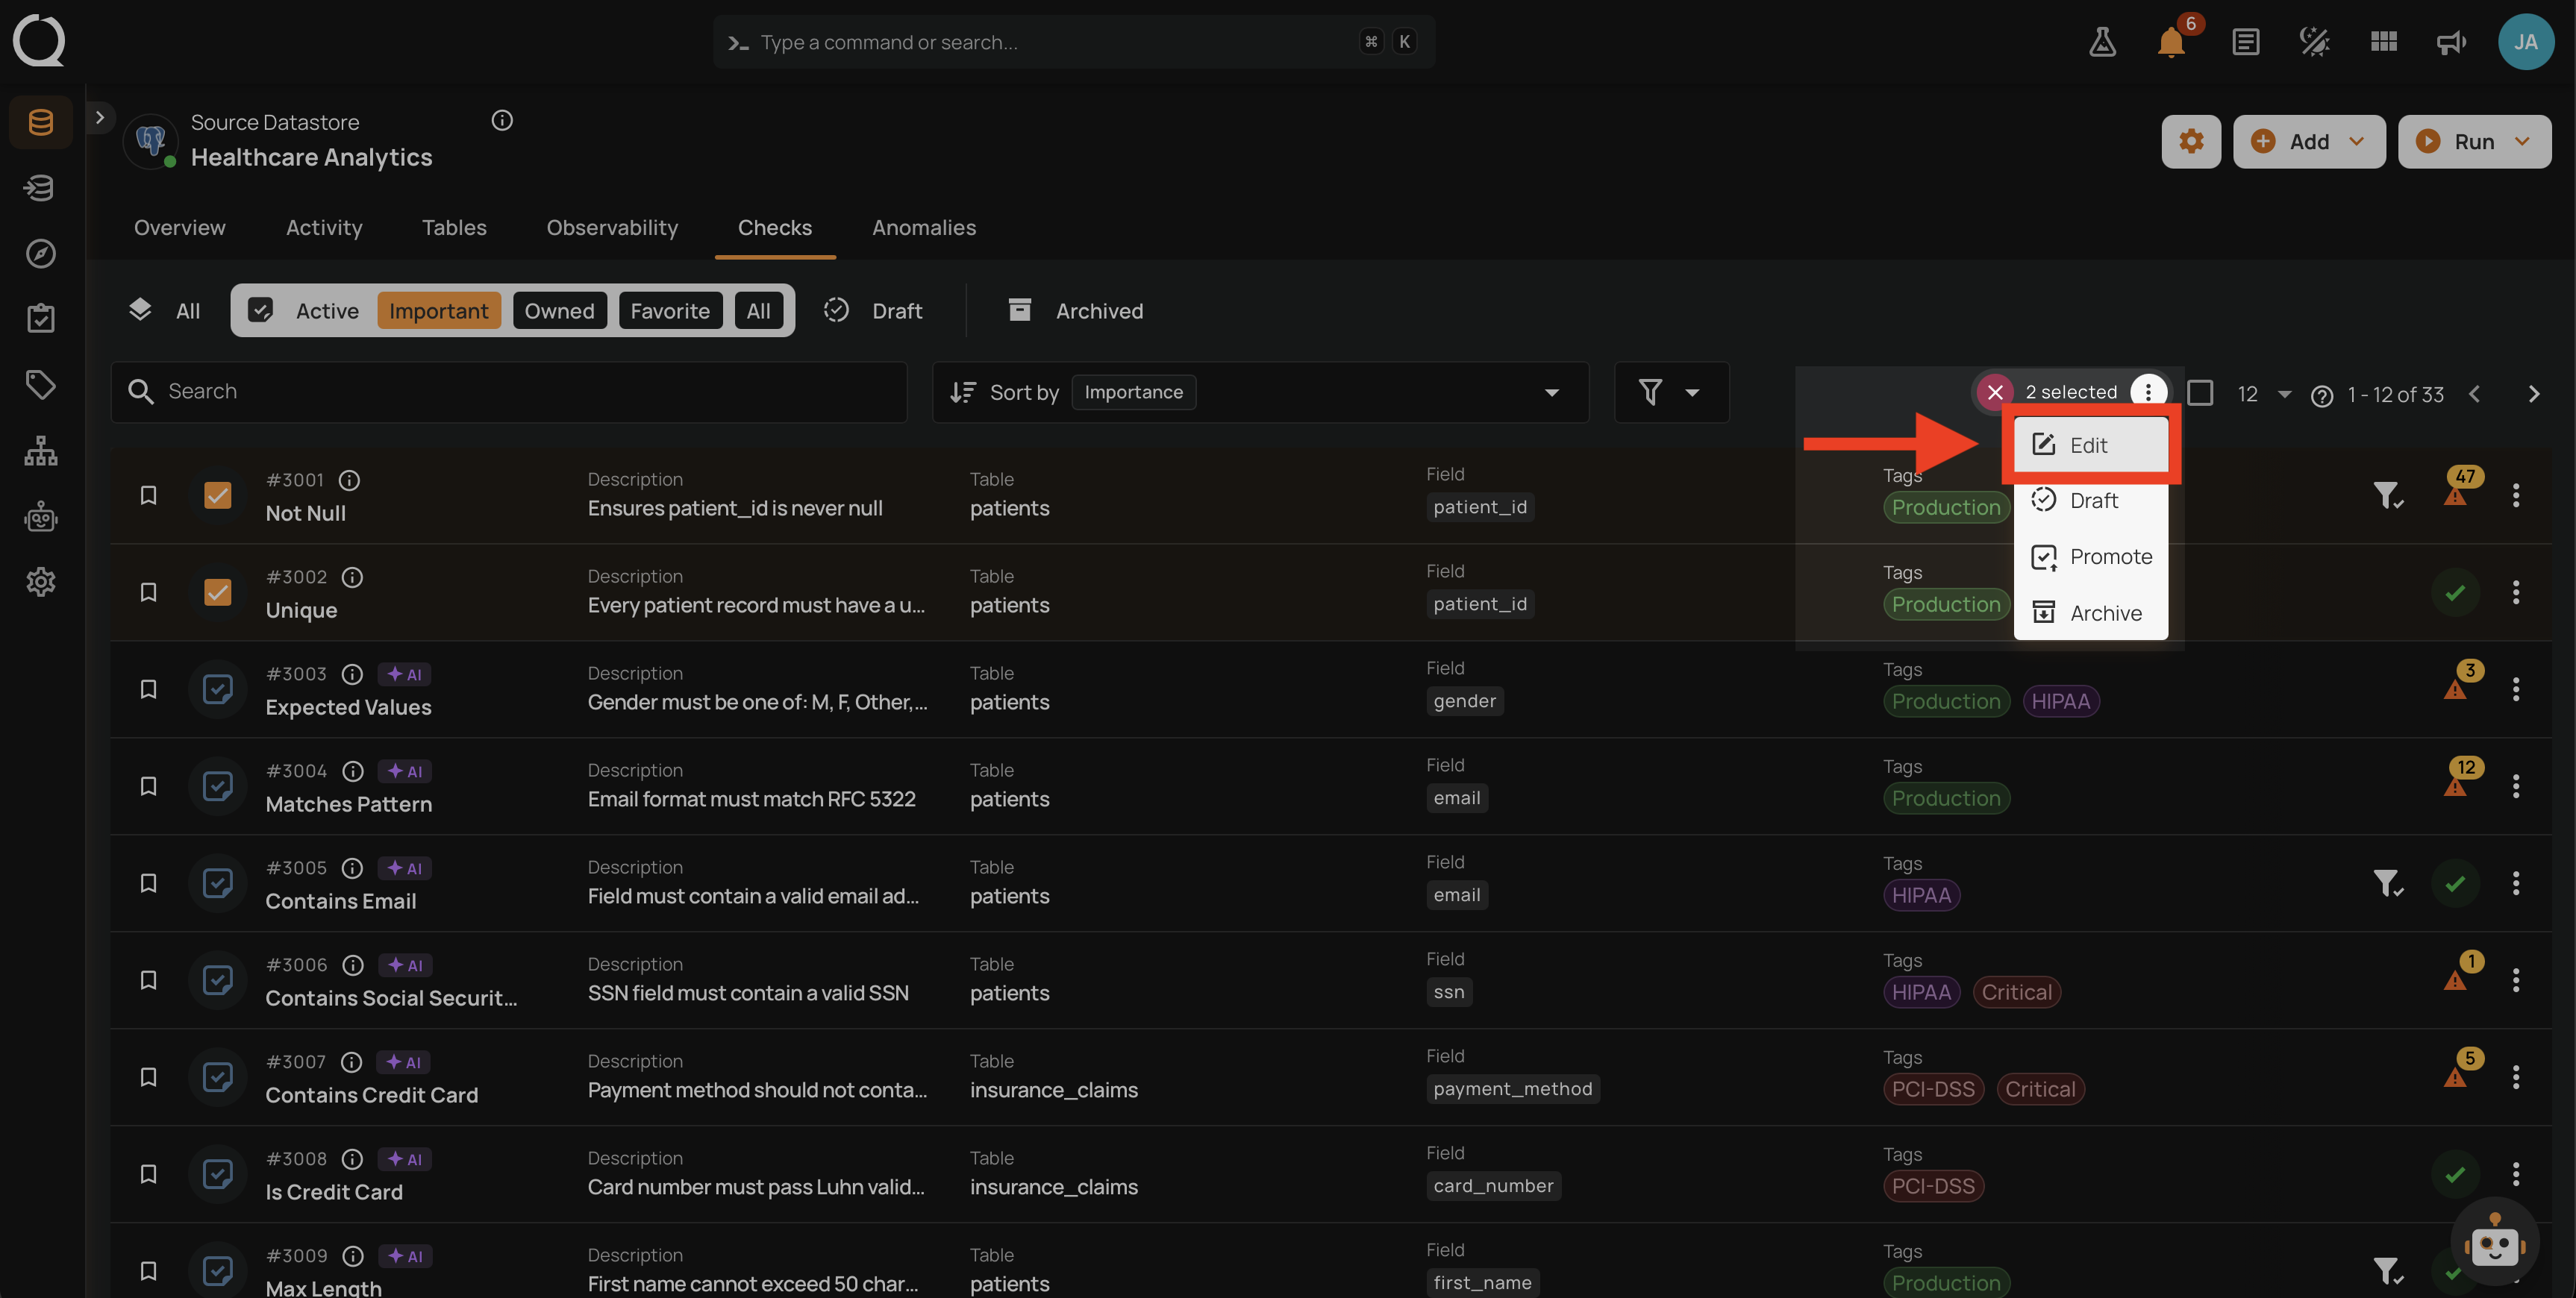
Step 4: A menu opens showing the bulk actions available: Edit, Draft, Promote, and Archive.
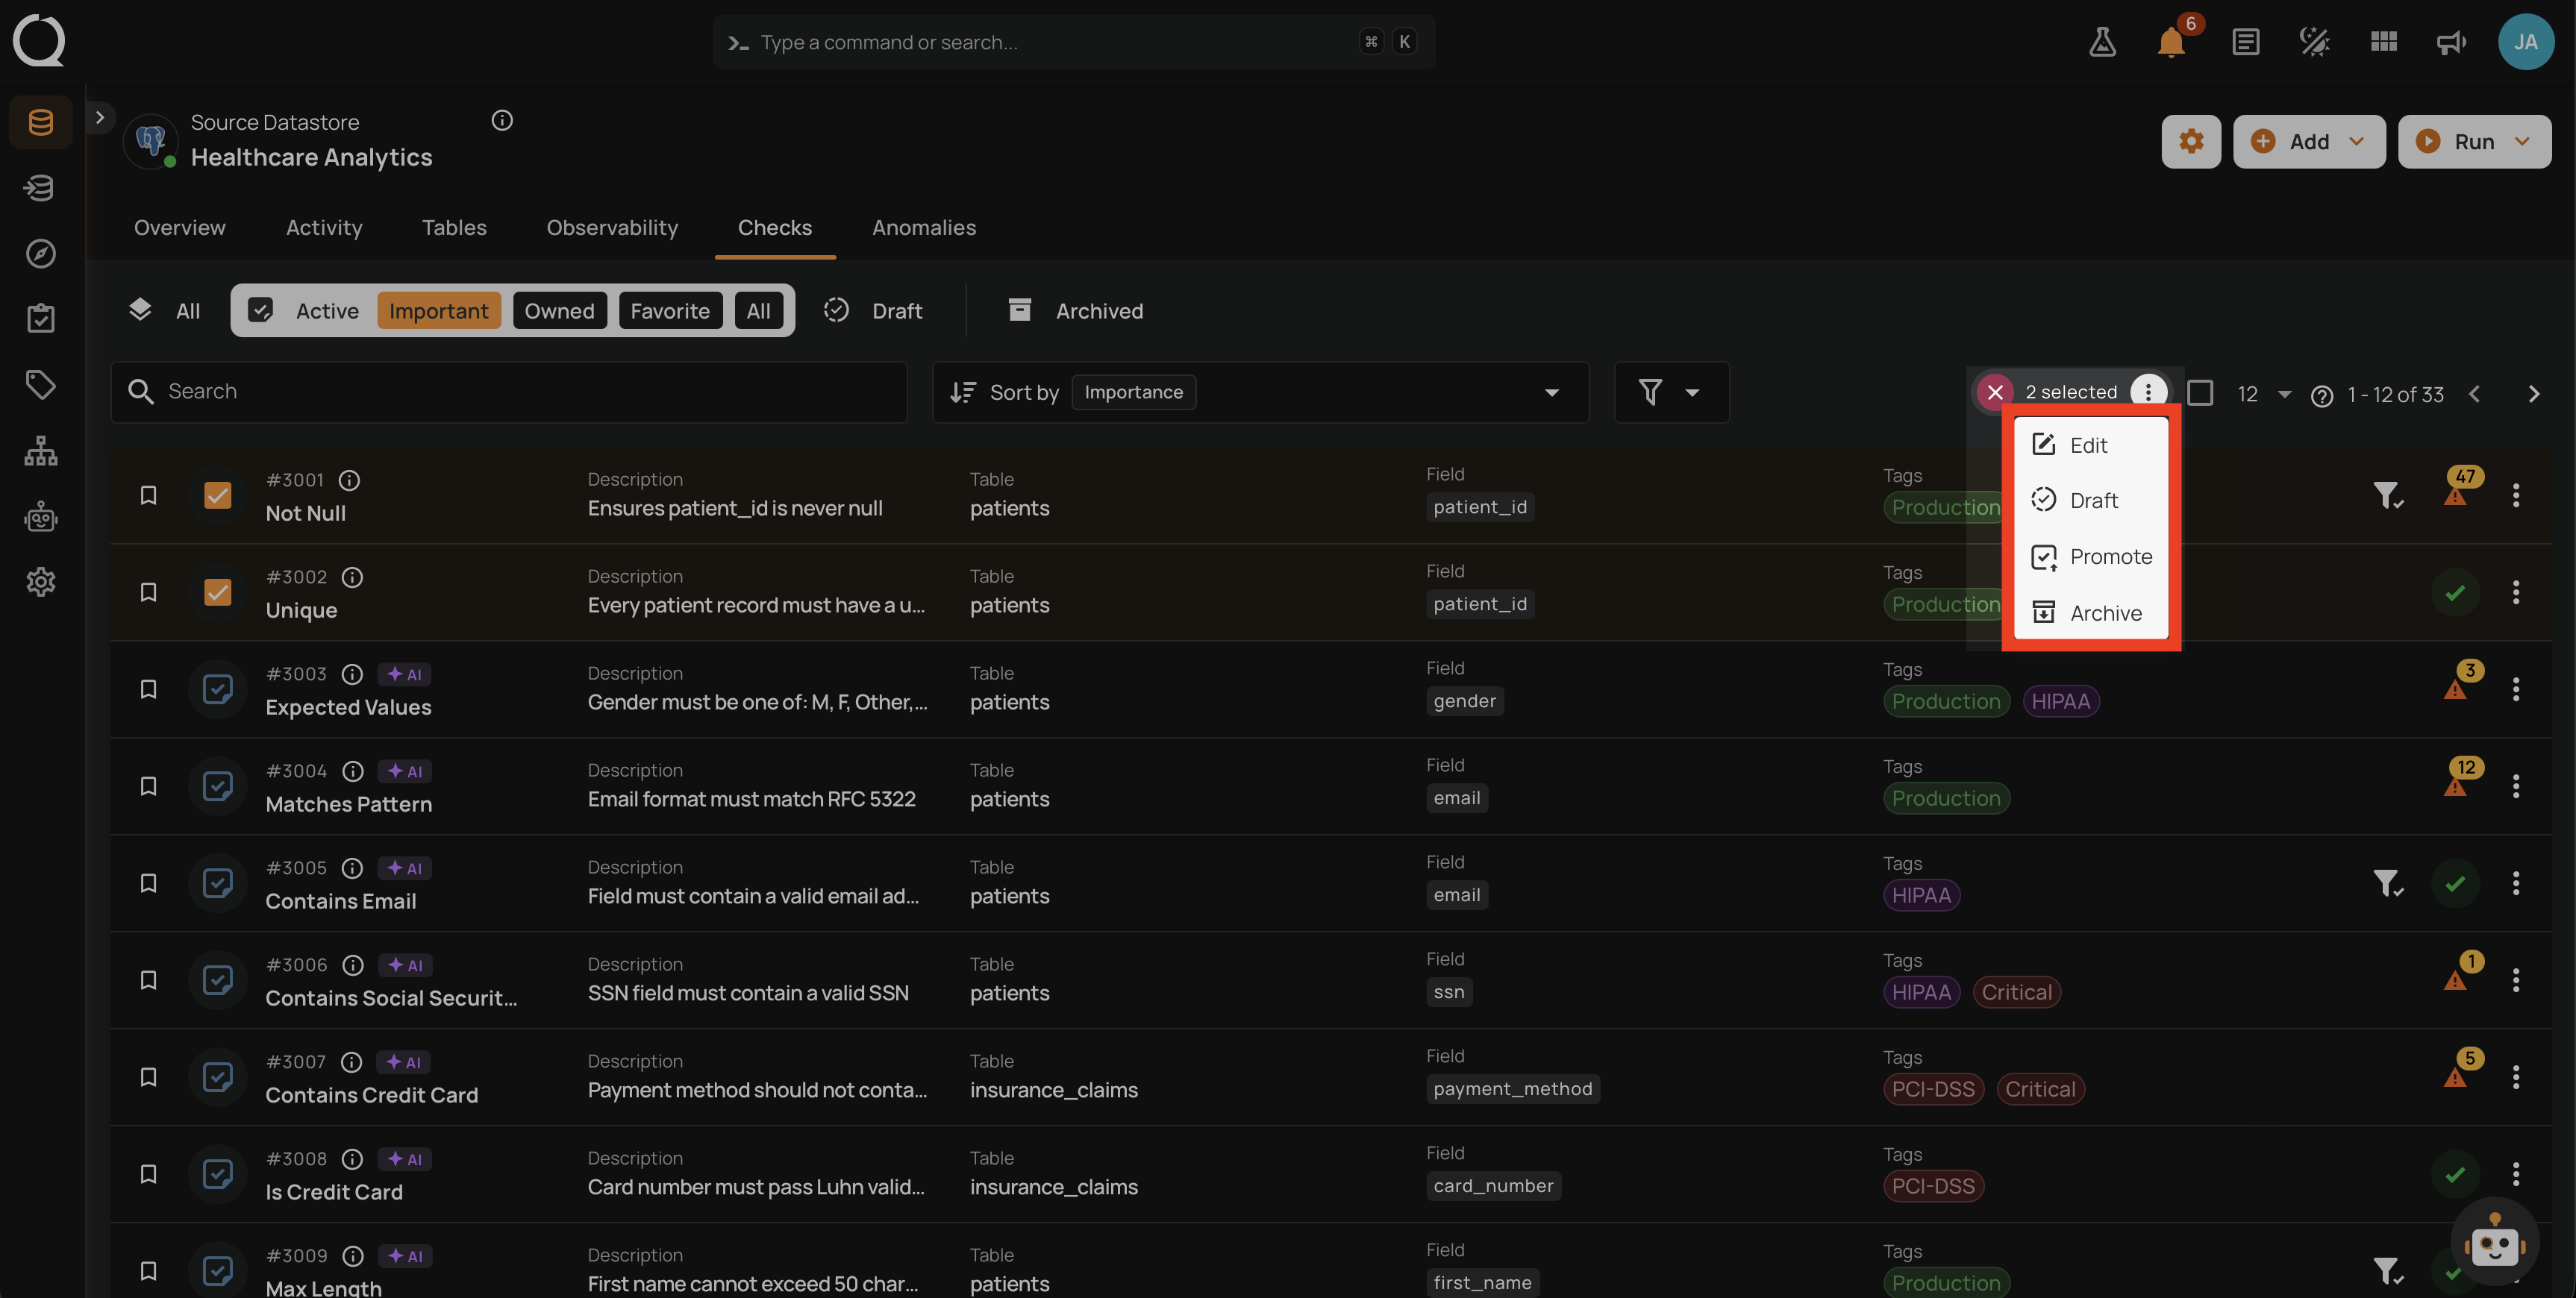
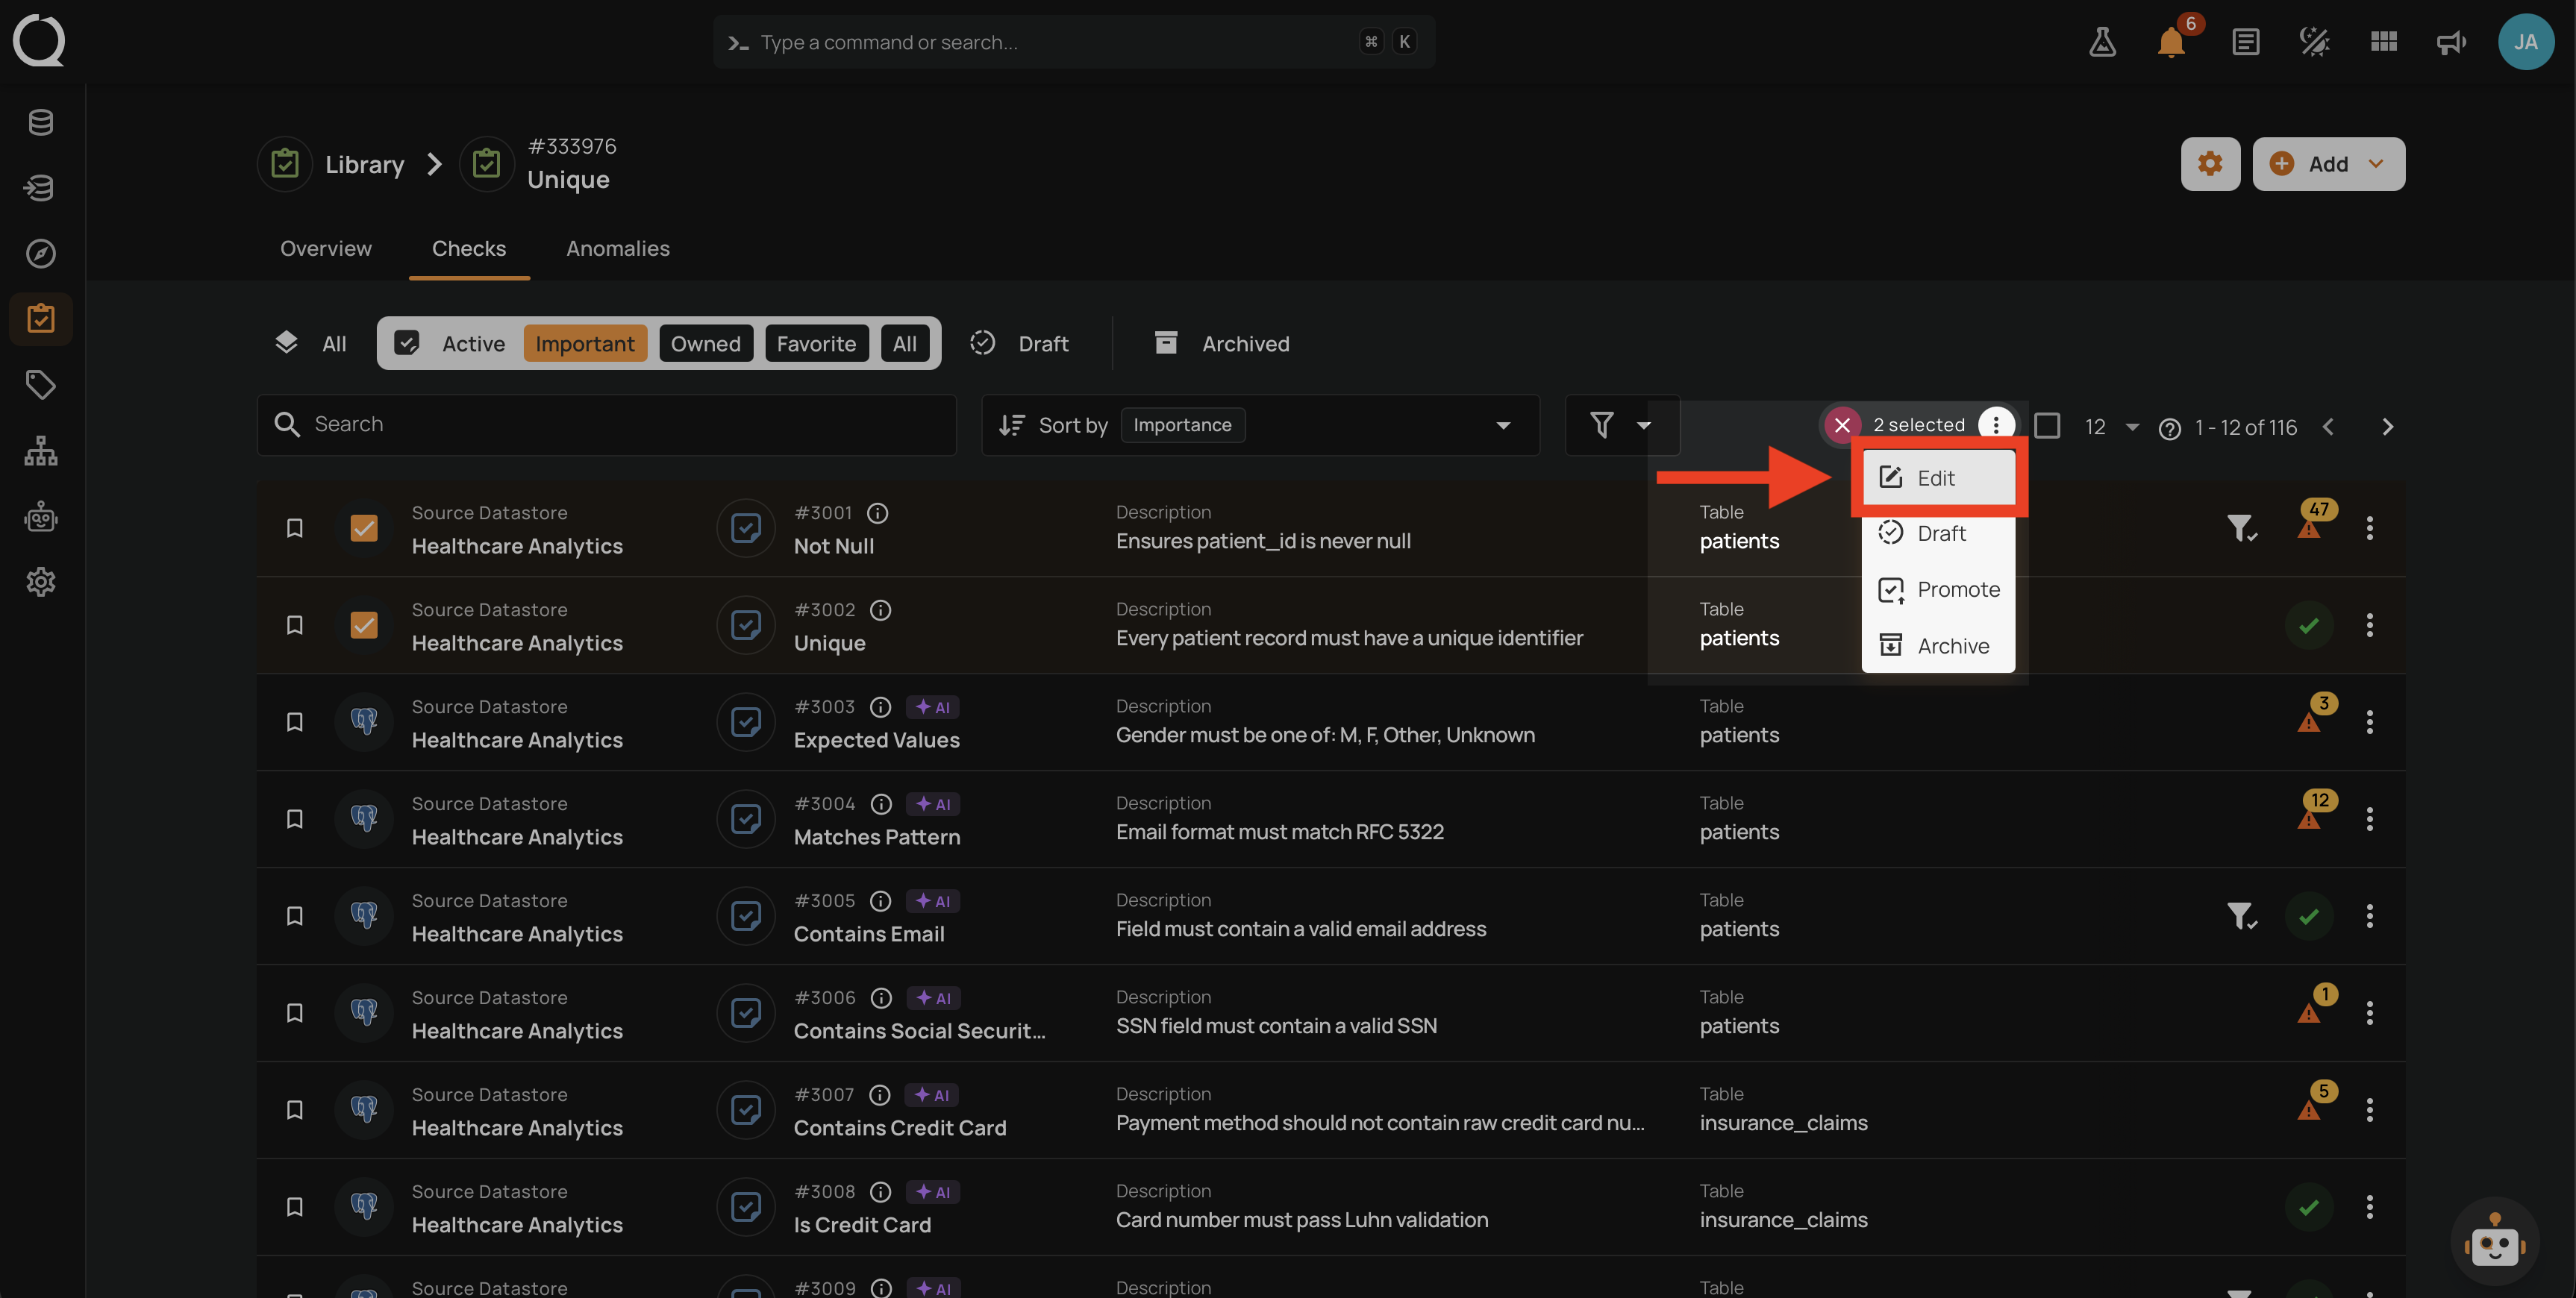
Step 5: Click Edit .
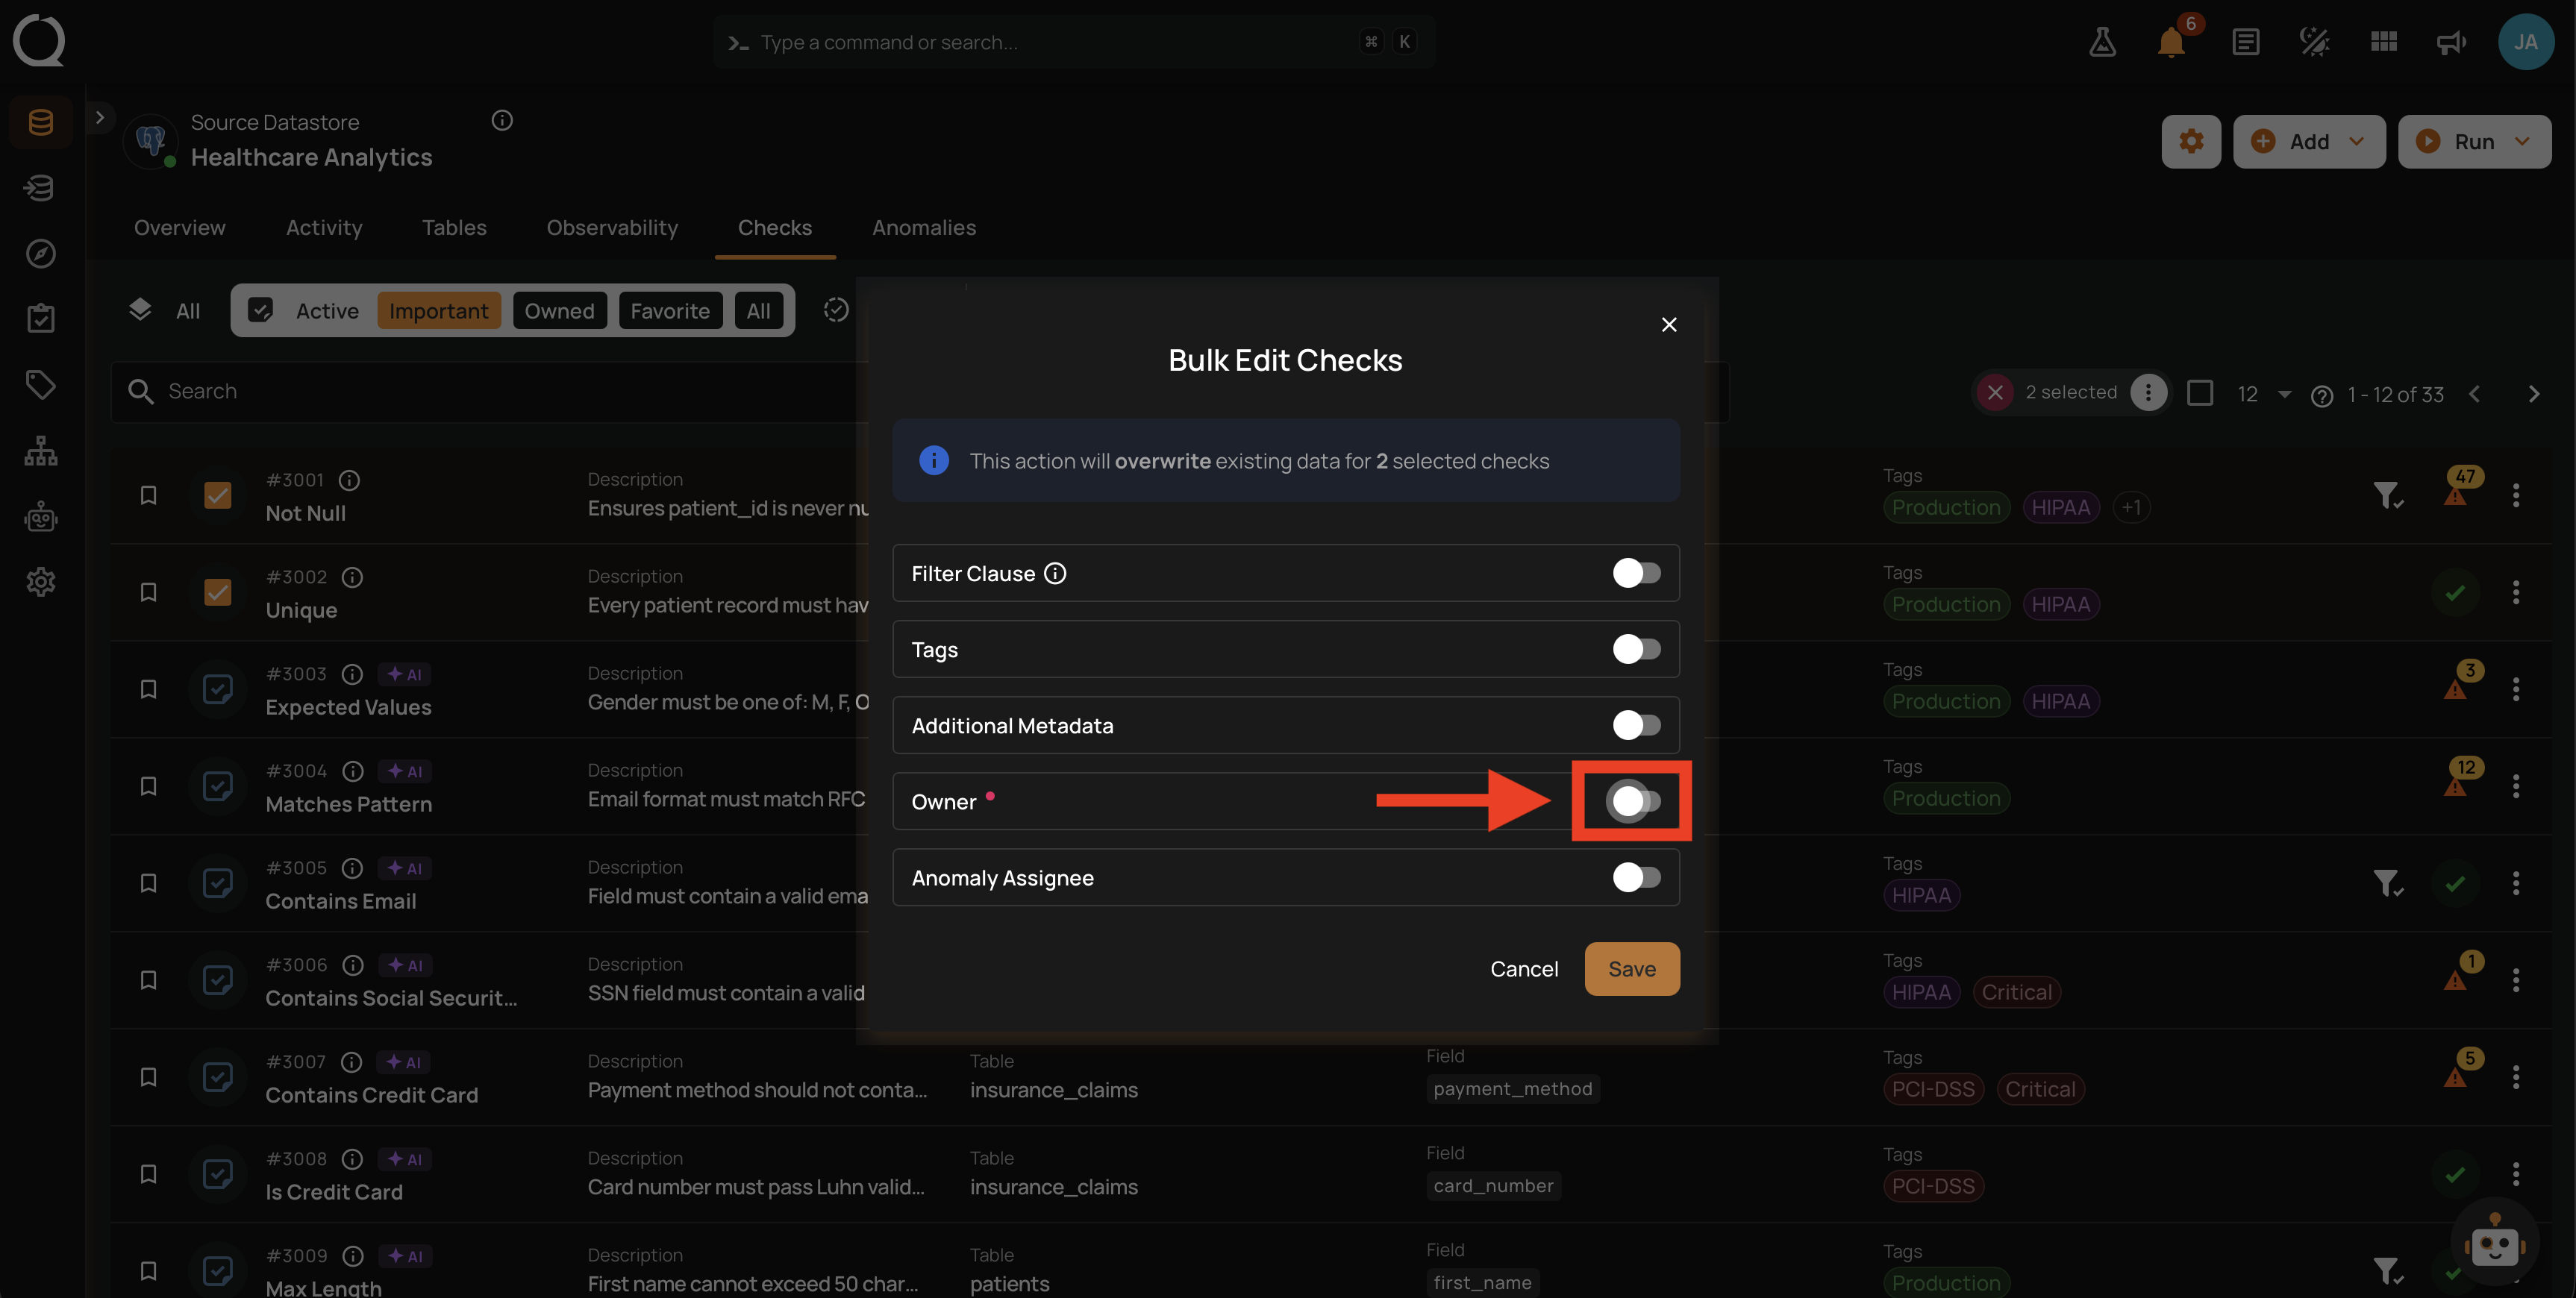
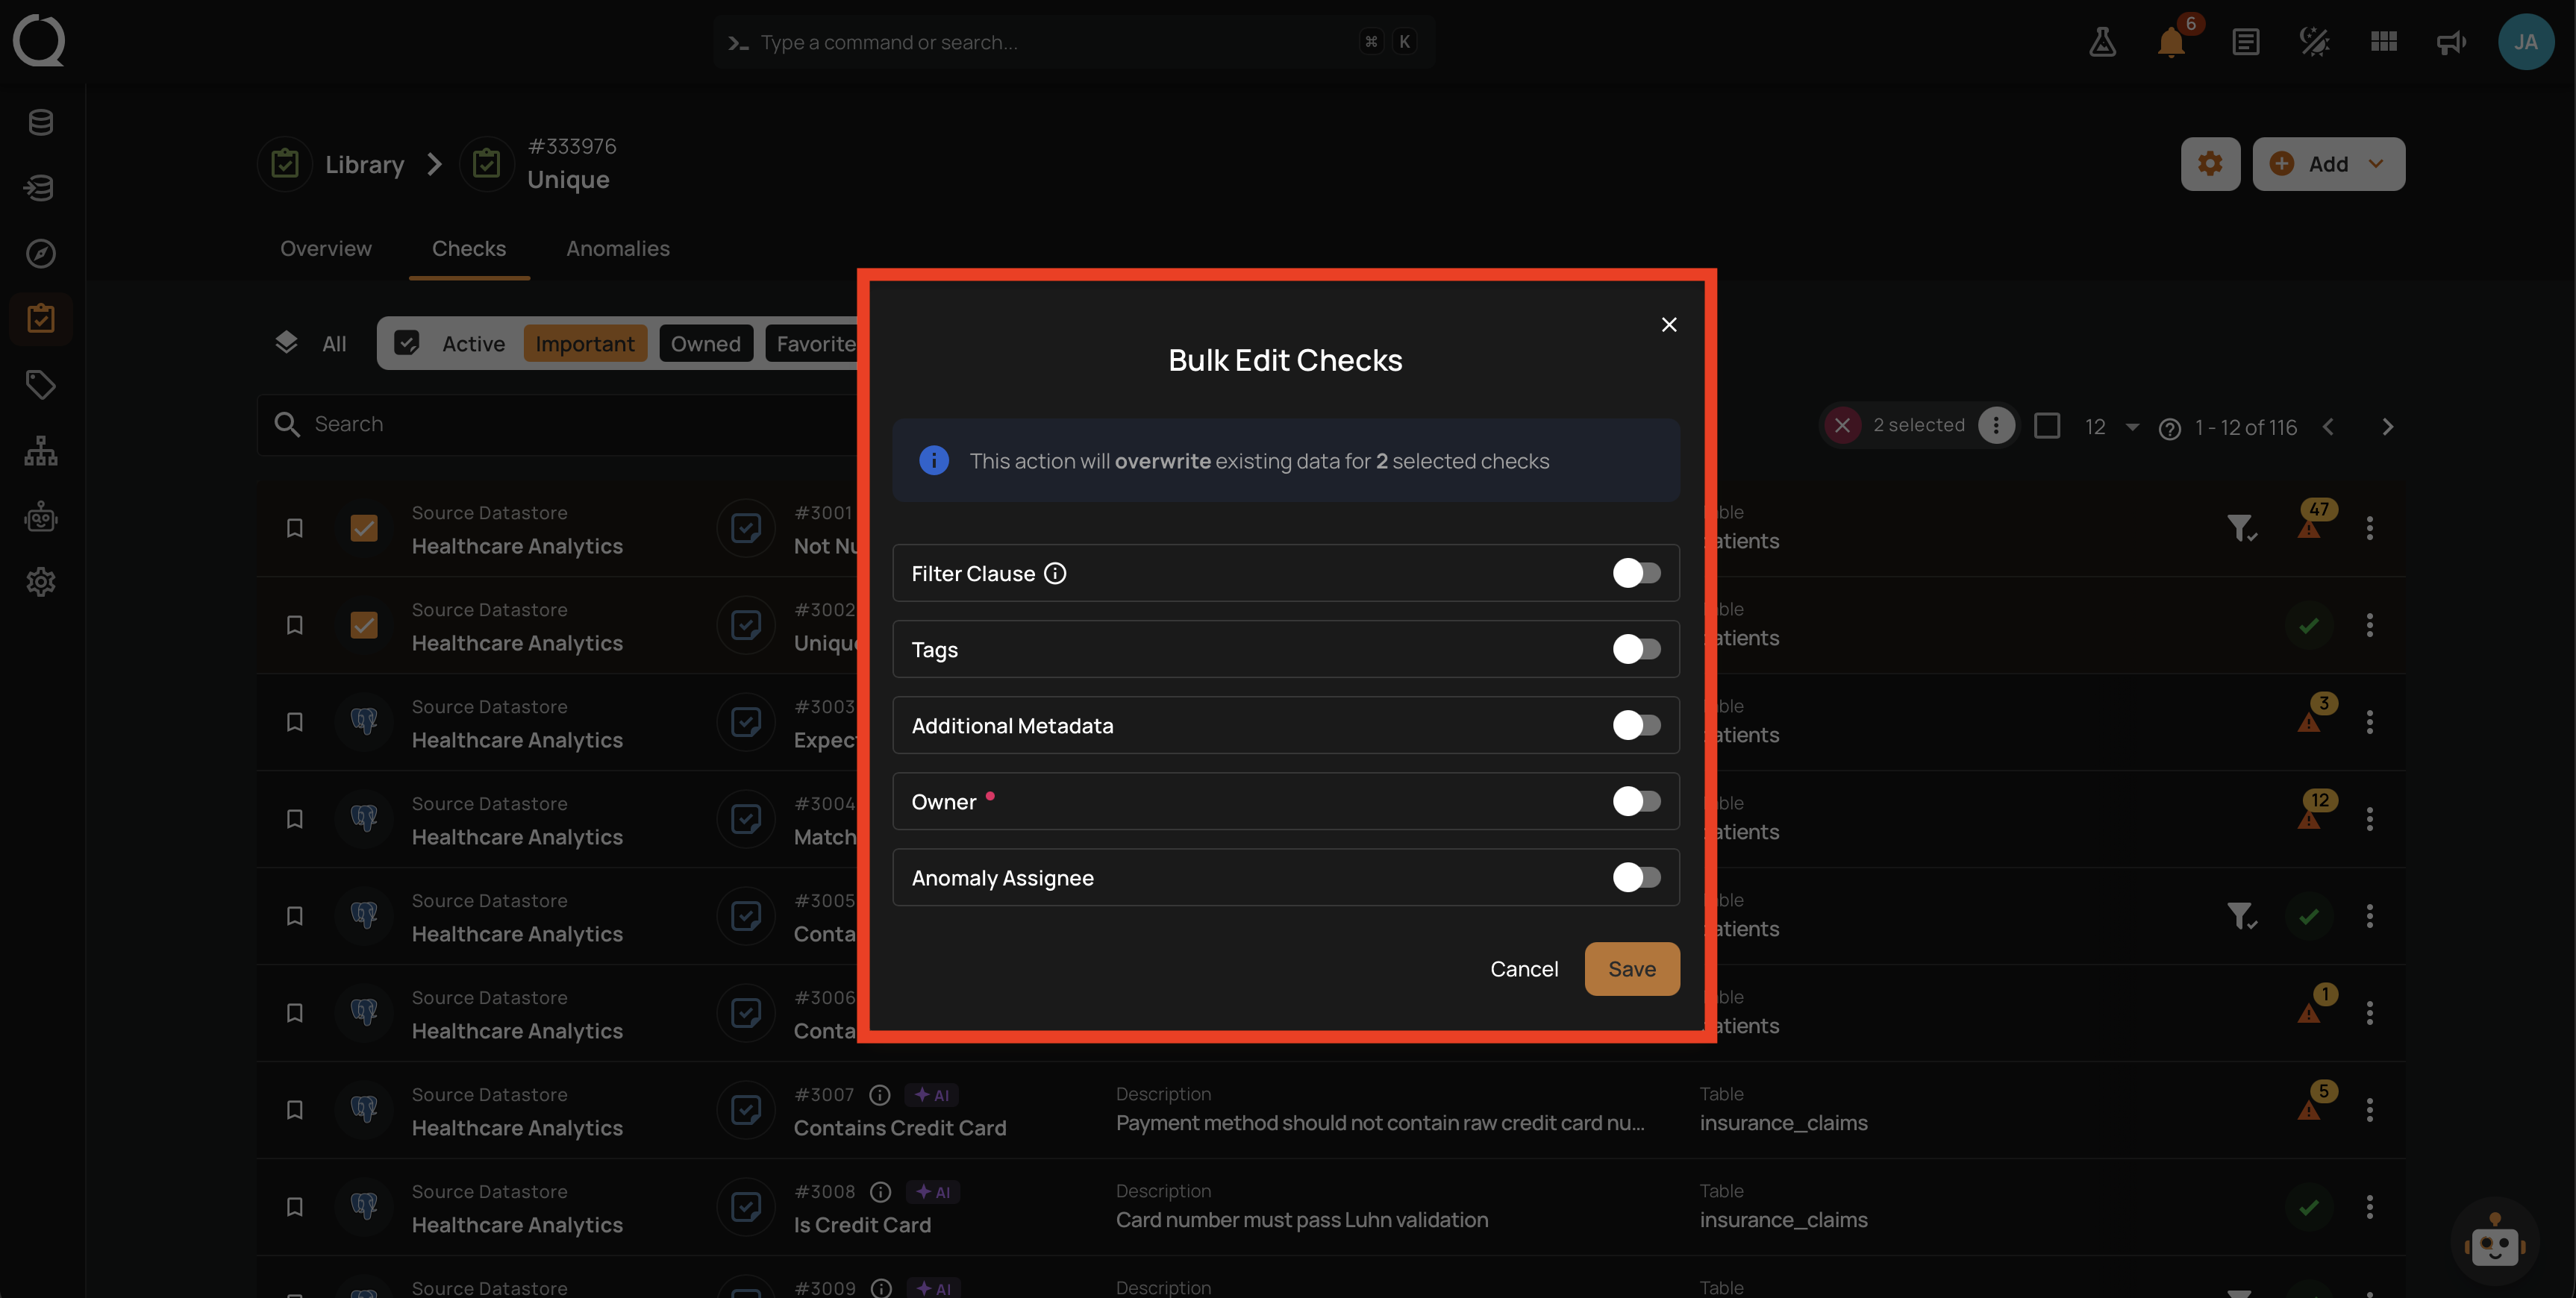
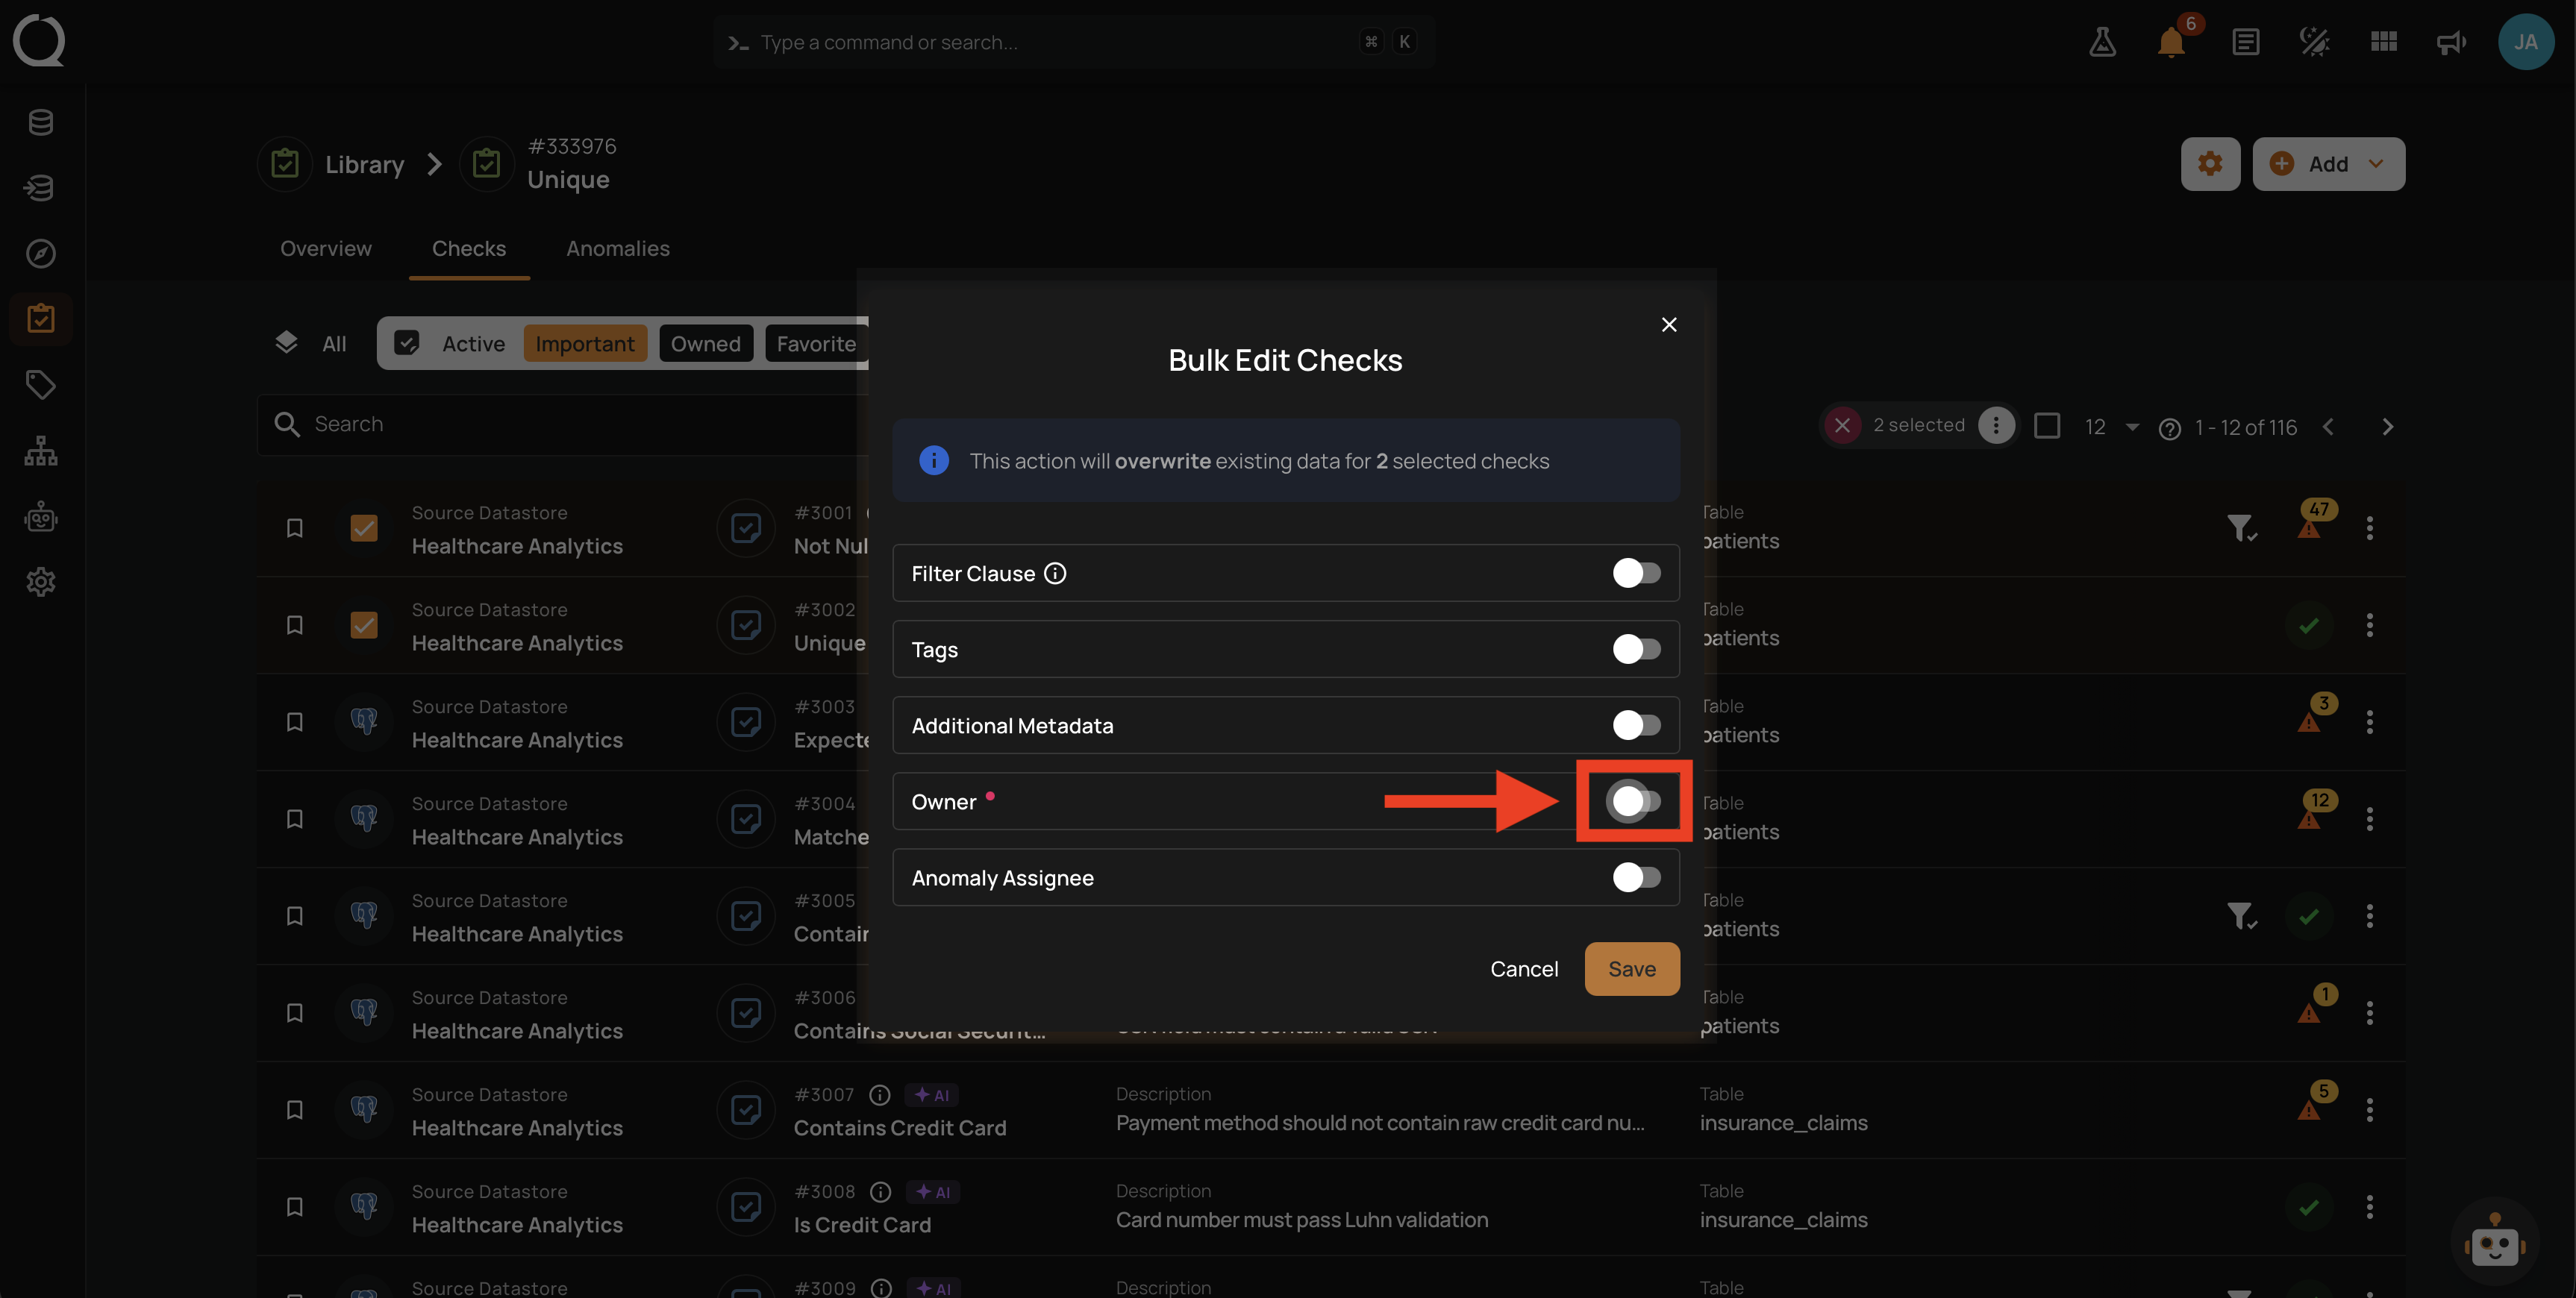
Step 6: The Bulk Edit Checks modal opens with the editable fields (Filter Clause, Tags, Additional Metadata, Owner, Anomaly Assignee) listed with toggles set to off. A banner at the top warns that the action will overwrite existing data for the selected checks.
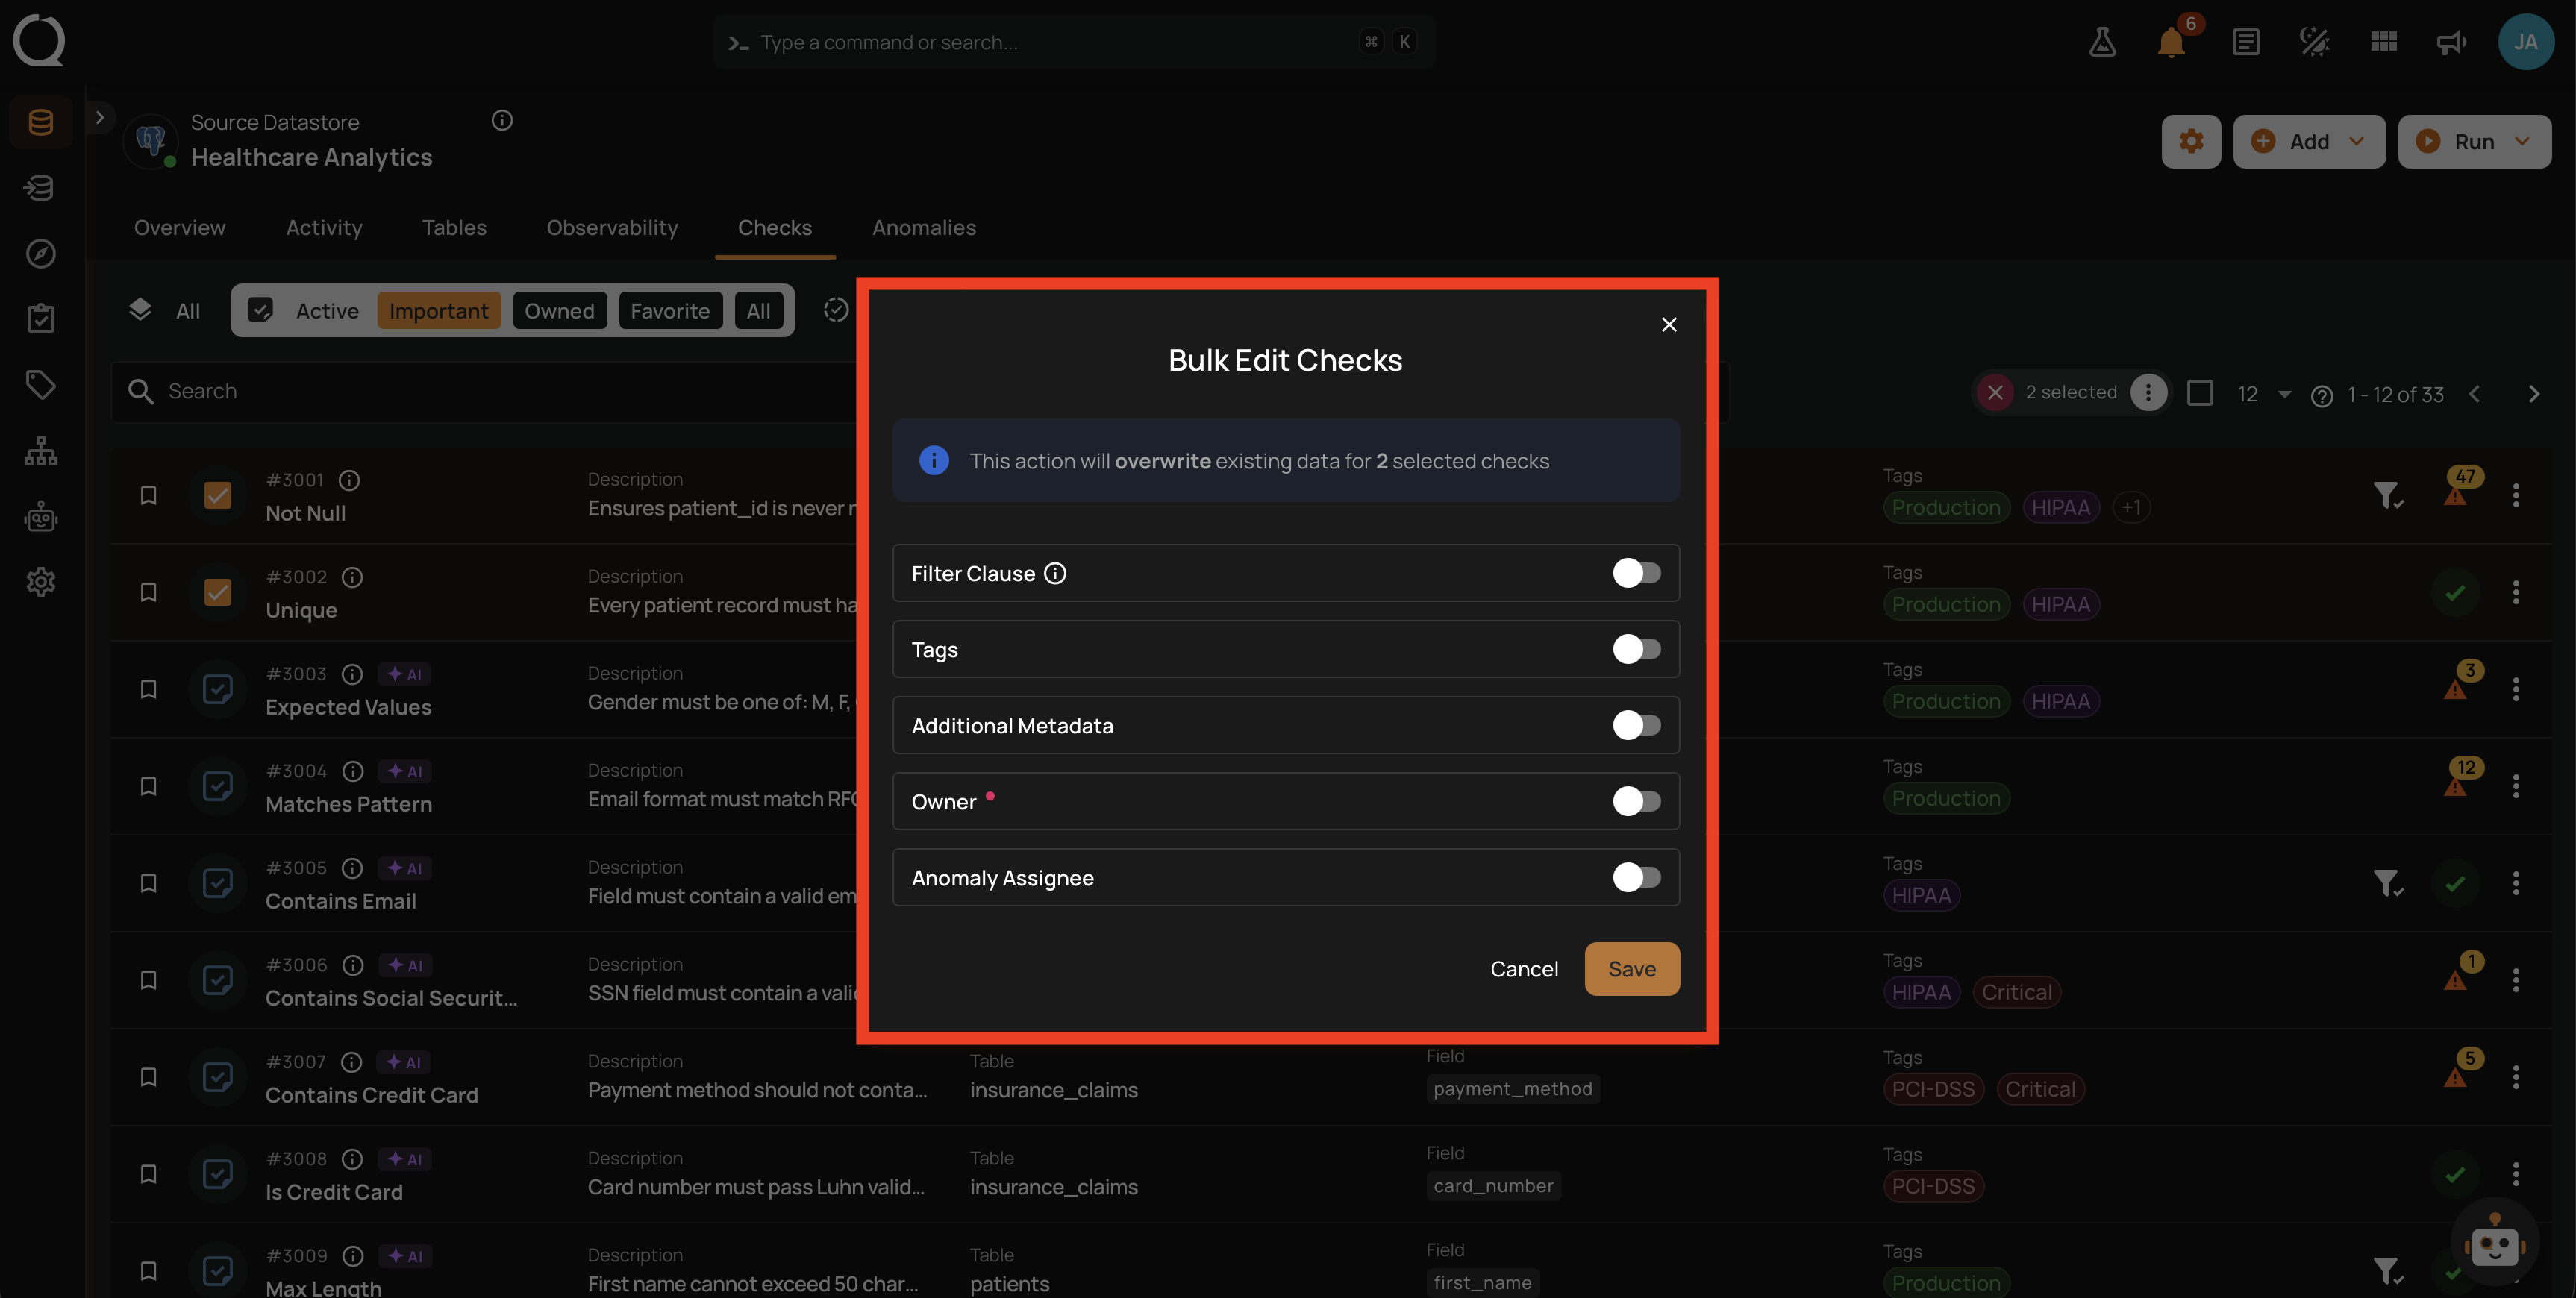
Step 7: Toggle on the Owner row.
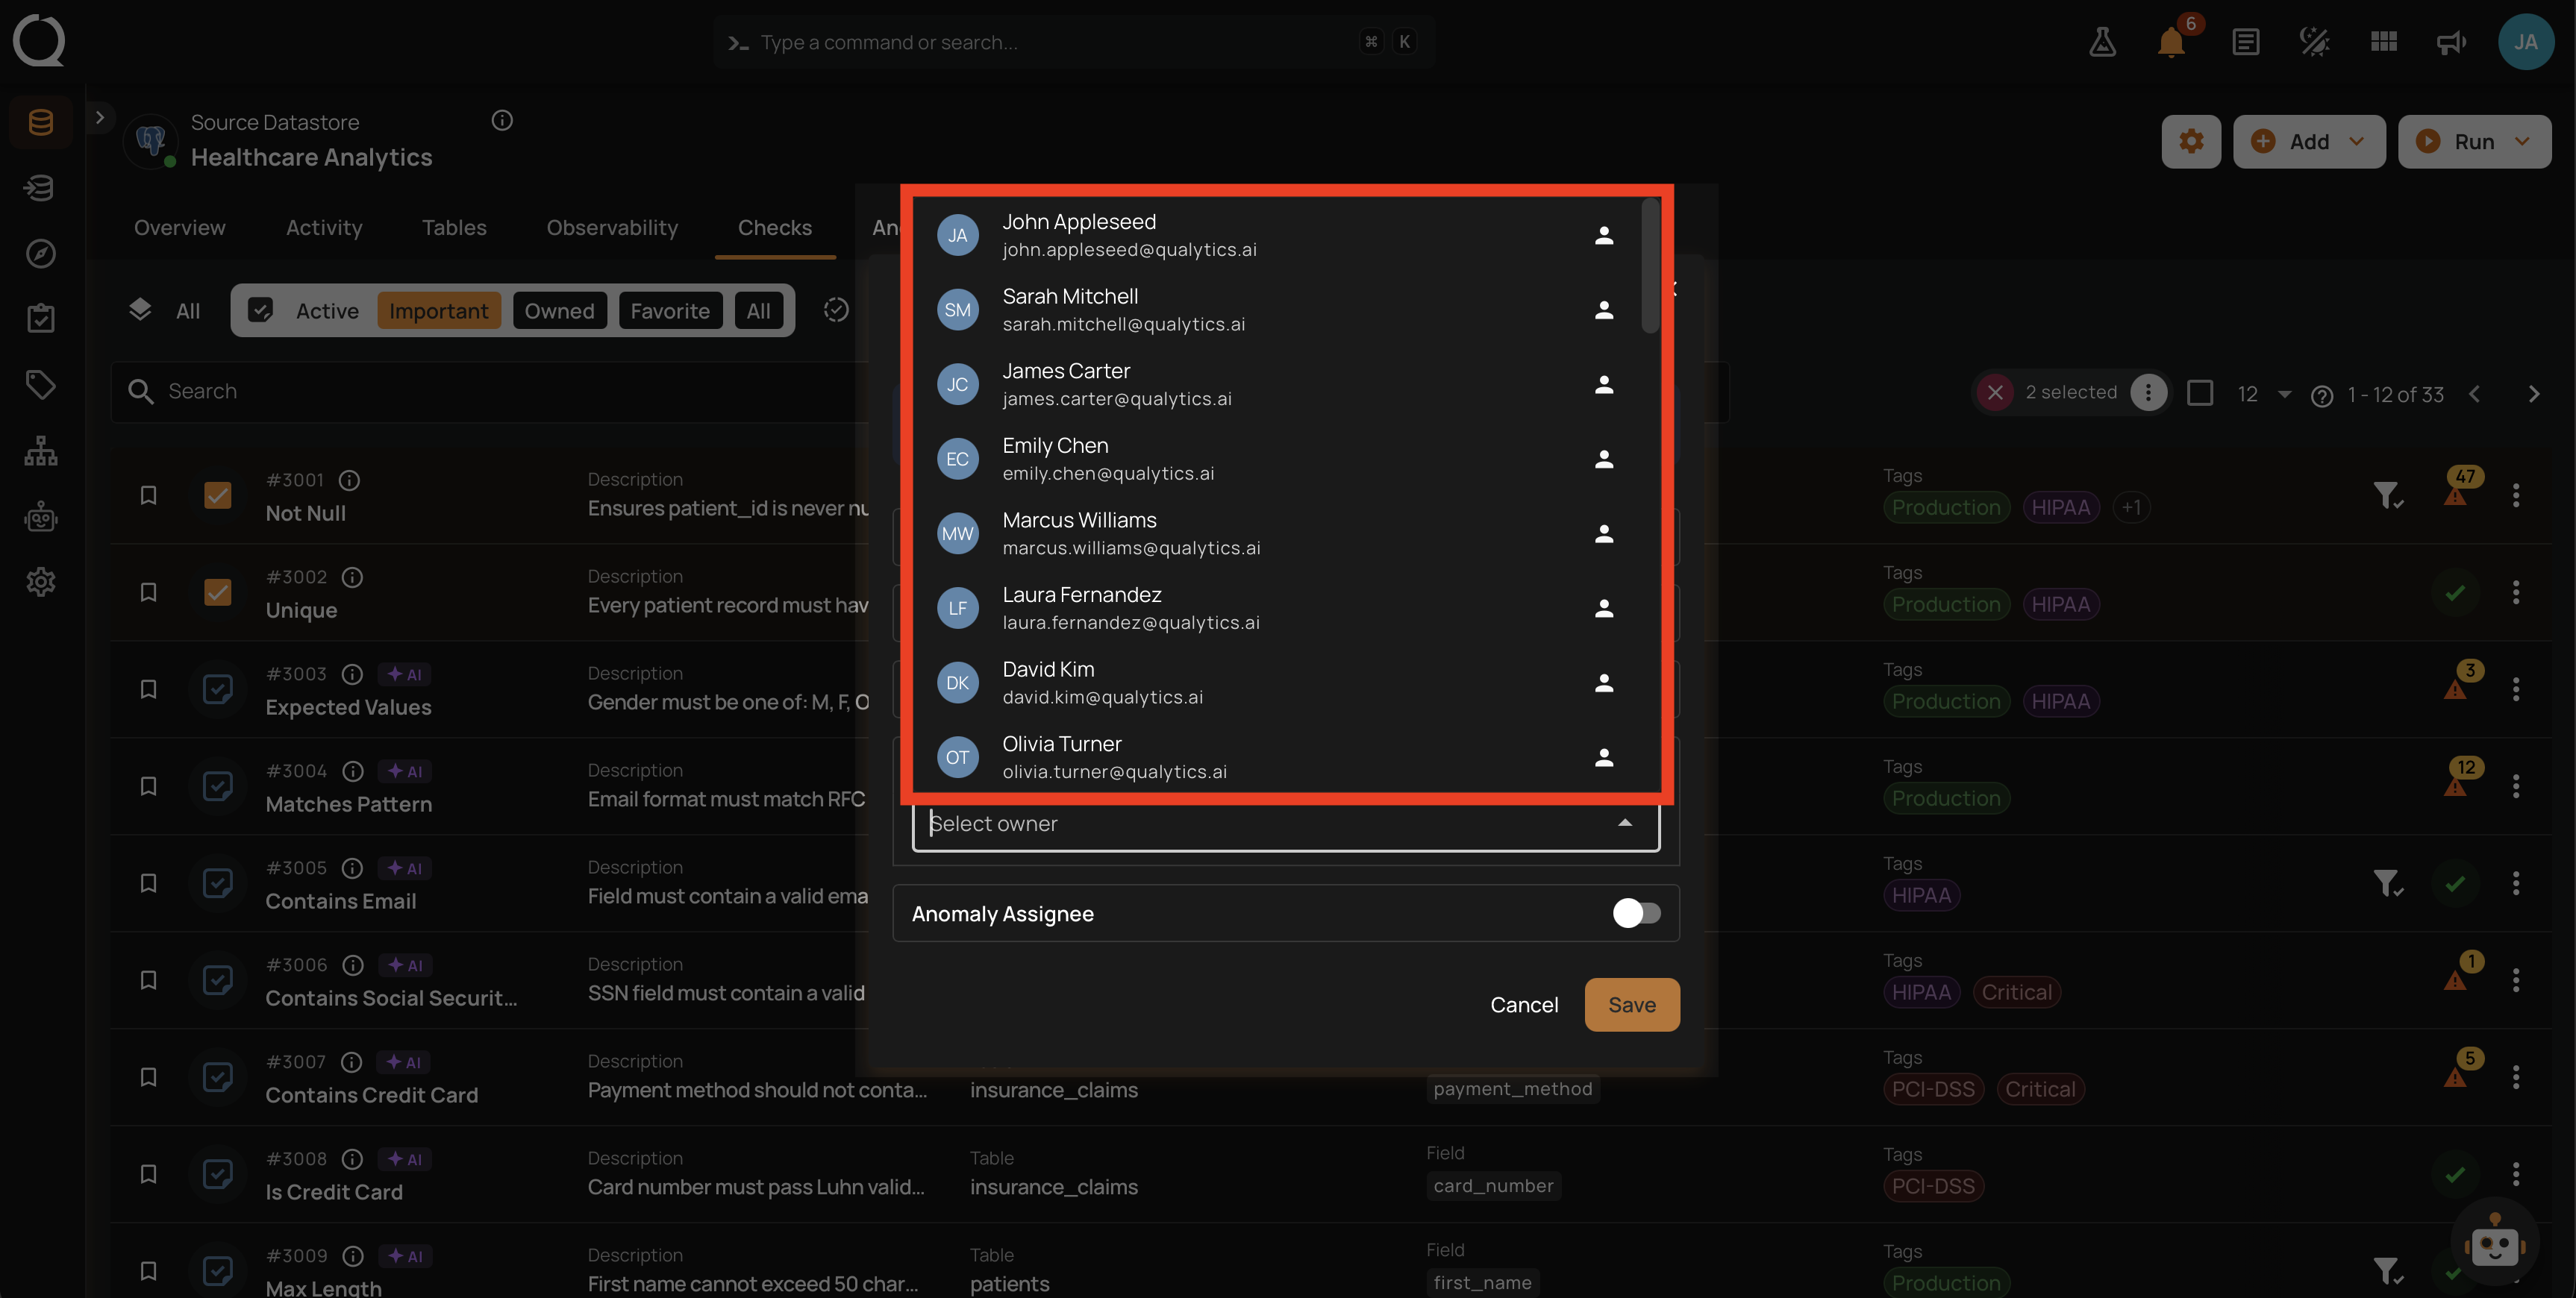
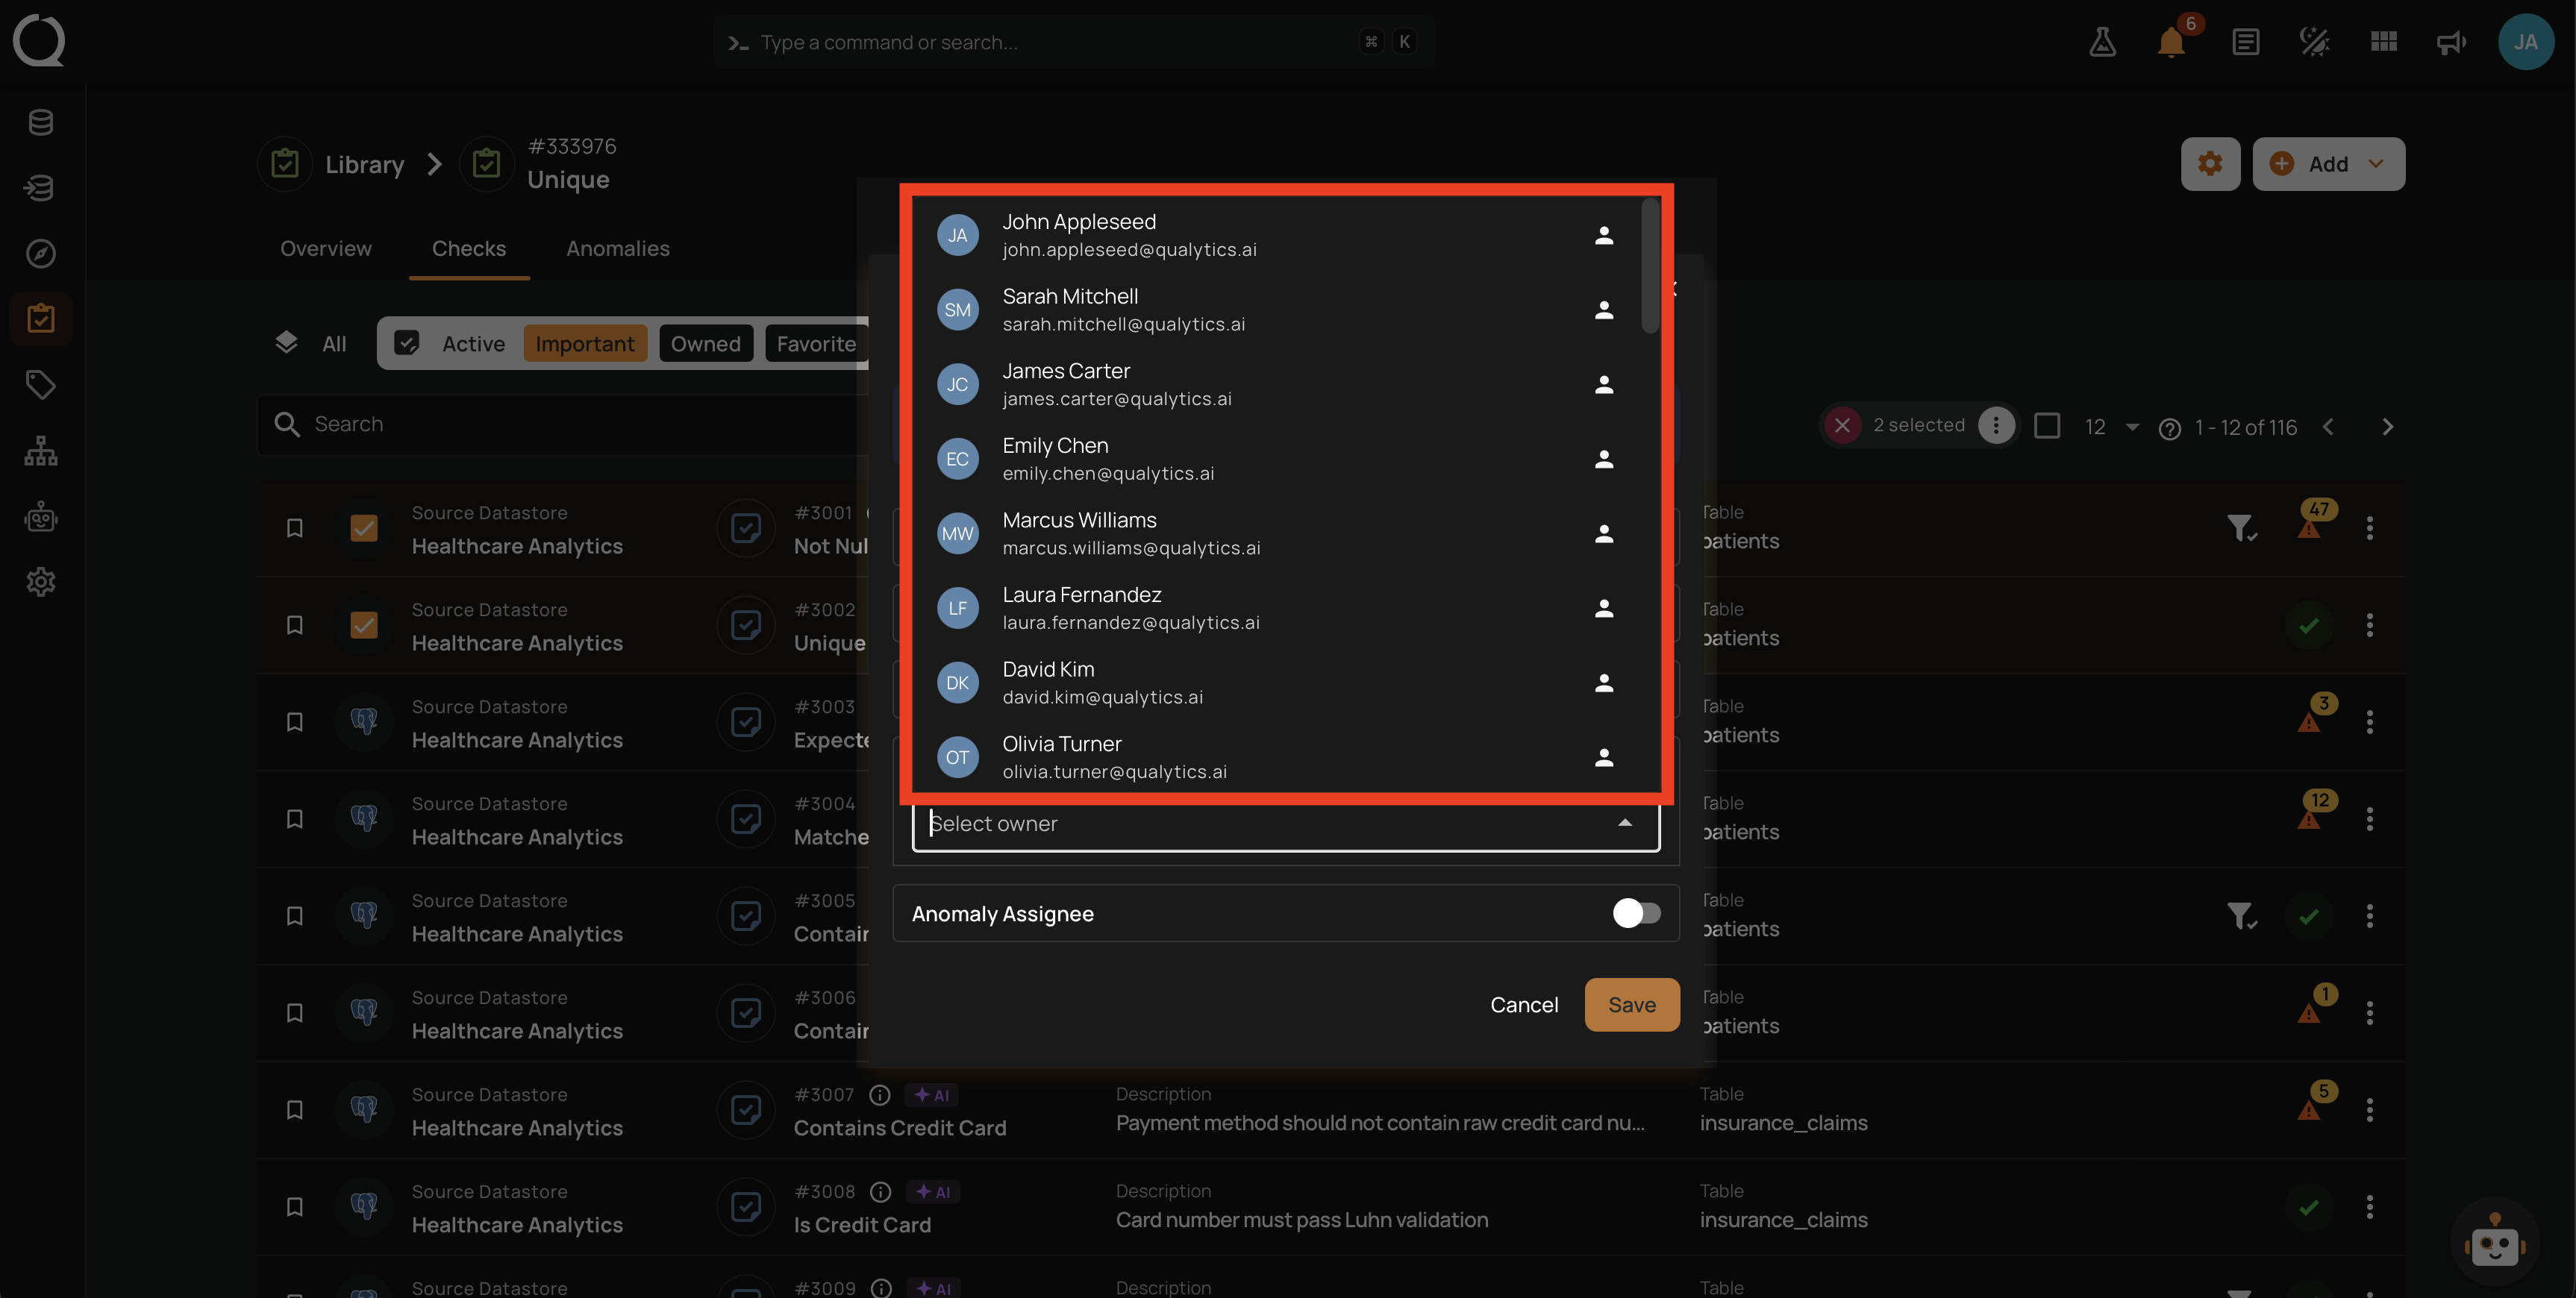
Step 8: Click the dropdown and select the new owner from the list. It contains every user with at least the Drafter team permission on the datastore.
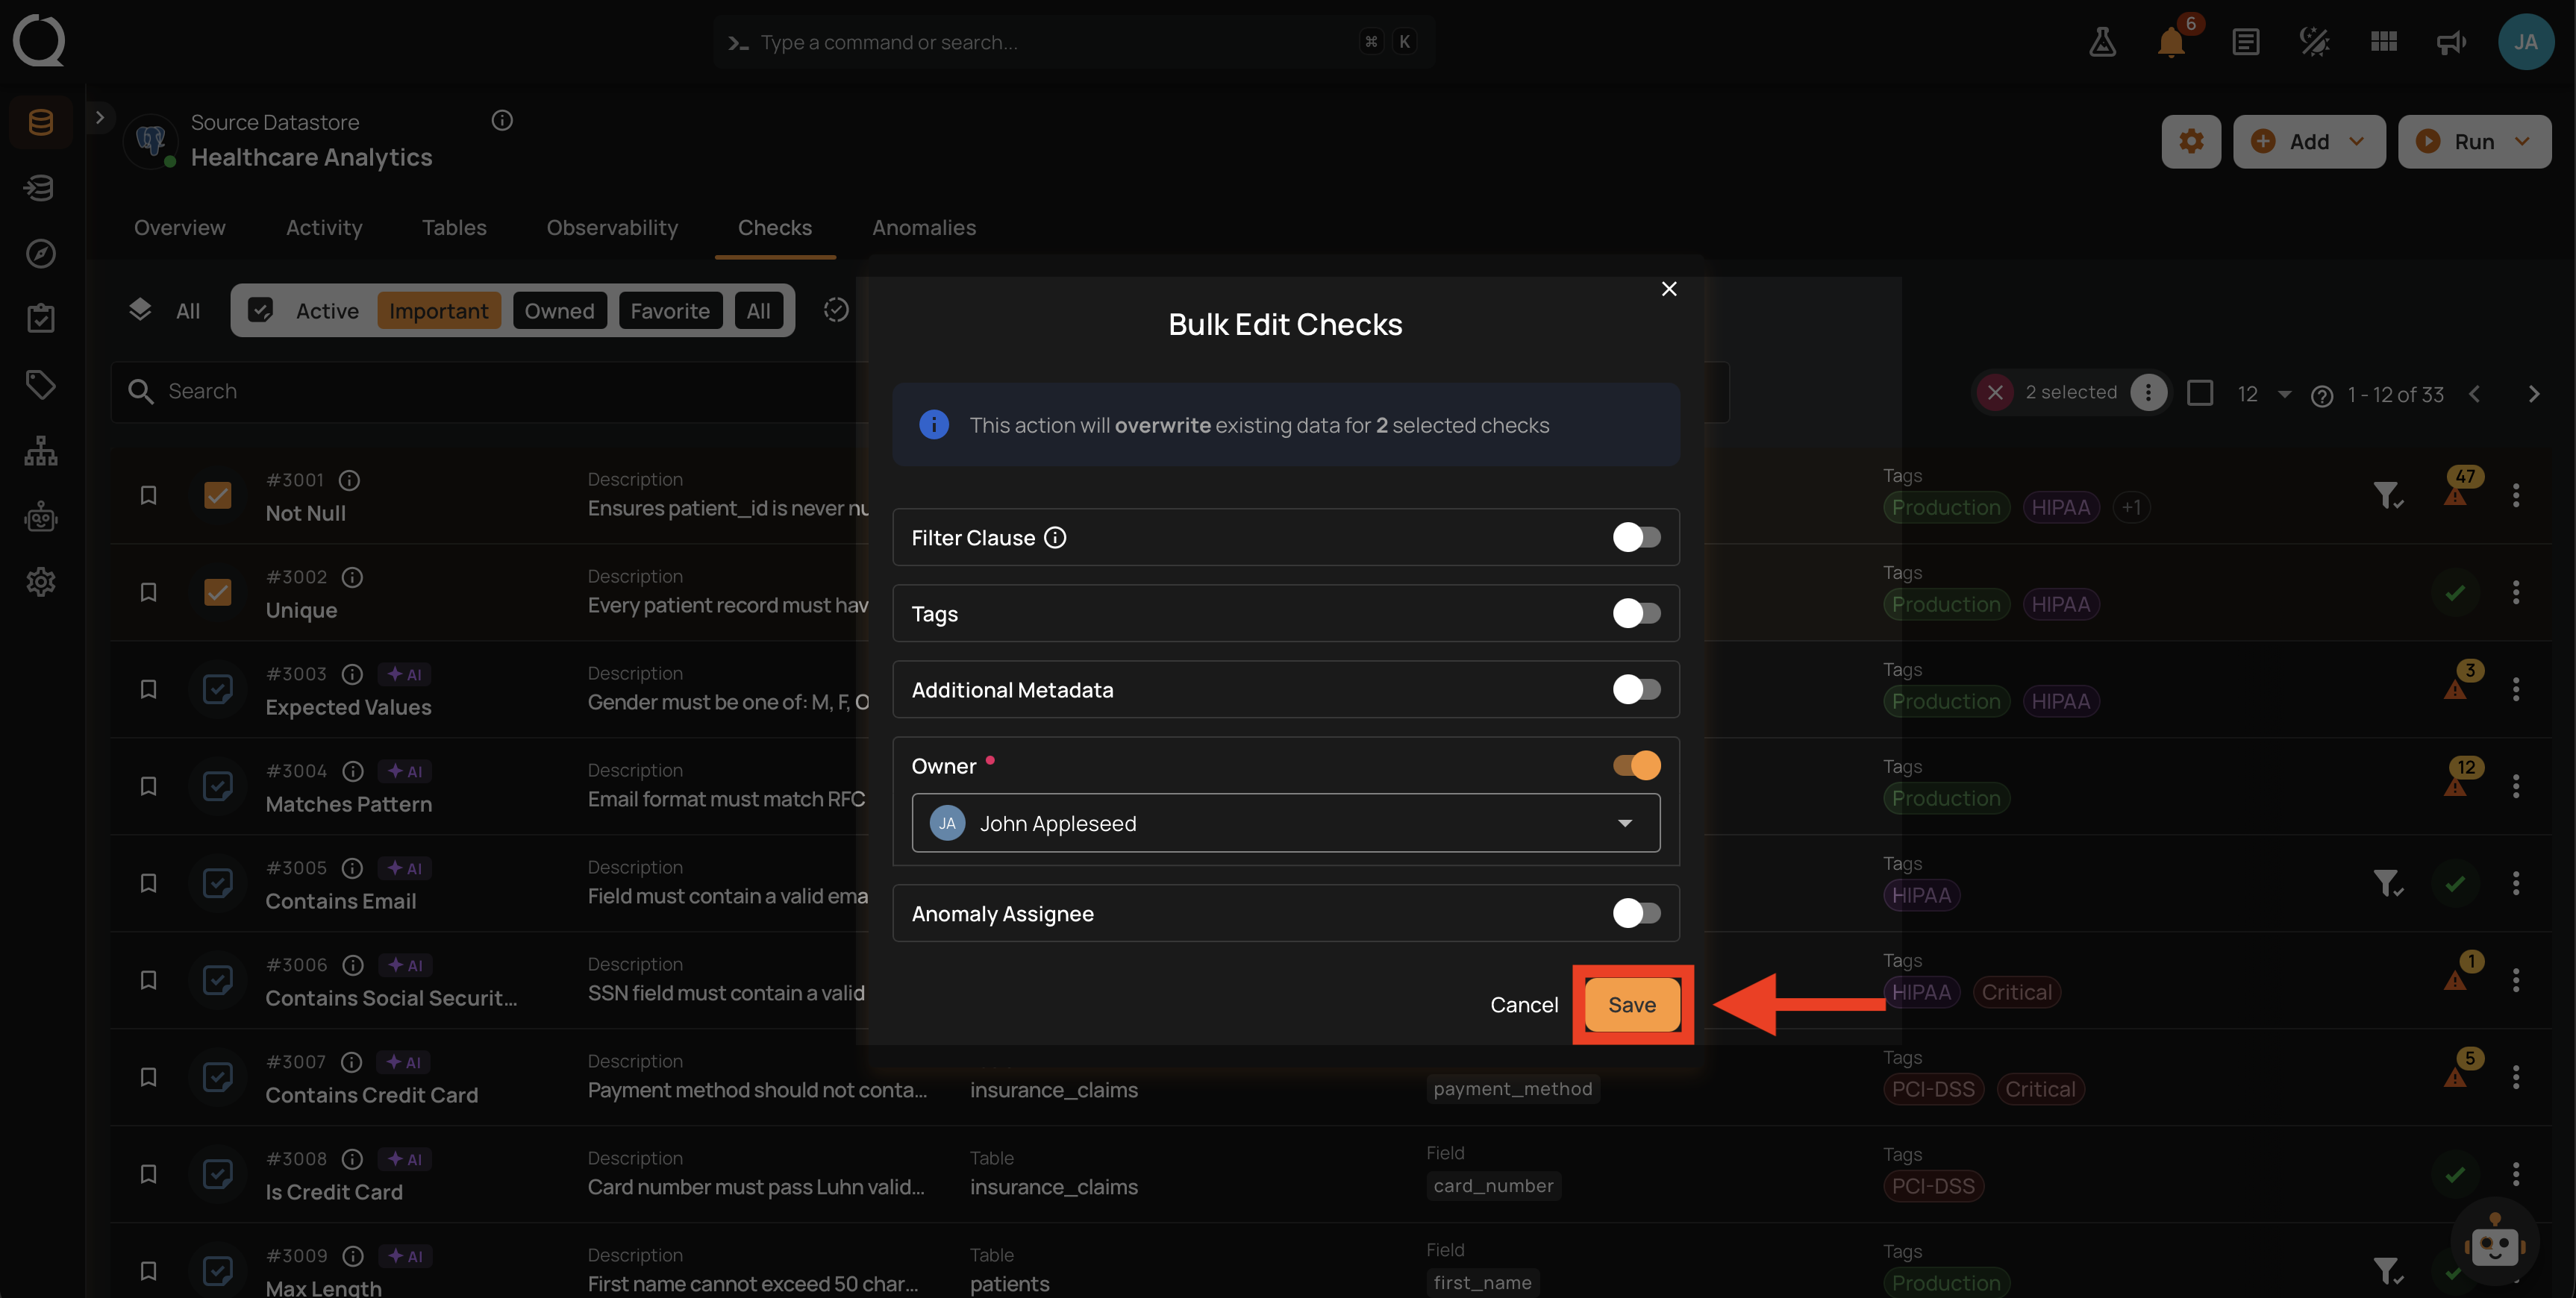
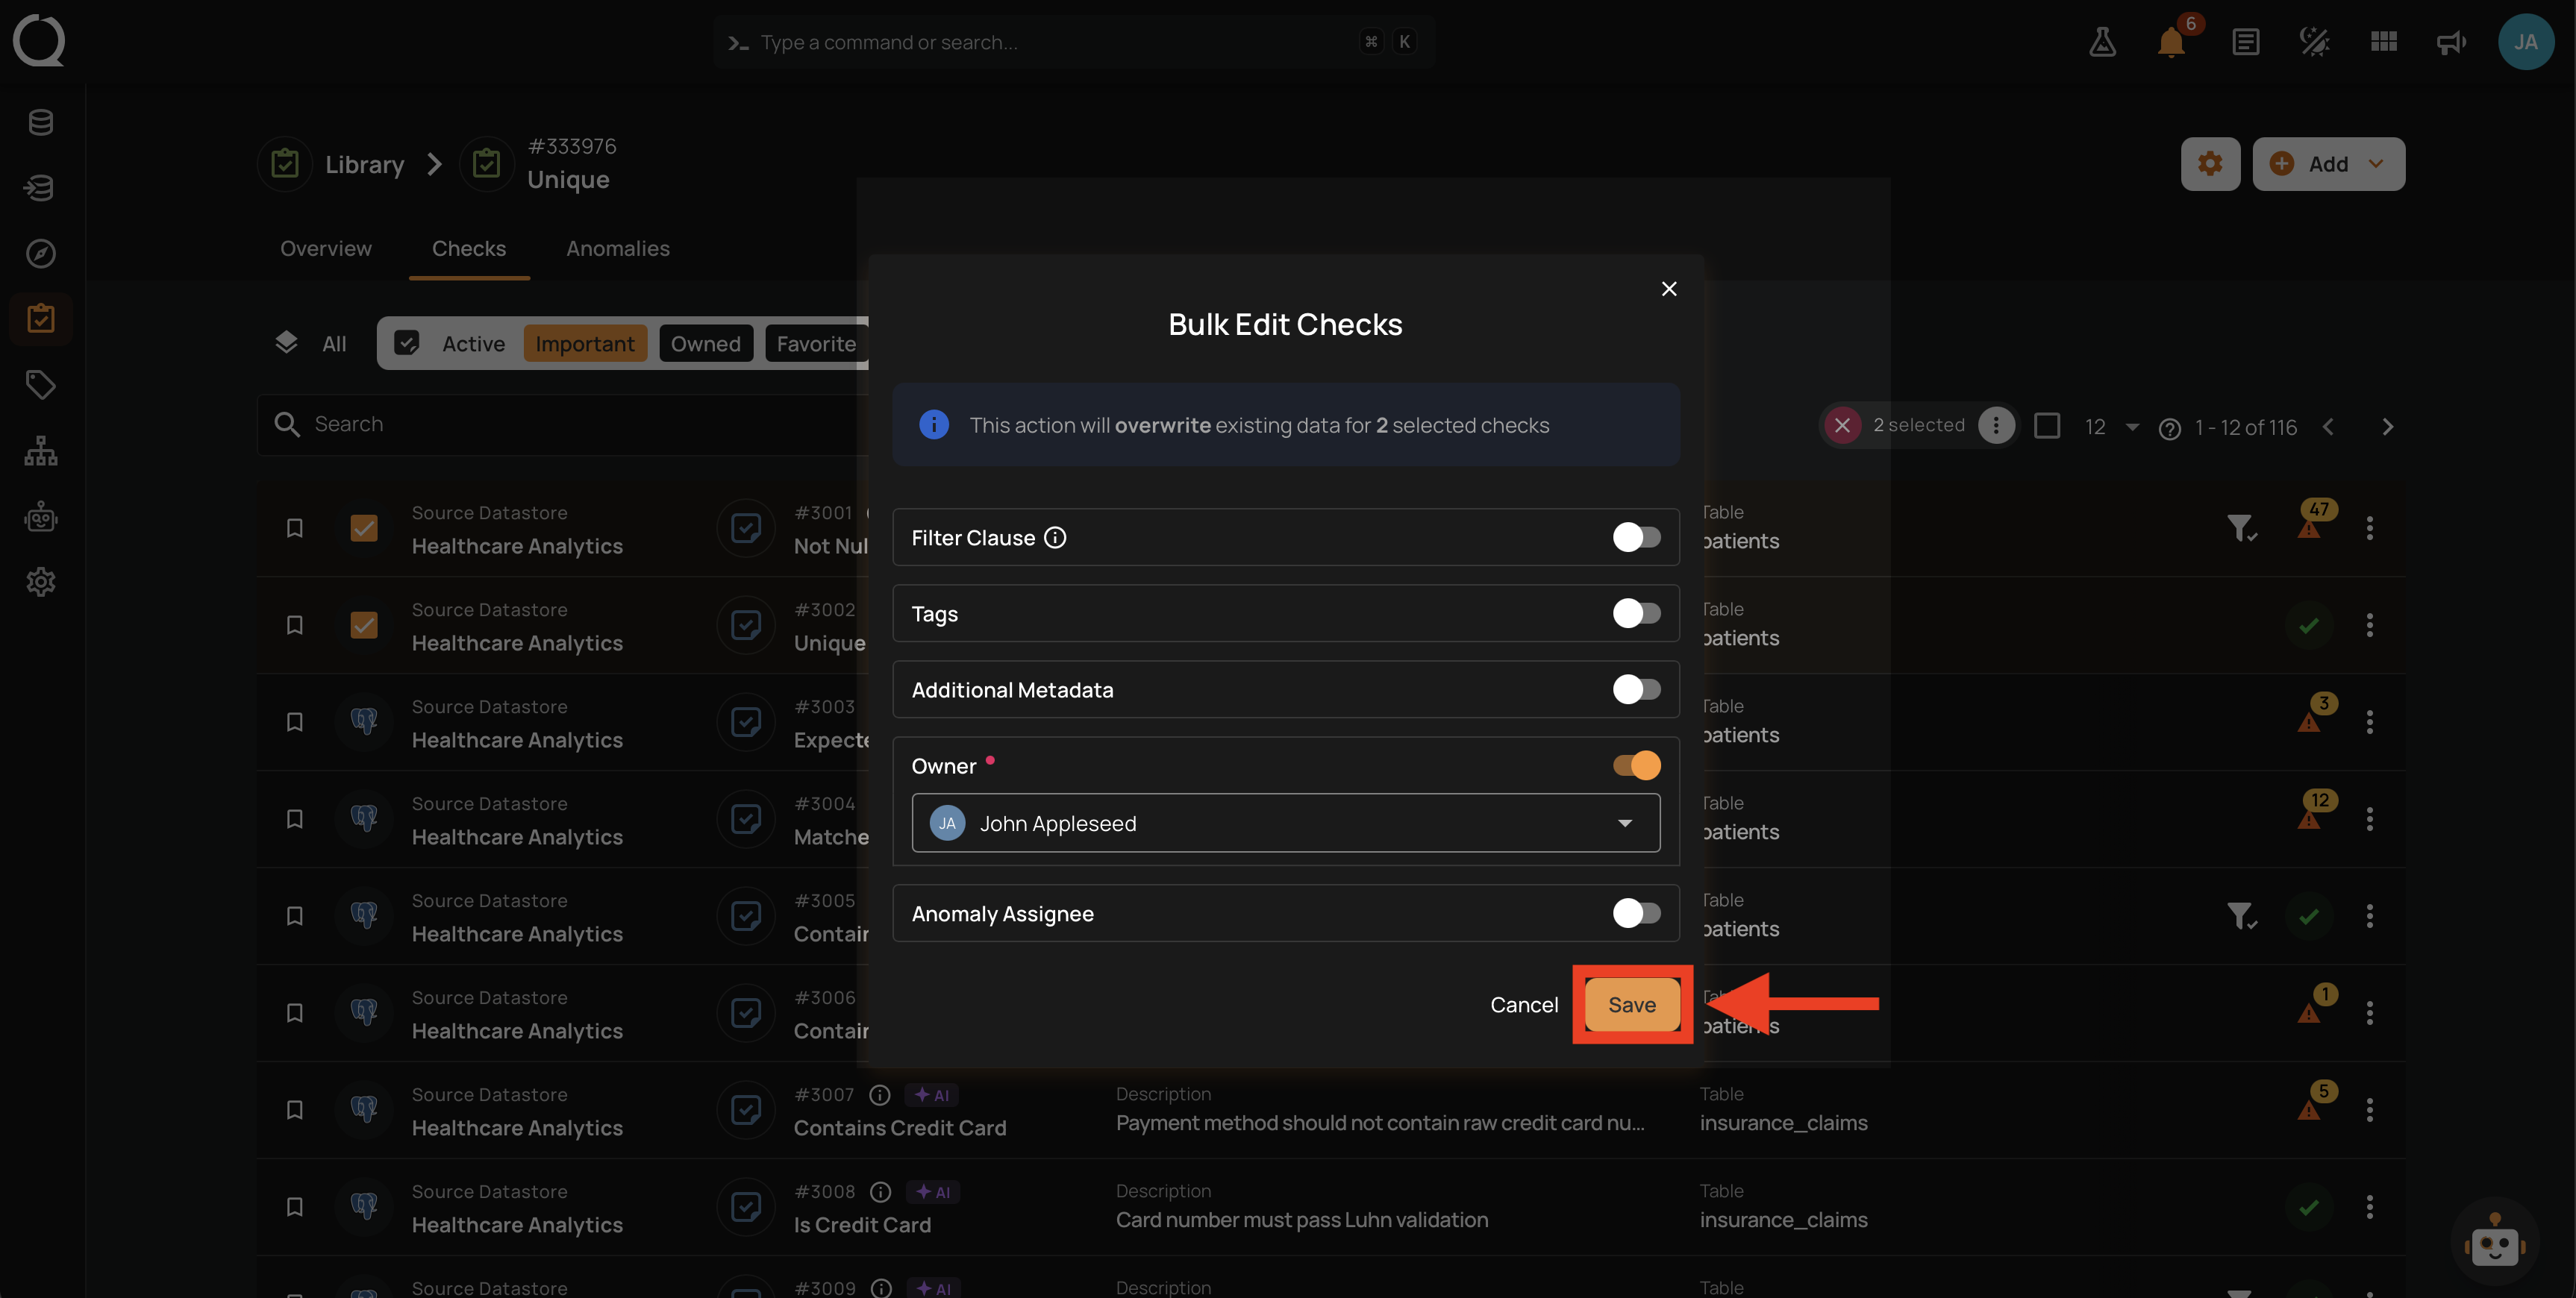
Step 9: Click Save to apply the new owner to every selected check.
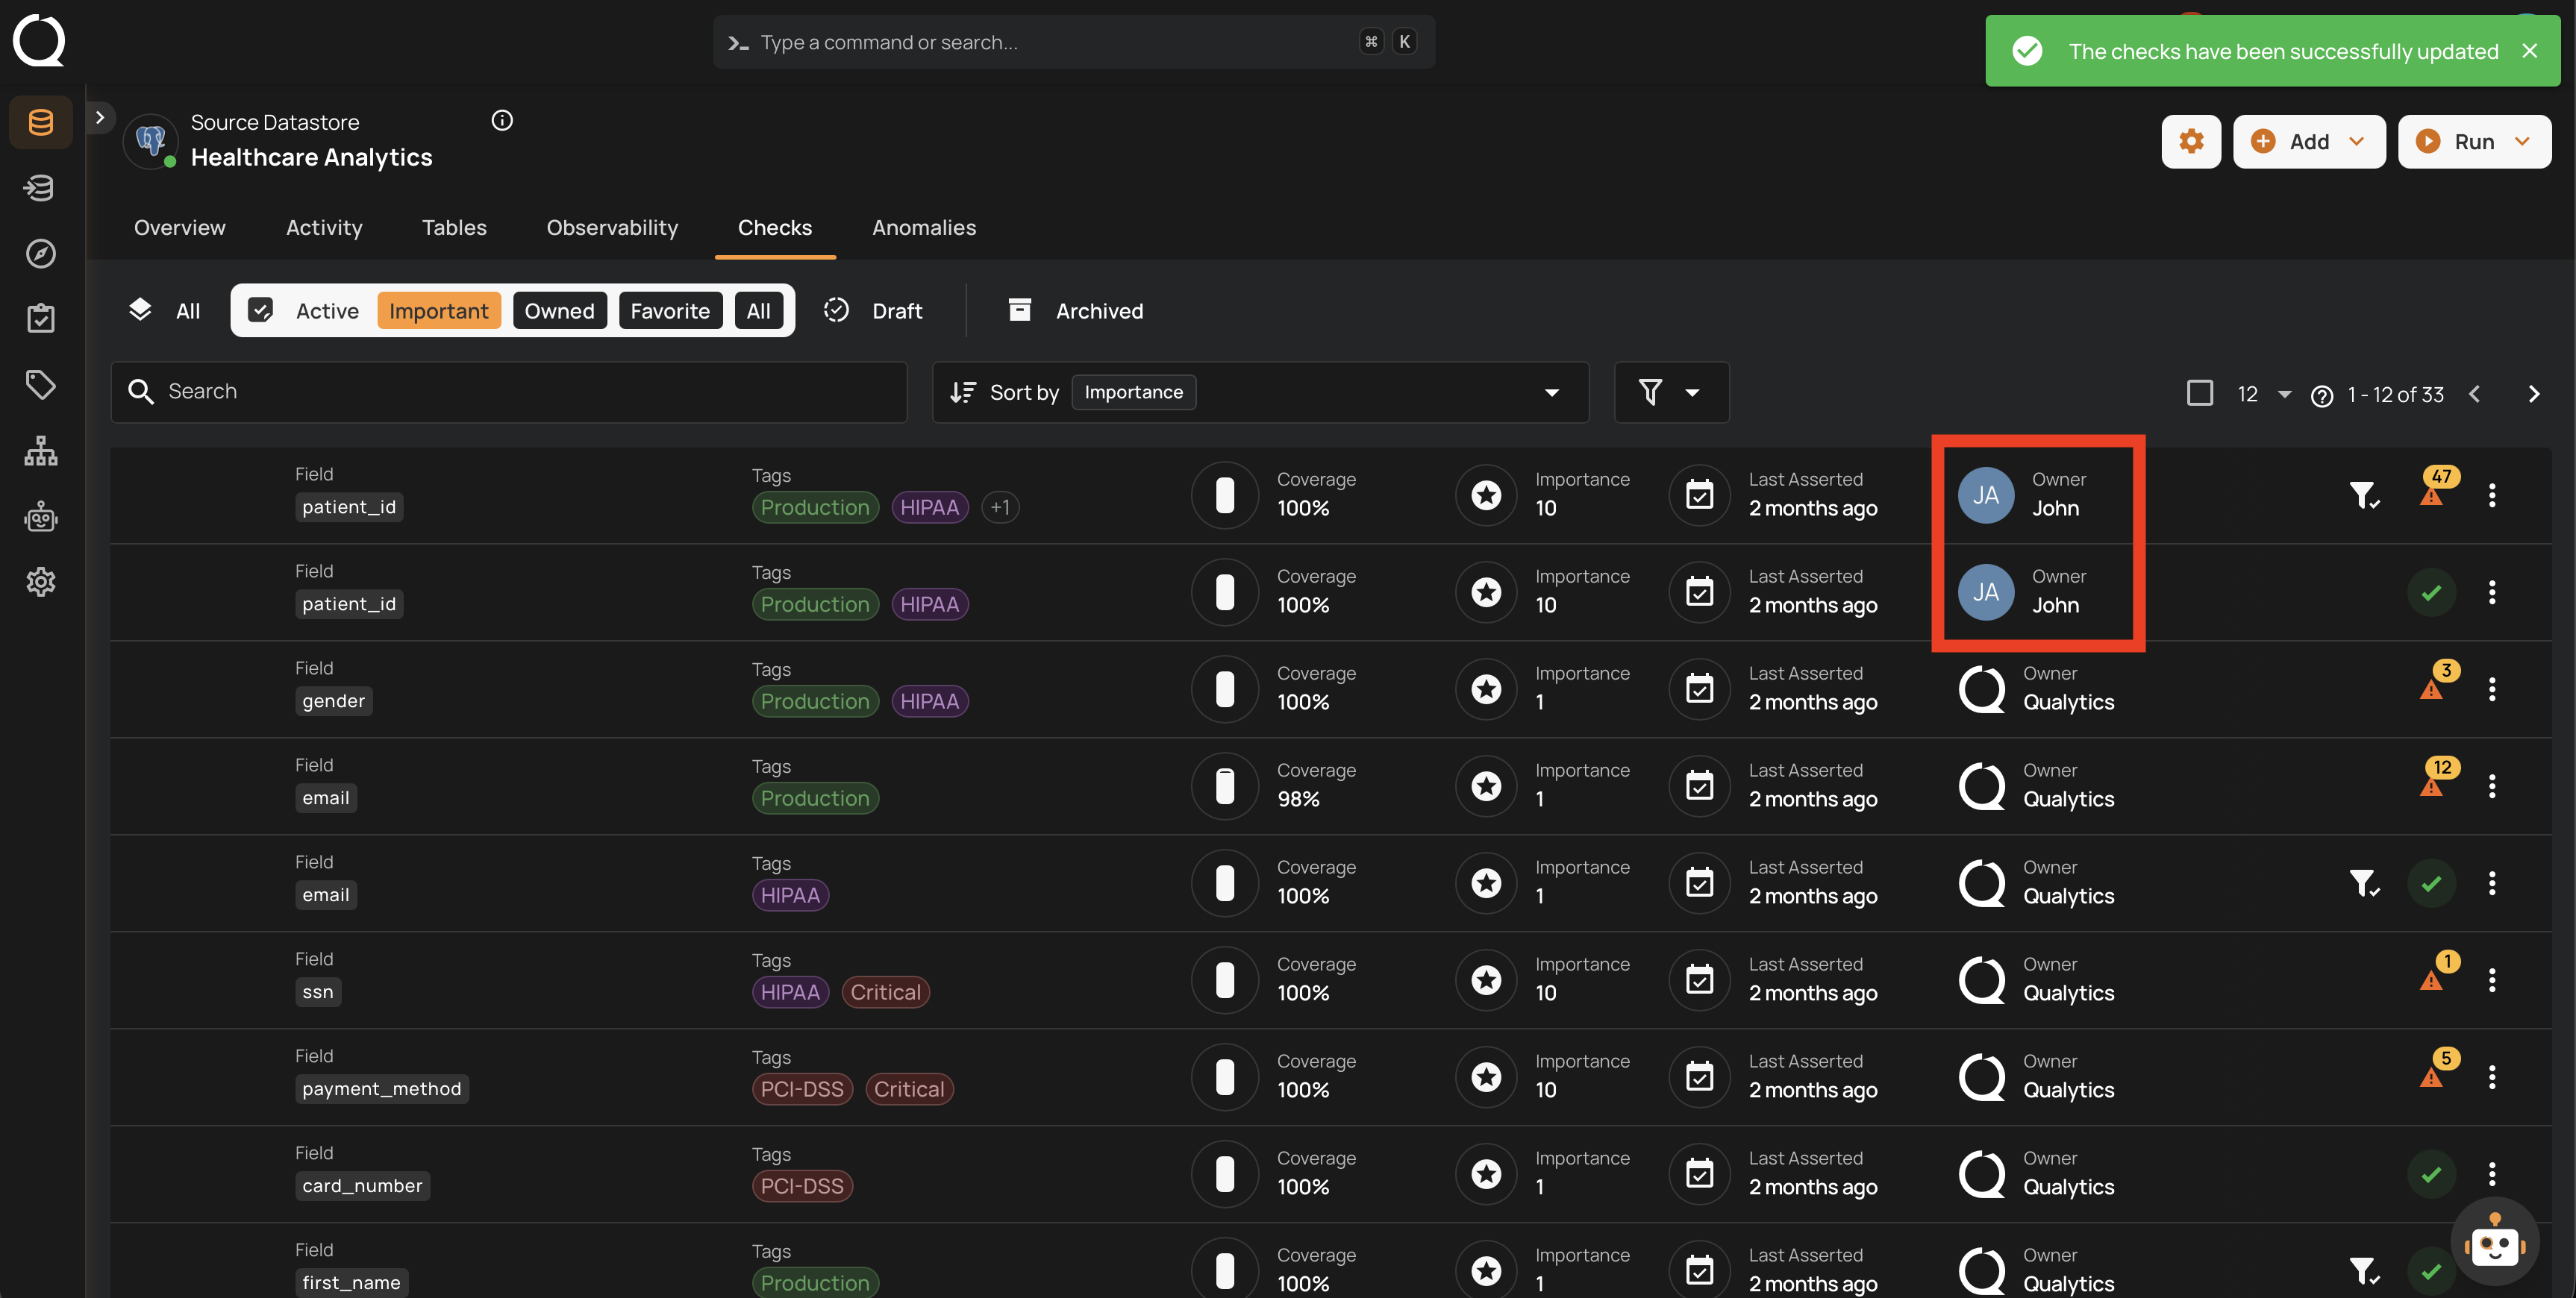
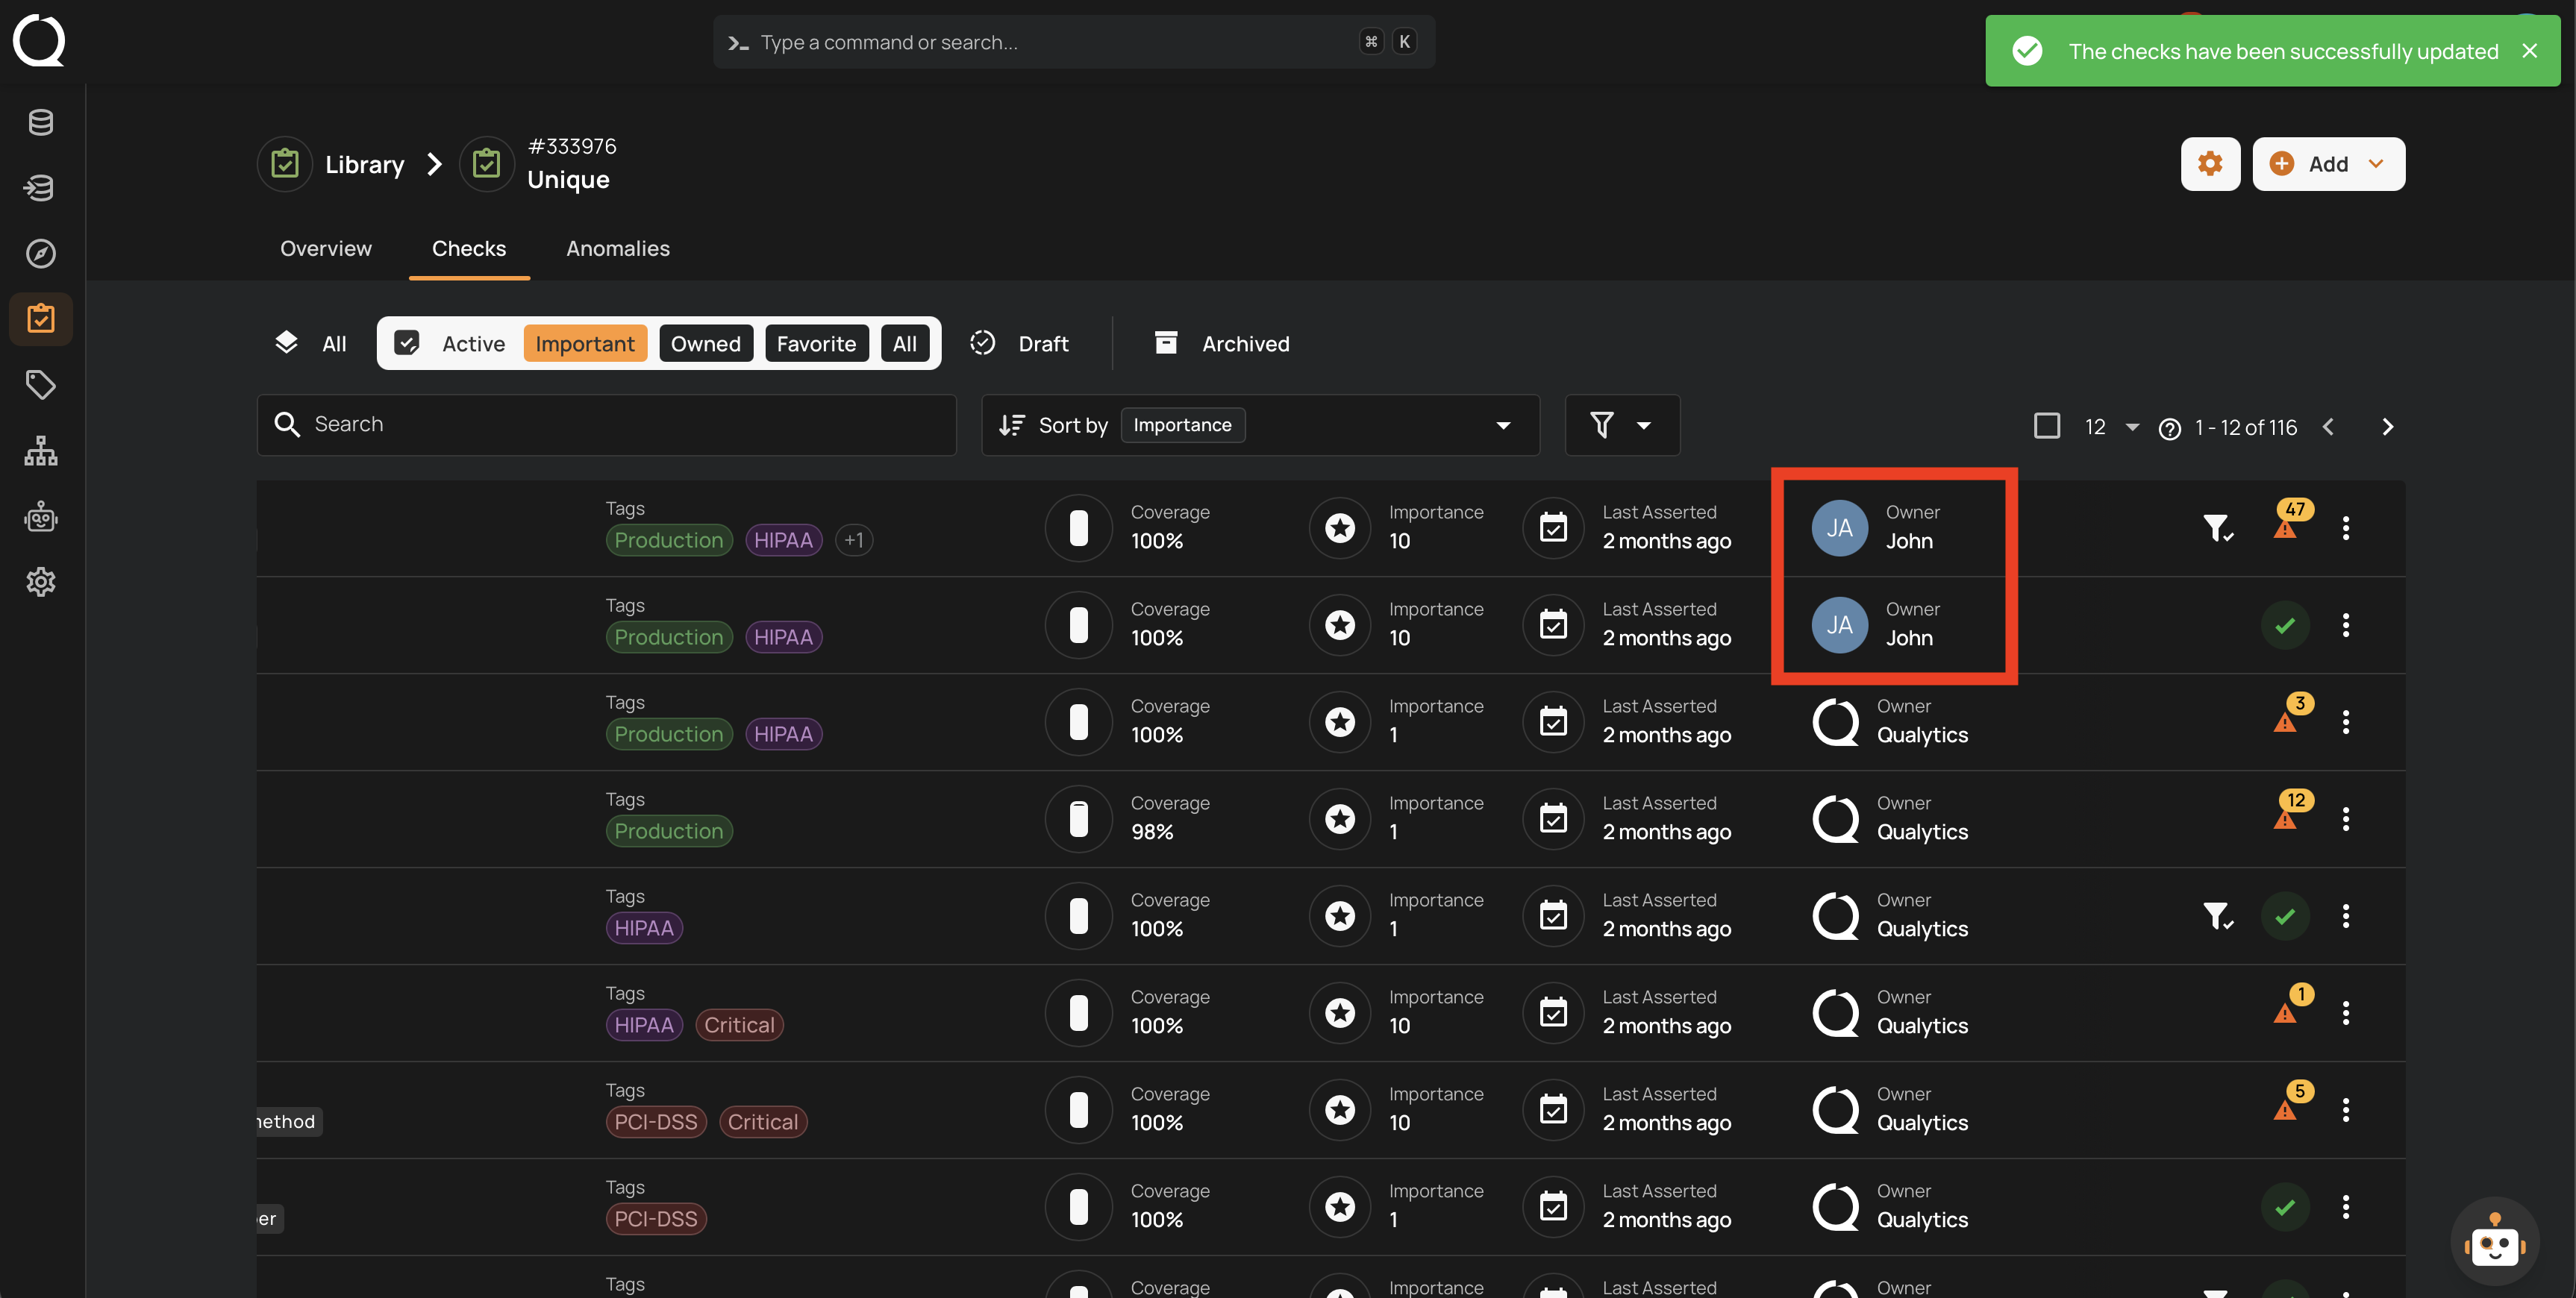
Step 10: A success message appears at the top of the page, and the Owner column refreshes to show the new owner avatar on every selected row. Each check's History records the bulk change.
Step 1: Open the source datastore, go to the Check Templates tab, and open the template that owns the checks. The template's Checks tab shows every check attached to it.

Step 2: Hover each check row and click the checkbox on the left to select it. The selected rows stay highlighted and a counter showing the count (for example, 2 selected) appears at the top of the list.
Step 3: Click the Bulk menu button next to the N selected counter.
![]()
Step 4: A menu opens showing the bulk actions available: Edit, Draft, Promote, and Archive.
Step 5: Click Edit .
Step 6: The Bulk Edit Checks modal opens with the editable fields (Filter Clause, Tags, Additional Metadata, Owner, Anomaly Assignee) listed with toggles set to off. A banner at the top warns that the action will overwrite existing data for the selected checks.
Step 7: Toggle on the Owner row.
Step 8: Click the dropdown and select the new owner from the list. It contains every user with at least the Drafter team permission on the datastore.
Step 9: Click Save to apply the new owner to every selected check.
Step 10: A success message appears at the top of the page, and the Owner column refreshes to show the new owner avatar on every selected row. Each check's History records the bulk change.
Bulk replaces, not merges
The value you choose in the Bulk Edit Checks modal becomes the owner for every selected check. There is no merge step: if some of the selected checks were previously owned by other users, those owners are replaced.