Generate Service Token
Use the Generate Token action to create a new Service Token for a Service User. Service Tokens enable automated systems to authenticate with the Qualytics API.
Permissions
Only users with the Admin role can generate Service Tokens. See the Permissions page for details.
Warning
Tokens are shown only once at creation time. Make sure to copy or download the token before closing the modal — it cannot be retrieved later.
Fields
The token form contains the following fields:
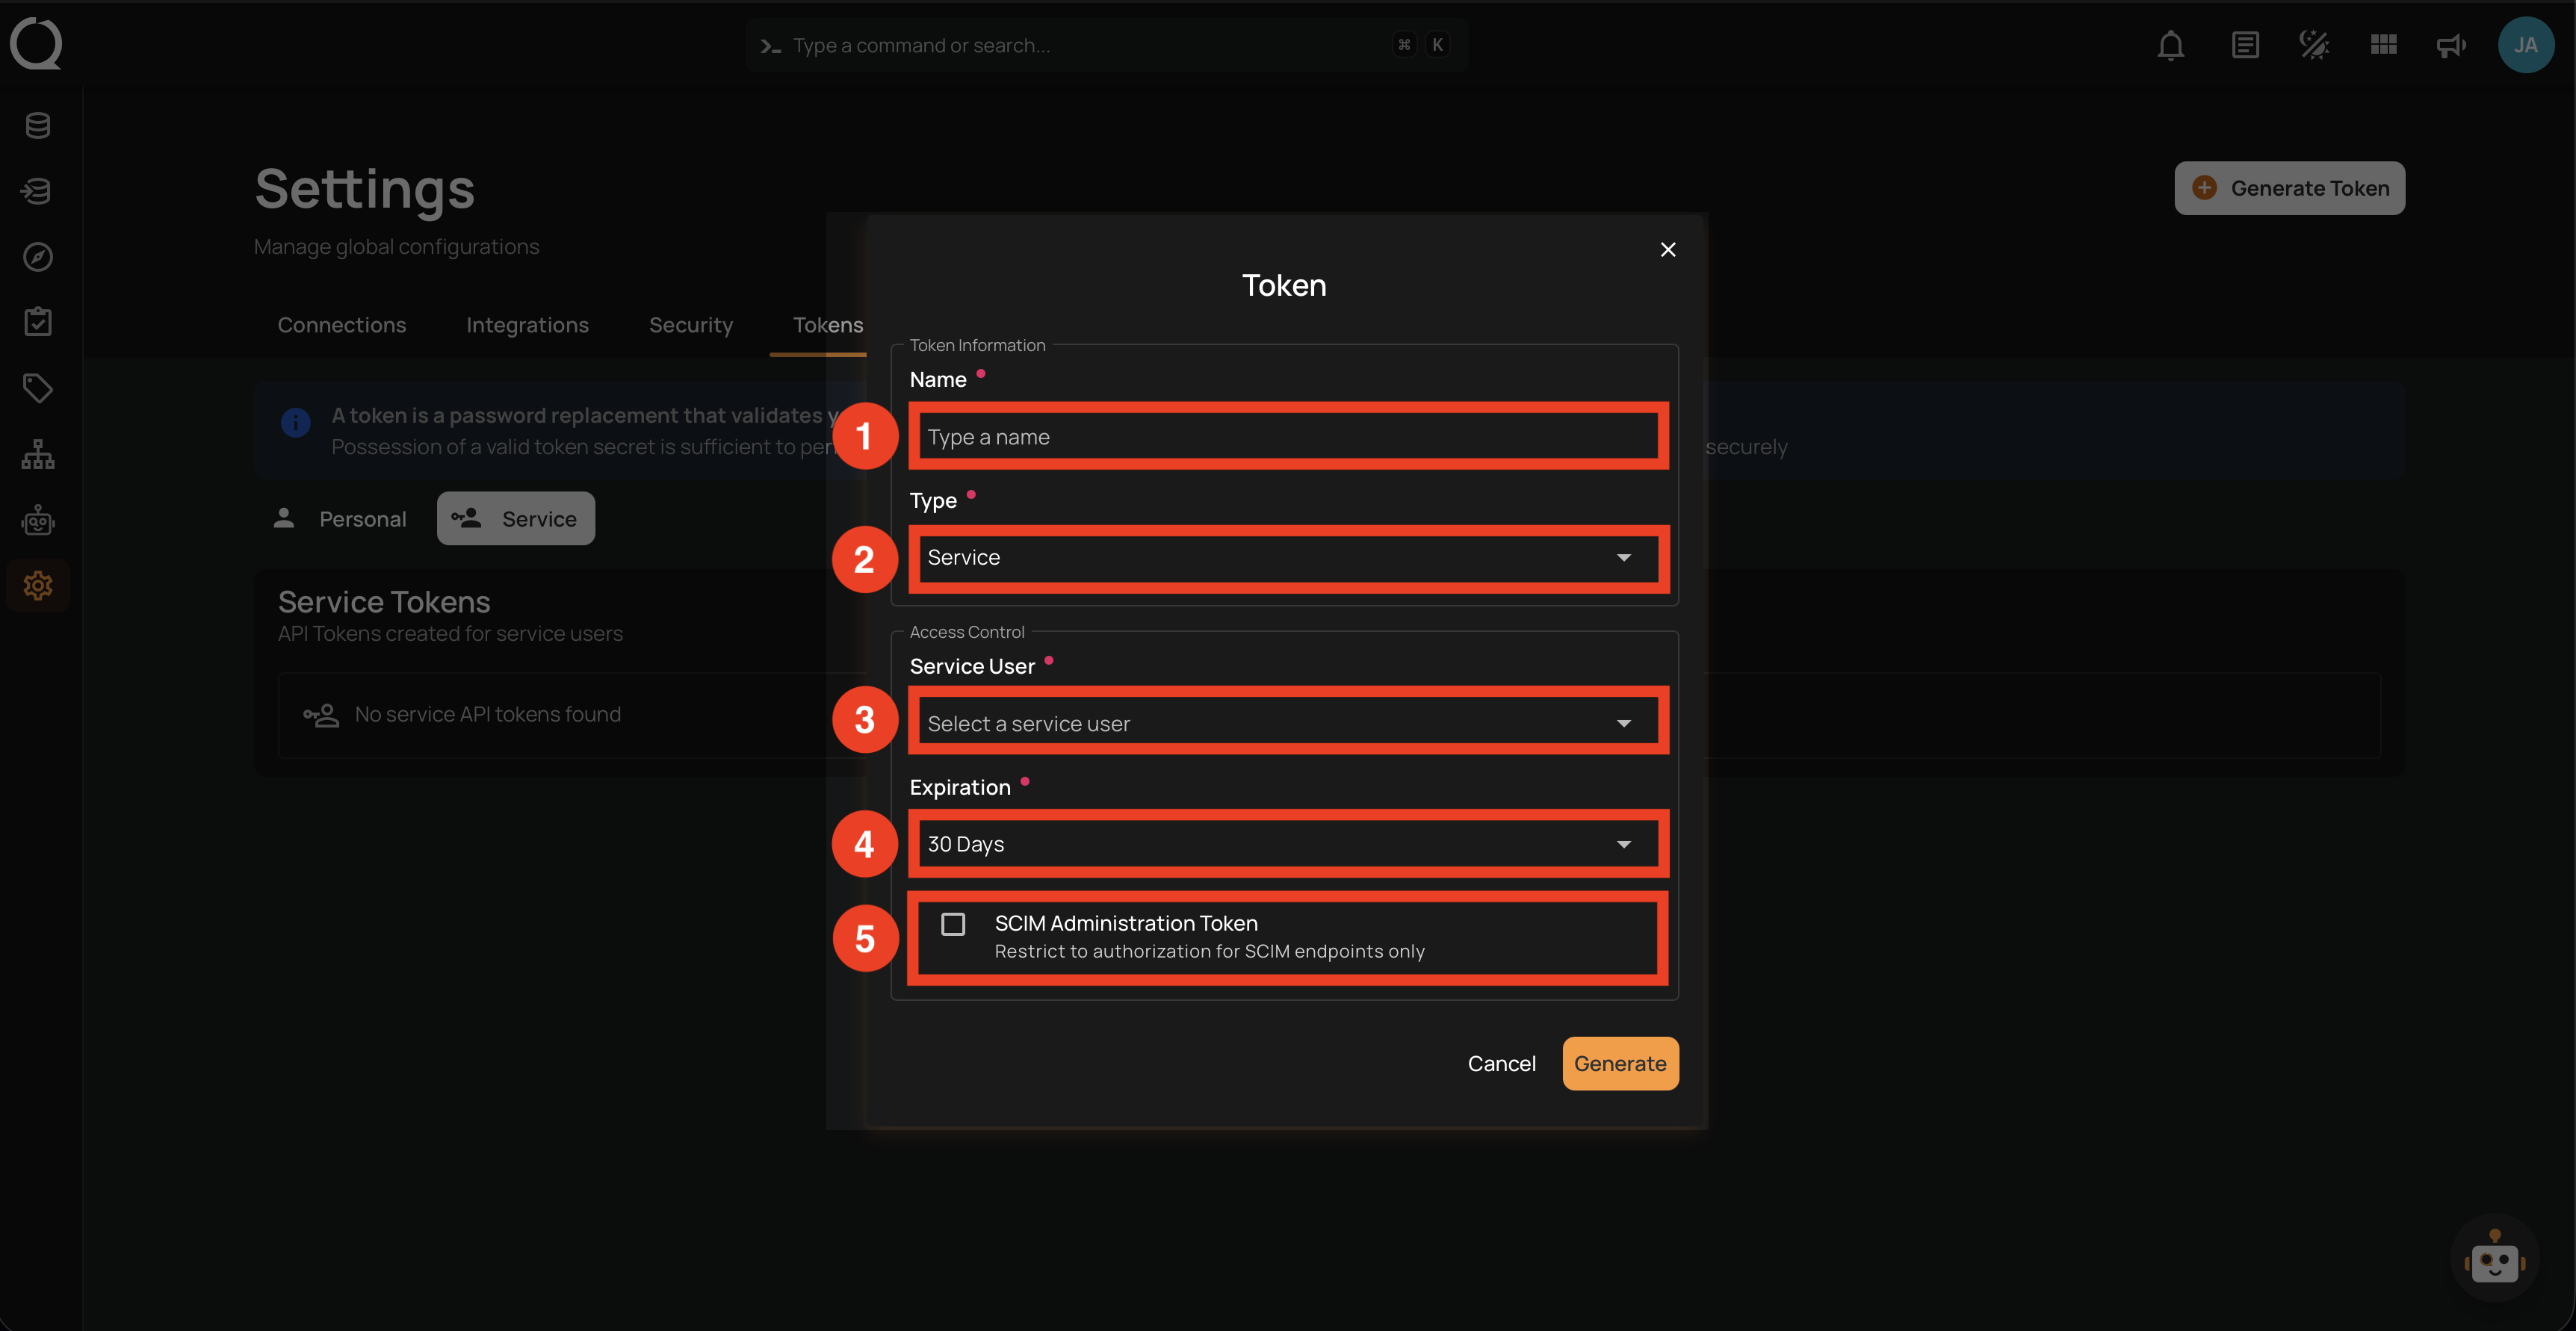
| REF. | FIELD | DESCRIPTION |
|---|---|---|
| 1 | Name | A descriptive label for the token (e.g., Airflow Service User). Must be unique per Service User. |
| 2 | Type | The token type (Personal or Service). Select Service to create a Service Token. |
| 3 | Service User | Select the Service User that the token will be tied to. A Service User must be created before generating a token — see Create Service User or Service Users for details. |
| 4 | Expiration | The token's lifespan: 30 days, 60 days, 90 days, 1 year, or Never. |
| 5 | SCIM Administration Token | When enabled, the token is restricted to SCIM endpoints (/scim/v2/*) for automated user provisioning and identity management. See How It Works for details on SCIM. |
Steps
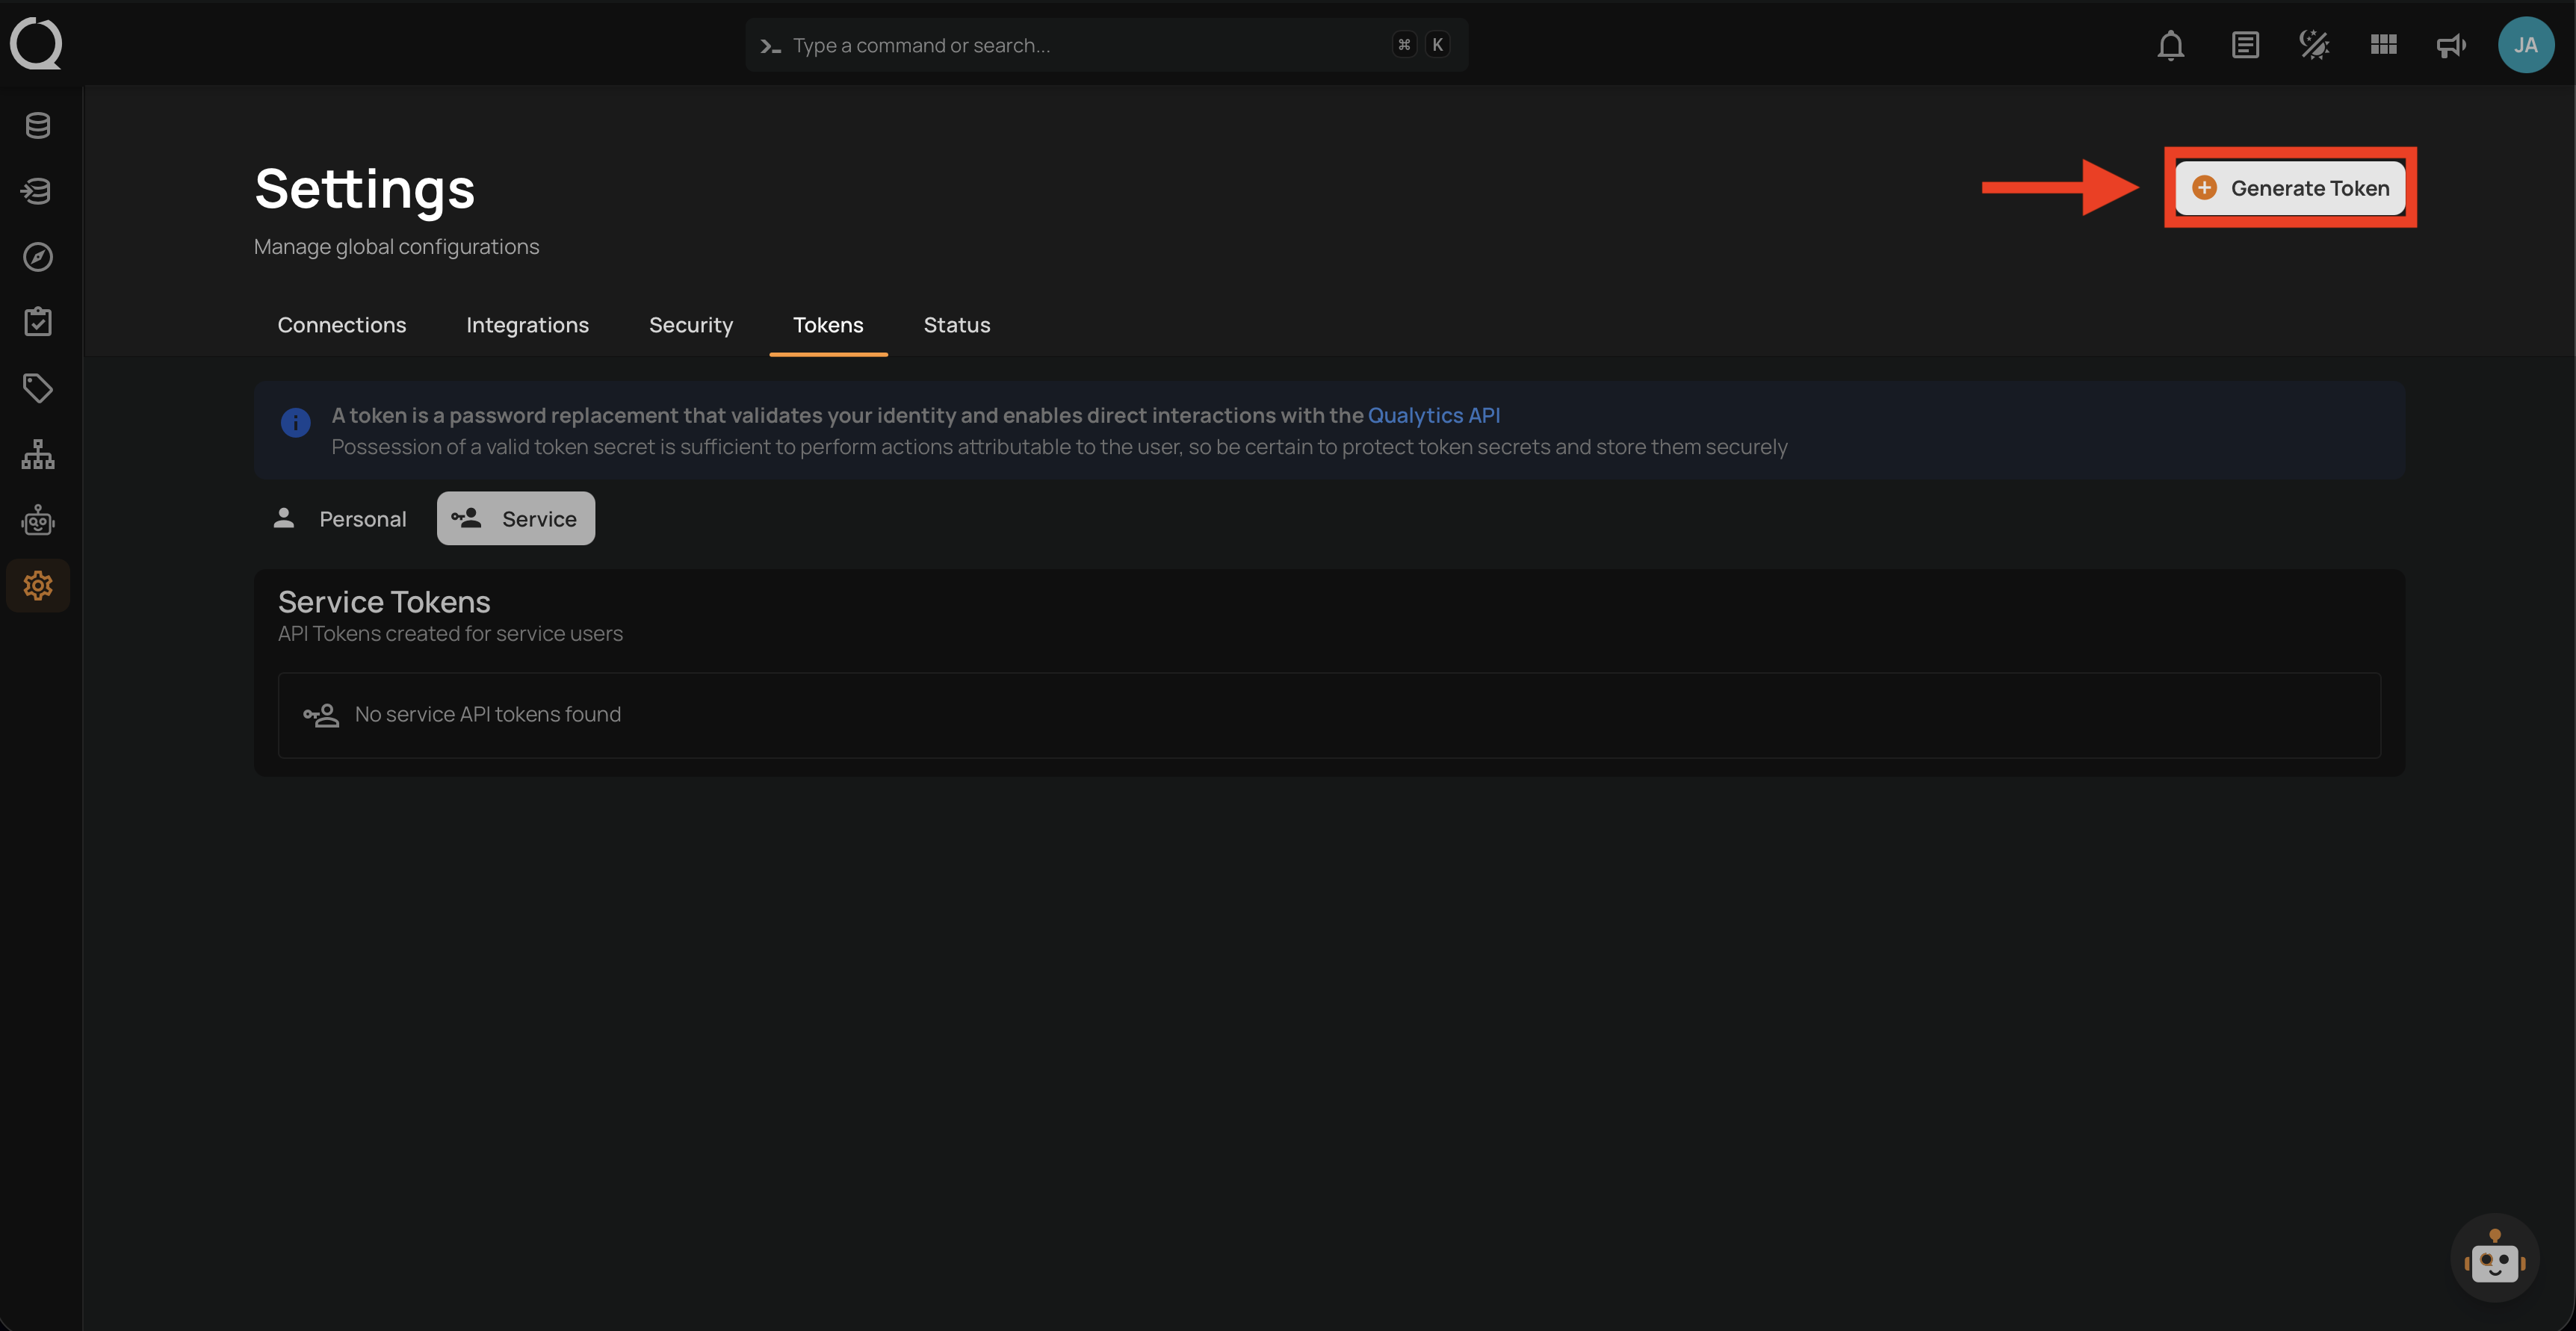
Step 1: Click the Generate Token button located in the top right corner of the Settings page.
Step 2: Fill in the fields and review your selections.
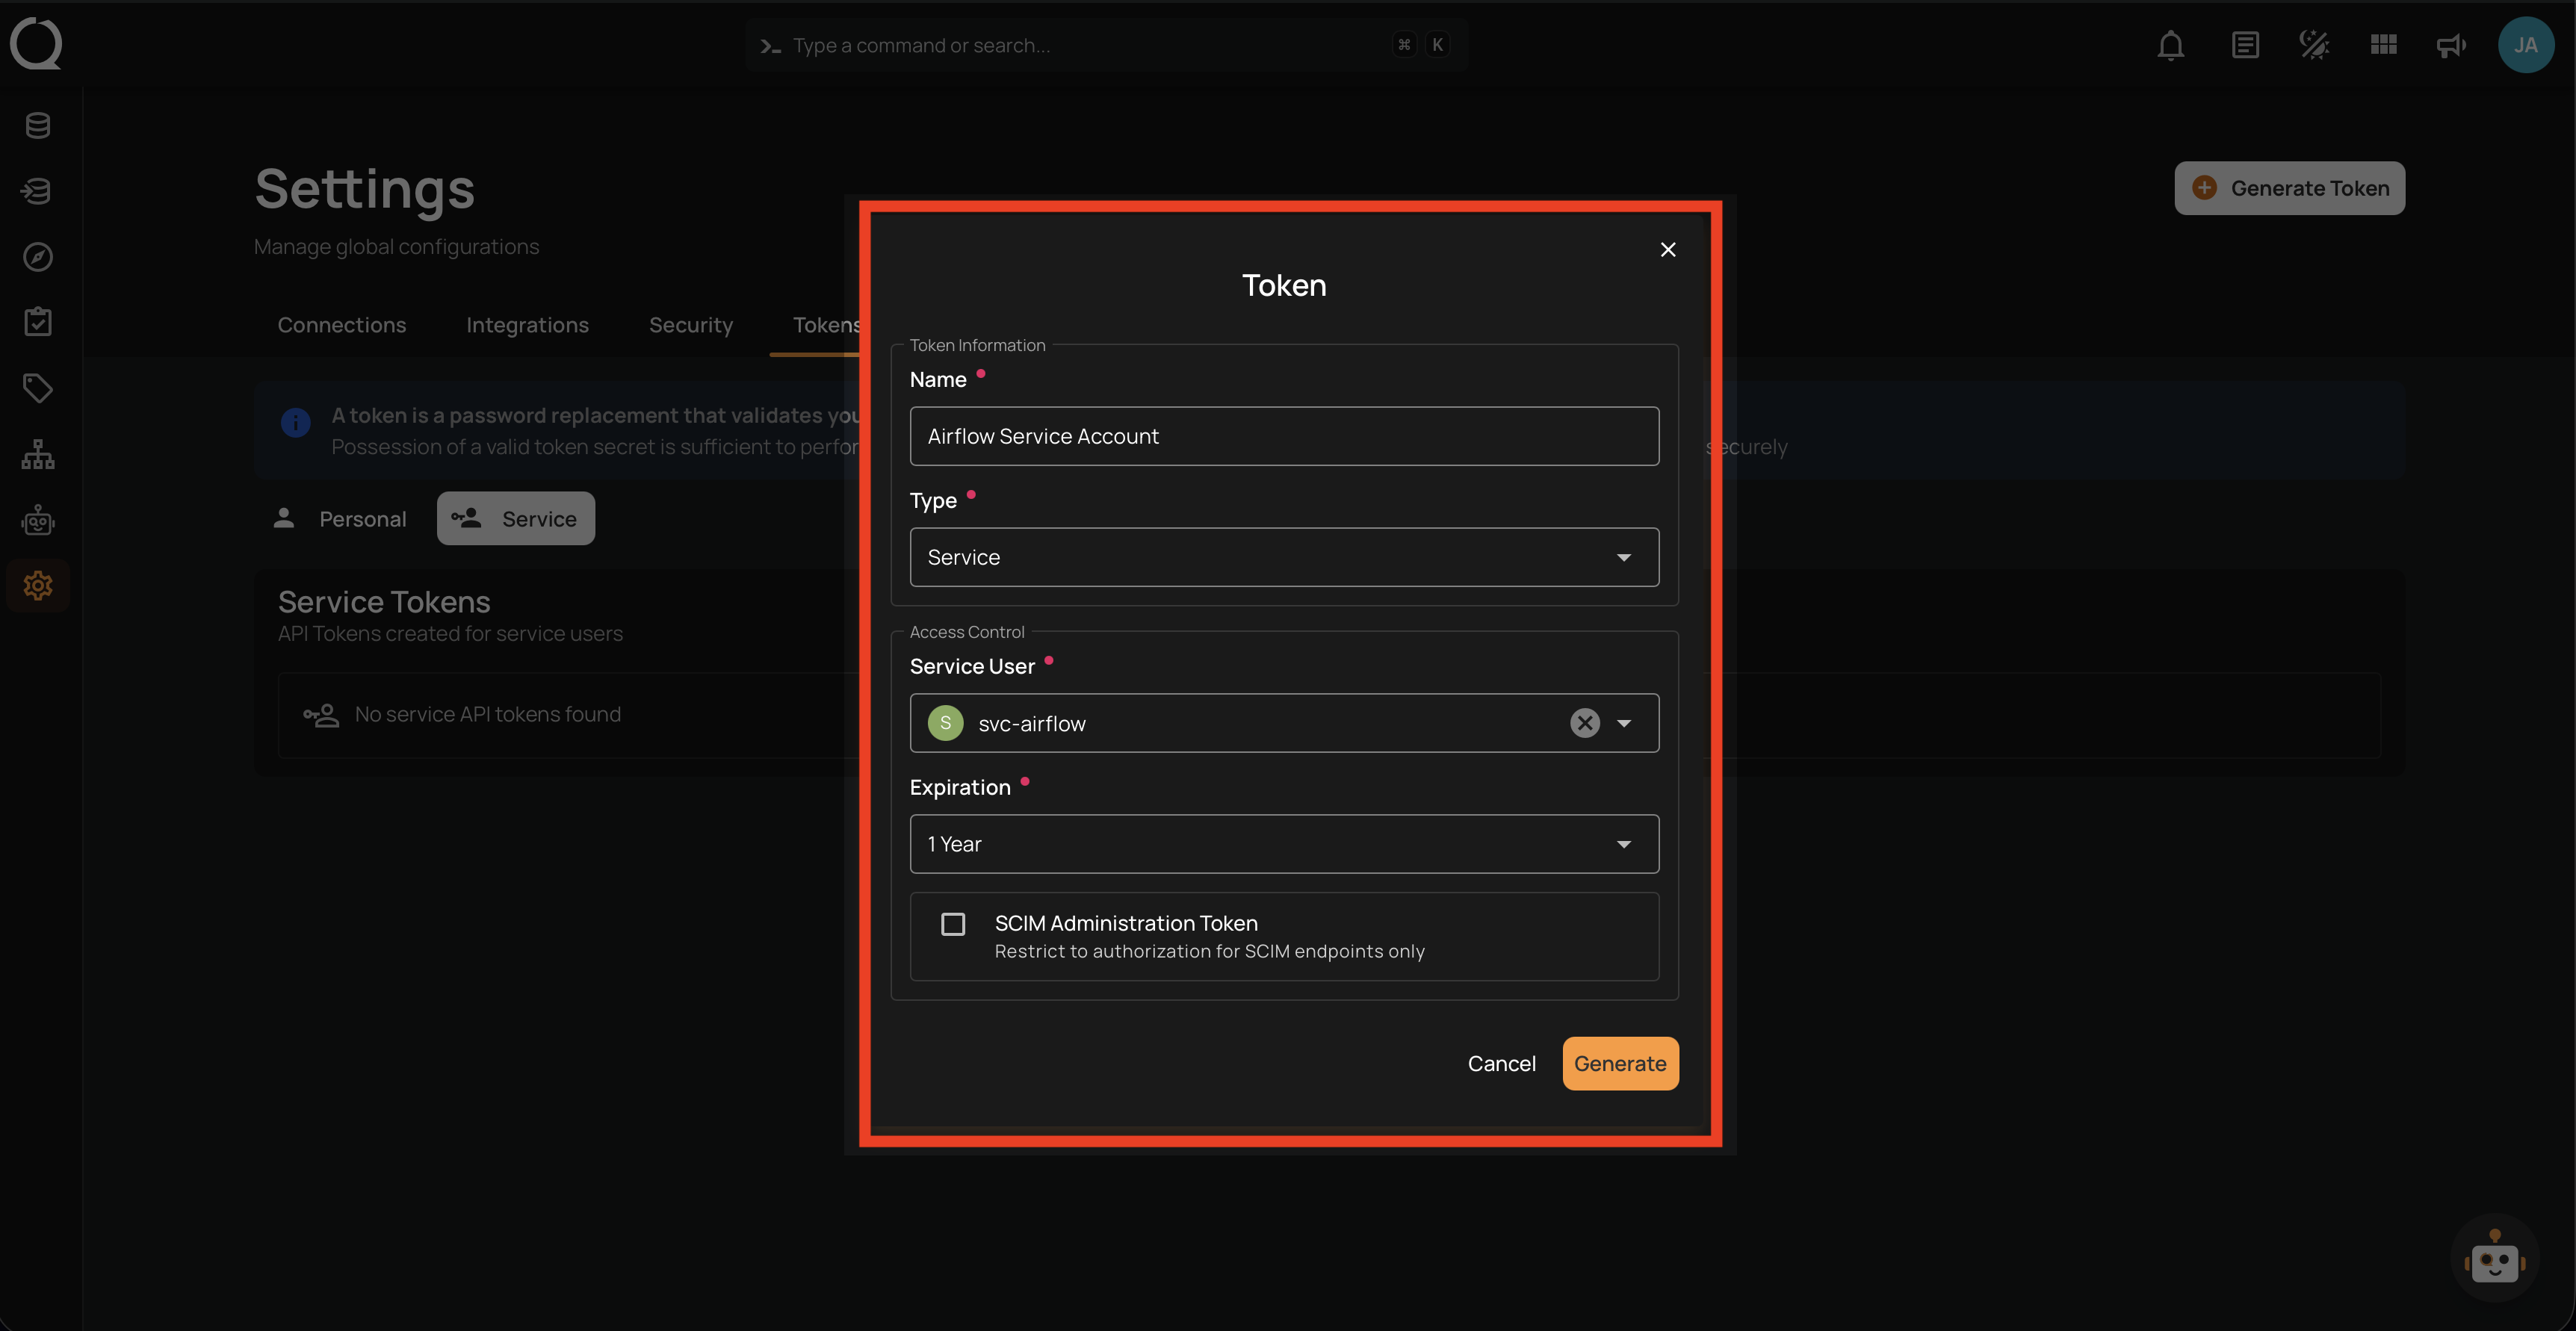
Note
Avoid selecting Never as the expiration for production tokens. See Best Practices for recommended expiration periods per environment.
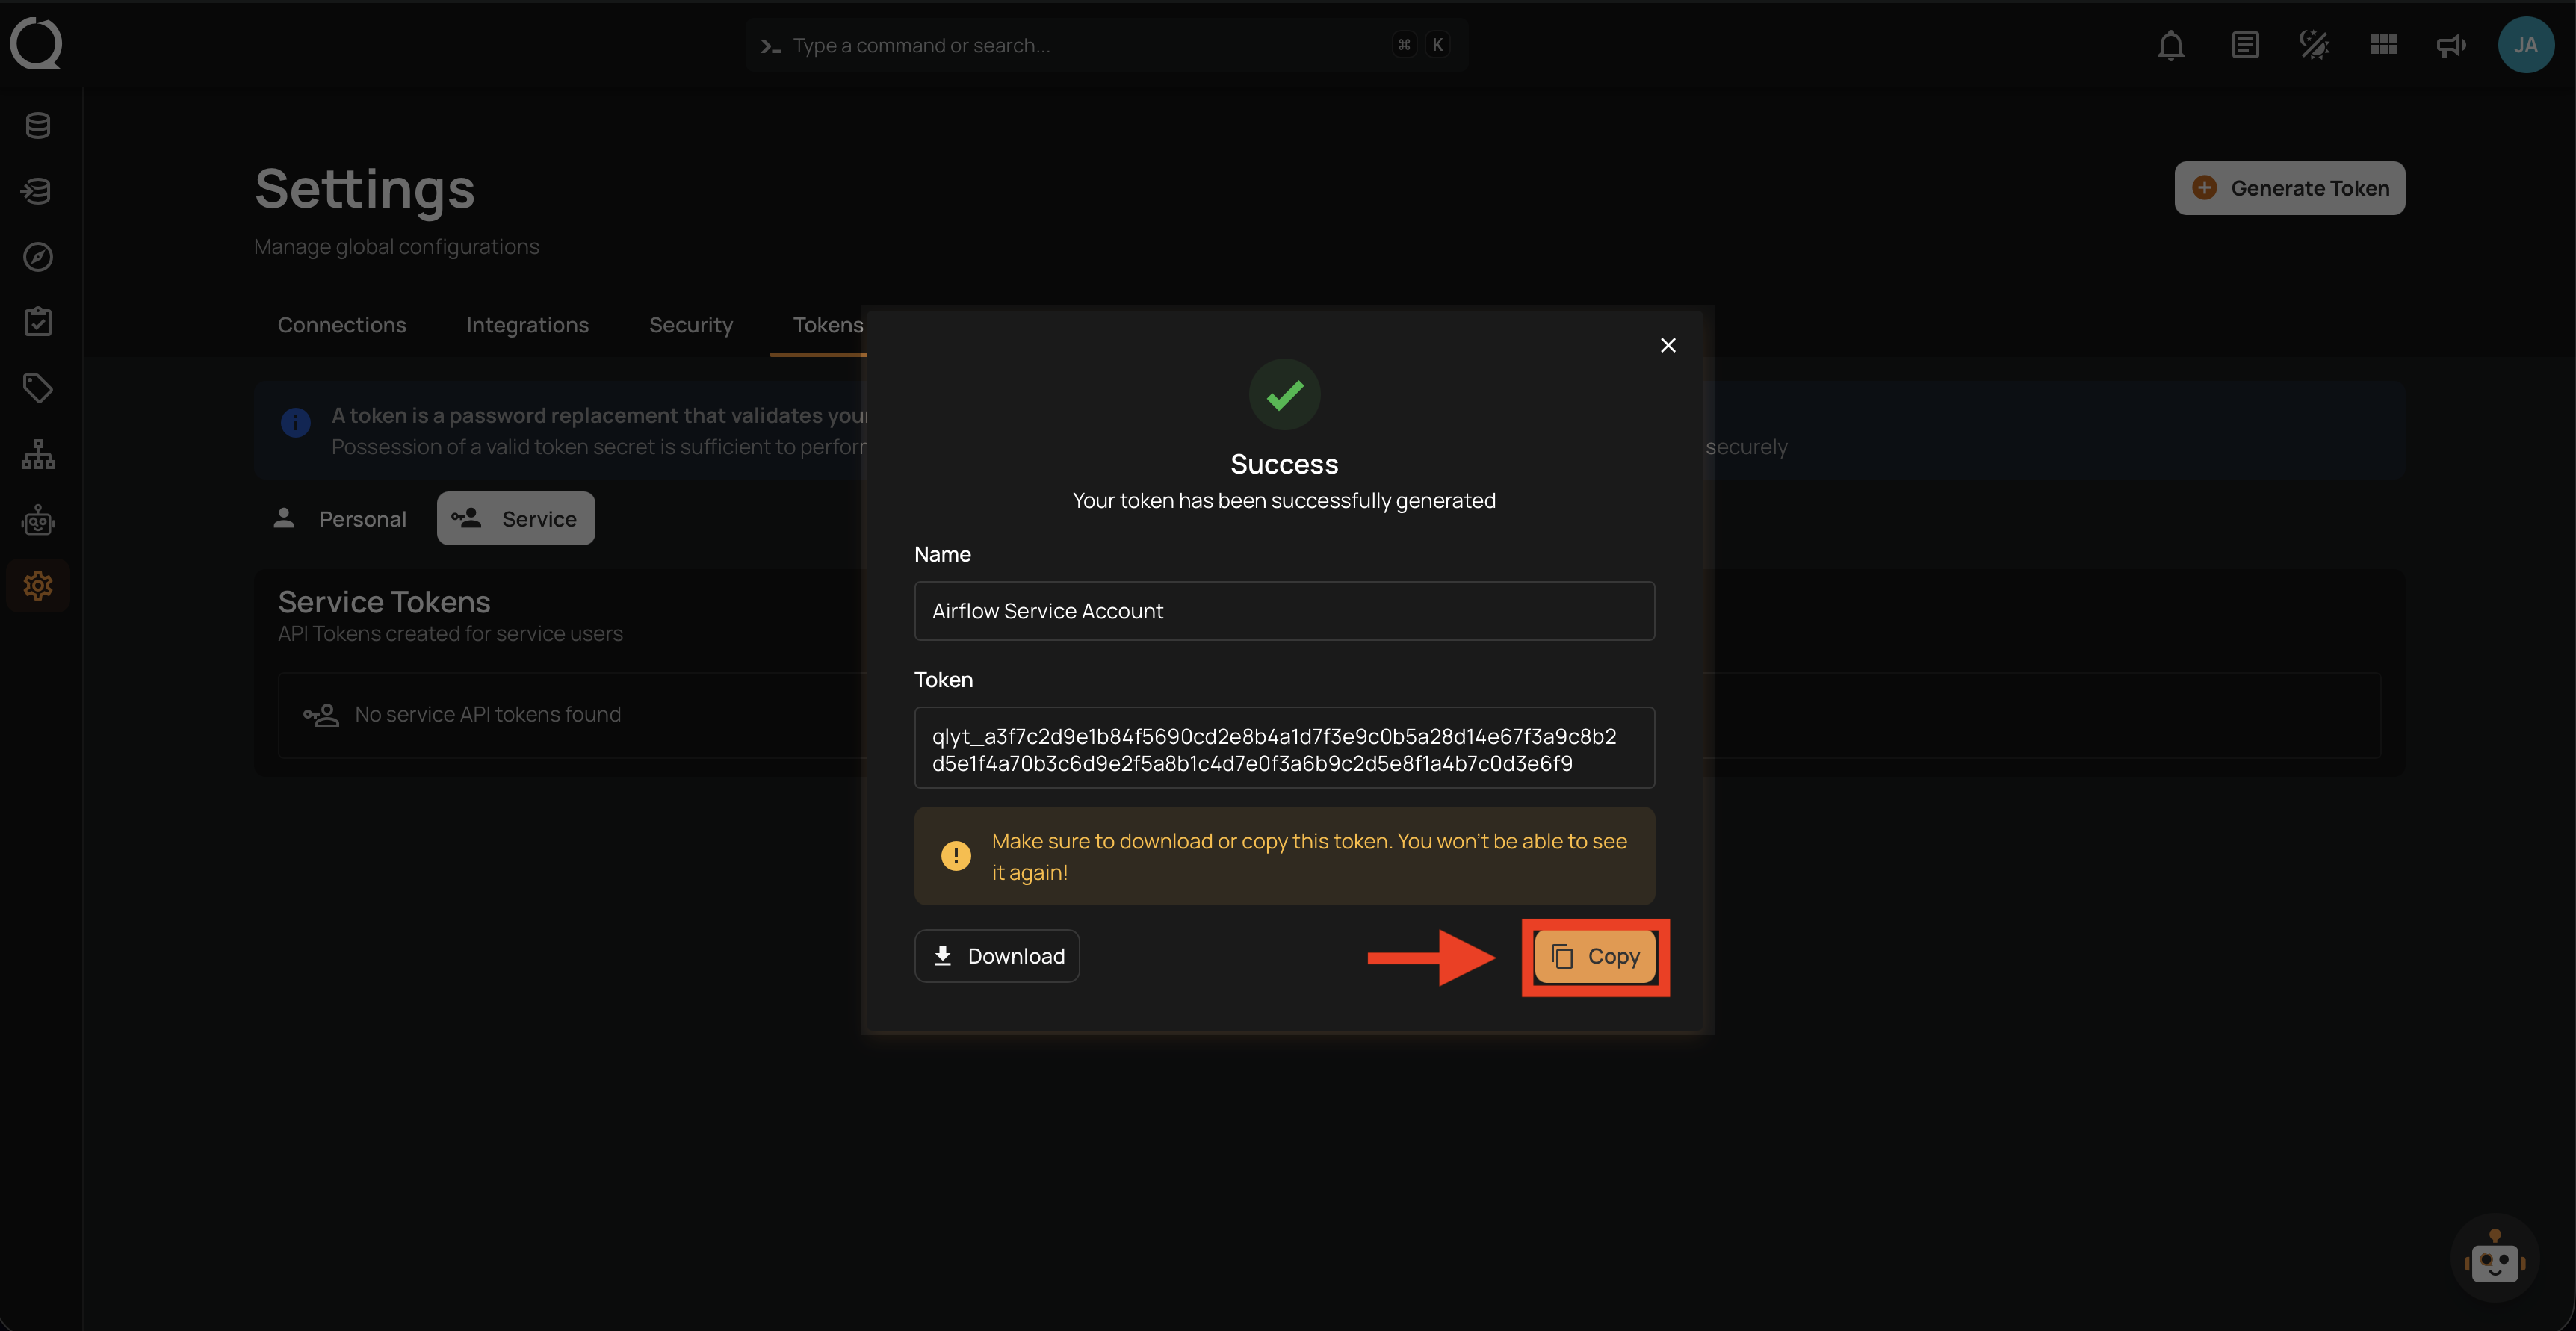
Step 3: Click the Generate button to create the token. The modal switches to a success view displaying the generated token.
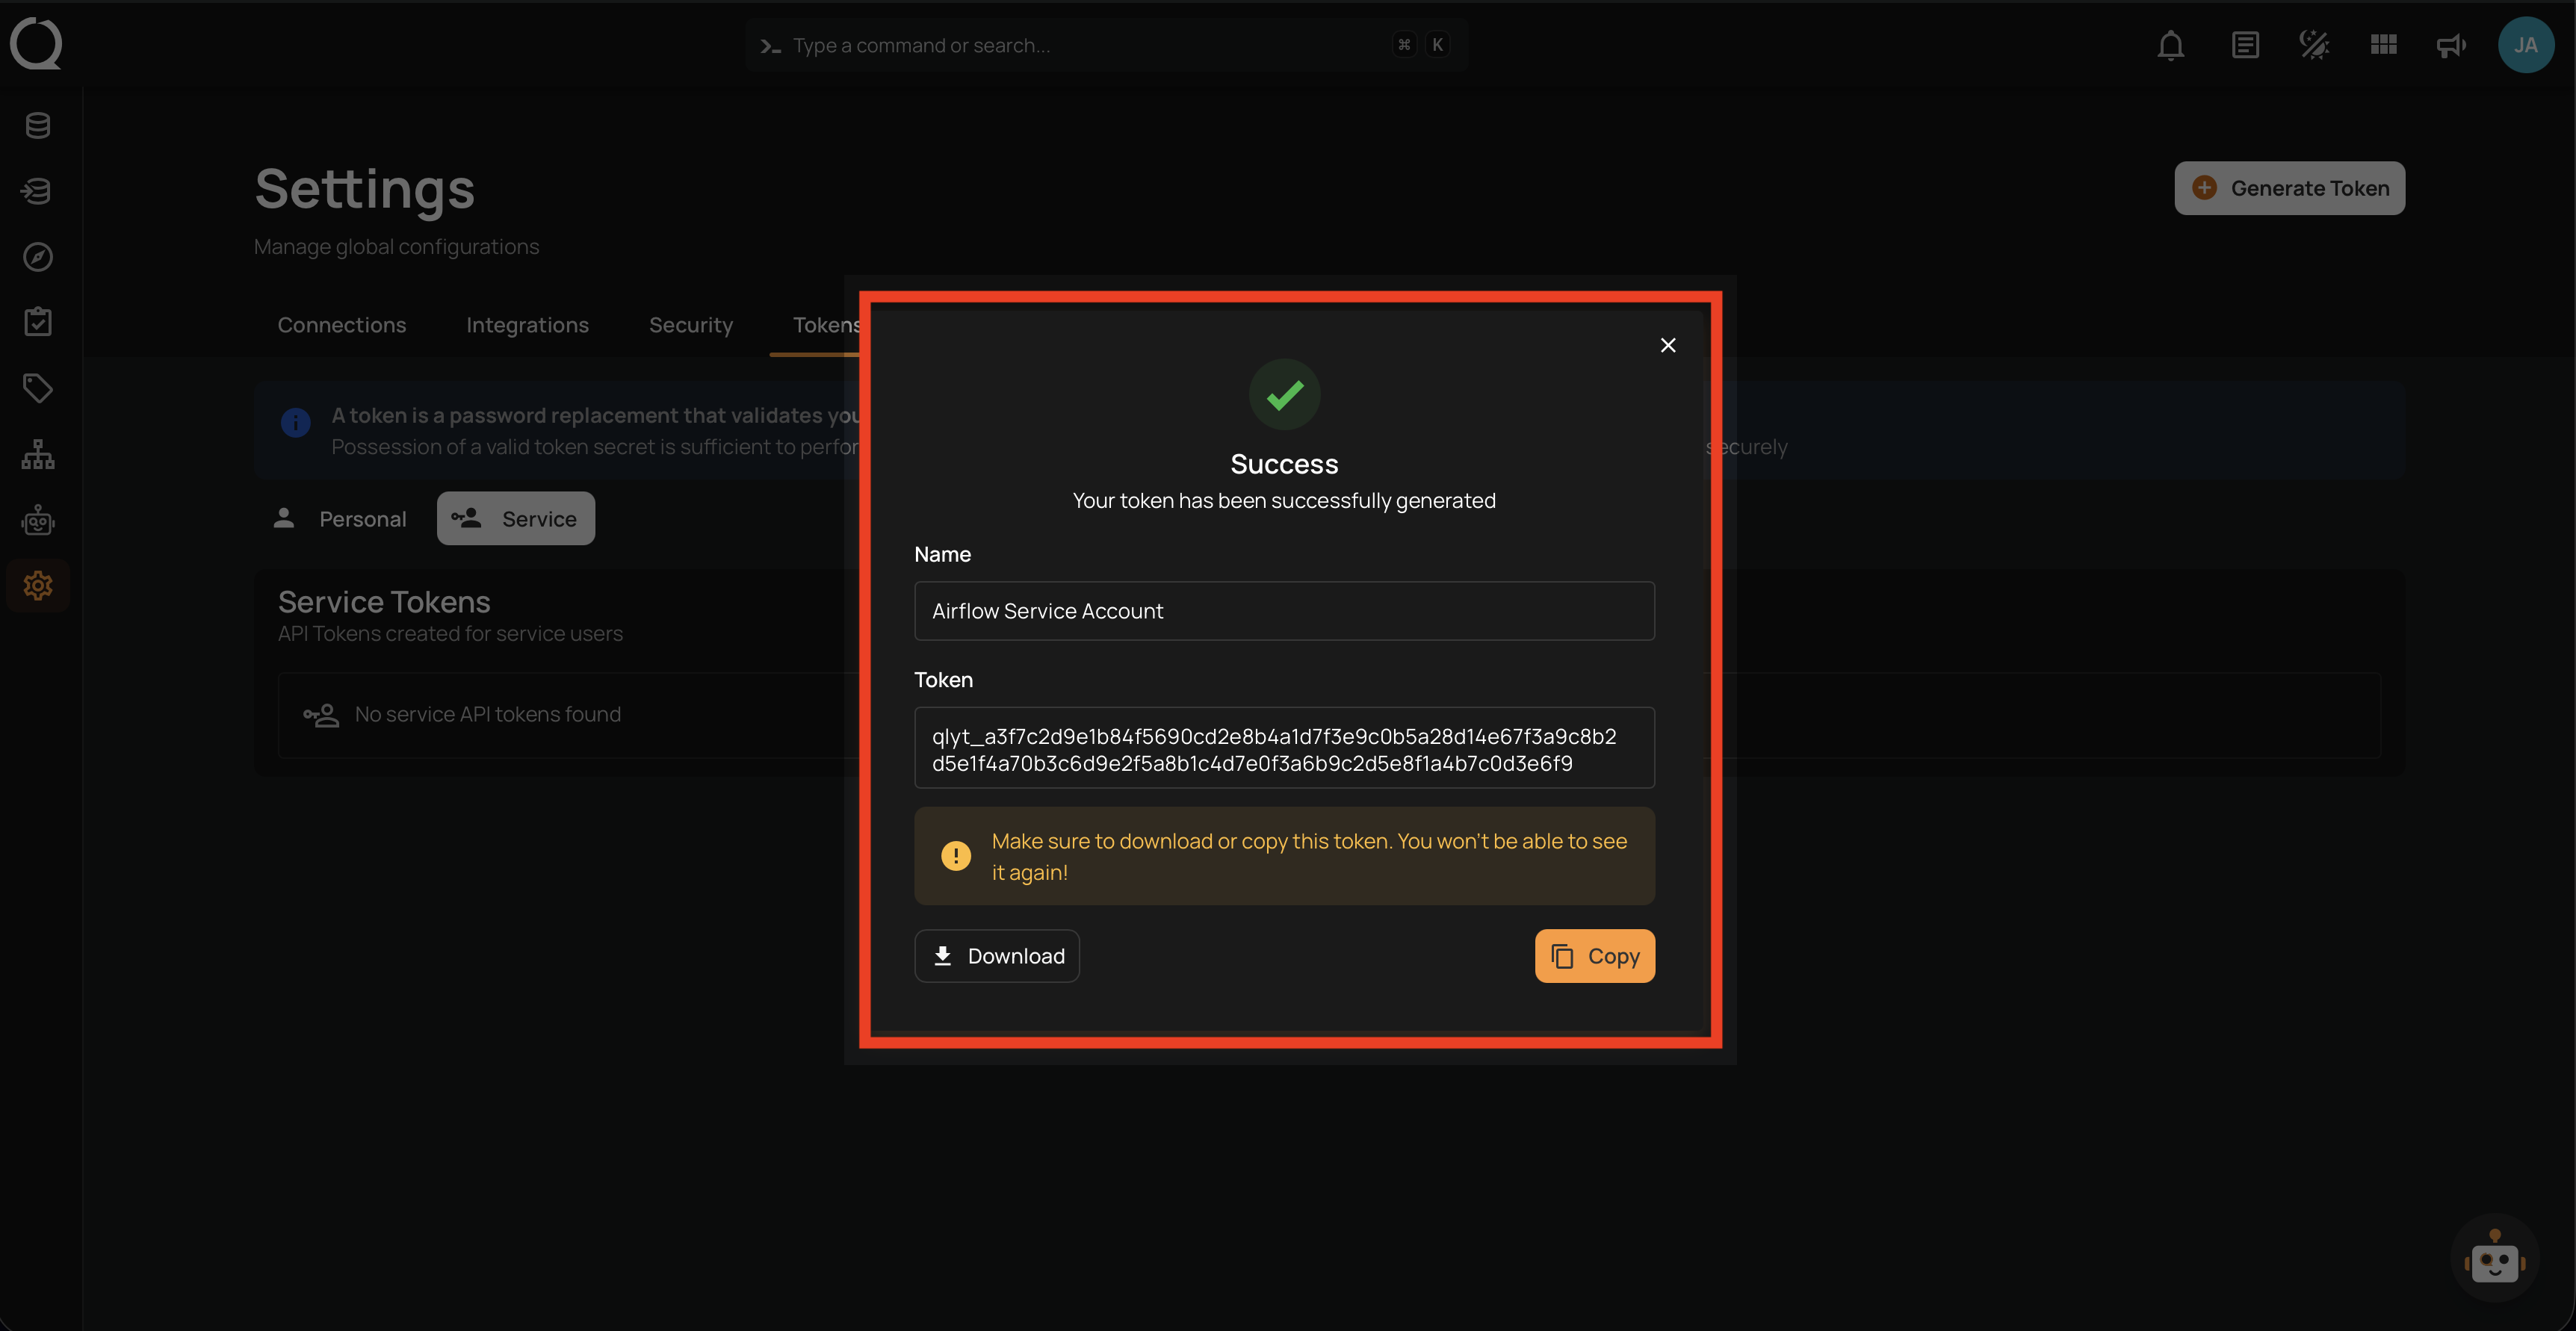
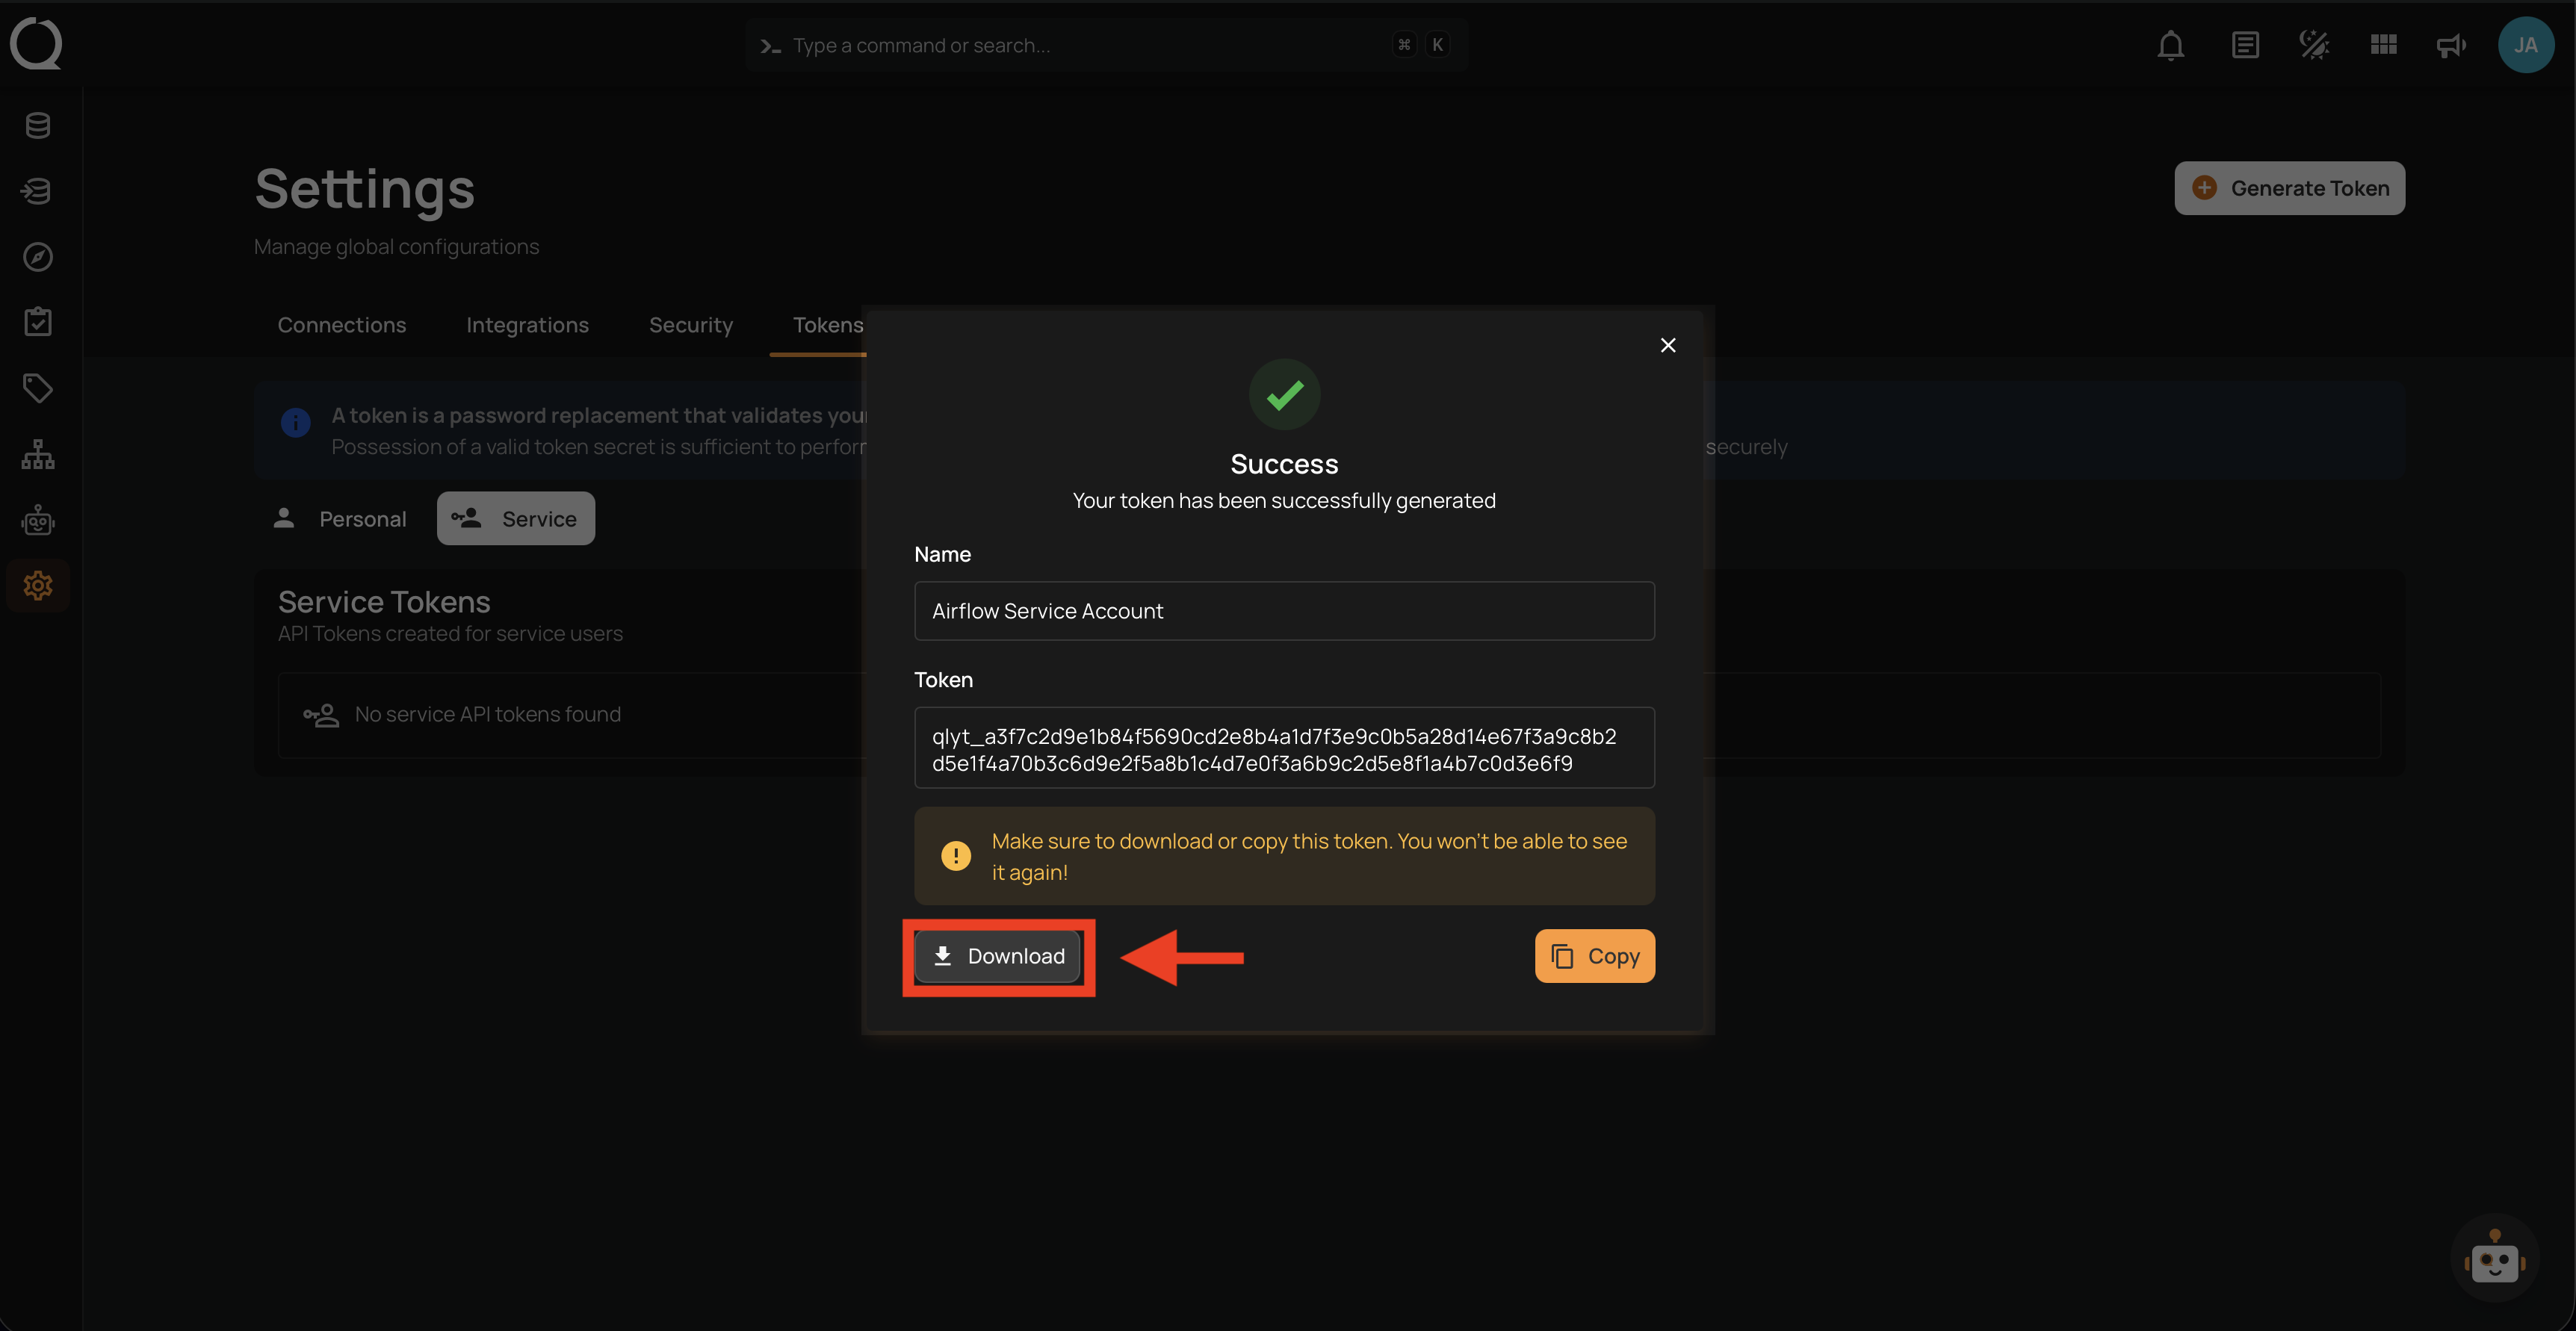
Step 4: Save the token using one of the two options:
Click the Copy button to copy the token to your clipboard.
Click the Download button to save the token as a .txt file. The filename follows the pattern <token-name>-token.txt (e.g., airflow-service-user-token.txt).
Step 5: Close the modal. The new token appears in the Service Tokens list with Active status.