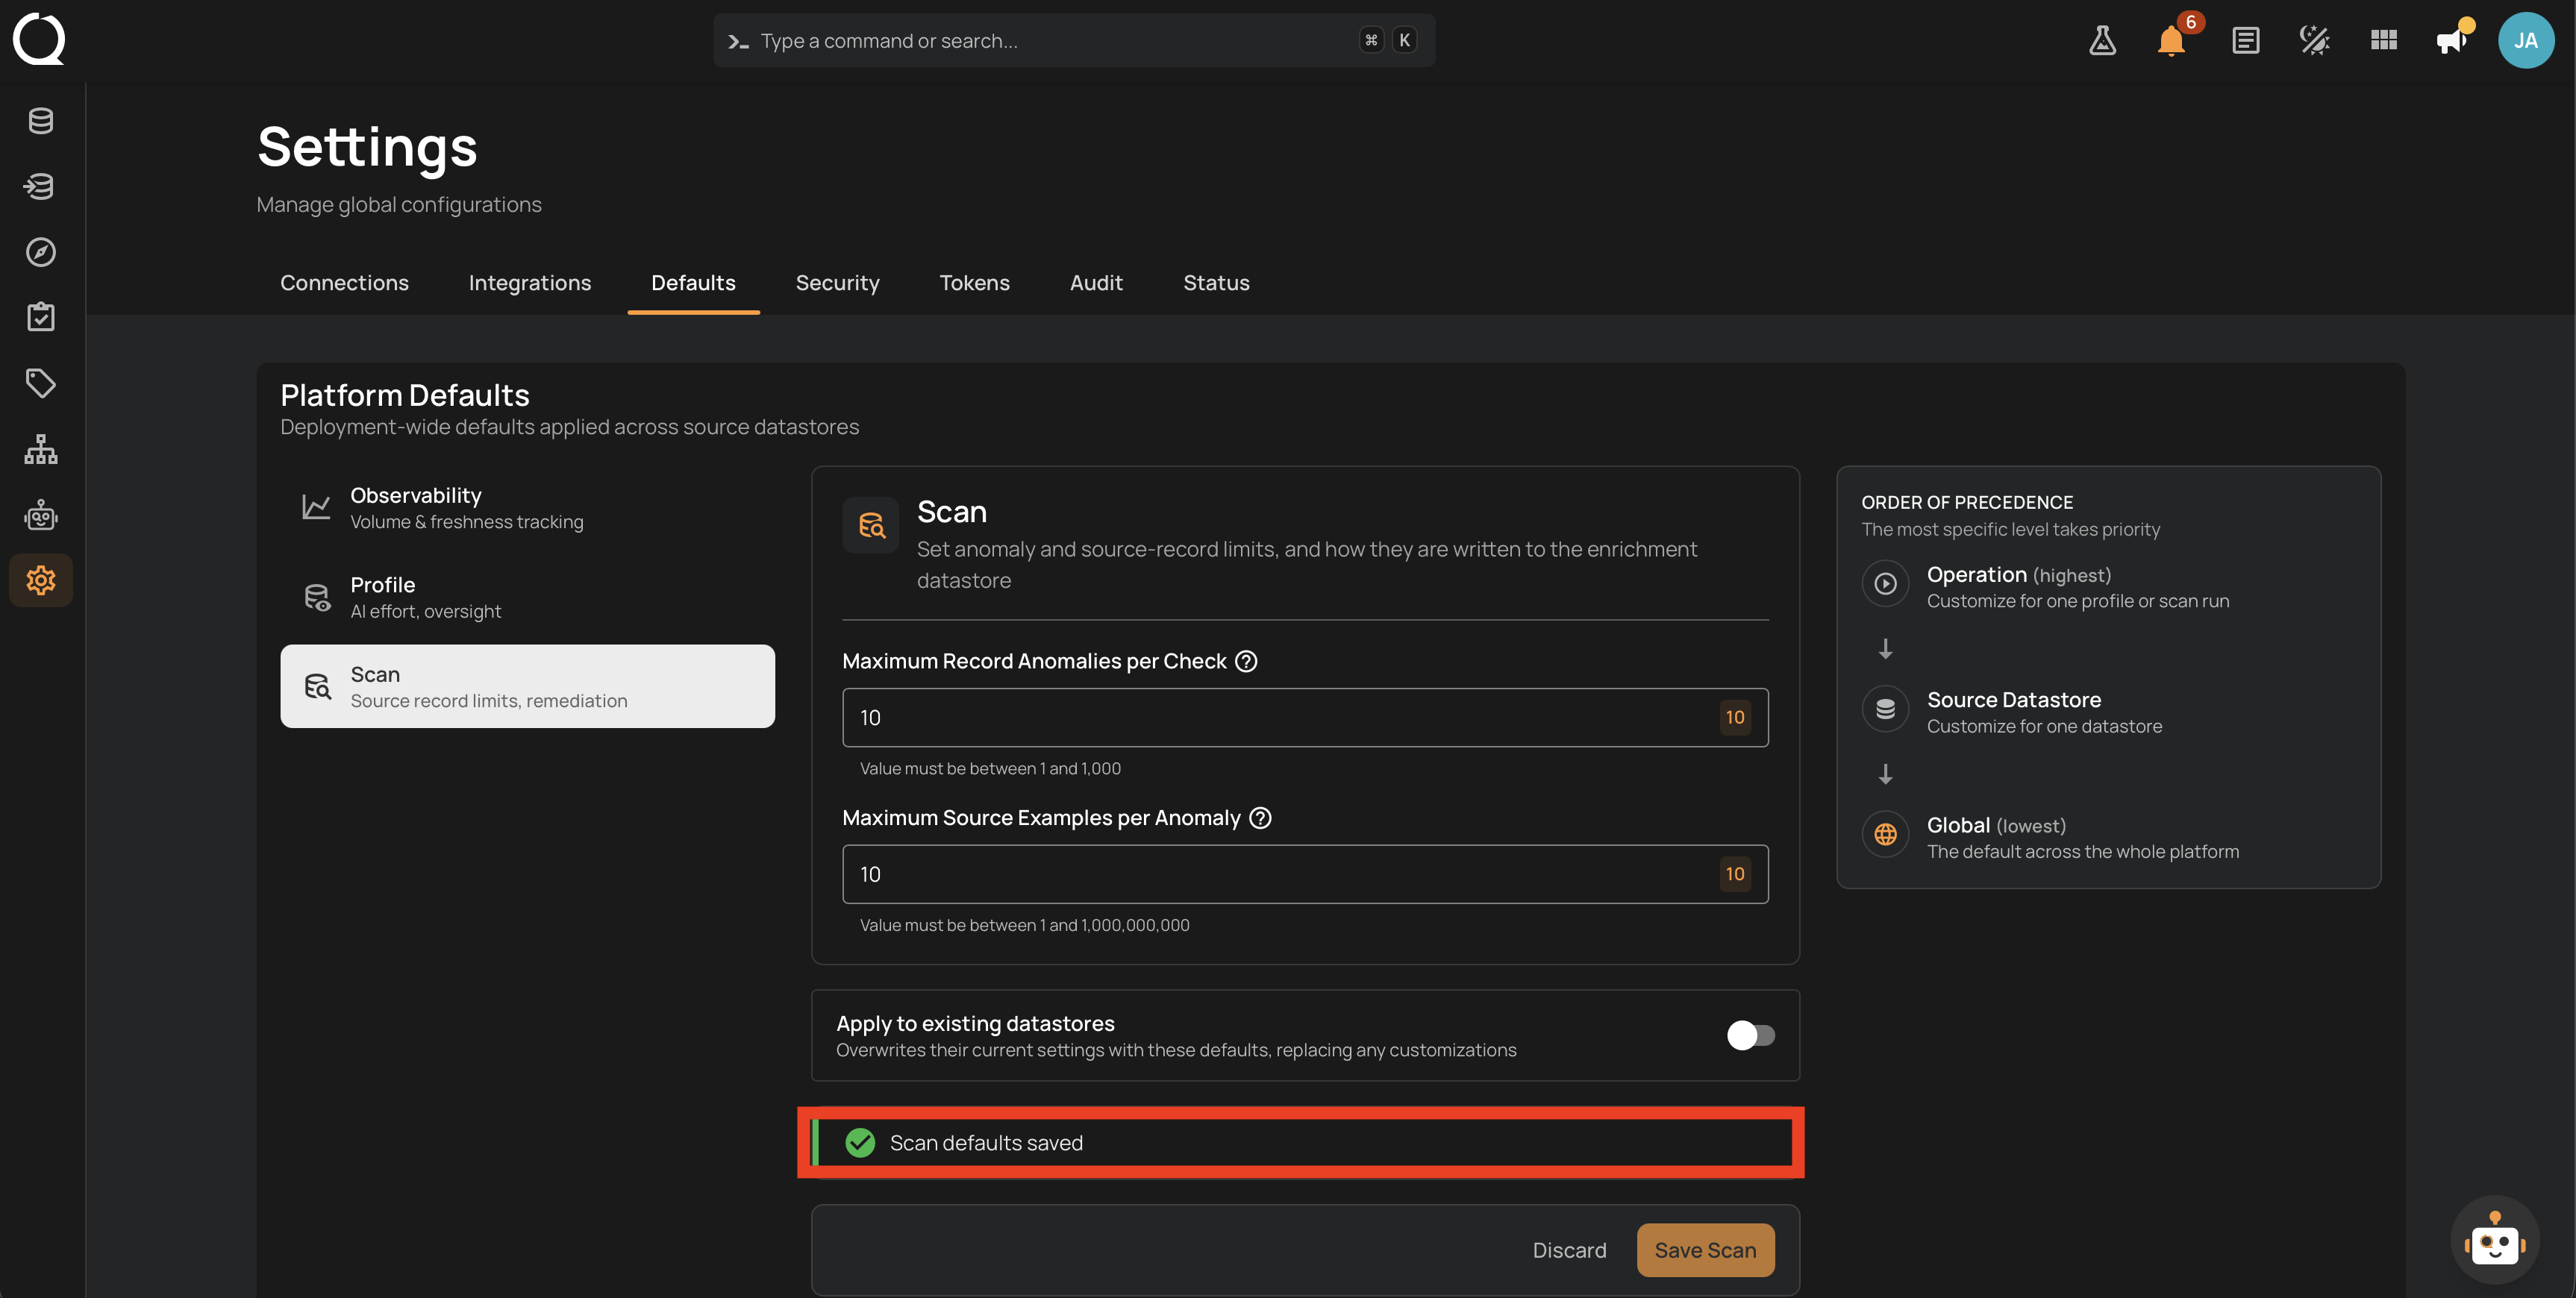
Reset Defaults to Qualytics Values
Restore Qualytics' shipped values for any of the four Platform Defaults sections in one click.
Permission Required
You need the Admin user role to reset Platform Defaults. See the Permissions page for details.
Deployment-wide impact
Platform Defaults are workspace-wide. Saving a reset makes the shipped values the new default for every new source datastore, container, and operation across your deployment. Already-created datastores keep their current values unless you also turn on Apply to existing datastores at save time (which then overwrites their per-asset customizations). Observability and Profile resets exclude enrichment datastores; Scan resets include source and enrichment datastores. A Sync reset touches no datastore at all, since that value is one shared limit for the whole deployment. See How Platform Defaults Work for the precedence chain and propagation semantics.
When the Reset button appears
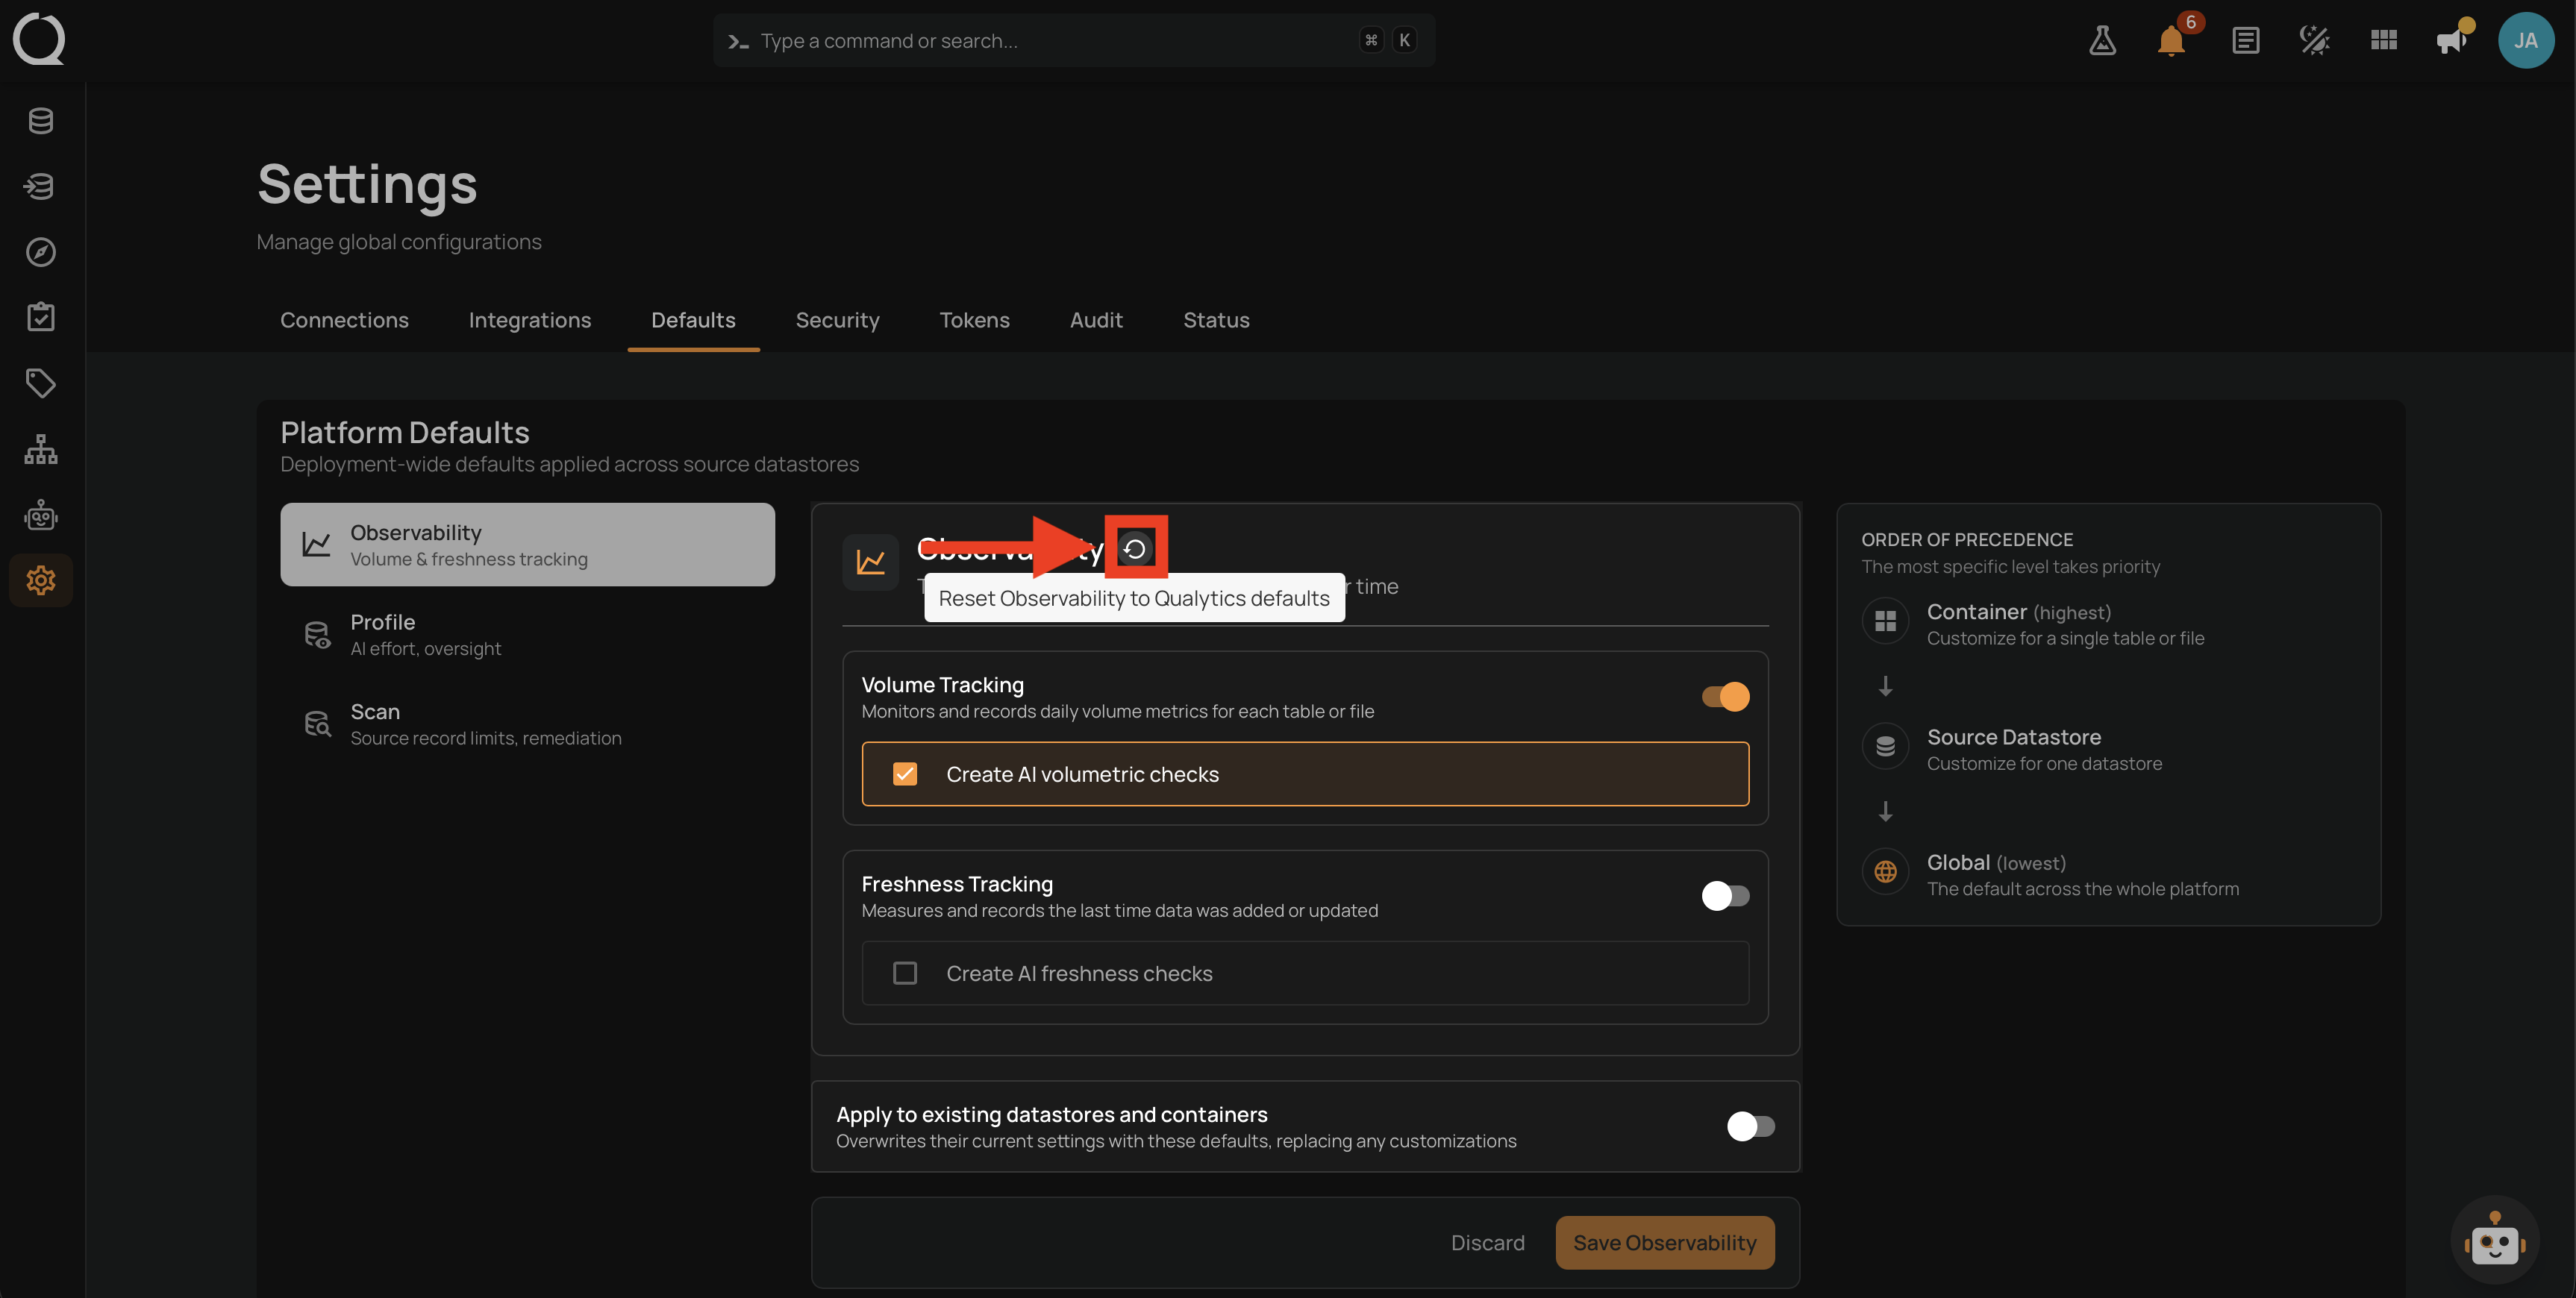
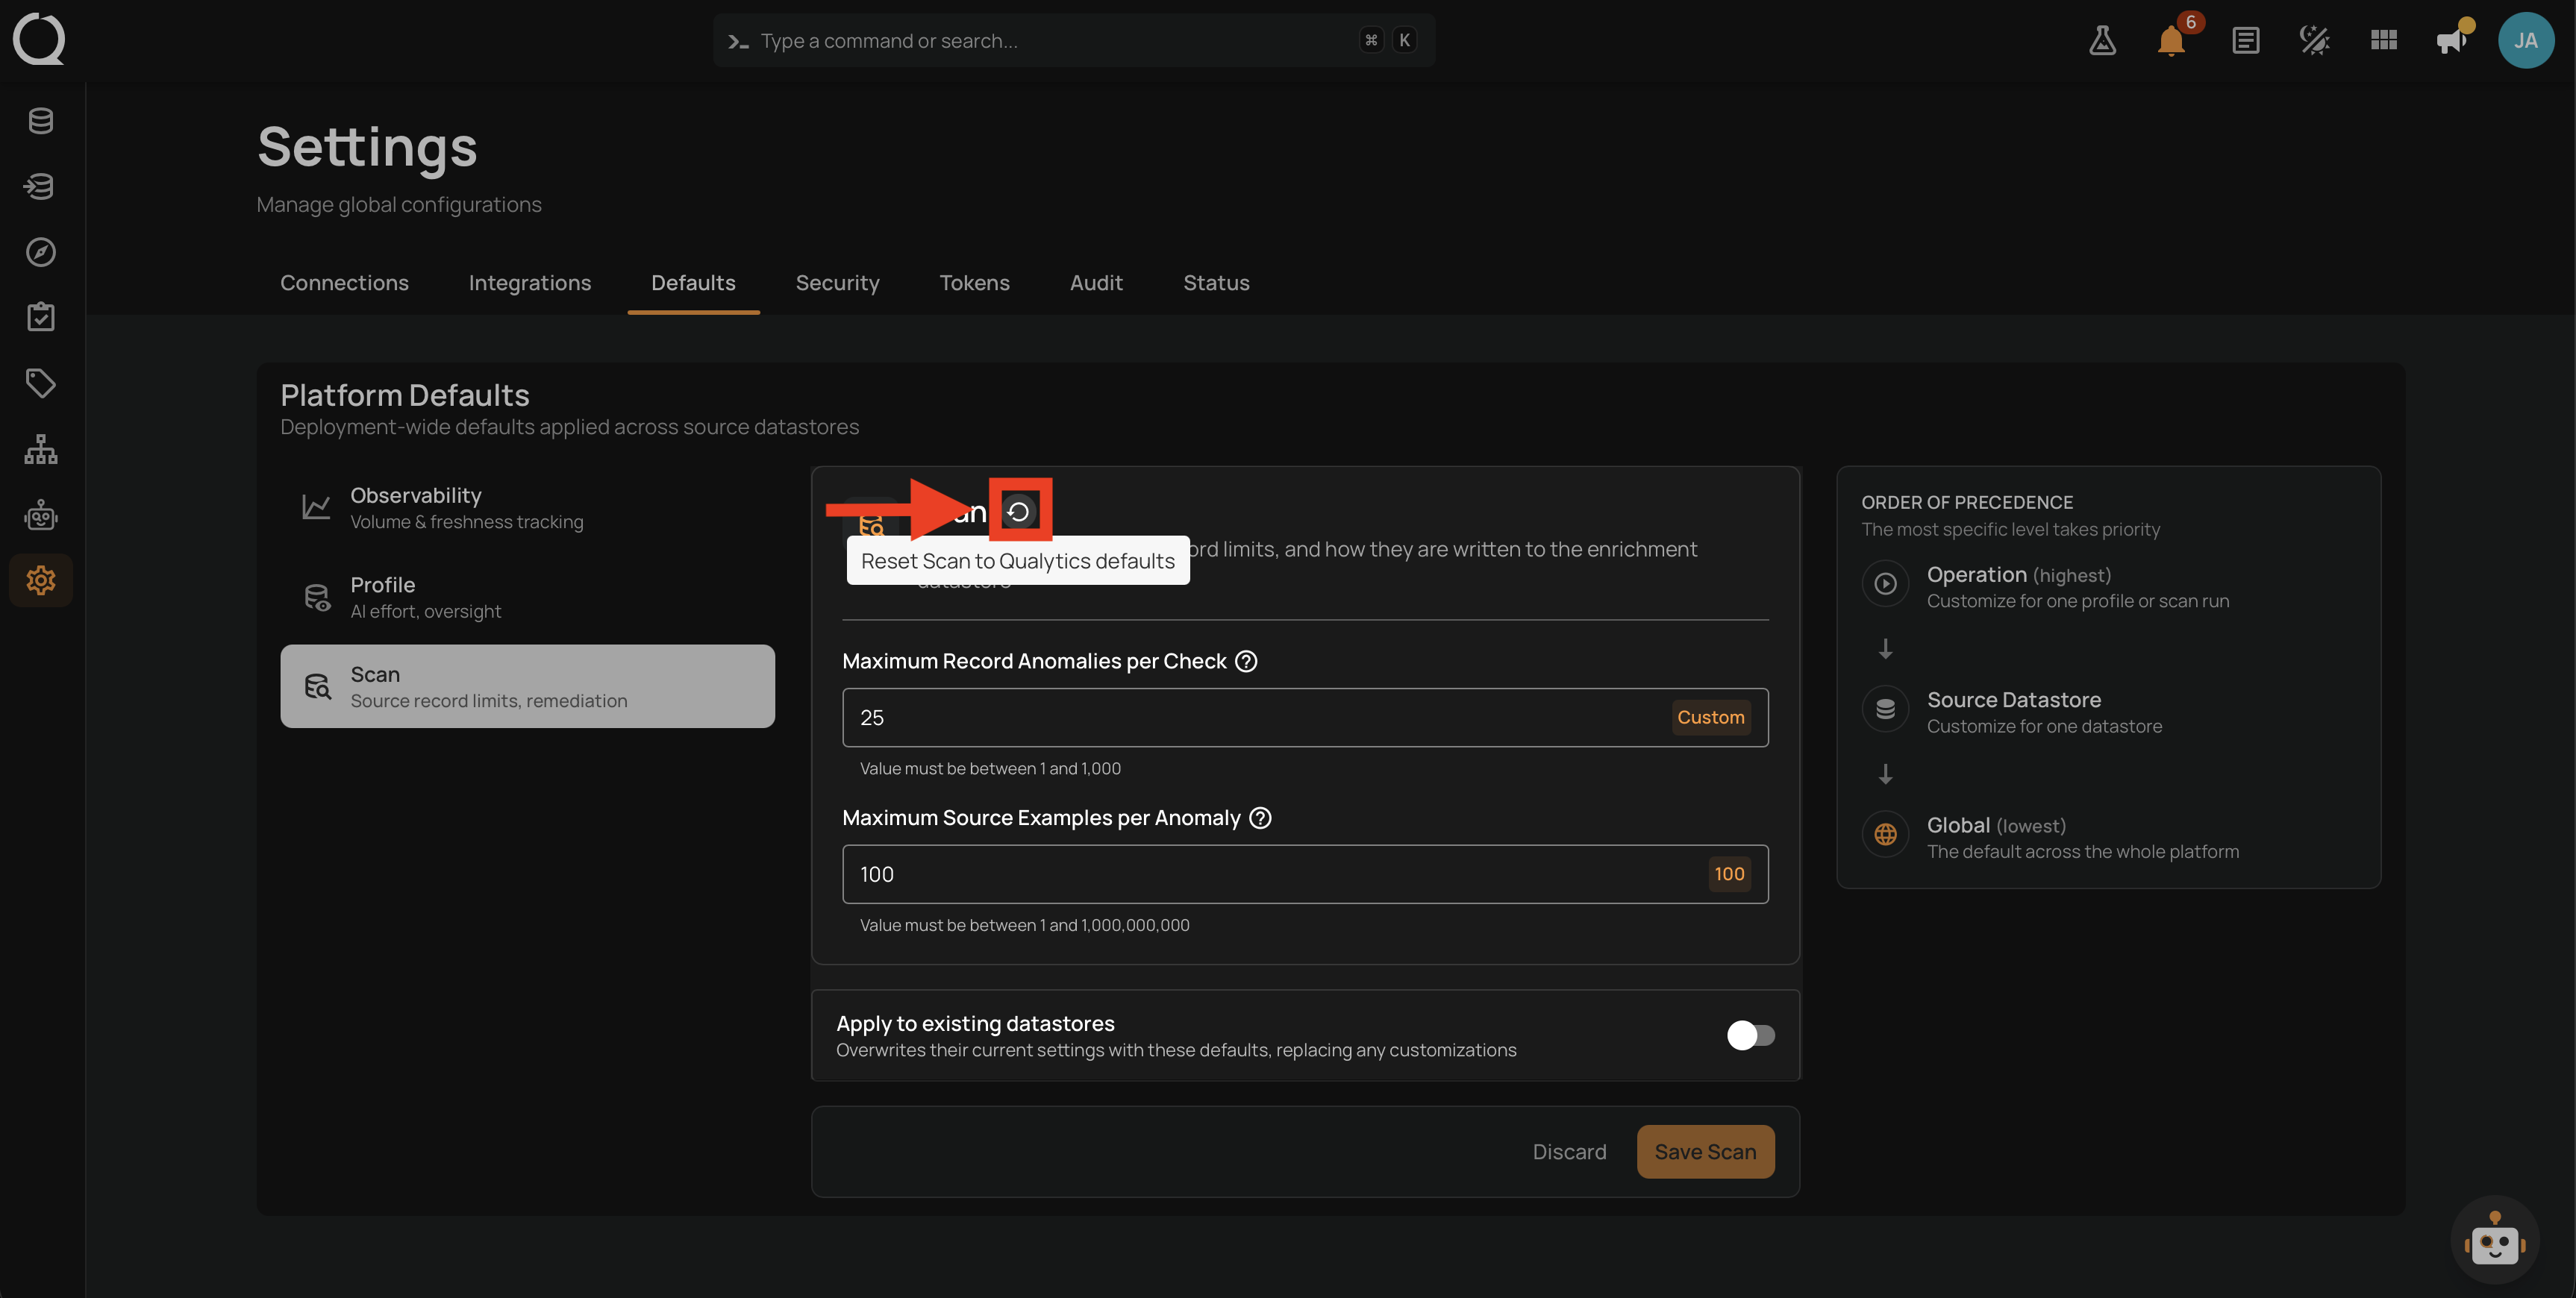
The Reset icon button appears next to the section title only when the current tab has drifted from Qualytics' shipped values. If the tab is already at the shipped defaults, the button is hidden.
Steps
Each tab below covers a separate reset operation. Pick the tab for the section you want to reset.
Step 1: In Settings > Defaults, click Observability in the left rail and click the Reset icon button next to the section title.
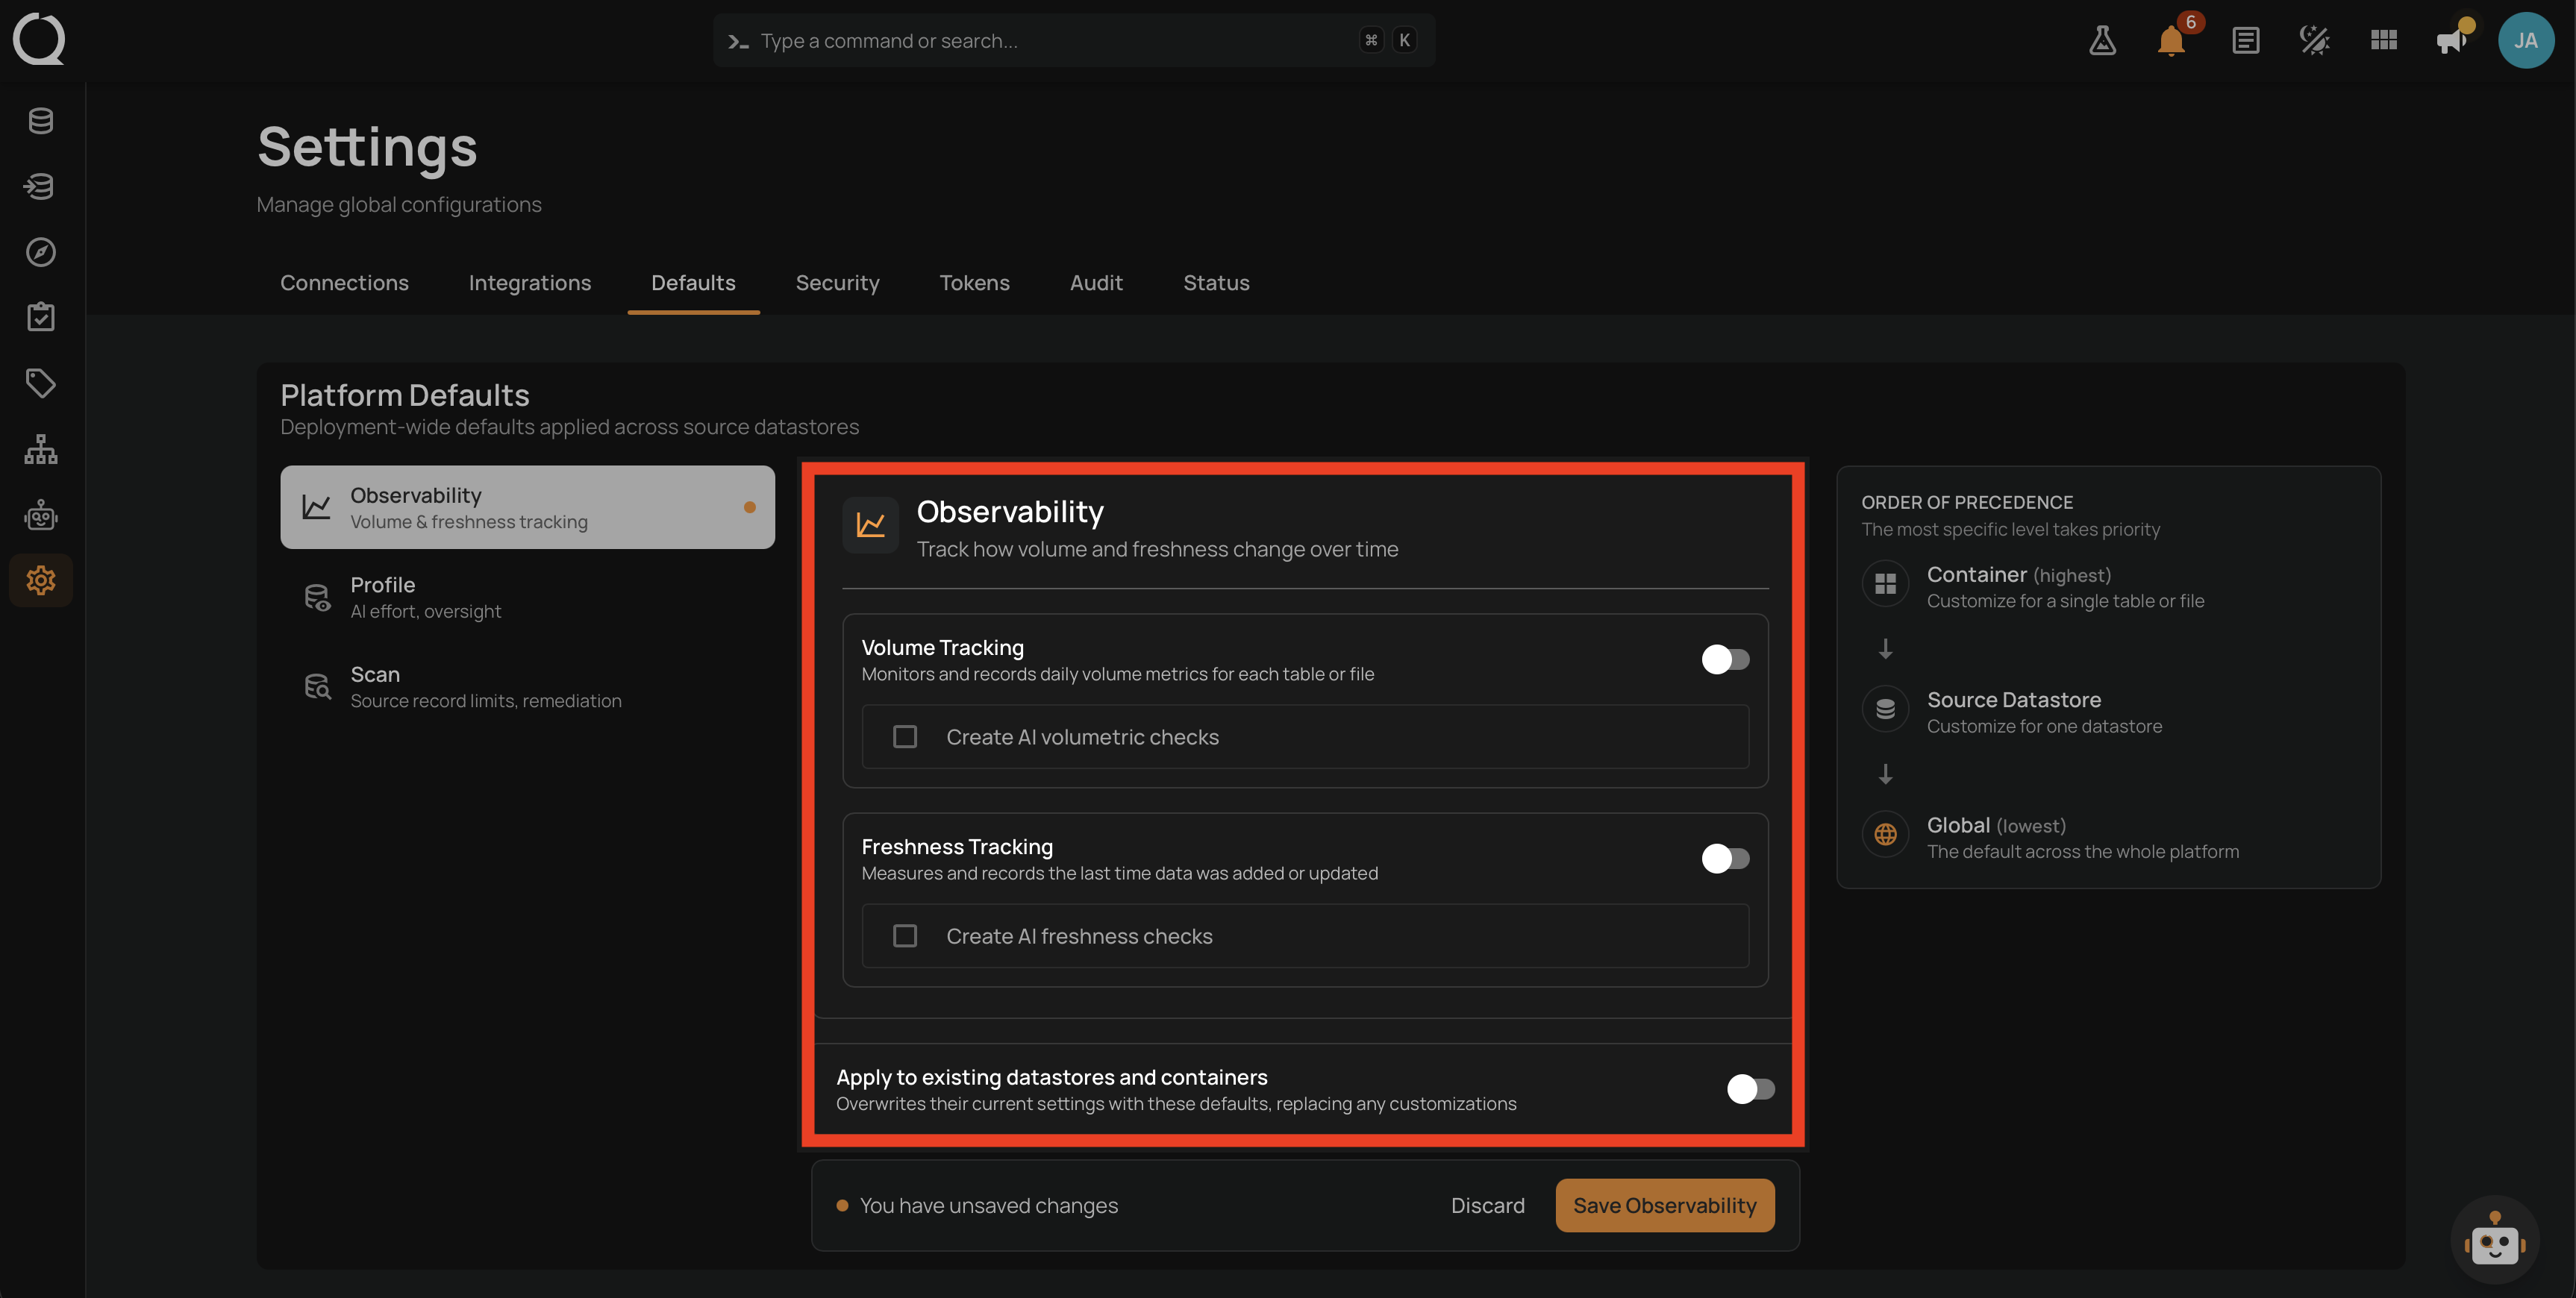
Step 2: The form loads Qualytics' shipped default values for the four Observability fields: Volume Tracking, Create AI volumetric checks, Freshness Tracking, and Create AI freshness checks.
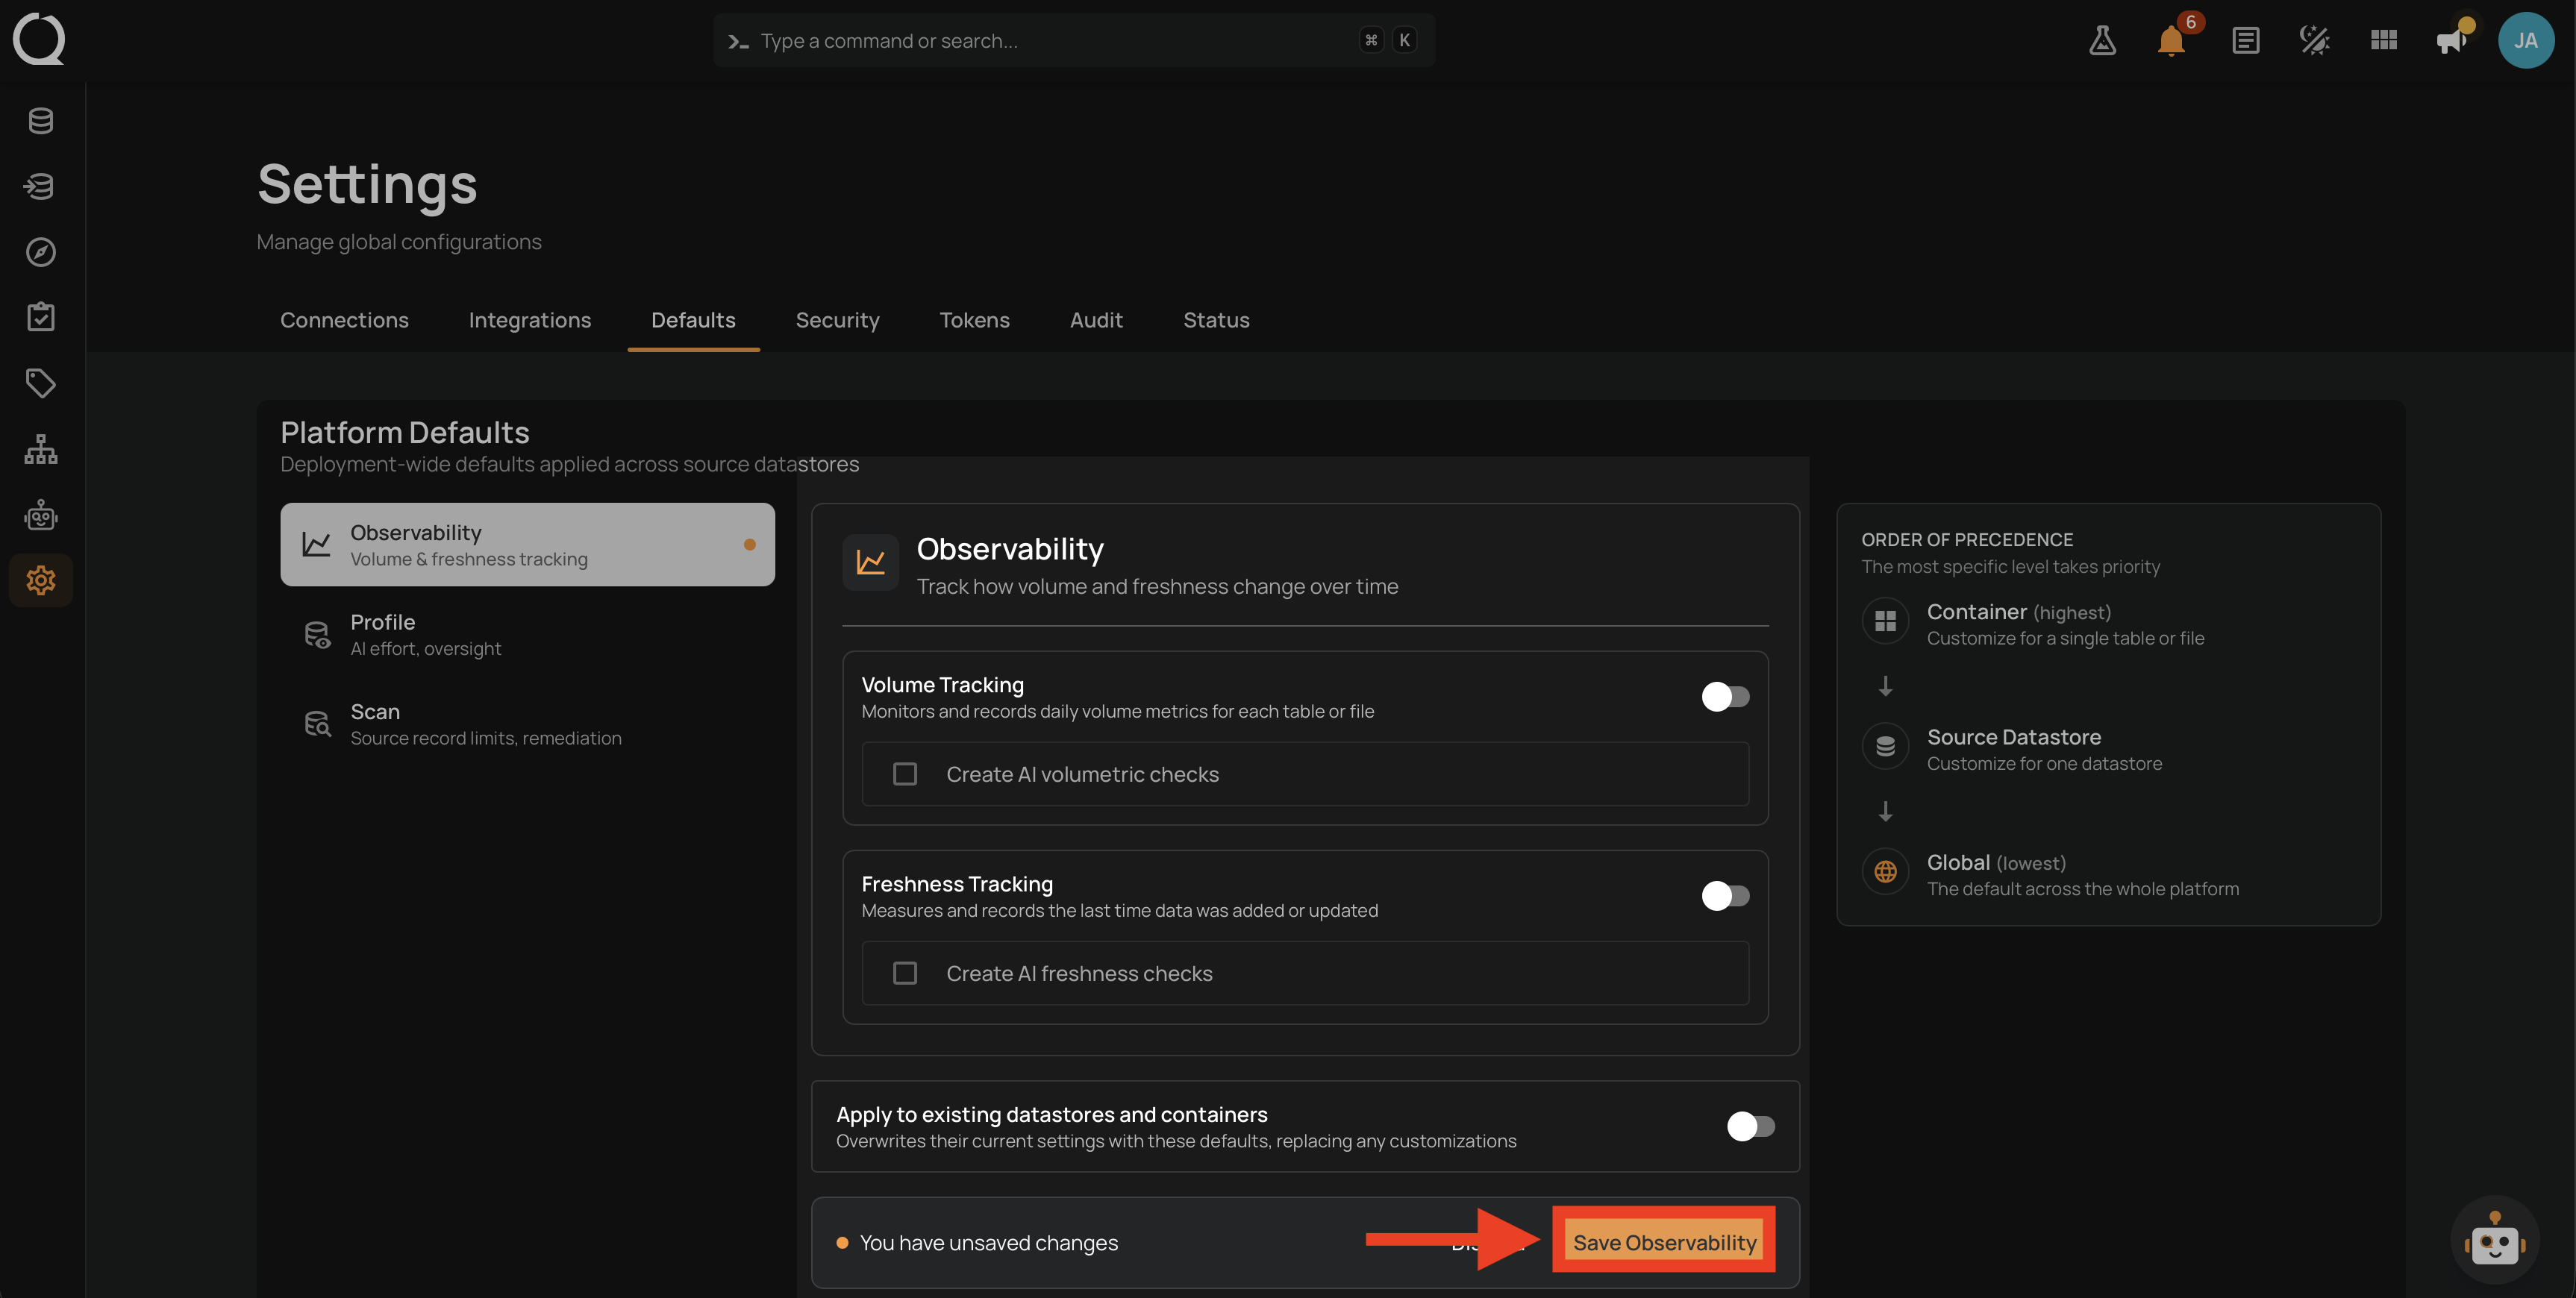
Step 3: Click Save Observability to persist the reset. Without saving, the form values revert when you switch tabs.
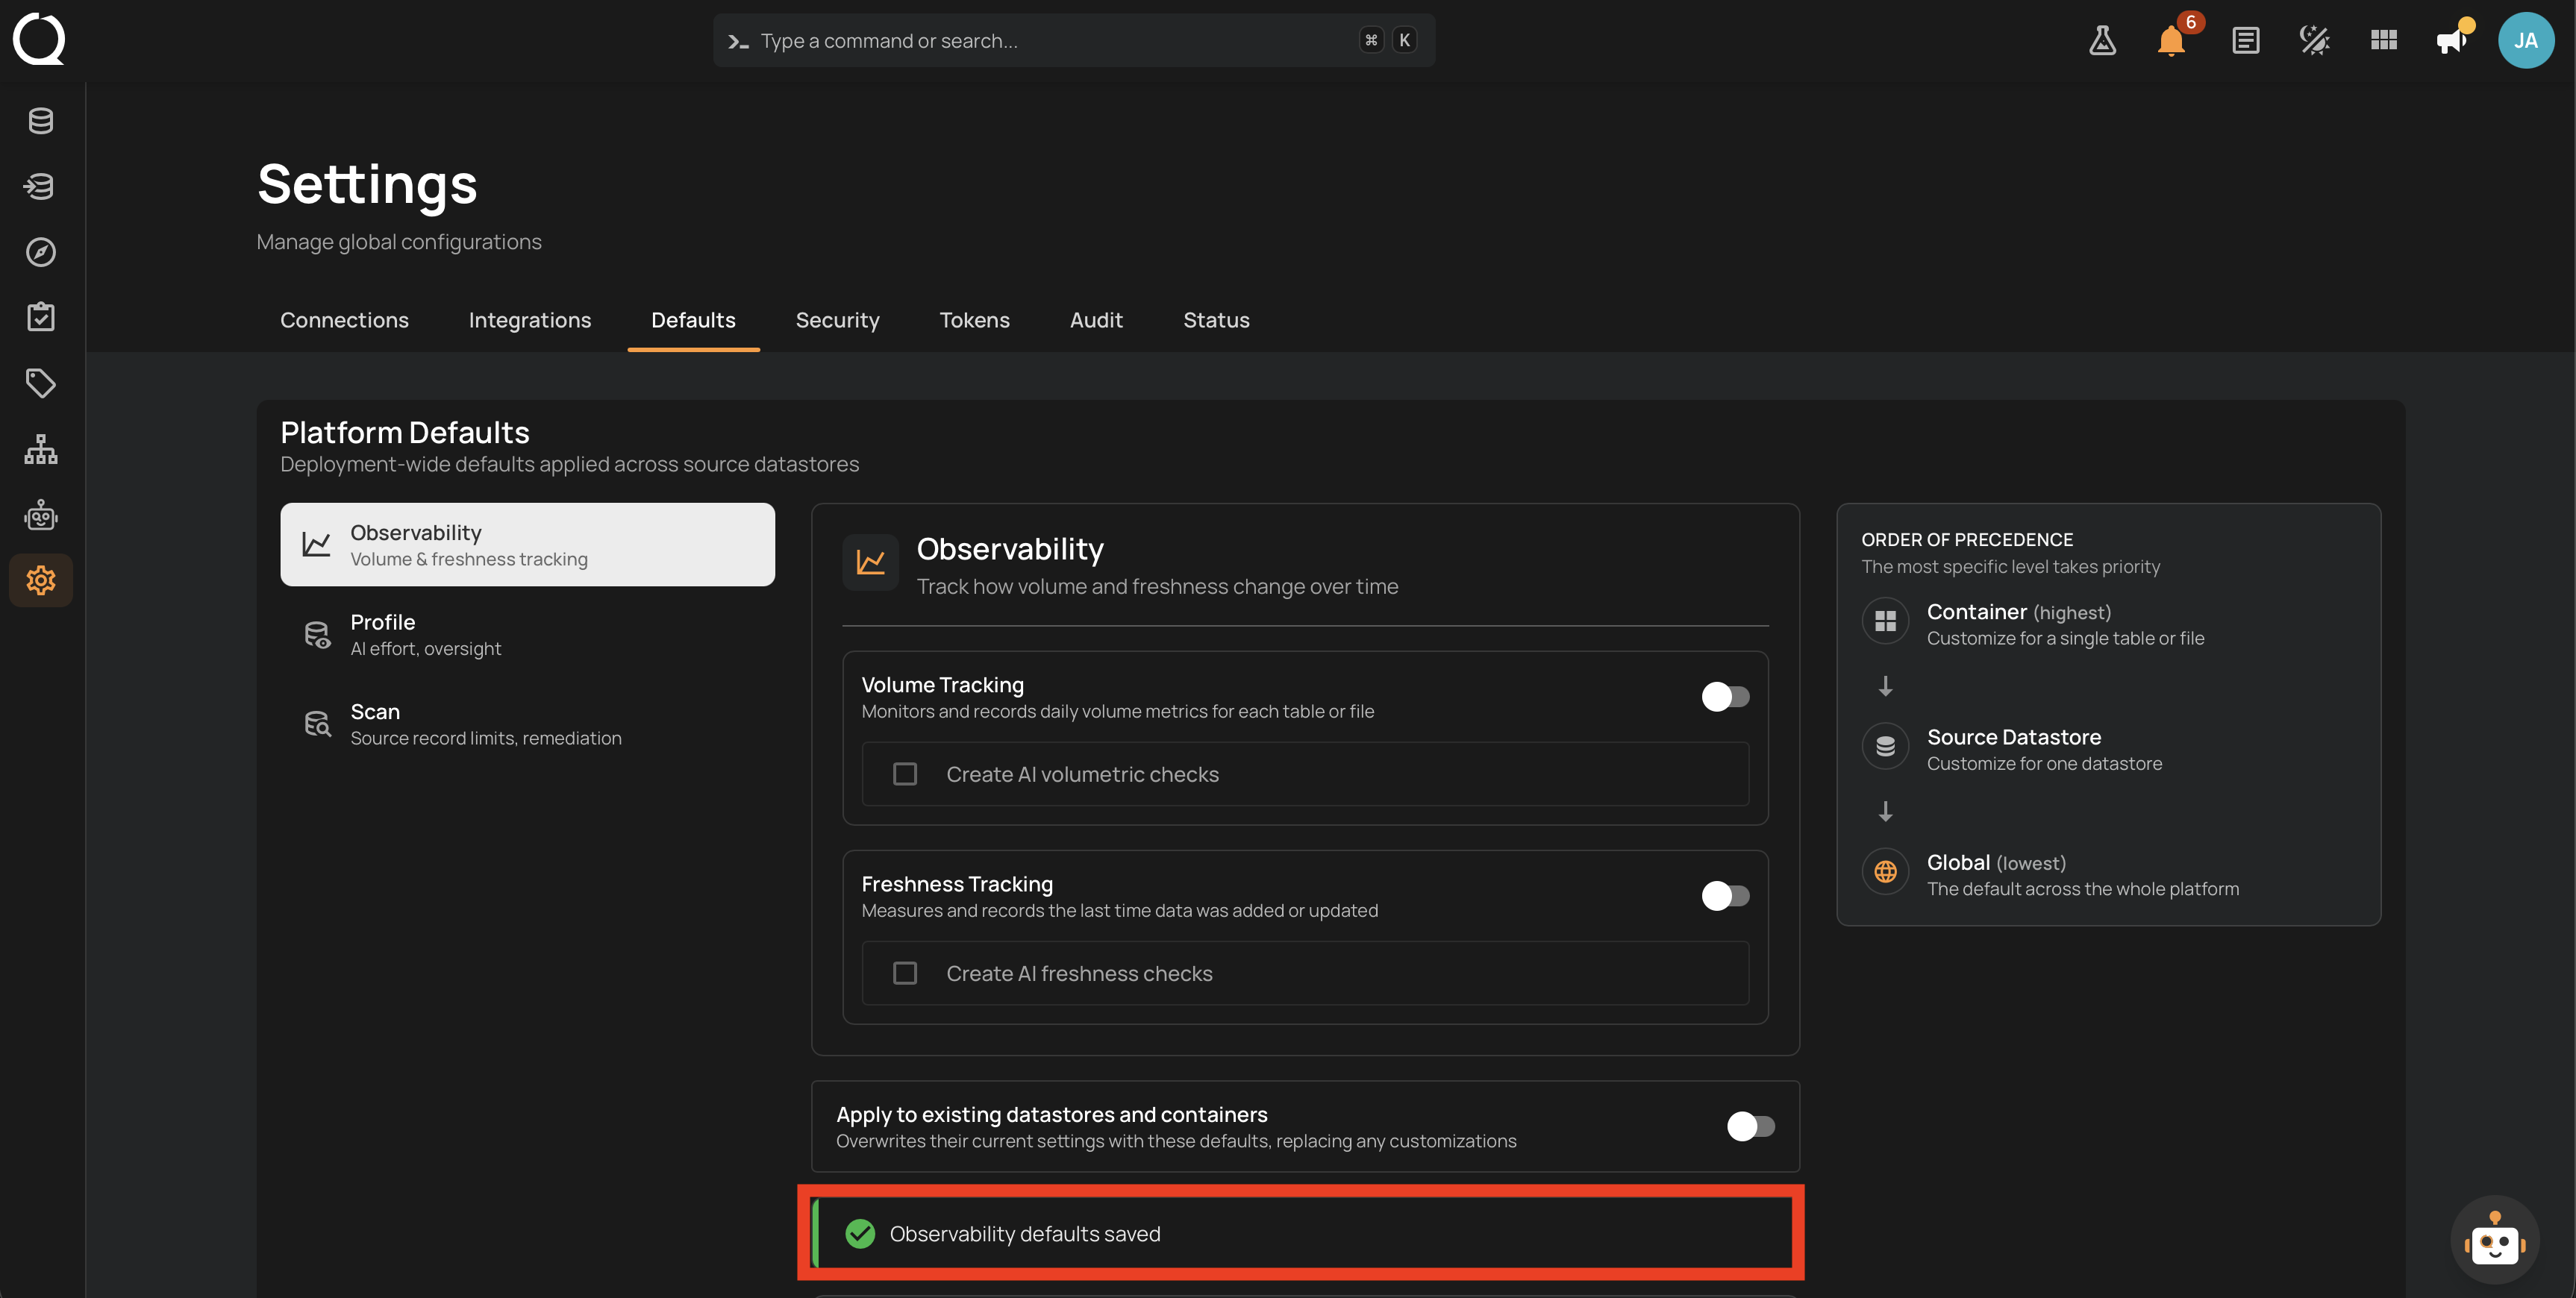
Step 4: A confirmation banner appears at the top of the panel, confirming that the defaults were saved.
Step 1: In Settings > Defaults, click Sync in the left rail and click the Reset icon button next to the section title. The button is there only while the value differs from the shipped 16.
Step 2: The form loads Qualytics' shipped value for Tables or Files Analyzed at Once, which is 16, and the preset menu at the end of the field switches to 16.
Step 3: Click Save Sync to persist the reset. Without saving, the form value reverts when you switch tabs.
Step 4: A confirmation banner reading Sync defaults saved appears at the top of the panel. The next Sync to start runs with the shipped limit.
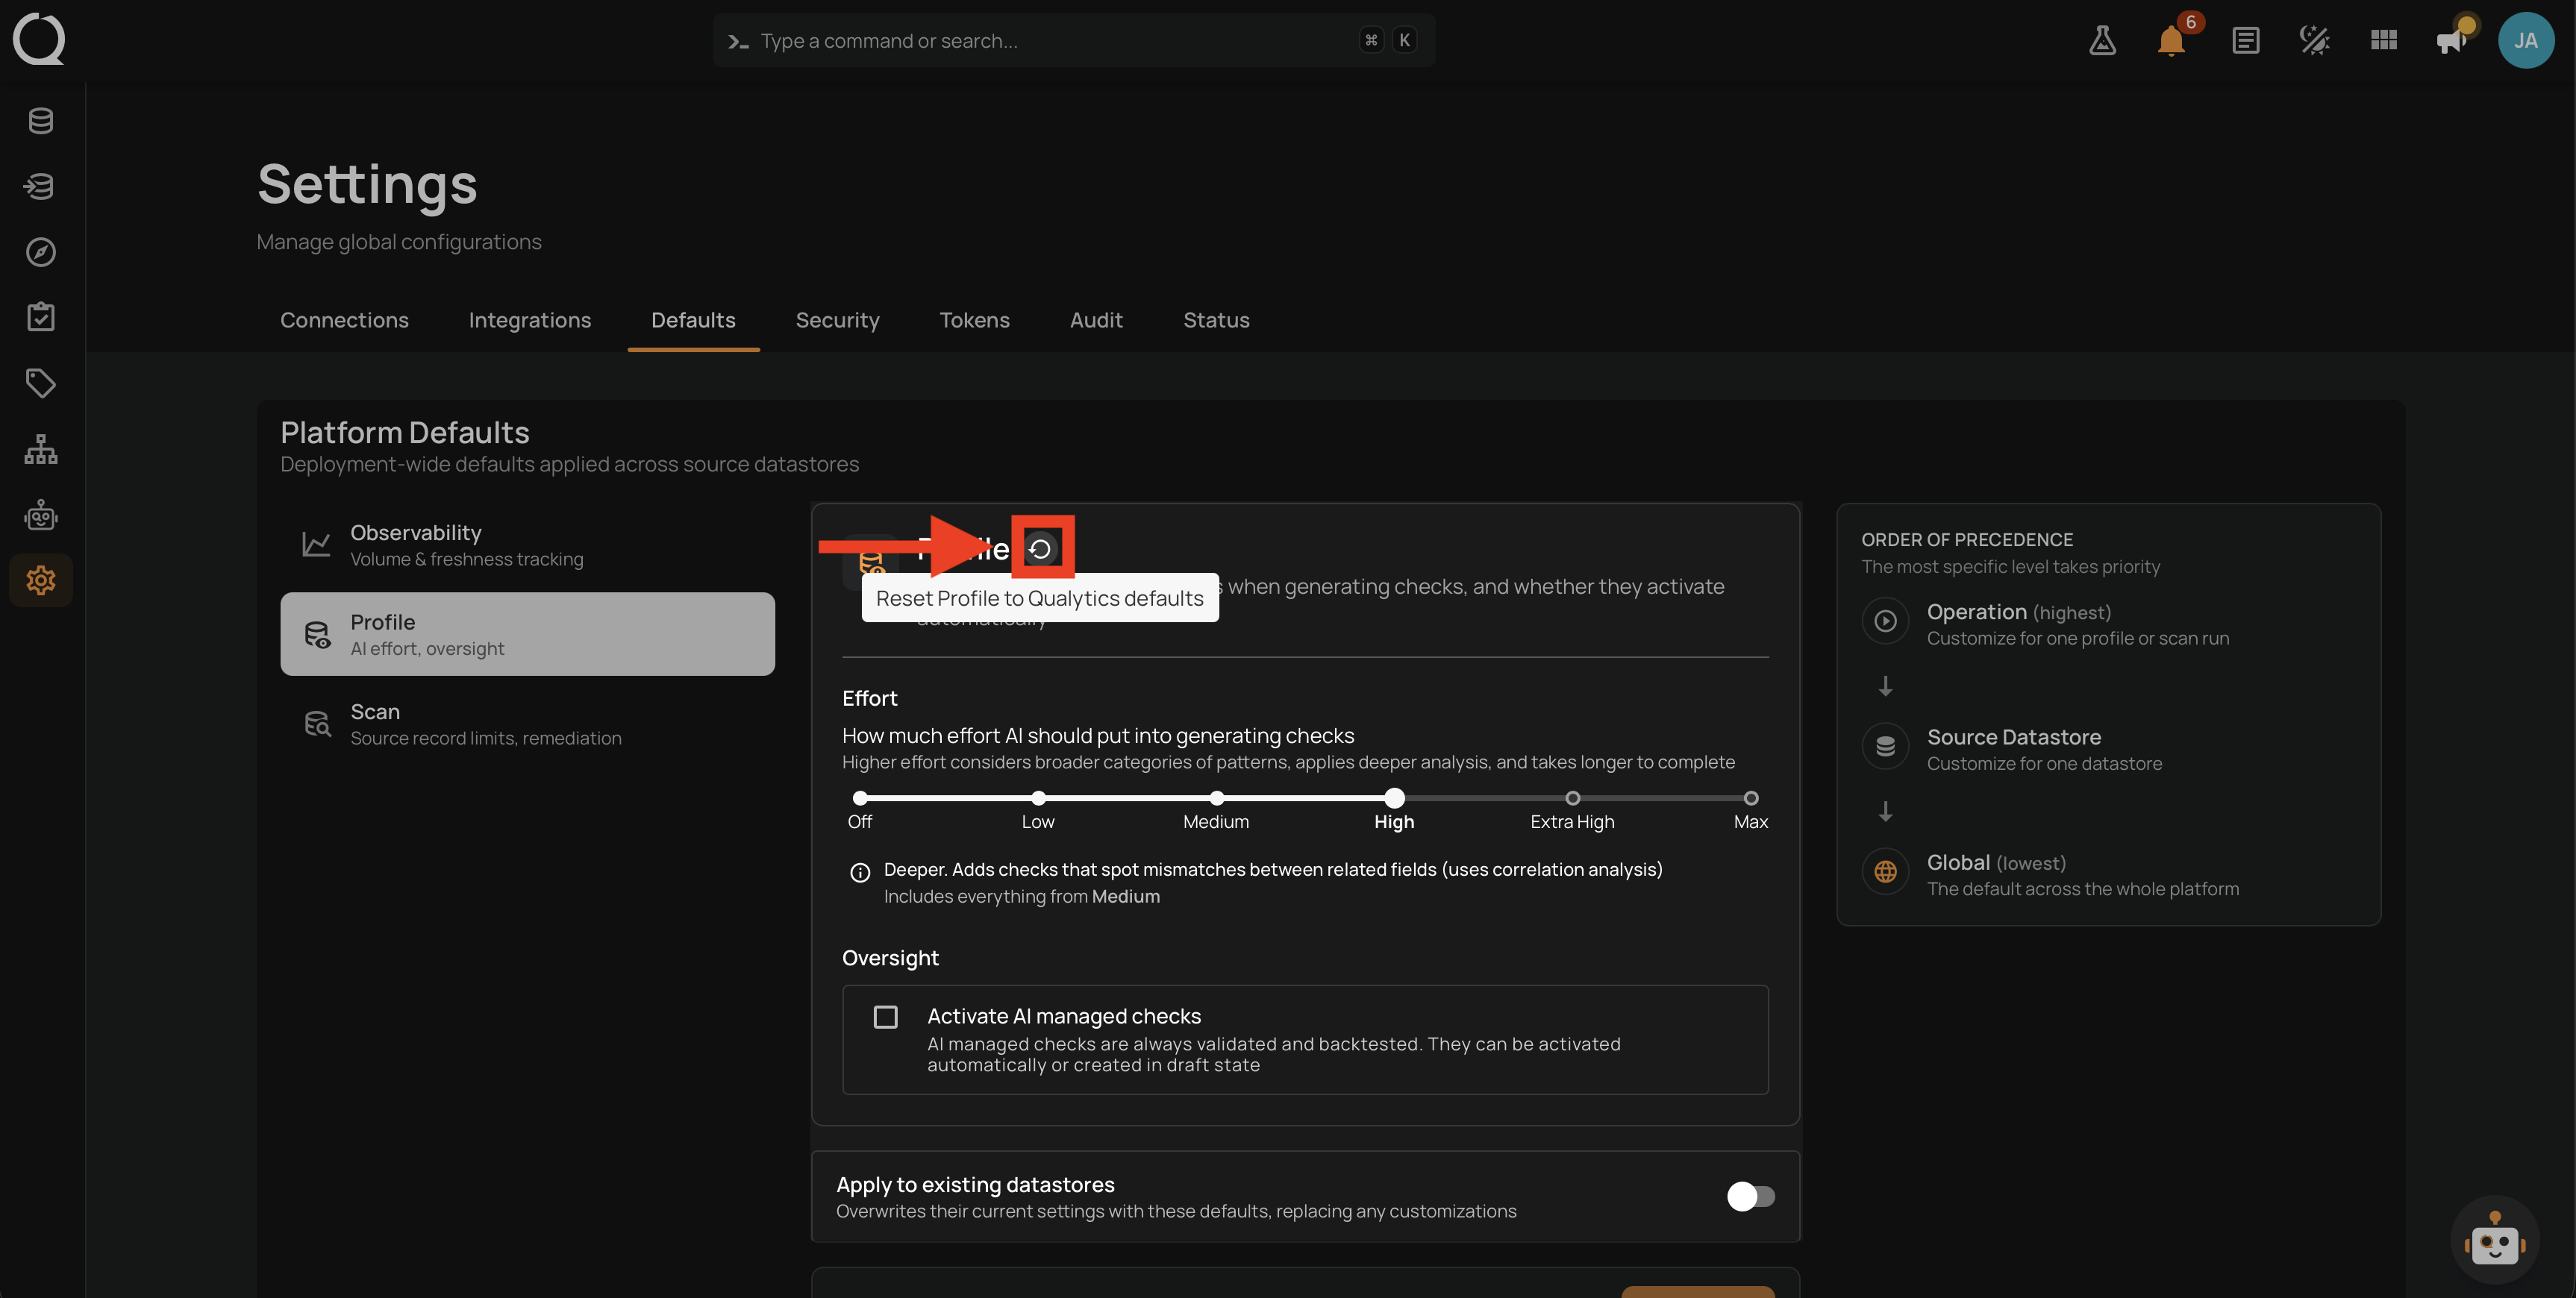
Step 1: In Settings > Defaults, click Profile in the left rail and click the Reset icon button next to the section title.
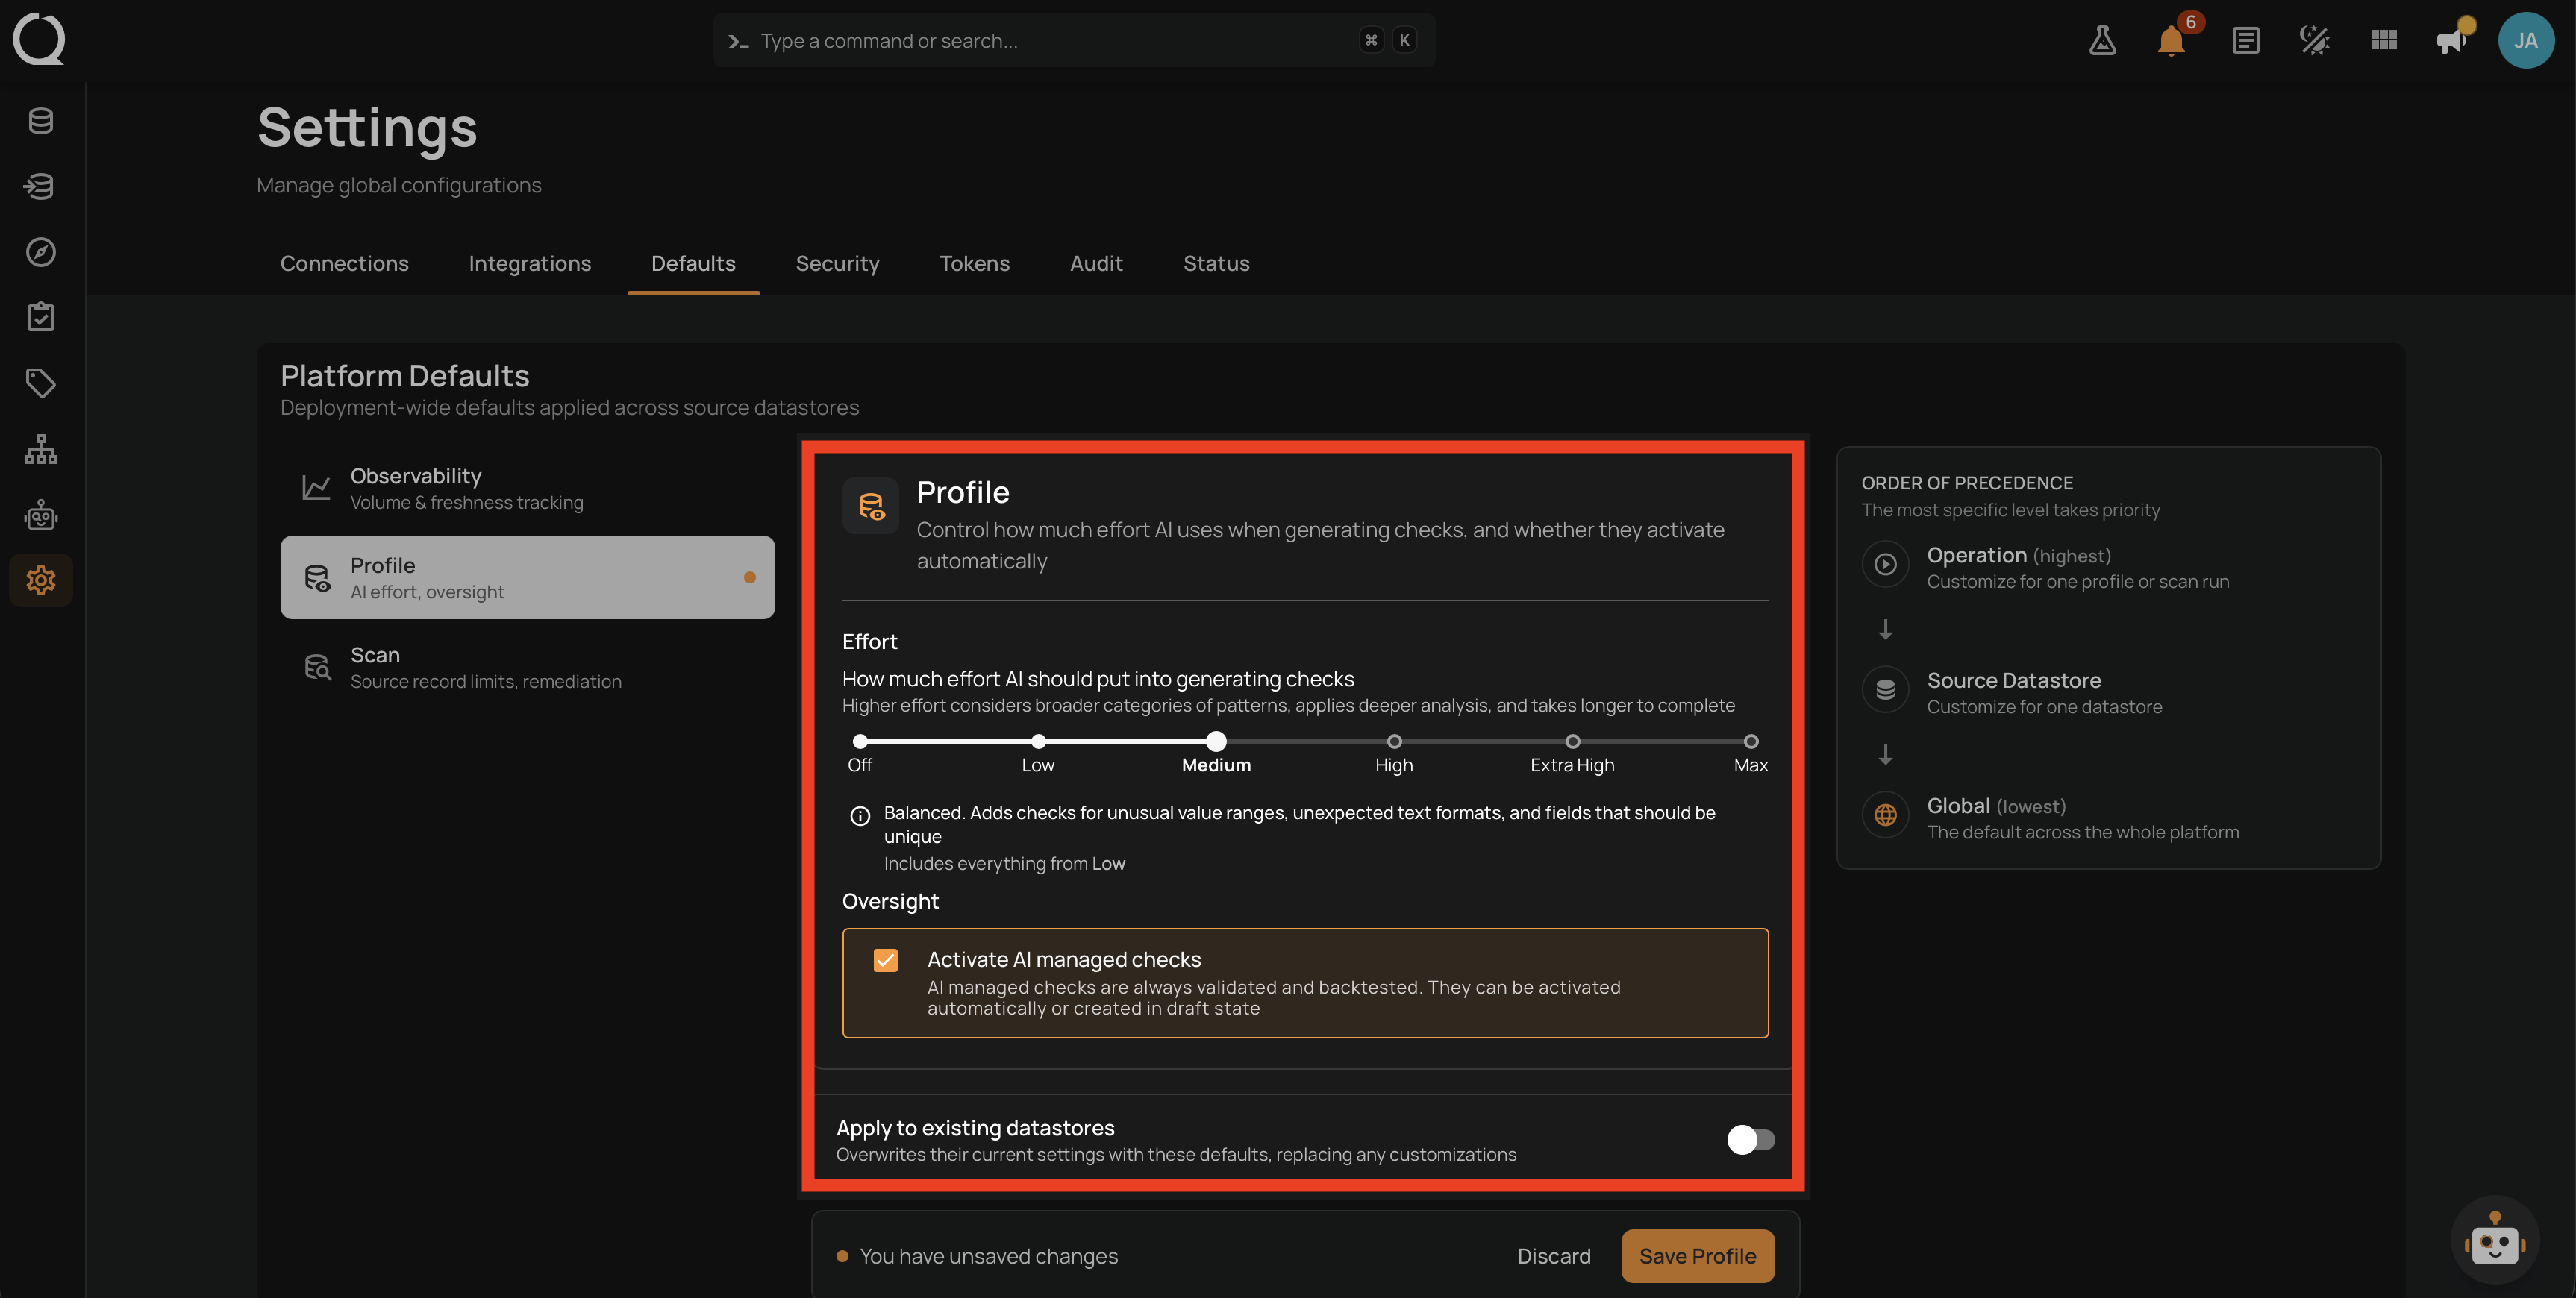
Step 2: The form loads Qualytics' shipped default values for Effort and Activate AI managed checks.
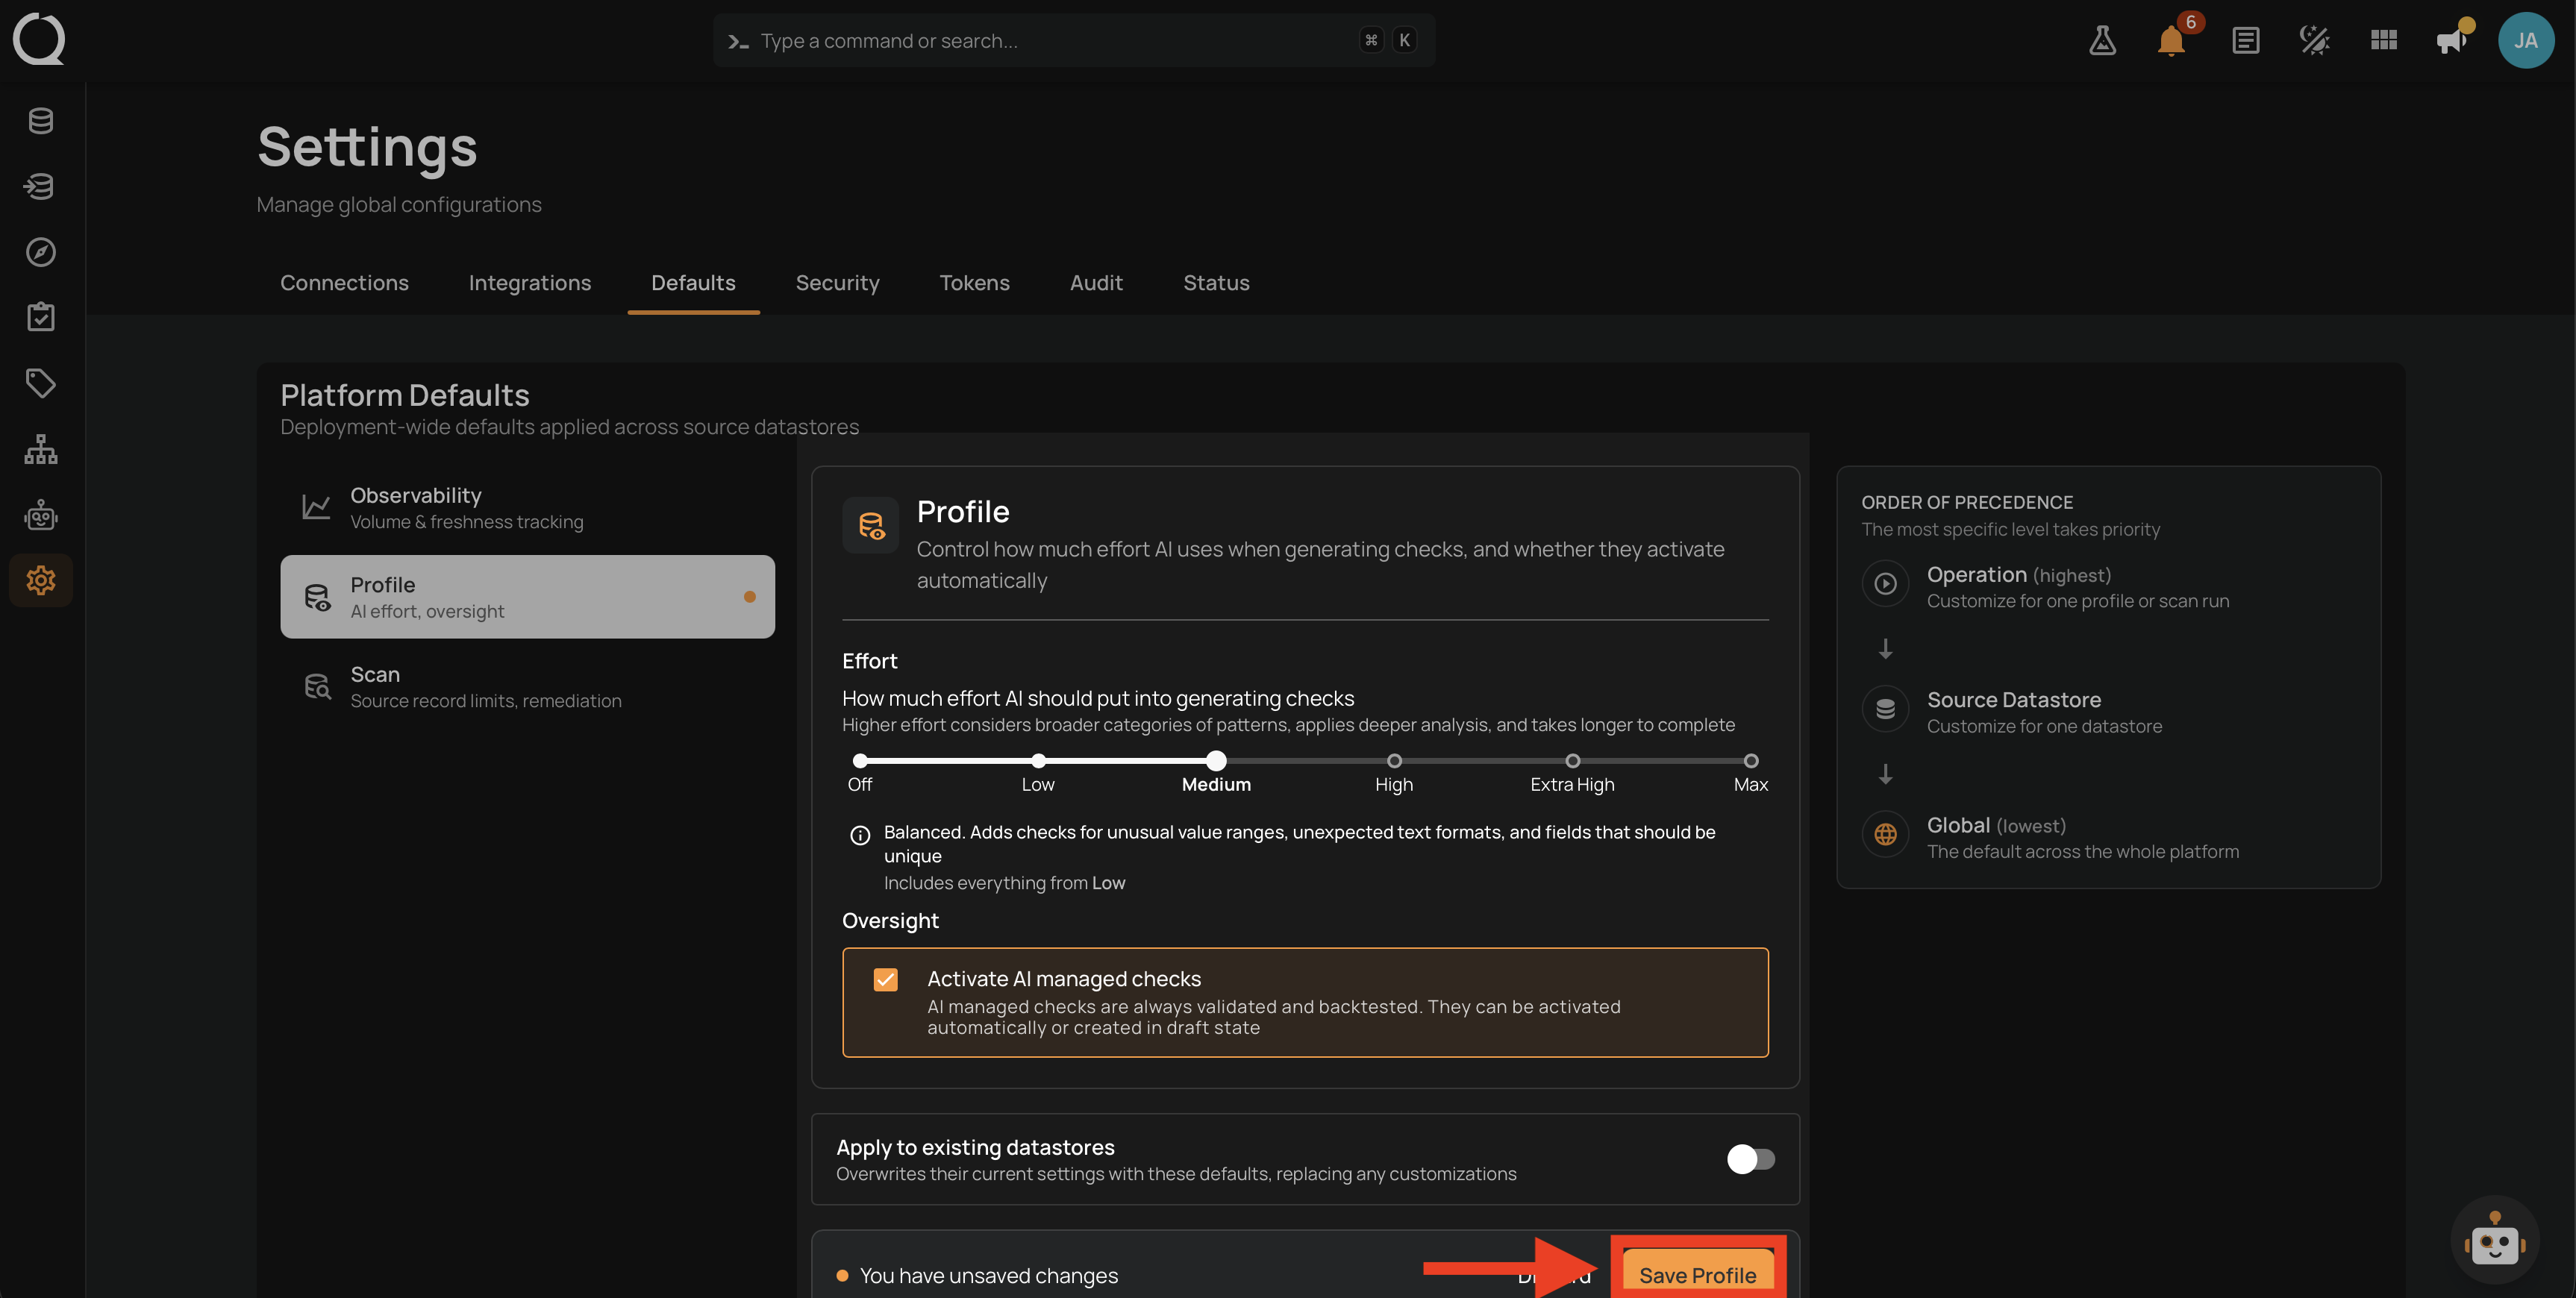
Step 3: Click Save Profile to persist the reset. Without saving, the form values revert when you switch tabs.
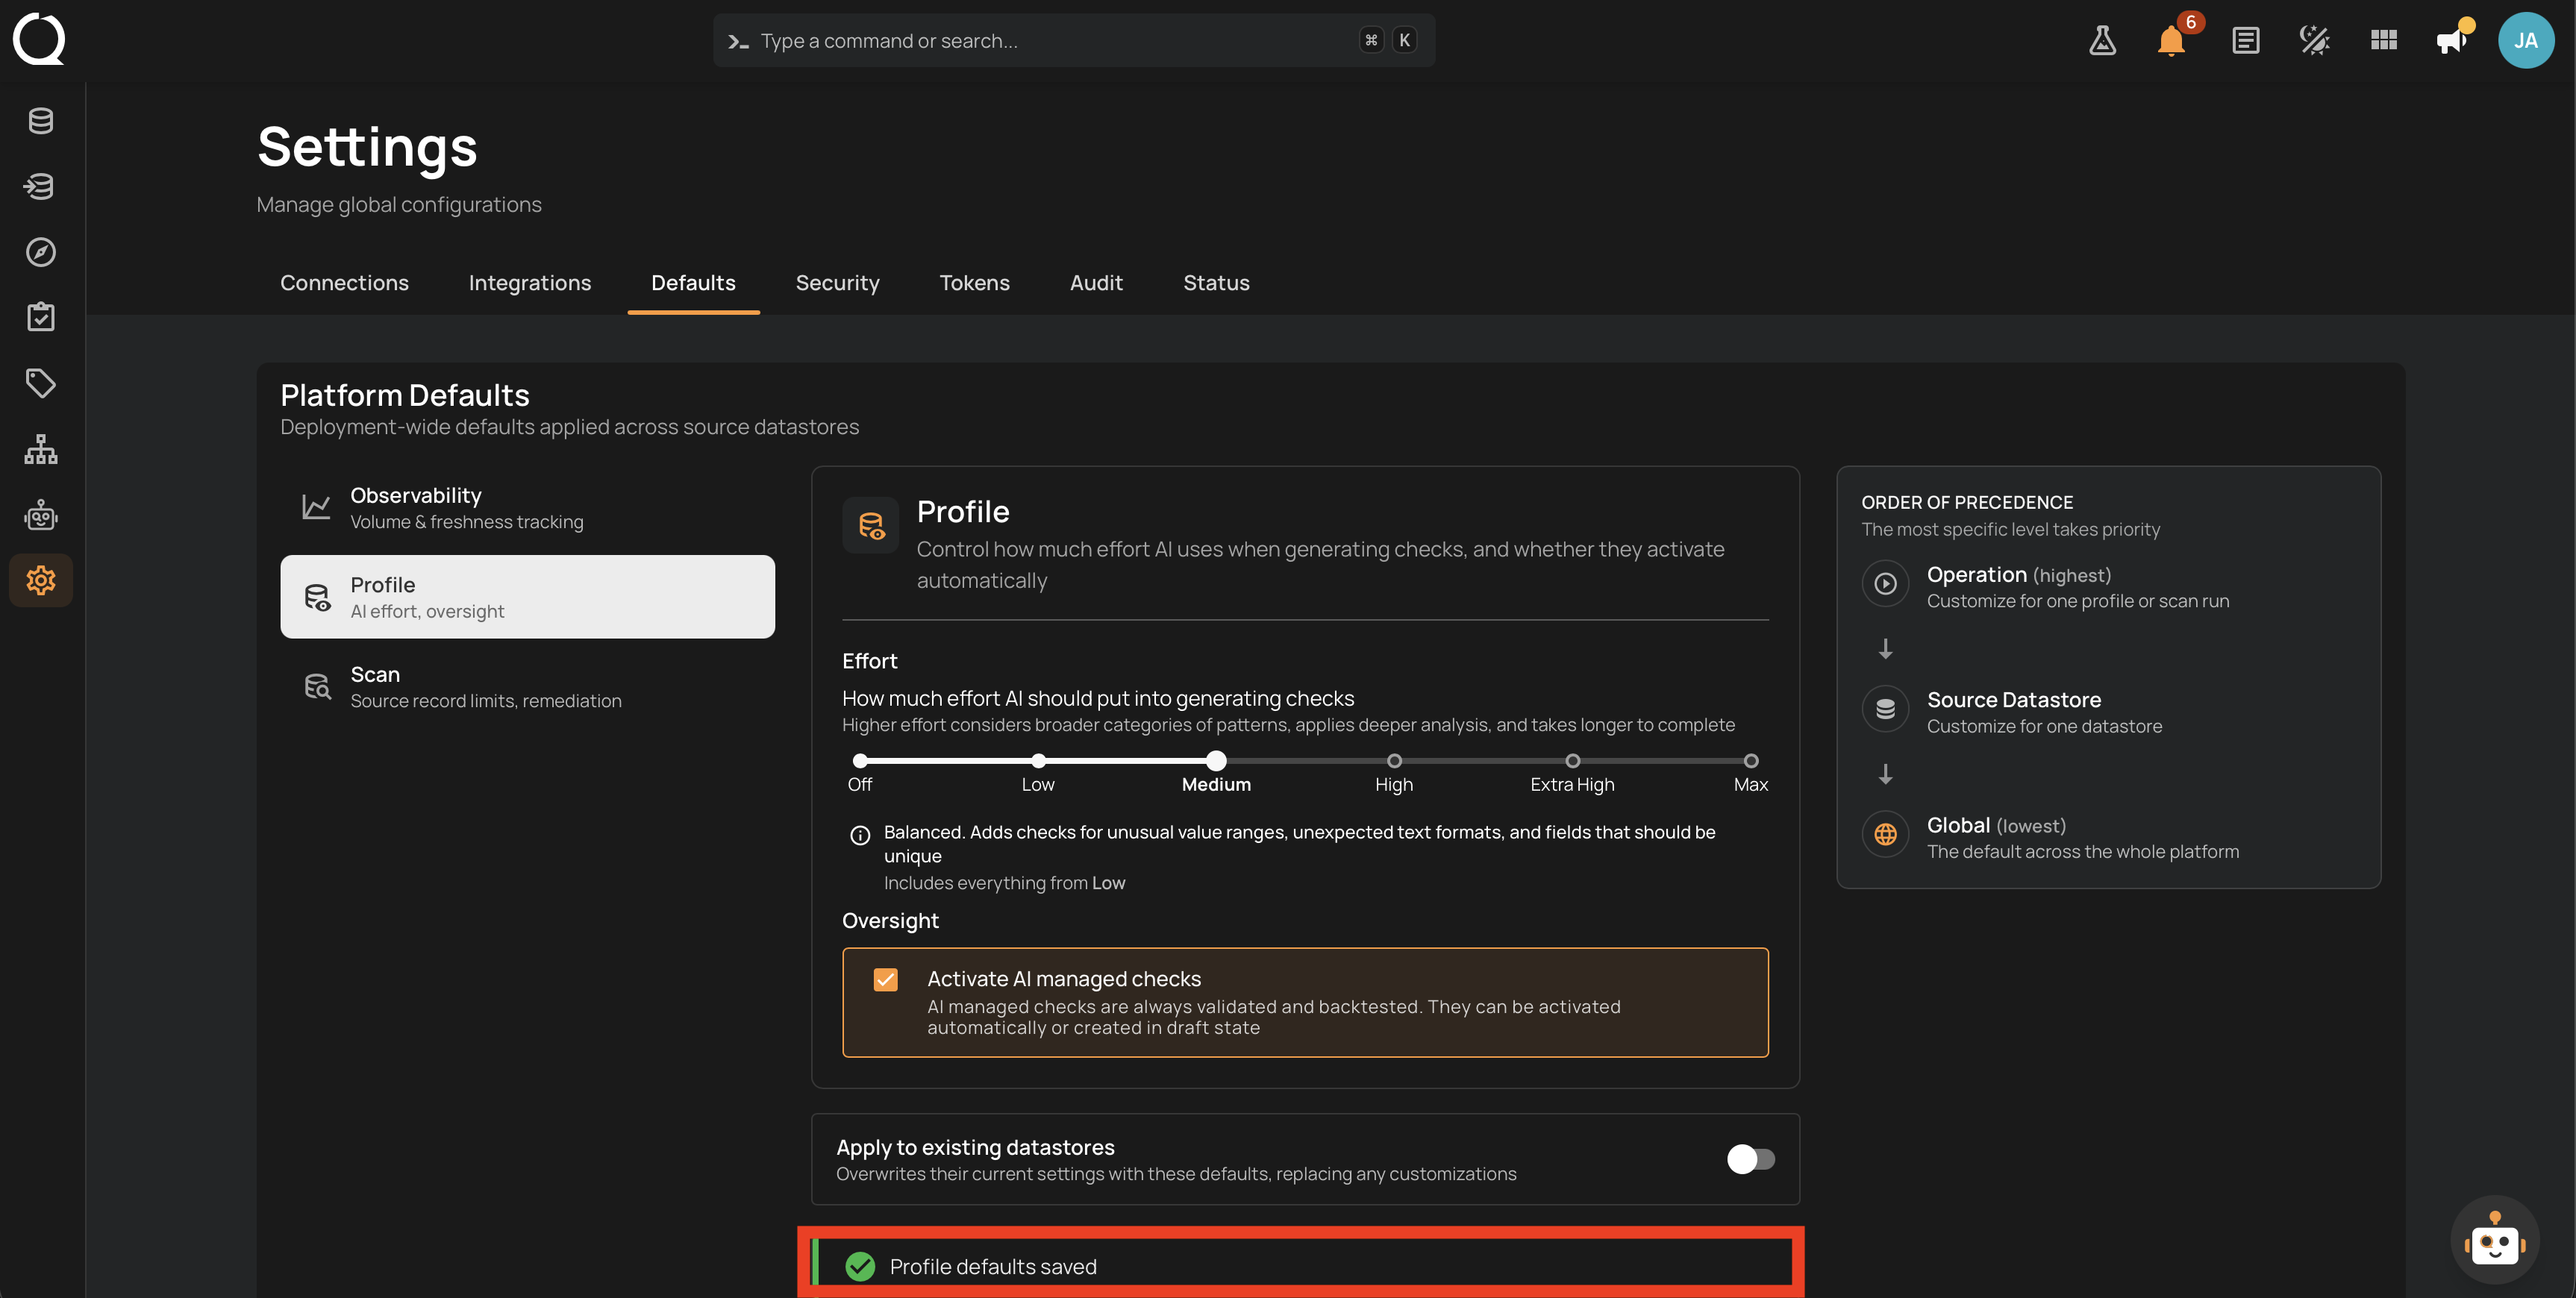
Step 4: A confirmation banner appears at the top of the panel, confirming that the defaults were saved.
Step 1: In Settings > Defaults, click Scan in the left rail and click the Reset icon button next to the section title.
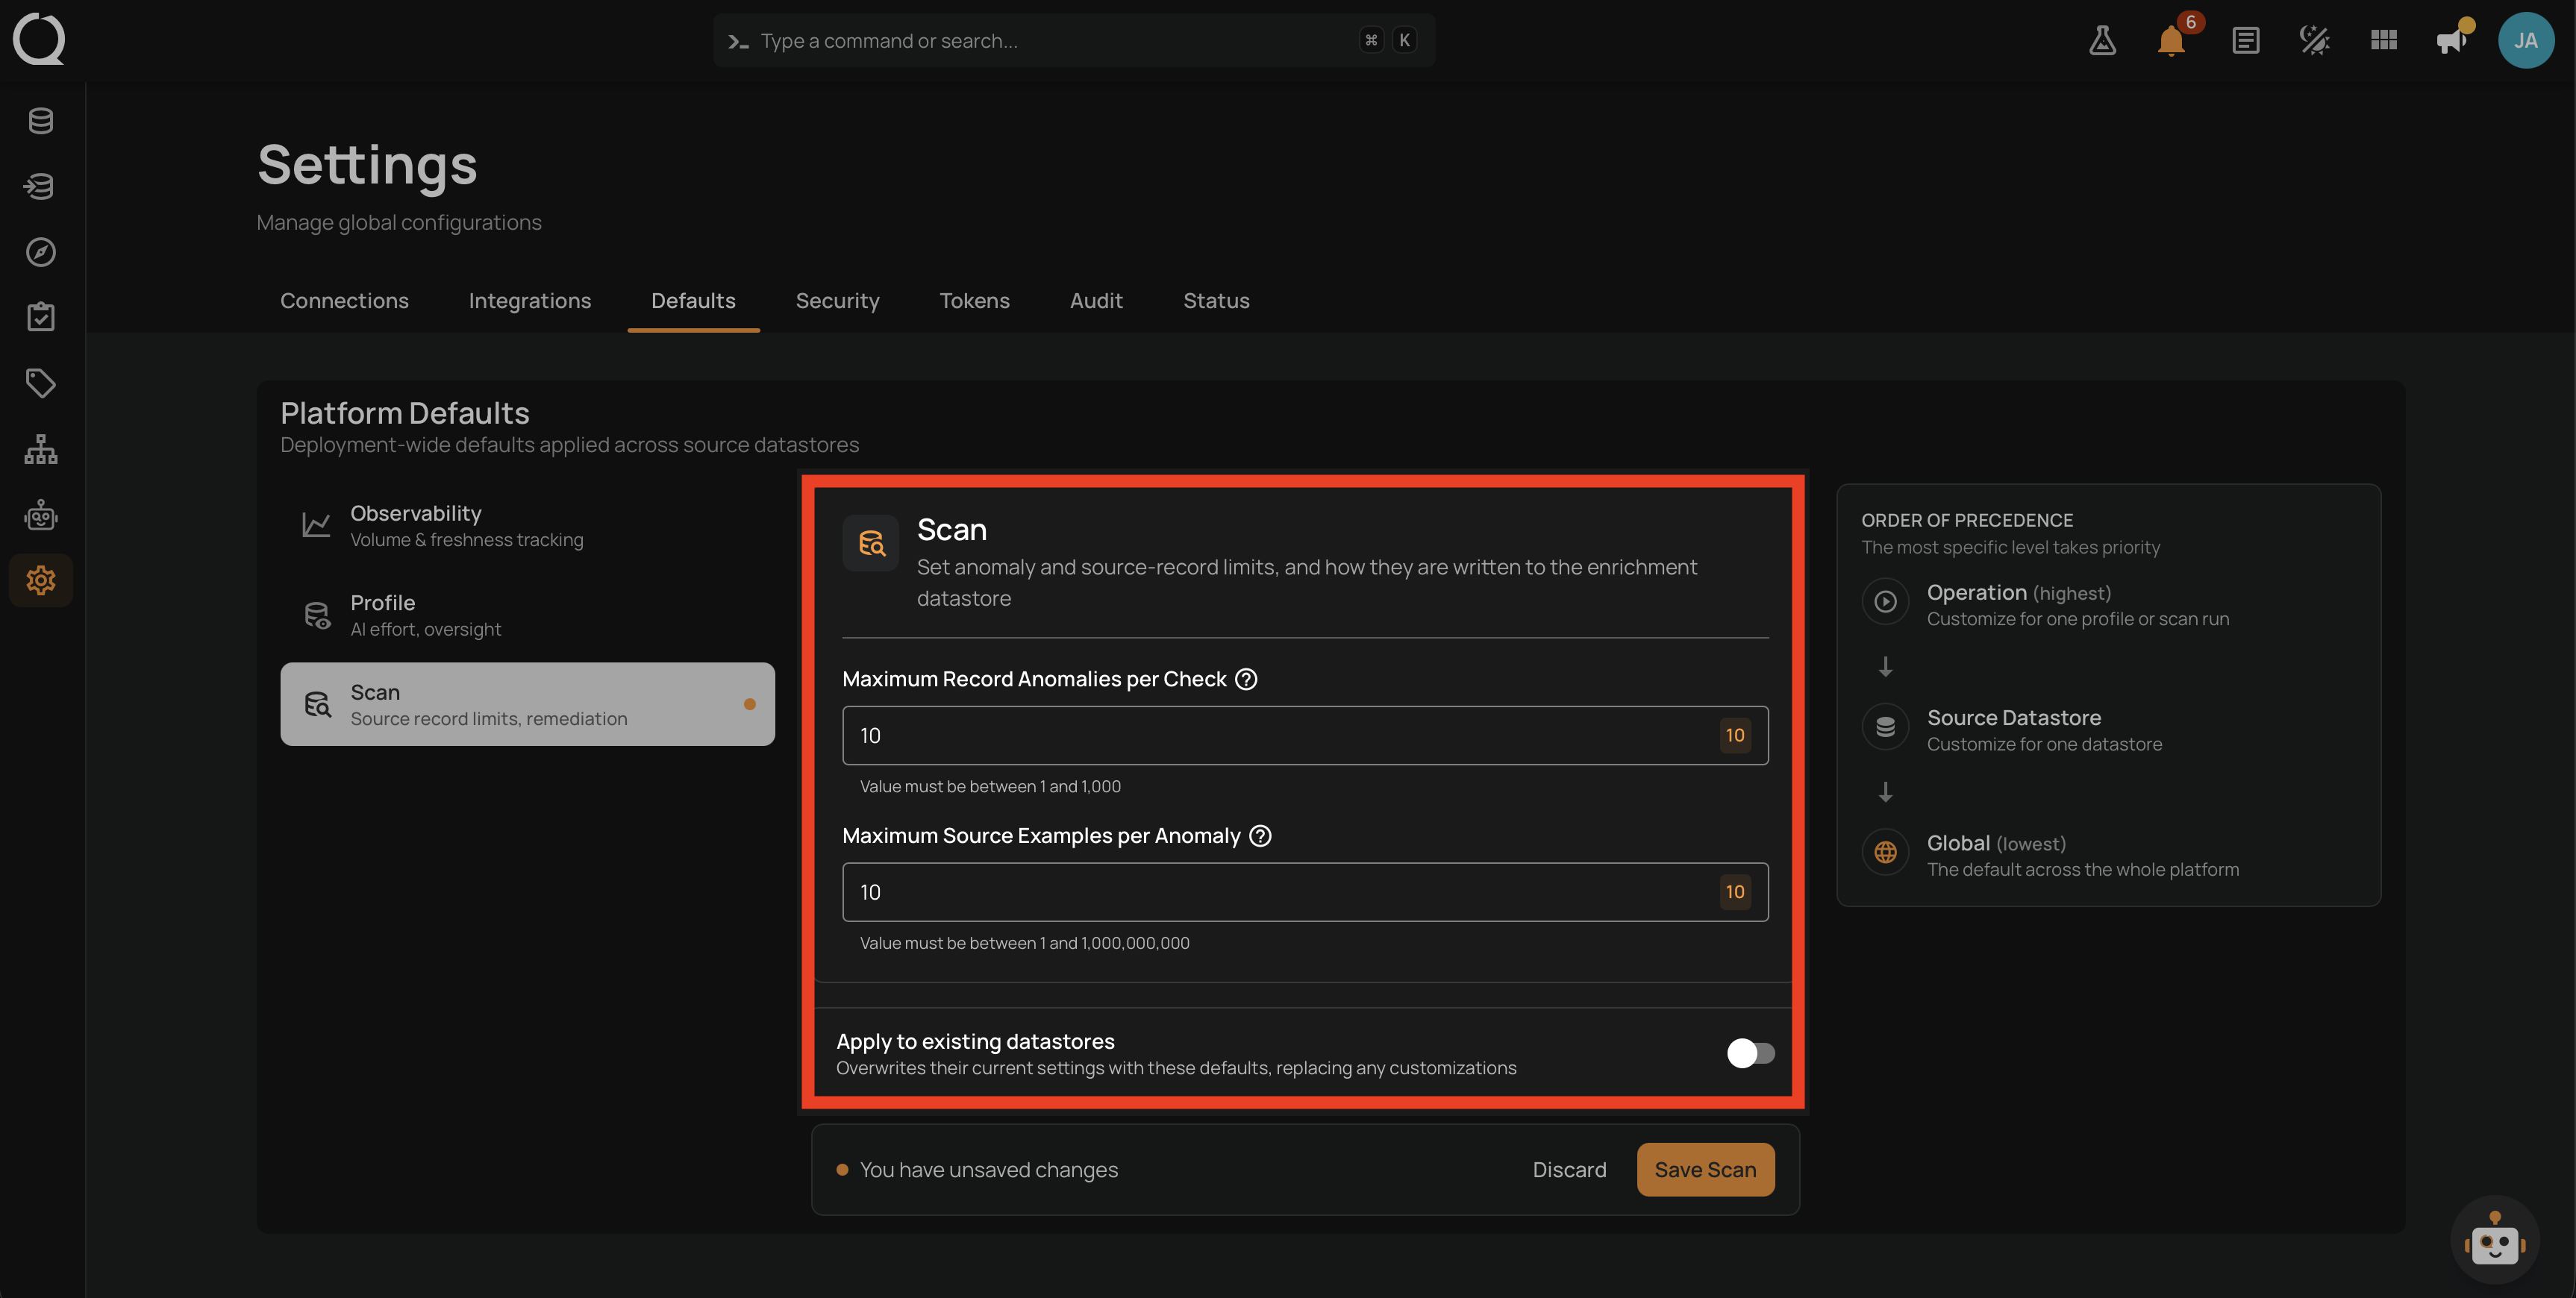
Step 2: The form loads Qualytics' shipped default values for Maximum Record Anomalies per Check and Maximum Source Examples per Anomaly.
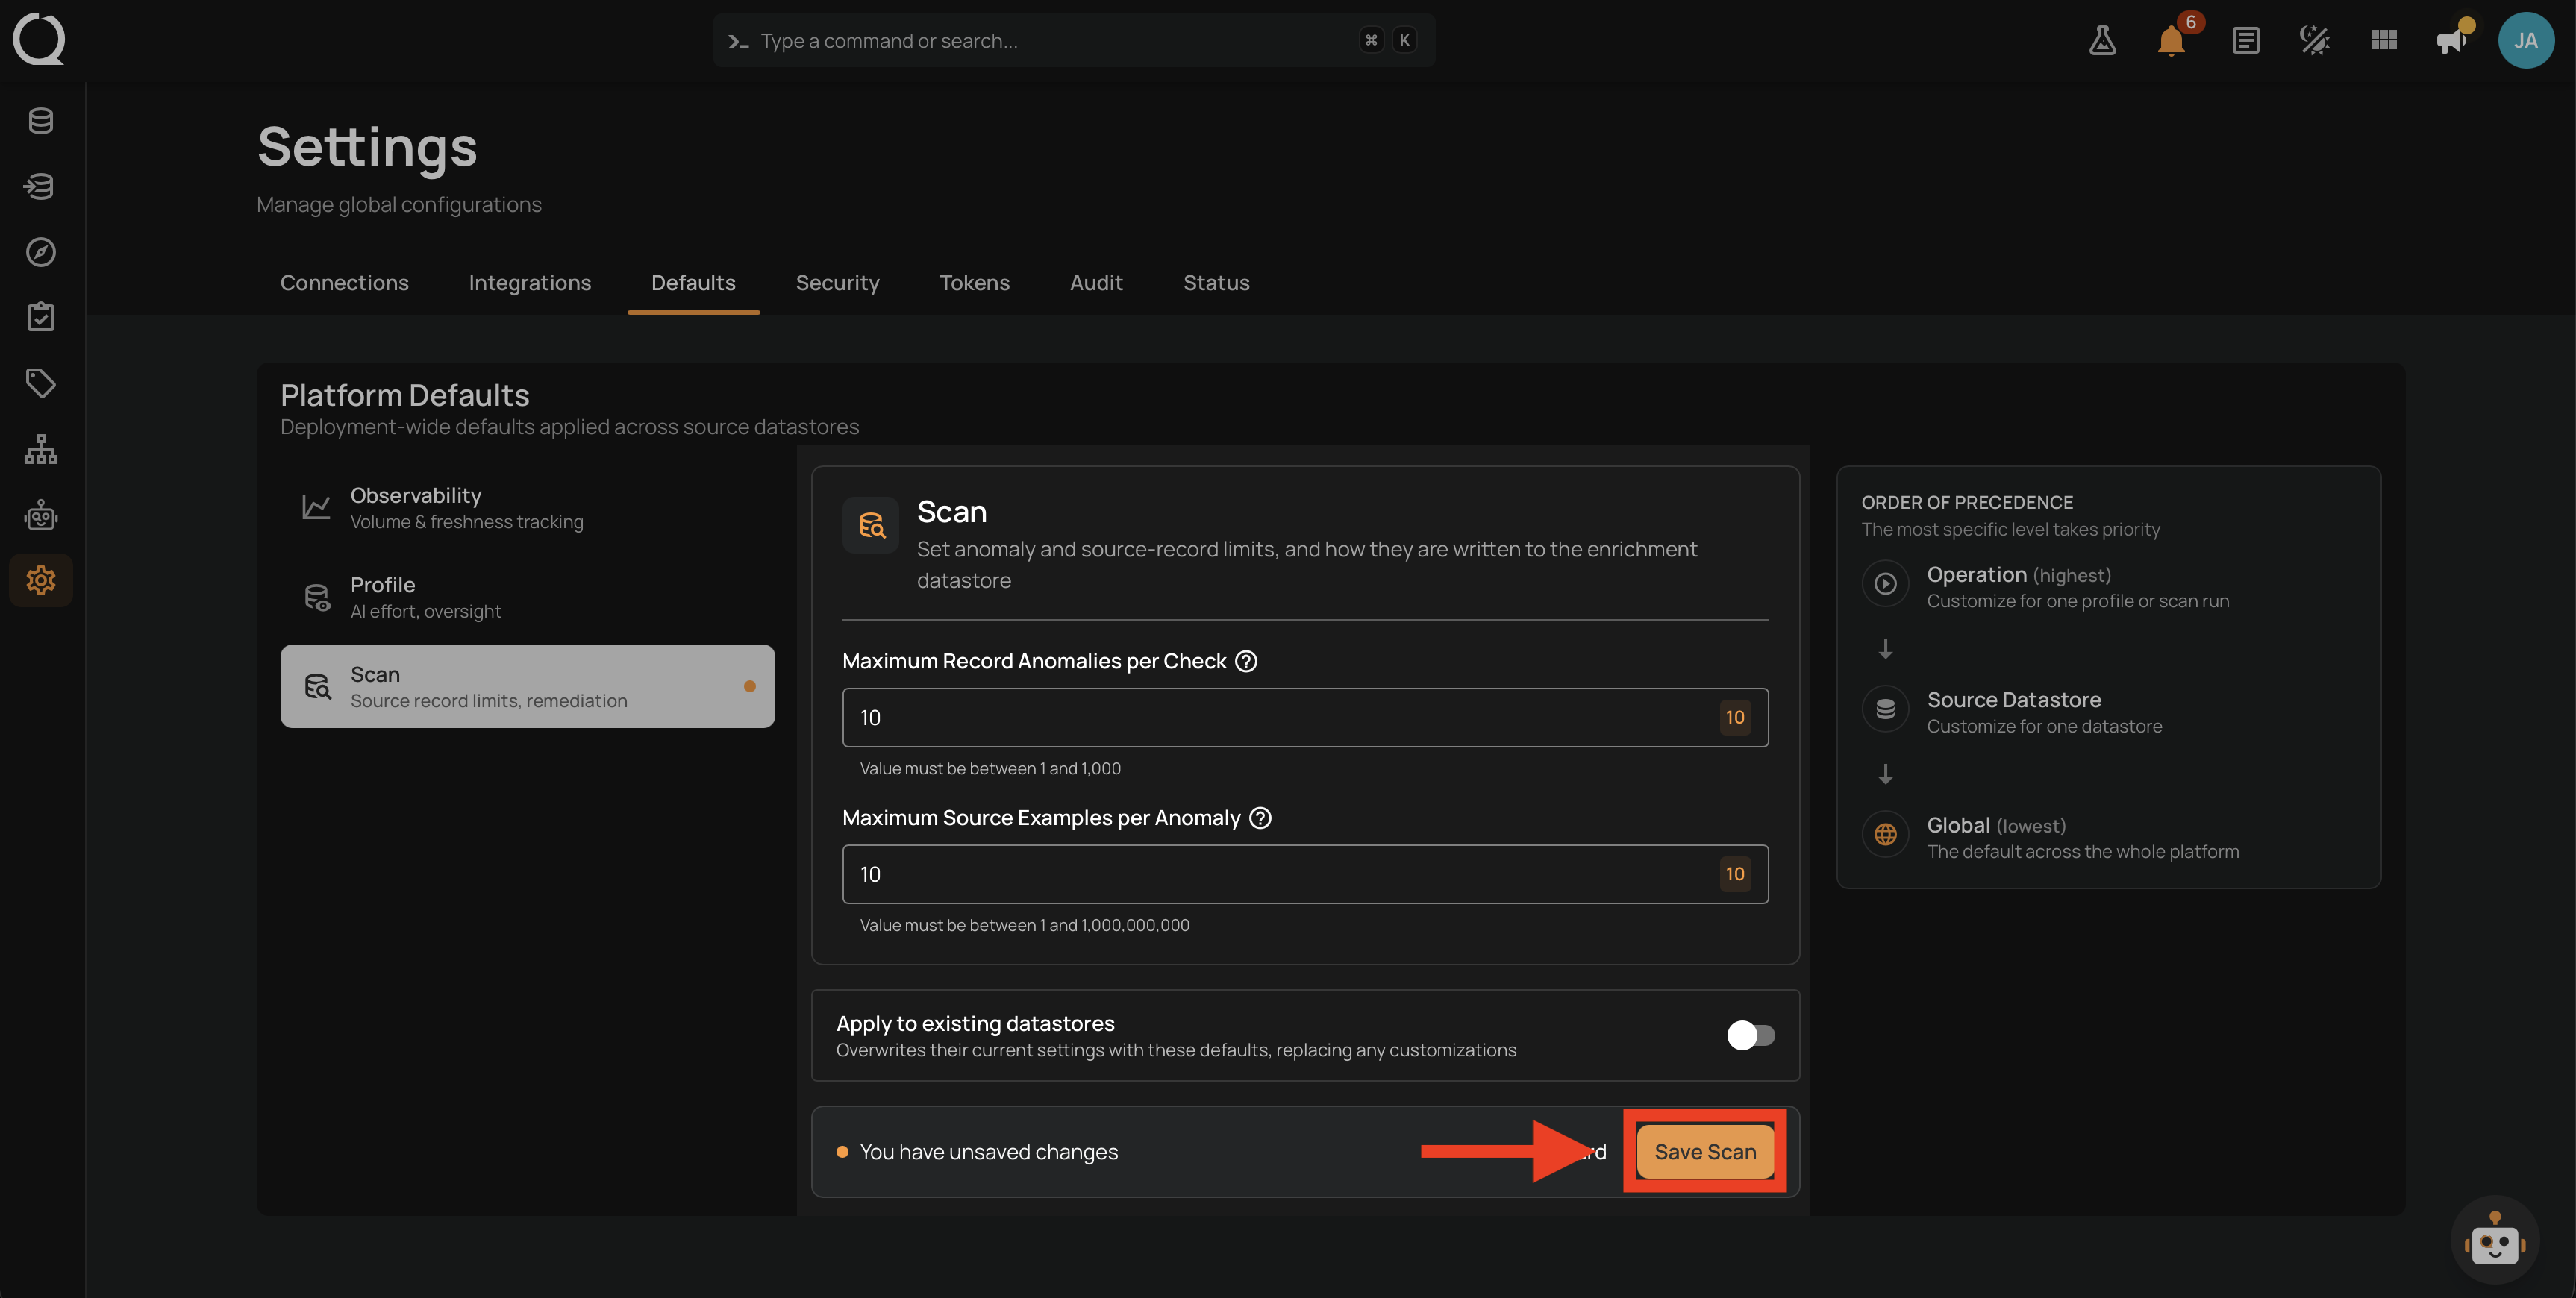
Step 3: Click Save Scan to persist the reset. Without saving, the form values revert when you switch tabs.
Step 4: A confirmation banner appears at the top of the panel, confirming that the defaults were saved.