Add a Computed Field
Add a Computed Field to a container to derive a new value from one or more existing fields.
Related
- Concept: Introduction for what a Computed Field is.
- Mechanics: How It Works for validation, execution model, and interaction with Sync.
- Reference: Transformation Types for the full list of transformations and their options.
Show me how
The app can walk you through this. Click Show me how in the form's header, or press H while it is open, and the Add a Computed Field walkthrough highlights each step while you fill in the real form. See The How-tos Scope for every way to start one.
Field Reference
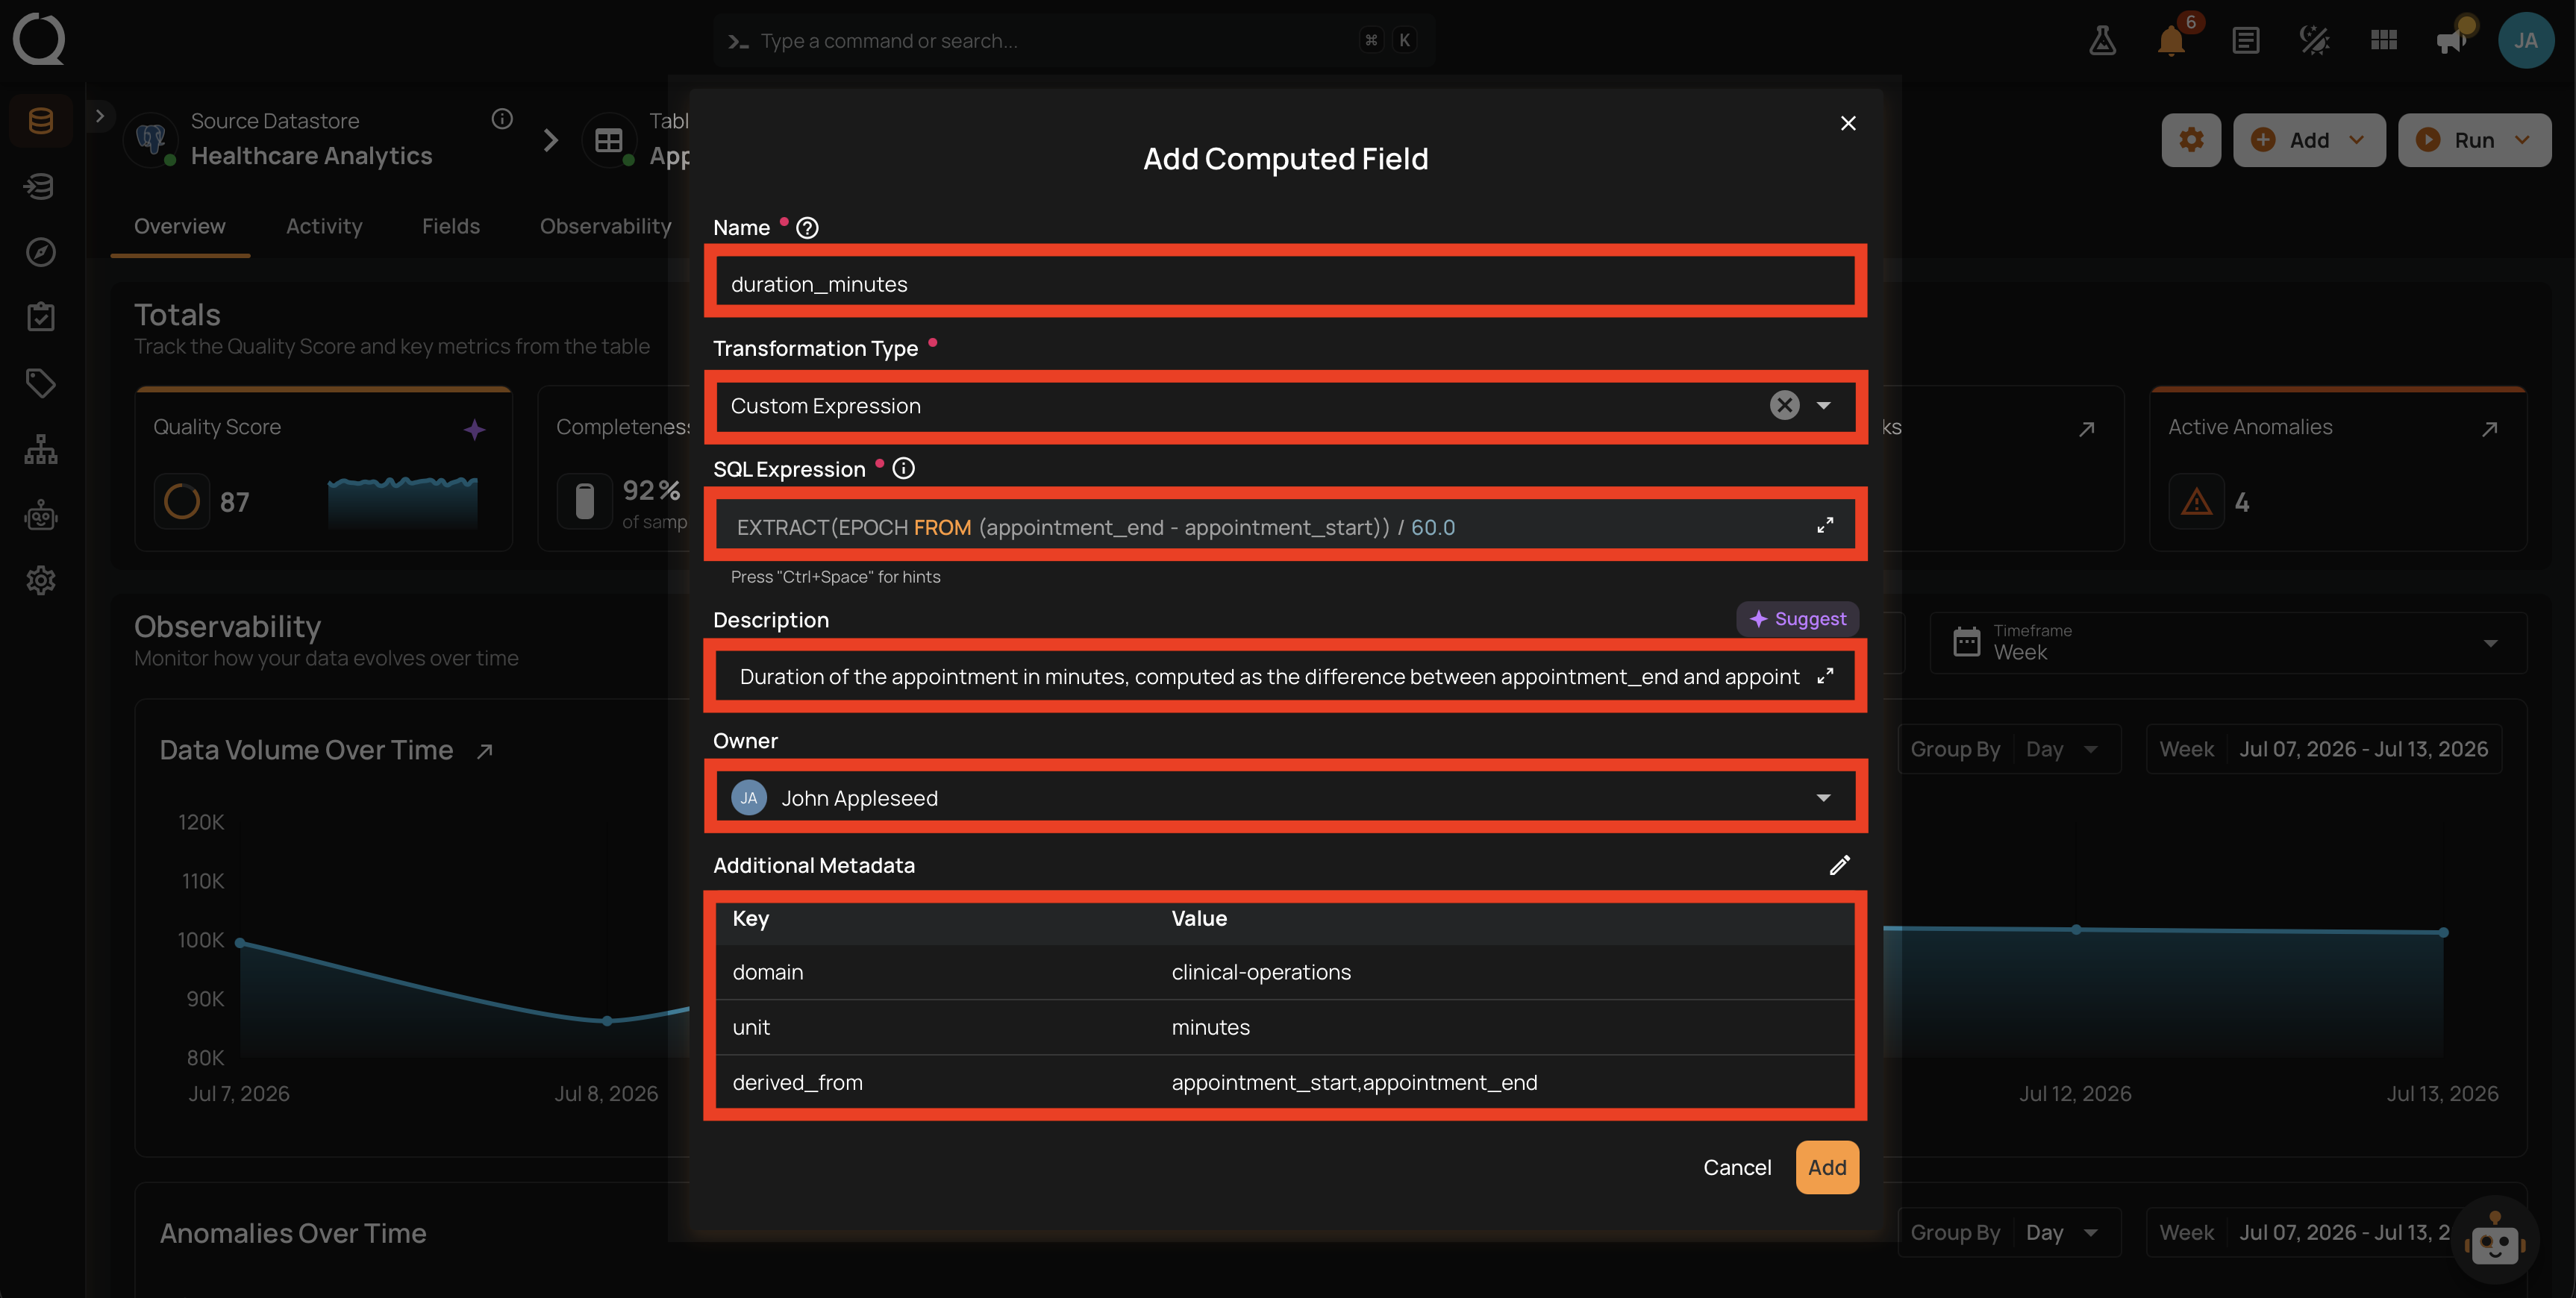
Every field on the Add Computed Field modal, in three sections that mirror the layout of the form.
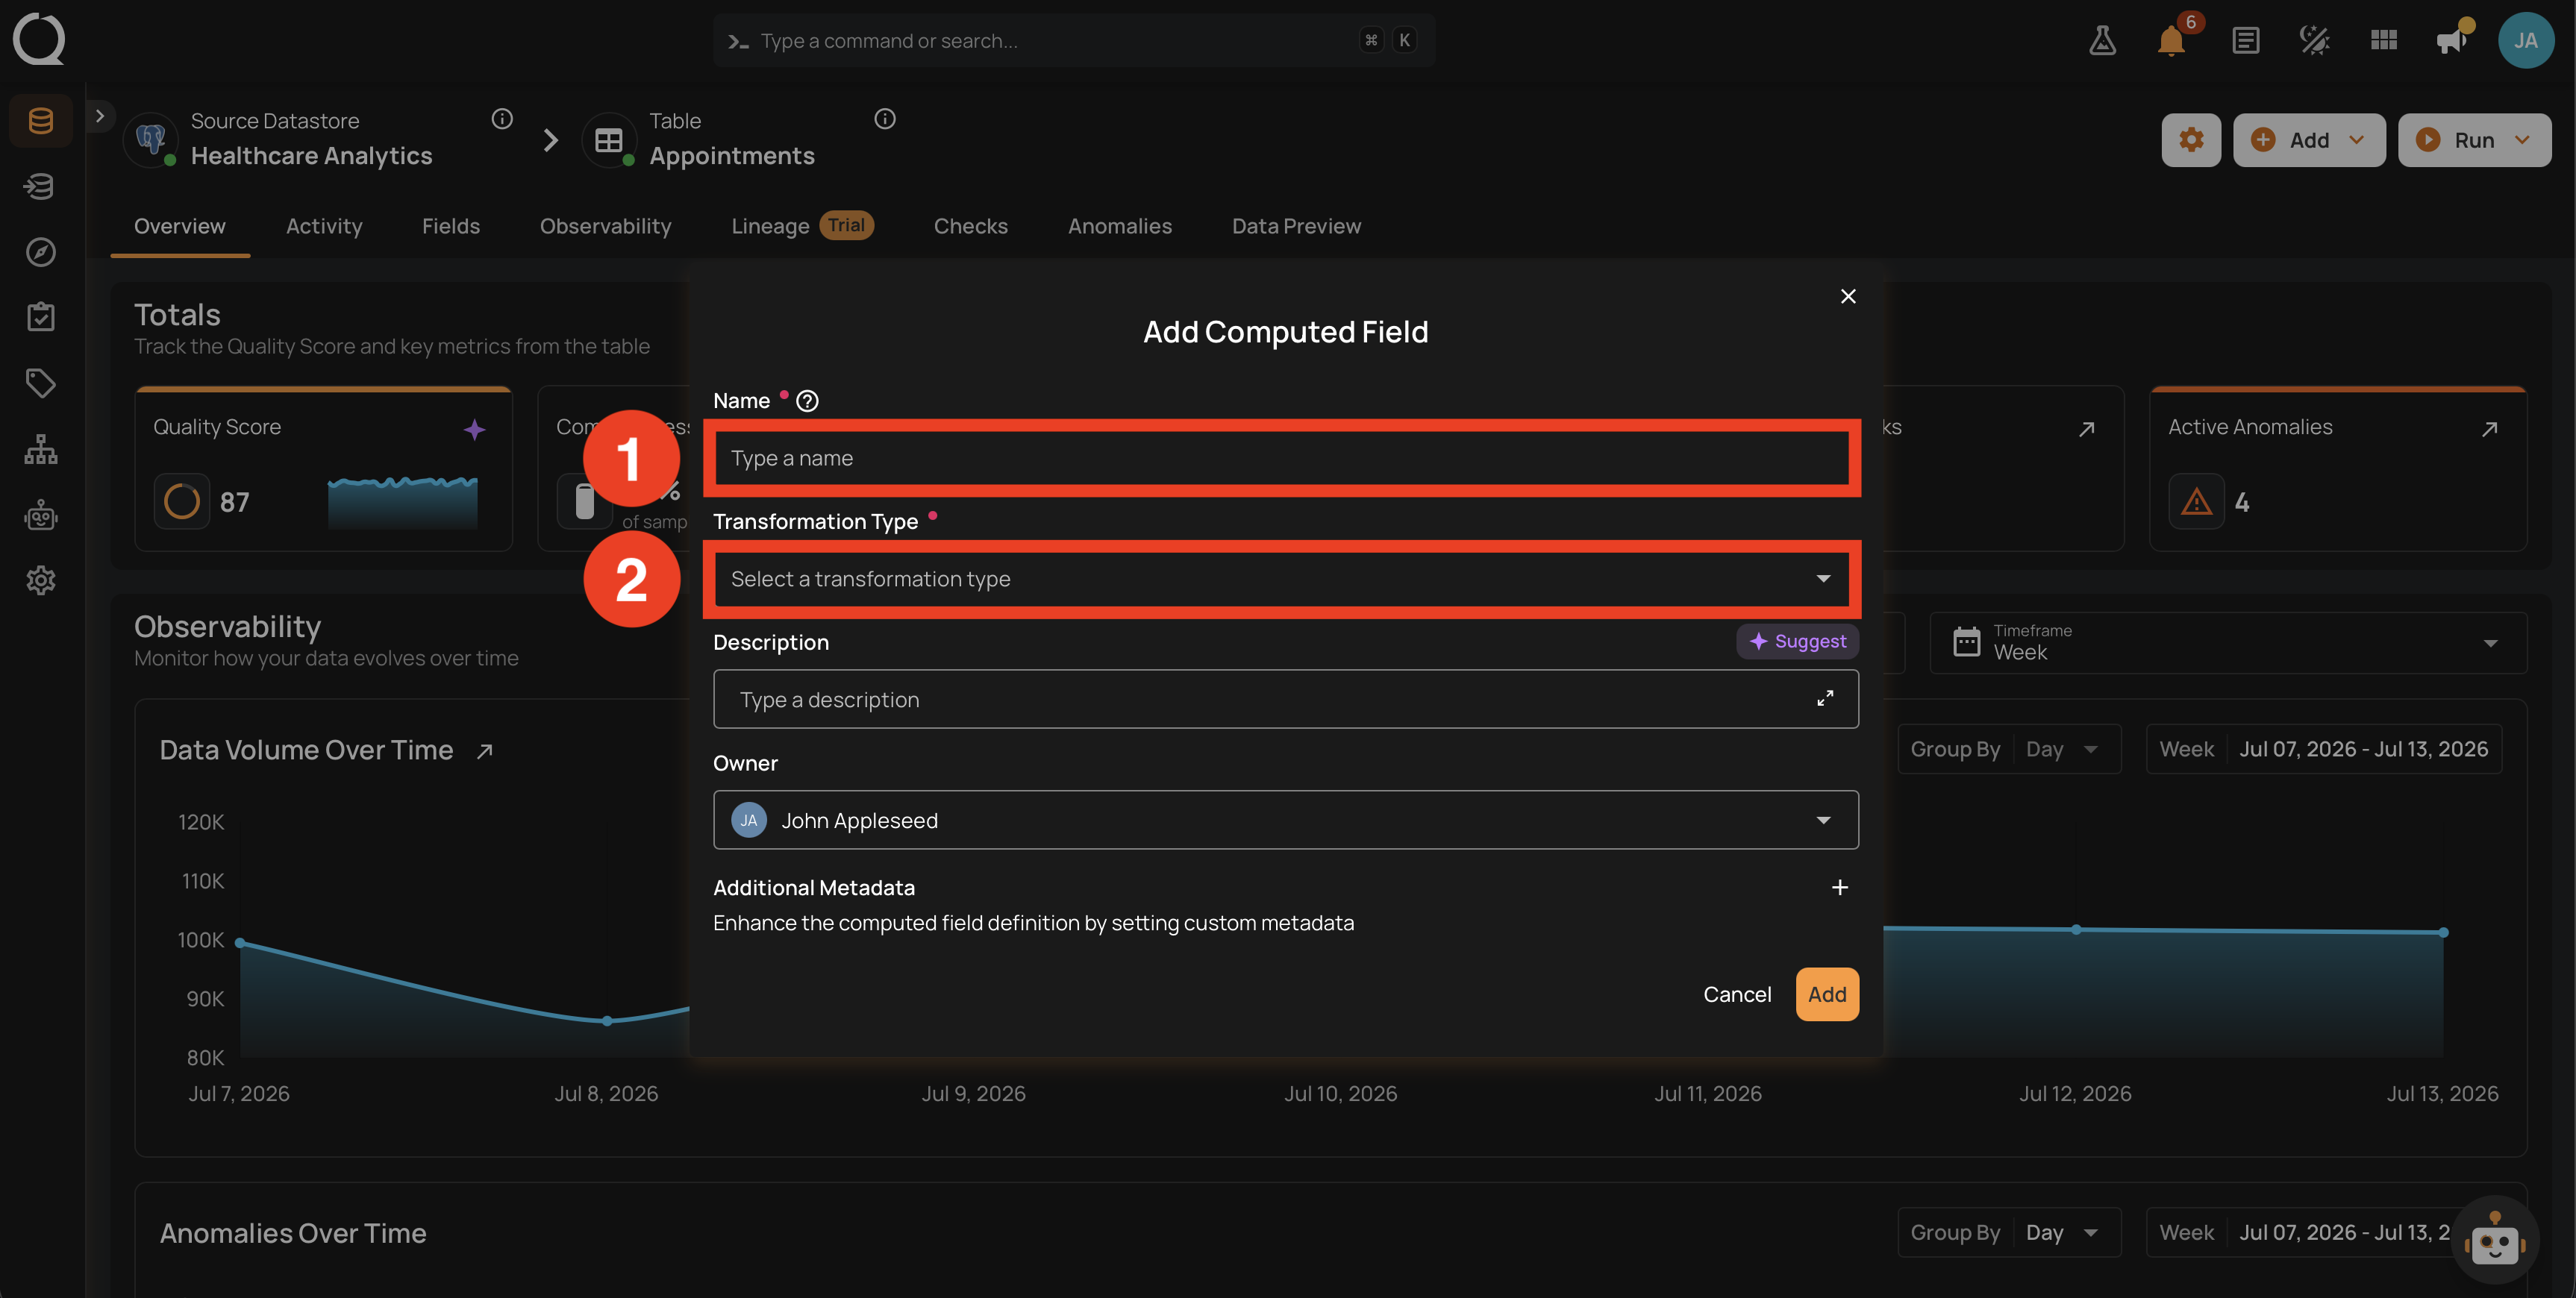
| REF. | Field | Description |
|---|---|---|
| 1 | Name (Required) | A unique name for the Computed Field inside the container. Prefer snake_case with a suffix that hints at the shape of the derived value (for example, duration_minutes). |
| 2 | Transformation Type (Required) | One of Cast, Cleaned Entity Name, Convert Formatted Numeric, or Custom Expression. Selecting a type reveals the fields specific to that transformation. See Transformation Types for what each type needs. |
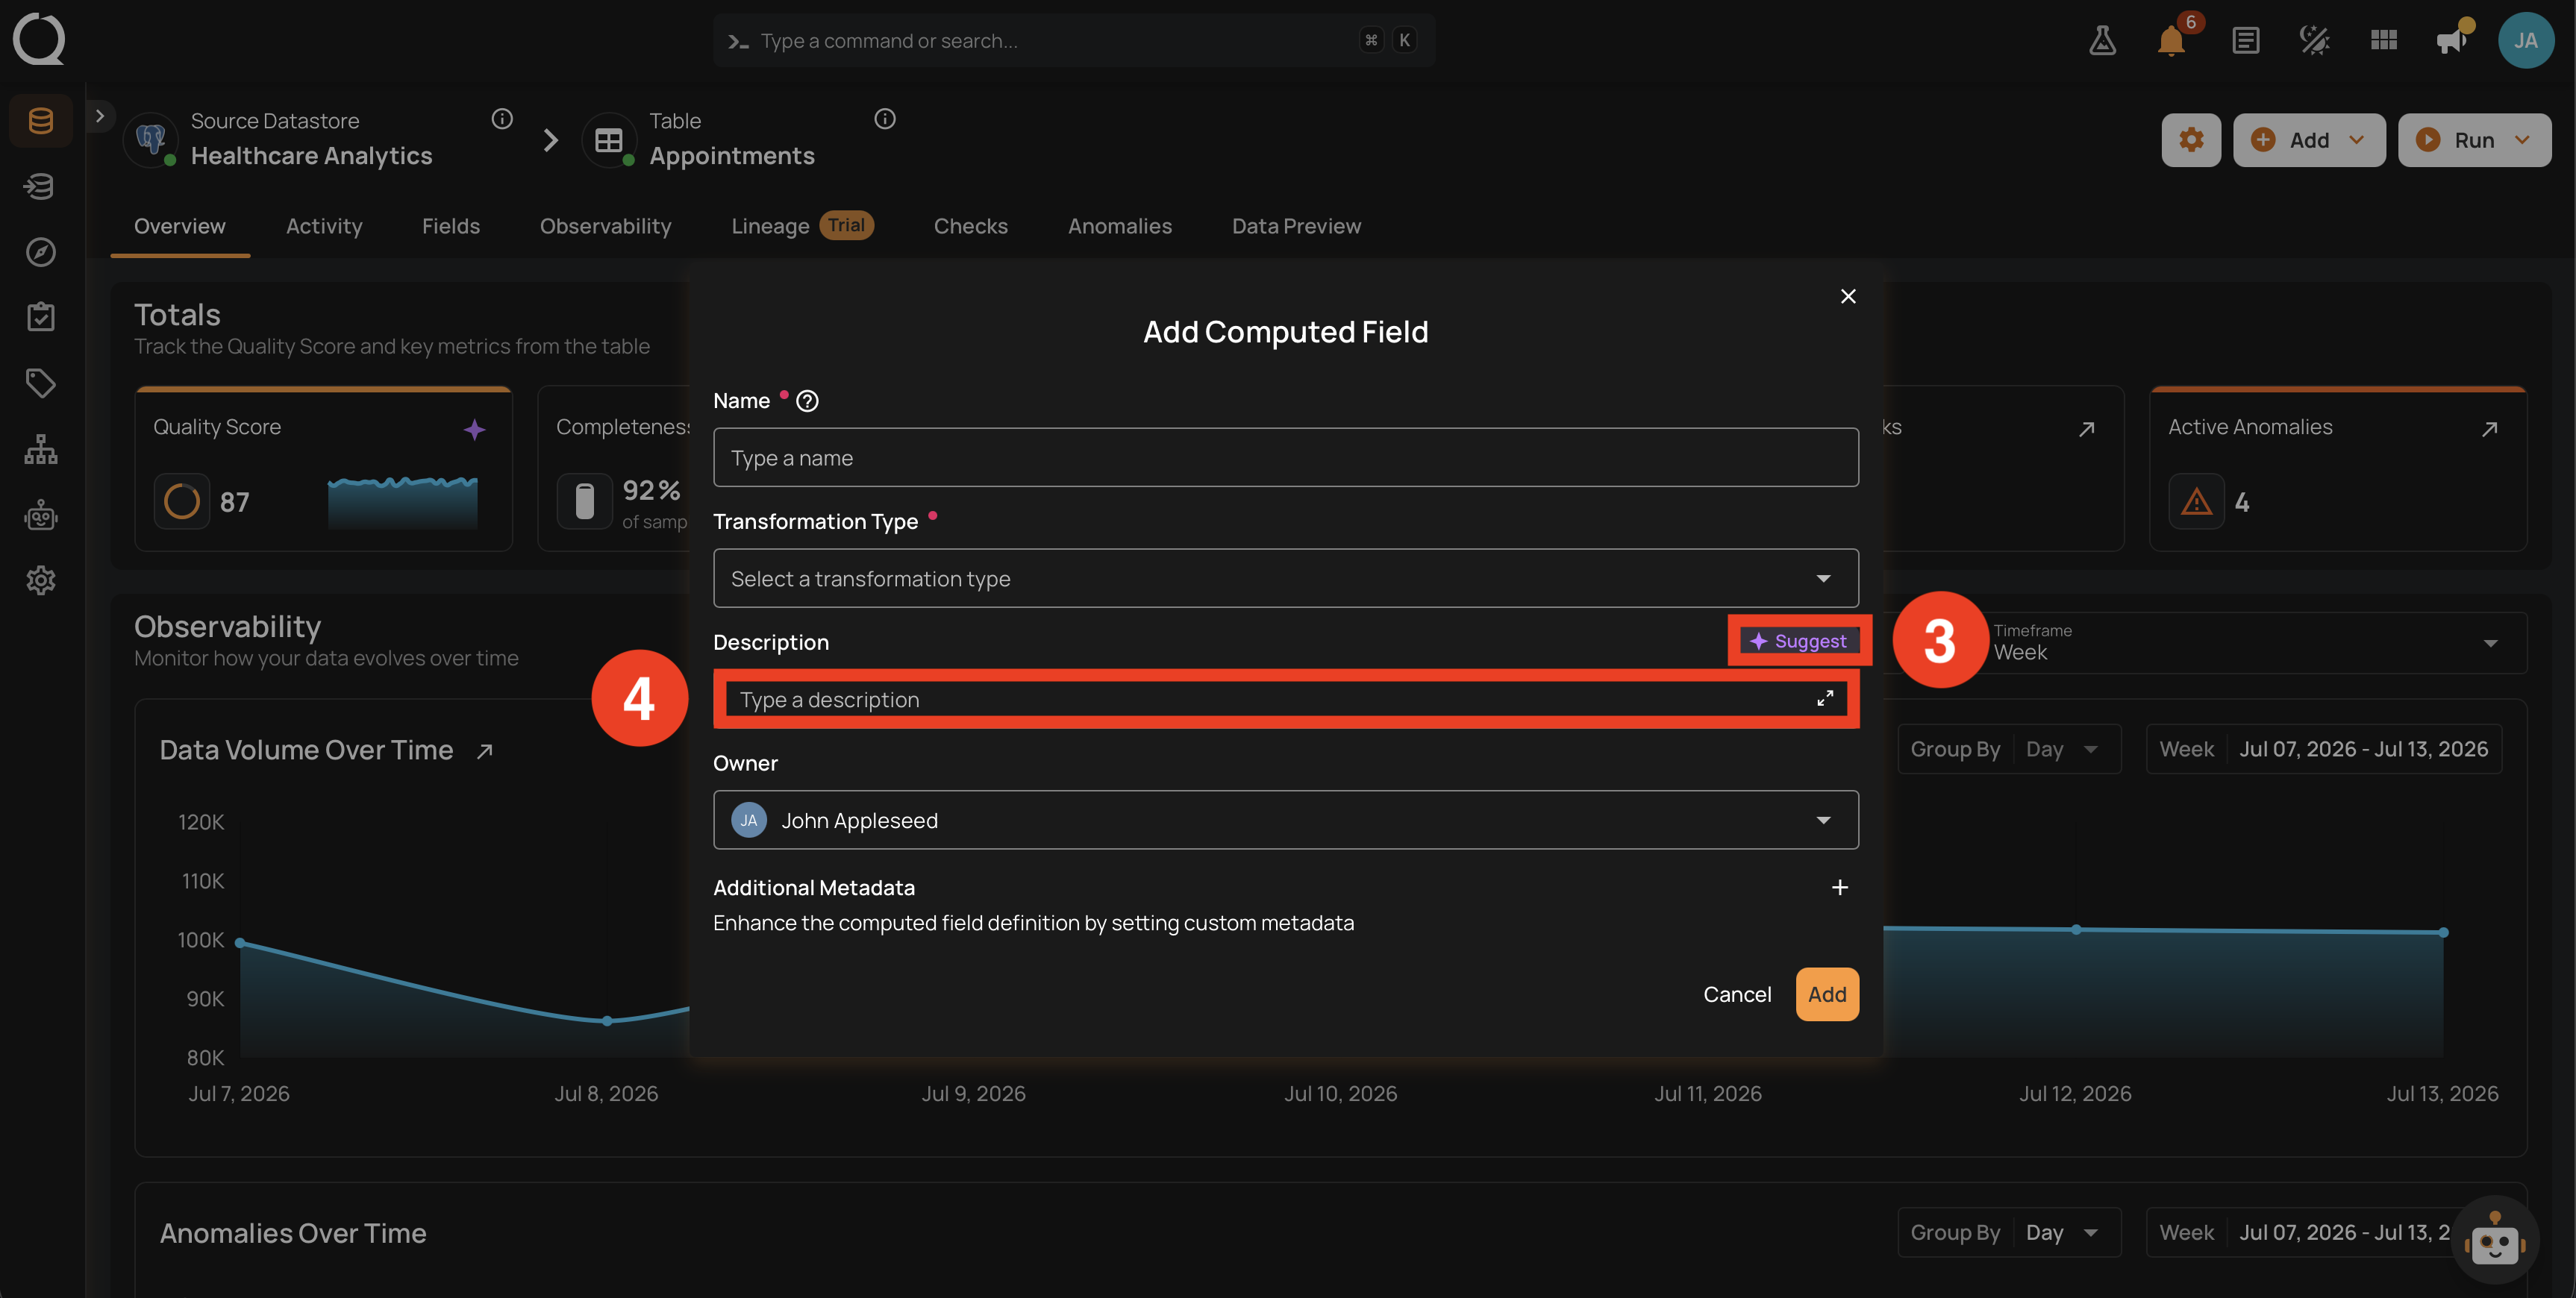
| REF. | Field | Description |
|---|---|---|
| 3 | Suggest | Generates an AI description for the Computed Field based on the current form values. Only visible when an AI provider is configured under AgentQ. See Description Suggestions for the full workflow. |
| 4 | Description (Optional) | A short business summary of what the Computed Field represents. The field opens a Markdown editor (up to 8,000 characters) that can be pinned to the side of the page, so the transformation settings and the description stay visible together. |
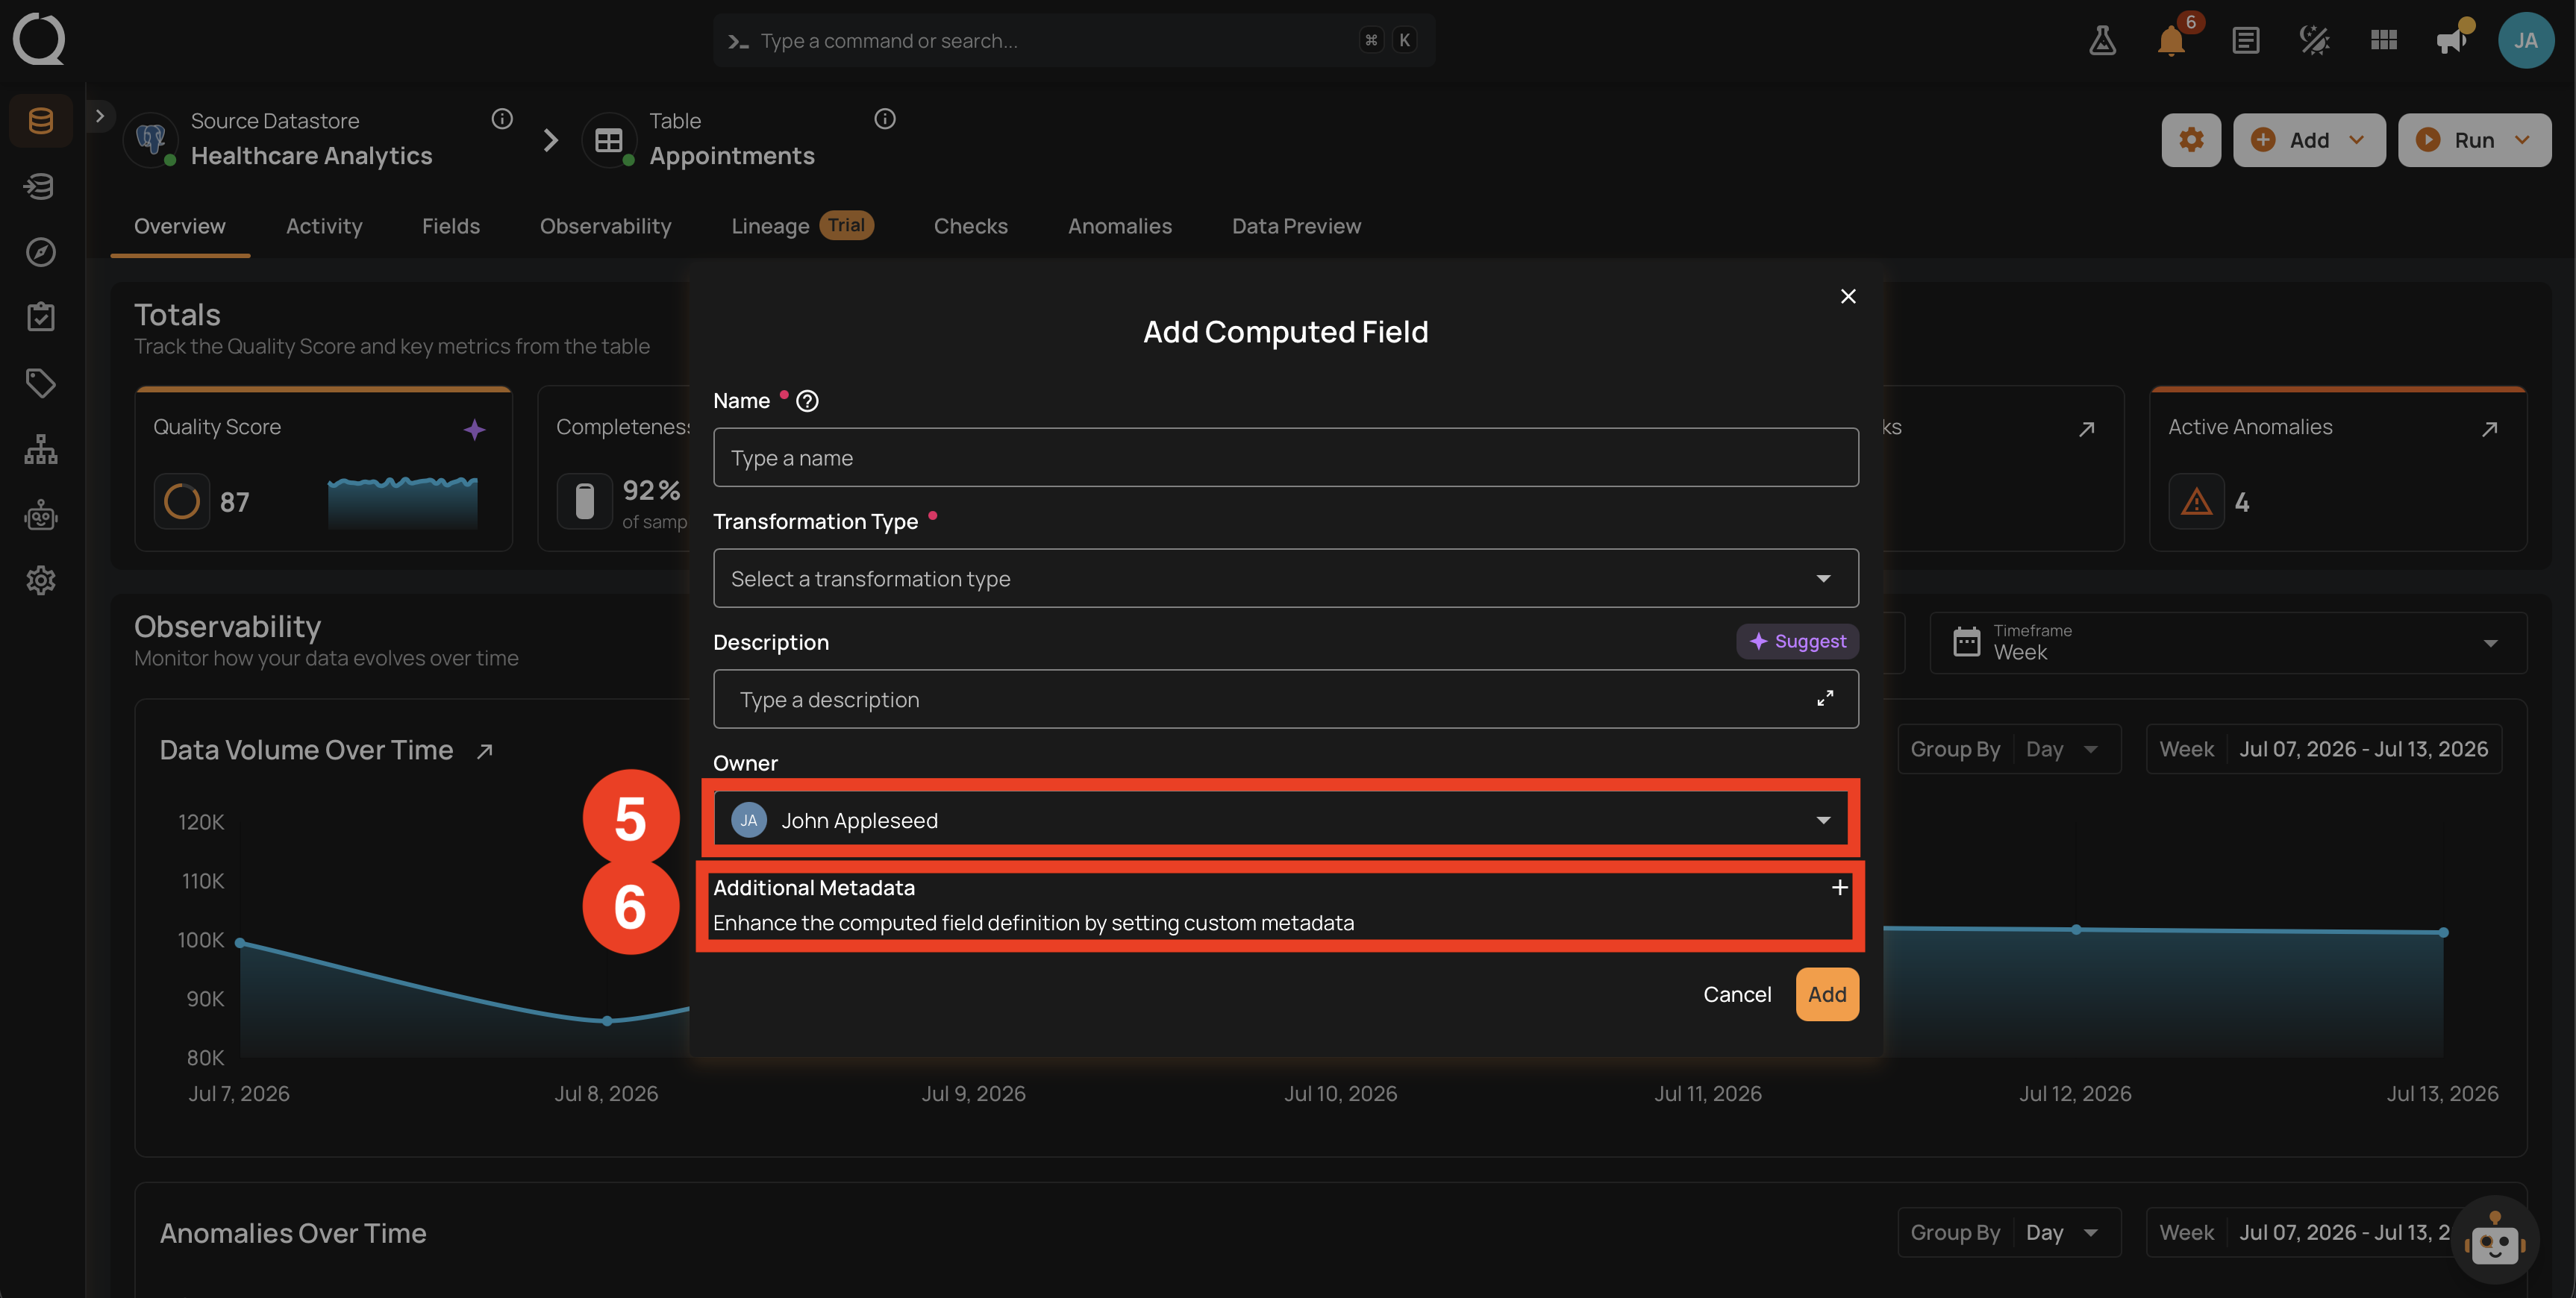
| REF. | Field | Description |
|---|---|---|
| 5 | Owner (Required) | The Qualytics user who owns this Computed Field. Defaults to you. Only users with the Editor team permission can assign a different owner; users with the Author team permission can create Computed Fields they own but cannot reassign later. |
| 6 | Additional Metadata (Optional) | Custom key-value pairs. Click the plus icon to open the editor and add rows. |
Transformation-specific fields (for example, source field, target type, term settings, or SQL expression) appear below Transformation Type once you pick a type. See Transformation Types for the per-type reference.
Steps
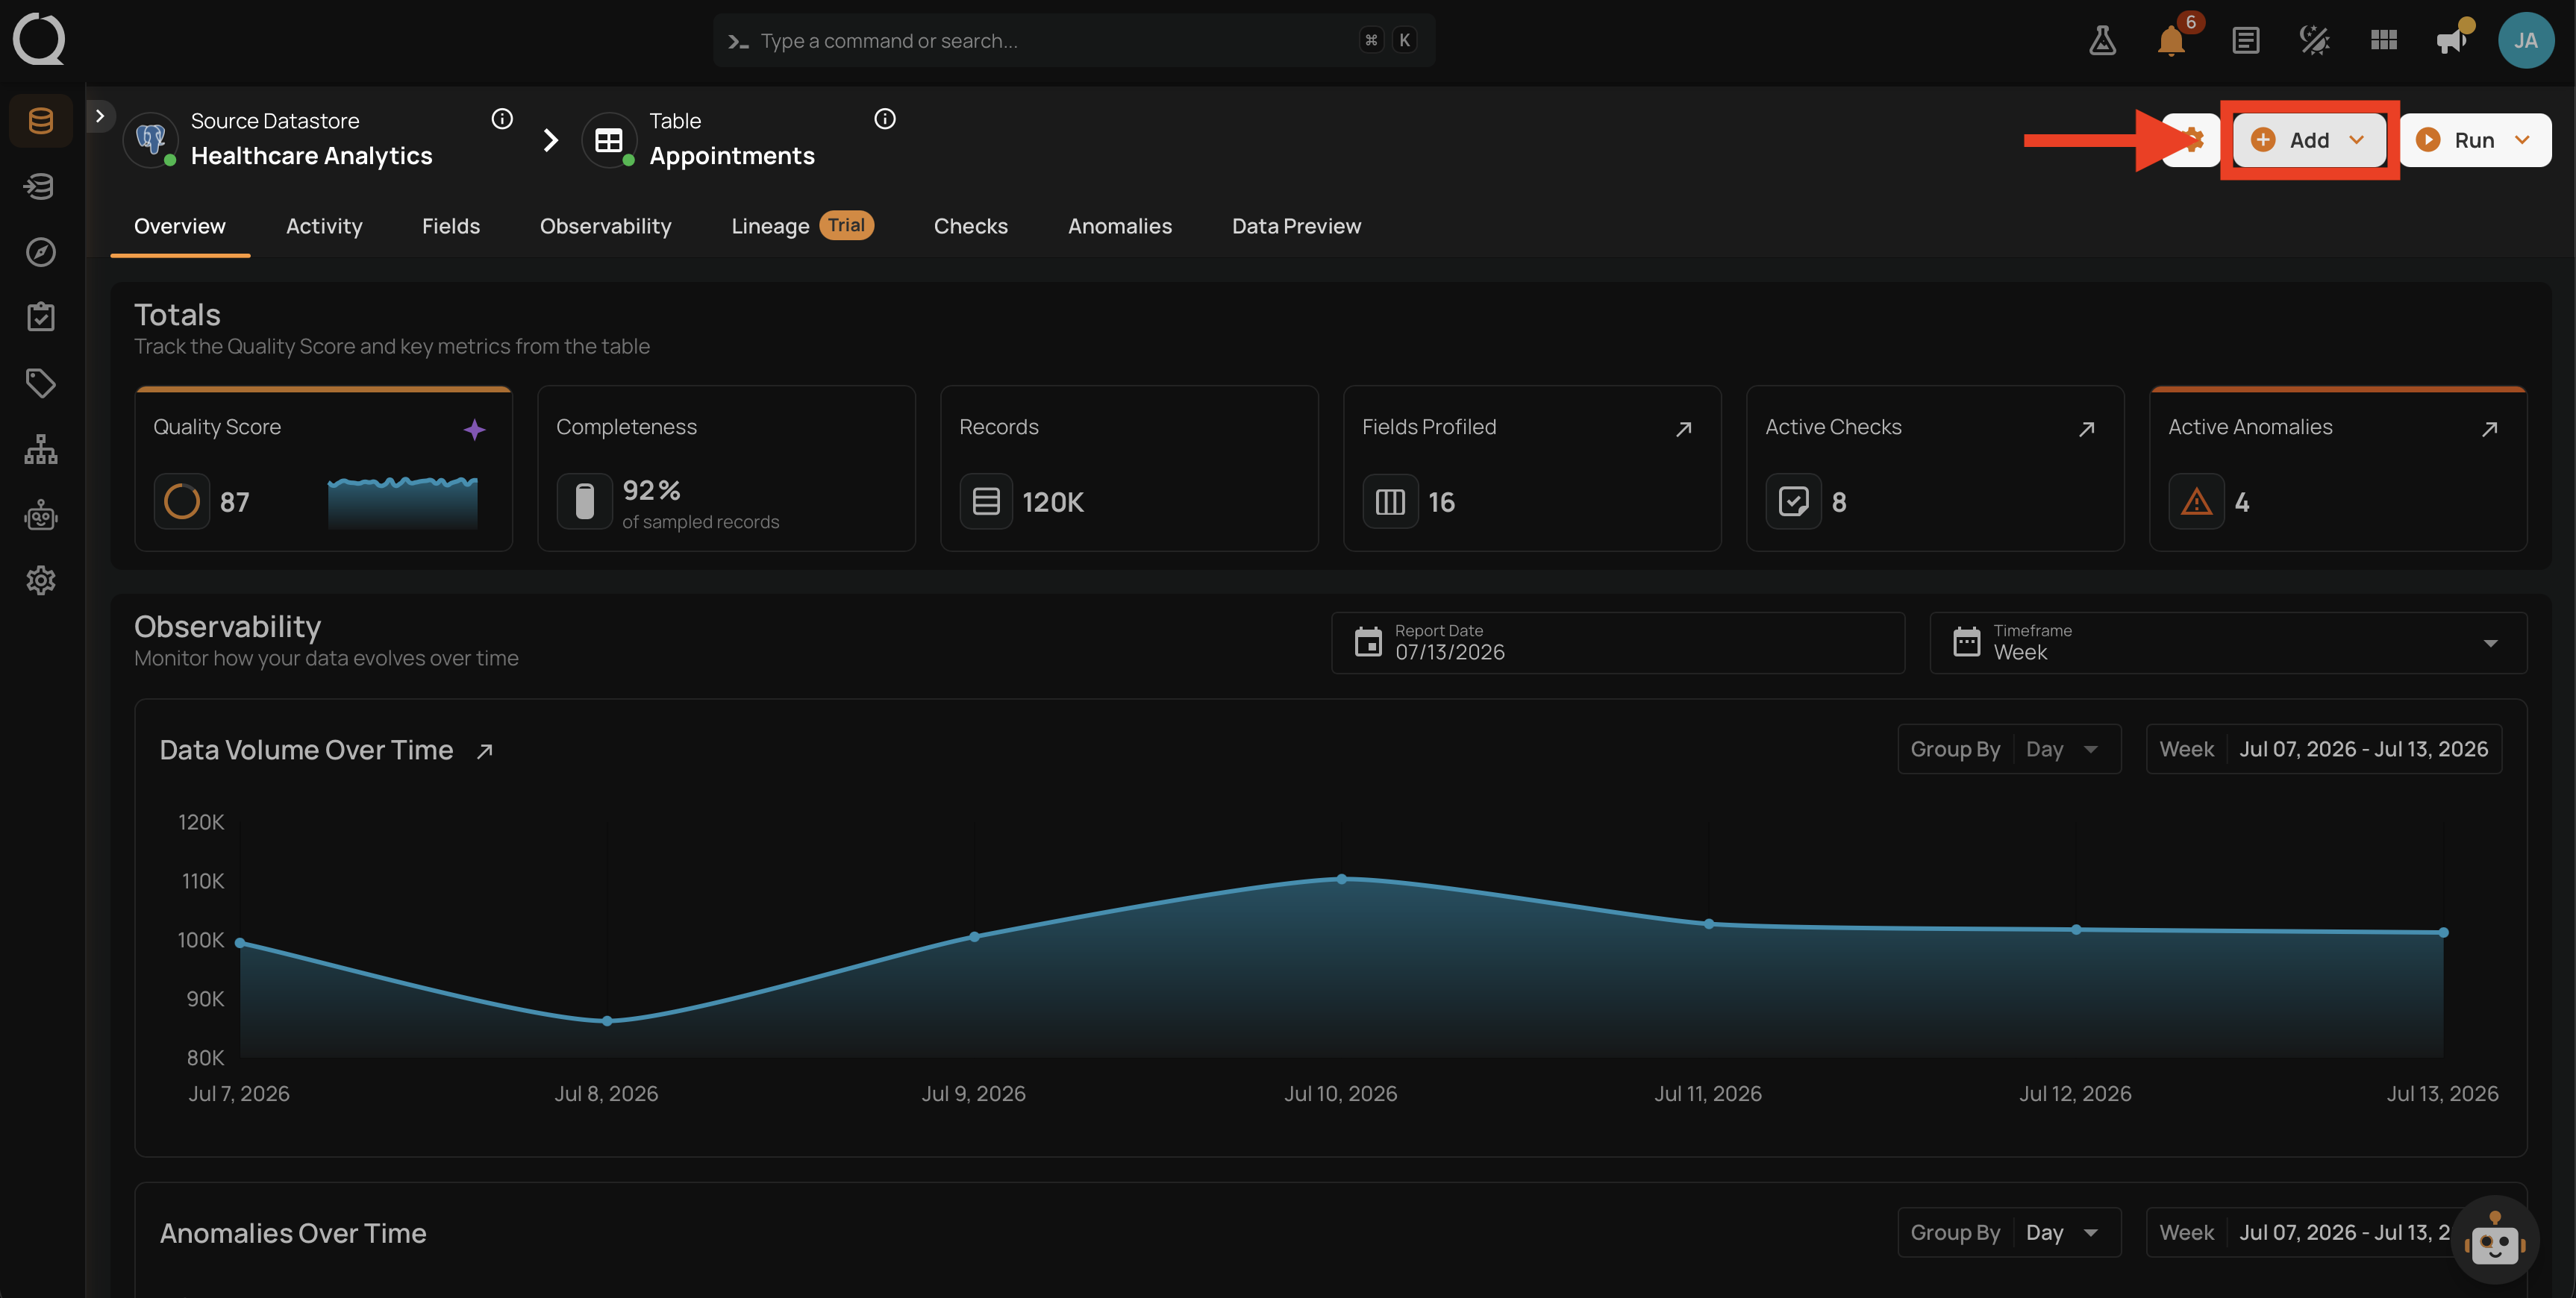
Step 1: Navigate to the container where you want to add the Computed Field and click the Add button in the top-right corner of the container overview.
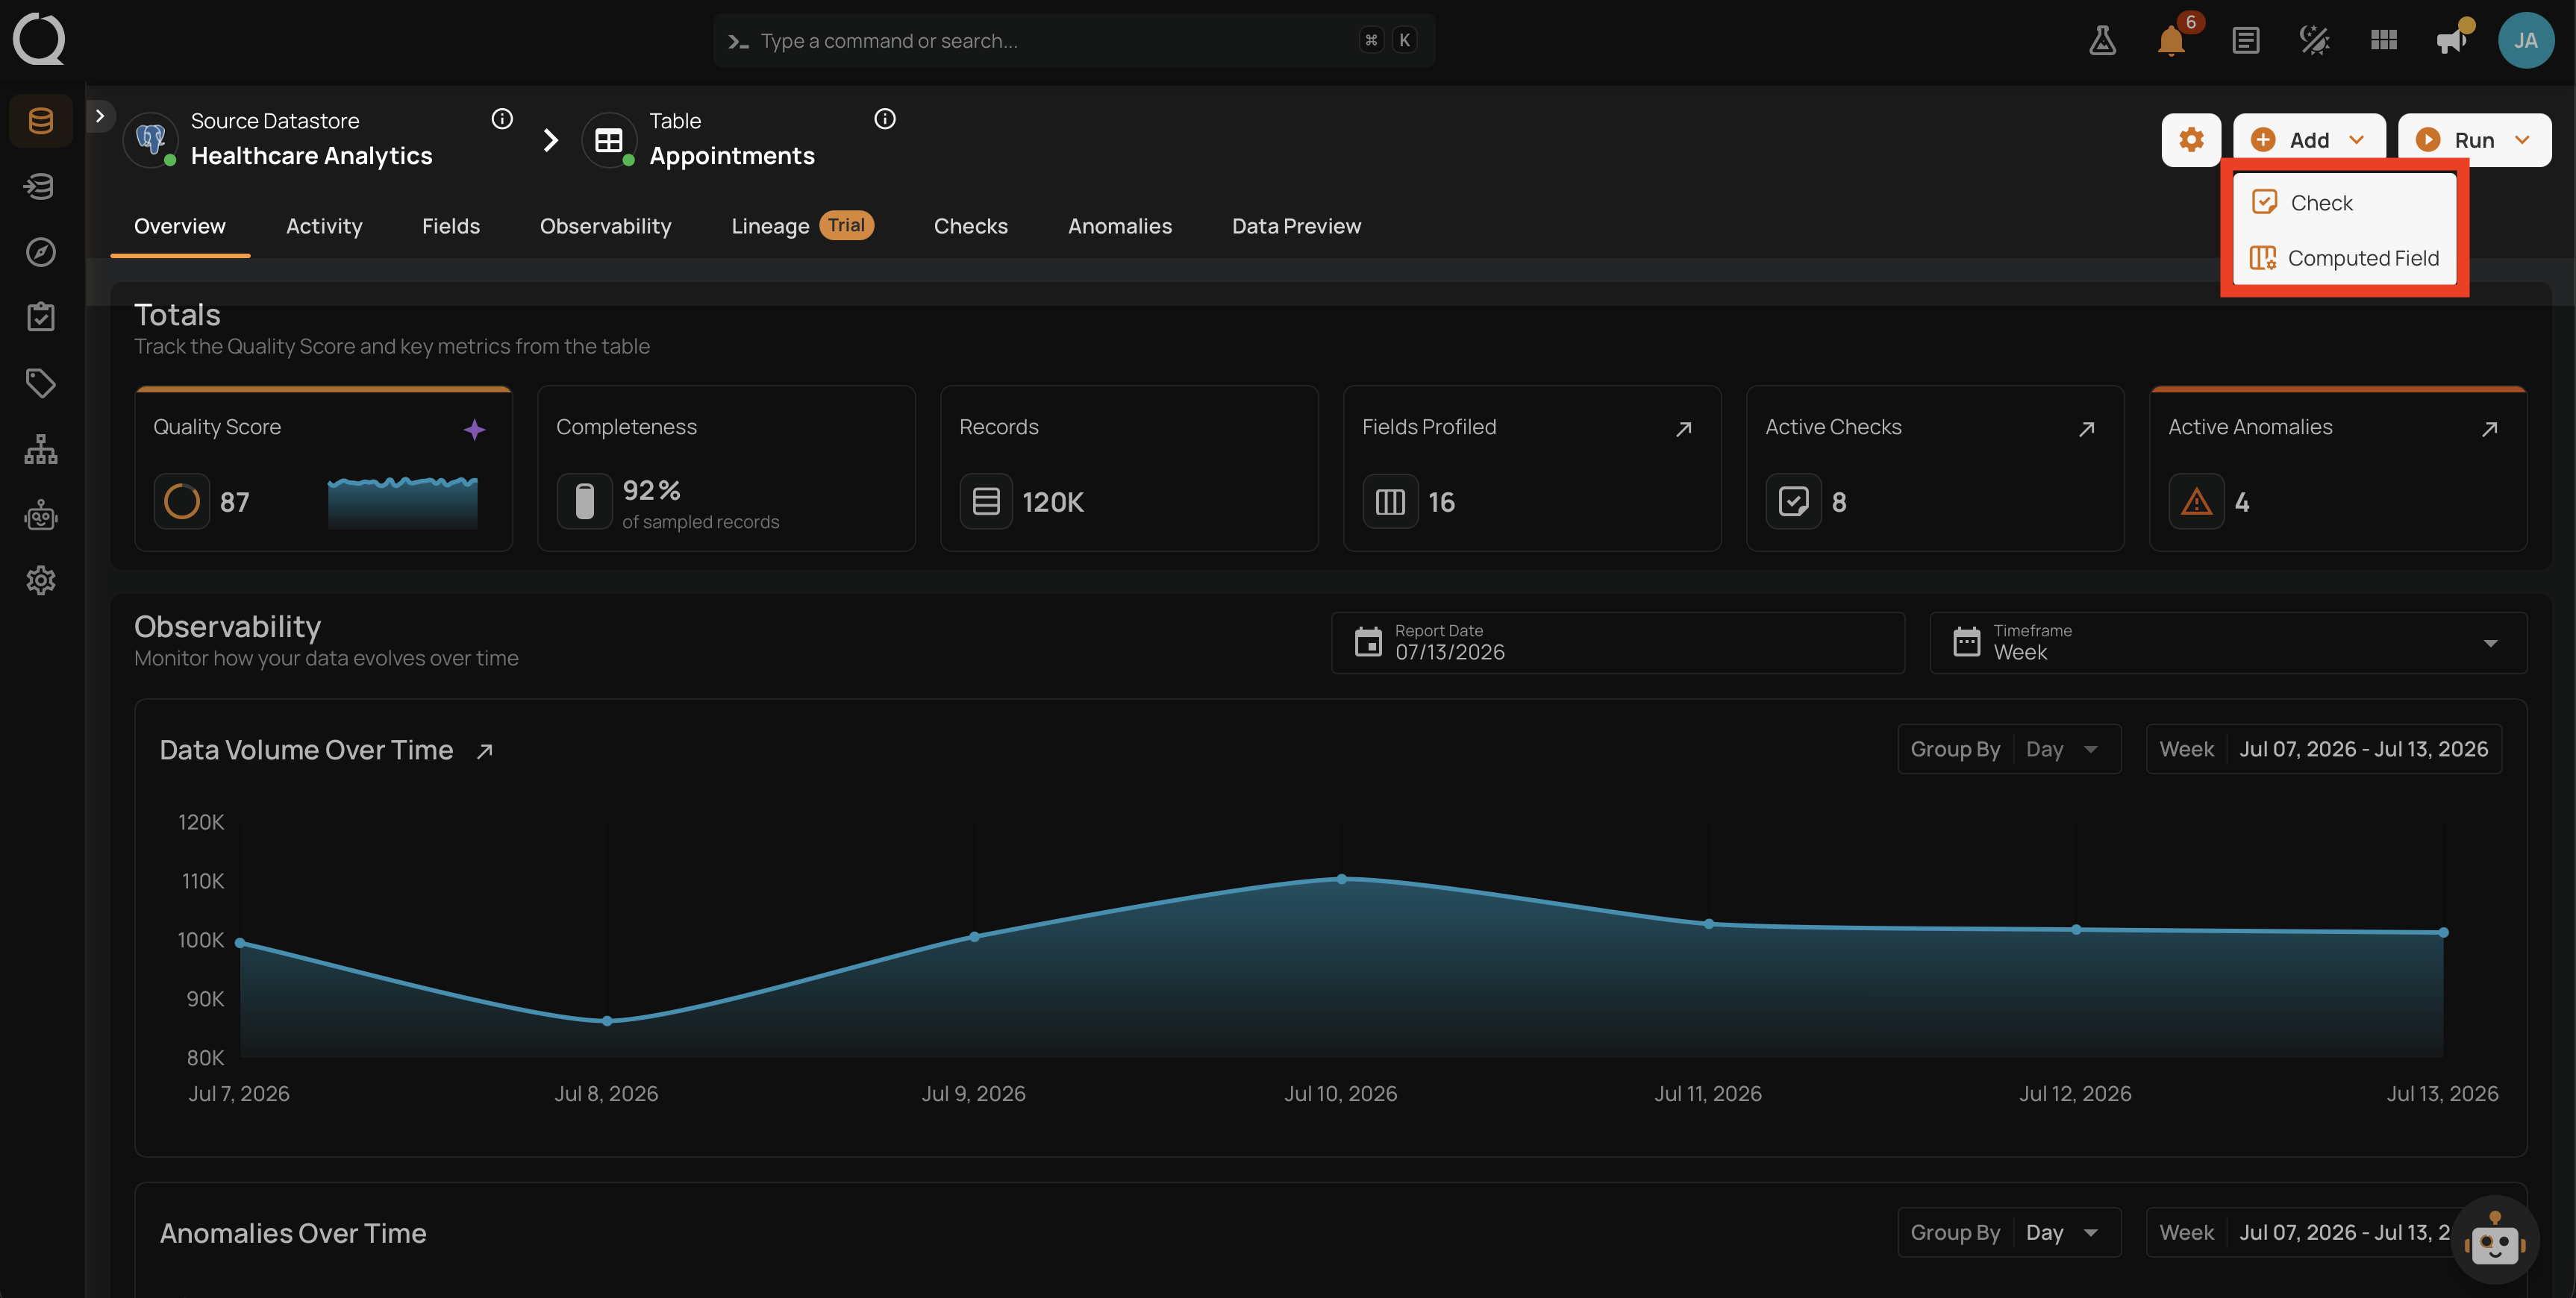
Step 2: A dropdown appears with the items you can add to the container.
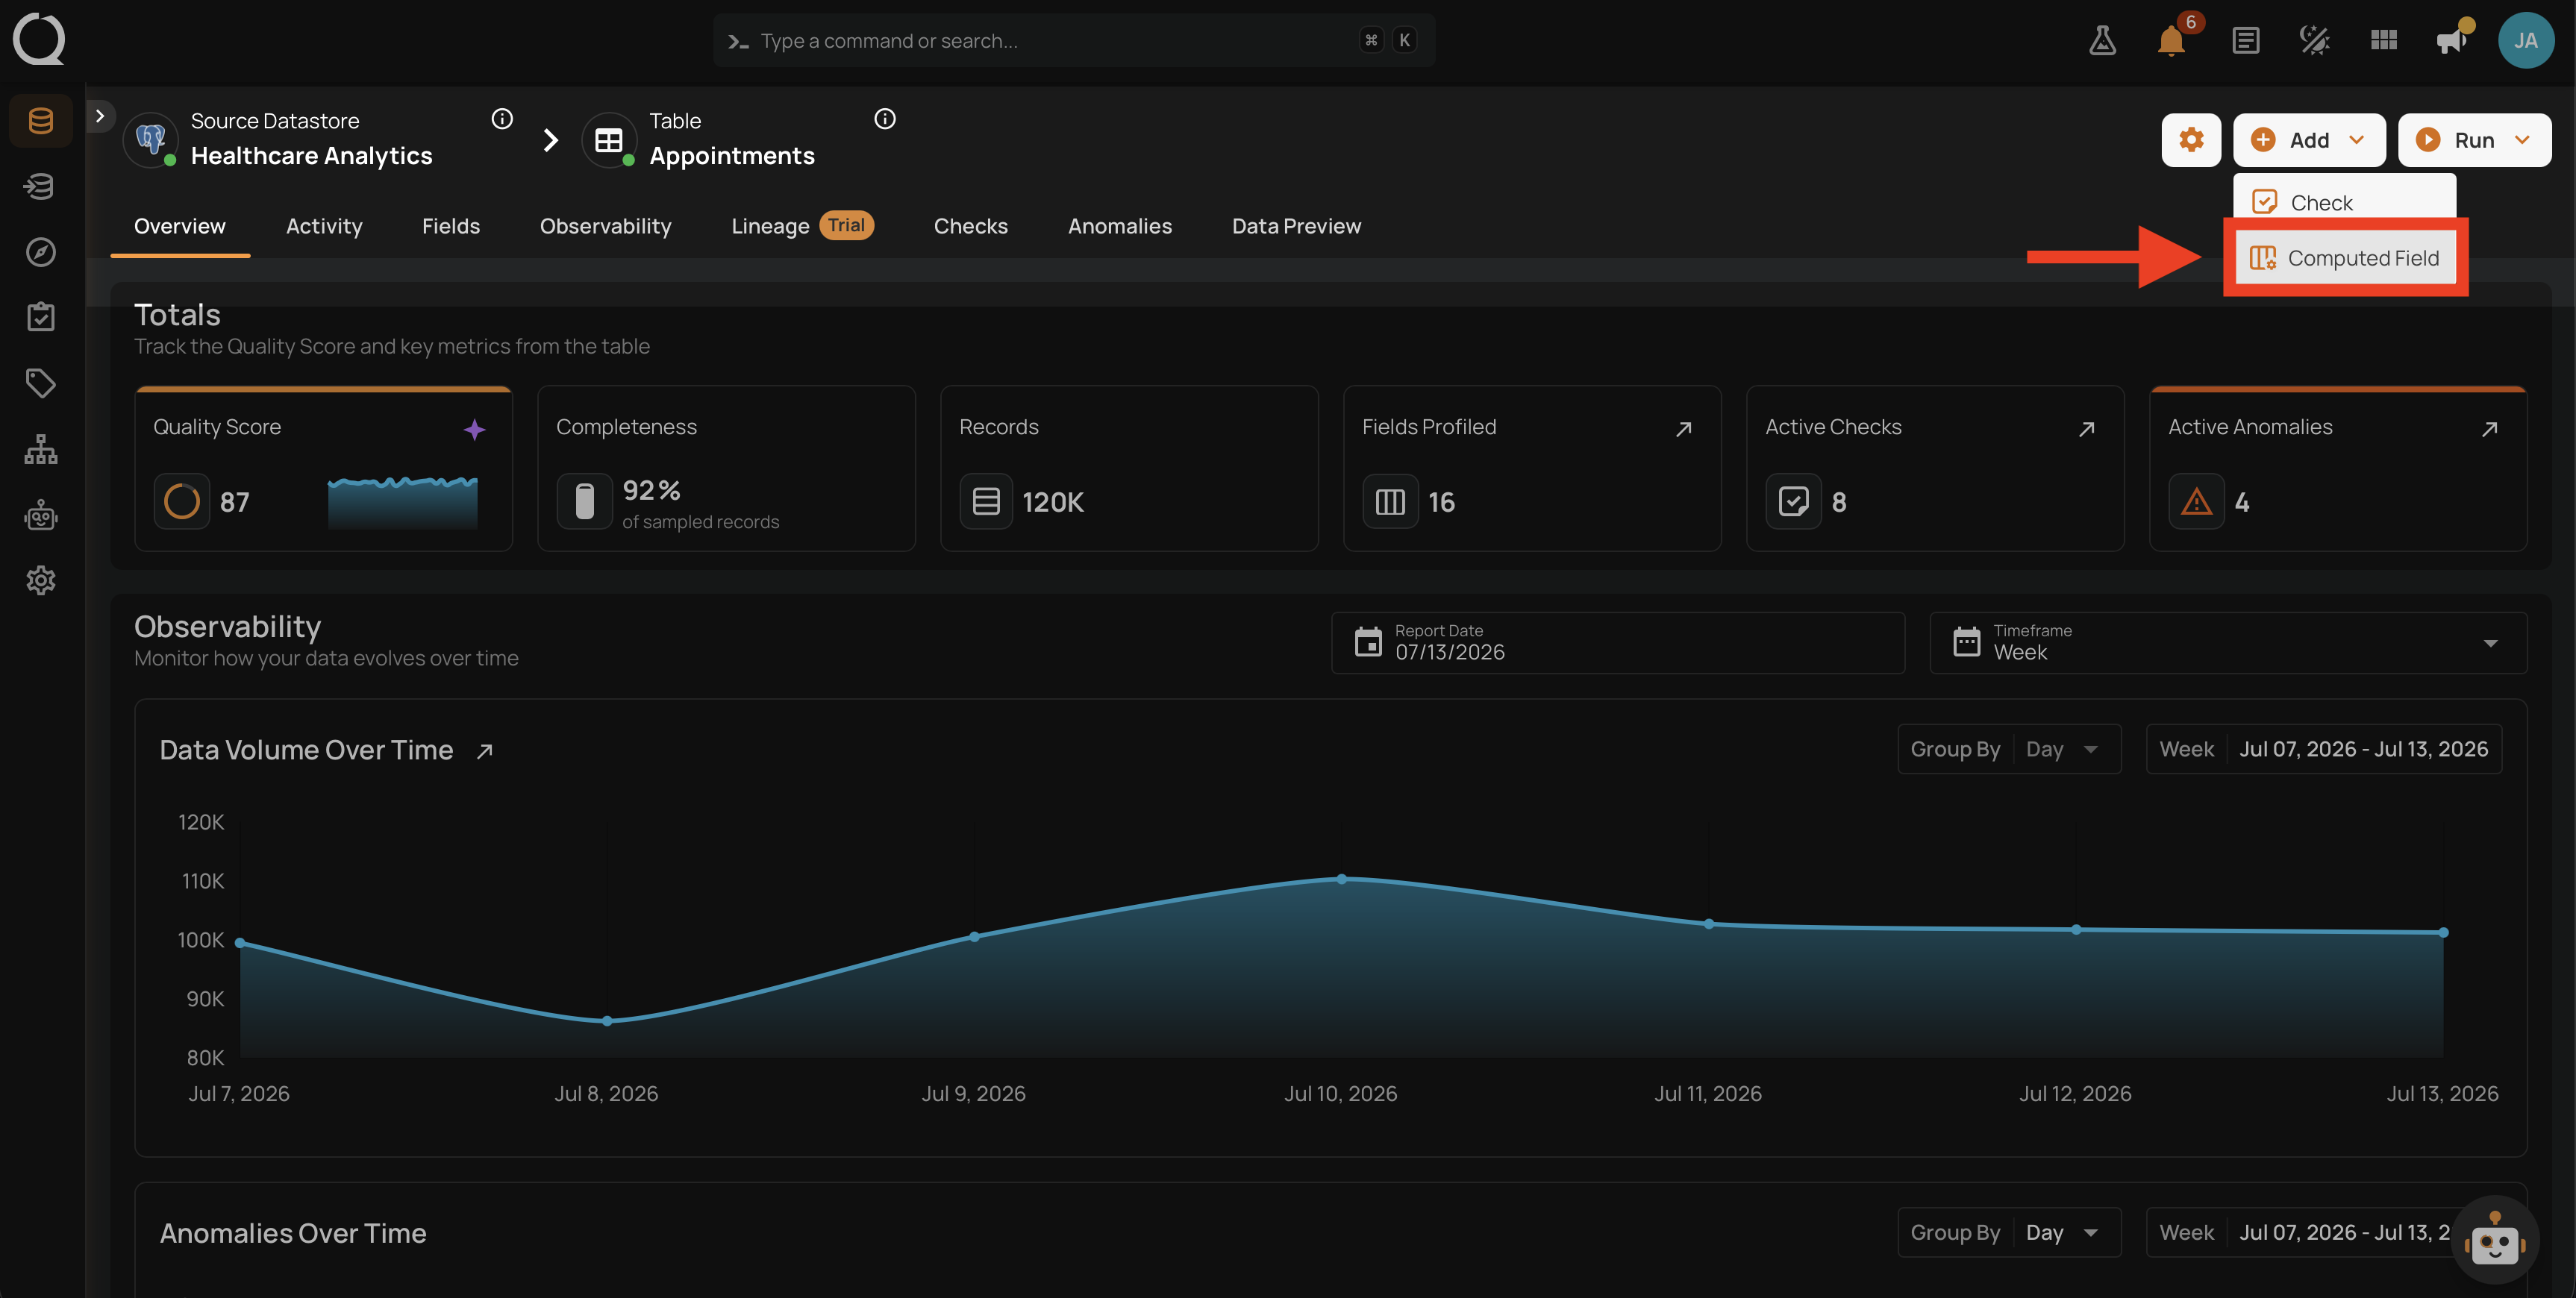
Step 3: Select Computed Field.
Step 4: The Add Computed Field modal opens. See the Field Reference above for what each input controls.
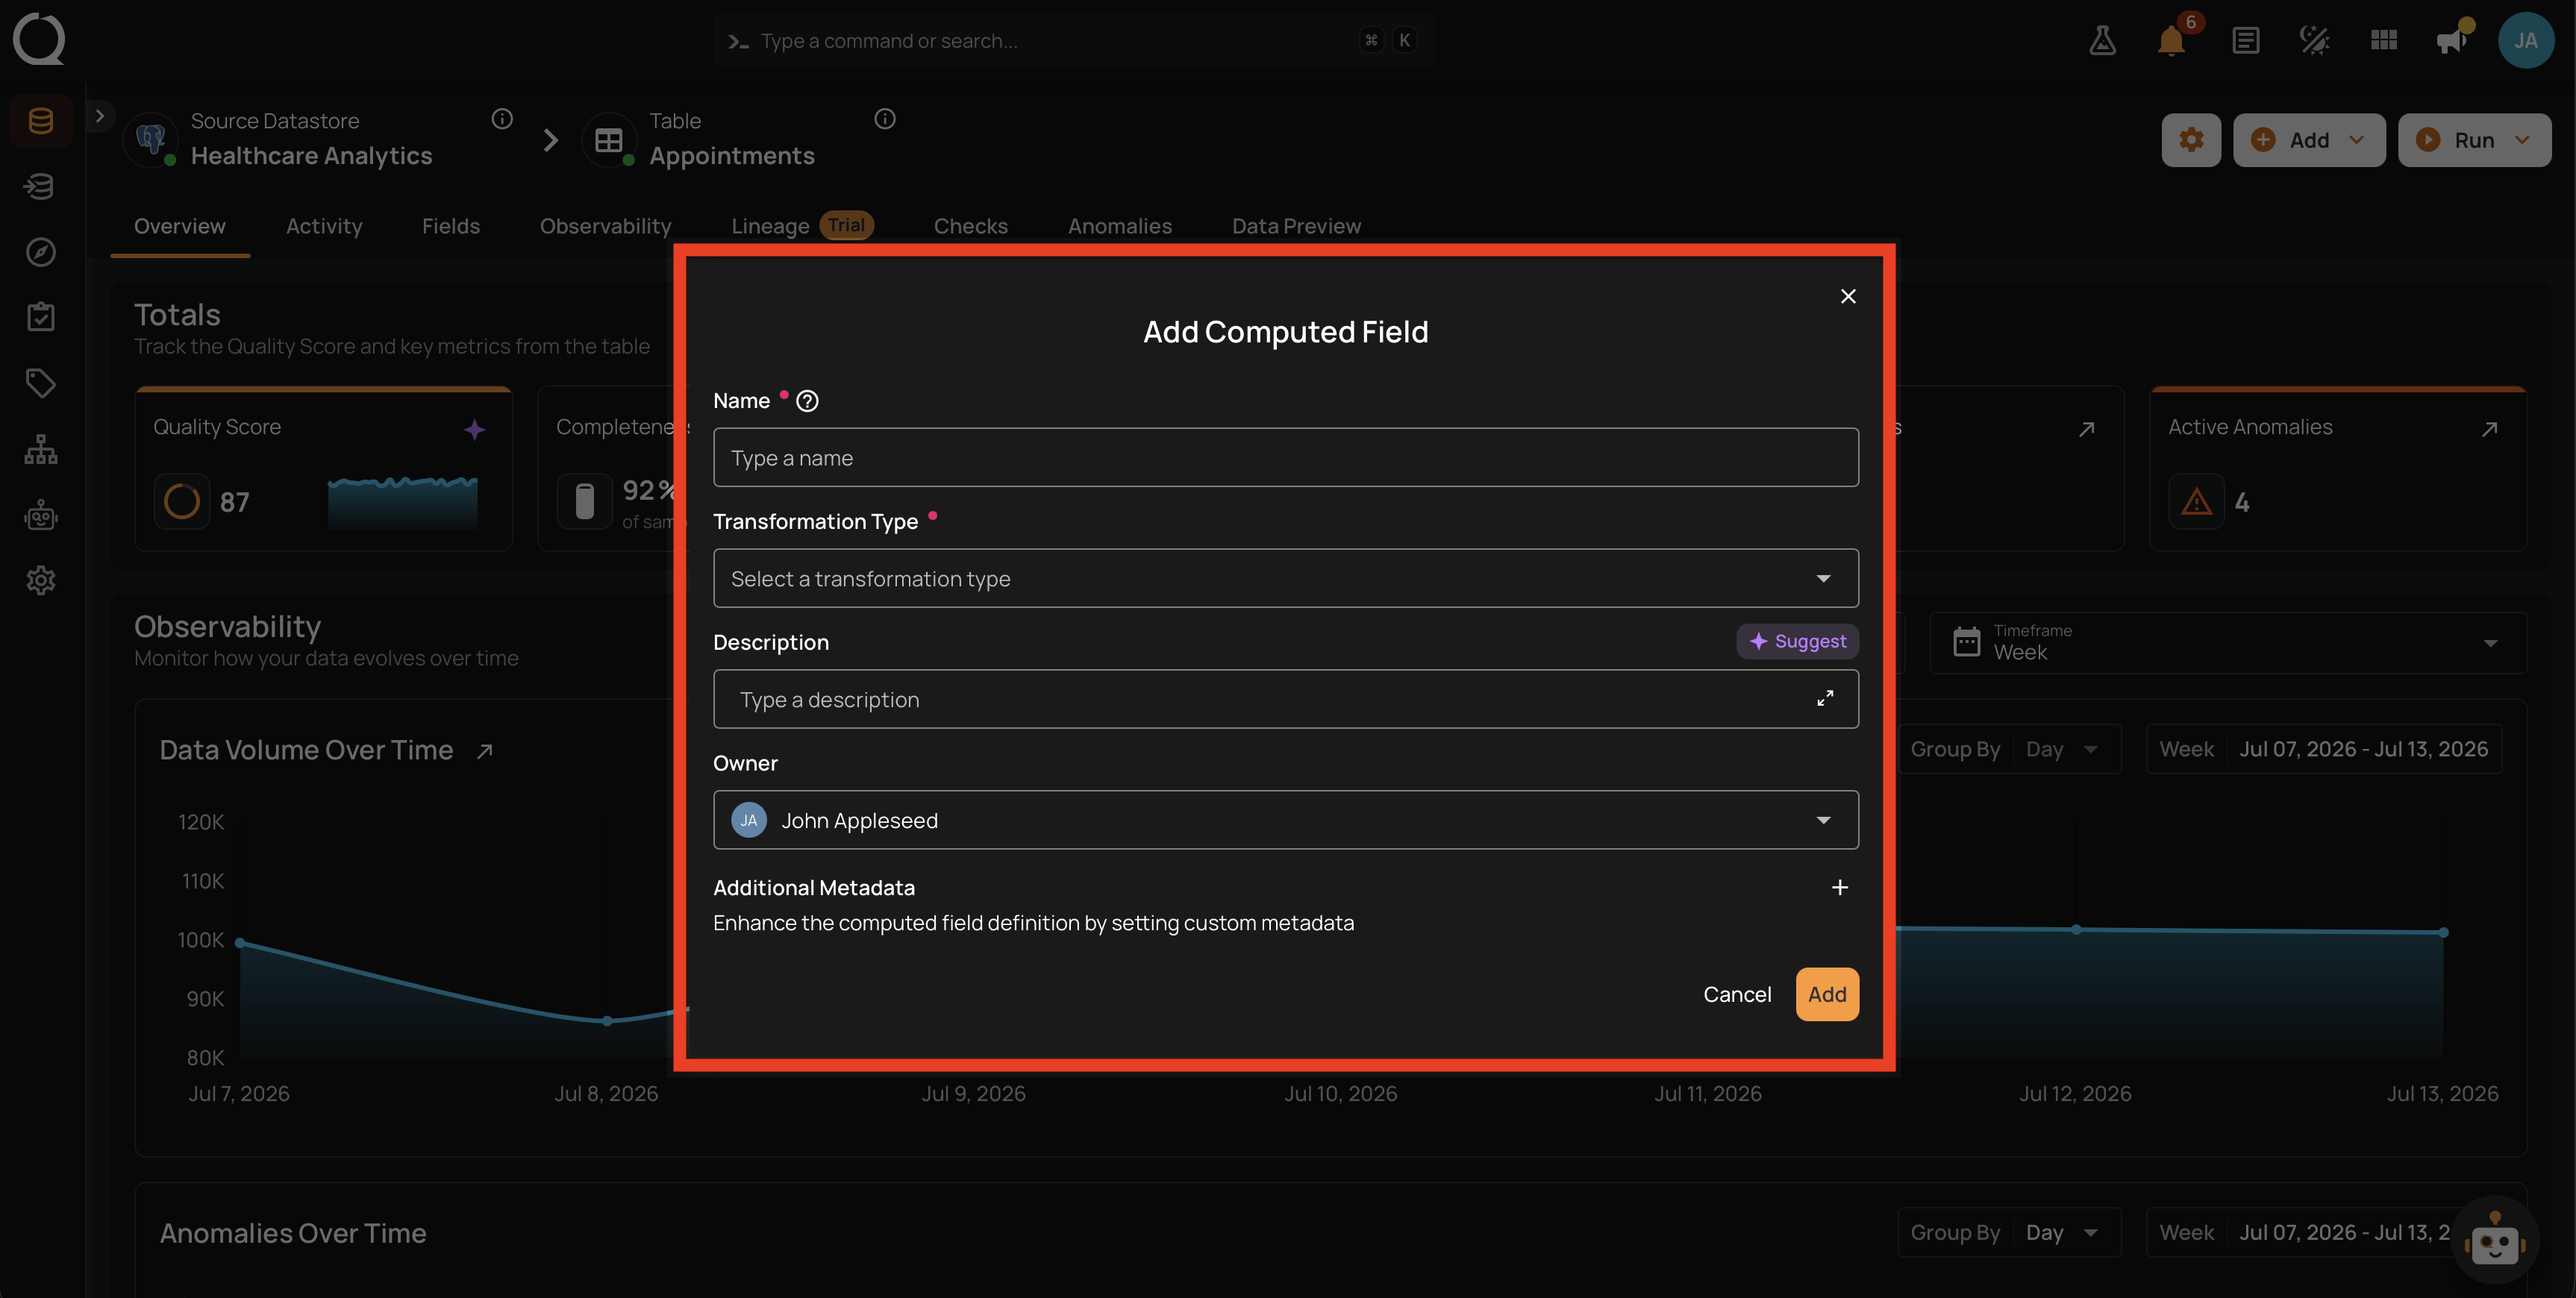
Step 5: Fill in the fields. Name, Transformation Type, and the transformation-specific fields are required; Description, Owner, and Additional Metadata are set as needed.
Step 6: Click Add.
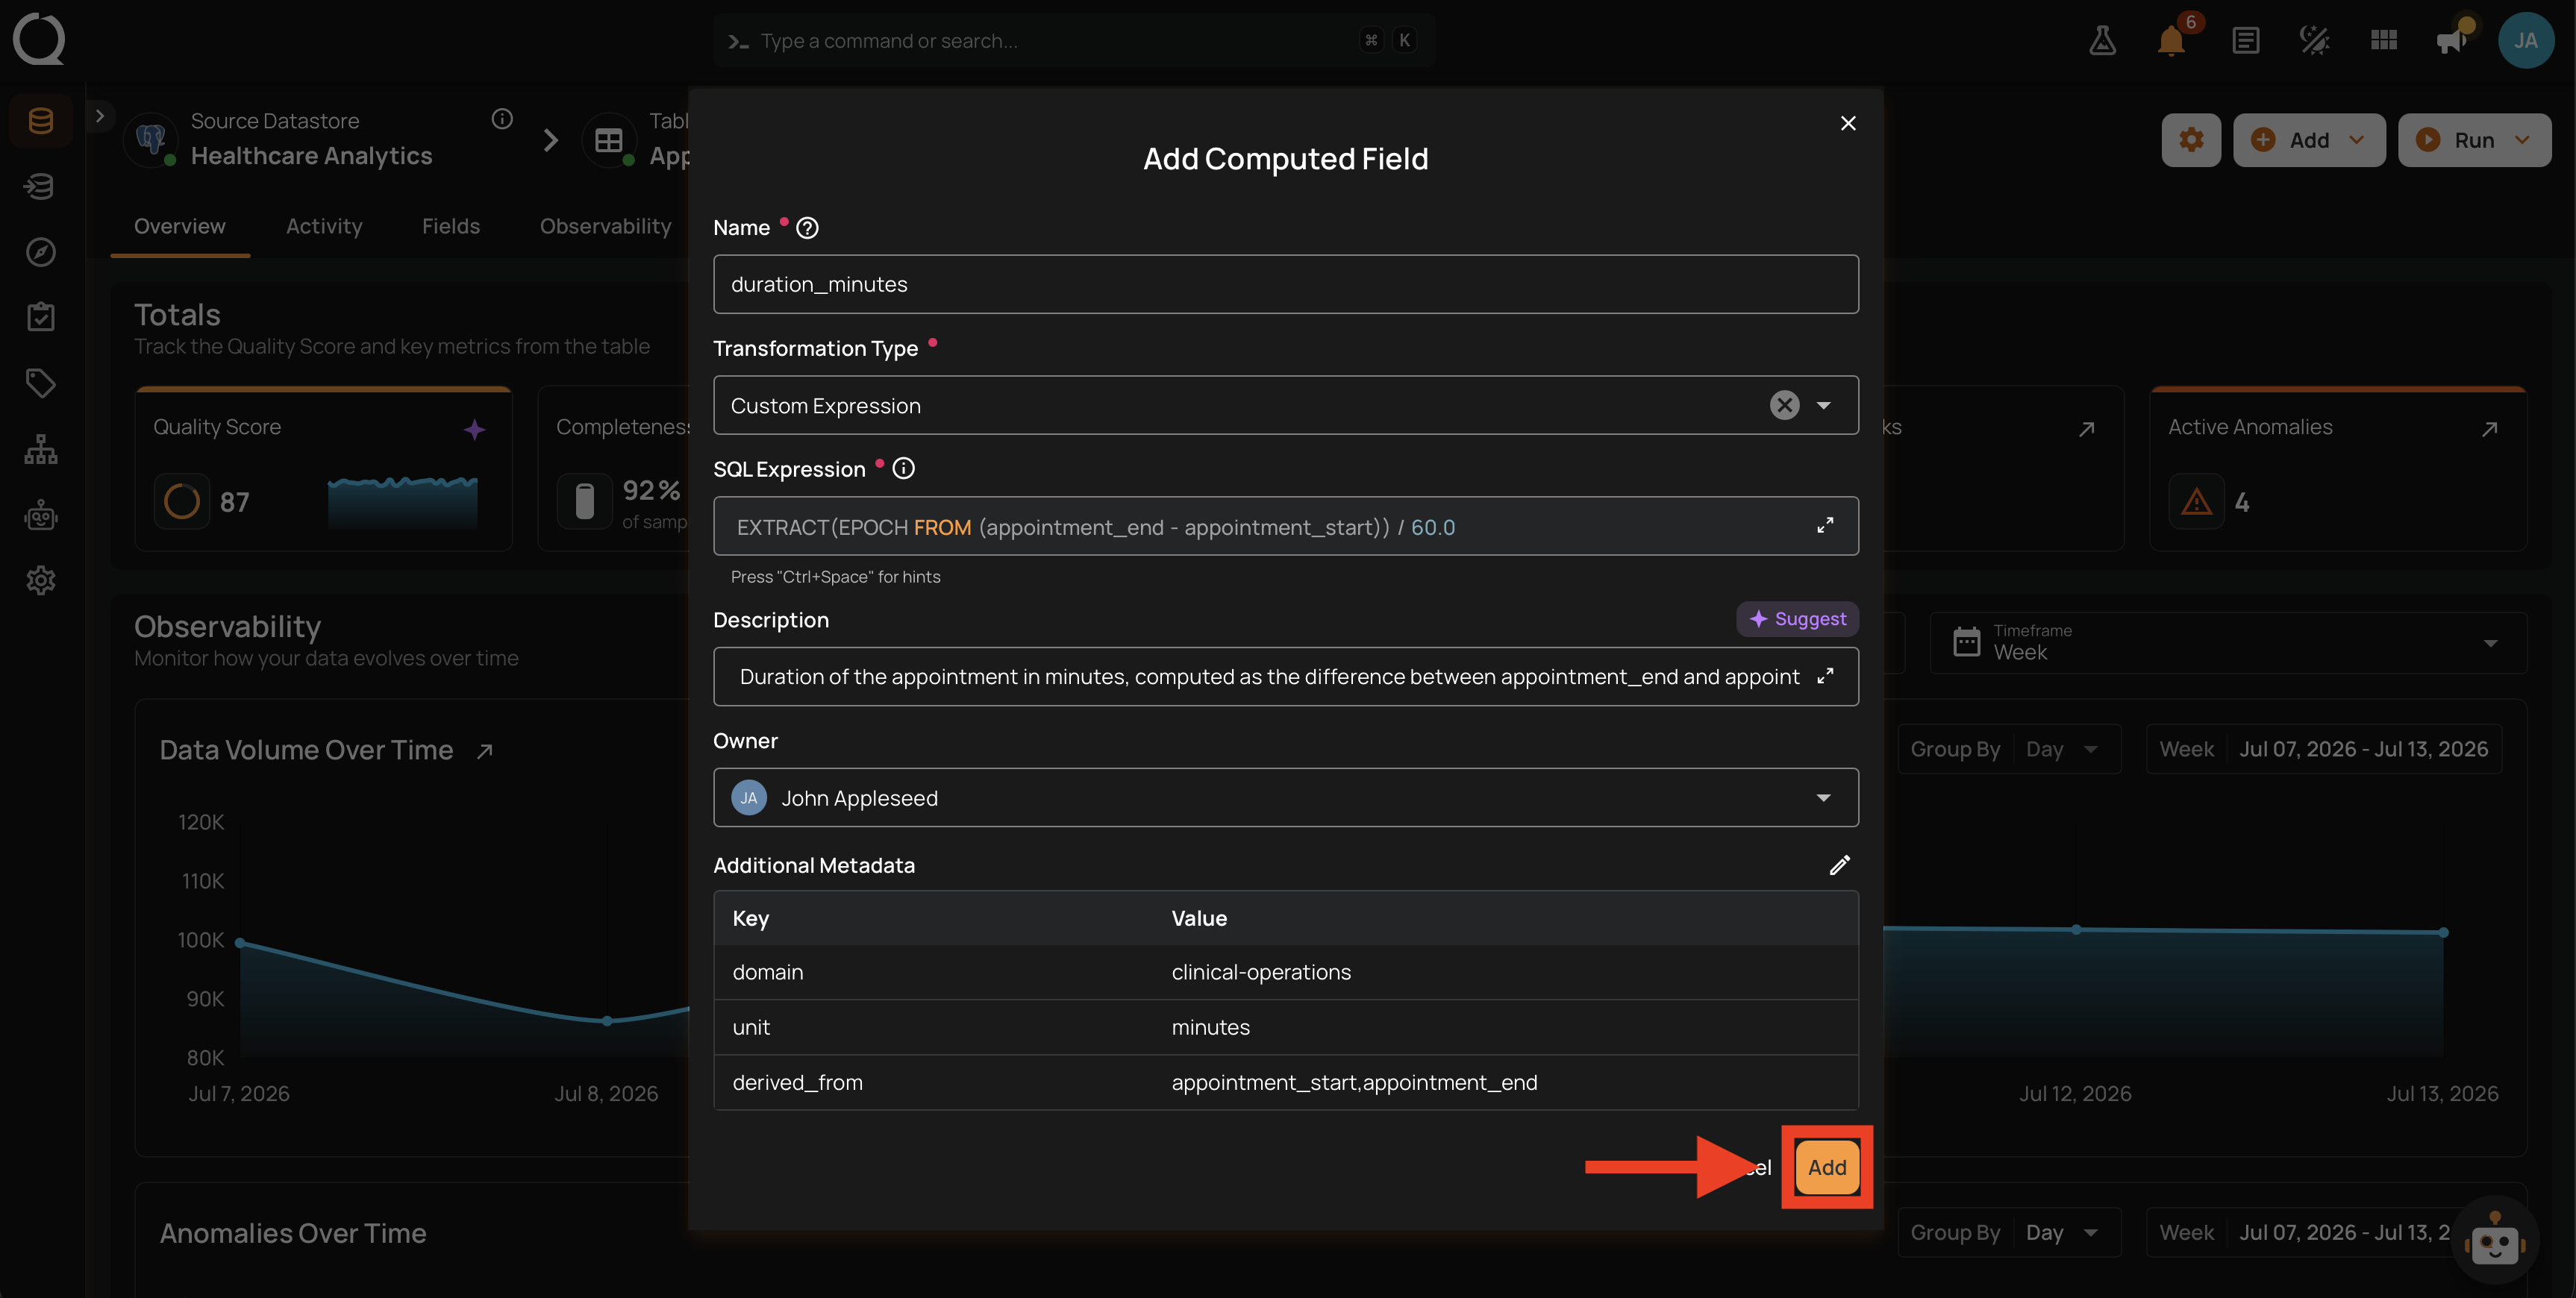
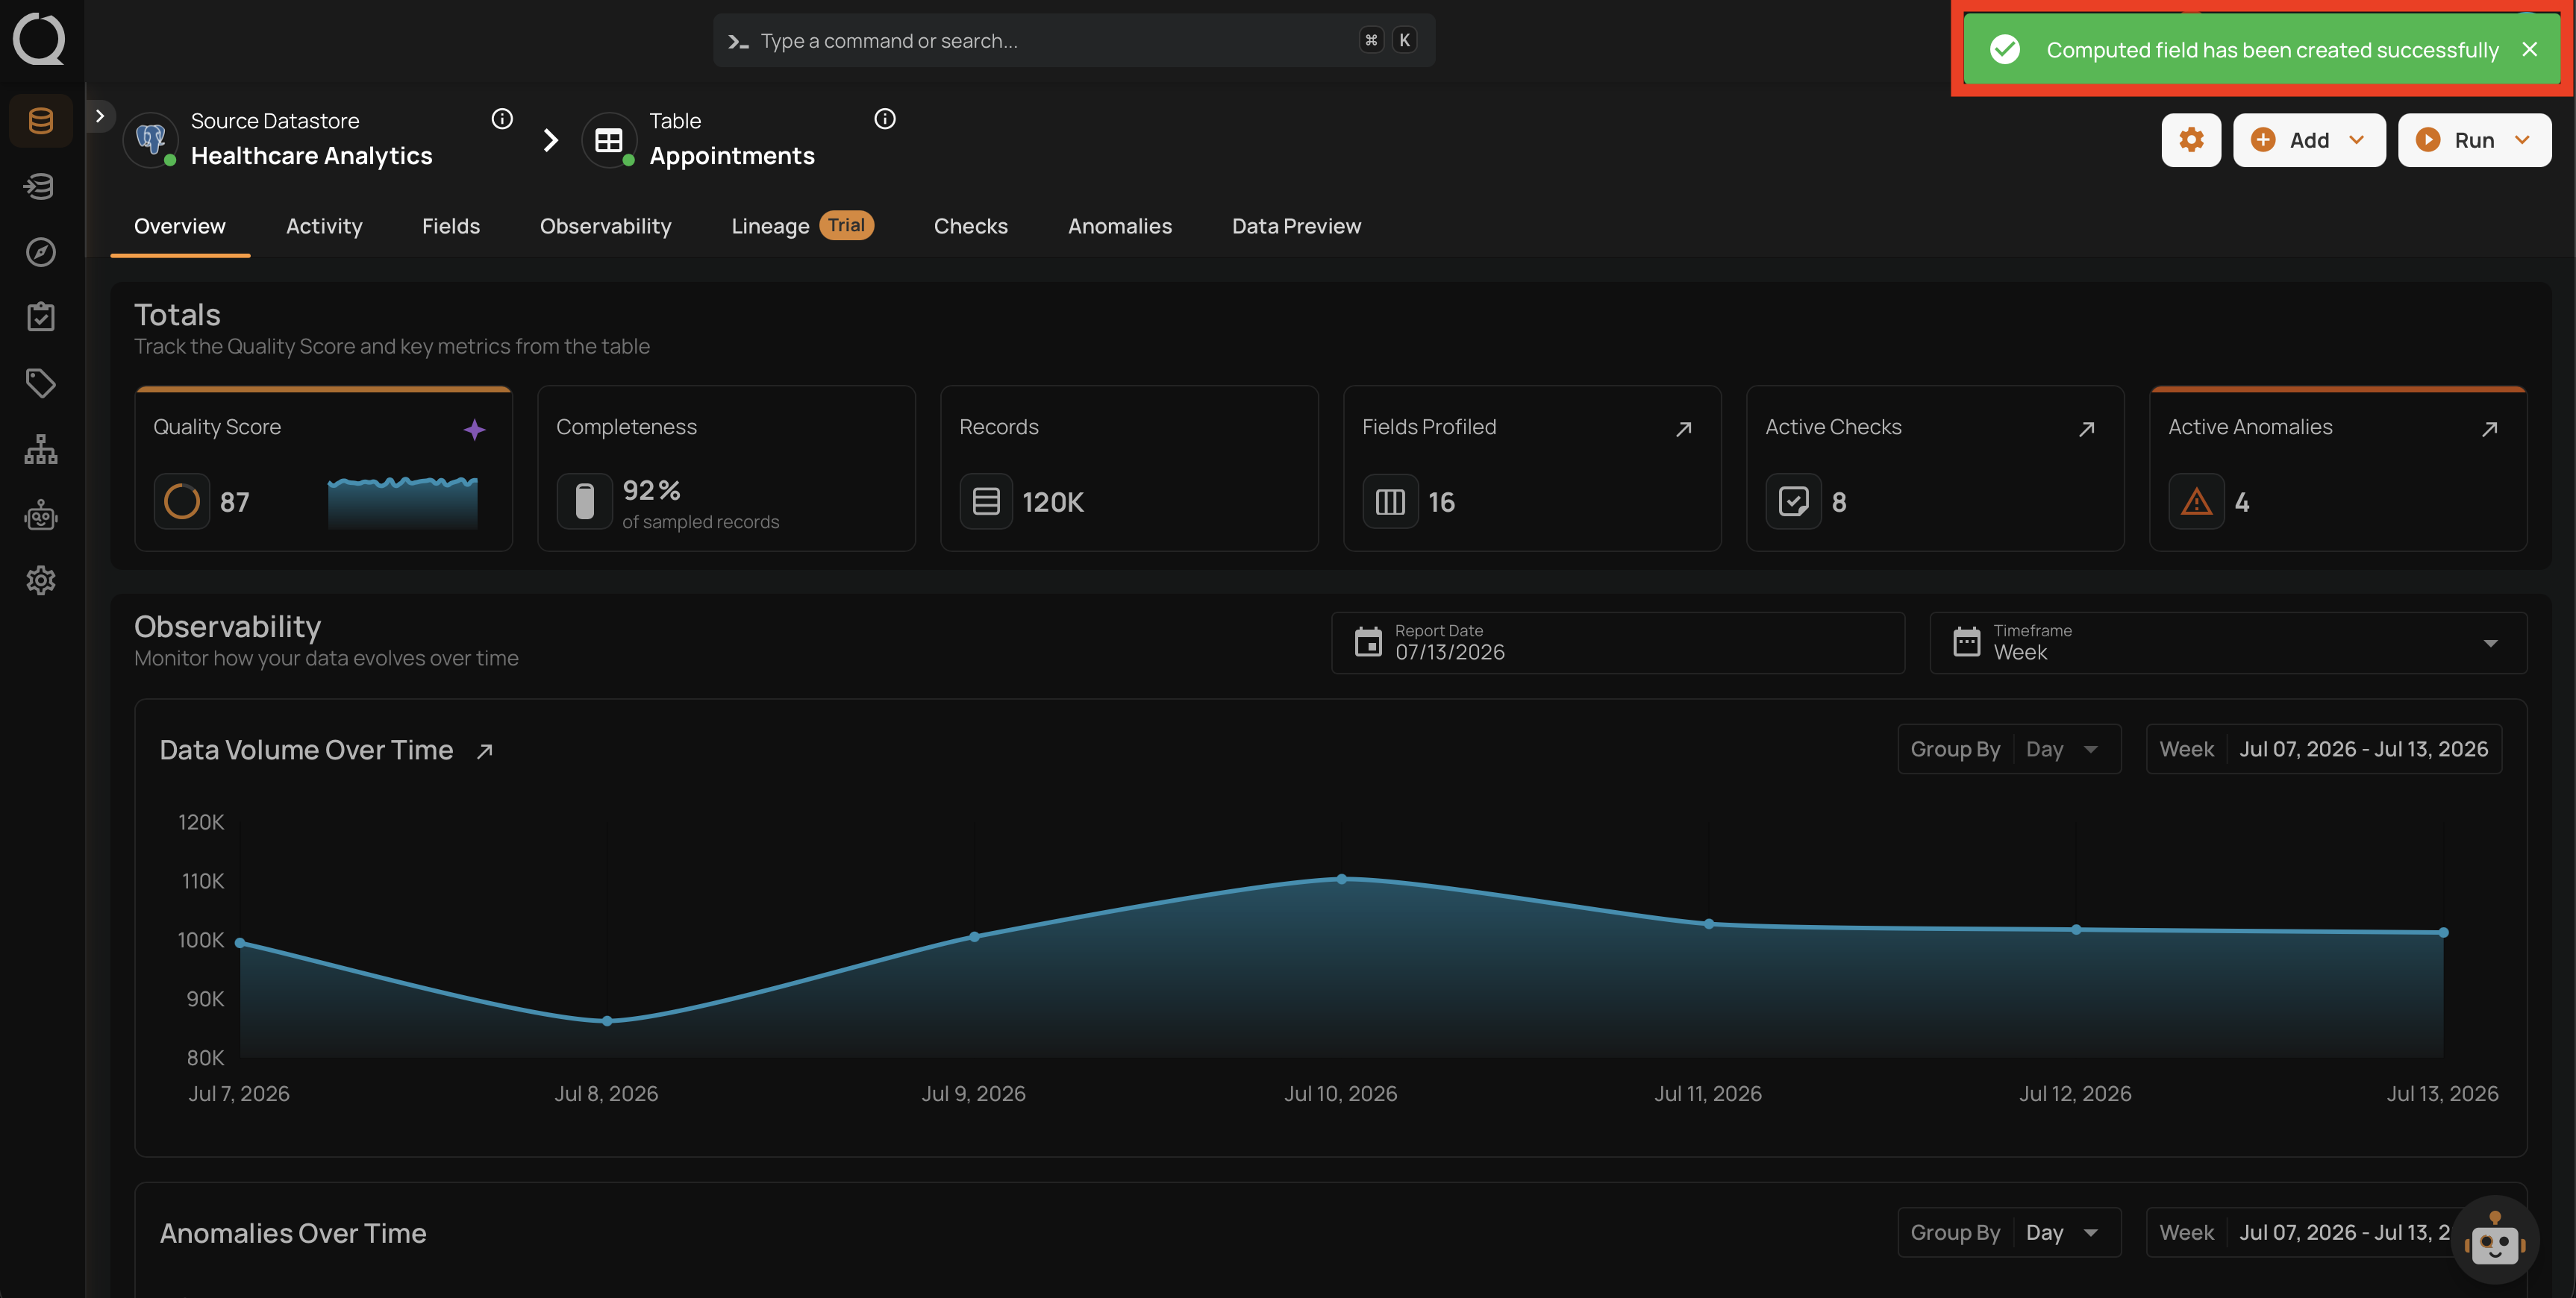
Step 7: A success message confirms the creation and the new Computed Field appears in the container's field listing. The Computed Field's first values populate on the next profile of the container.