Select Tables
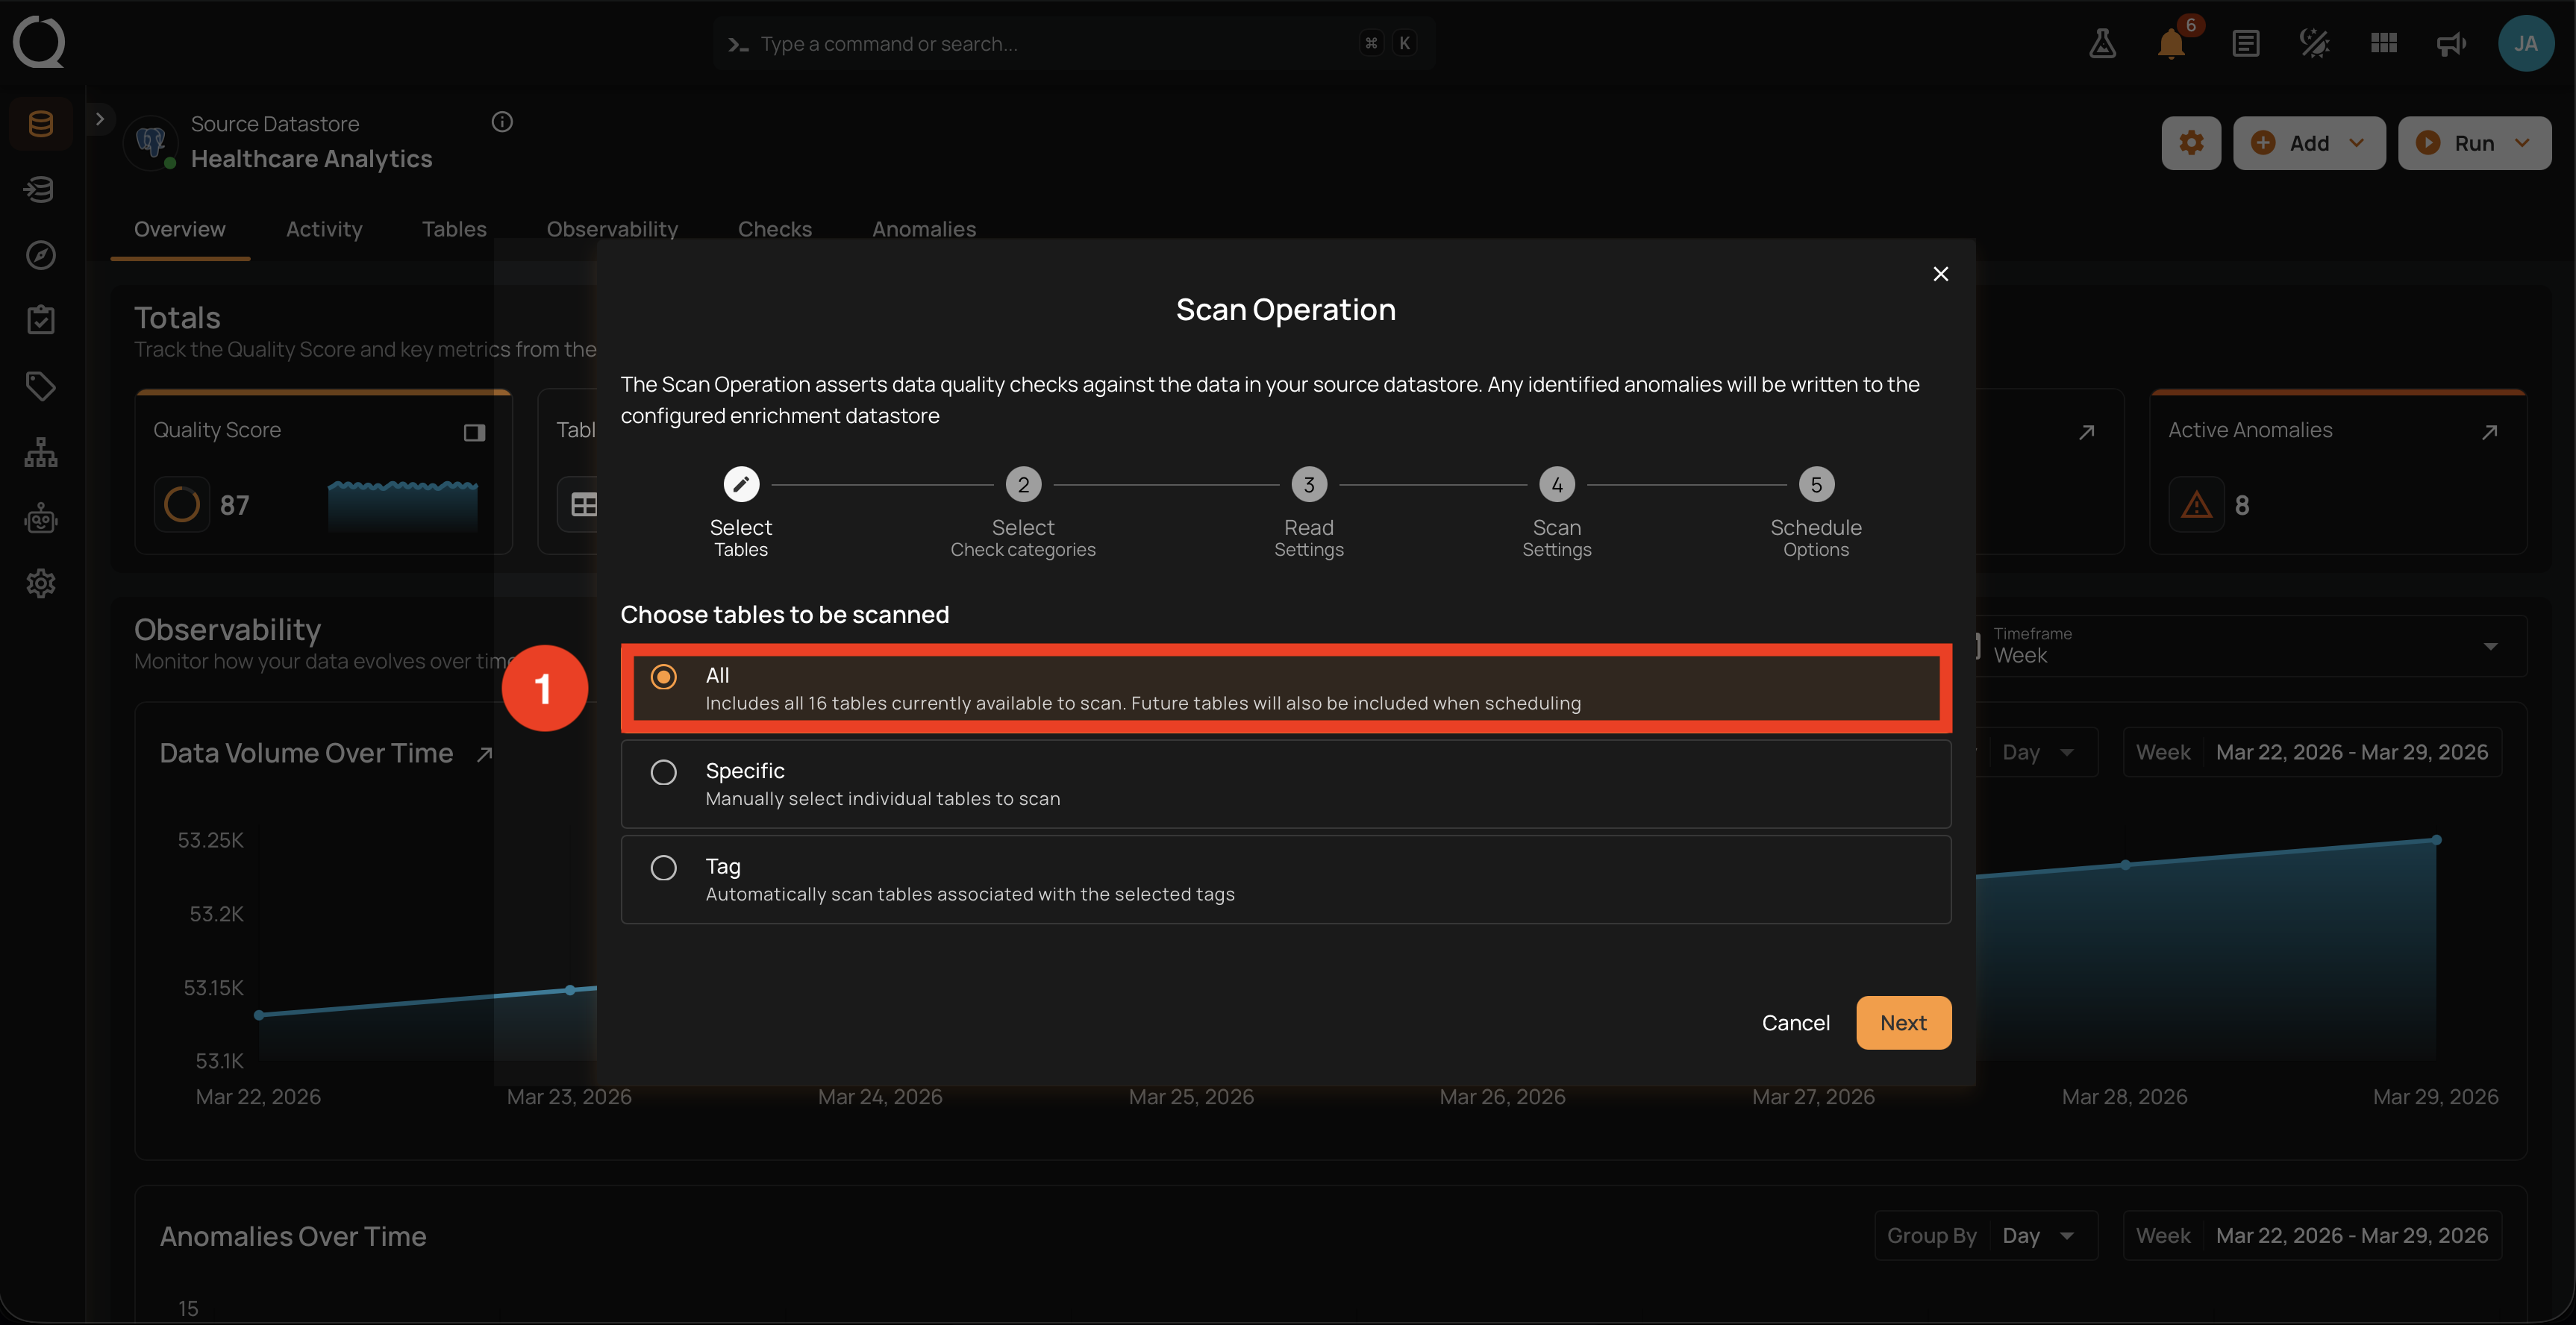
This is Step 1 of 5 in the Scan Operation modal. Before any other configuration, you choose which containers the scan will read. The choice is made once per scan and cannot be combined: a single scan picks one of three modes (All, Specific, or Tag) and advances to Step 2 with that selection locked in.
For JDBC datastores, containers are tables and views. For DFS datastores, they are file patterns. Scan also supports .txt.gz and .csv.gz files in DFS datastores.
Open the Scan Operation modal
From the datastore detail page, click the Run button under Scan. The modal opens at Step 1, Select Tables, with the section header Choose tables to be scanned and three radio options below it.
The stepper at the top of the modal shows the full configuration flow: 1. Select Tables → 2. Select Check Categories → 3. Read Settings → 4. Scan Settings → 5. Schedule Options. Stepper navigation lets you go back to revisit a previous step, but advancing always requires a valid selection in the current one.
Choose tables to be scanned
Pick exactly one of the three options. The selection determines which containers are read in this run; the same datastore can be scanned with different modes on different runs or schedules.
Switching options resets the previous selection
Switching from one option to another wipes the selection of the previous one. For example, picking containers in Specific and then switching to Tag clears the container selection. Switching back to Specific starts with an empty selection.
Includes every table or file pattern currently available in the datastore. The modal shows the total count next to the option (for example, "Includes all 16 tables currently available to scan"), and that count reflects the latest result of a Sync operation against this datastore.
What gets scanned
- Every container of the supported type currently in the datastore (tables and views for JDBC, file patterns for DFS). The count next to the option is the live, denormalized container count that is refreshed after every Sync (and after any other change that adds or removes a container).
- Containers marked Unloadable are still included in the scan request. They surface the same Unloadable error per container until the status is cleared. See Troubleshooting: Unloadable Container Error for the resolution steps.
Future tables are included on scheduled scans
When this option is selected on a scheduled scan, any container added to the datastore after the schedule was created is automatically included in subsequent runs. There is no need to edit the schedule when new tables arrive: the schedule stores an empty container list and re-resolves it against the live datastore at every execution.
When to use
- Nightly or weekly comprehensive scans that should cover every container.
- A datastore that grows over time and where you want new containers picked up without manual intervention.
- A baseline run after a check edit that may affect many containers.
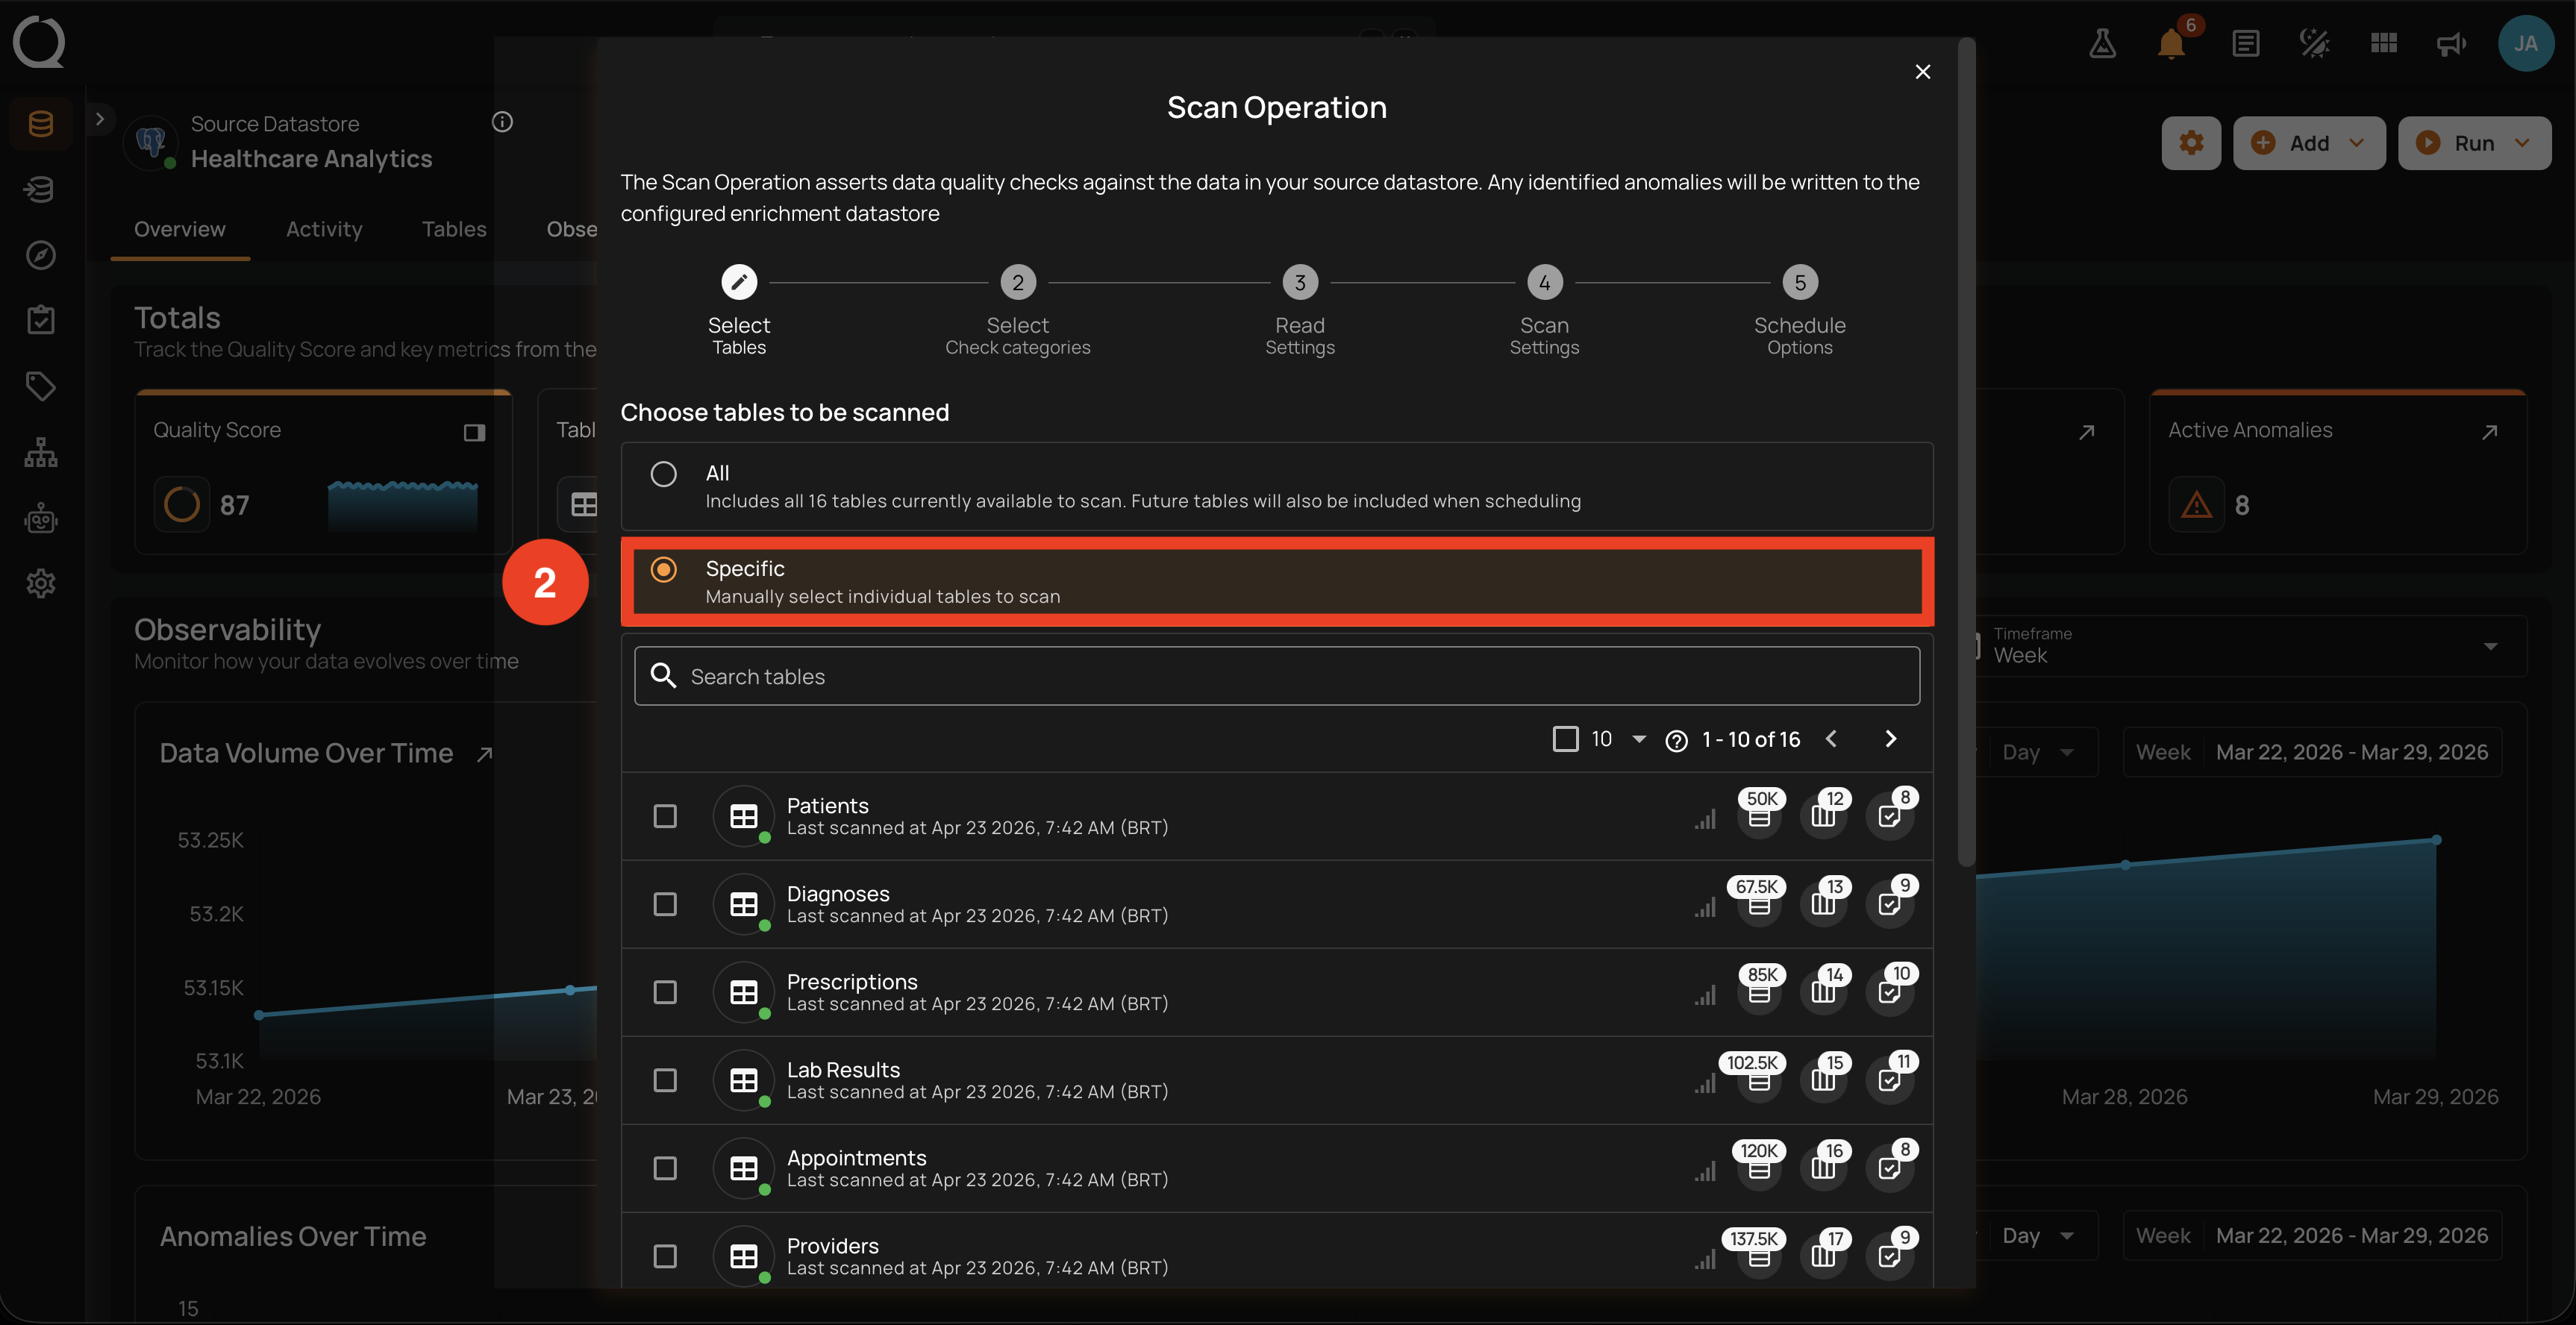
Lets you hand-pick one or more containers from the datastore's current list. The list is searchable and paginated, and each row shows the container's last scanned timestamp, record and field counts, active check count, and an icon indicating whether the container has an incremental identifier configured.
What gets scanned
- Only the containers checked in the list. Unchecked containers are skipped entirely, even if they currently have open anomalies.
- Use the Search tables input at the top of the list to filter by container name. The search is sent to the server with a 500 ms debounce.
- Pagination (
1-10 of N) lets you navigate large datastores without overwhelming the modal. - A page-scoped Select all / Deselect all checkbox next to the pagination toggles every visible row on the current page. Selection is page-local: switching pages keeps the selections from the previous page intact, but the toggle only acts on the page you are looking at.
- A counter chip with a Clear selection button appears above the list when at least one container is selected. Clicking it clears the entire selection in one step.
Containers that cannot be selected
Rows for containers whose status prevents them from being scanned (for example, Unloadable) render as disabled with a tooltip explaining the status. Unprofiled containers still appear in the list but show "
Selection is recorded on the operation
The exact list of containers is stored on the scan operation. If you schedule the scan instead of running it immediately, the schedule keeps that same list and reuses it on every execution. Containers added to the datastore after the schedule is created are not picked up automatically; if you want new containers to be included, use All or Tag instead.
When to use
- Ad-hoc validation of a single new table or view.
- Targeted re-scan after editing checks on a specific container.
- Excluding containers that are known to be unstable, in maintenance, or out of scope for this run.
- Performance-sensitive runs where you want to avoid the cost of scanning everything.
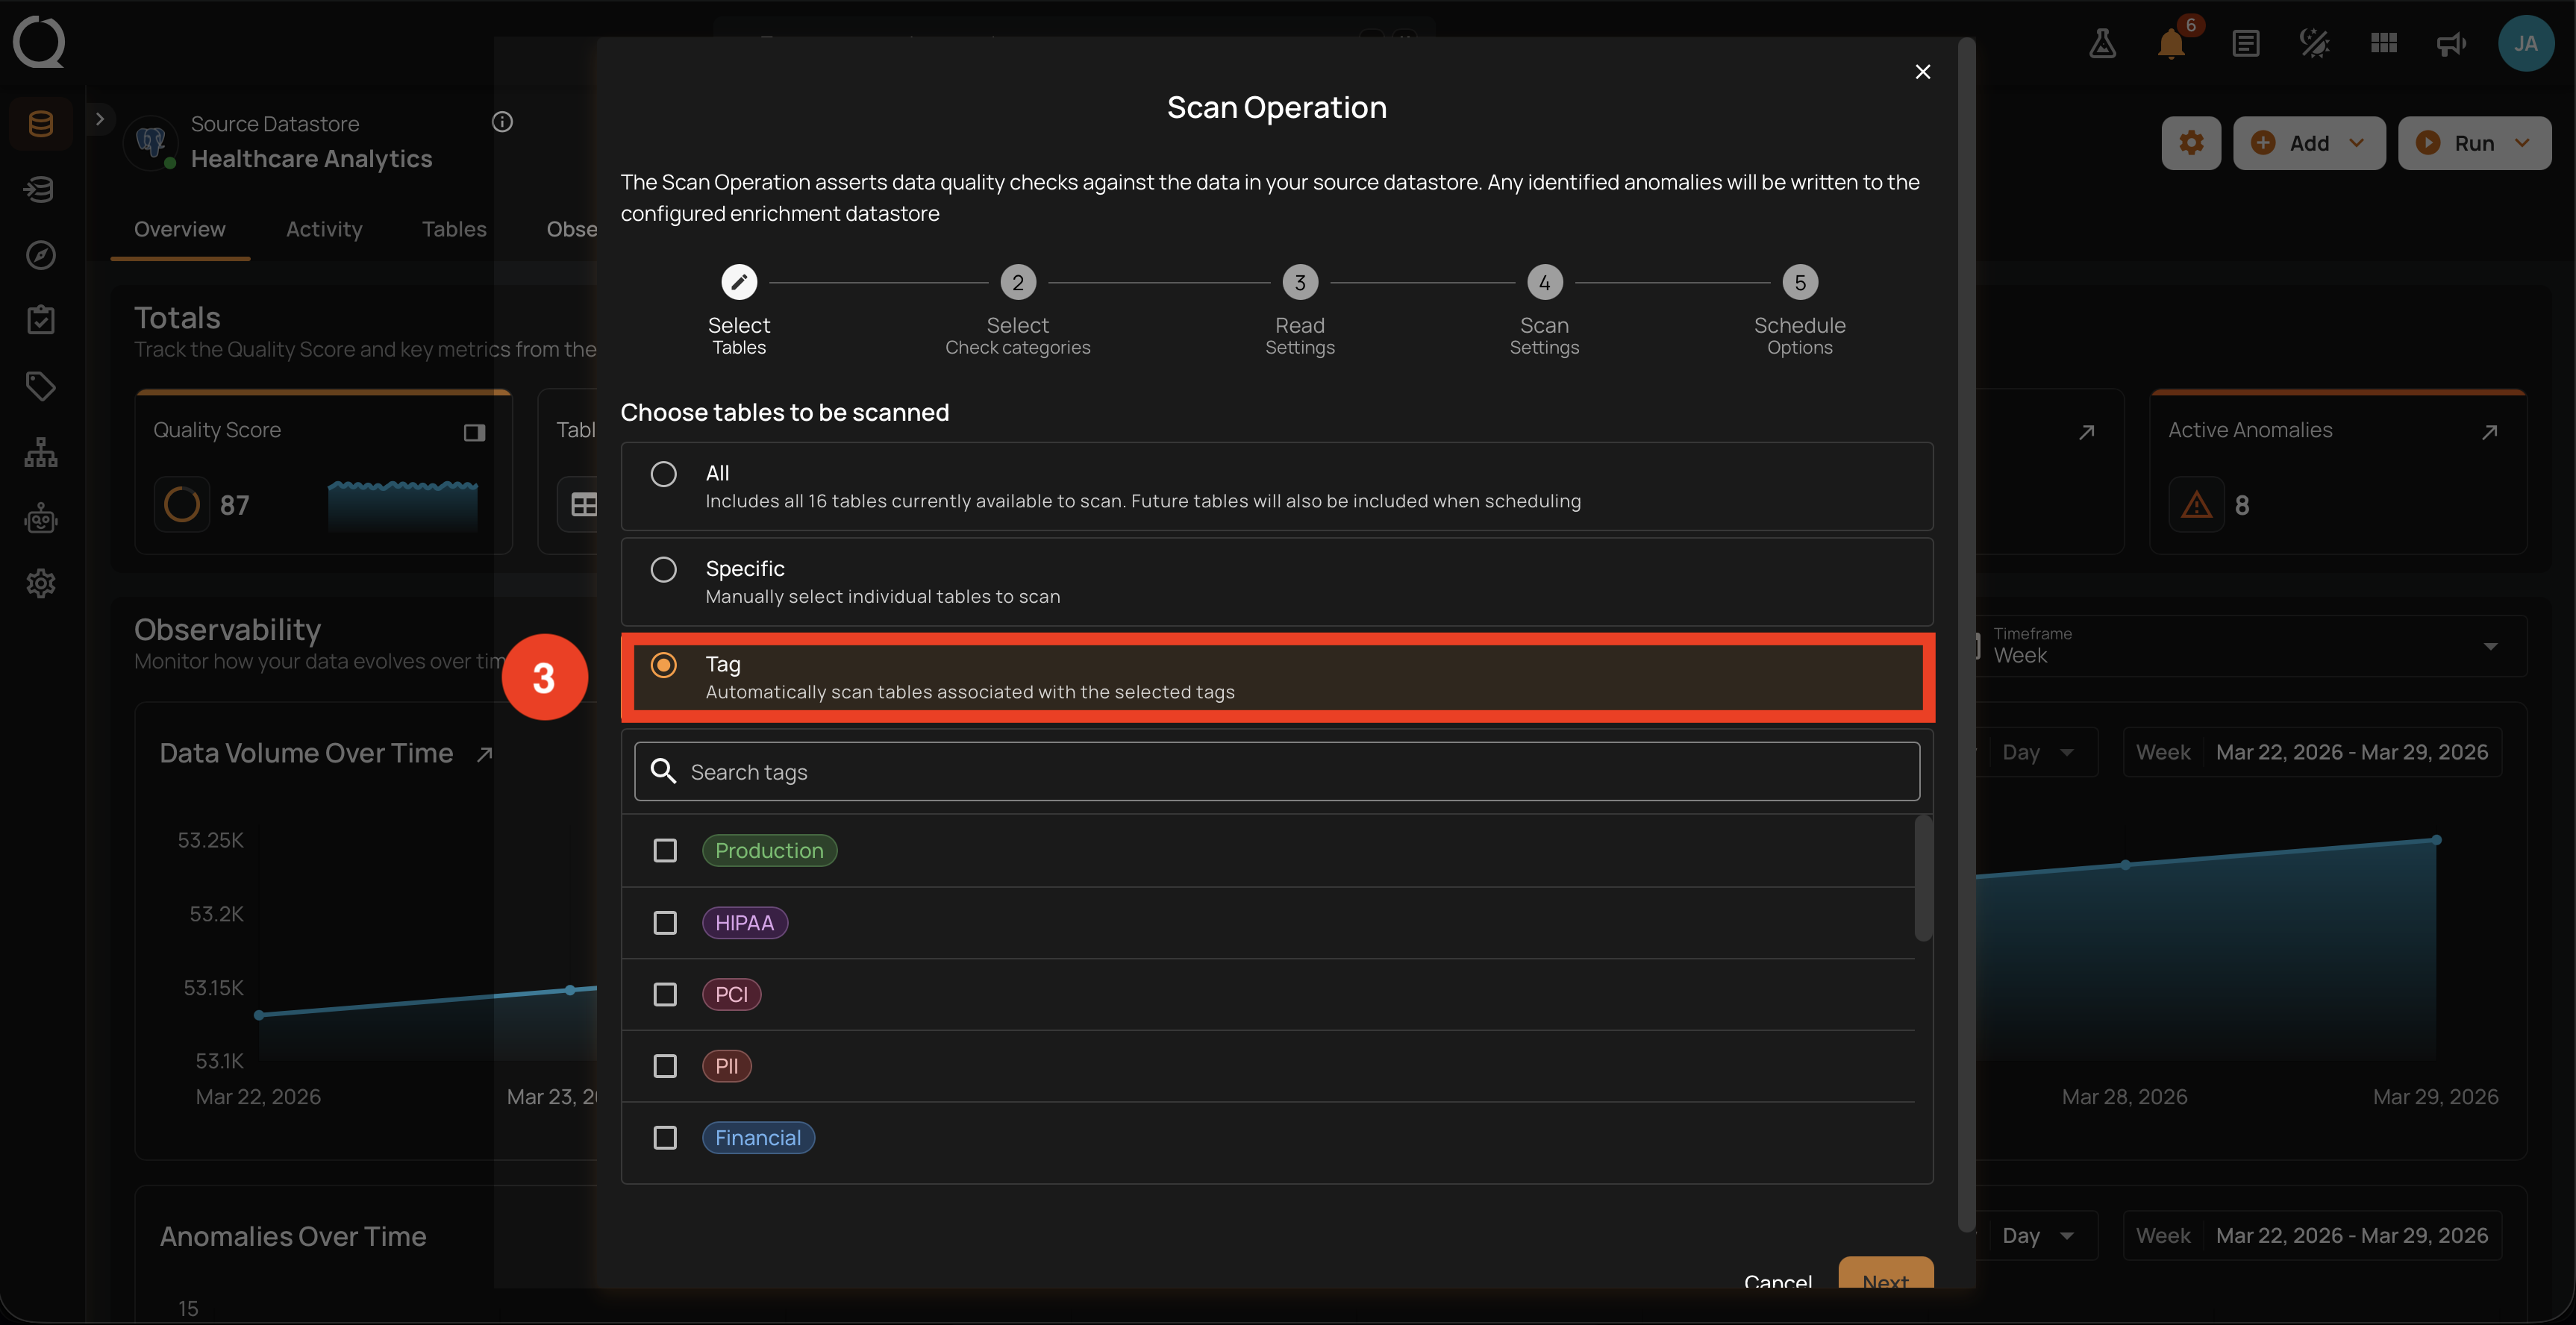
Scans every container associated with one or more tags. Tags are applied to containers separately (from the container's detail page or via bulk-edit in the Tags section), so this option only makes sense when your datastore is already tagged.
What gets scanned
- Every container associated with at least one of the tags you pick. The matching is OR-based: a container tagged
Productionis included ifProductionis selected, regardless of whether other tags likeHIPAAare also selected. - You can pick multiple tags at once; the result set is deduplicated so a container tagged with two of the selected tags is scanned exactly once.
- Each tag preserves its color in the picker (in the screenshot above: Production, HIPAA, PCI, PII, Financial) so you can recognize the policy or domain each tag represents.
The tag picker is workspace-wide
The picker lists every tag defined in the workspace. It is not filtered to tags currently applied in this datastore. If you select a tag that no container in this datastore carries, the Next button is still enabled (the rule only requires at least one tag to be picked), but the scan will resolve to zero containers and finish immediately. Apply tags to containers (from the container's detail page or via the Tags section) before relying on Tag-based scans.
Future tables are included via tags on scheduled scans
Like All, scheduled scans configured with Tag automatically include newly tagged containers. If a table is added to the datastore later and you apply the Production tag to it, the next scheduled run with Production selected picks it up without editing the schedule.
When to use
- Compliance sweeps against a tag like
HIPAA,PCI, orPII. - Domain-driven scans where each business area (Finance, Marketing, HR) has its own tag and is scanned on its own cadence.
- Sharing a single scan strategy across many containers without having to list each one individually.
Continue to the next step
Once the option is set, click Next to continue to Select Check Categories. The Next button is enabled as soon as a valid selection exists:
- All is valid by itself.
- Specific requires at least one container to be checked.
- Tag requires at least one tag to be selected.
Examples
Regional bank: nightly comprehensive scan: A mid-size bank runs data quality every night against its core analytics warehouse. The catalog contains transactions, accounts, customer_profiles, loan_originations, plus 60+ smaller dimension tables, and the data team adds new mart tables roughly once a month. They pick All on the schedule so each newly synced table is included automatically on the next run, with no need to edit the schedule when the catalog grows.
Online retailer: ad-hoc validation of a new product table: The data engineering team at an e-commerce company ships a new product_recommendations table generated by a freshly trained model. Before exposing it to downstream BI, they pick Specific and select only product_recommendations. The scan finishes in minutes instead of re-validating the 300 unrelated tables in the warehouse.
Health system: HIPAA compliance sweep: A hospital network has 14 tables containing Protected Health Information (patients, encounters, claims, lab_results, and so on), all tagged with HIPAA. The compliance team scans on the HIPAA tag every Monday to validate Contains Email, Contains SSN, and Not Null checks on patient_id and member_id. When the data team adds a new PHI-bearing table later in the year, applying the HIPAA tag to it is enough for the next scheduled scan to pick it up.
Fintech: targeted re-scan after editing a check: A payments fintech edits the Expected Values check on transactions.payment_method to add the new pix_instant method. They pick Specific and select only transactions, payment_attempts, and refunds. The scan validates the updated check against the three relevant tables and skips everything else.
B2B SaaS: domain-driven recurring scans: A B2B SaaS company has tables labeled with three domain tags: billing, product_analytics, and customer_success. Each domain has its own data steward and its own cadence. They create three schedules using Tag: billing runs hourly (cash-flow critical), product_analytics runs daily at 02:00 UTC, and customer_success runs weekly on Mondays. Each schedule reuses the same tag-based selection logic without listing tables explicitly.
Where to go next
-
Select Check Categories
Choose Metadata, Data Integrity, or both.
-
Read Settings
Pick Incremental or Full, set an optional starting threshold, and the record limit.
-
Scan Settings
Anomaly Options (including Auto Resolve), record-anomaly limits, and source examples.
-
Schedule Options
Set up a recurring run, or skip this step and use Run Now.