Okta
- Managed deployment
- Self-hosted
This guide walks you through setting up Directory Sync with Okta using SCIM provisioning.
Add a SCIM Integration in Okta
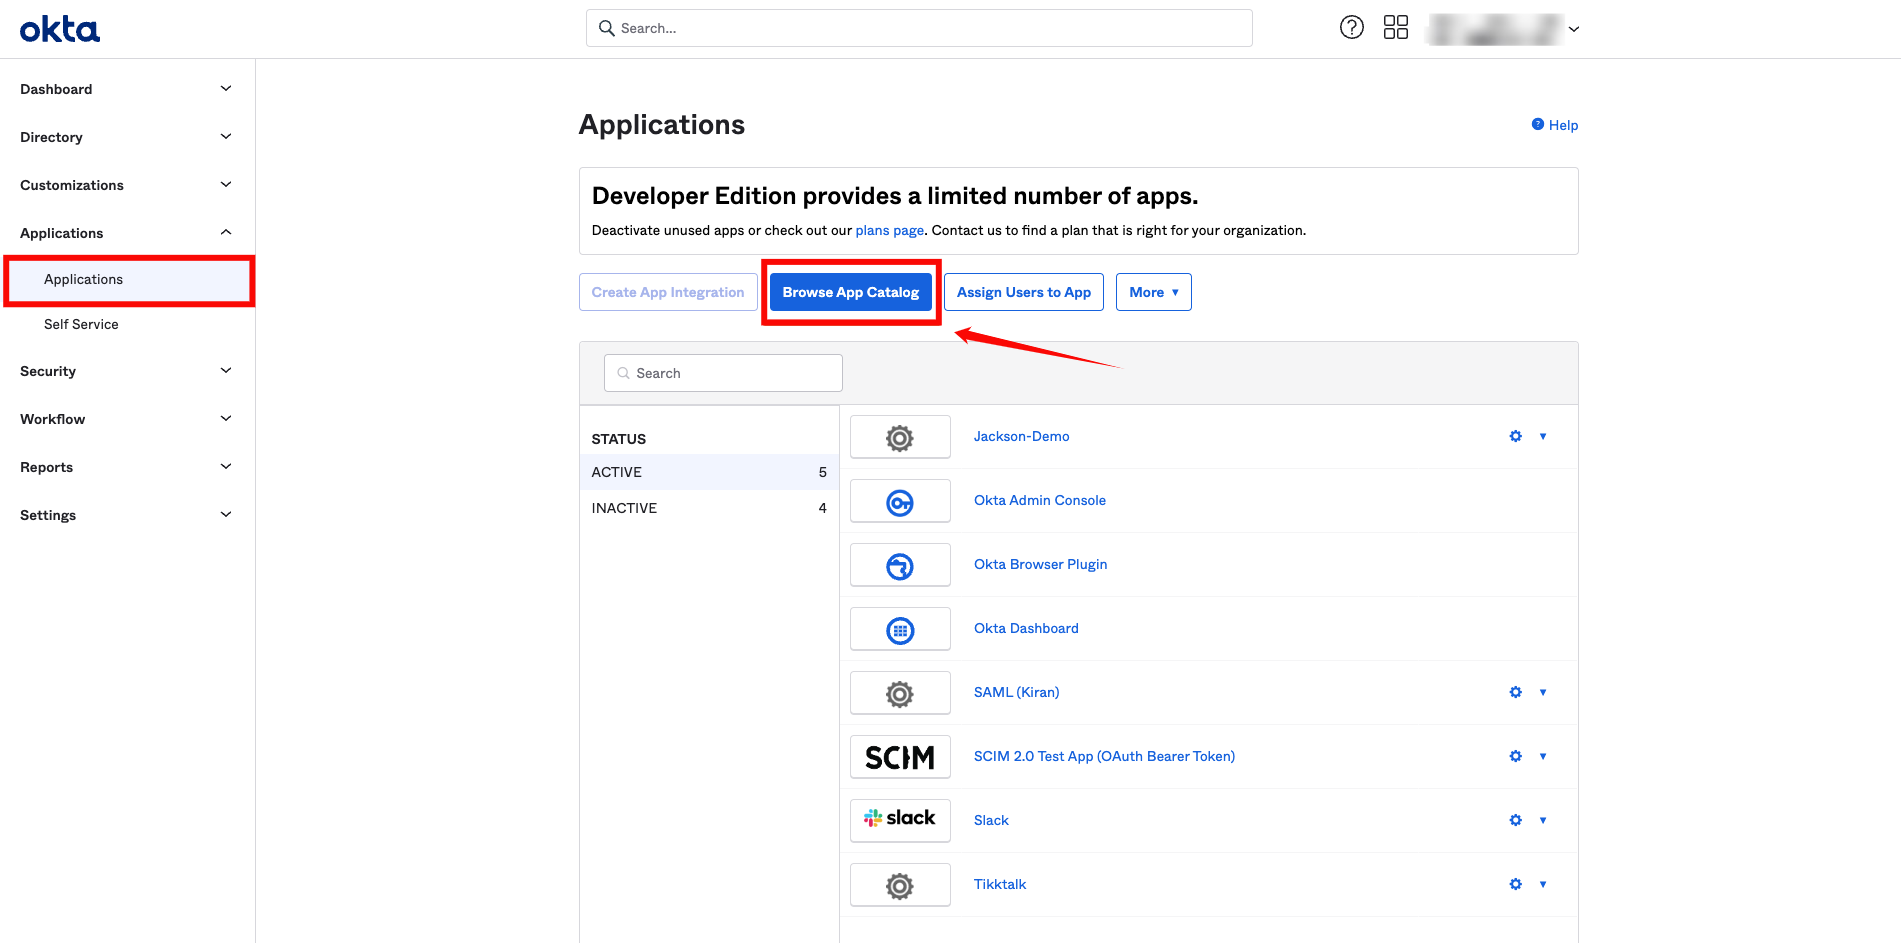
Step 1: Log in to your Okta account using your administrator credentials. From the left-hand navigation menu, click Applications, then select Browse App Catalog.
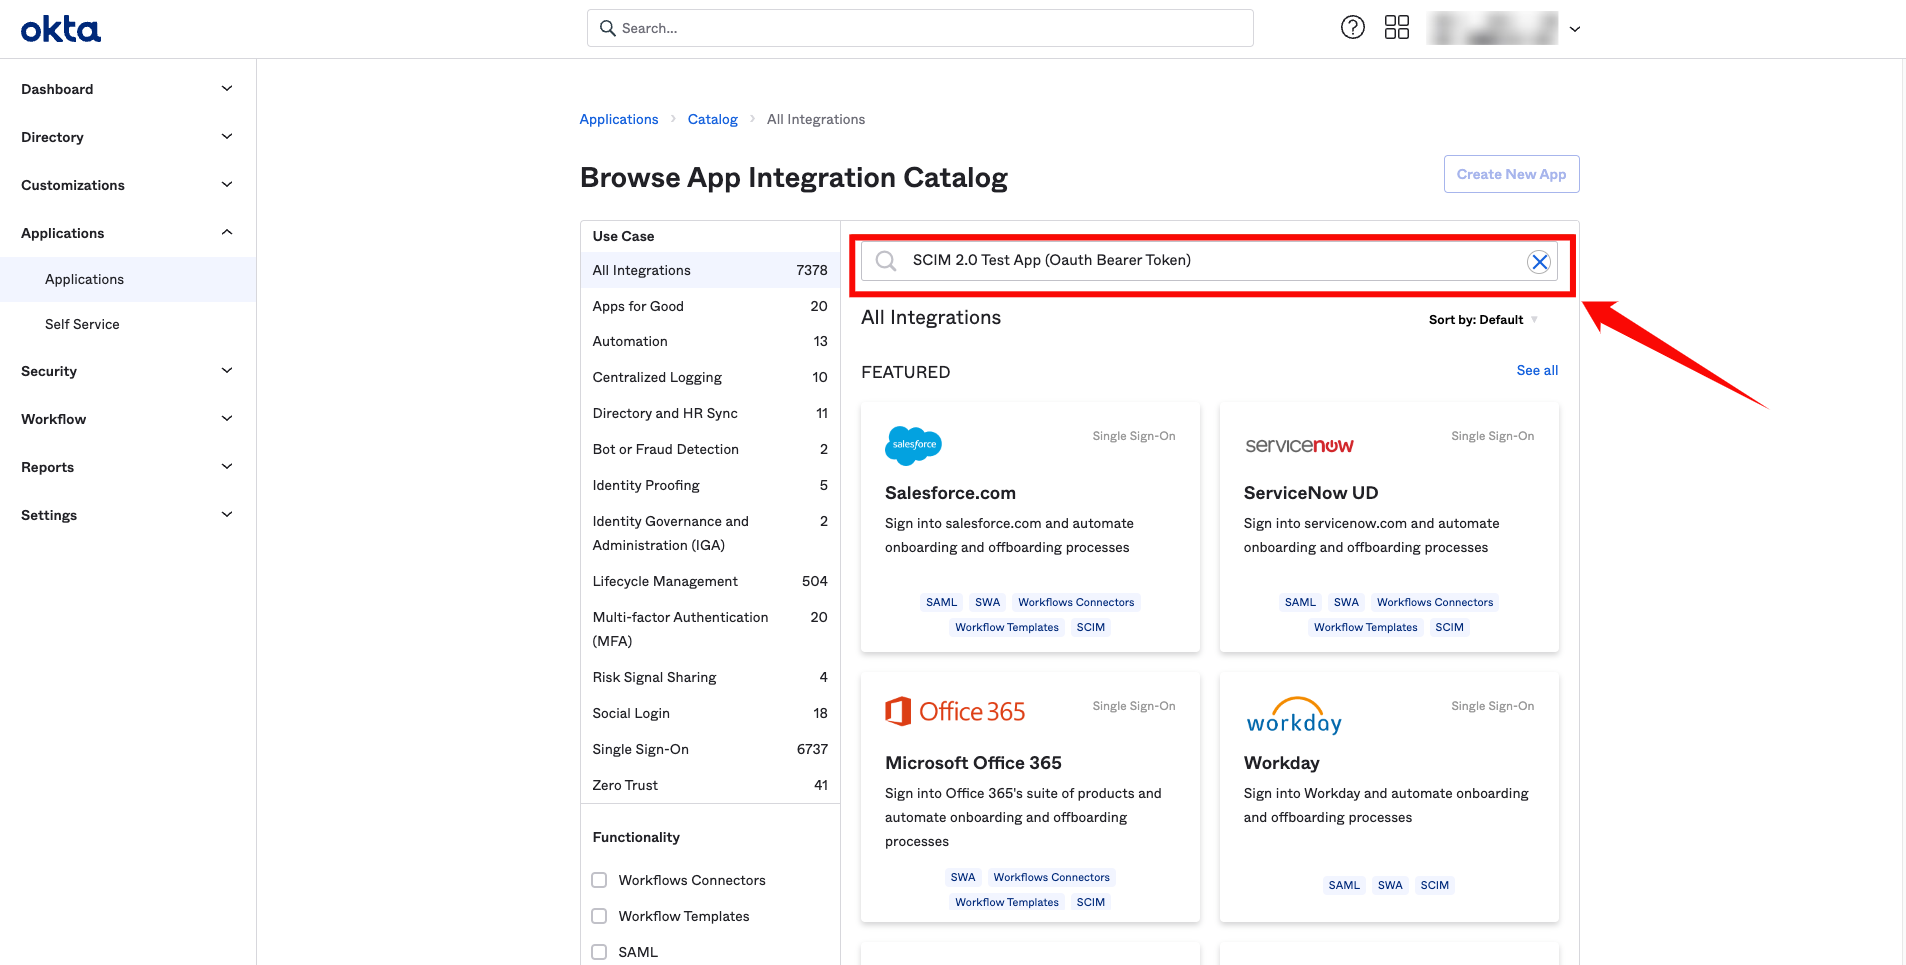
Step 2: In the search bar, type SCIM 2.0 Test App (OAuth Bearer Token), and select the app called SCIM 2.0 Test App (OAuth Bearer Token) from the search results.
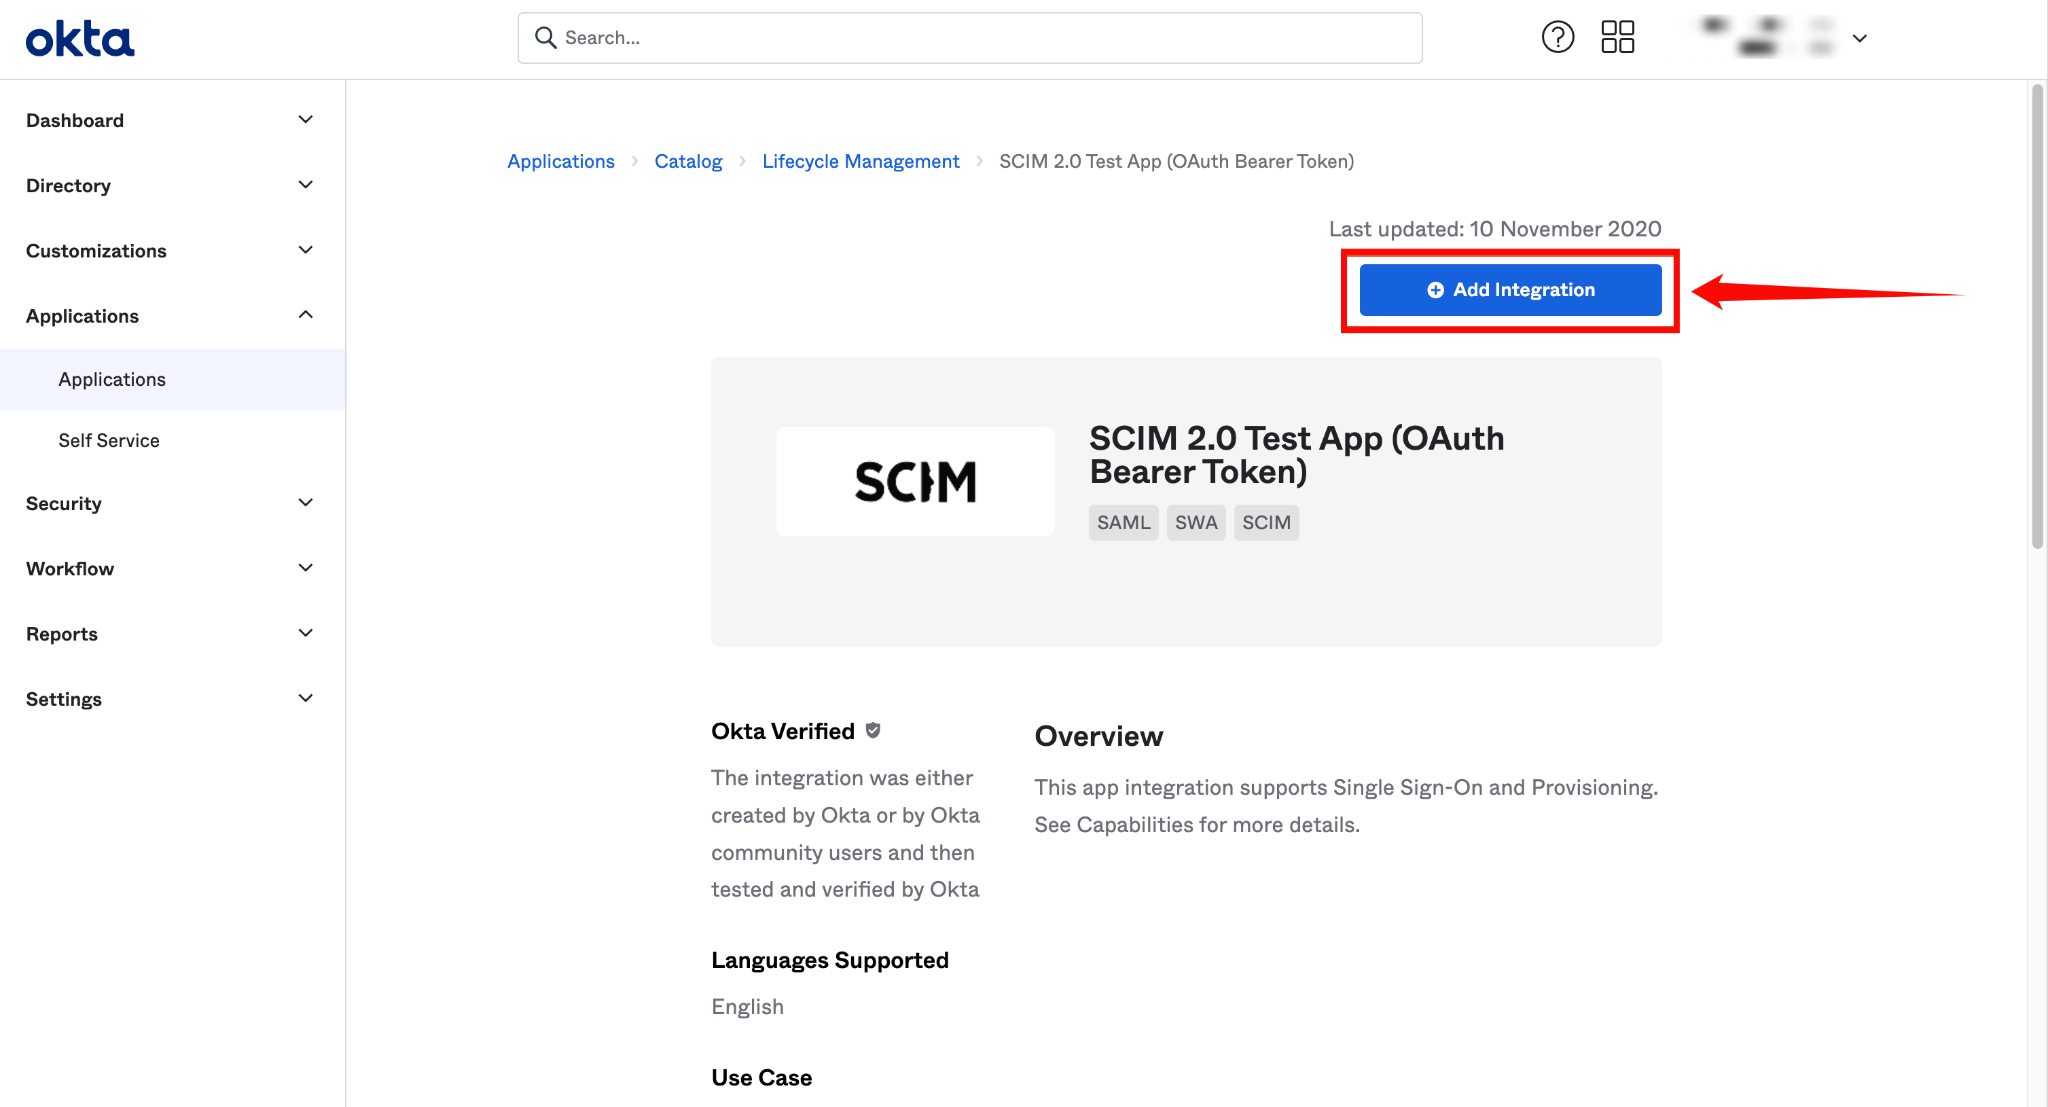
Step 3: On the app's details page, click Add Integration.
Step 4: Enter a name for your application, such as "Qualytics Directory Sync."
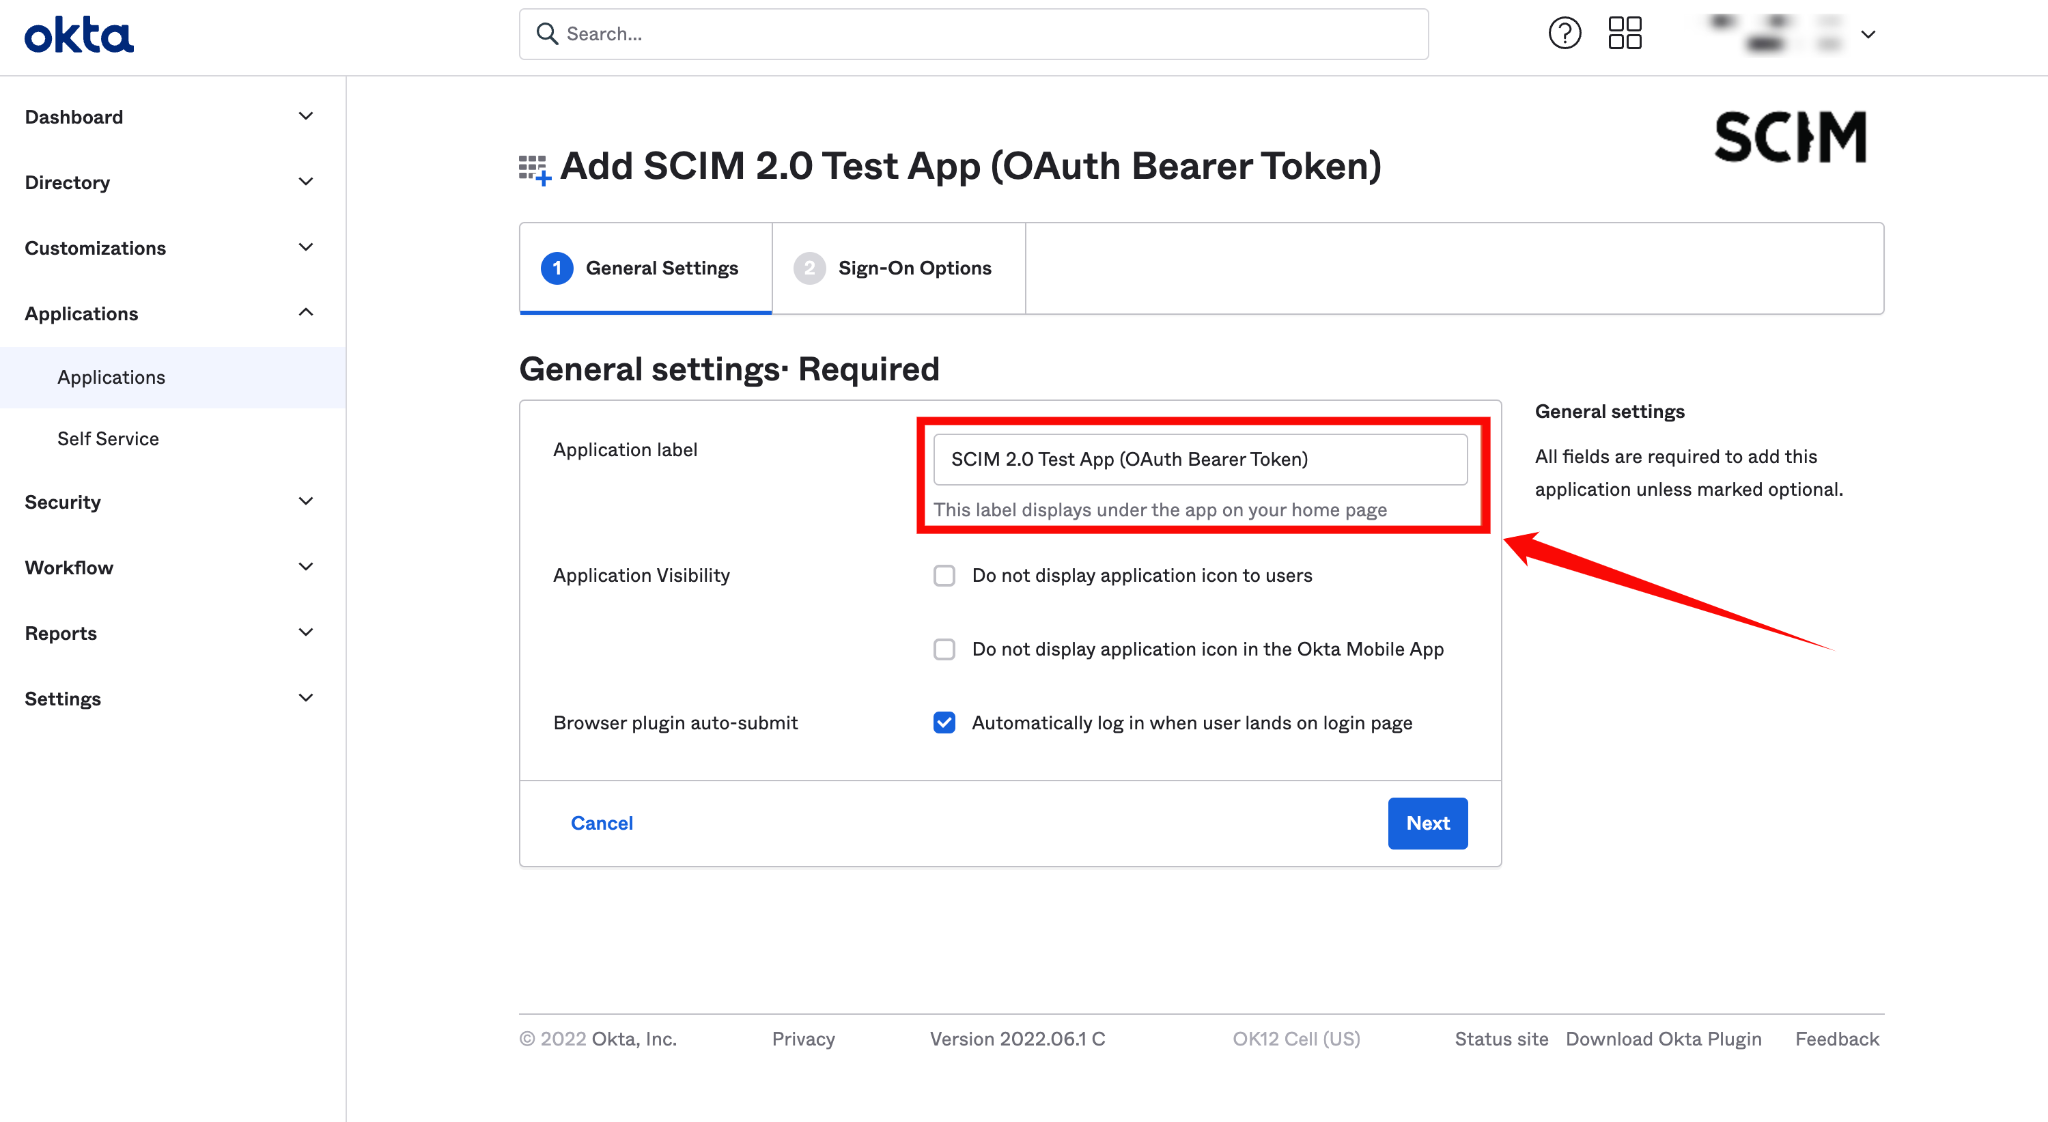
Step 5: Click on the Next button.
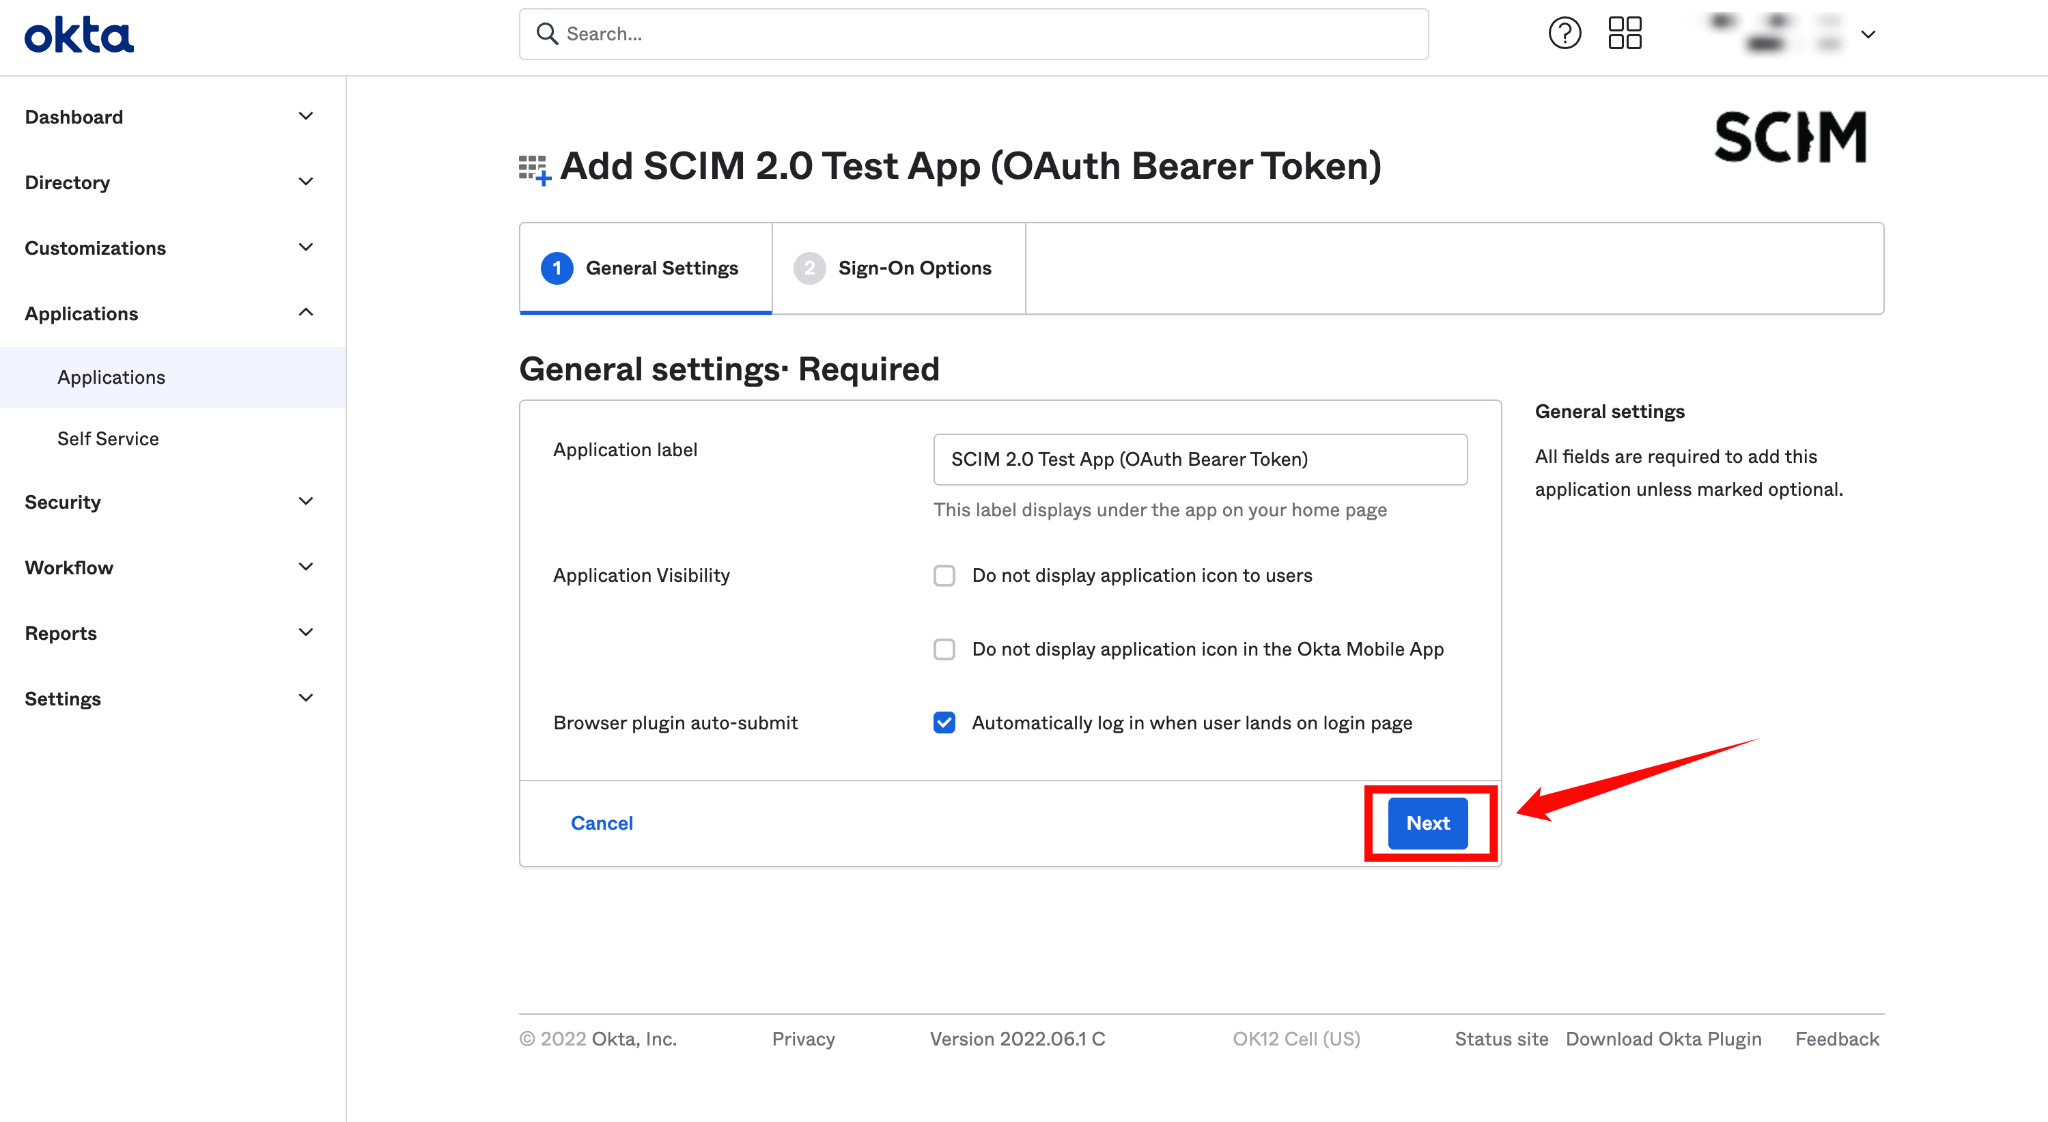
Configuring SCIM Endpoints
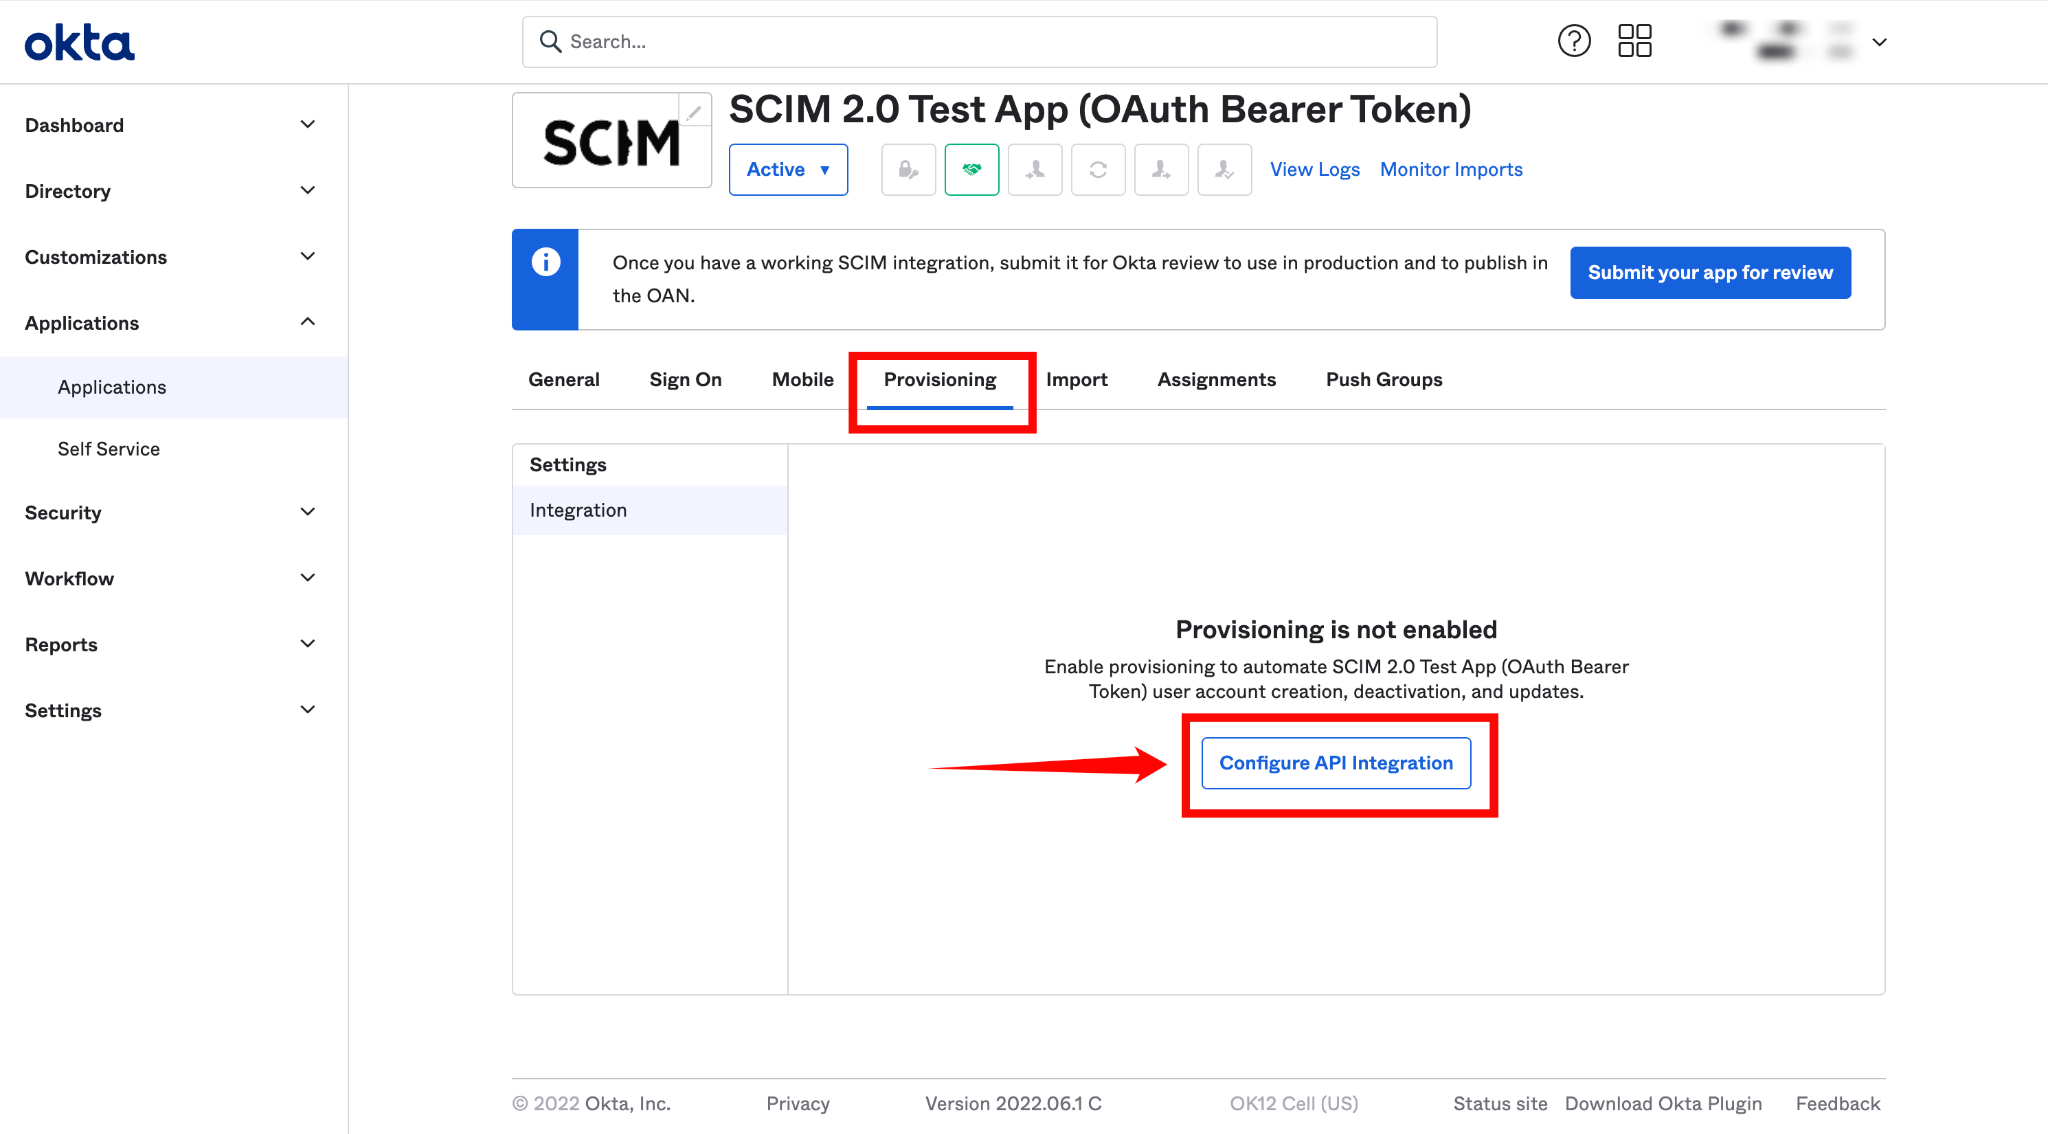
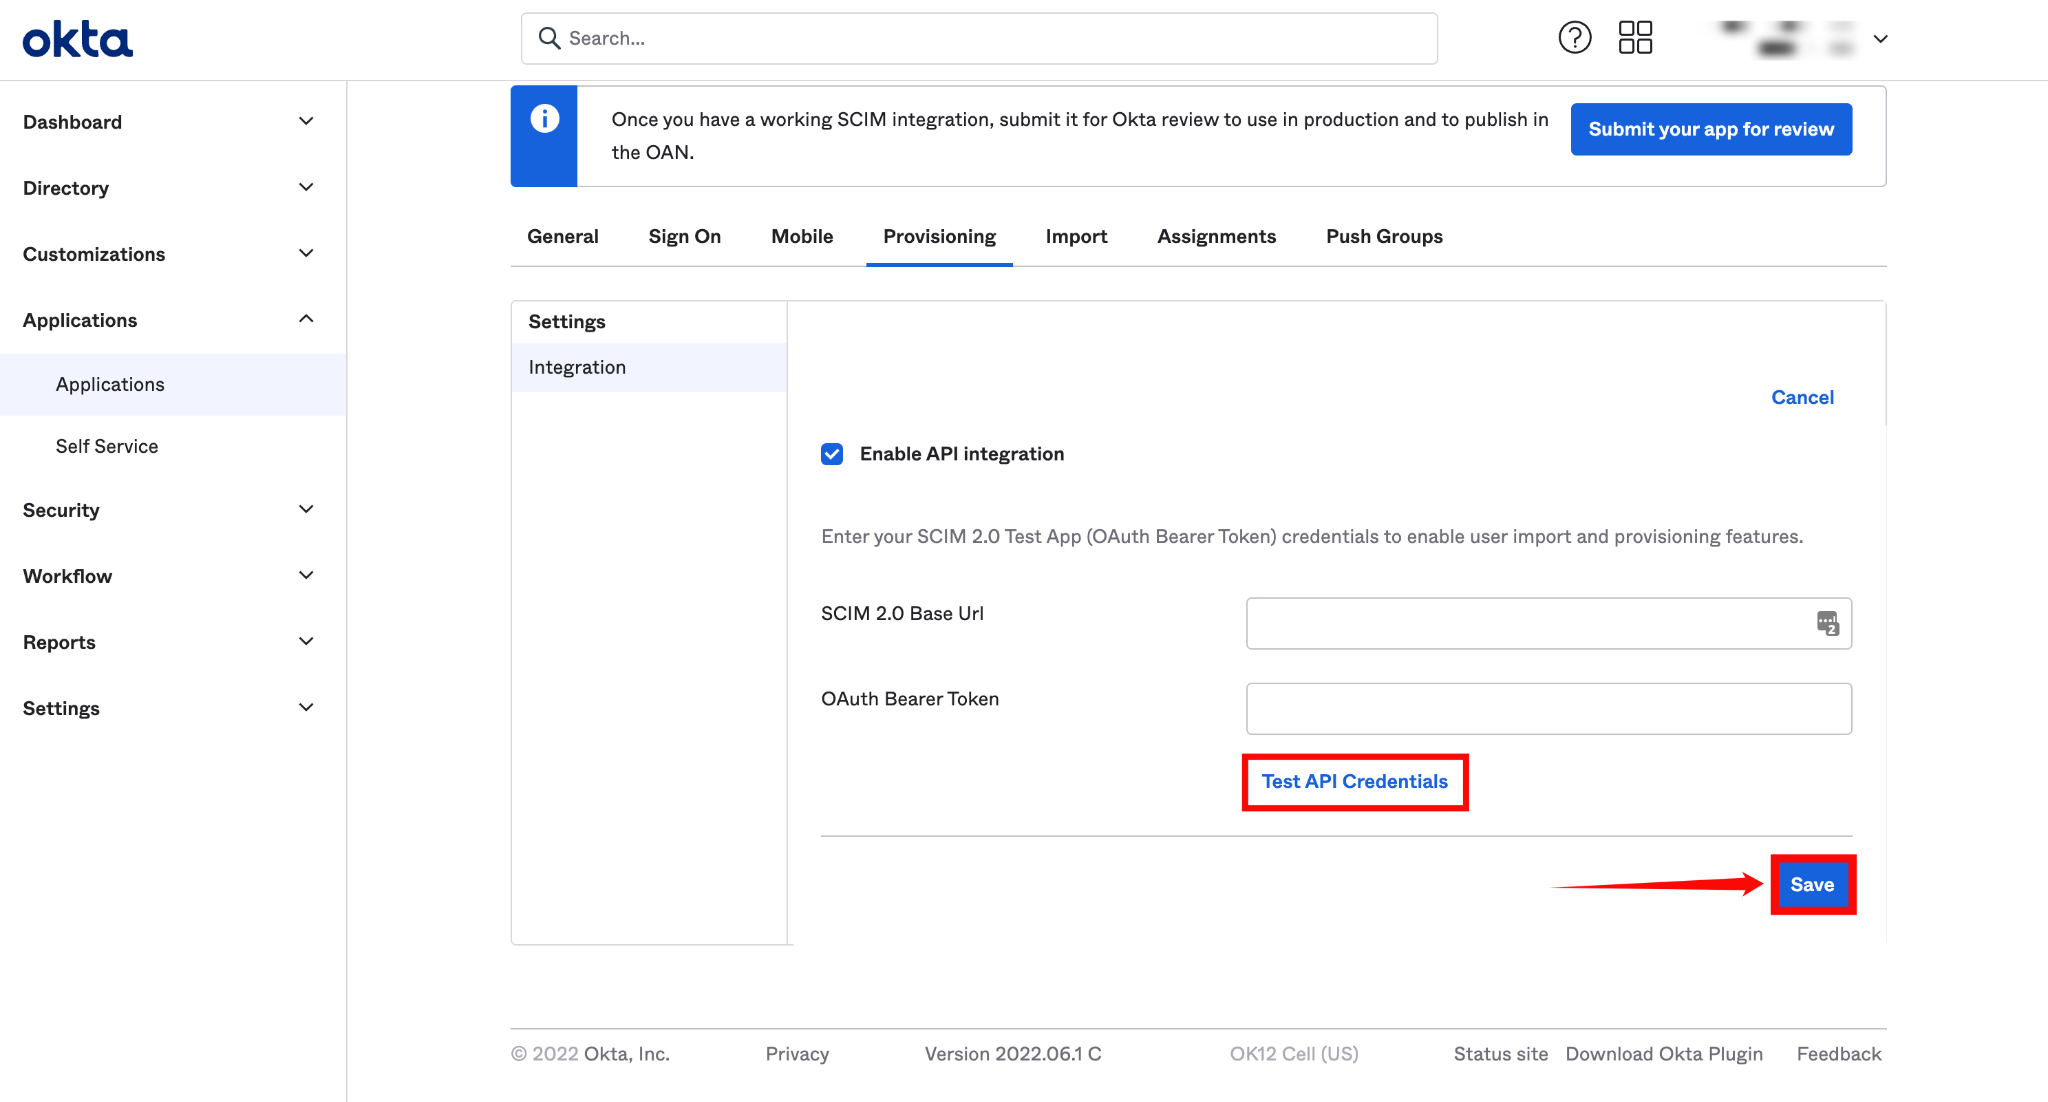
Step 1: In the newly created app, go to the Provisioning tab and click Configure API Integration.
Step 2: Check the box labeled Enable API Integration, and enter the following details:
-
SCIM 2.0 Base URL:
https://<your-Qualytics-domain>/api/scim/v2 -
OAuth Bearer Token: Use the restricted Service Token described in the Directory Sync requirements.
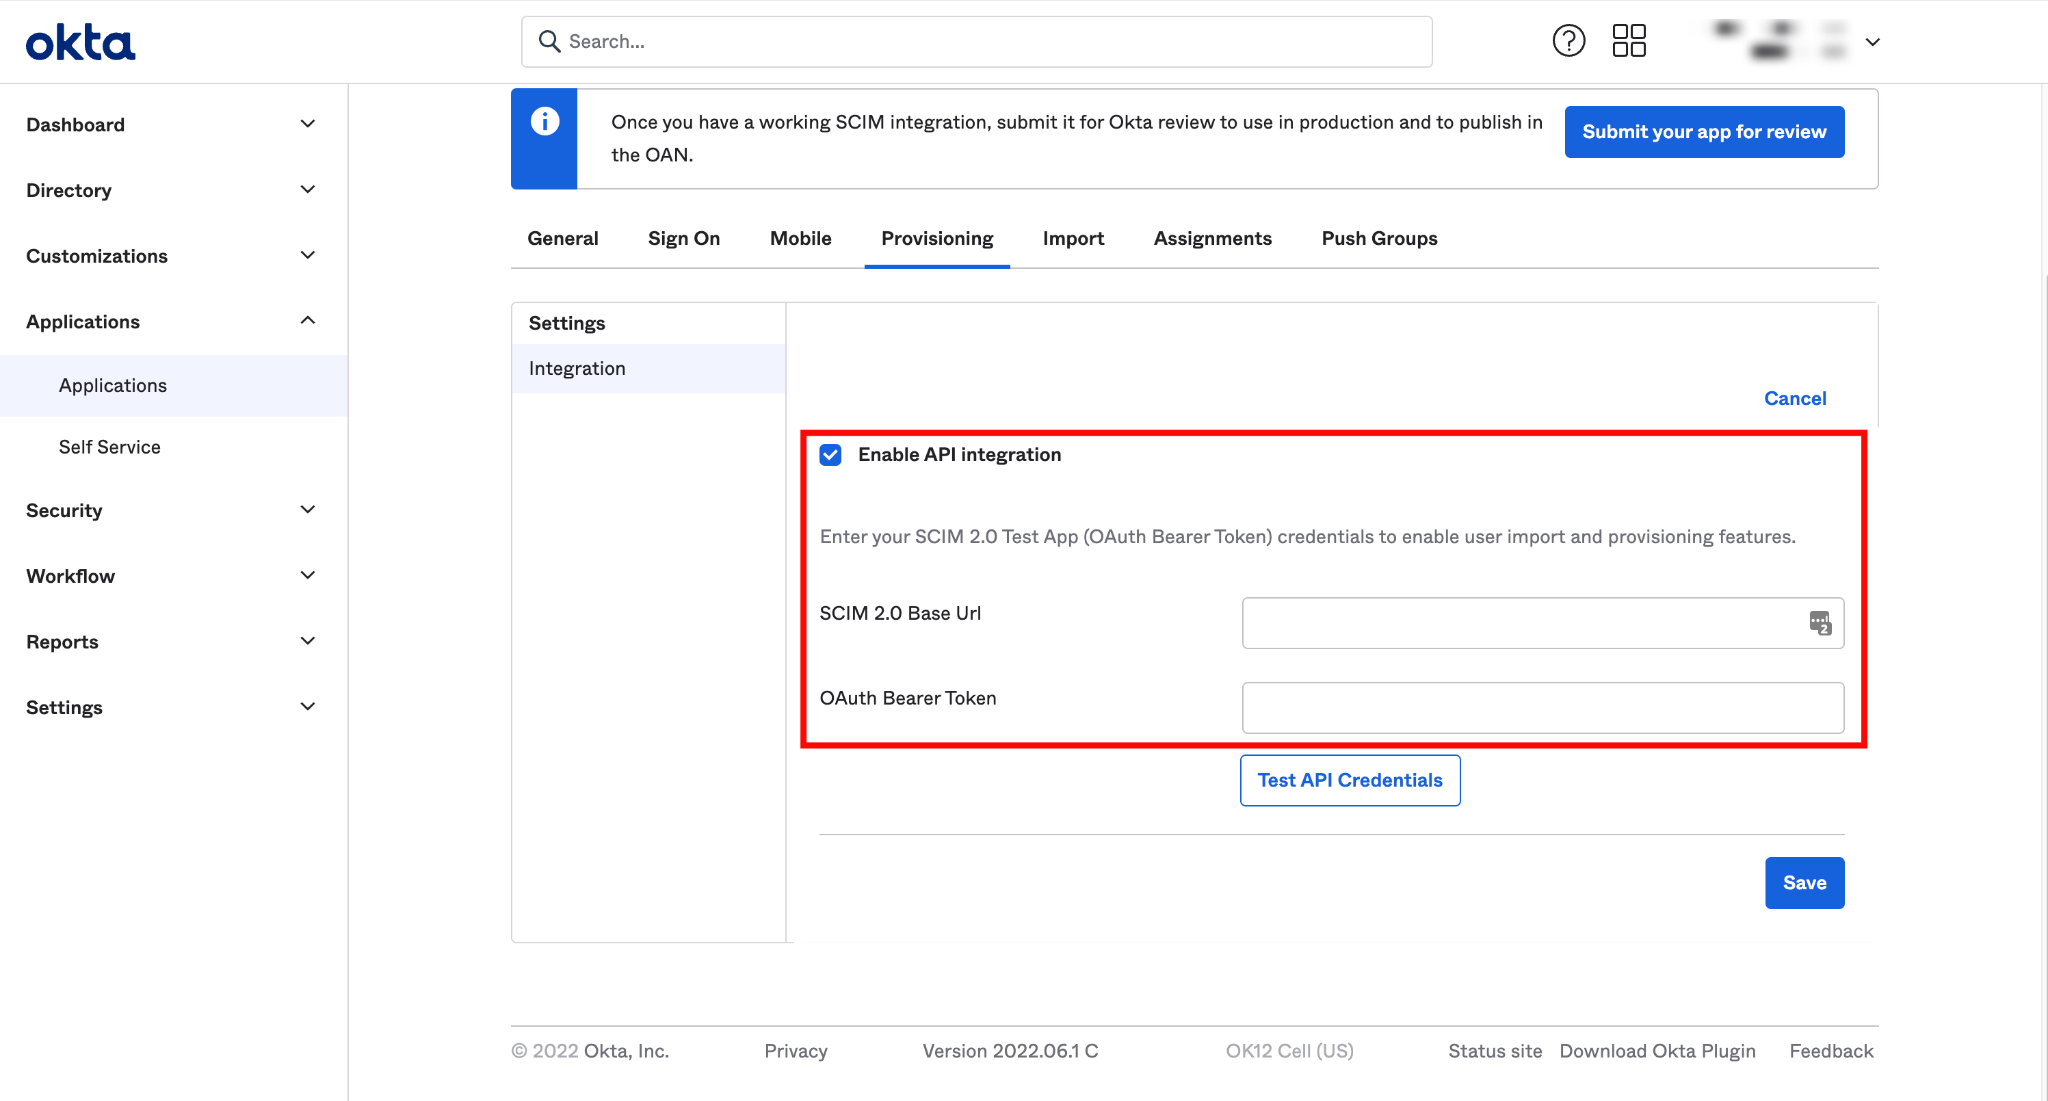
Step 3: Click Test API Credentials to verify the connection. Once the credentials are validated, click Save.
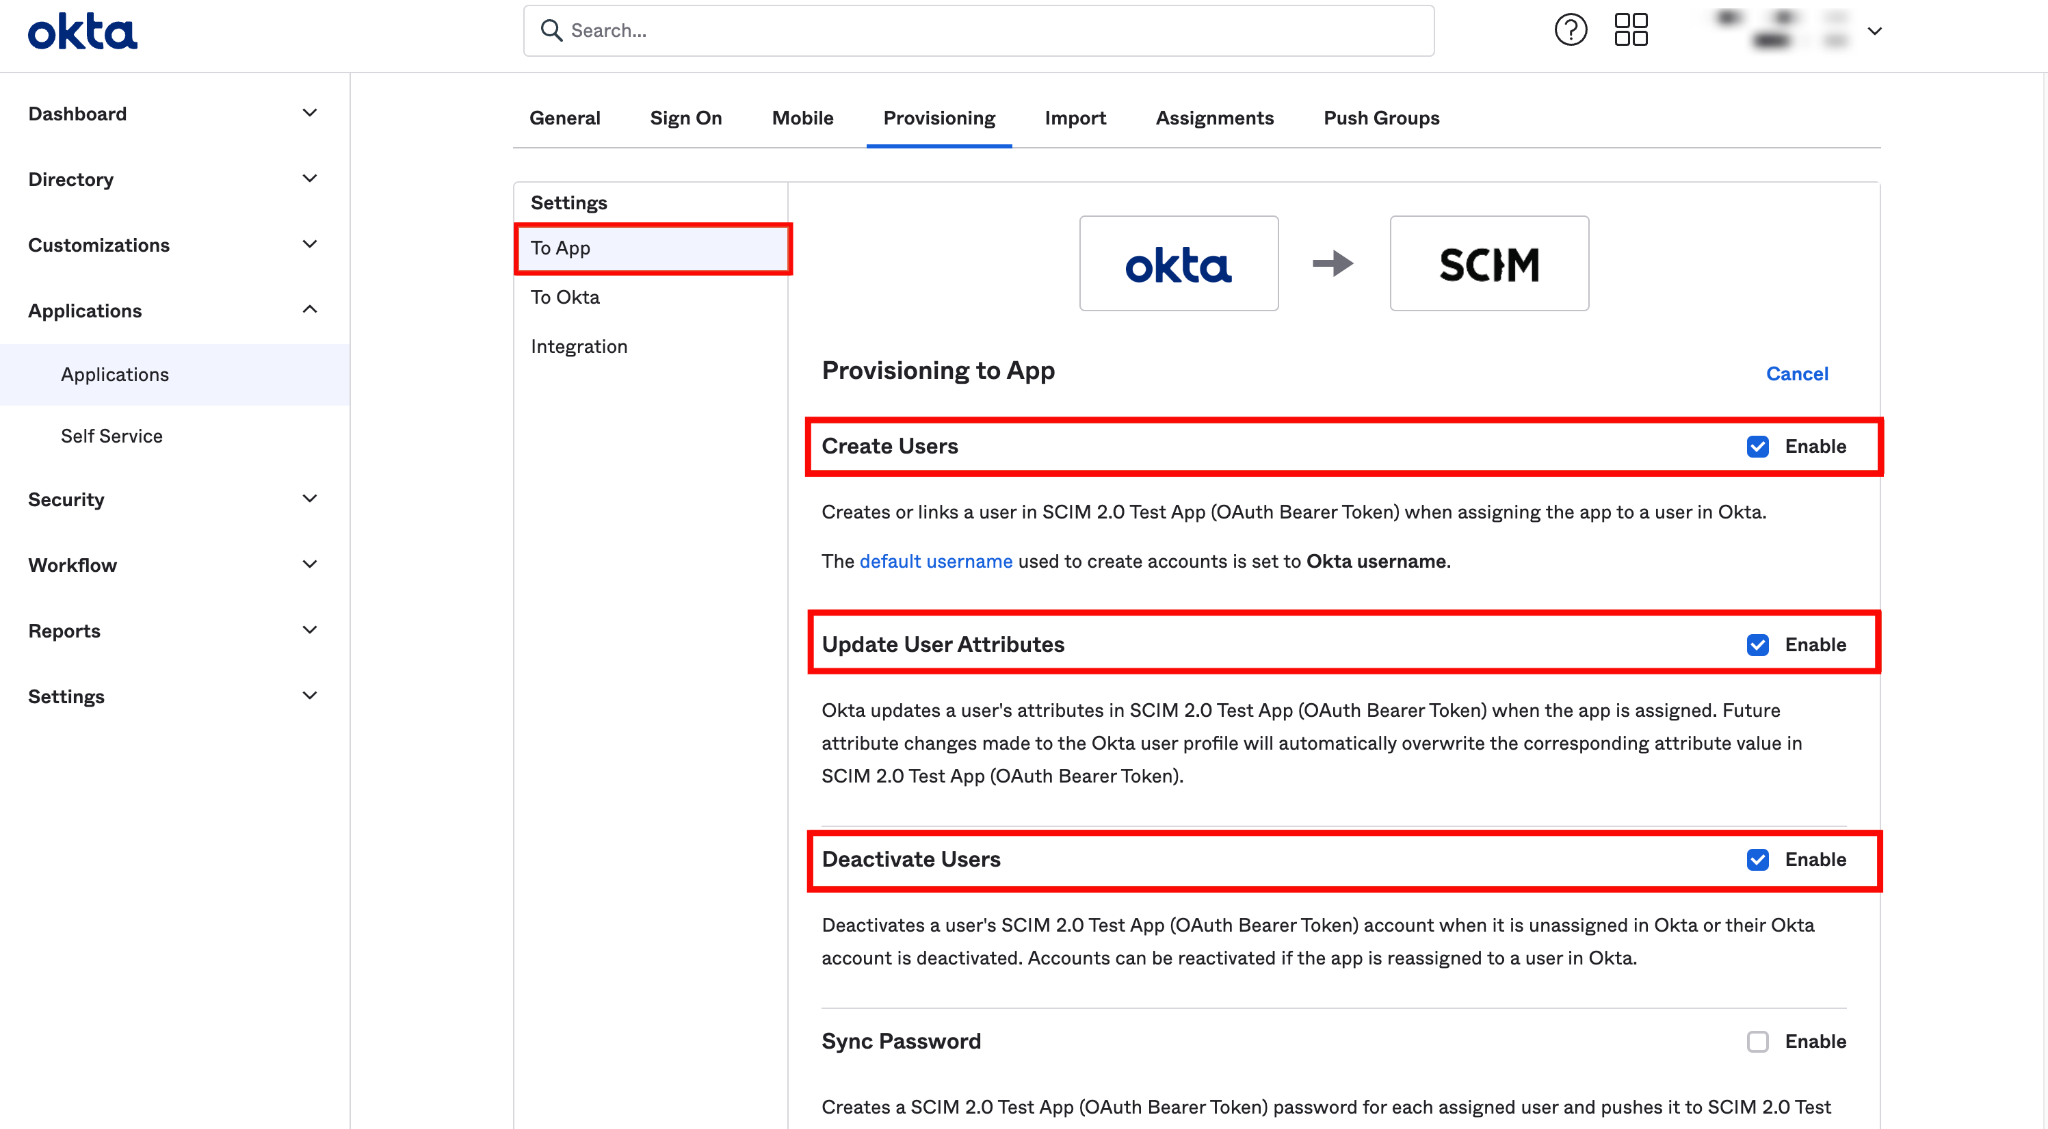
Step 4: A new settings page will appear. Under the To App section, enable the following settings:
- Create Users
- Update User Attributes
- Deactivate Users
After enabling these settings, your Okta SCIM API integration is successfully configured.
Assigning Users for Provisioning
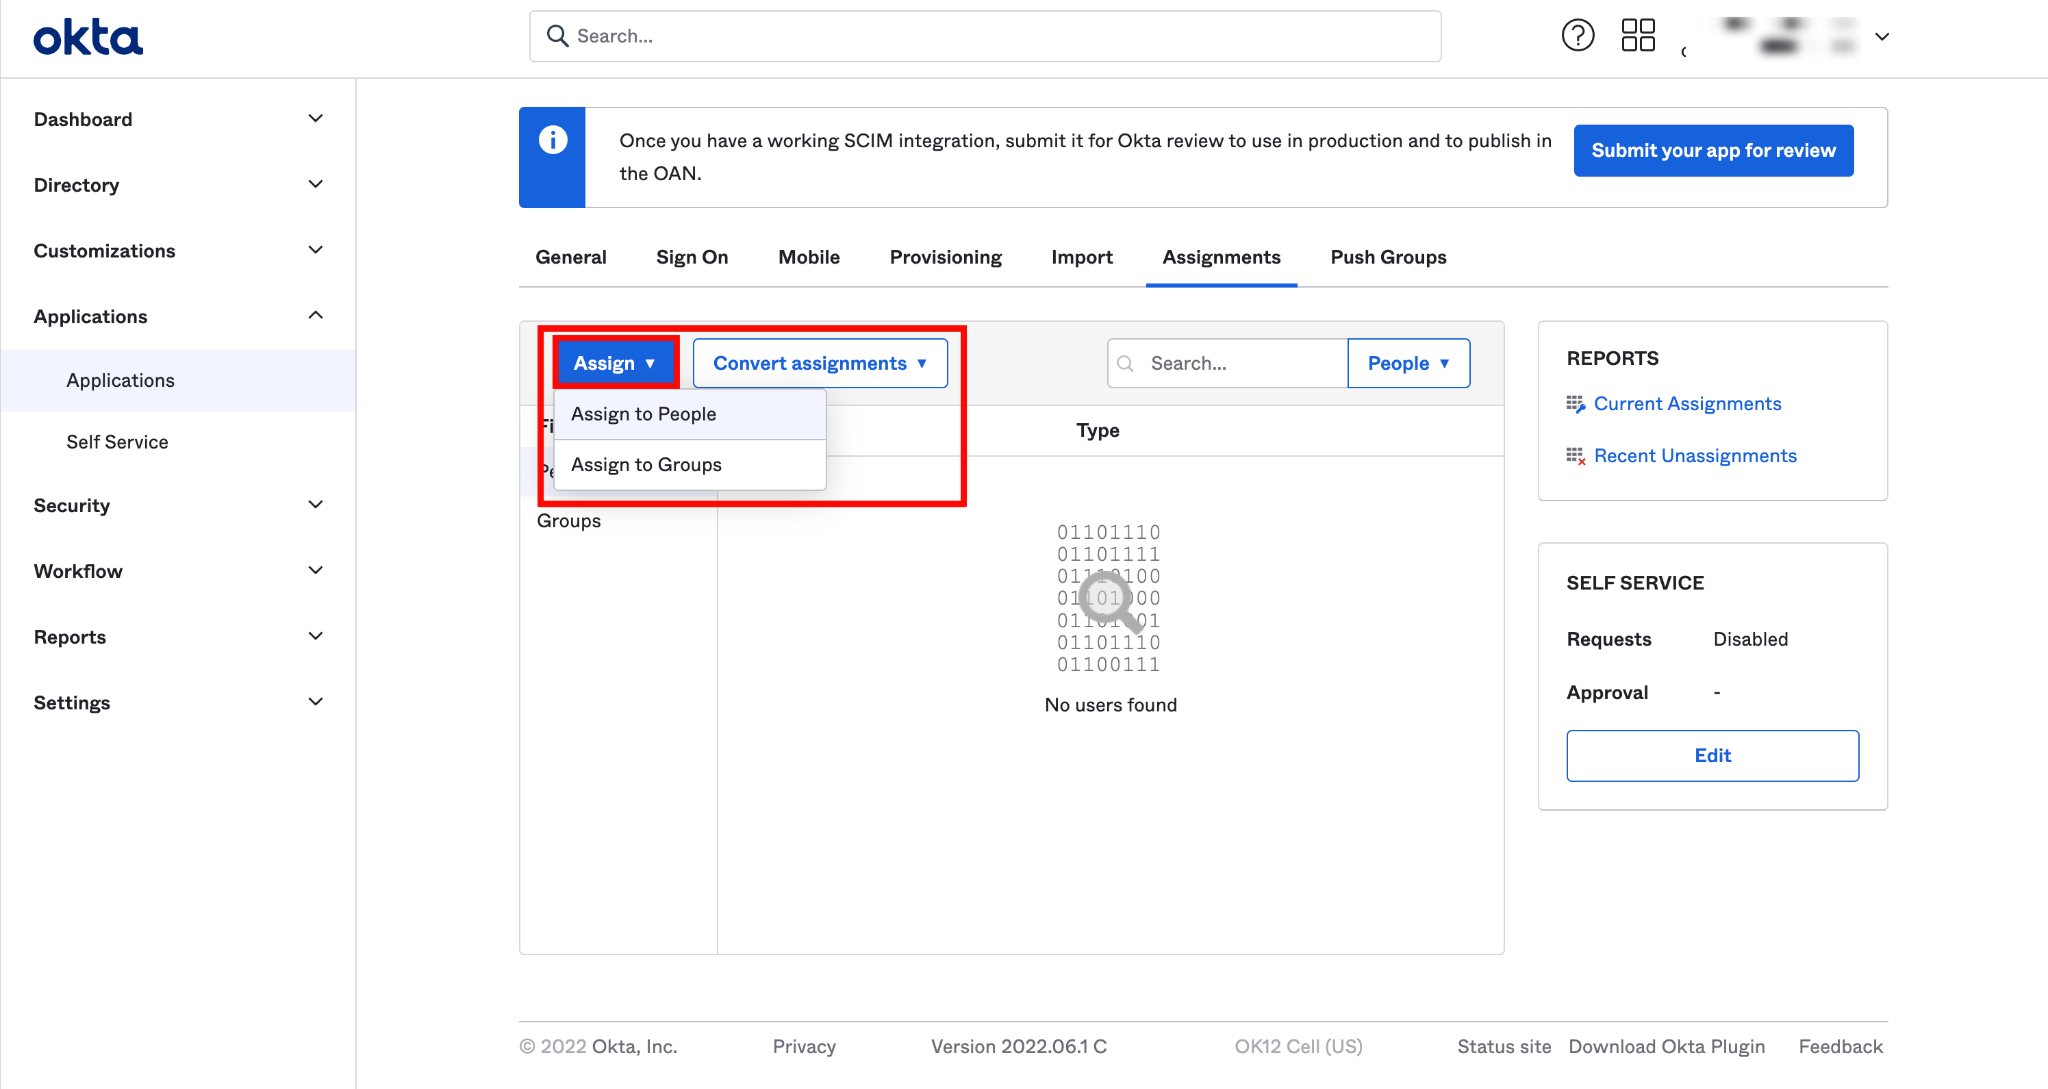
Step 1: Click the Assignments tab and select Assign to People from the dropdown Assign.
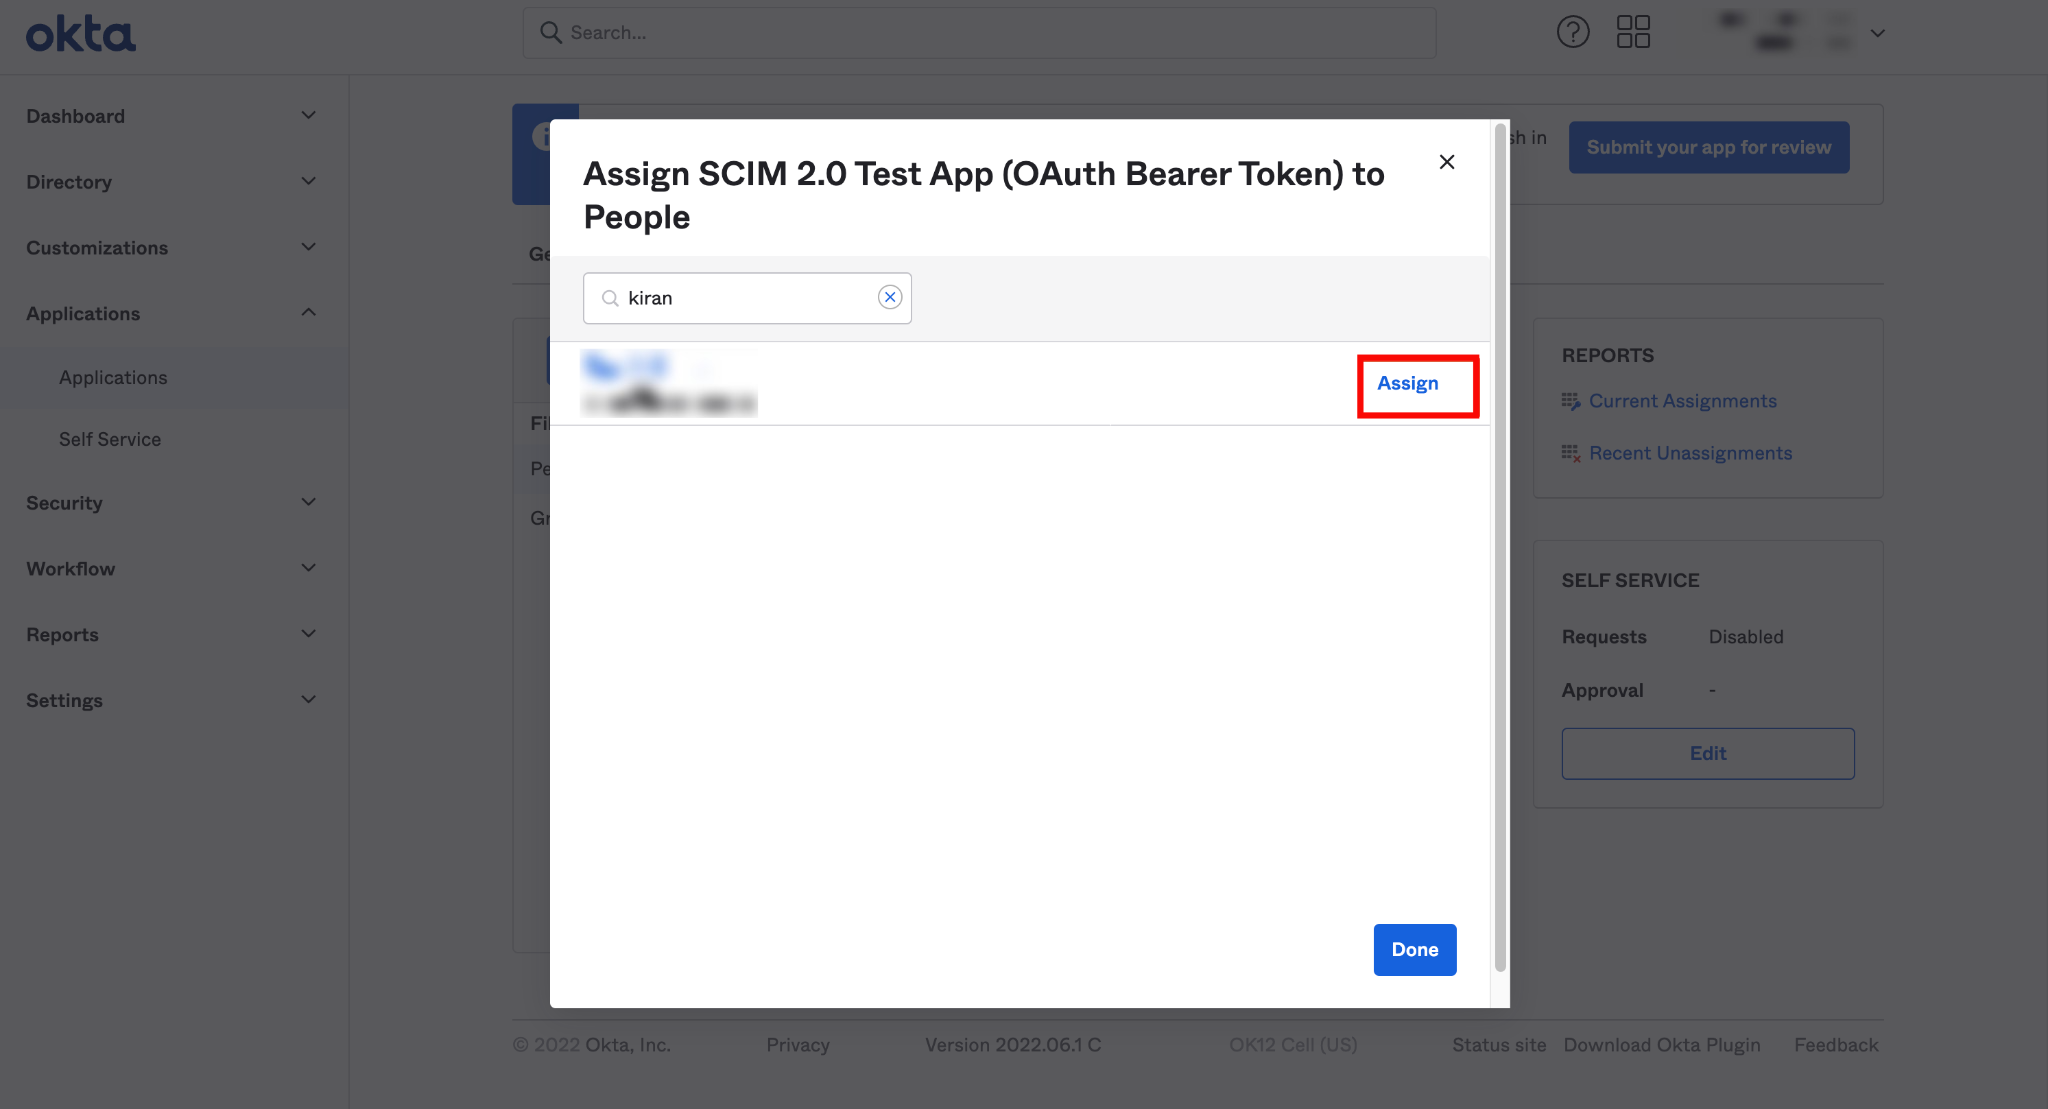
Step 2: Select the users you want to assign to the app and click the Assign button.
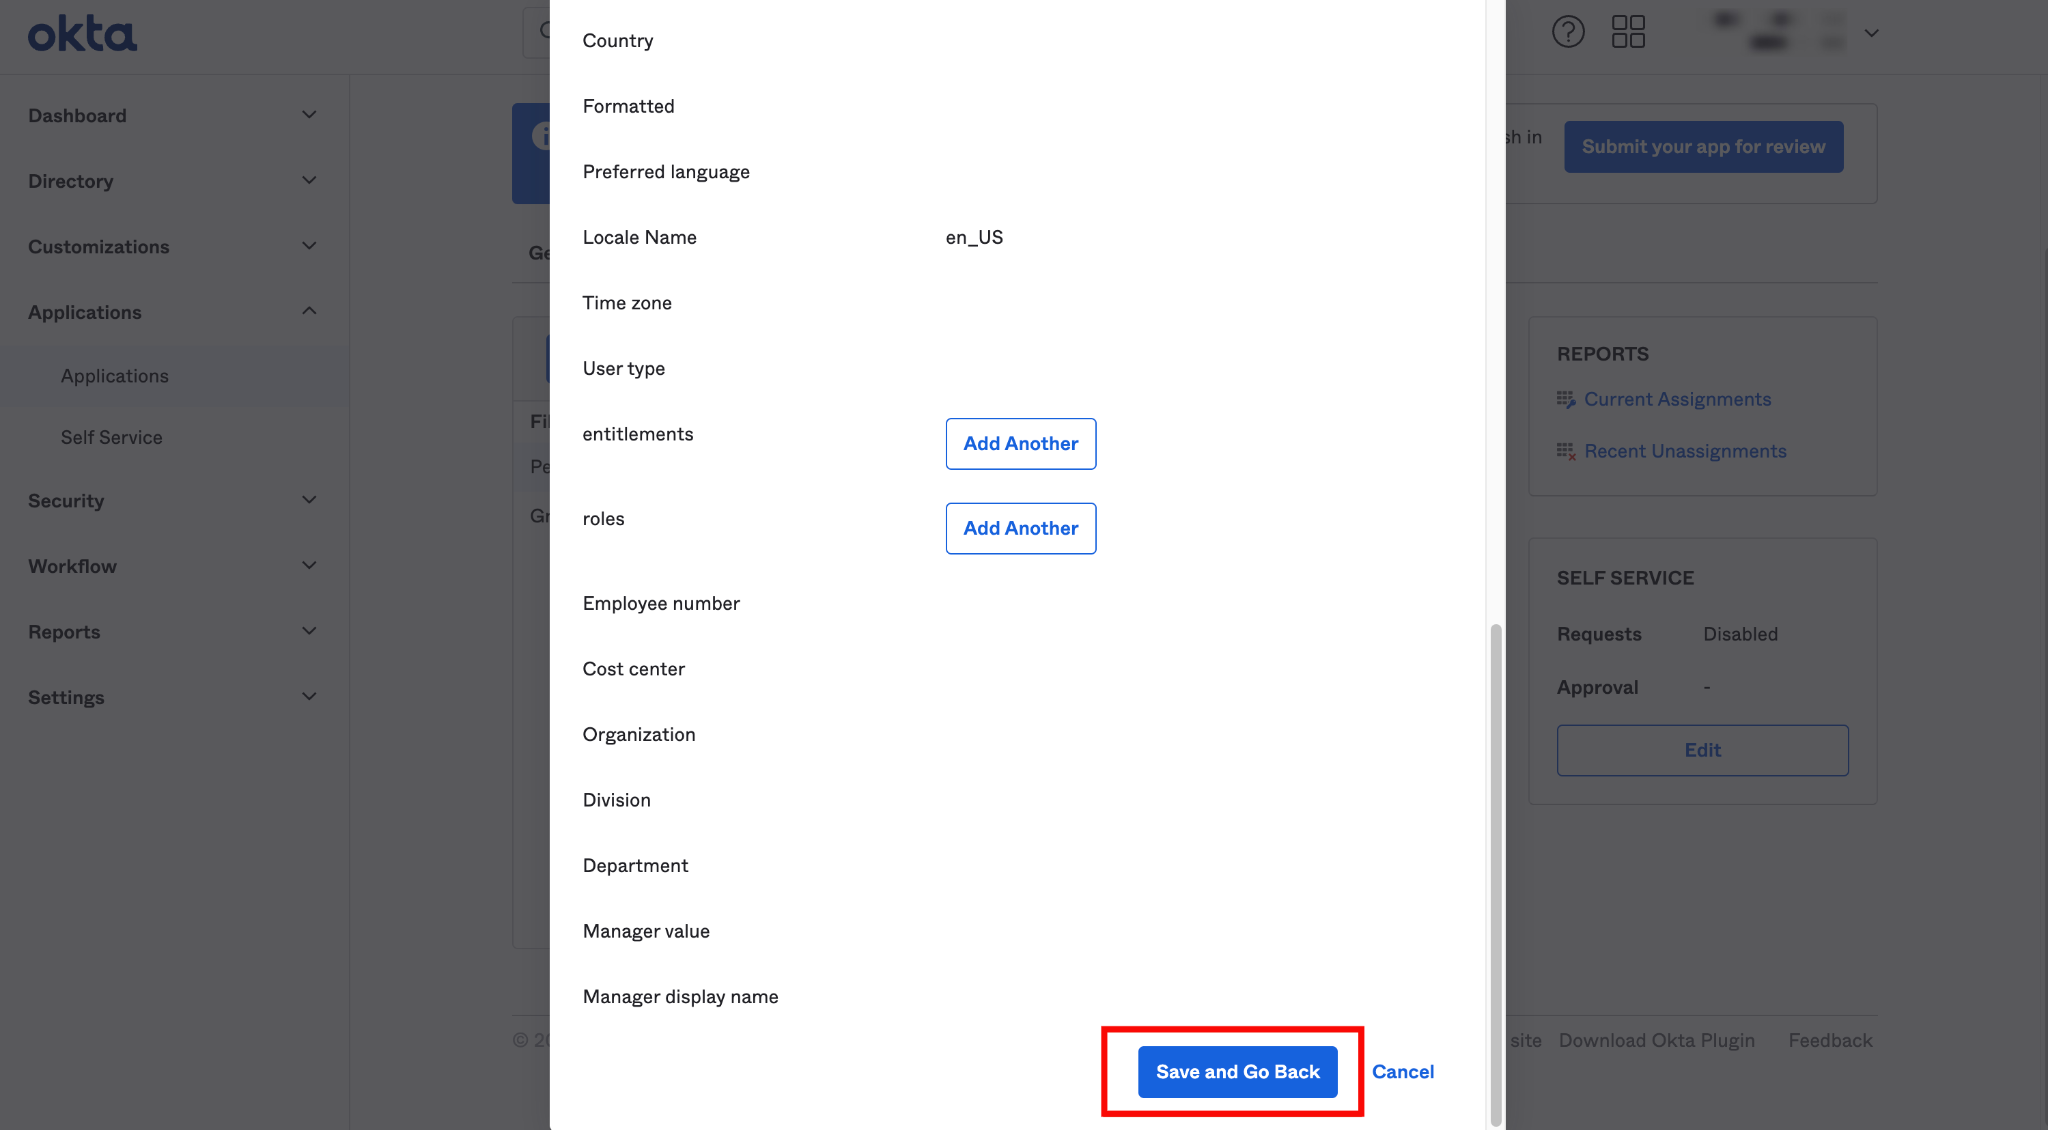
Step 3: After you click the Assign button, you'll see a new popup window with various fields. Confirm the field values and click the Save and Go Back buttons.
Assigning Groups for Provisioning
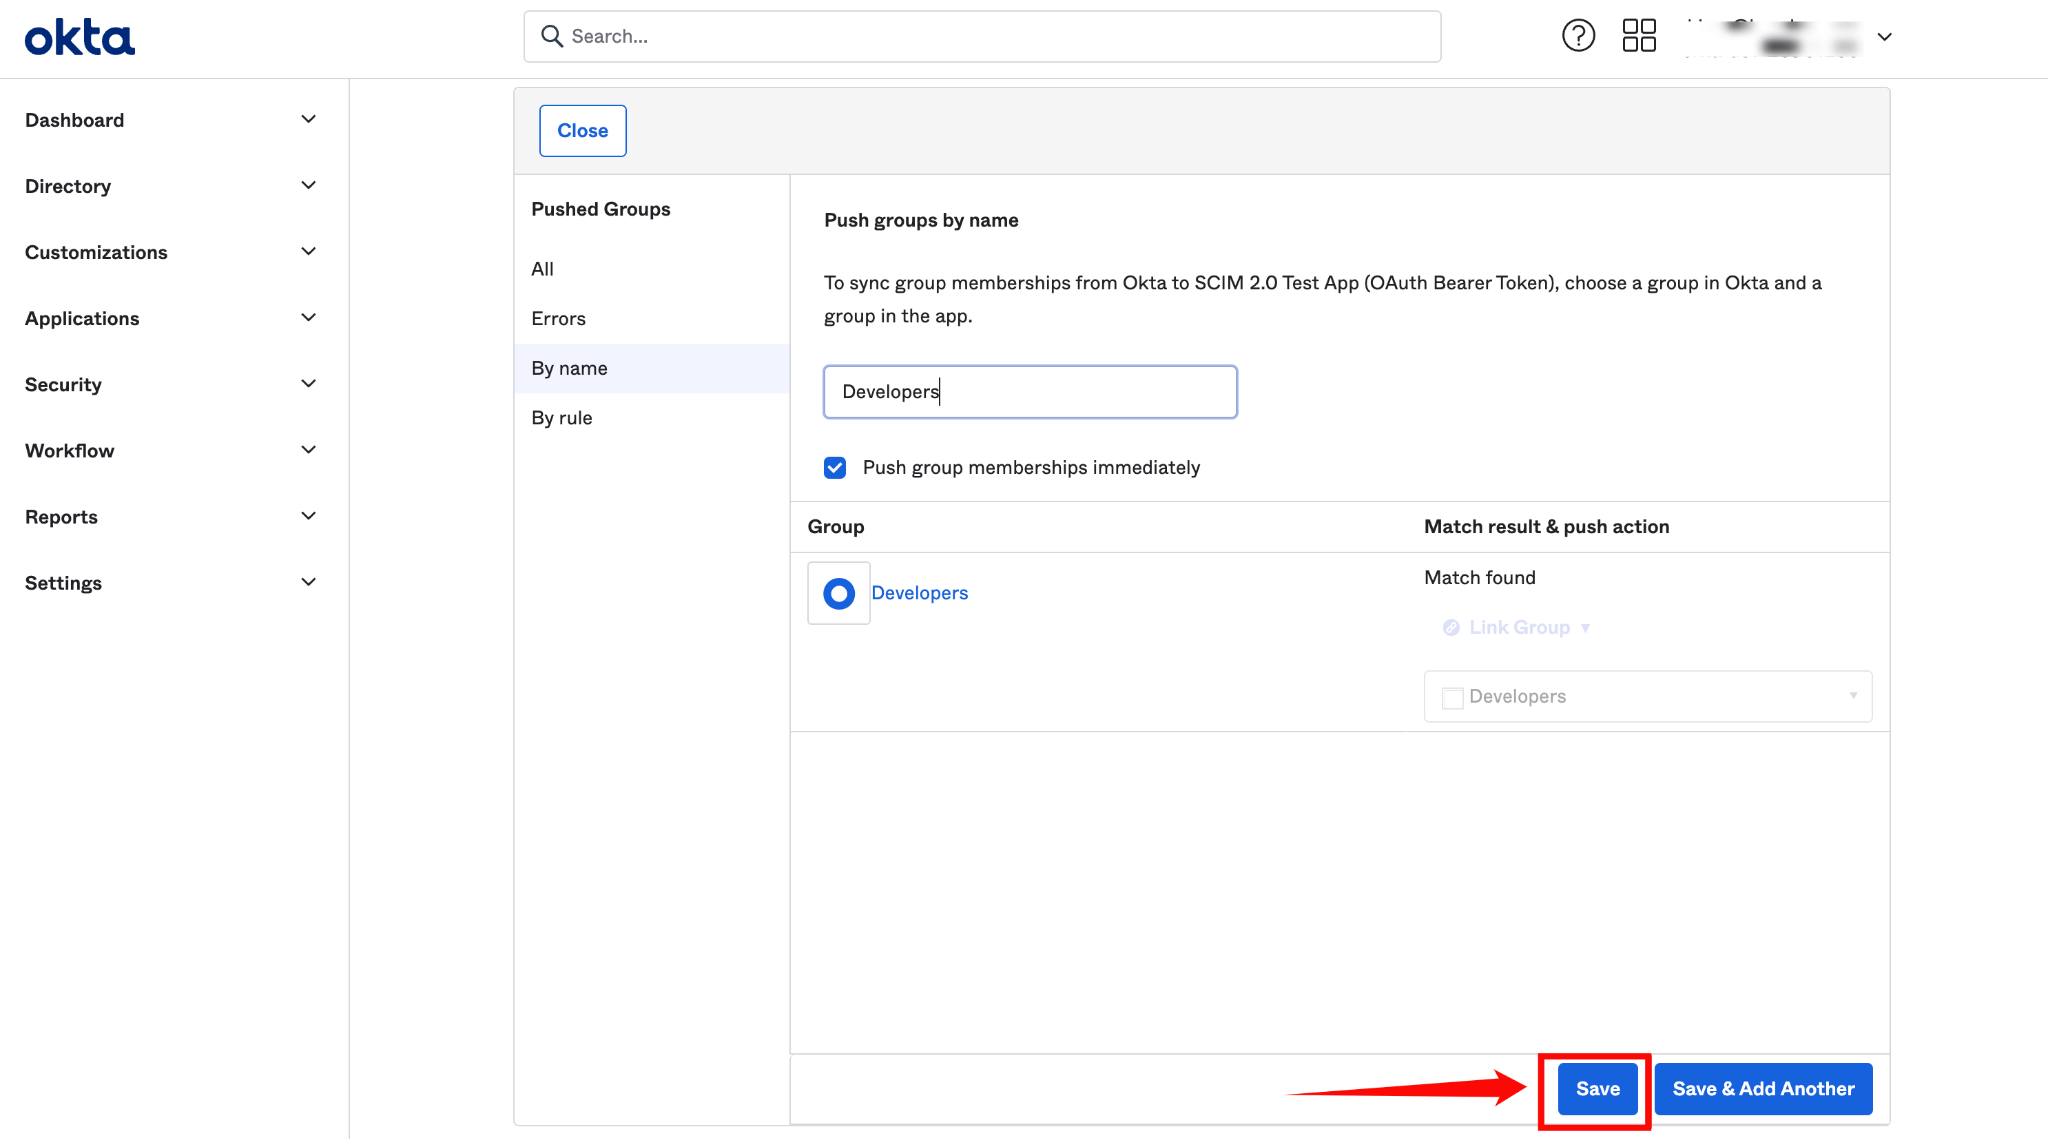
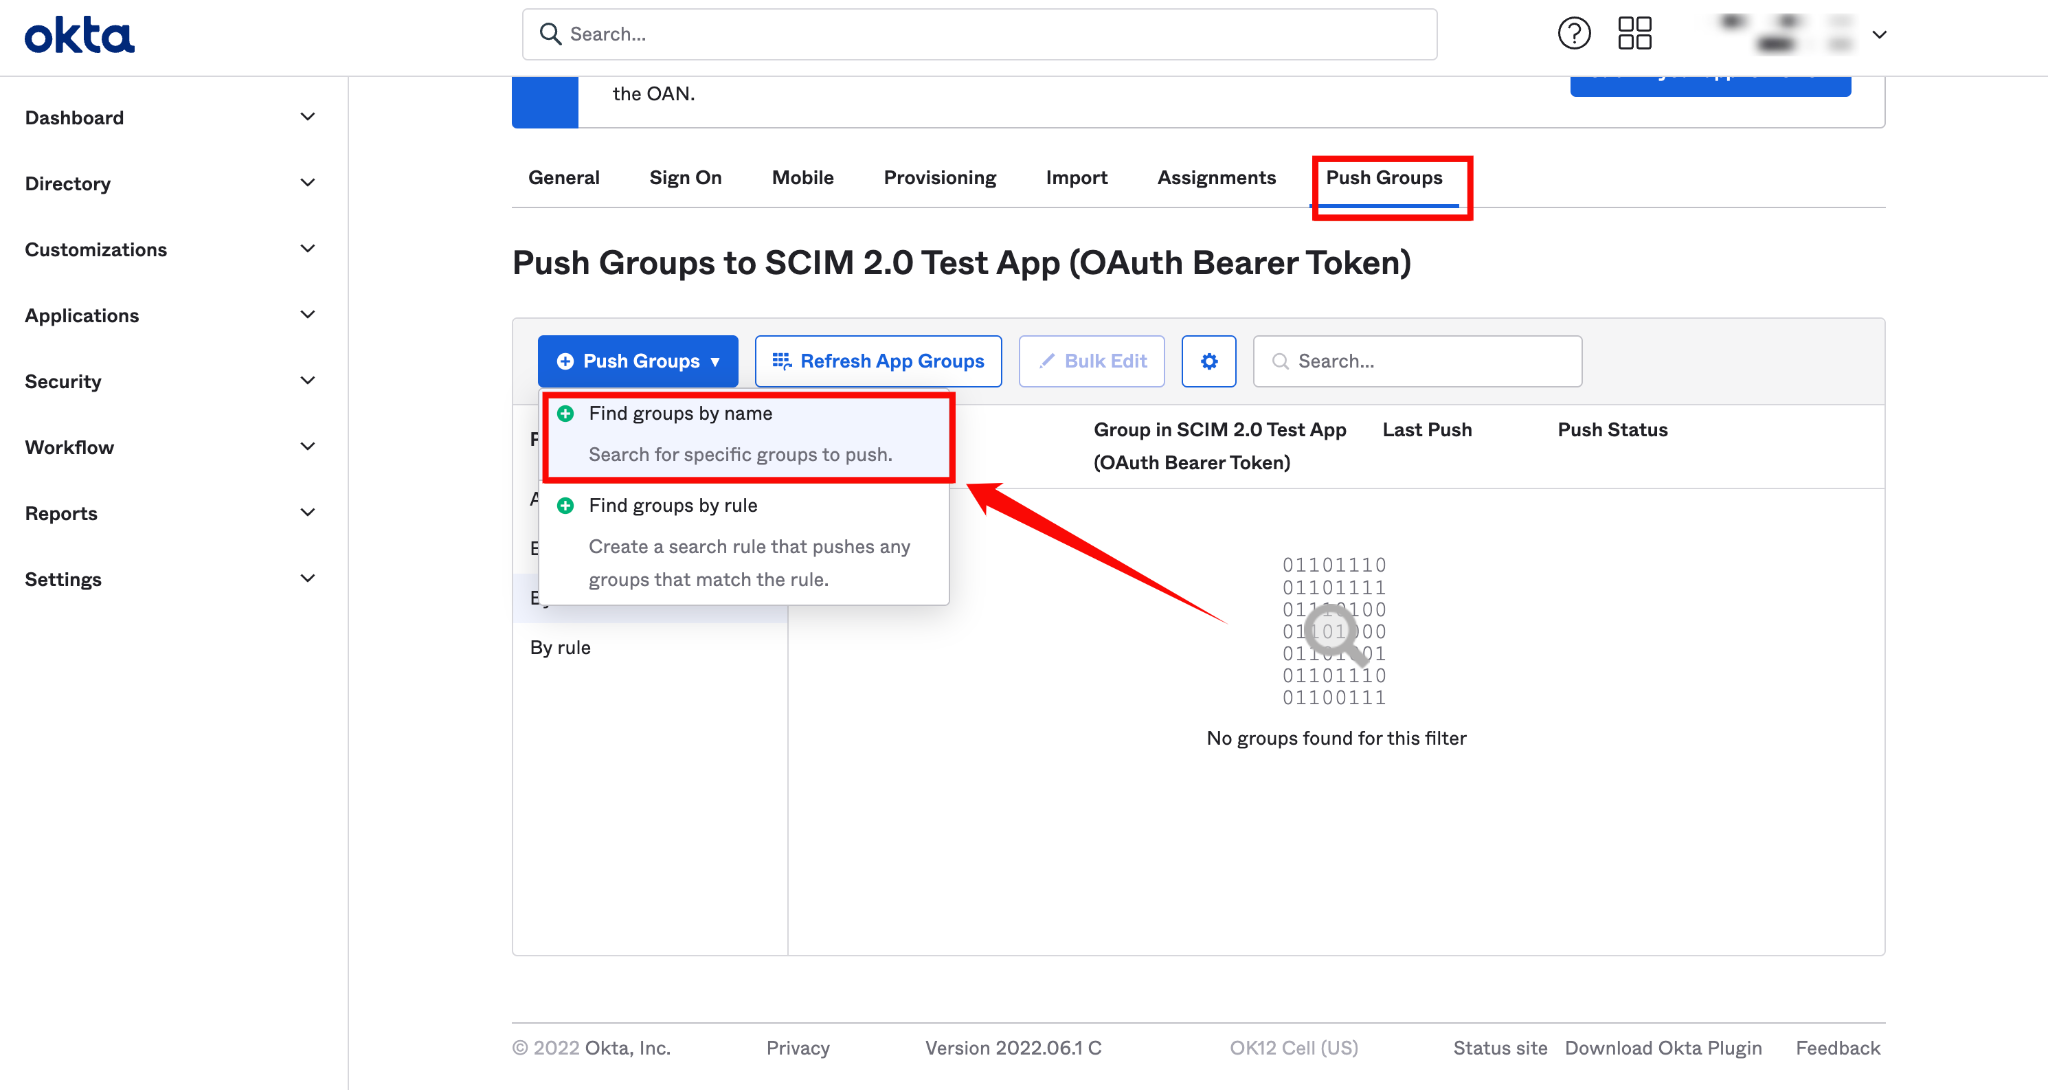
Step 1: Navigate to the tab Push Groups and select Find group by name from the dropdown Push Groups.
Step 2: Search for the group you want to assign to the app.
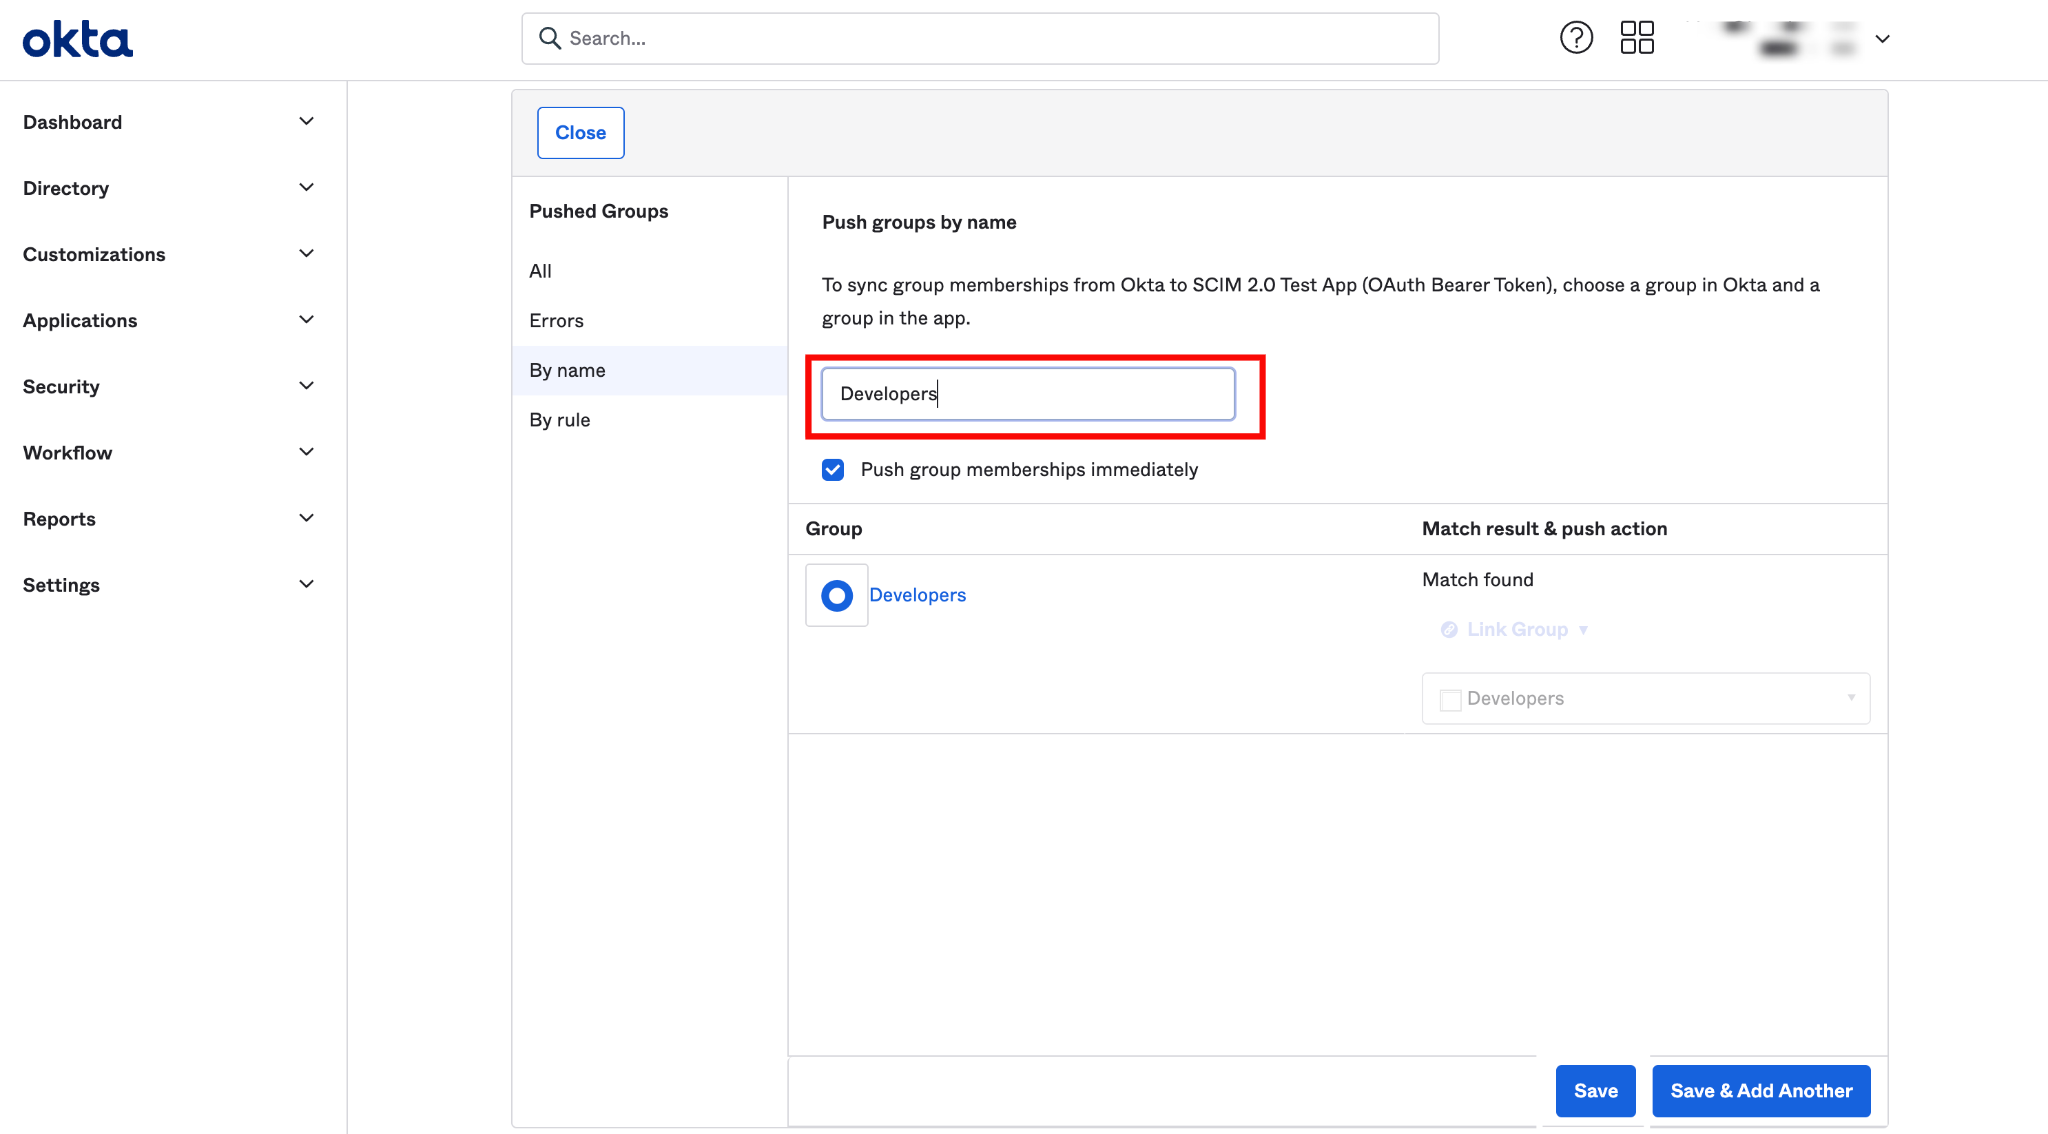
Step 3: After assigning the group name, then click on the Save button.