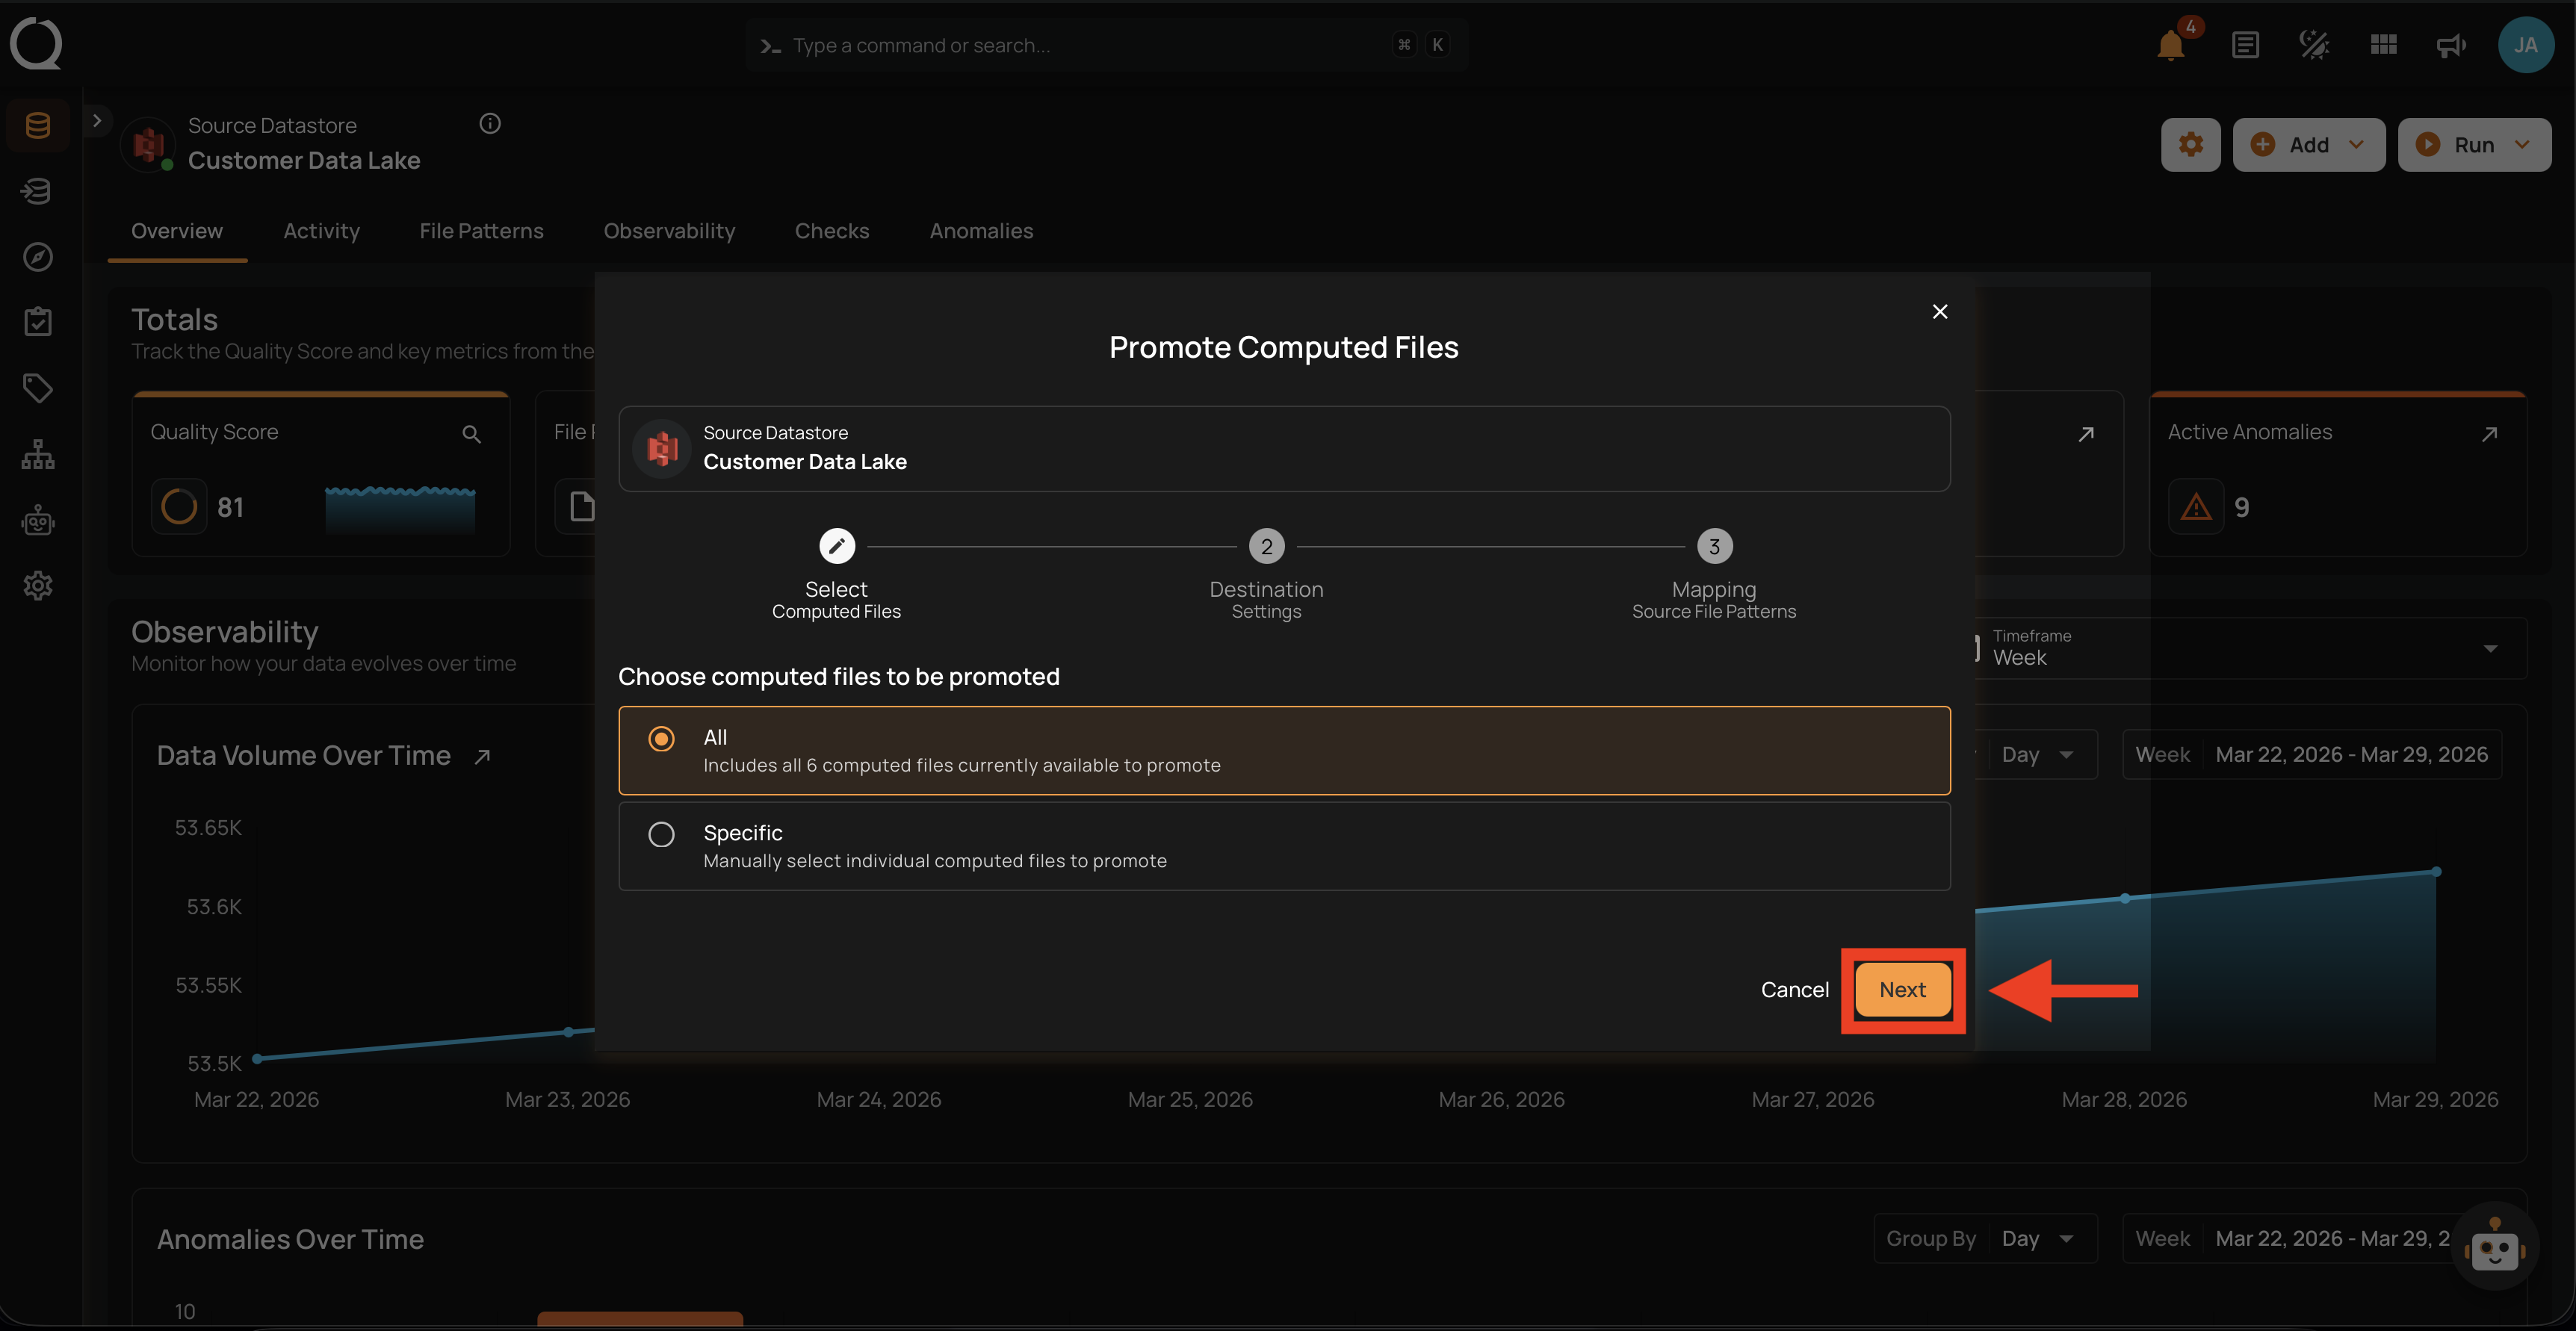
Promote Computed Files
Computed file promotion copies computed file definitions from a source DFS datastore to a destination DFS datastore in bulk. The promotion copies each definition to the destination, runs a profile on each created or updated file, and records the source-to-destination link so subsequent promotions update the same destination instead of creating duplicates. Unlike other promote types, computed files require an explicit mapping step that associates each source computed file with a destination file pattern. This page documents the bulk workflow triggered from the source datastore's Settings > Promote > Computed Files menu.
Prerequisites
- The user has Editor team permission on both the source and the destination datastore.
- The source datastore has at least one computed file.
- The destination is a DFS datastore (JDBC datastores are not eligible).
- The destination datastore has at least one profiled file pattern container — every destination chosen during the mapping step must already have a completed profile, otherwise the request is rejected with a
422error before any work is enqueued.
Where to Trigger
The flow described on this page starts from the source datastore and operates in bulk. A single computed file can also be promoted from its container context menu — that flow skips the selection step and goes directly to the destination settings.
What Happens During Promotion
- Matching — For each source computed file, the platform first looks for a previous successful promotion to the same destination datastore (see Entity Matching). If no previous promotion is found, it falls back to name matching on the destination, including soft-deleted containers.
- Mapping enforcement — Every selected source computed file must be explicitly mapped to a destination file pattern. The platform also verifies each destination is a profiled file pattern; otherwise the request fails up front.
- Definition replication — The computed file definition is copied from the source to the destination.
- Comparison — If a match is found, the platform compares the source and destination definitions and either skips (identical), updates (different), or creates (no match).
- Soft-delete reactivation — If a soft-deleted destination container with the same name is found, it is reactivated and updated rather than recreated.
- Type-mismatch failure — If a regular (non-computed) file pattern already exists on the destination with the same name, the promotion fails for that entity with a type-mismatch message.
- Tag inheritance — New computed files receive the destination datastore's global tags (excluding any with
type=external) plus any additional tags specified on the request. Source tags are not carried over. - Result recording — A promote result is recorded linking the source container to the destination container, so future re-promotions can find this destination directly.
- Profile operation — A full profile runs on each created or updated computed file at the destination.
After Promotion
- The operation runs asynchronously. Monitor its progress from the Activity page.
- Review per-file results to verify each file's outcome — created, updated, skipped, or failed.
- Profile operations run automatically on created or updated files — no manual action is needed.
Fields
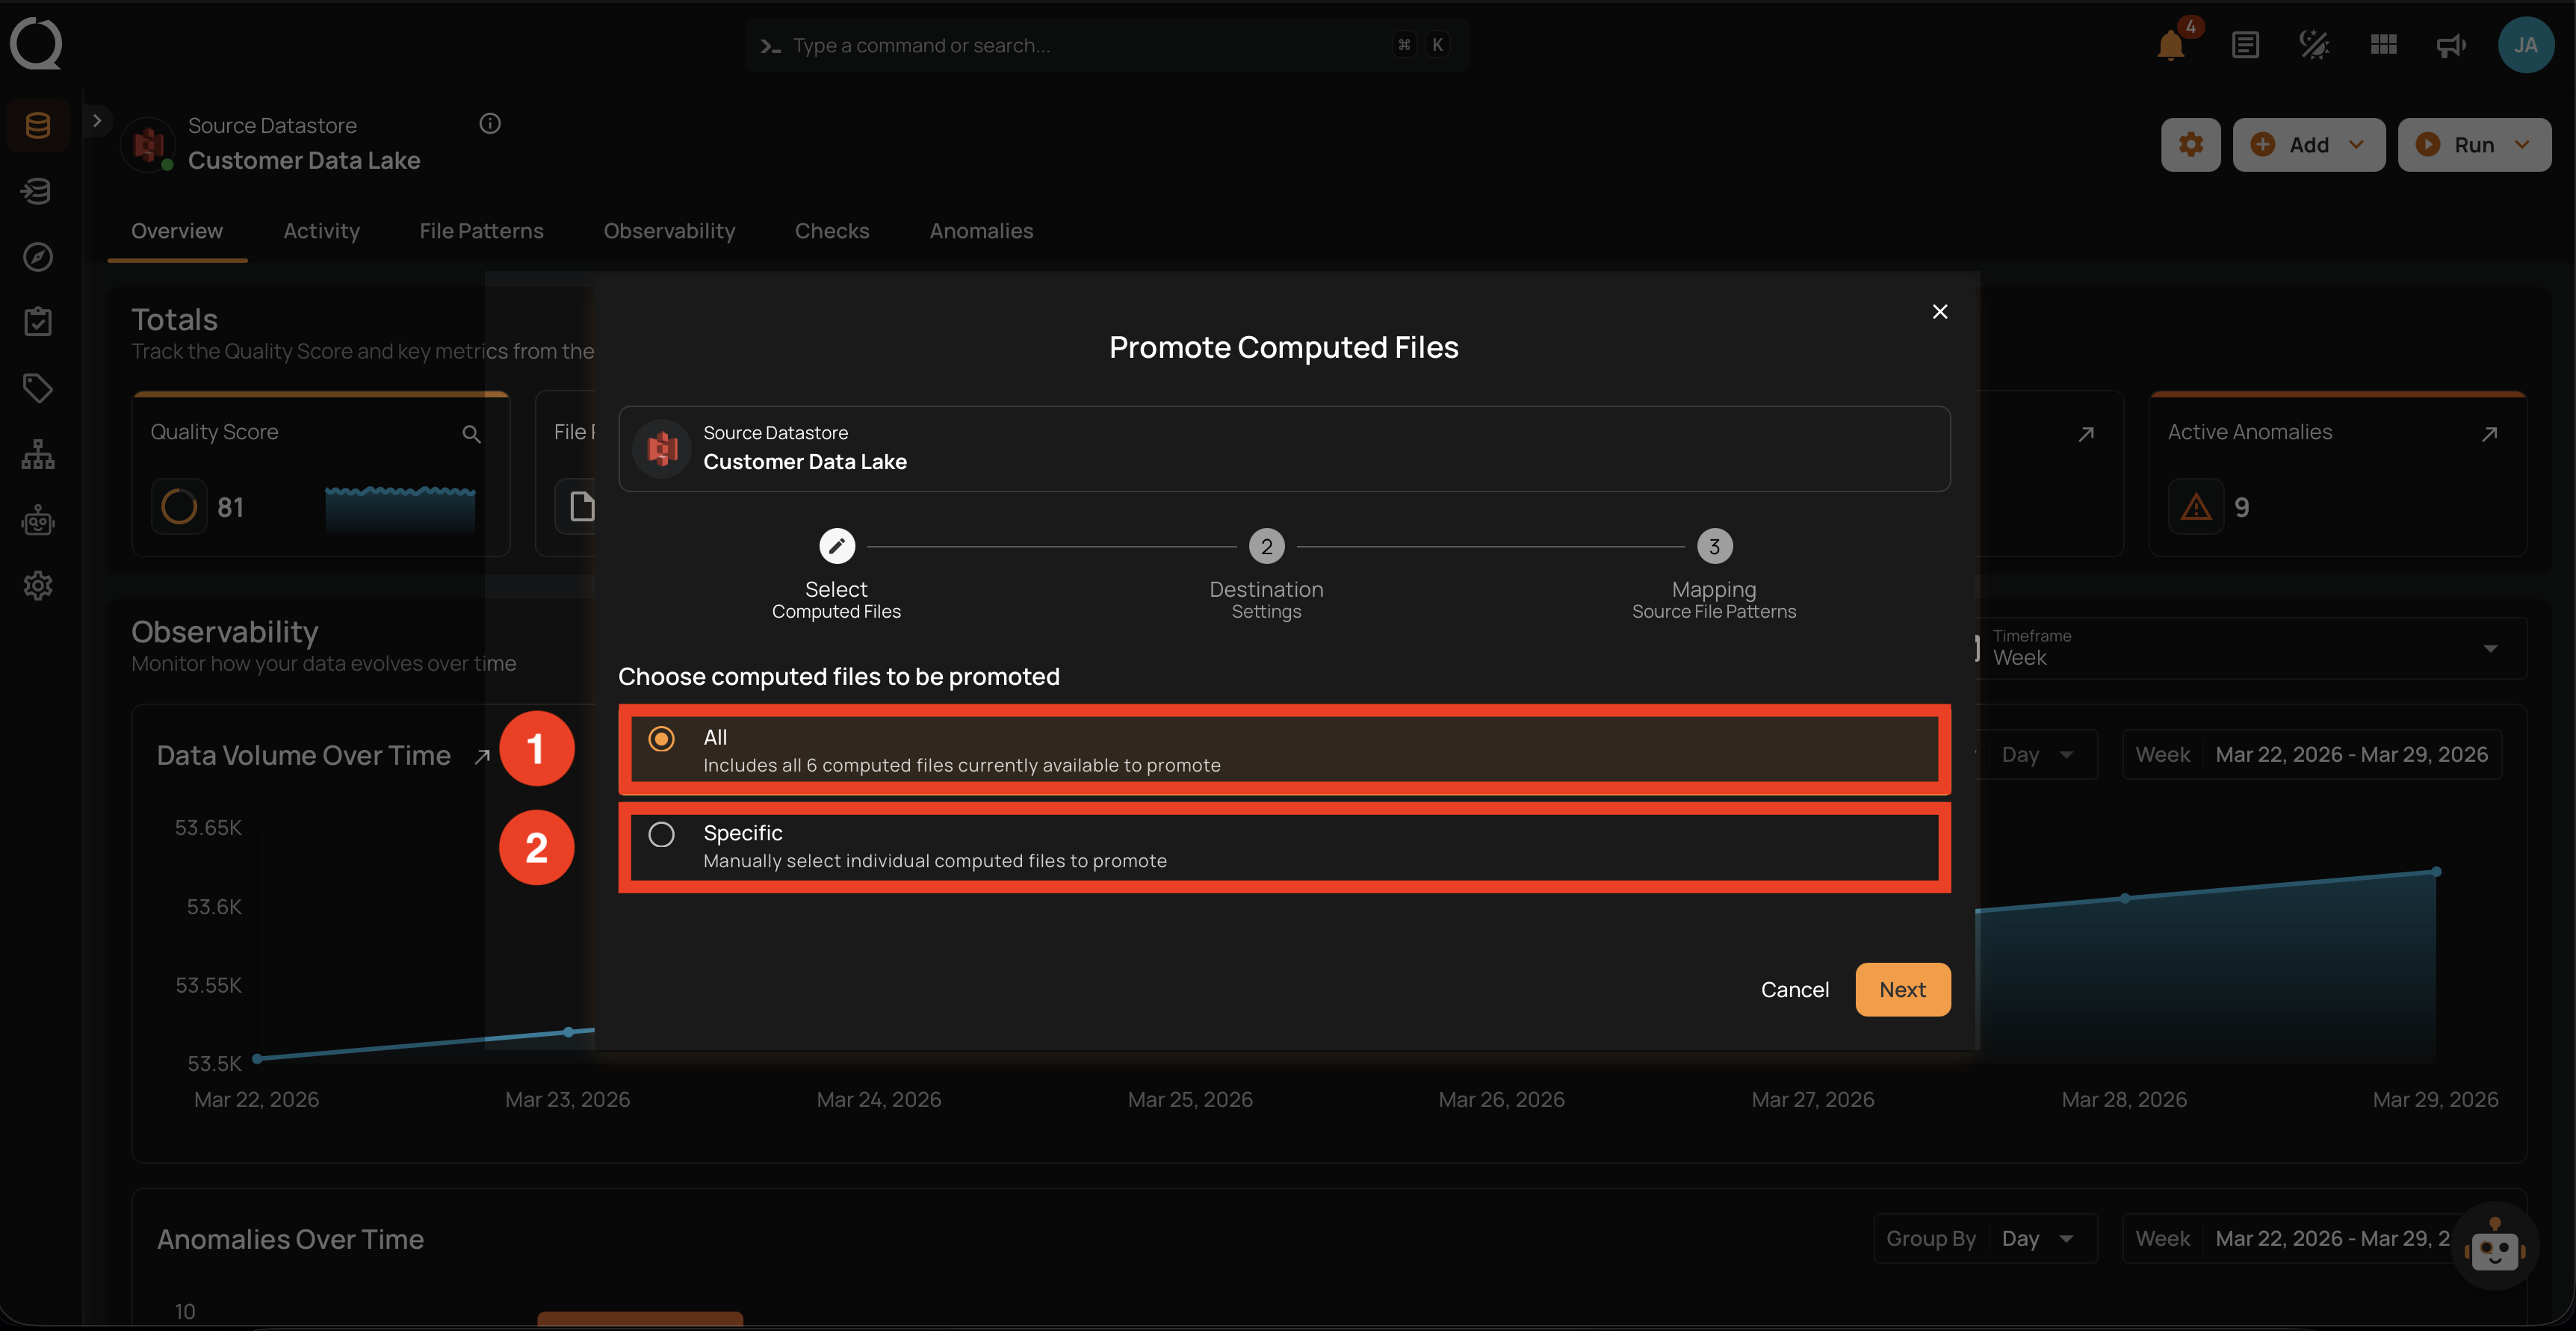
Select Computed Files
The first step of the modal — choose how to pick which computed files to promote. Unlike other promote types, computed files do not support tag-based selection.
| REF. | FIELD | DESCRIPTION |
|---|---|---|
| 1 | All | Includes every computed file currently available on the source datastore. |
| 2 | Specific | Manually pick individual computed files from a paginated, searchable list. |
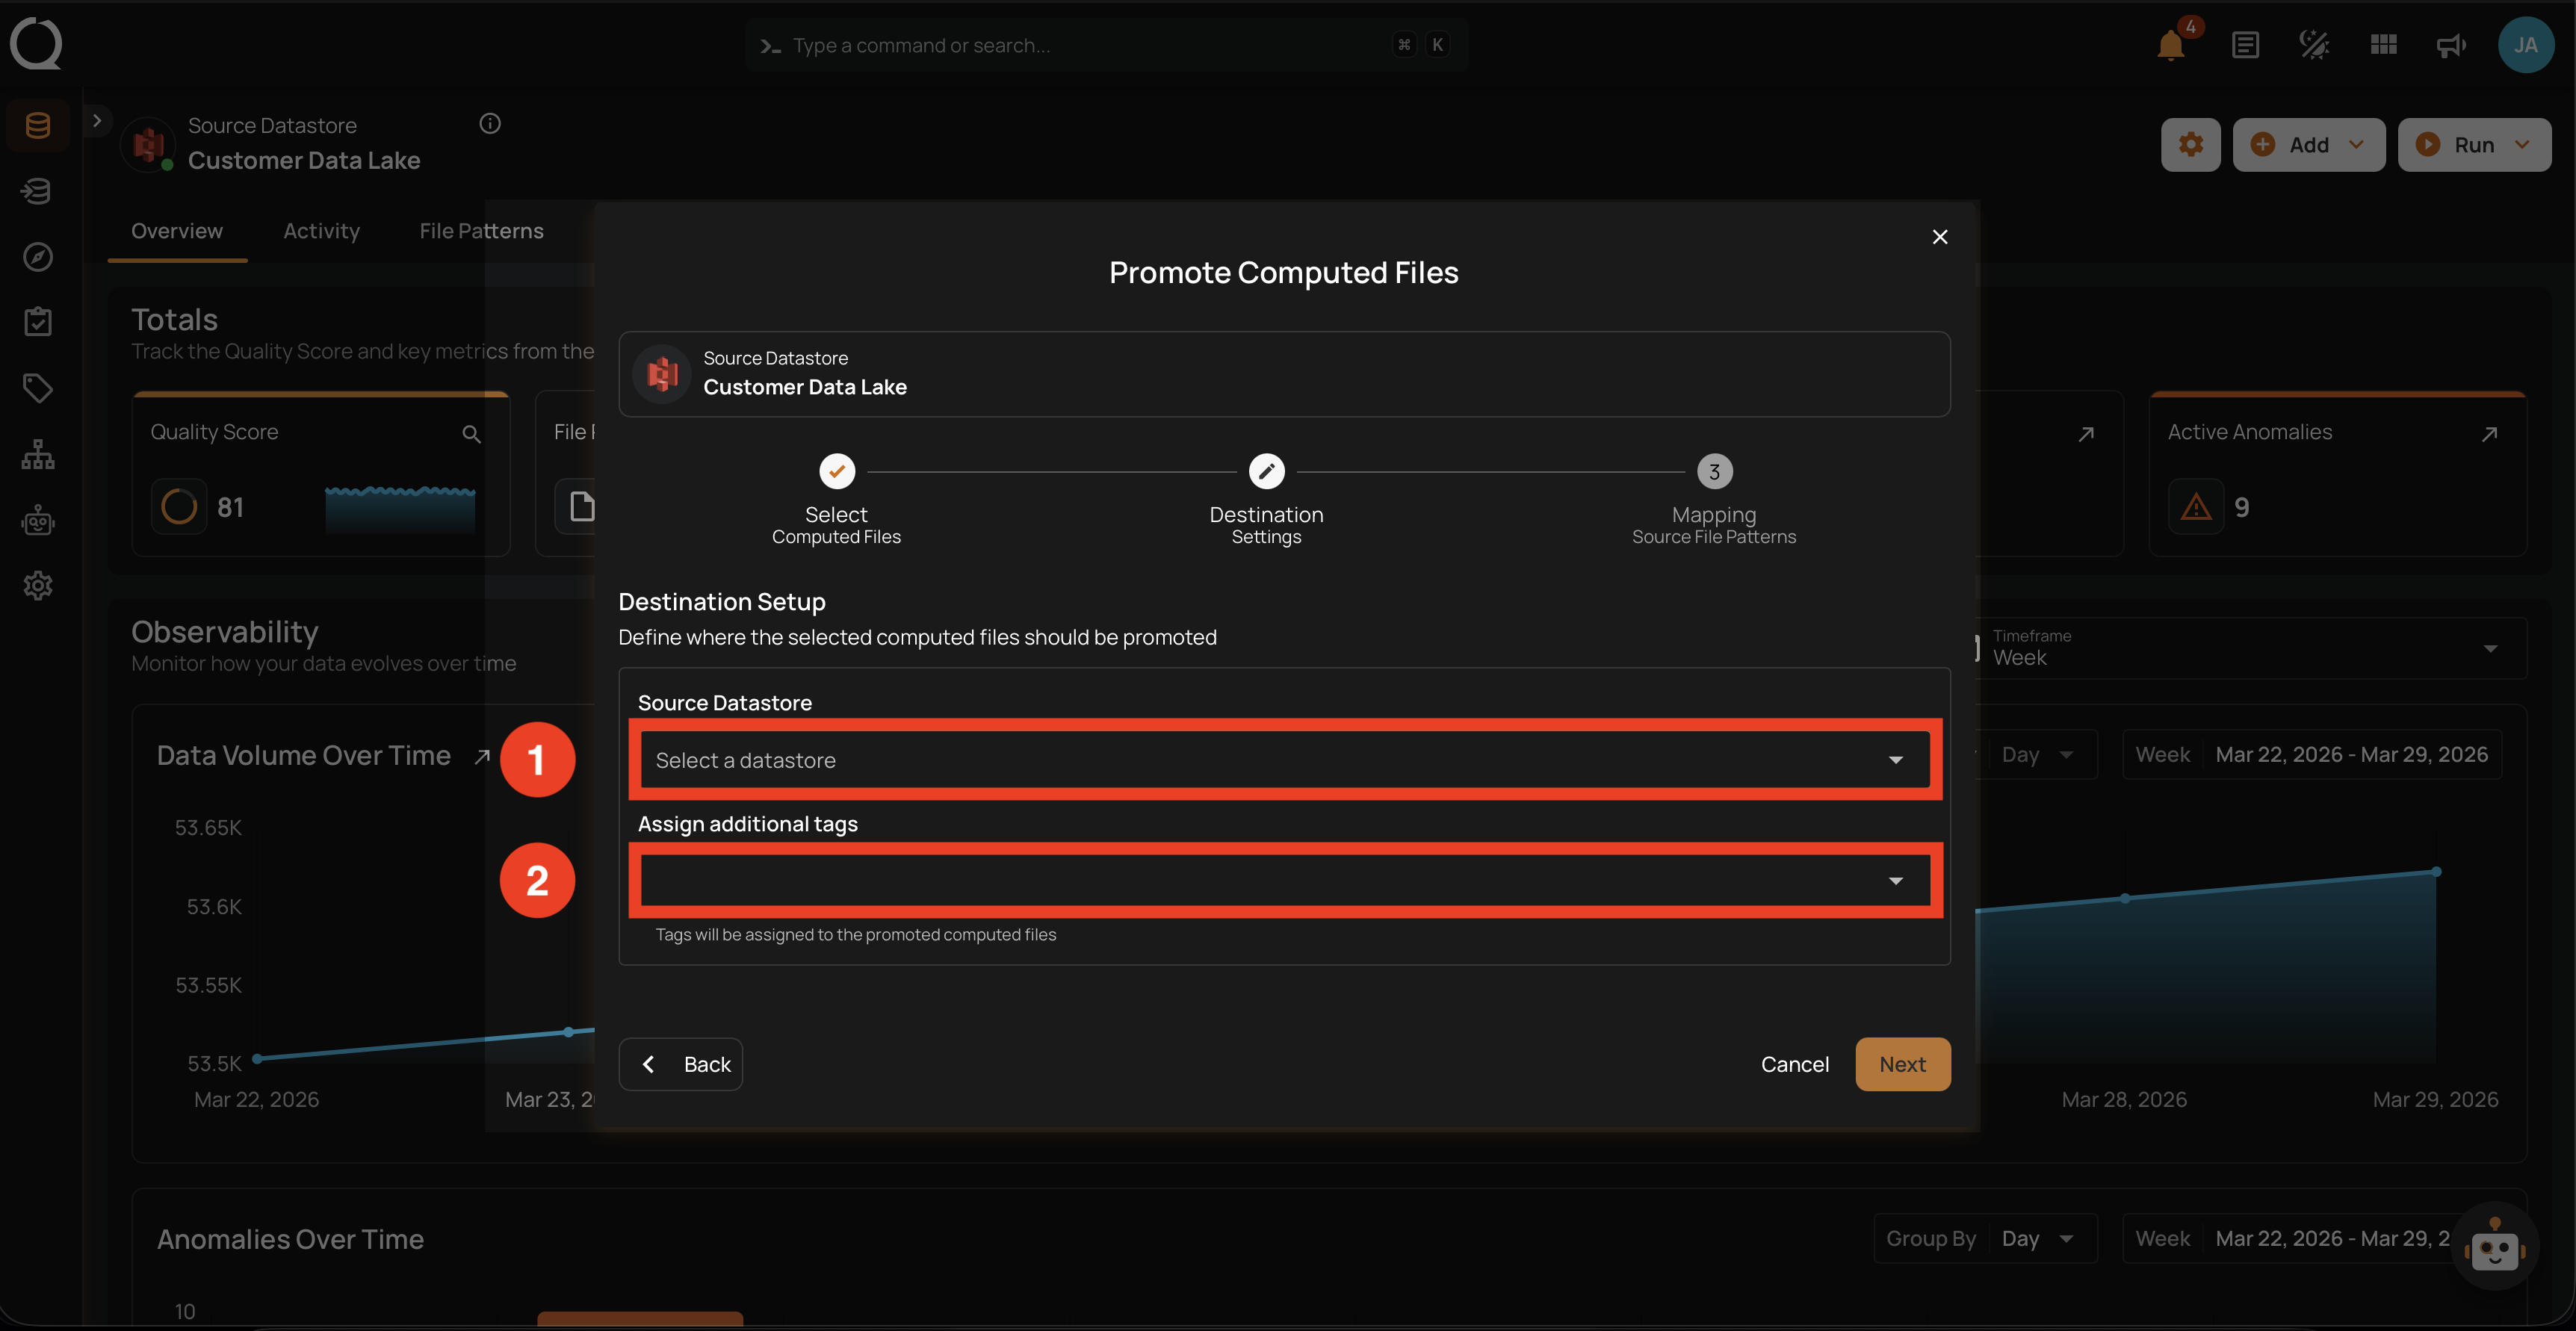
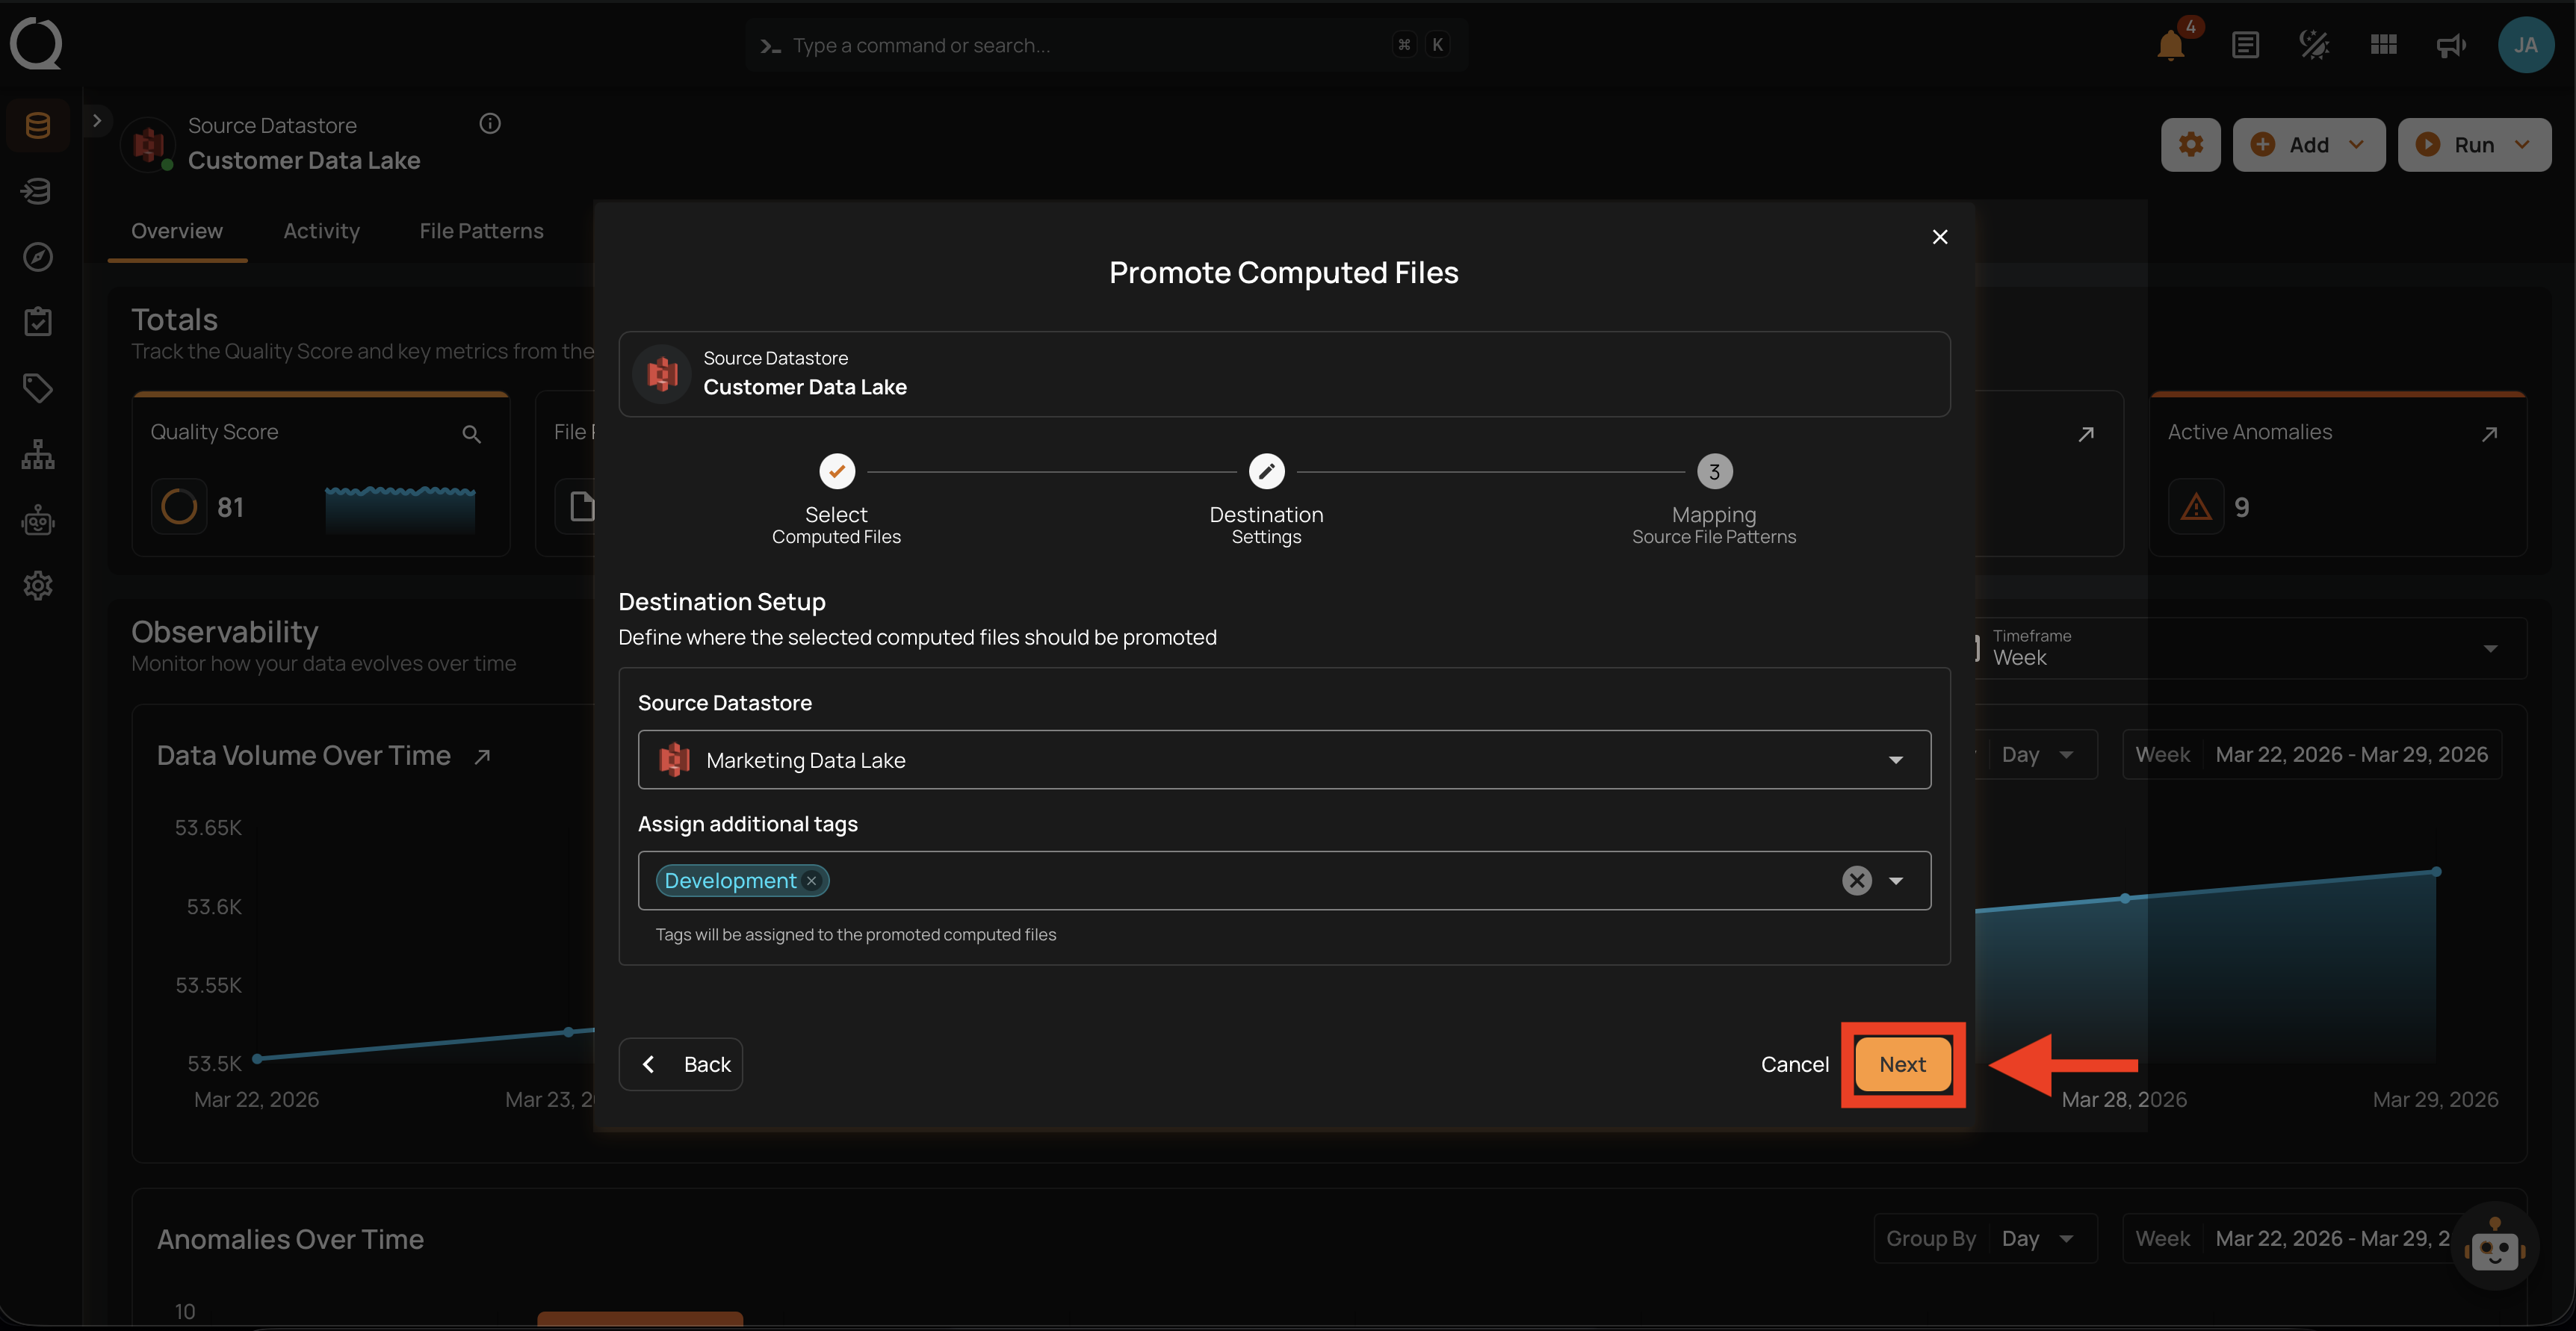
Destination Setup
The second step of the modal — configure the destination datastore for the selected computed files.
| REF. | FIELD | DESCRIPTION |
|---|---|---|
| 1 | Destination Datastore | The DFS datastore where the computed files will be created or updated. Only DFS datastores are listed. |
| 2 | Assign additional tags | Optional tags applied to the promoted files at the destination. These are merged with the destination datastore's default tags (external tags are excluded). Source tags are not carried over. |
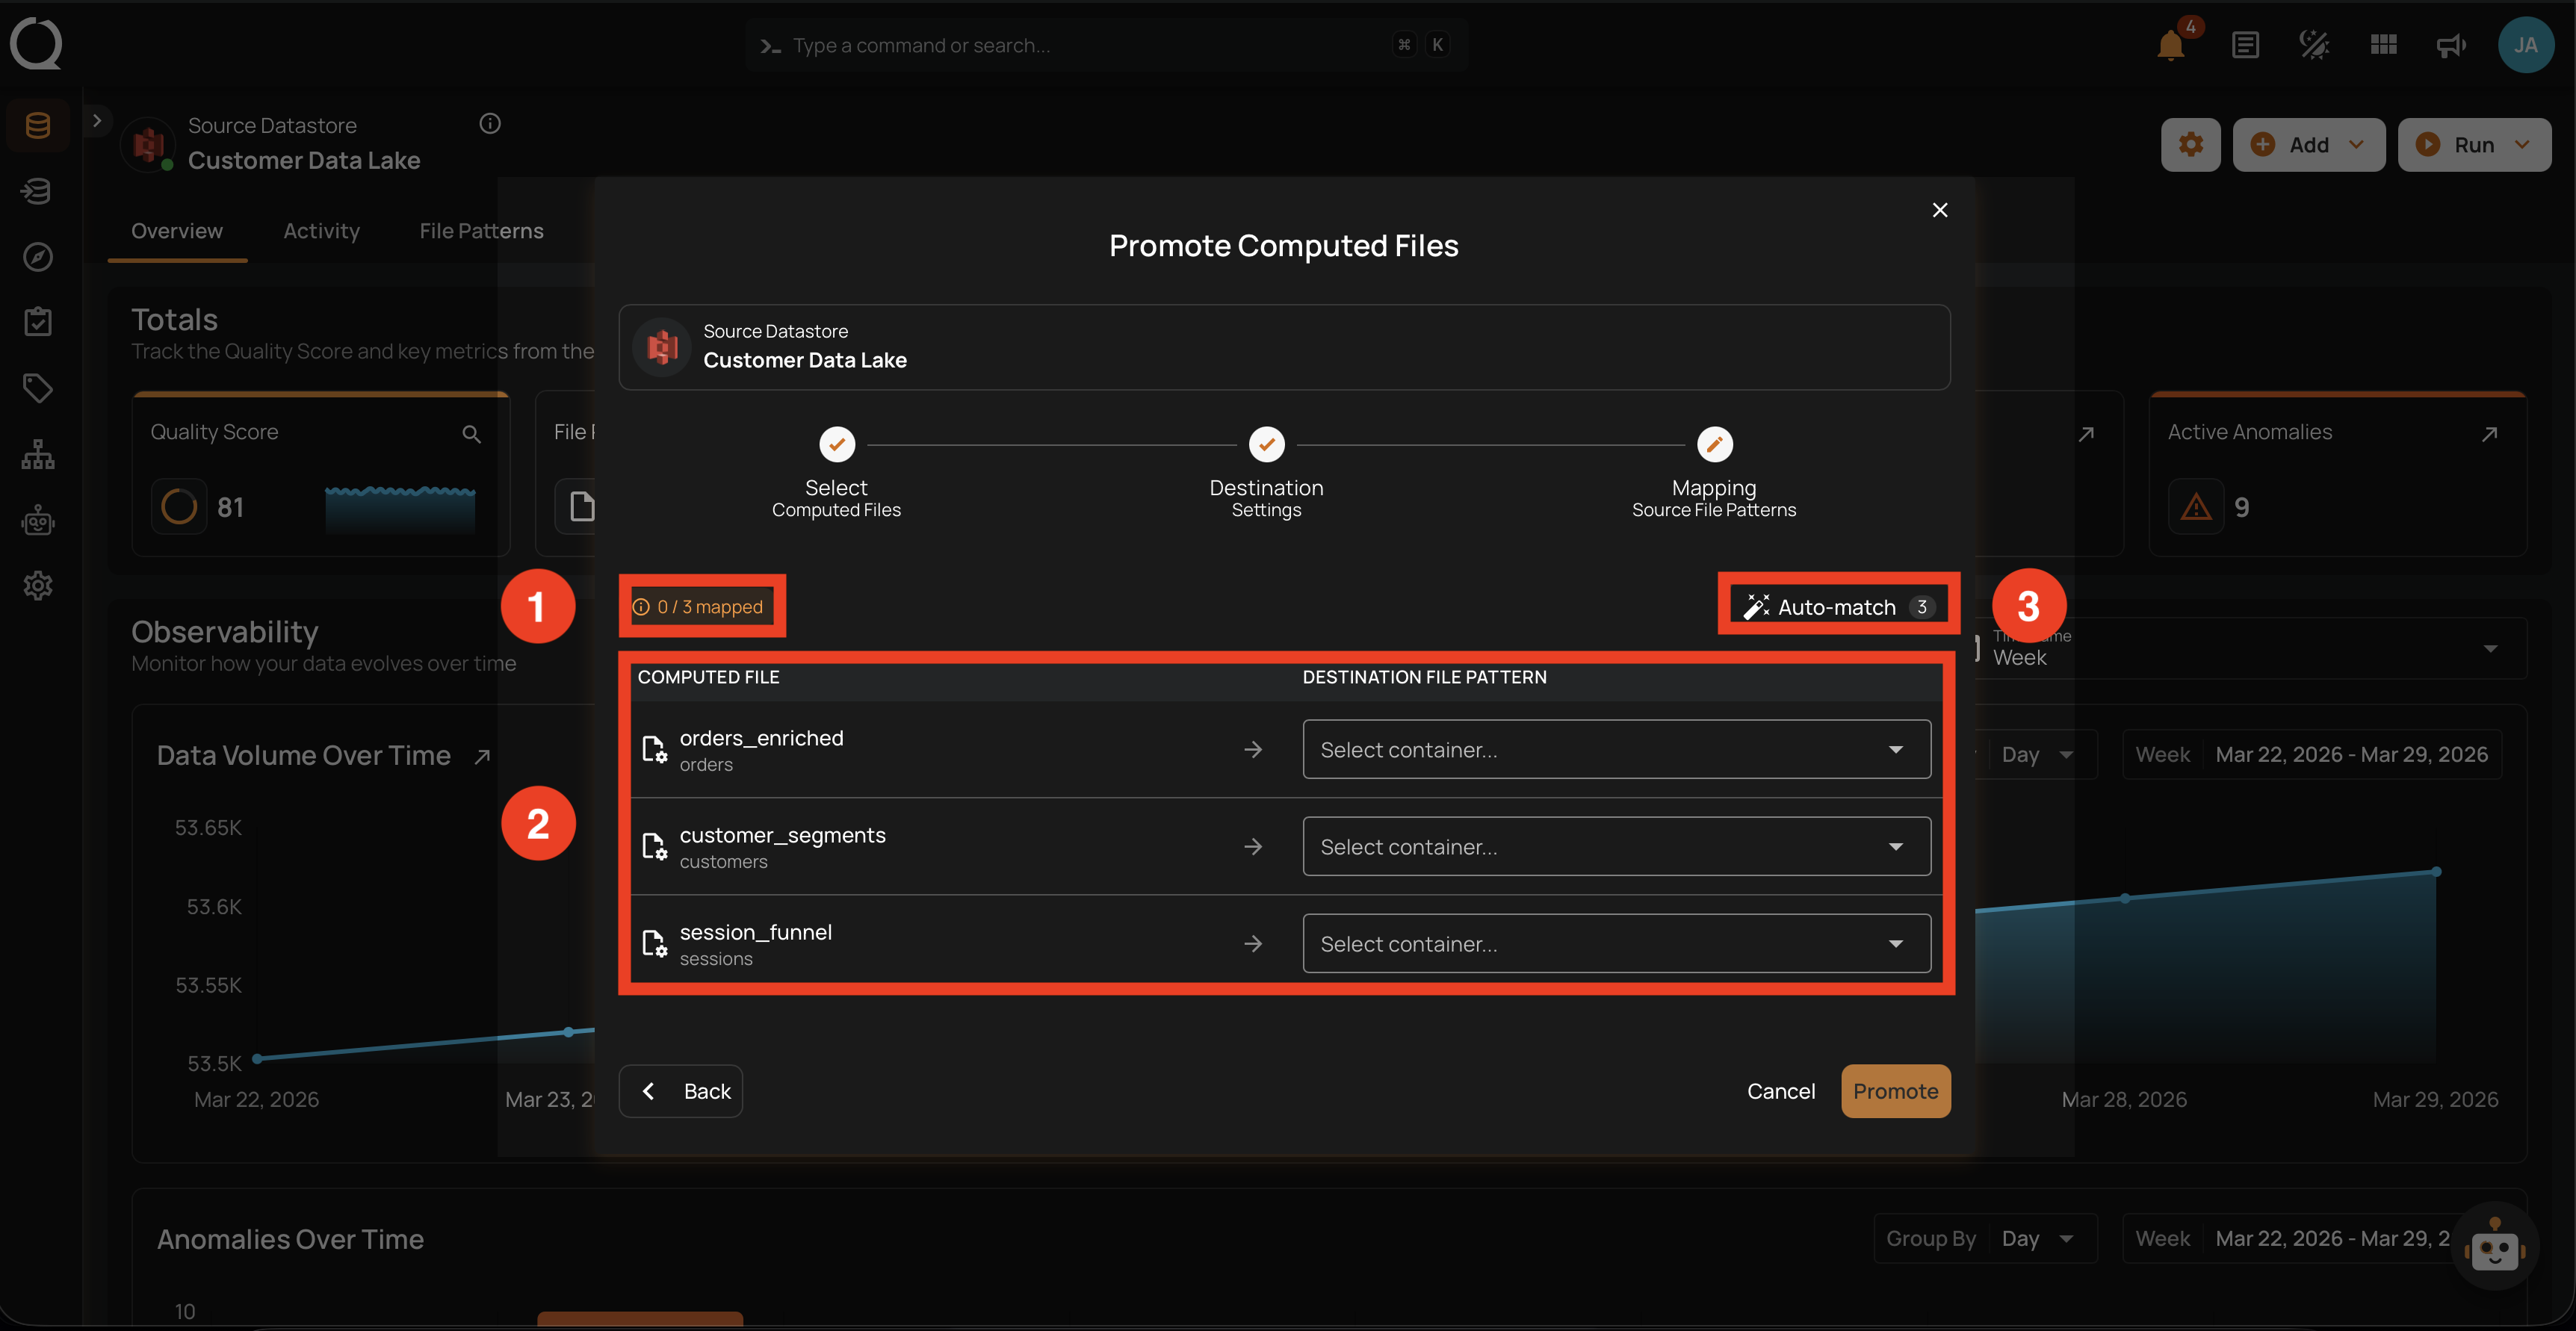
Mapping Source File Patterns
The third step of the modal — explicitly associate each source computed file with a profiled file pattern container on the destination datastore.
| REF. | FIELD | DESCRIPTION |
|---|---|---|
| 1 | Mapped counter | Shows how many source files have been mapped out of the total. The Promote button is disabled until every source file has a destination mapping. |
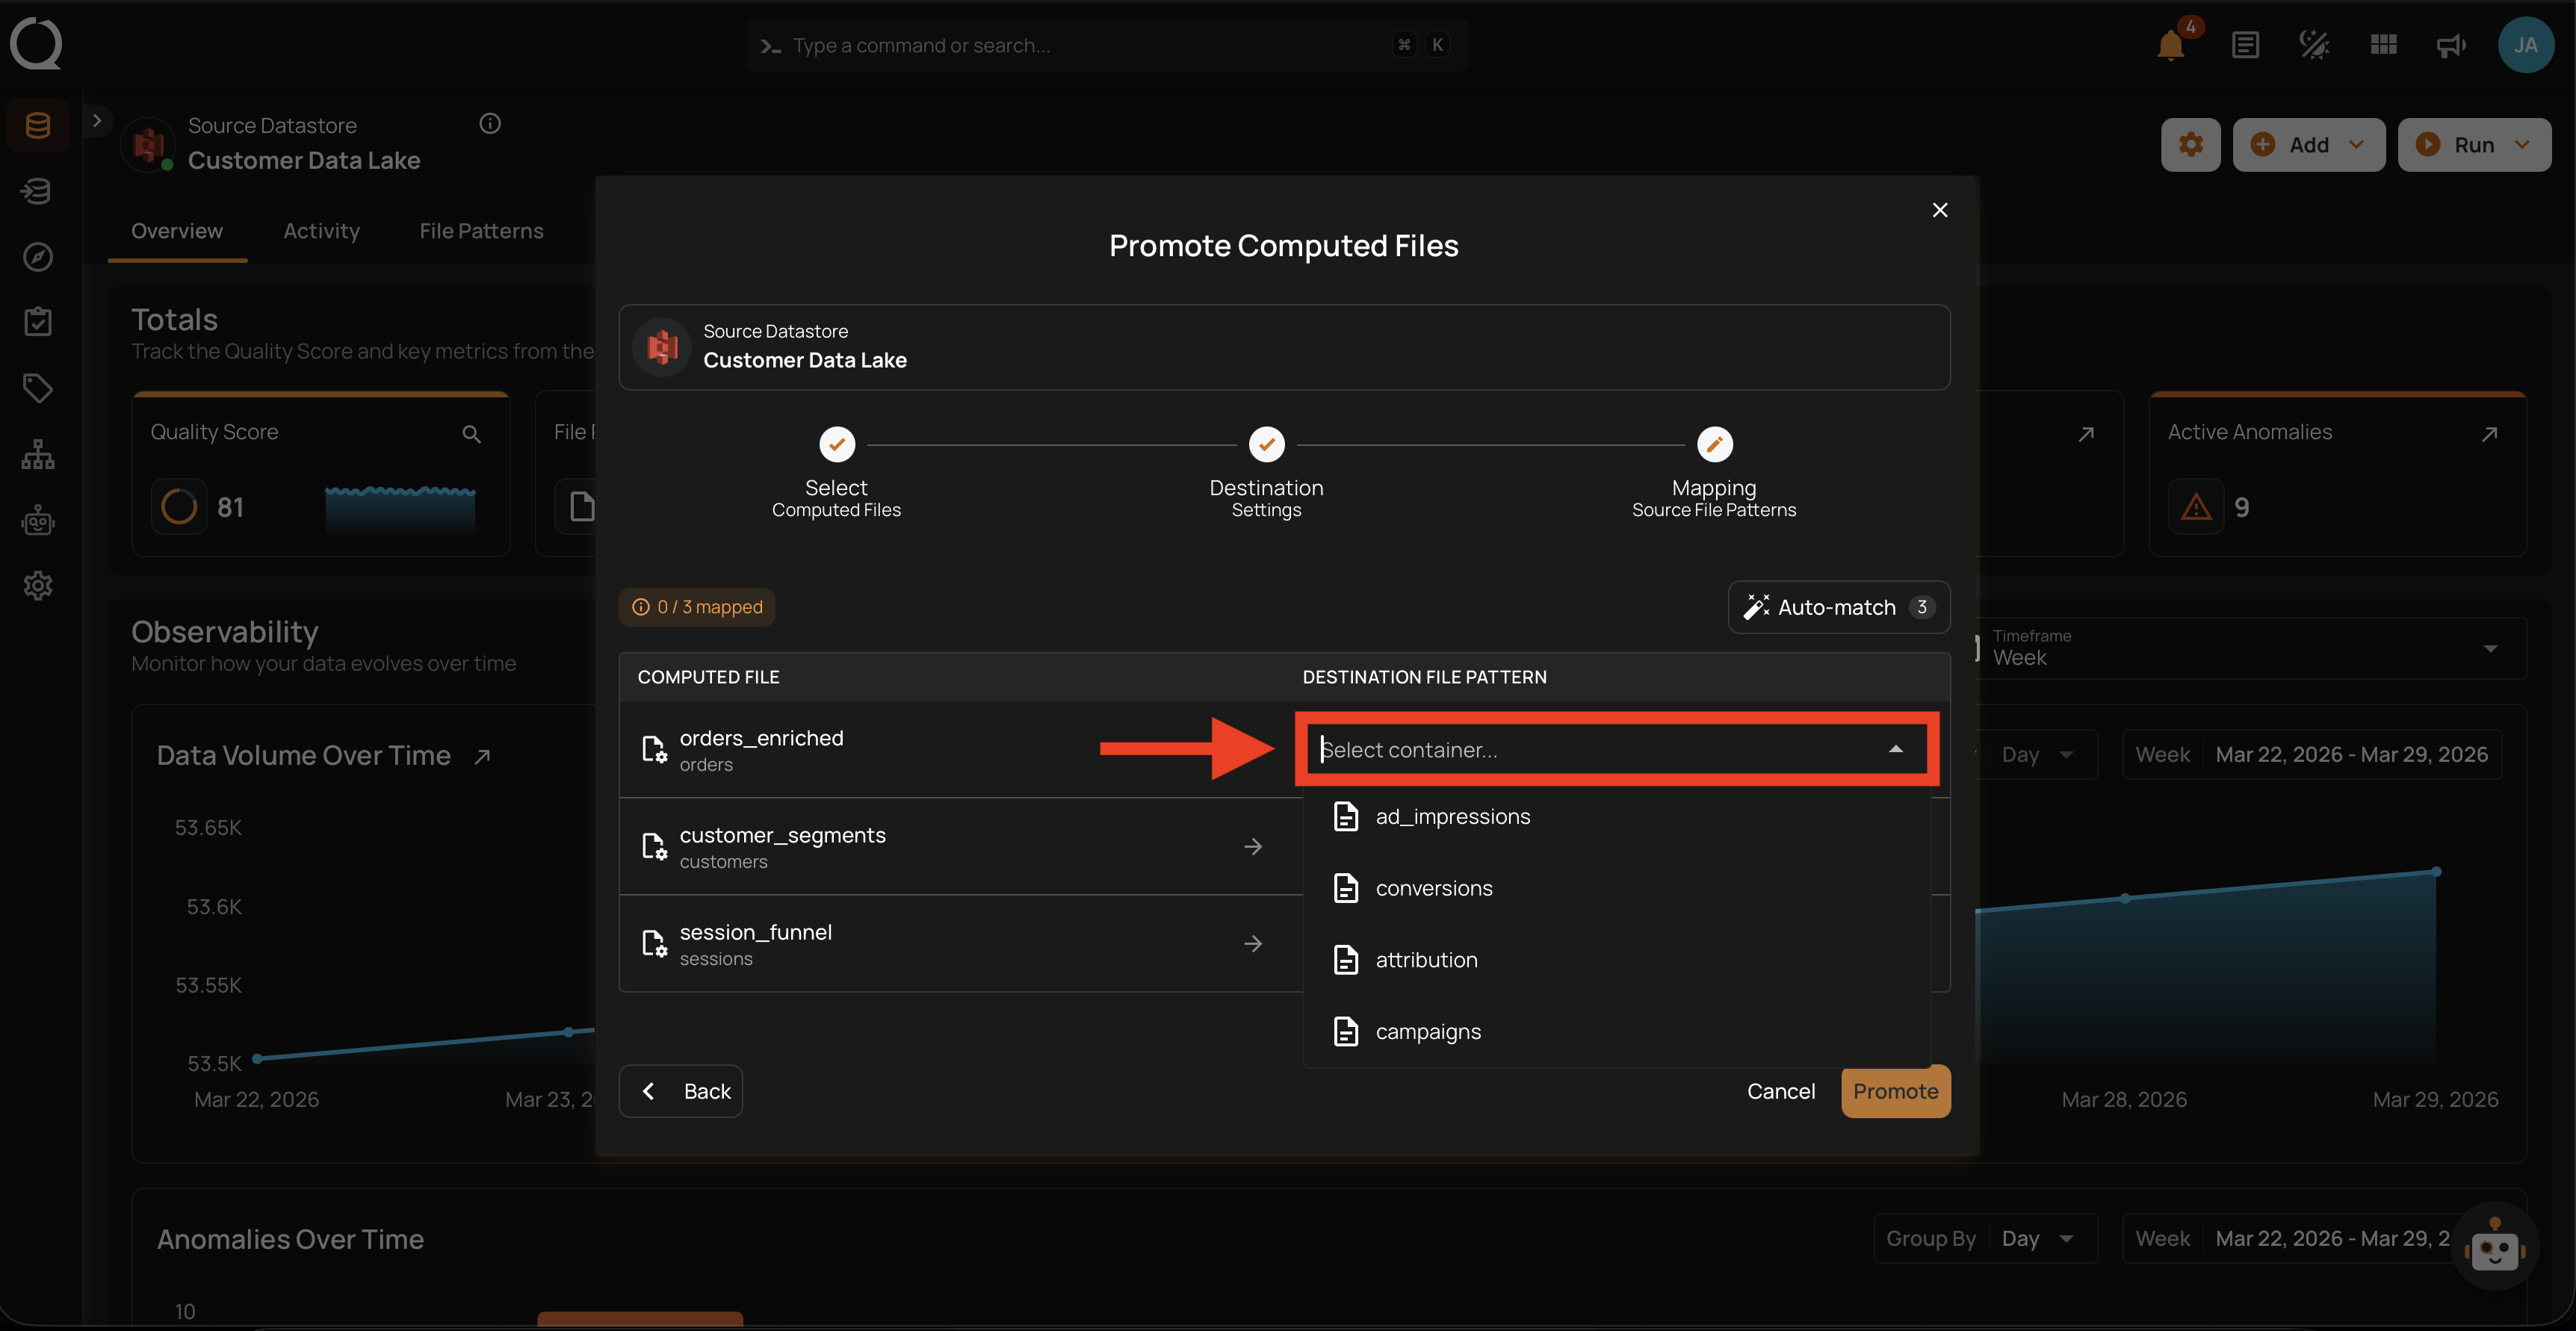
| 2 | Mapping table | Each row pairs a source computed file with a destination file pattern dropdown on the destination datastore. Pick a destination manually from each dropdown. |
| 3 | Auto-match | Populates the destination dropdowns automatically using fuzzy name matching. Each suggestion is shown with a confidence score, and you can override any match manually. |
Steps
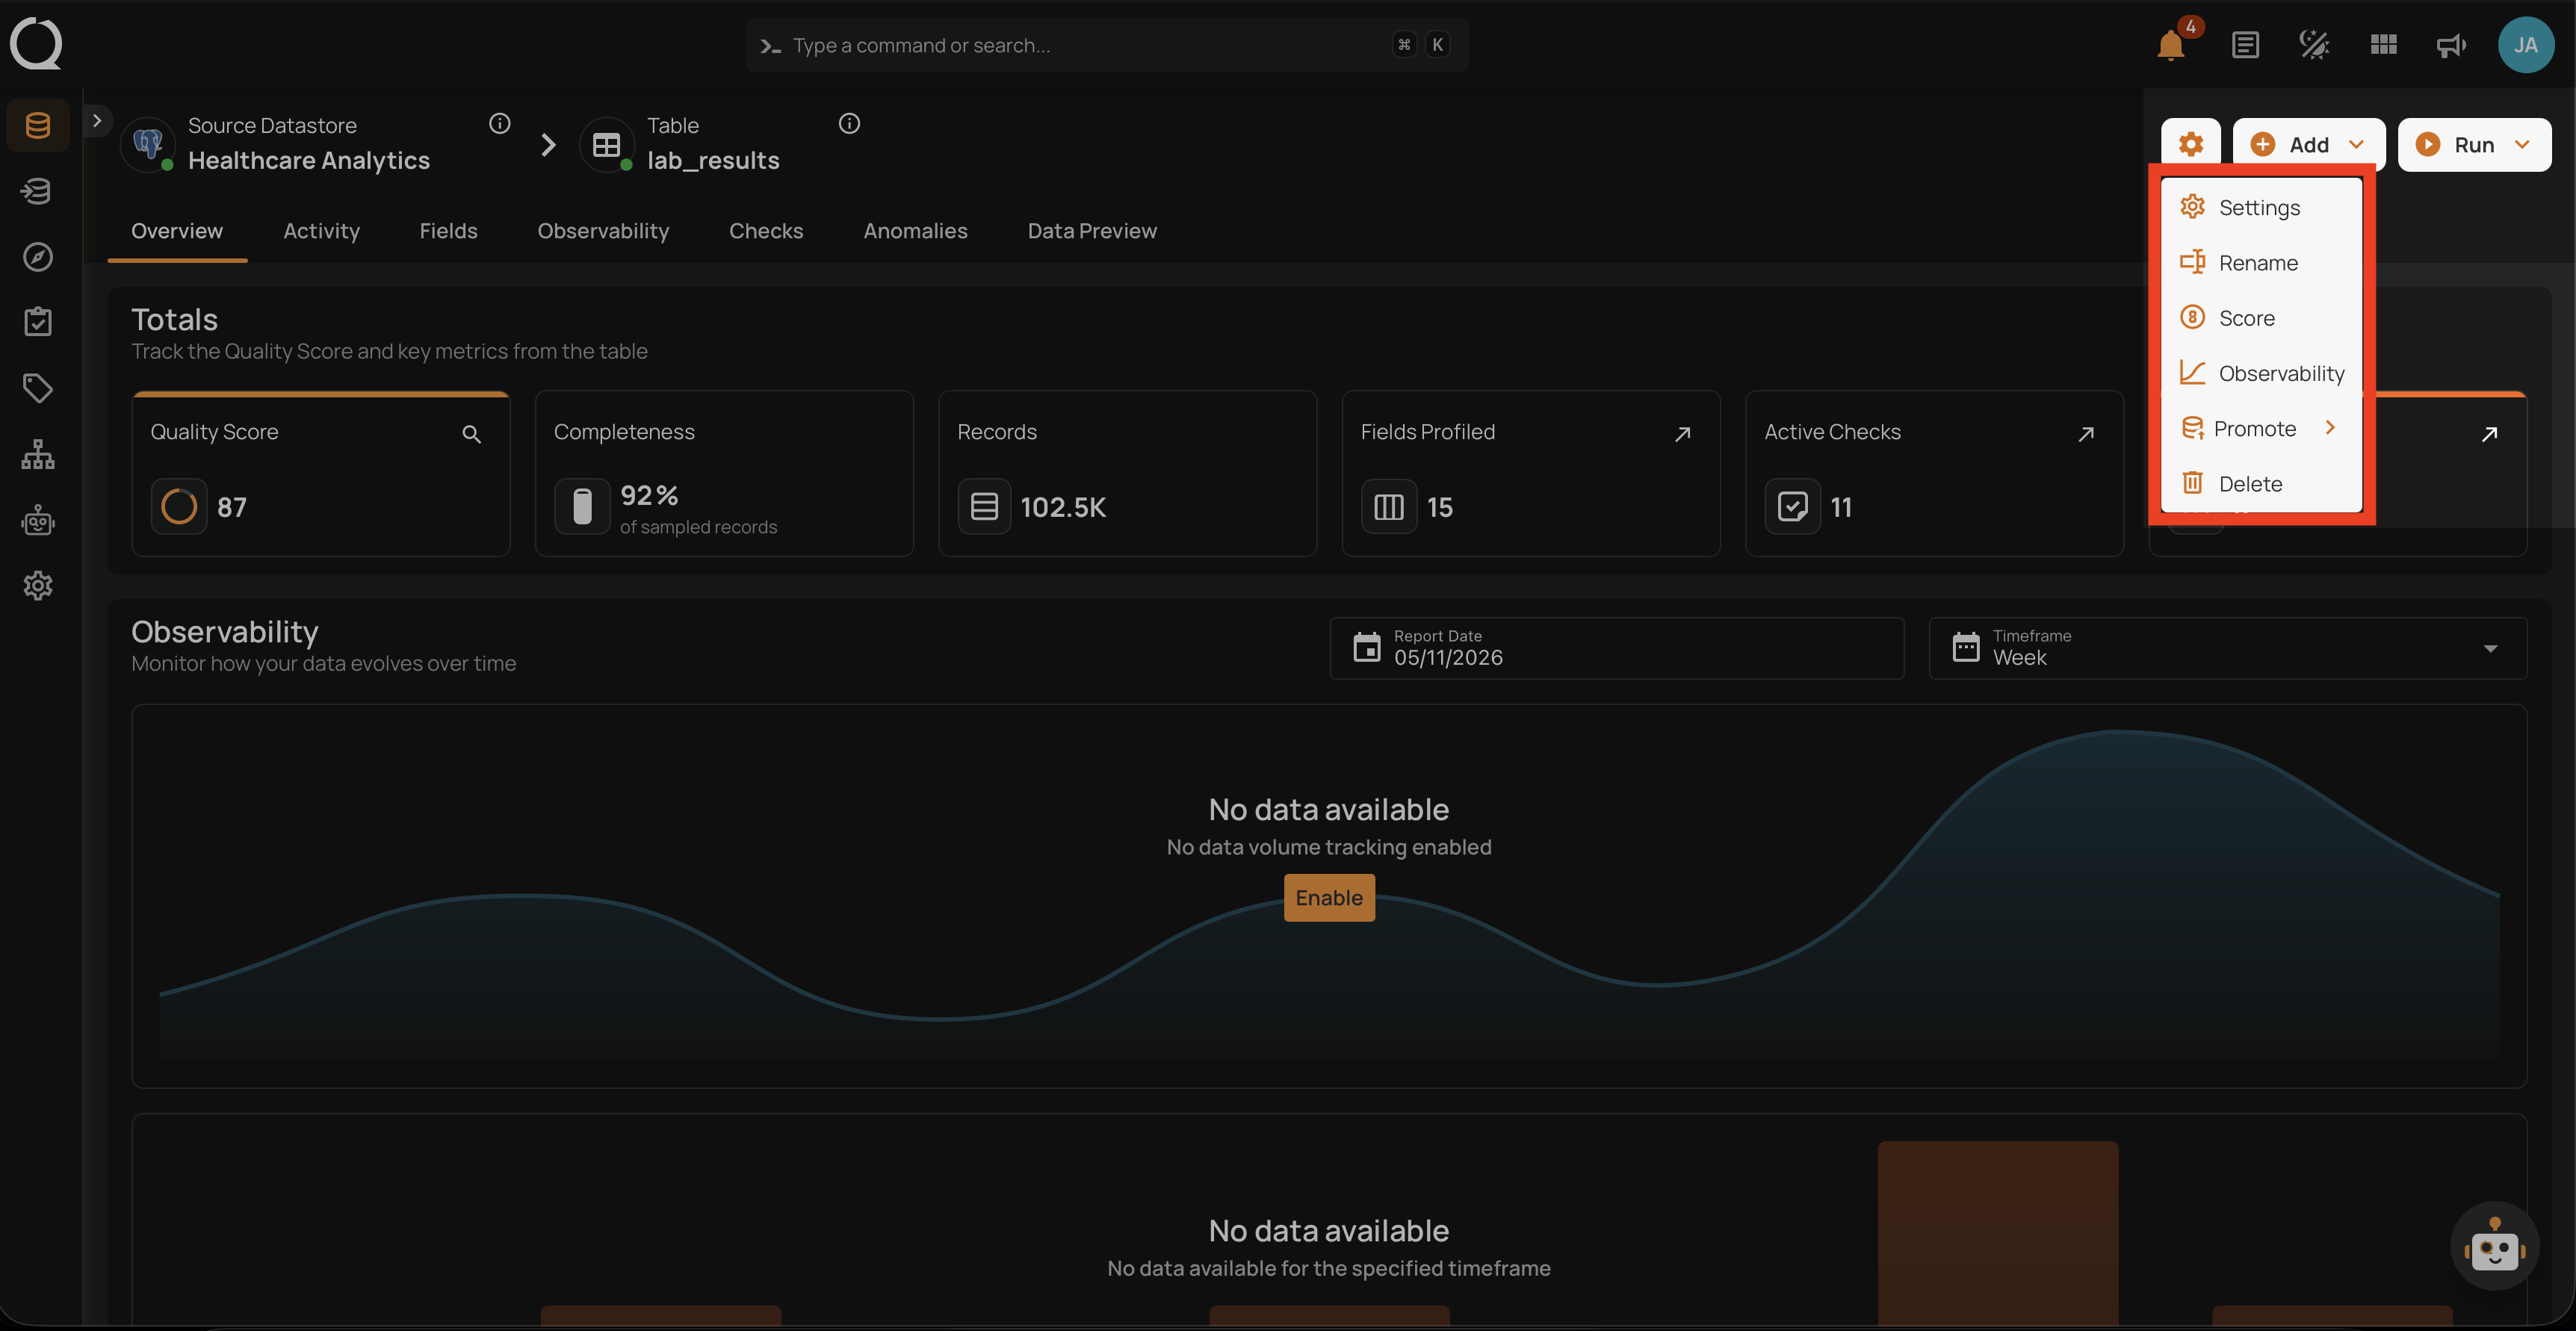
Step 1: Open the source datastore overview and click the Settings gear icon in the top-right corner.

Step 2: The settings menu opens, listing the available actions for the datastore.
Step 3: Click Promote to reveal the submenu.
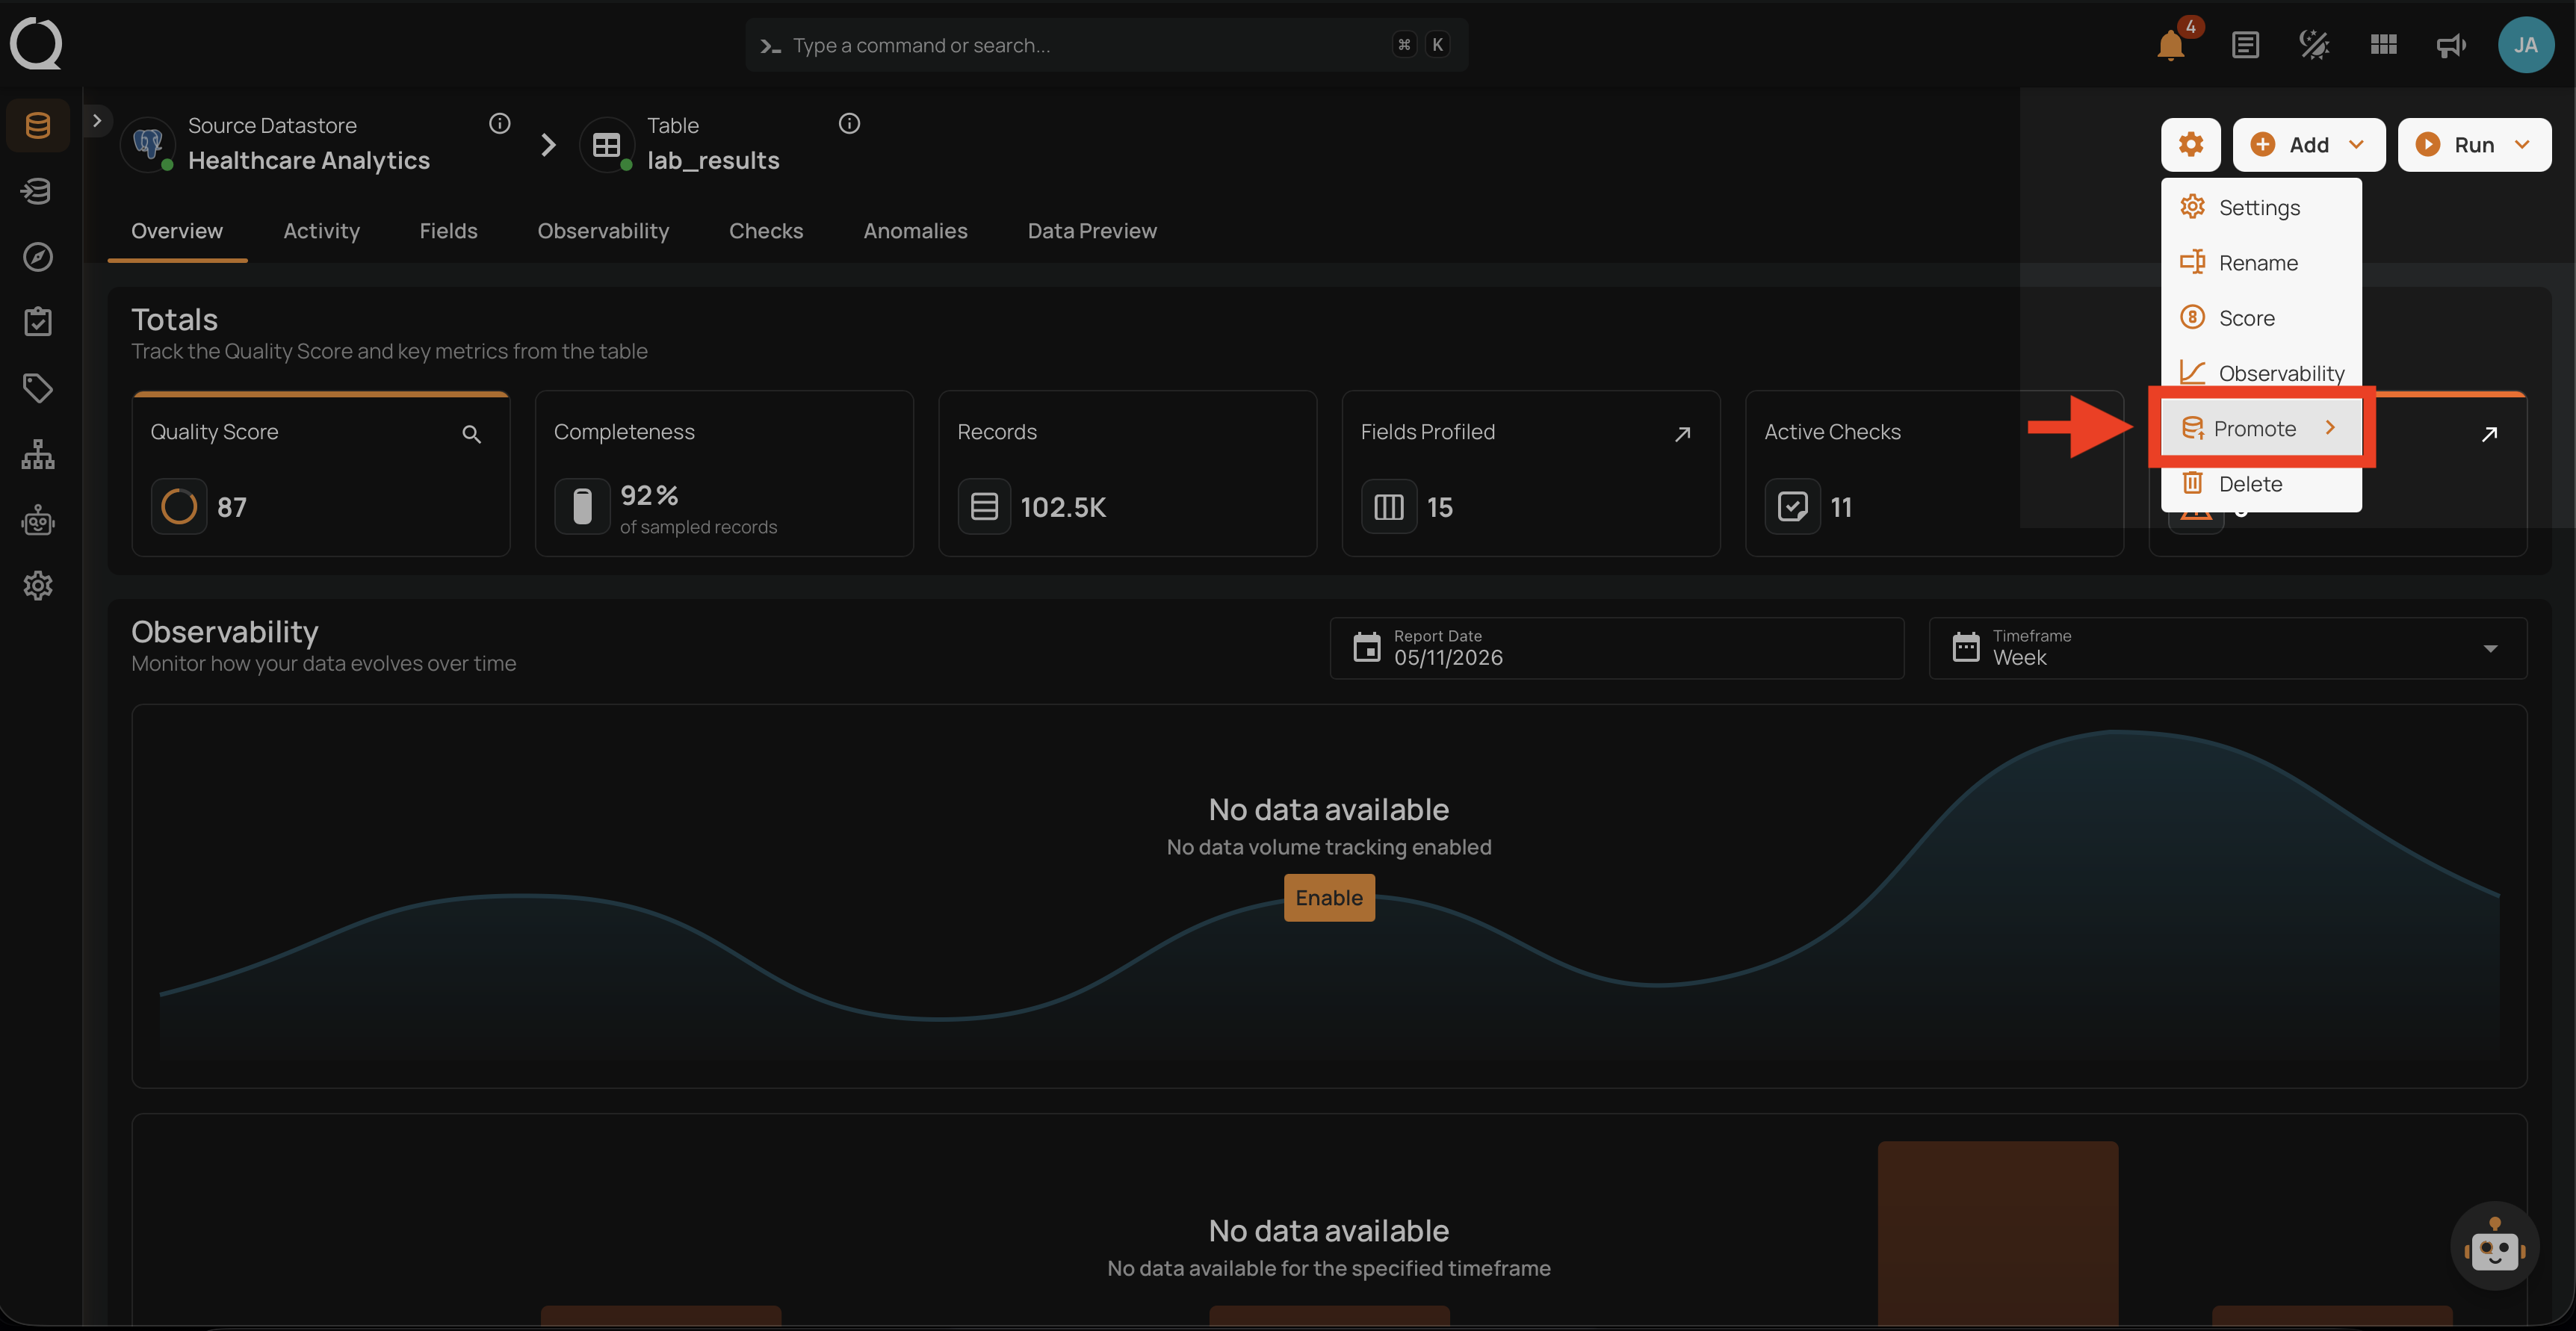
Step 4: The Promote submenu opens, showing the entity types available for promotion.
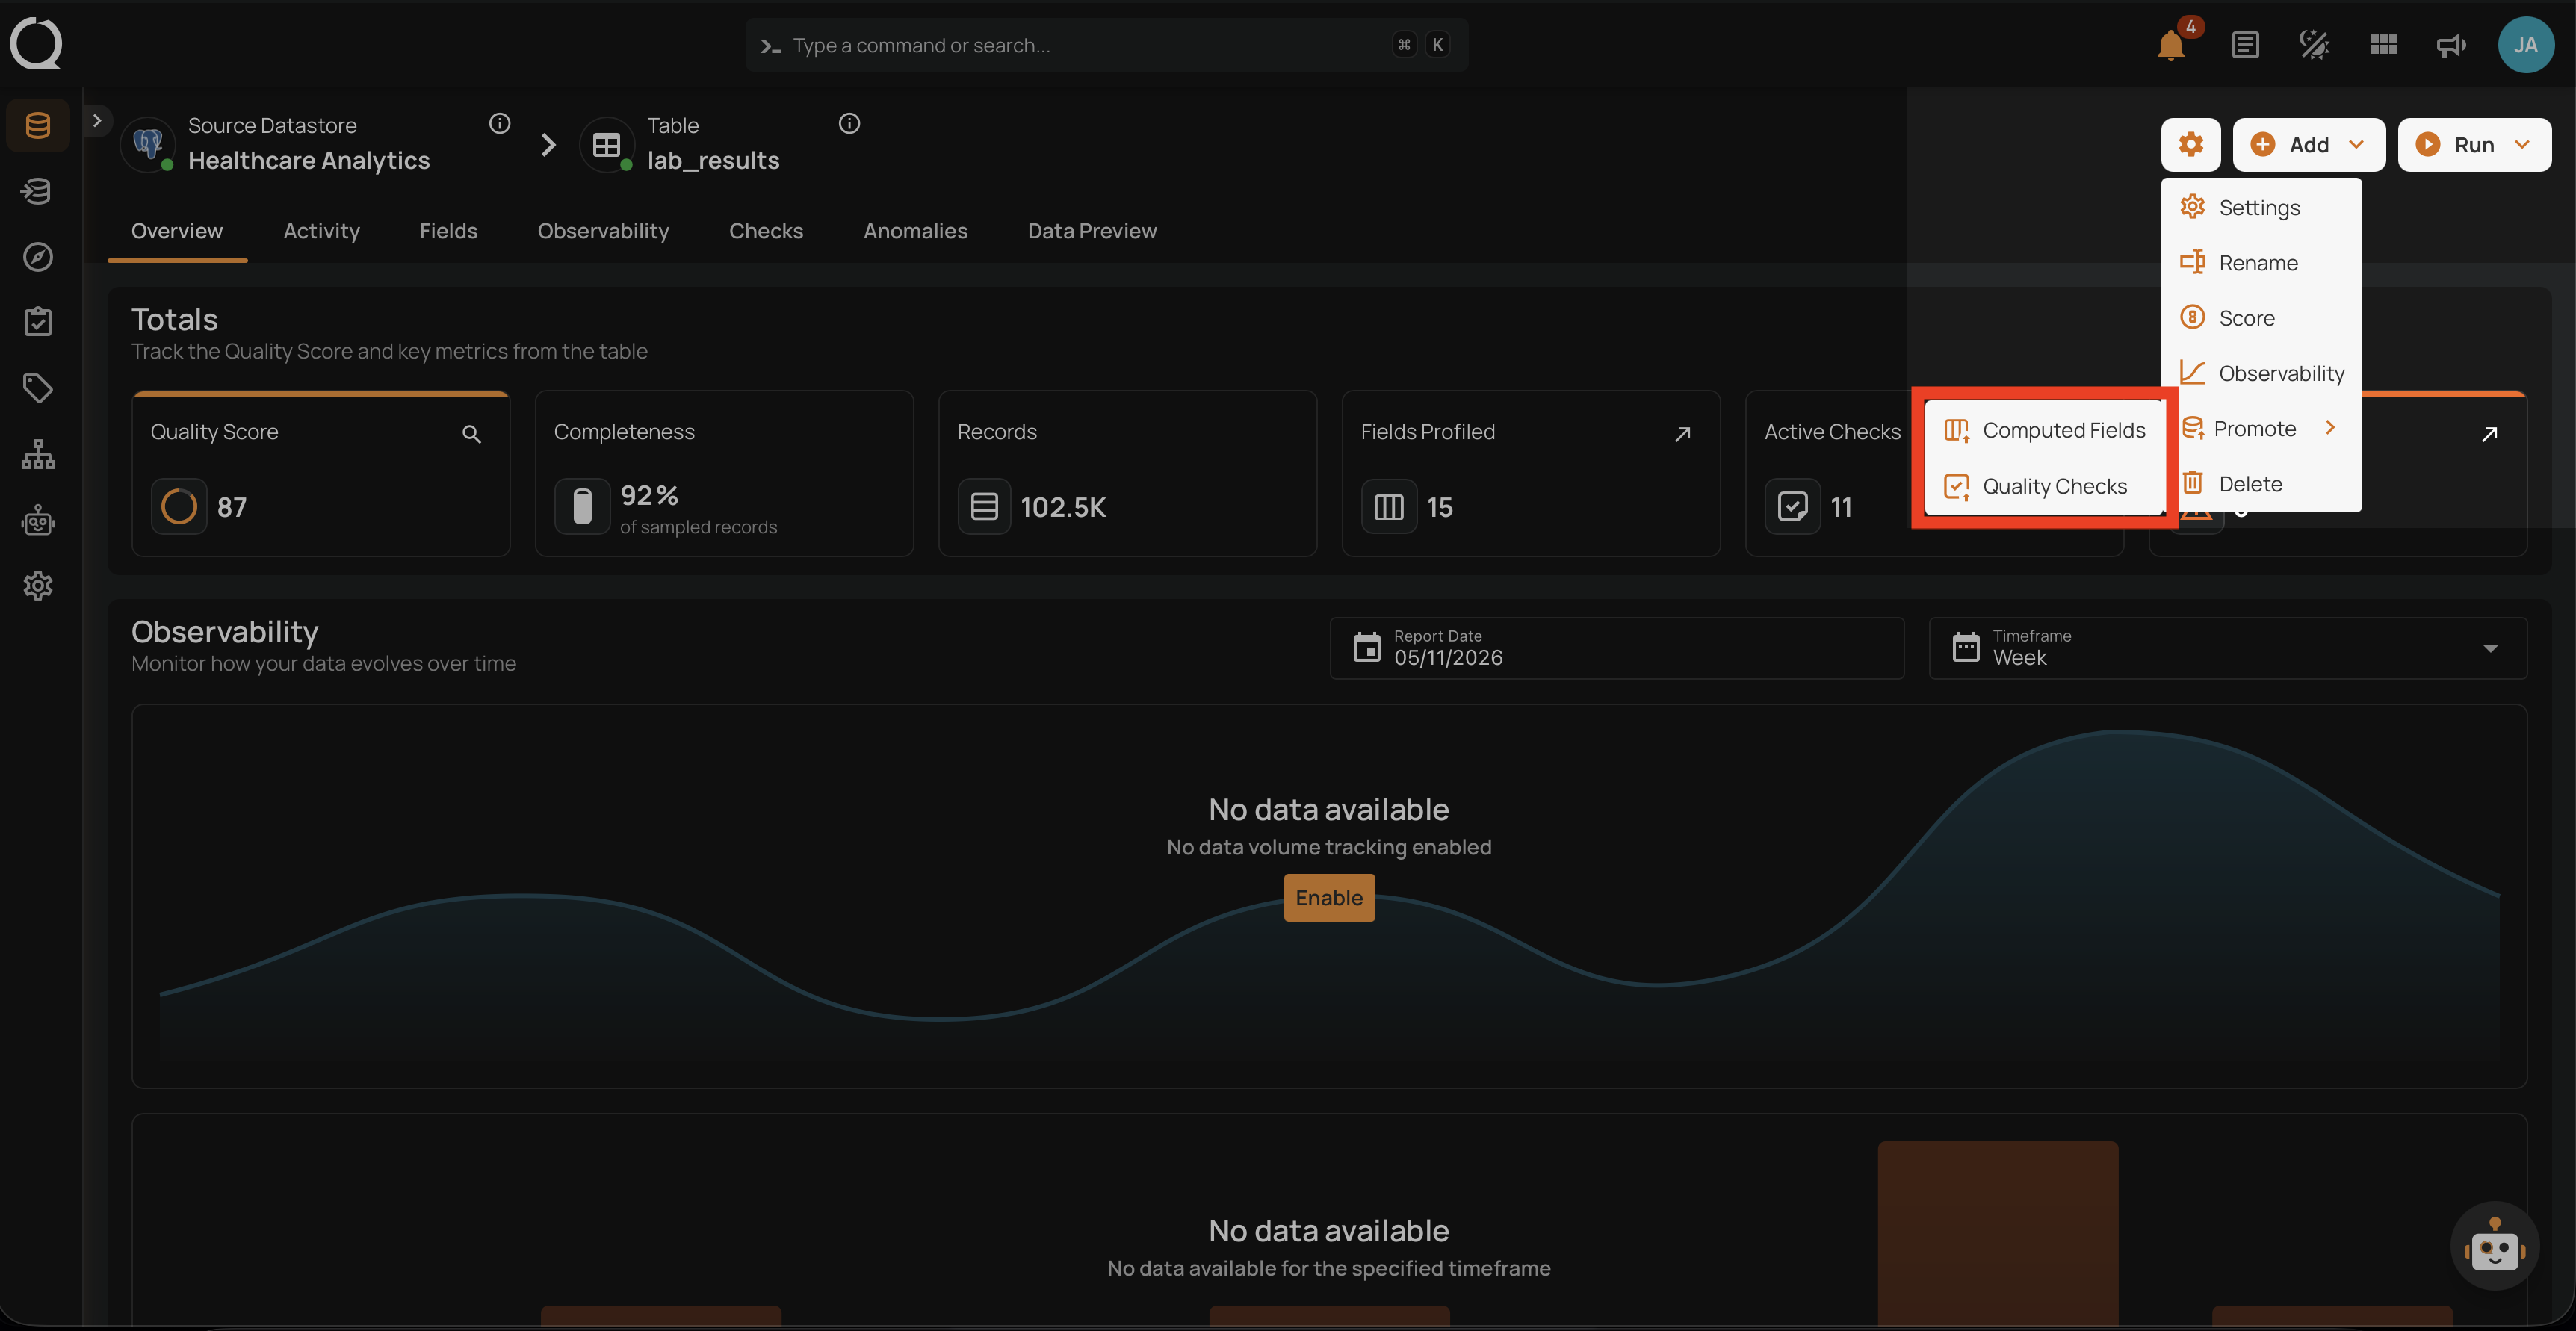
Step 5: Click Computed Files to open the promotion modal.

Step 6: The Promote Computed Files modal opens at the Select Computed Files step.
Step 7: Choose All or Specific (see Select Computed Files for the field reference), then click Next to proceed.
Step 8: On the Destination Settings step, choose the destination DFS datastore and optionally add tags (see Destination Setup for the field reference). Click Next to proceed to the Mapping Source File Patterns step.
Step 9: On the Mapping Source File Patterns step, associate each source computed file with a destination file pattern. There are two ways to do this:
Click Auto-match to populate every destination dropdown automatically using fuzzy name matching. Each suggestion is shown with a confidence score; you can still override any individual match afterward.
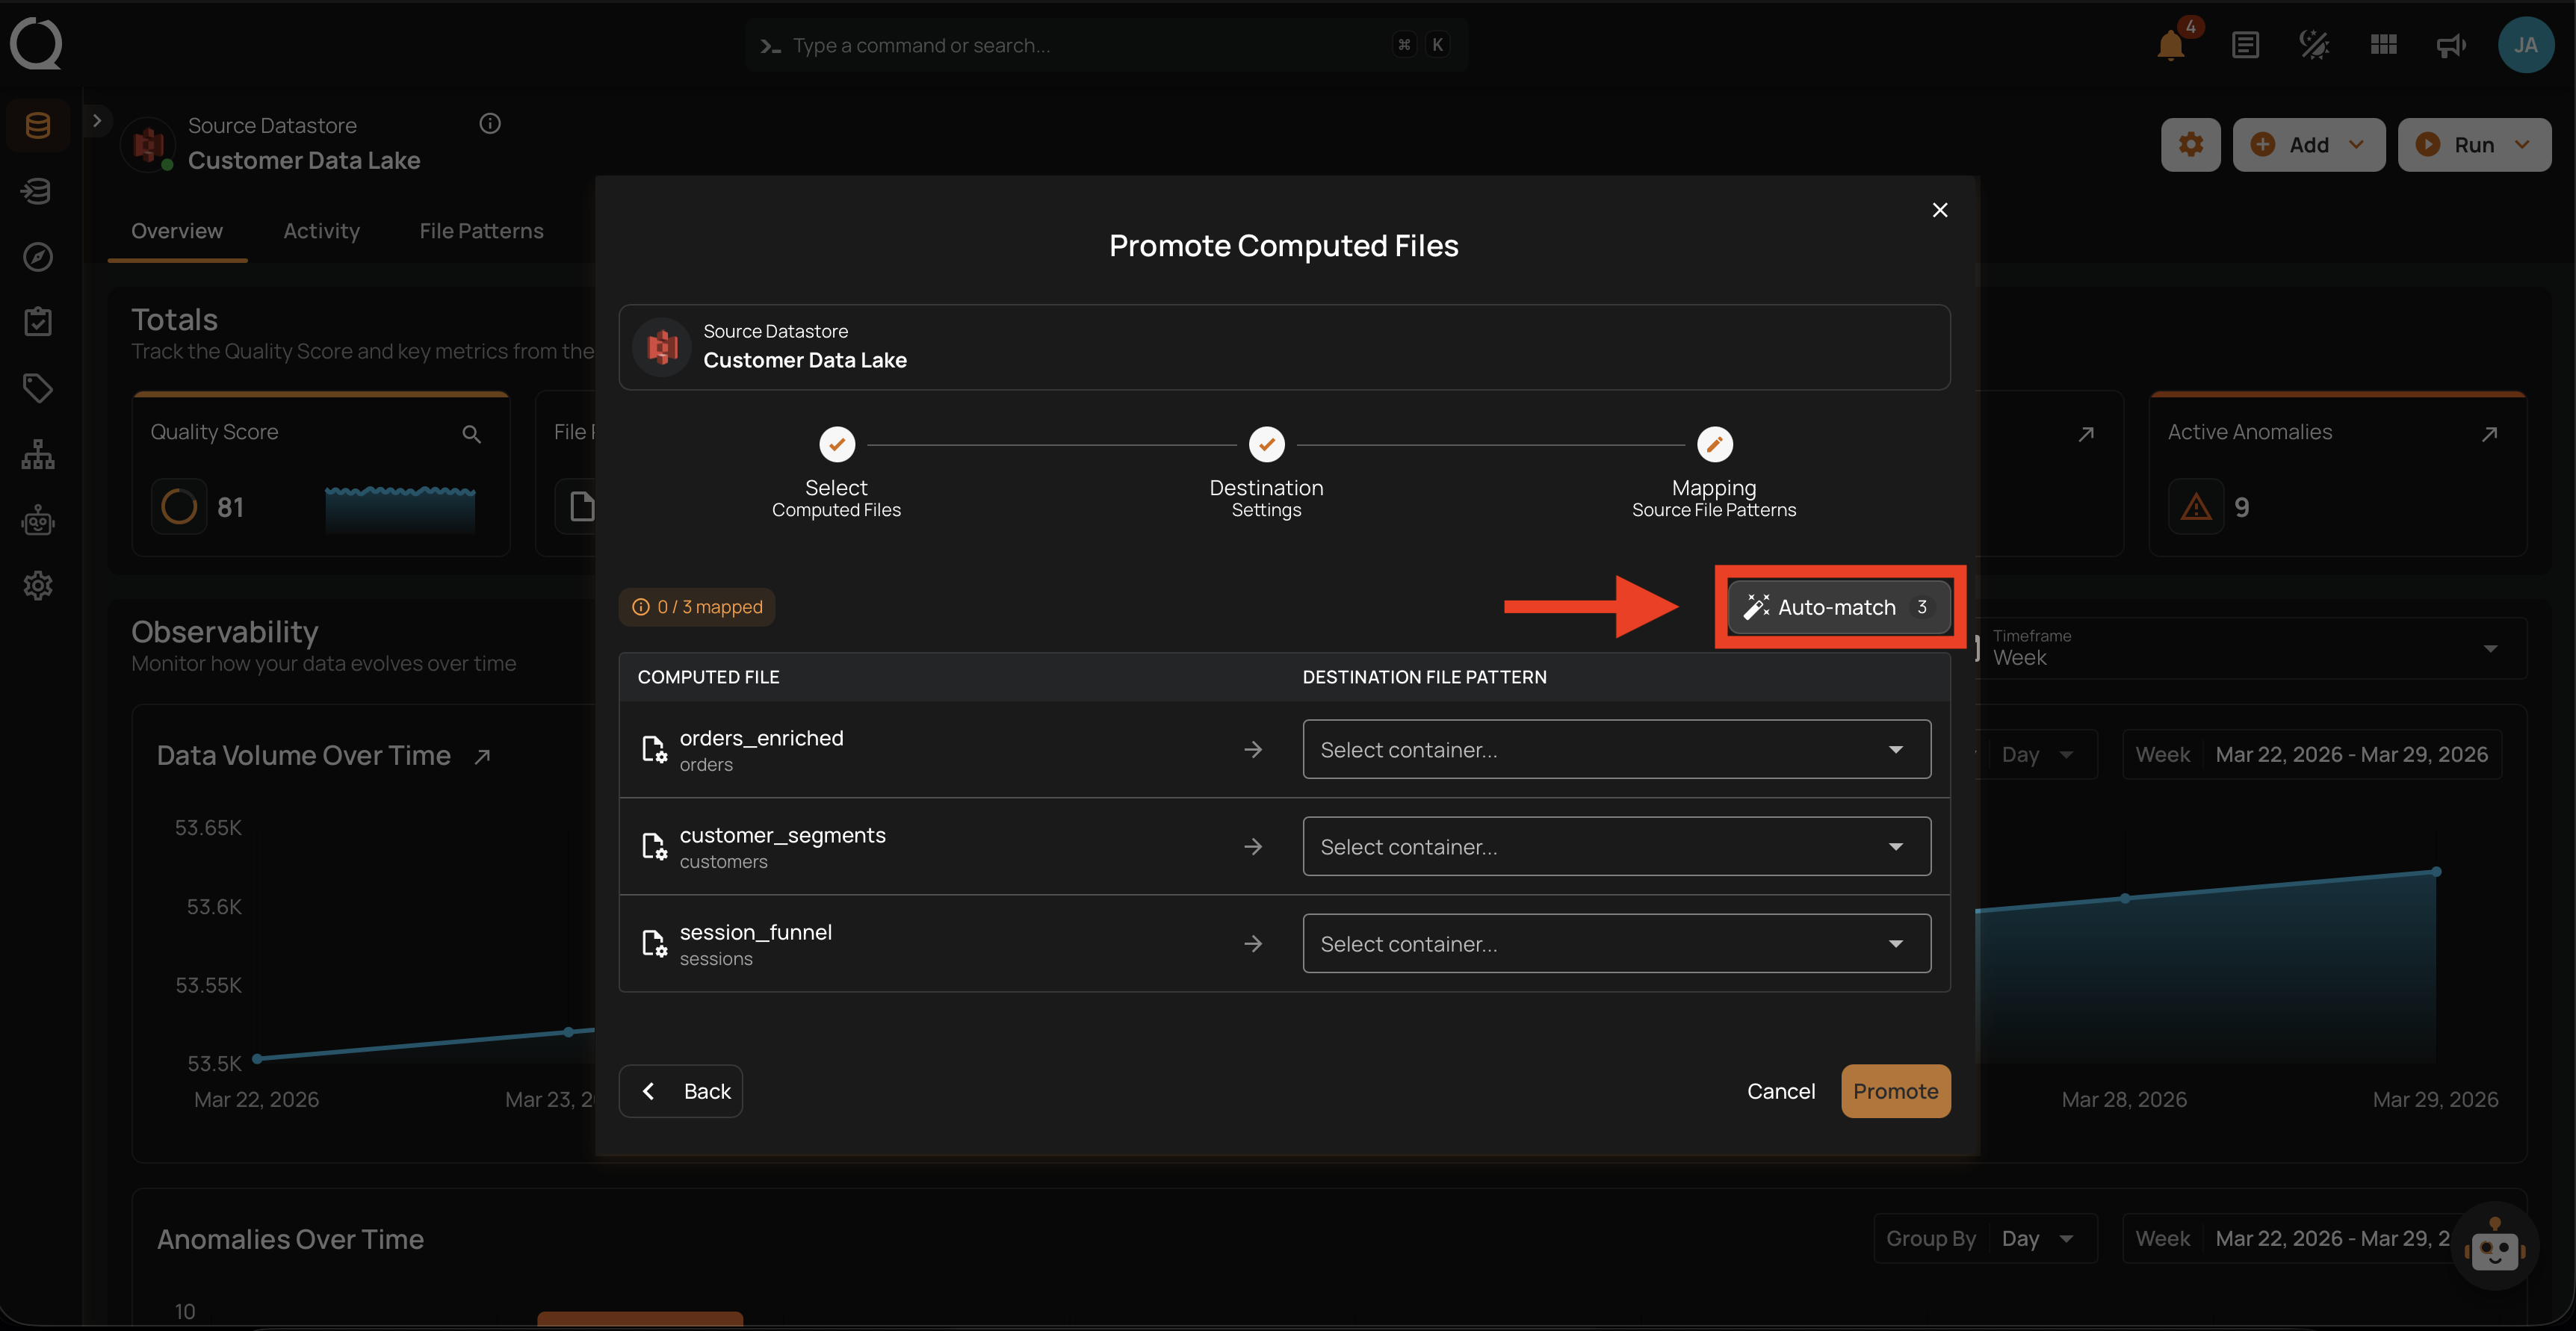
Click each destination dropdown in the mapping table and pick a profiled file pattern from the destination datastore. Only profiled file patterns are listed.
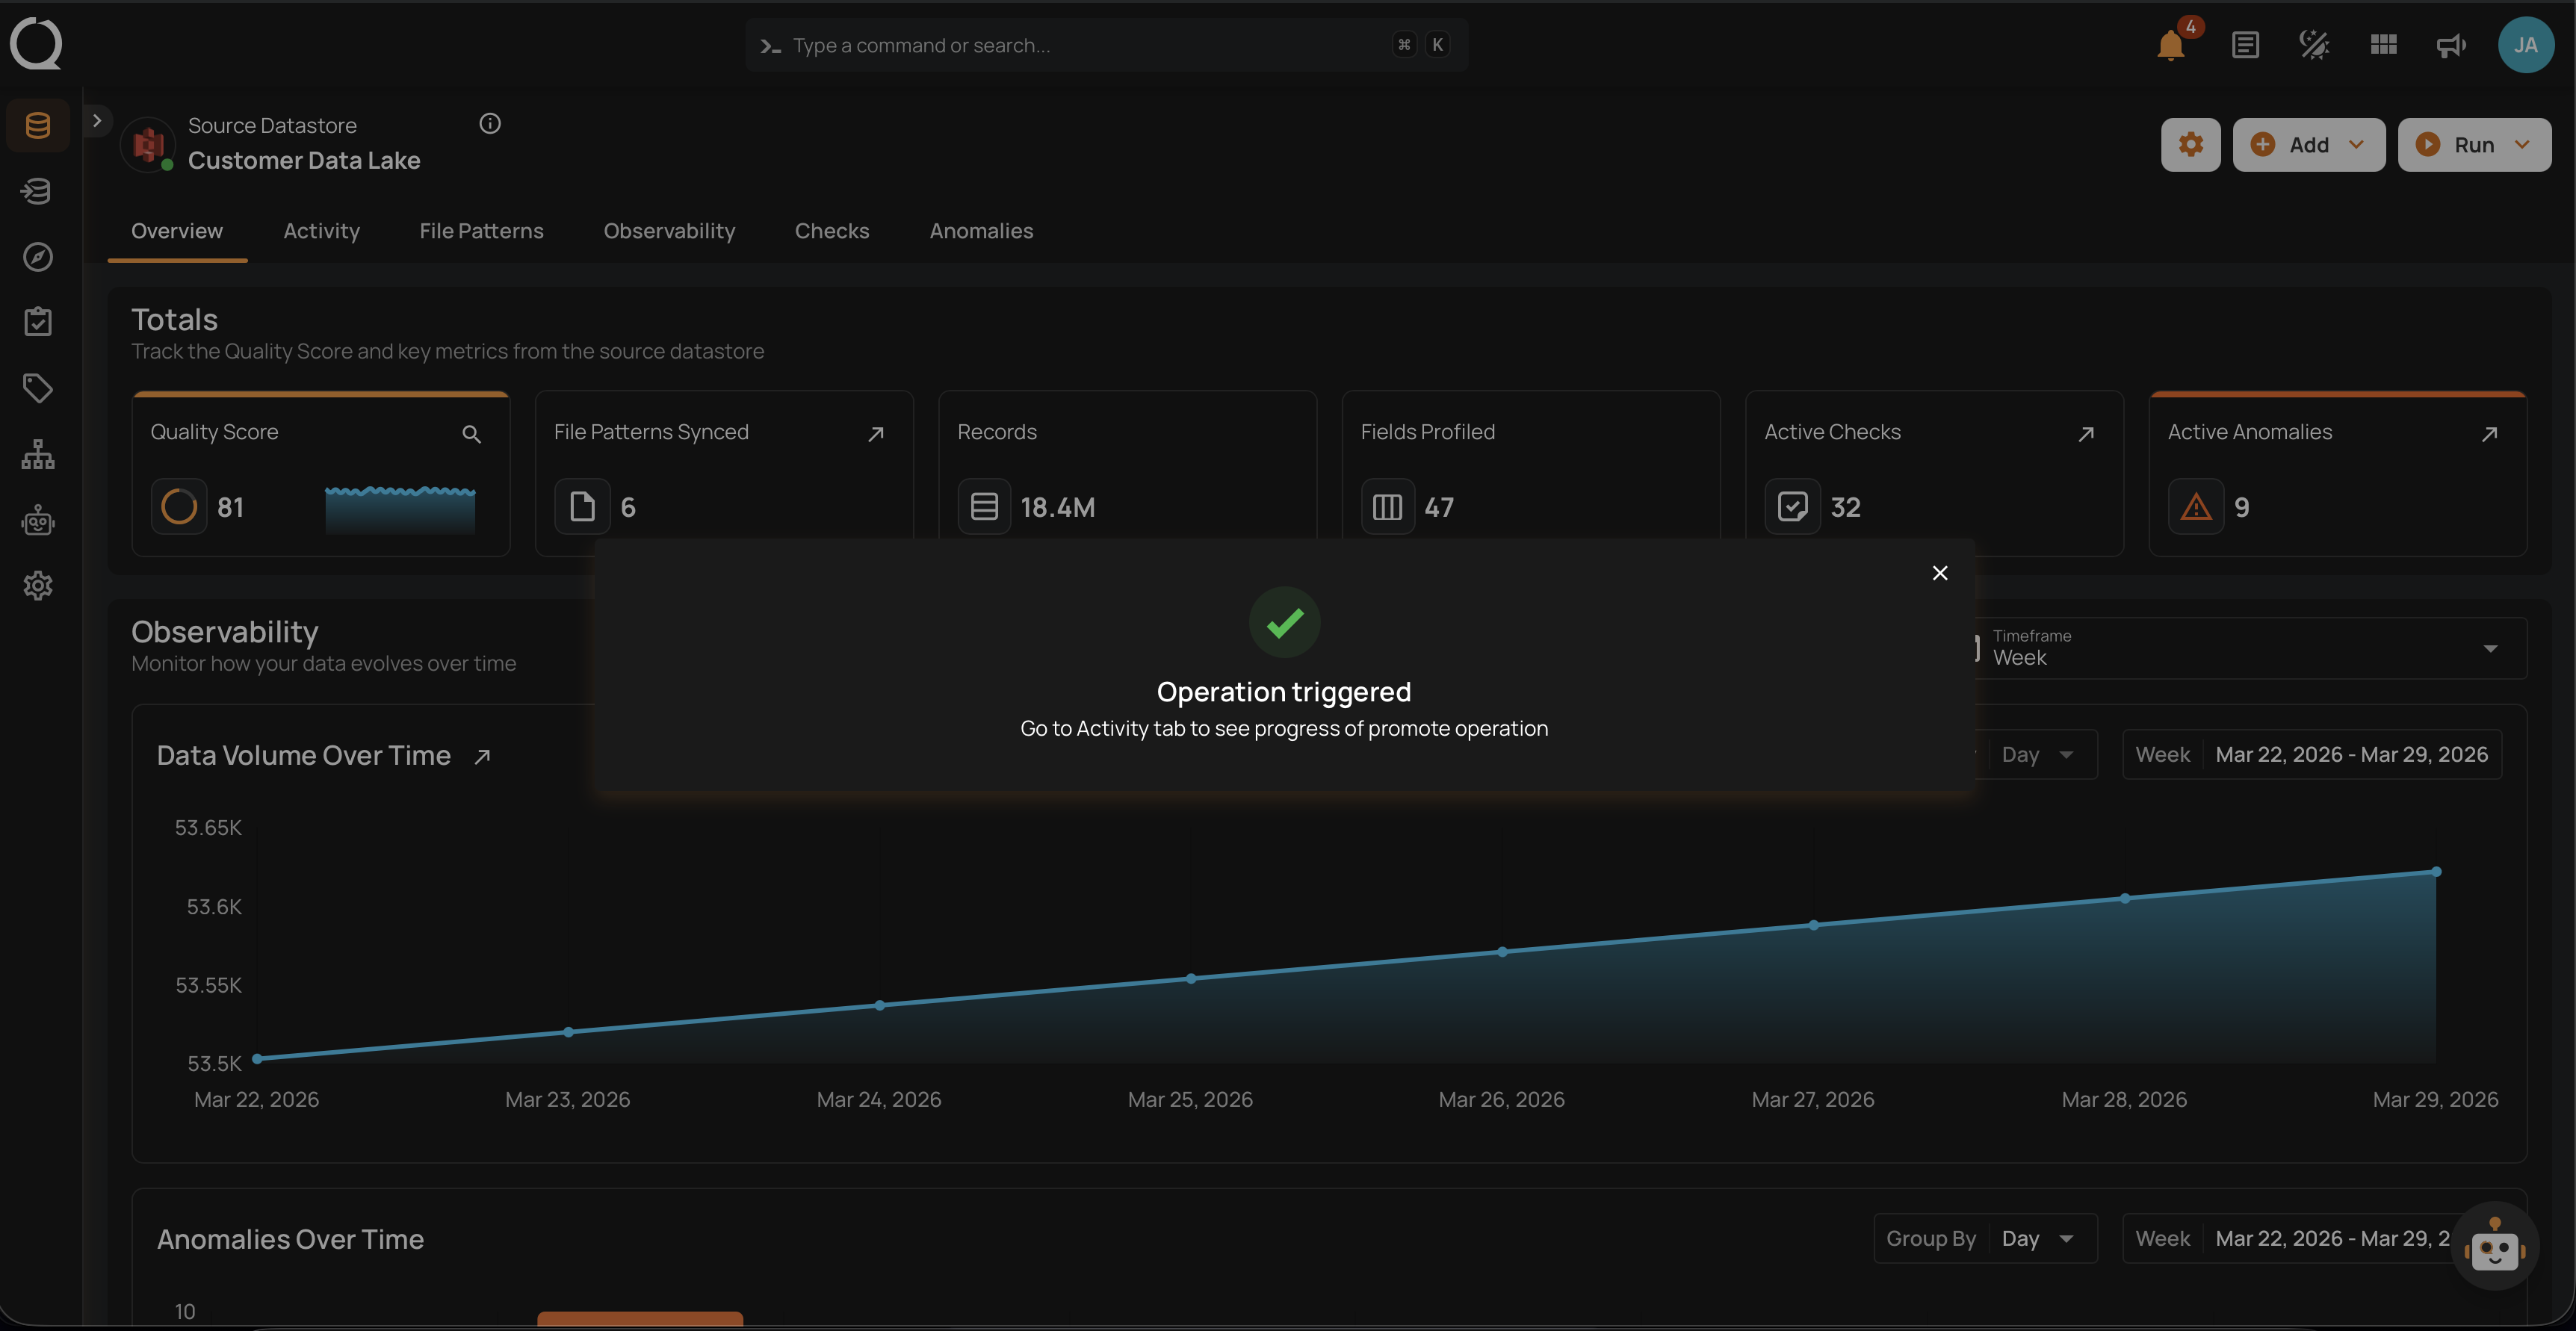
Step 10: Once every source file is mapped (counter reads N / N mapped), the Promote button becomes active. Click Promote to start the operation.
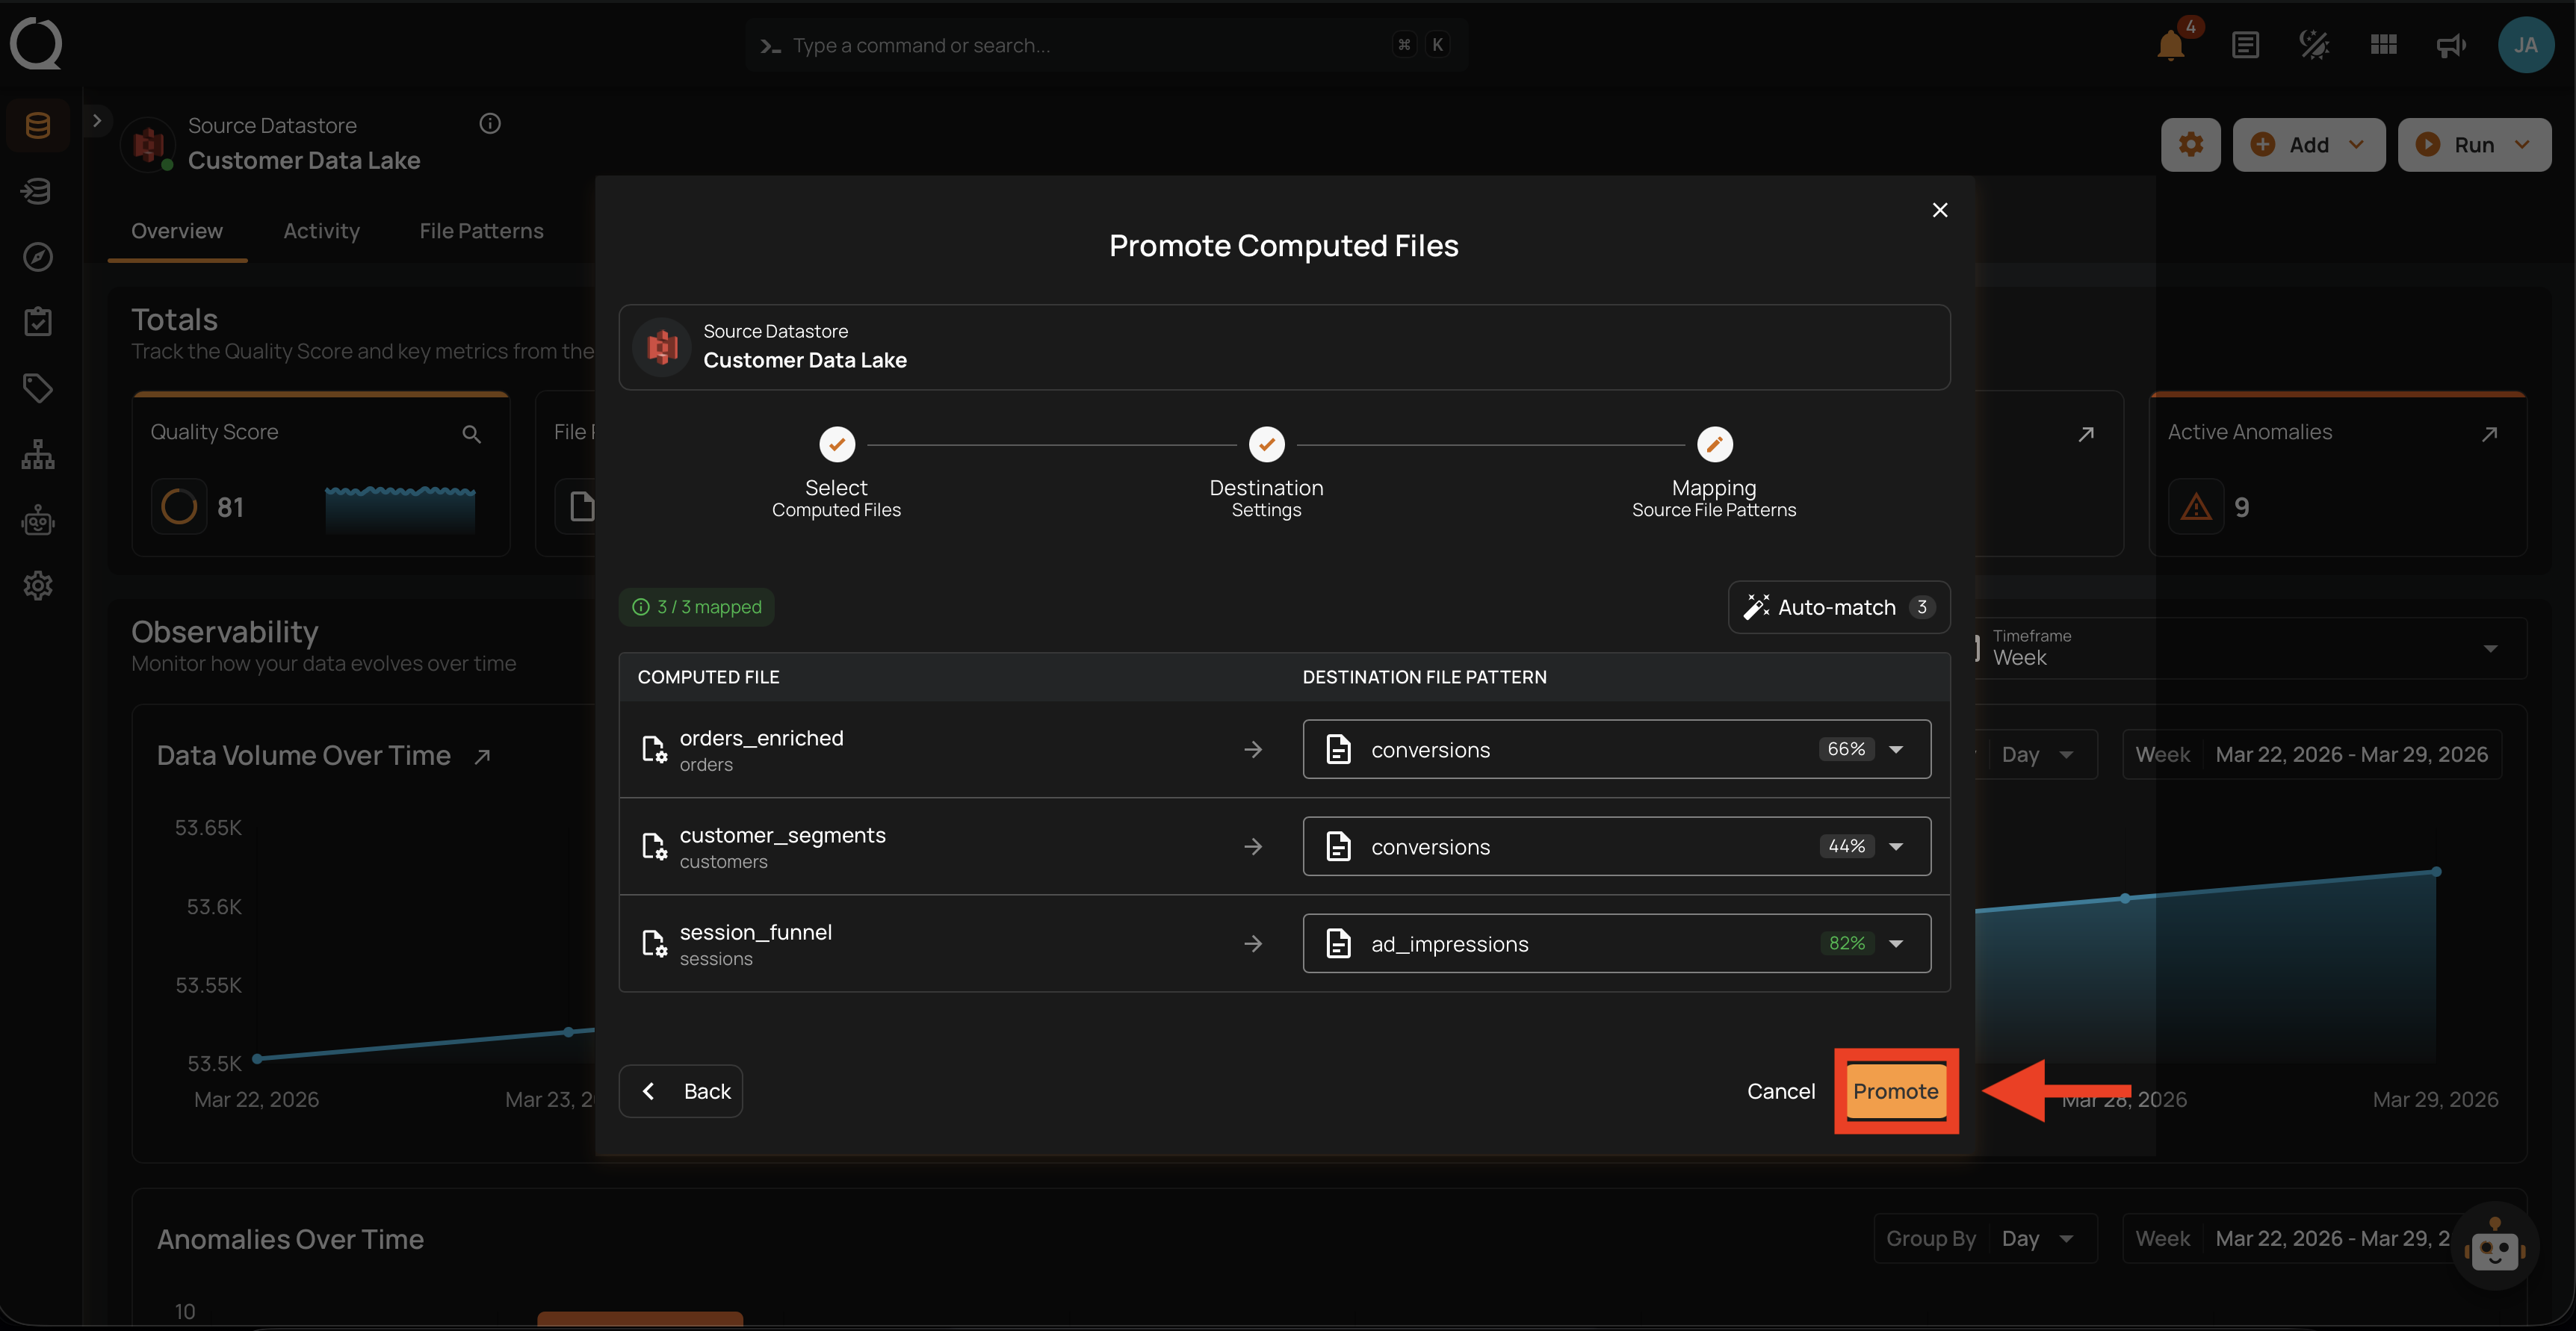
Step 11: A confirmation toast appears — the operation has been queued. Track progress on the Activity tab and review per-file results once the operation completes.