Okta
This guide walks you through setting up Directory Sync with Okta using SCIM provisioning.
Setting up the OAuth Client in Okta
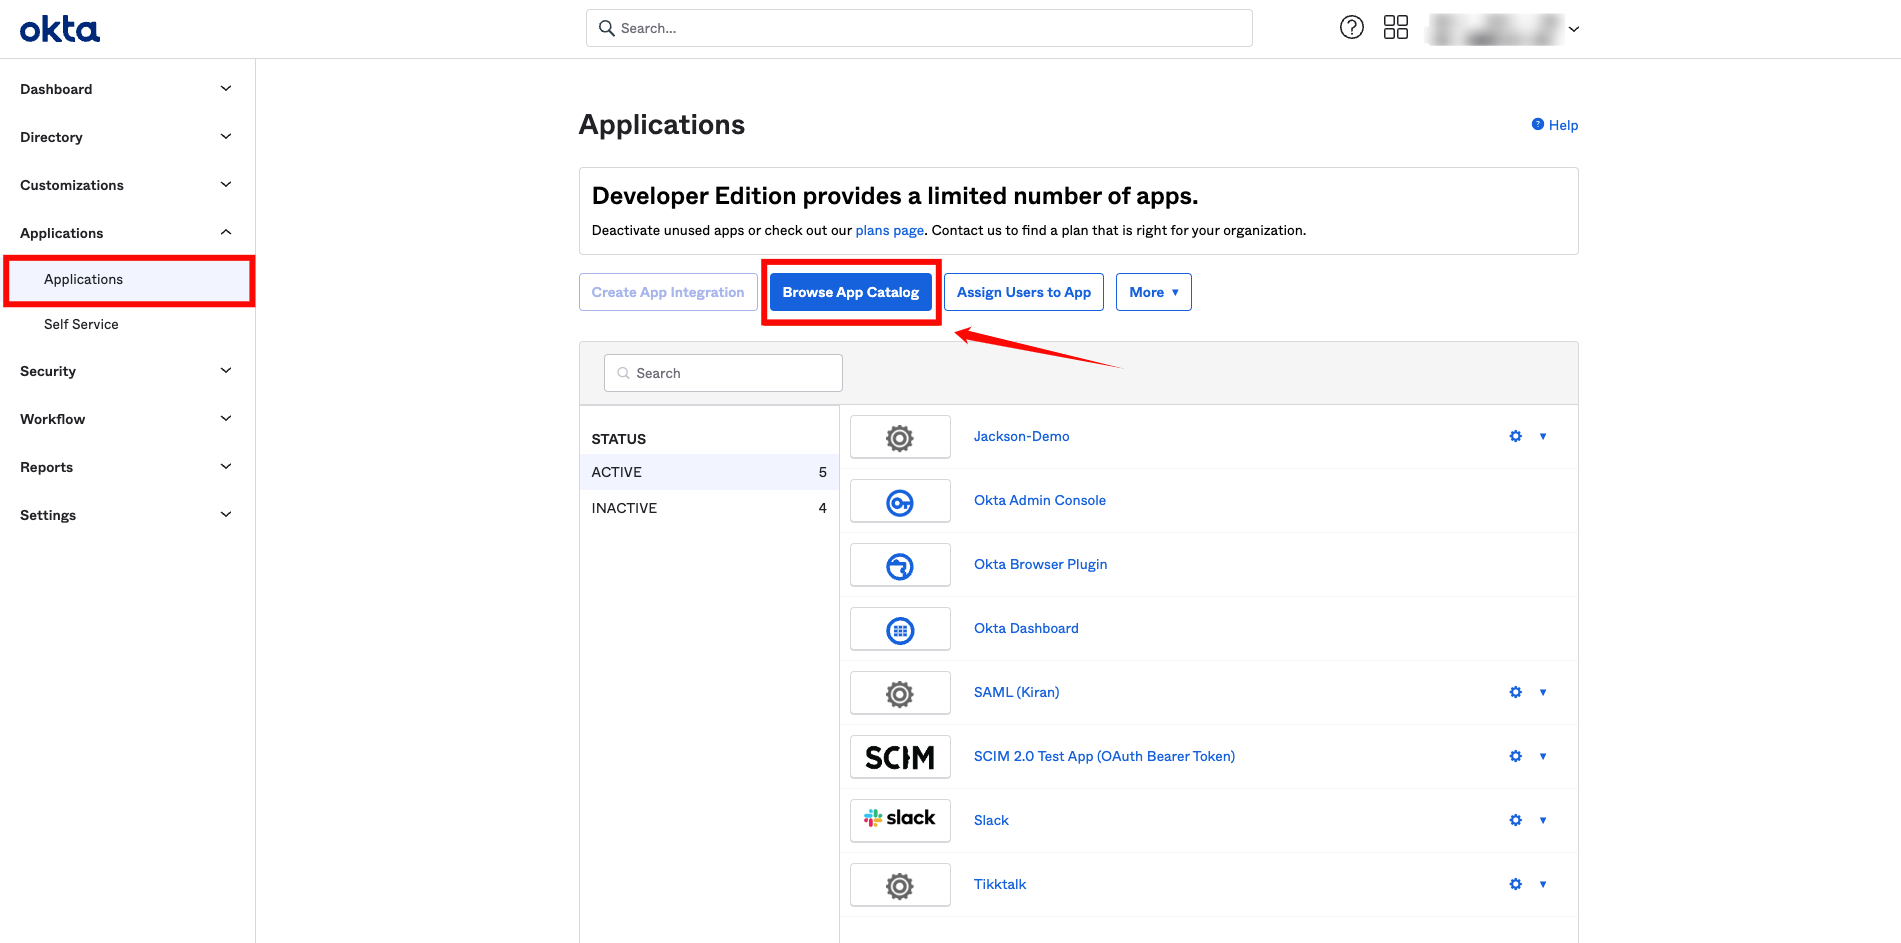
Step 1: Log in to your Okta account using your administrator credentials. From the left-hand navigation menu, click Applications, then select Browse App Catalog.
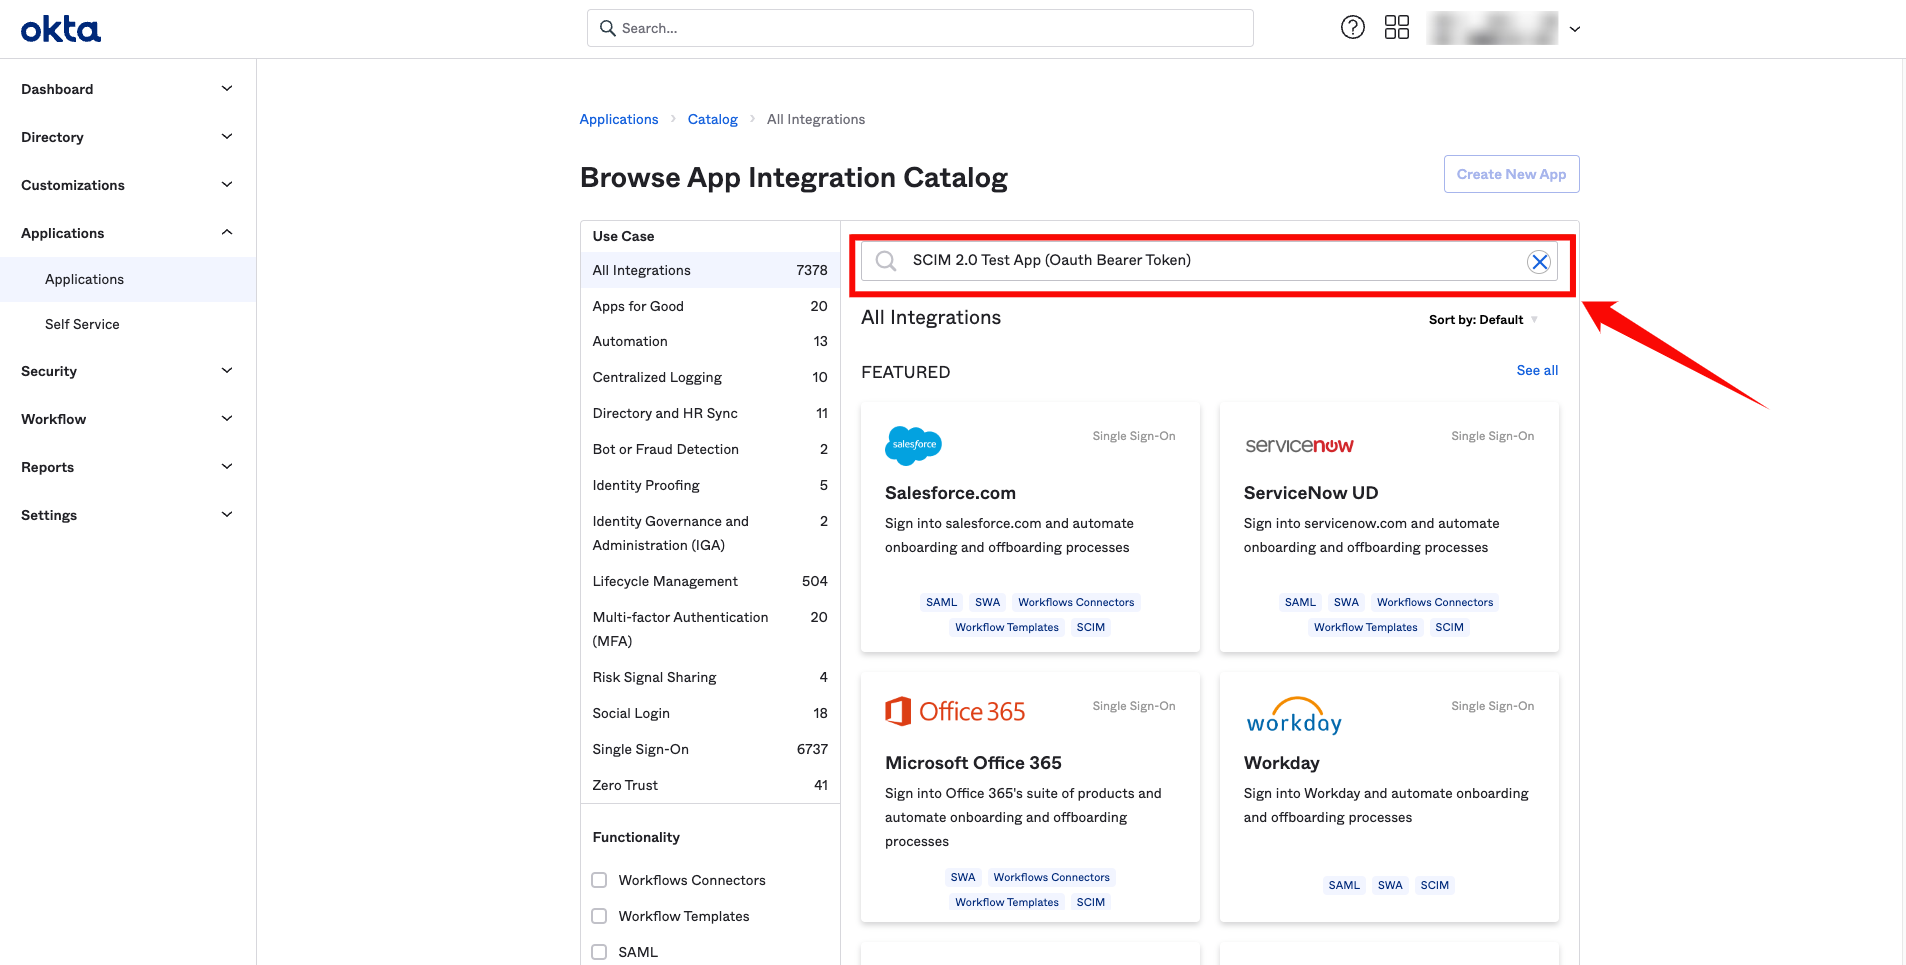
Step 2: In the search bar, type SCIM 2.0 Test App (OAuth Bearer Token), and select the app called SCIM 2.0 Test App (OAuth Bearer Token) from the search results.
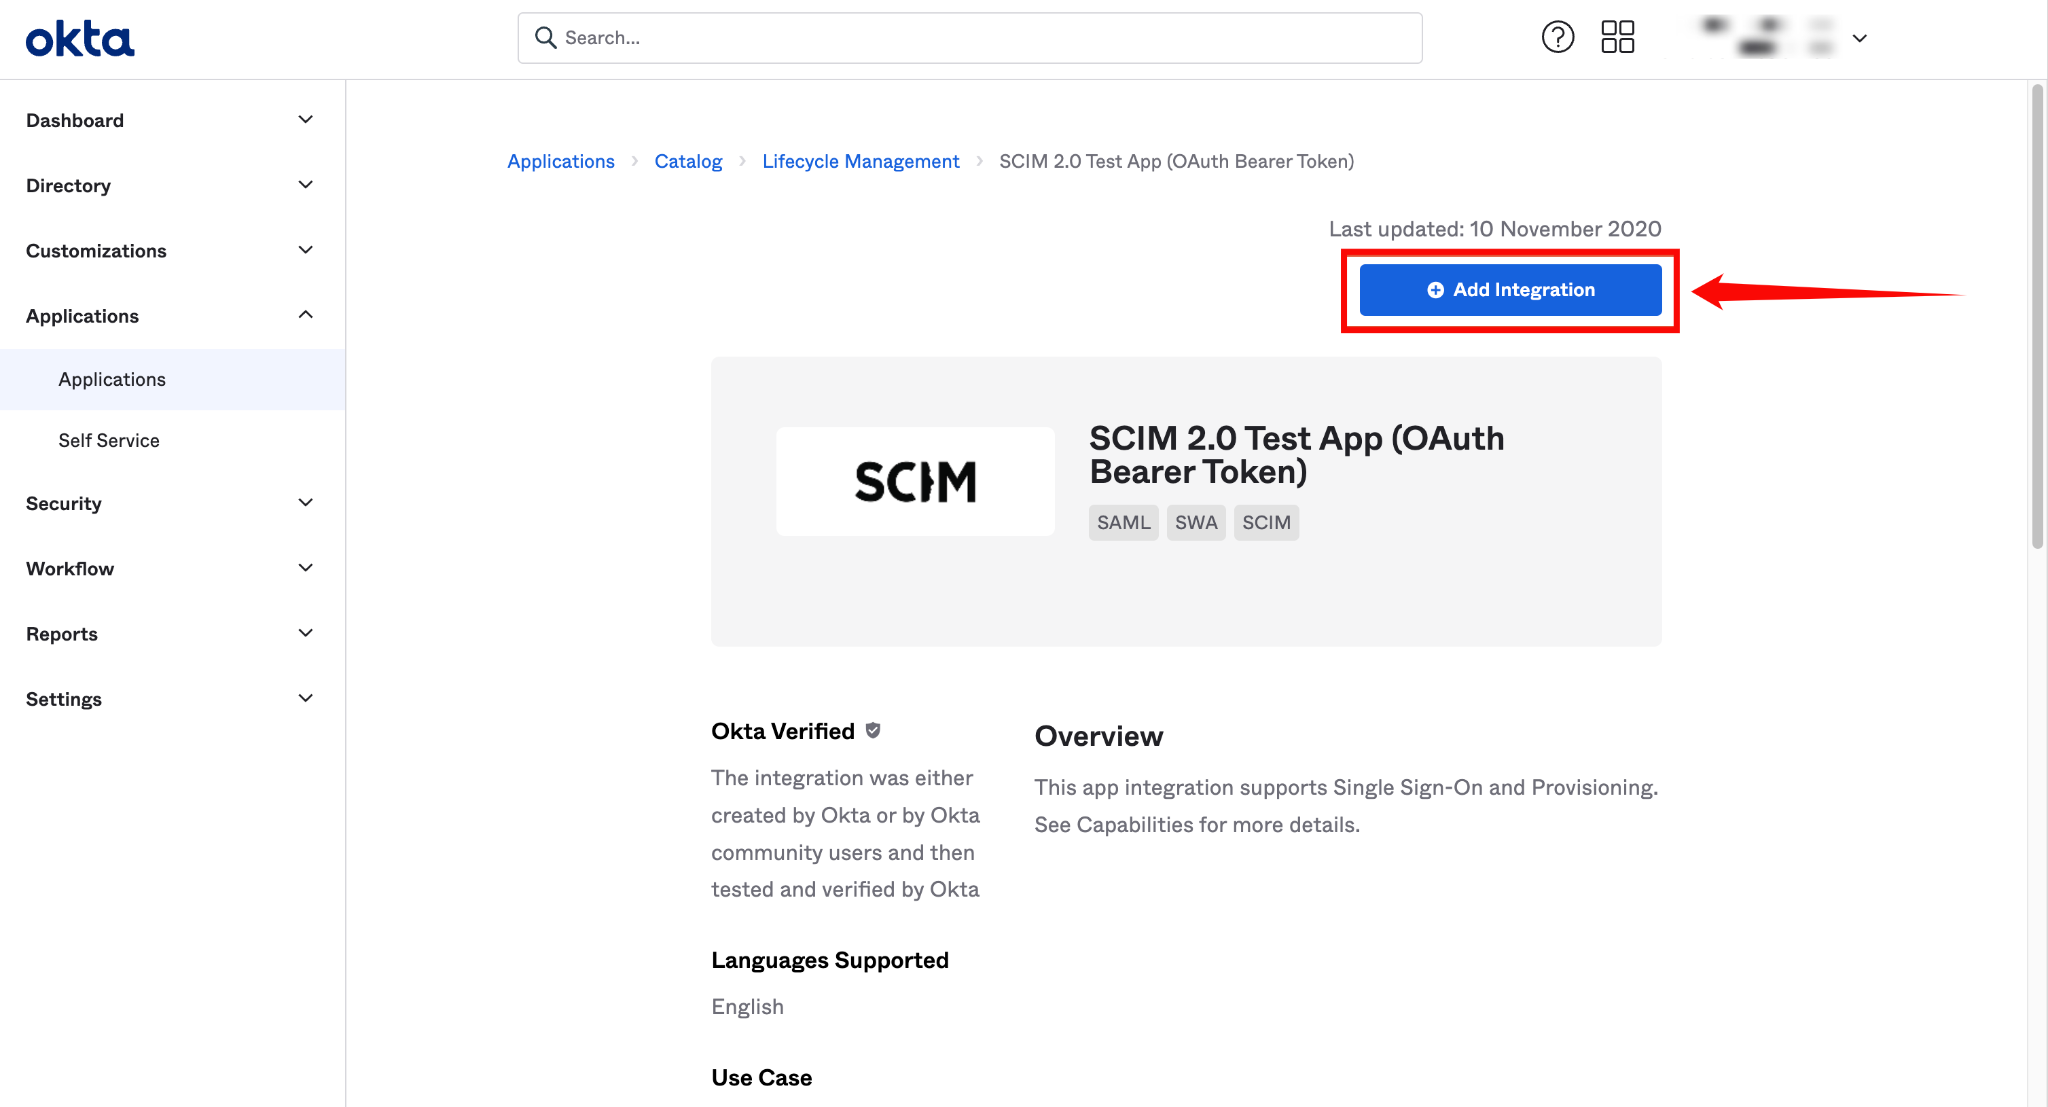
Step 3: On the app's details page, click Add Integration.
Step 4: Enter a name for your application (e.g., "Qualytics SCIM Client").
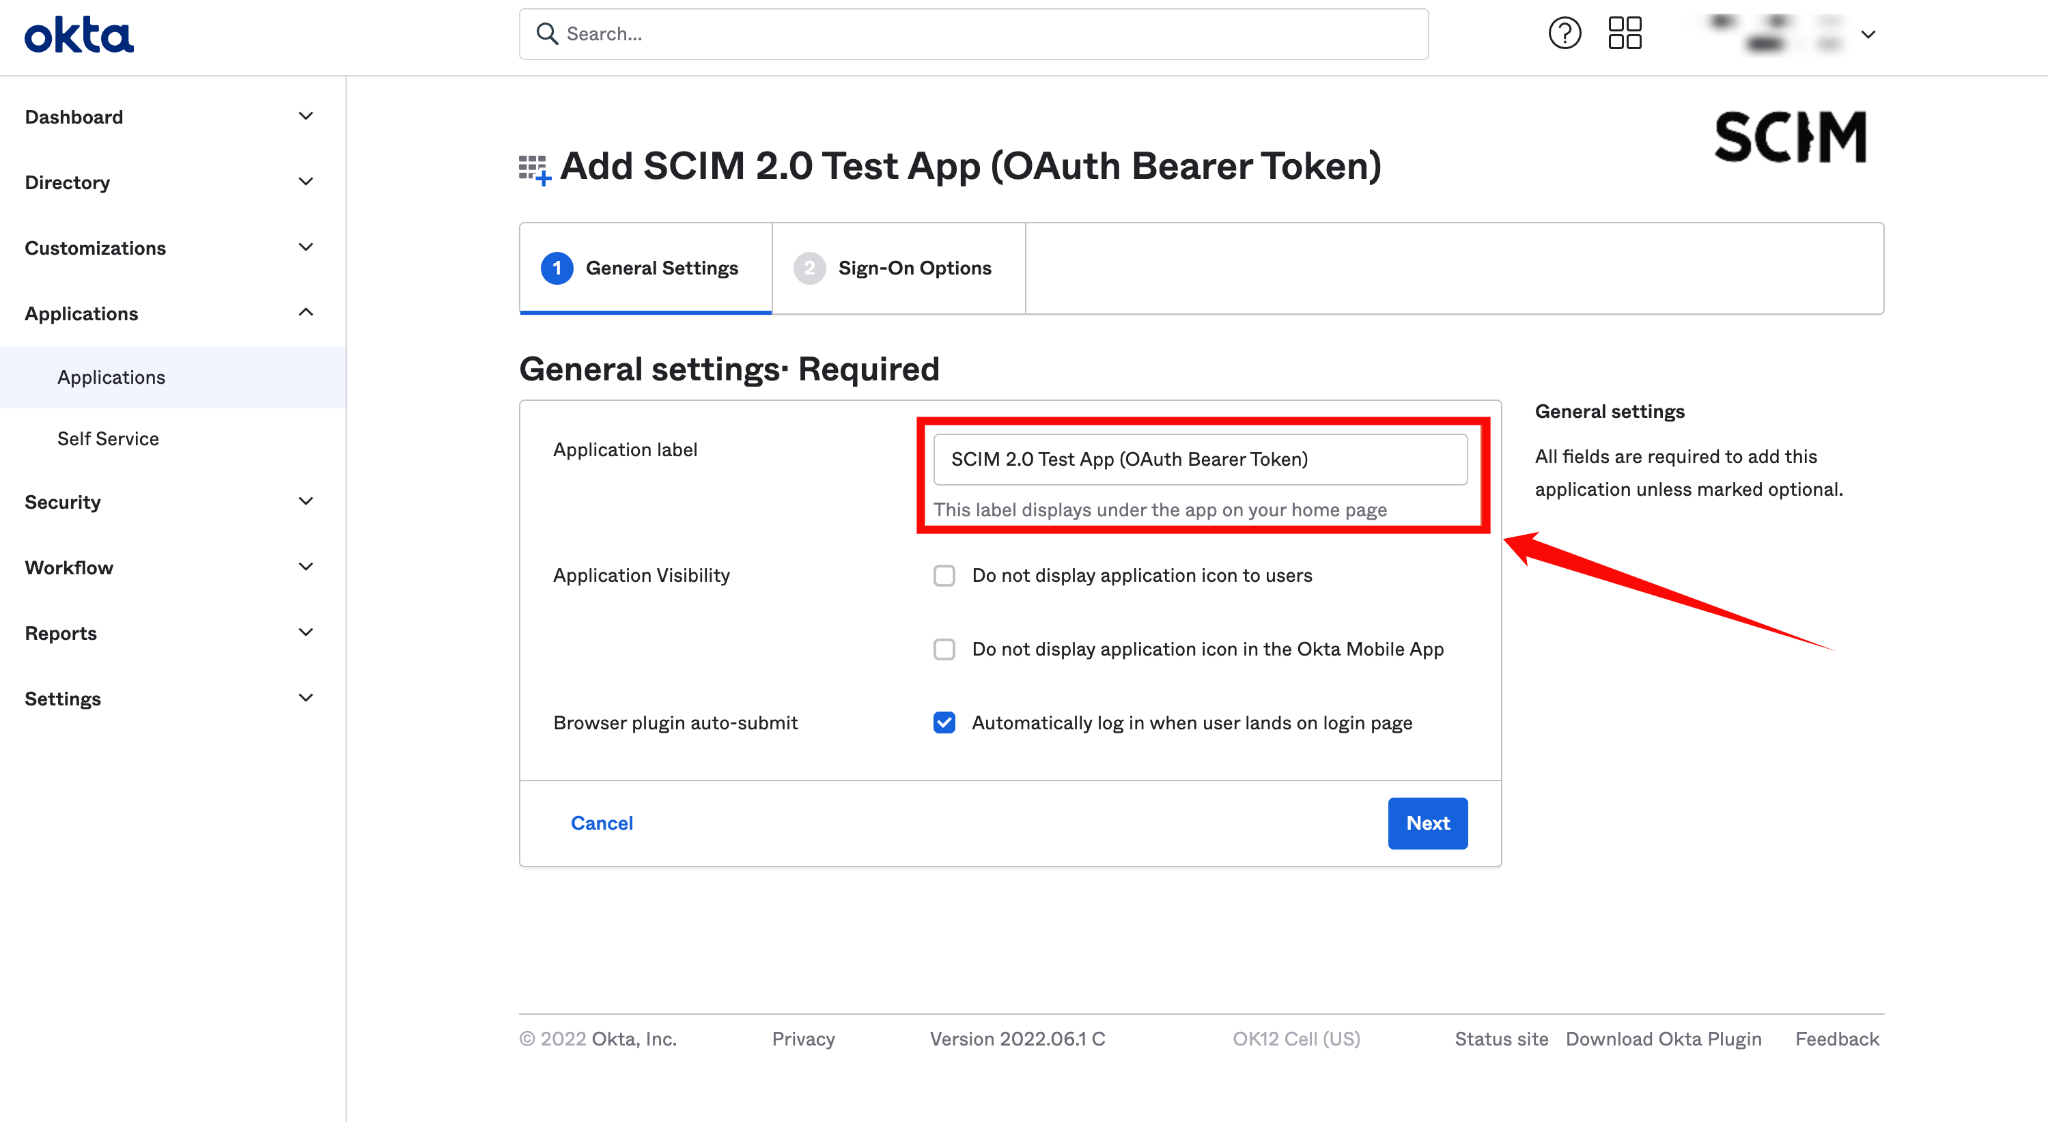
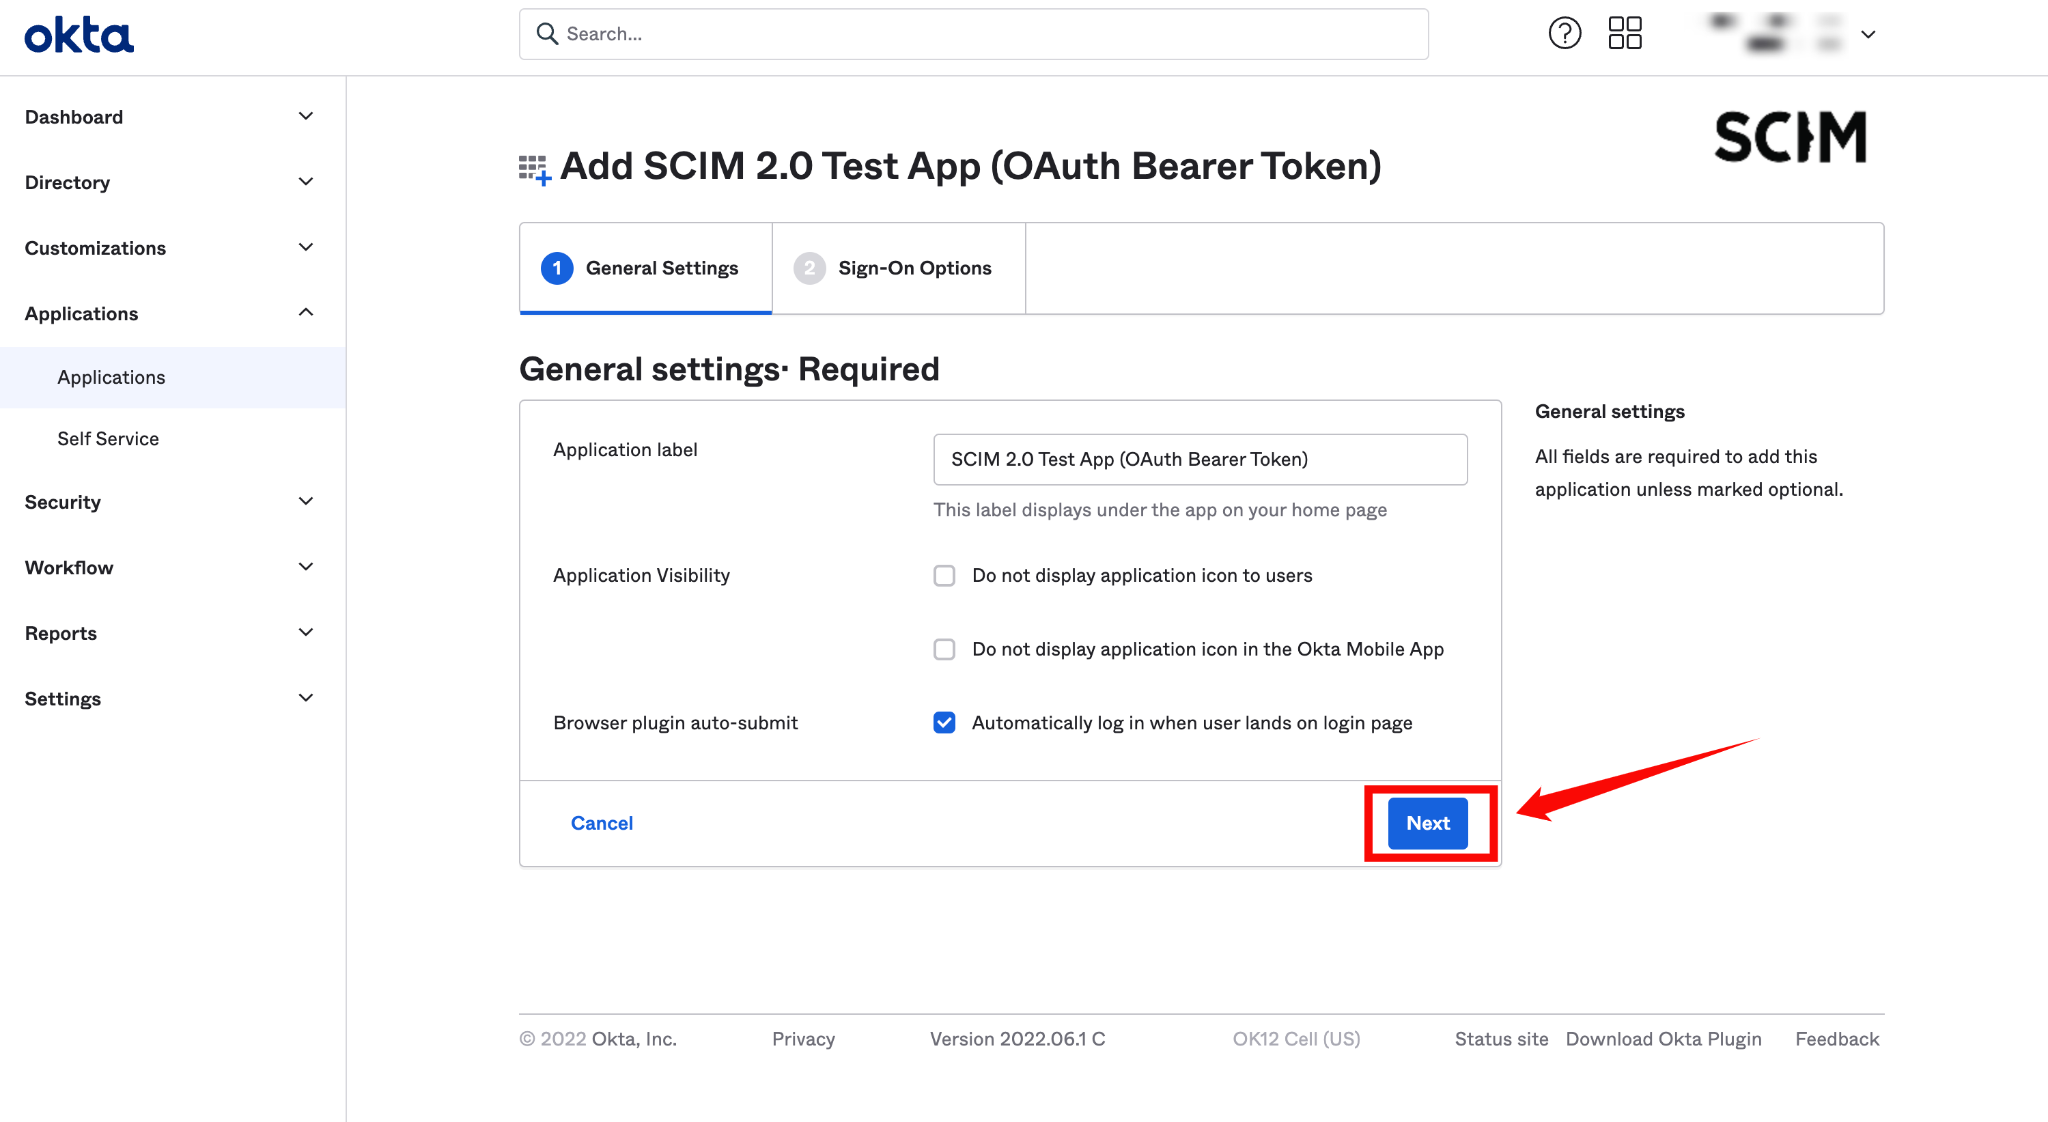
Step 5: Click on the Next button.
Configuring SCIM Endpoints
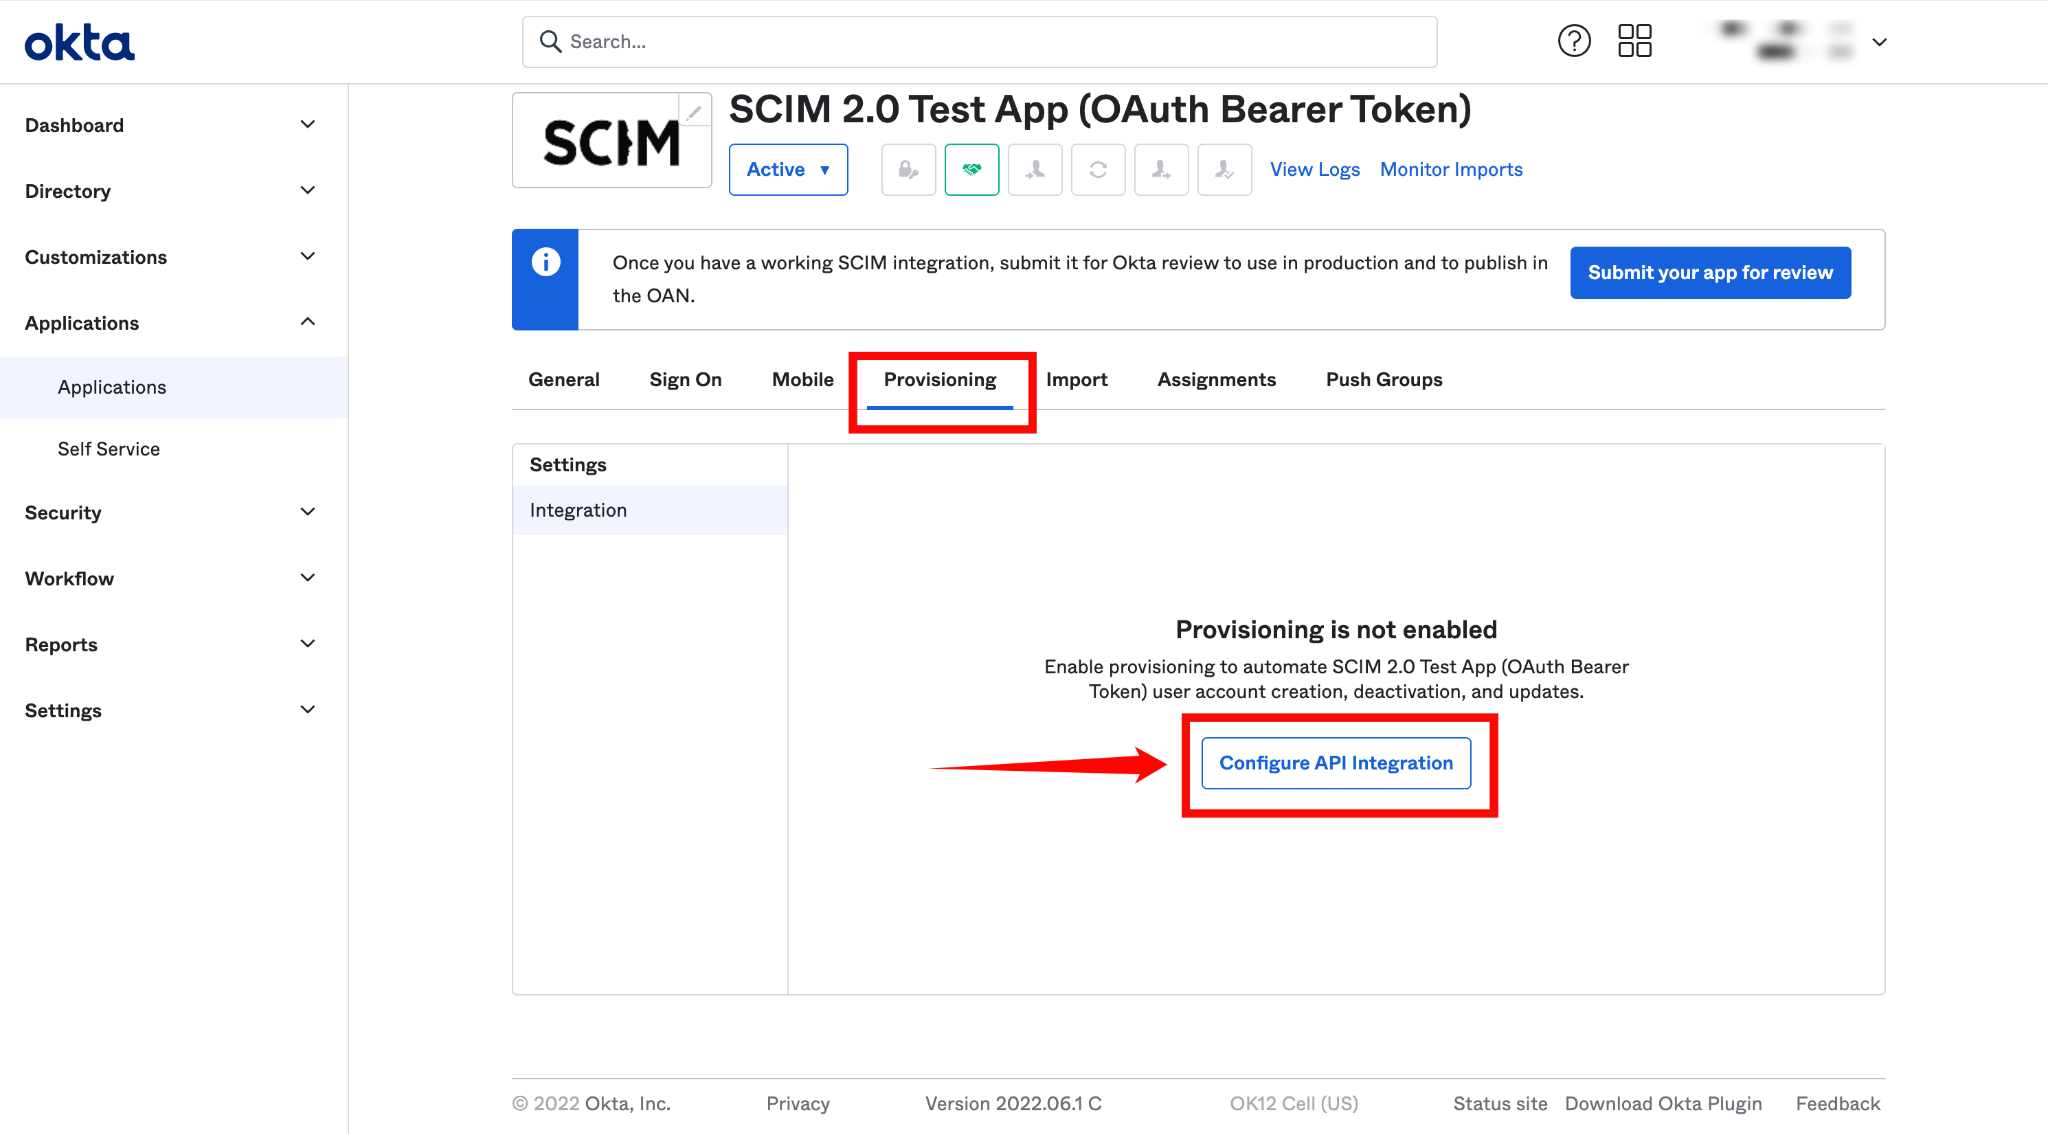
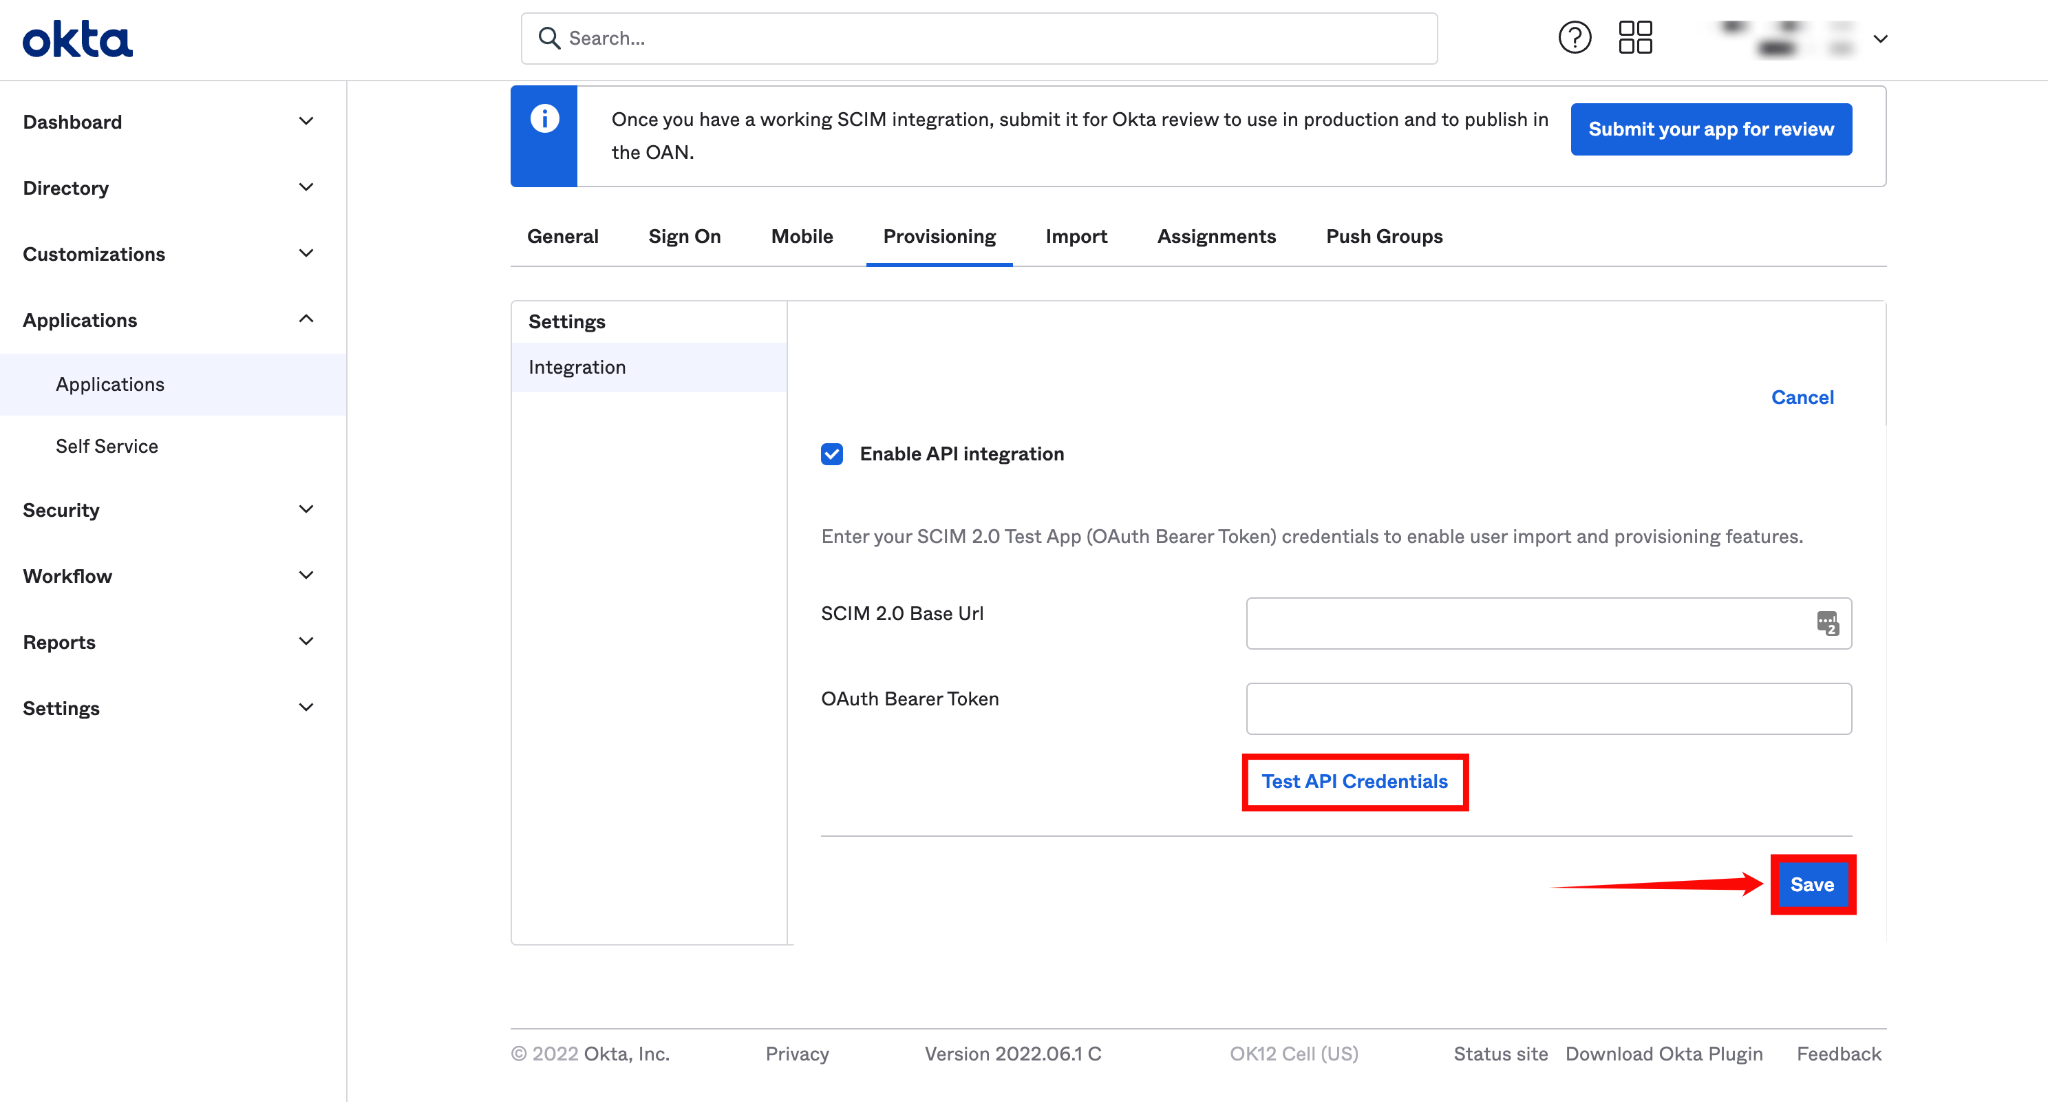
Step 1: In the newly created app, go to the Provisioning tab and click Configure API Integration.
Step 2: Check the box labeled Enable API Integration, and enter the following details:
-
SCIM 2.0 Base URL:
https://your-domain.qualytics.io/api/scim/v2 -
OAuth Bearer Token: Generate this token from the Qualytics UI when logged in as an admin user. For more information on how to generate tokens in Qualytics, refer to the documentation on Tokens.
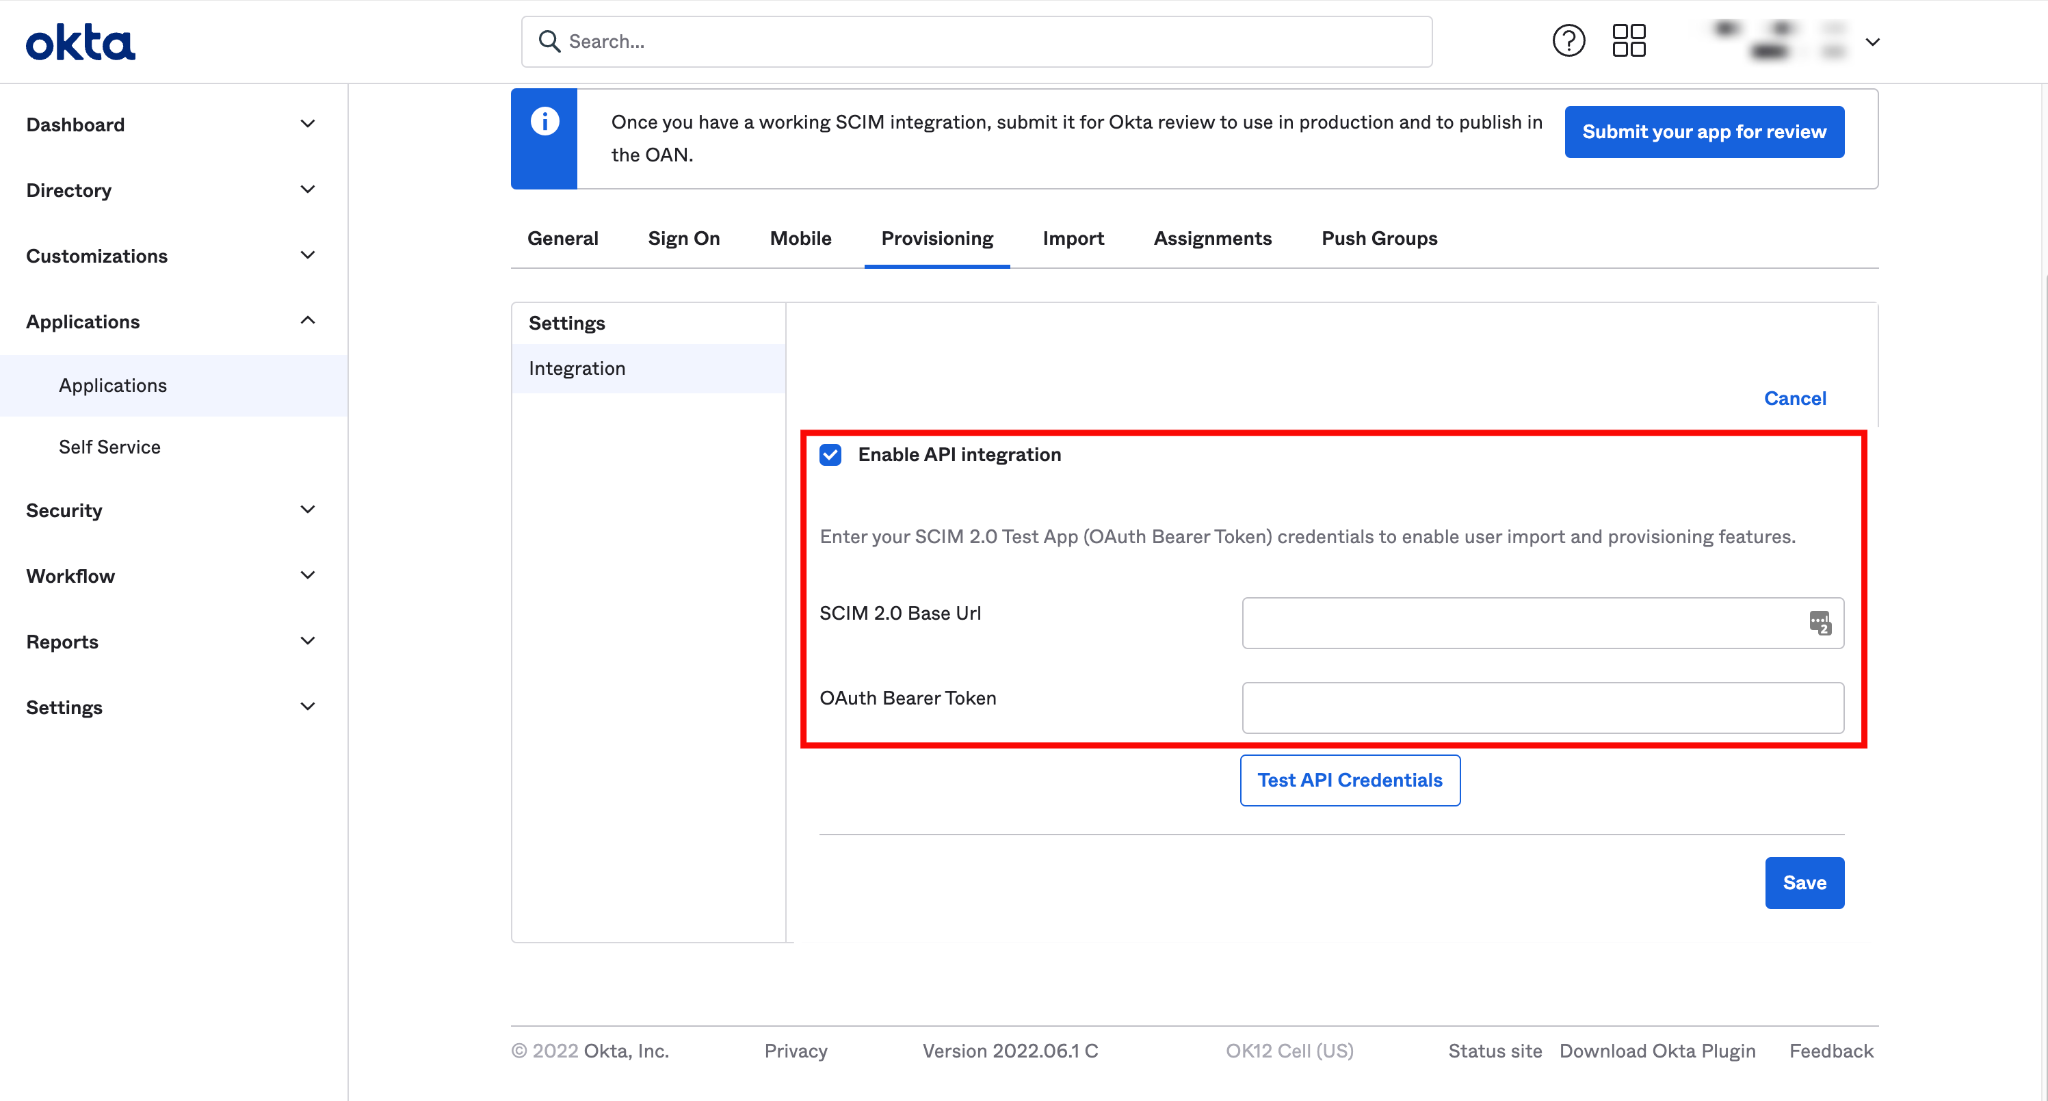
Step 3: Click Test API Credentials to verify the connection. Once the credentials are validated, click Save.
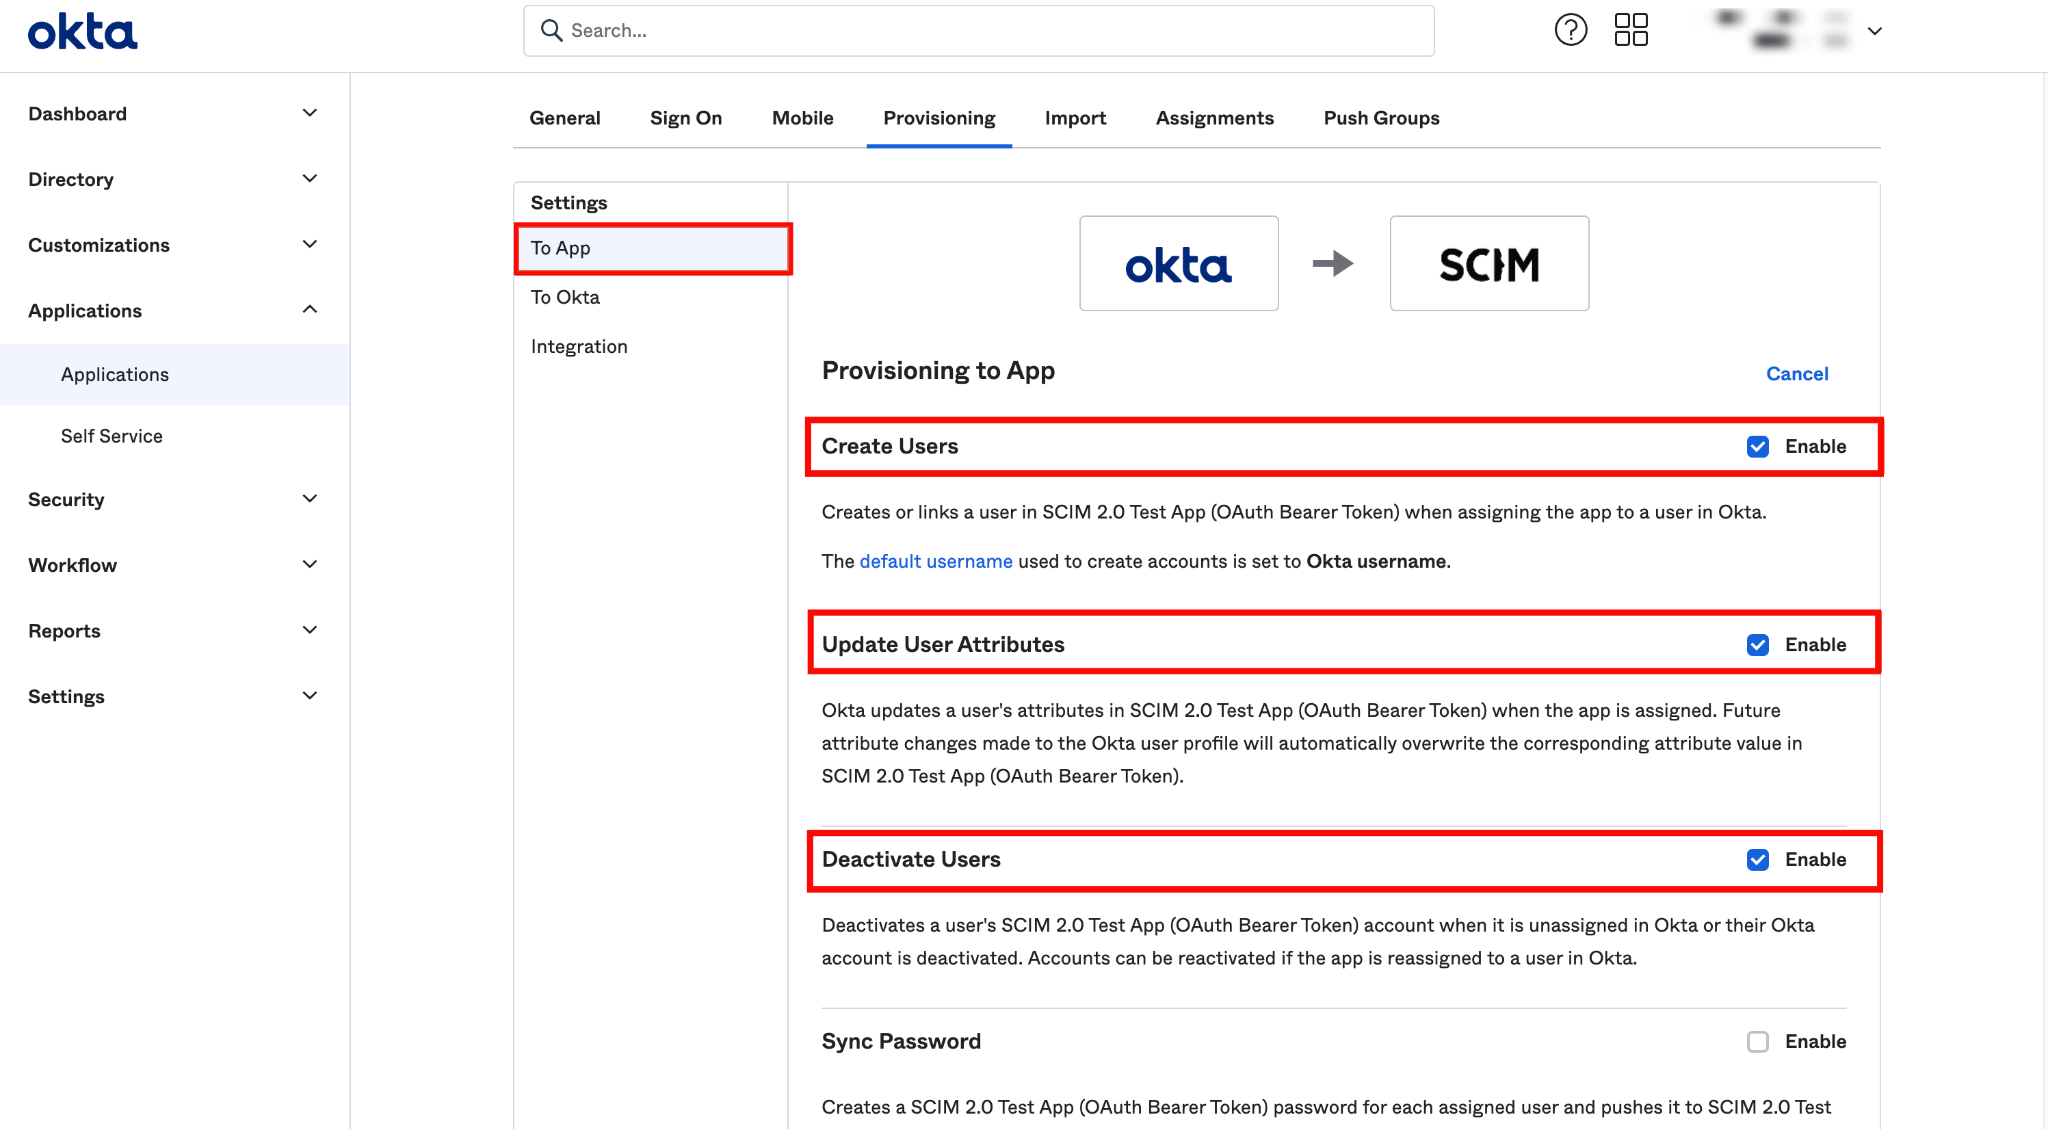
Step 4: A new settings page will appear. Under the To App section, enable the following settings:
- Create Users
- Update User Attributes
- Deactivate Users
After enabling these settings, your Okta SCIM API integration is successfully configured.
Assigning Users for Provisioning
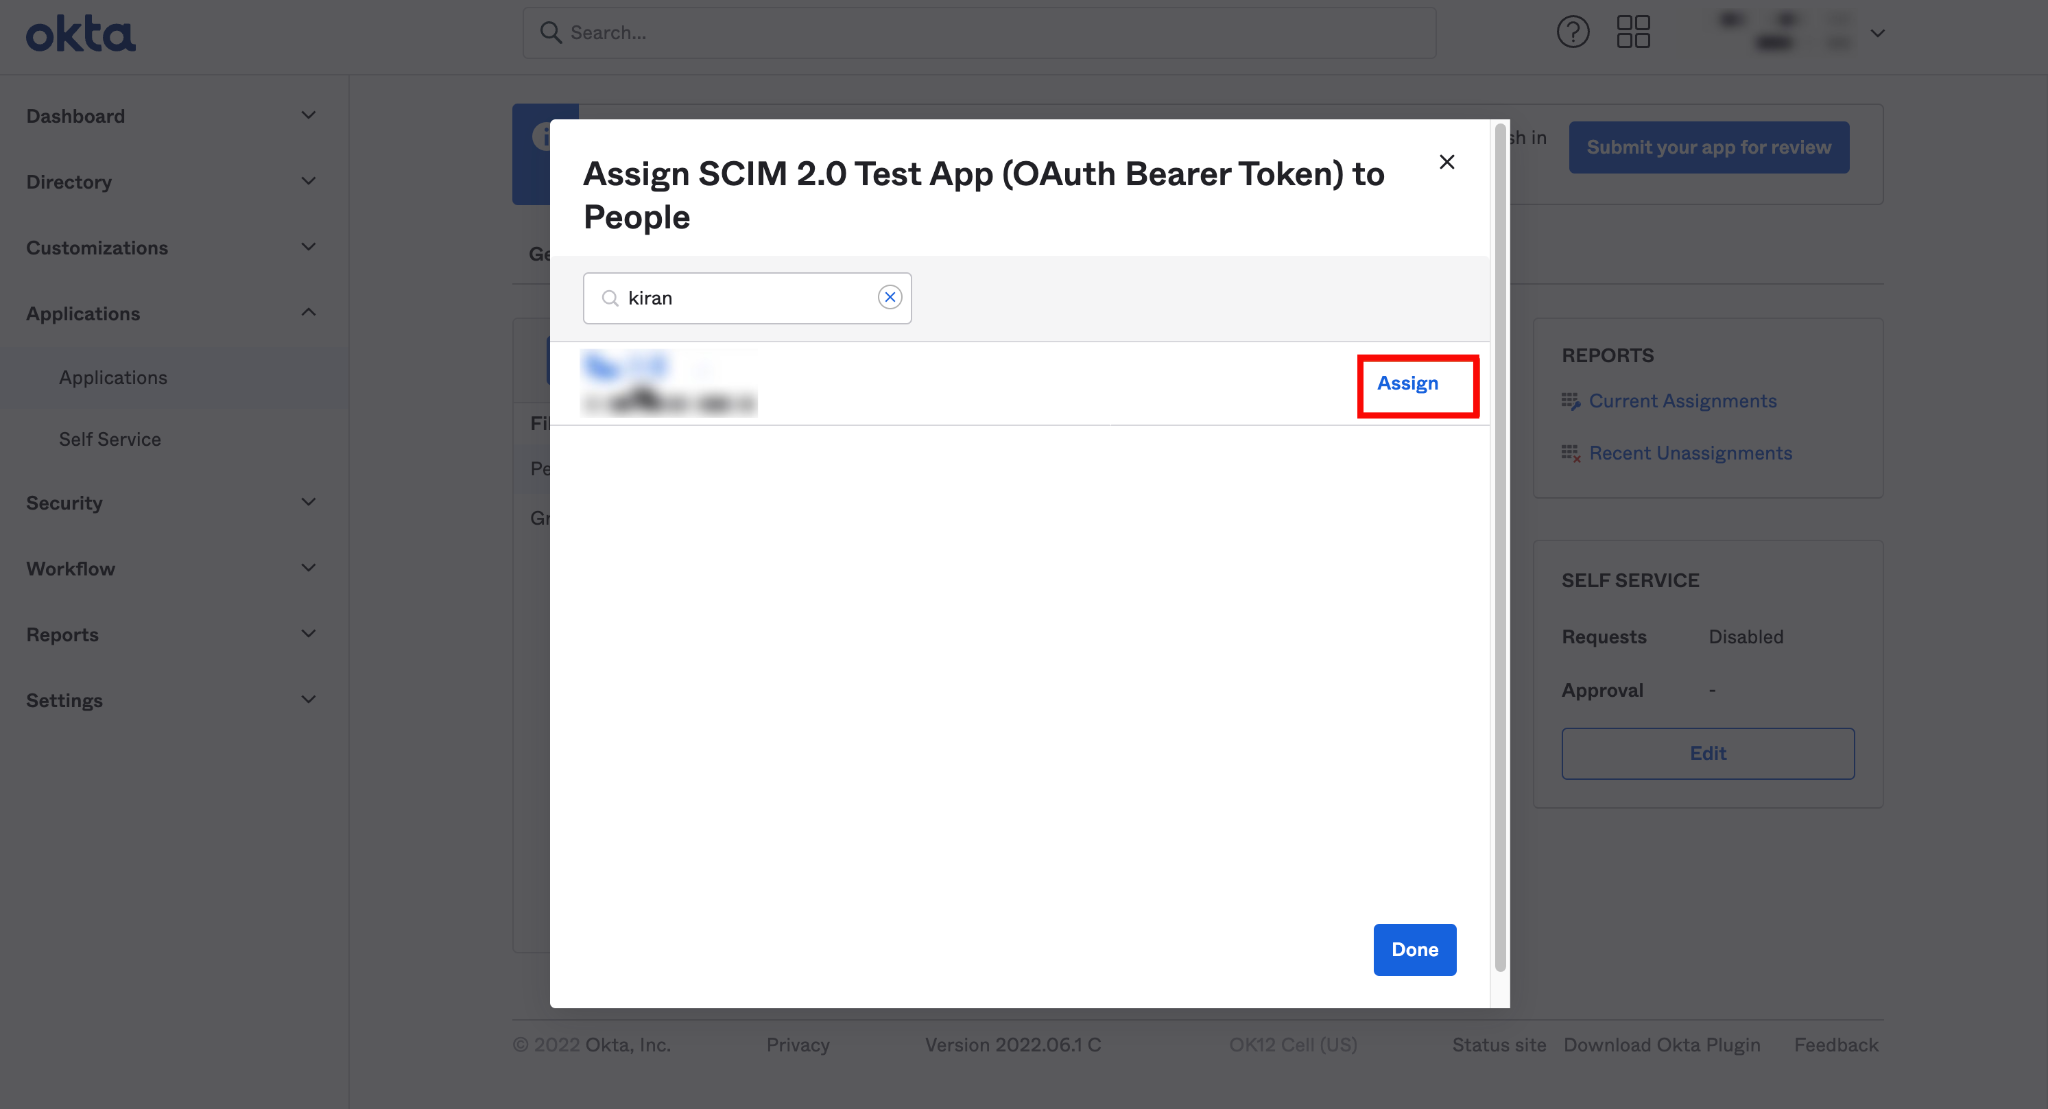
Step 1: Click the Assignments tab and select Assign to People from the dropdown Assign.

Step 2: Select the users you want to assign to the app and click the Assign button.
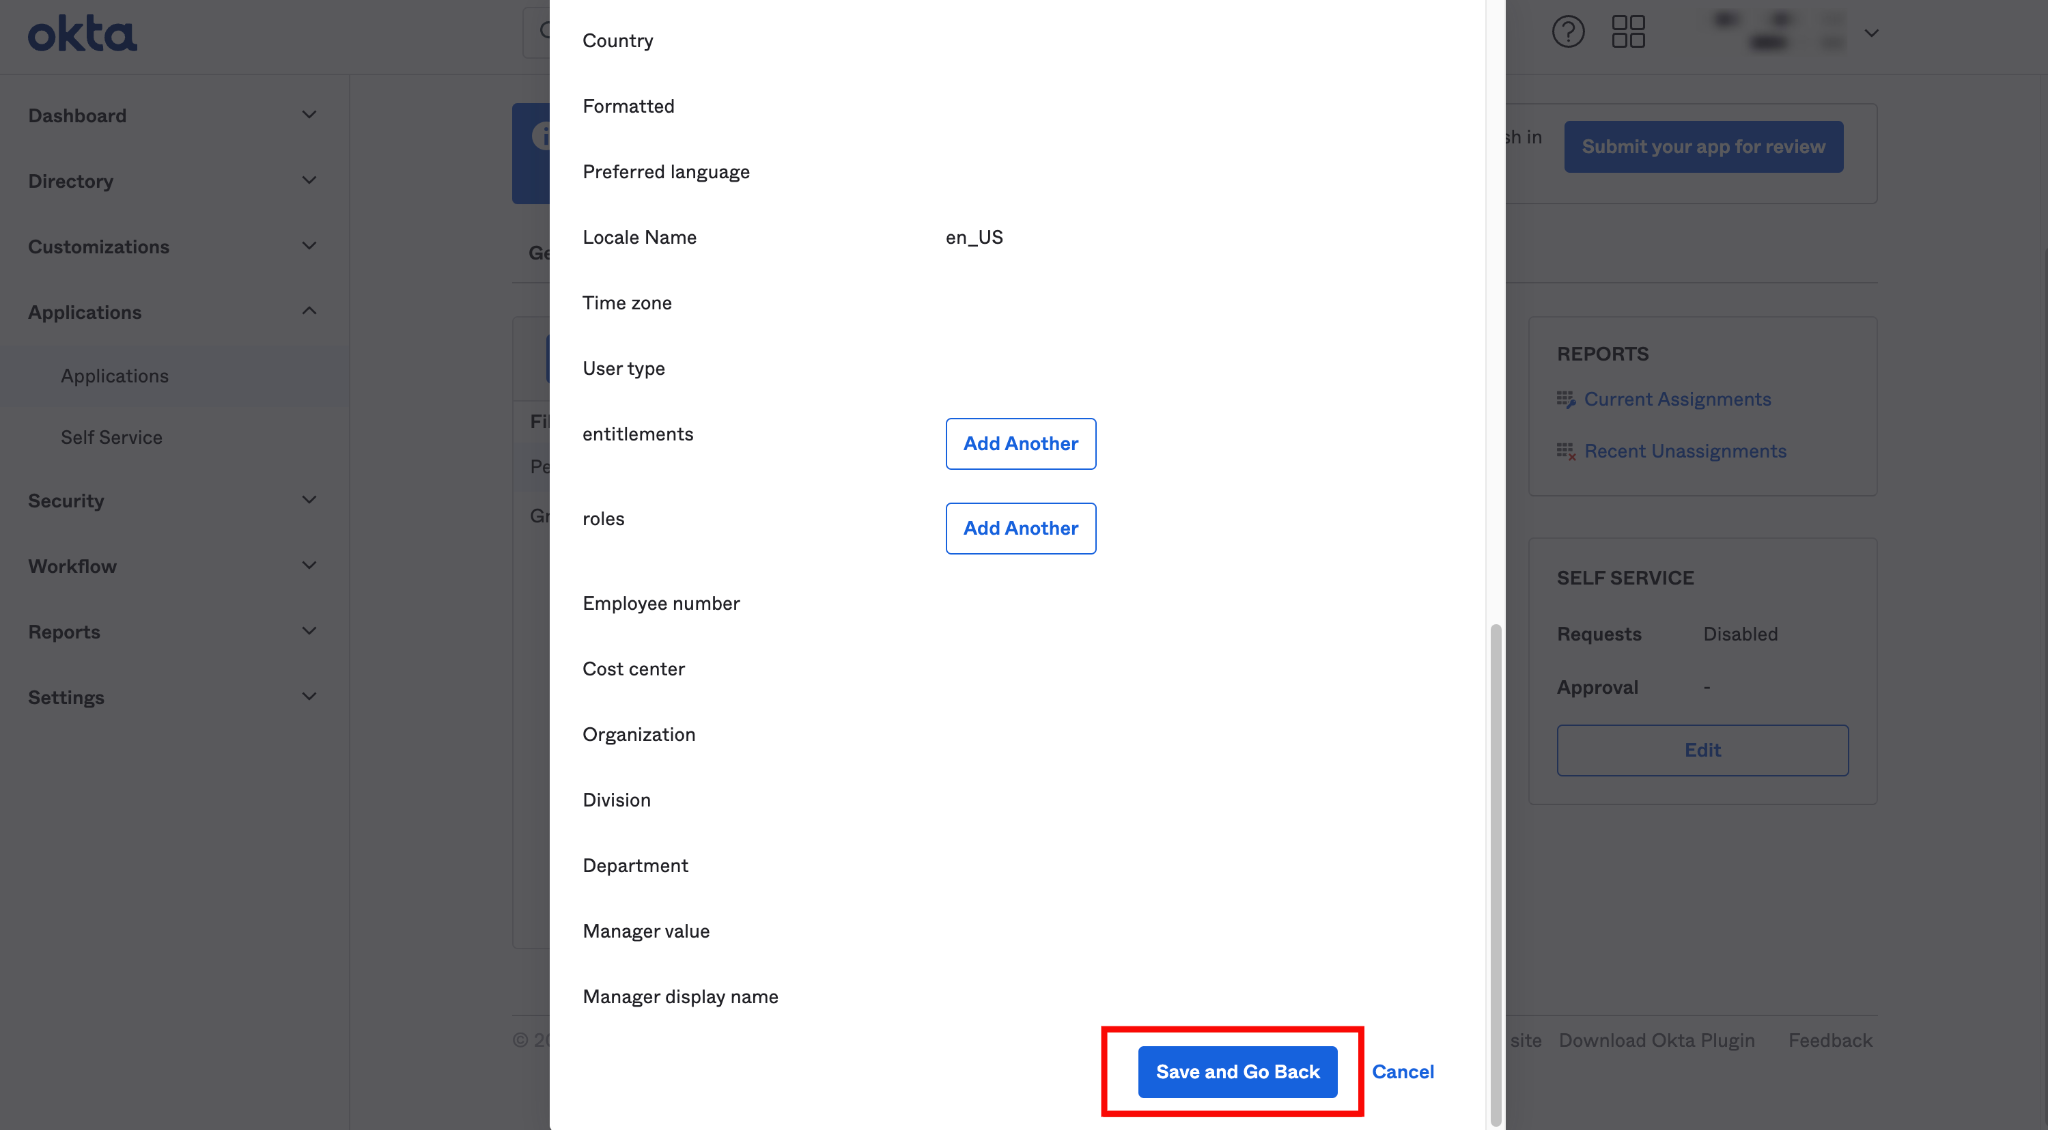
Step 3: After you click the Assign button, you'll see a new popup window with various fields. Confirm the field values and click the Save and Go Back buttons.
Assigning Groups for Provisioning
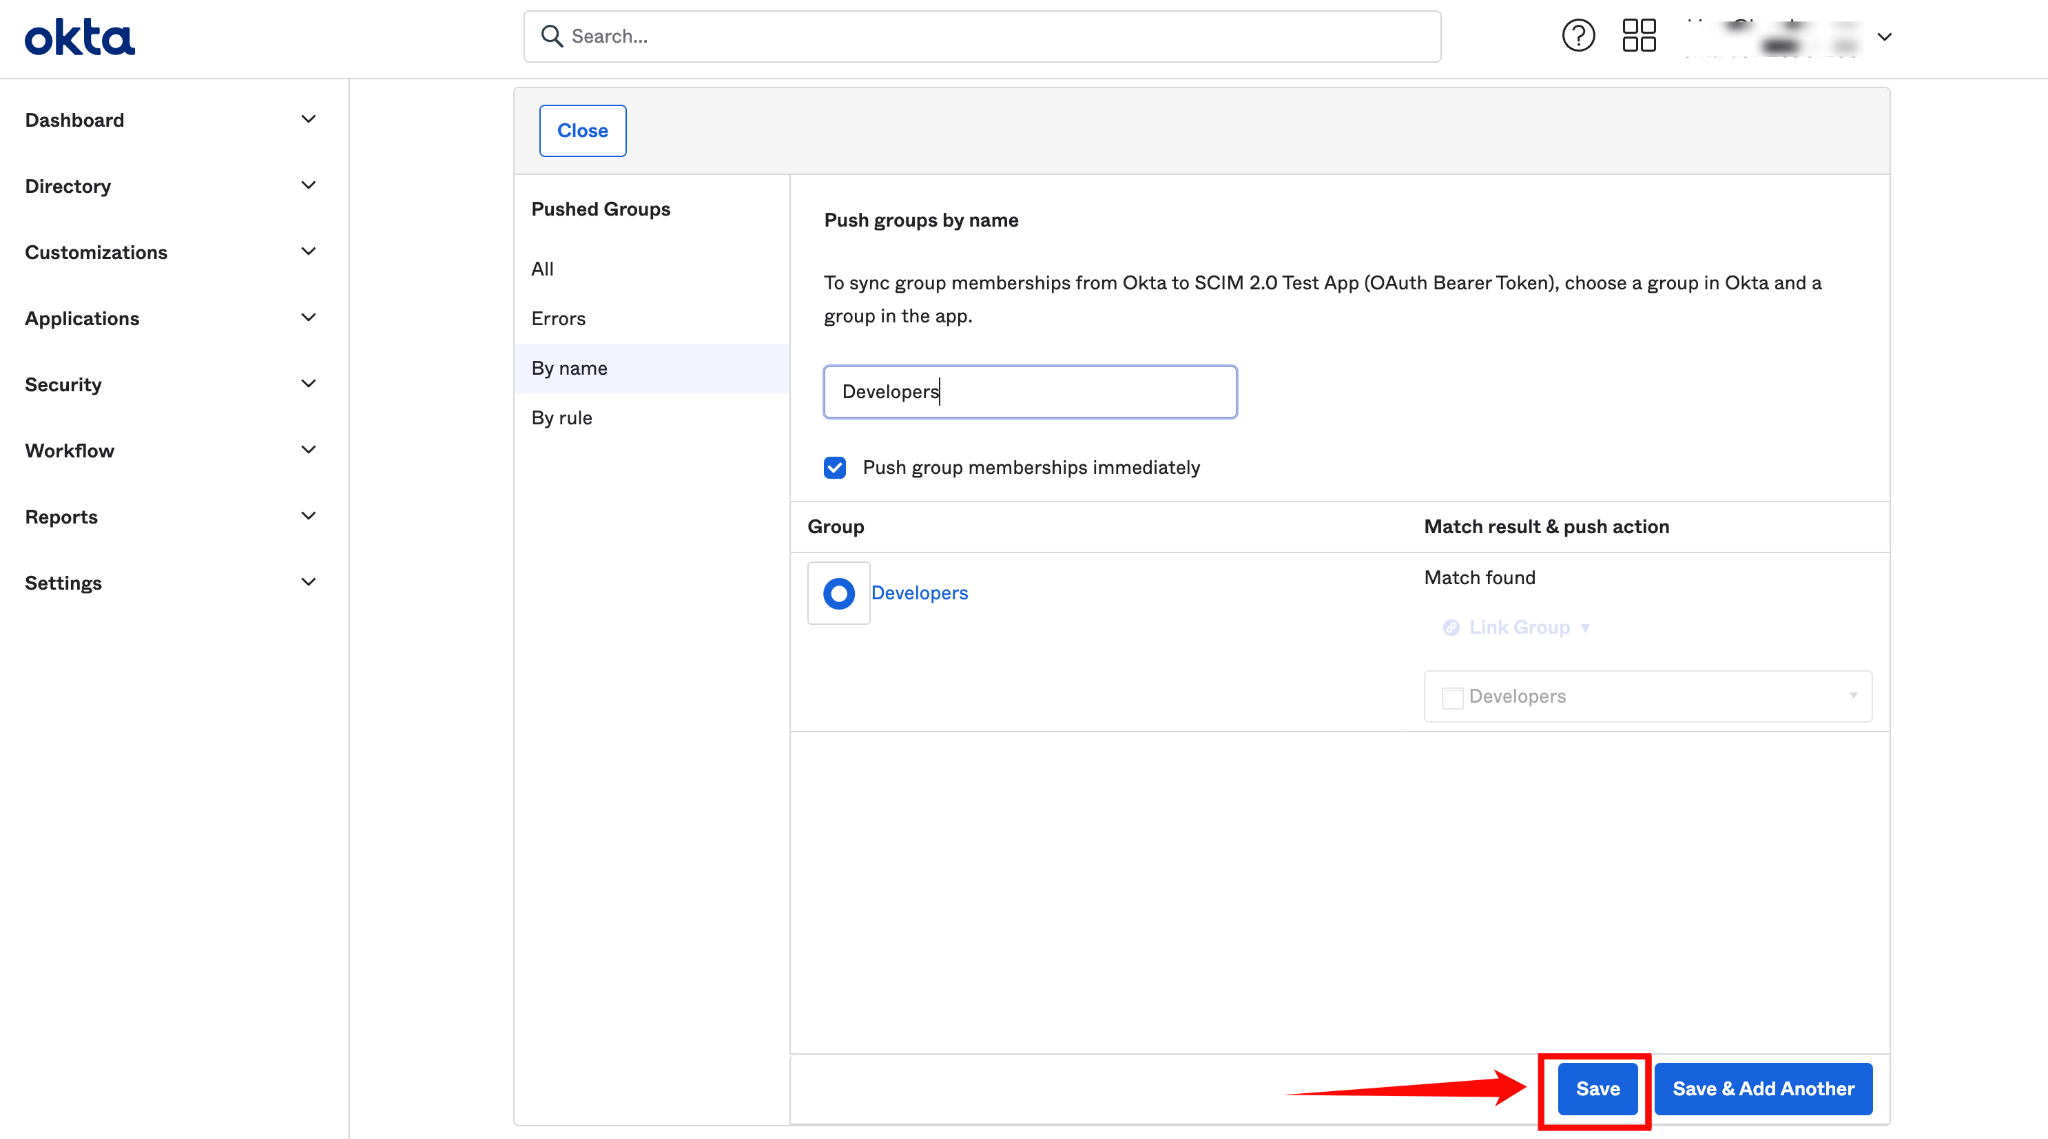
Step 1: Navigate to the tab Push Groups and select Find group by name from the dropdown Push Groups.
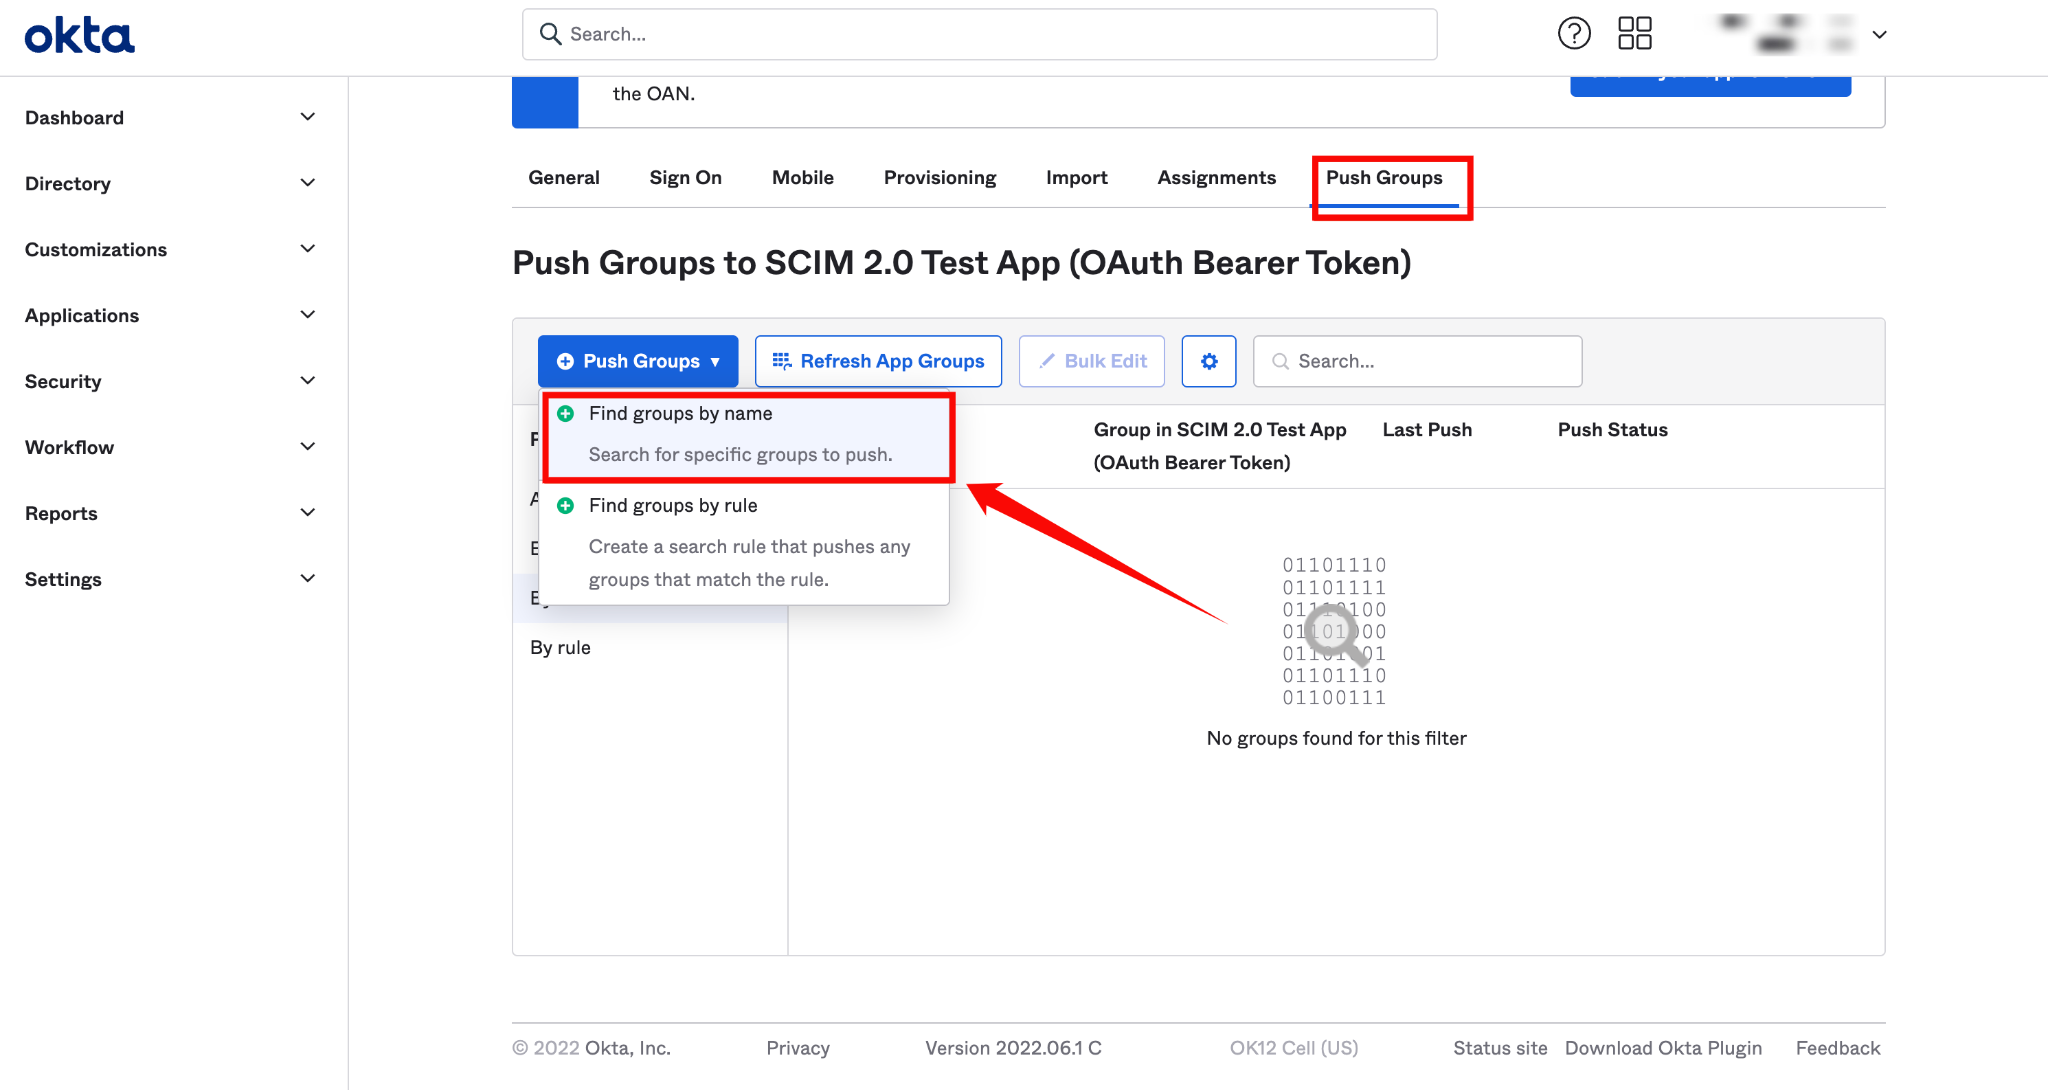
Step 2: Search for the group you want to assign to the app.
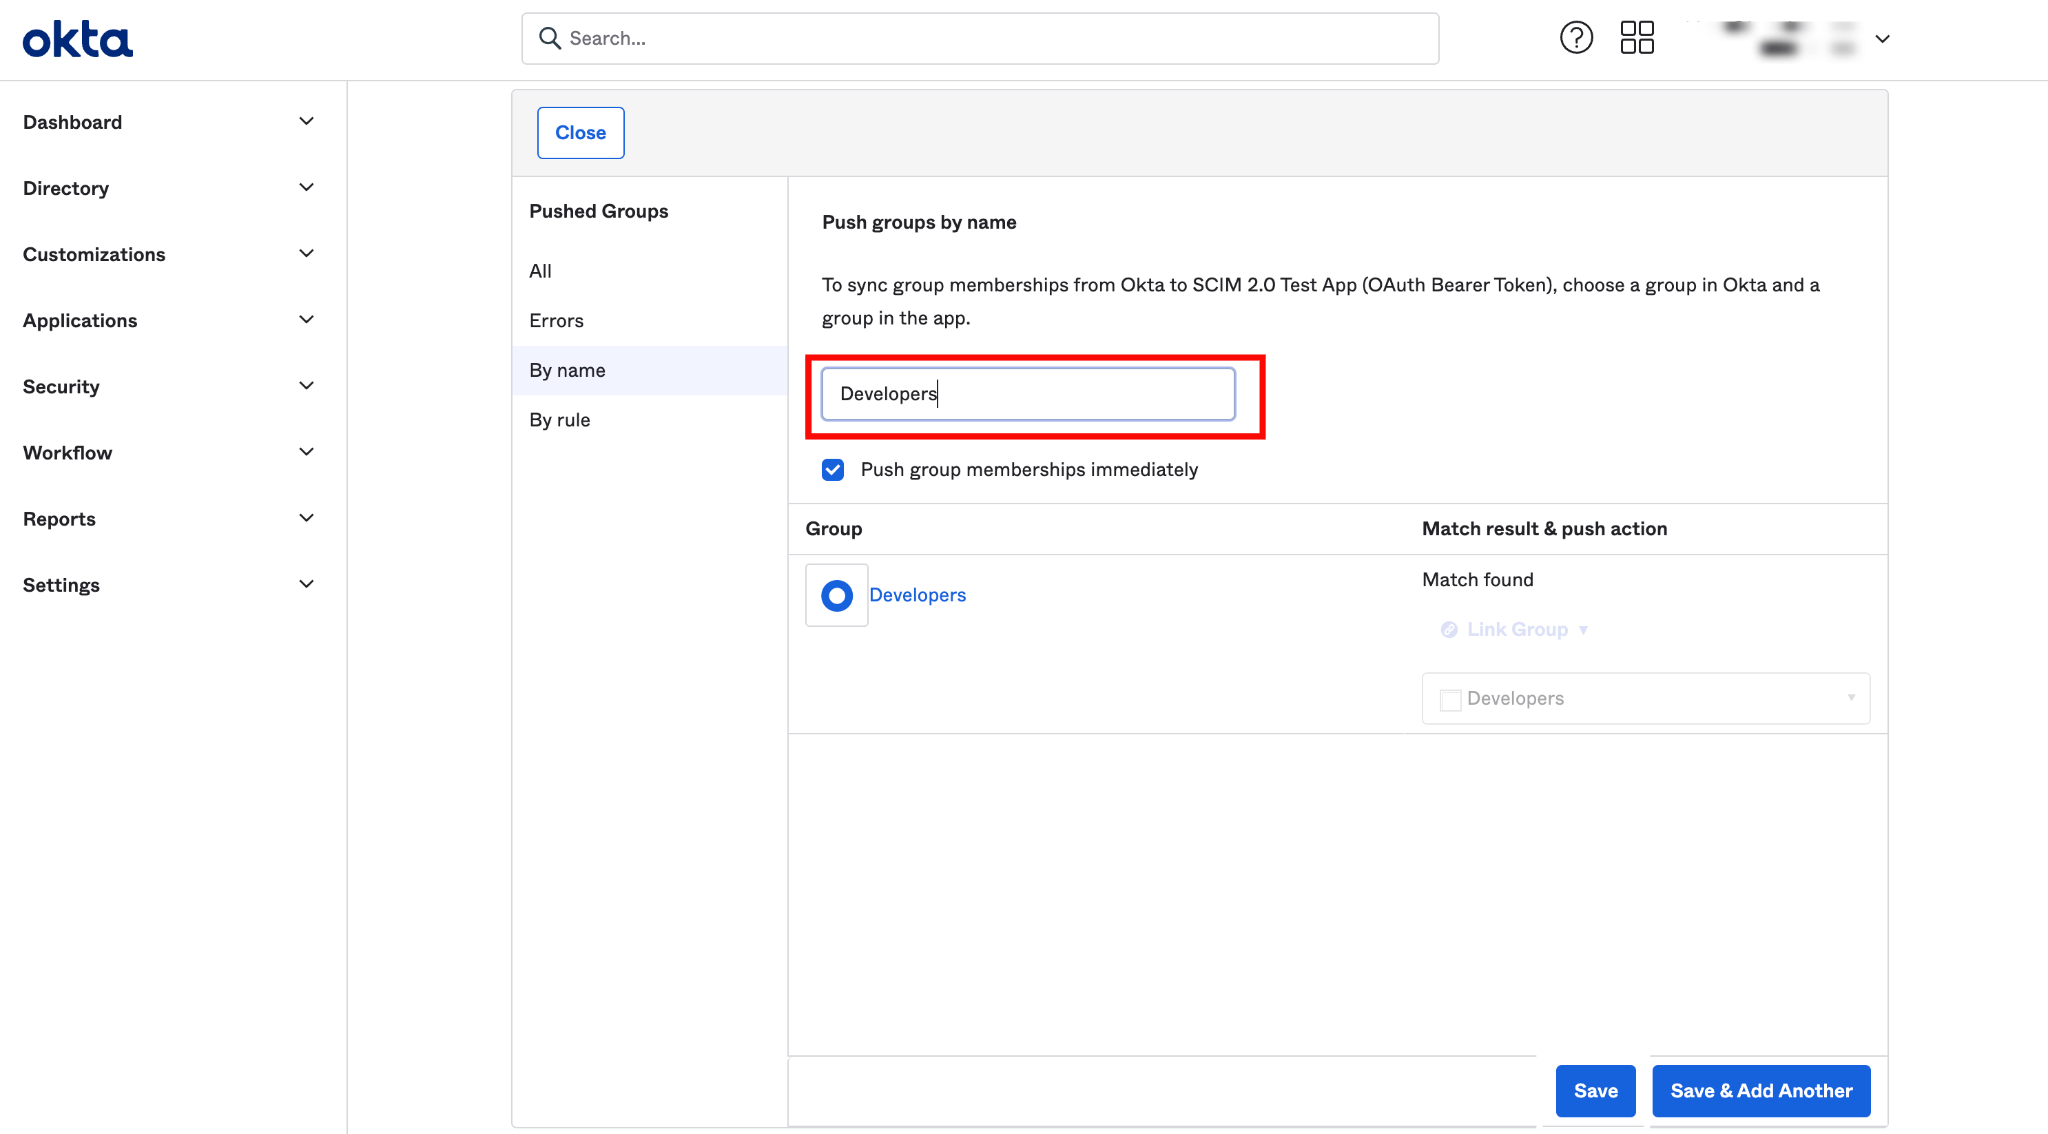
Step 3: After assigning the group name, then click on the Save button.