JumpCloud
This guide walks you through setting up Directory Sync with JumpCloud using SCIM provisioning.
Configuring SCIM Endpoints
JumpCloud supports SCIM provisioning within an existing SAML application. Follow these steps to configure SCIM provisioning:
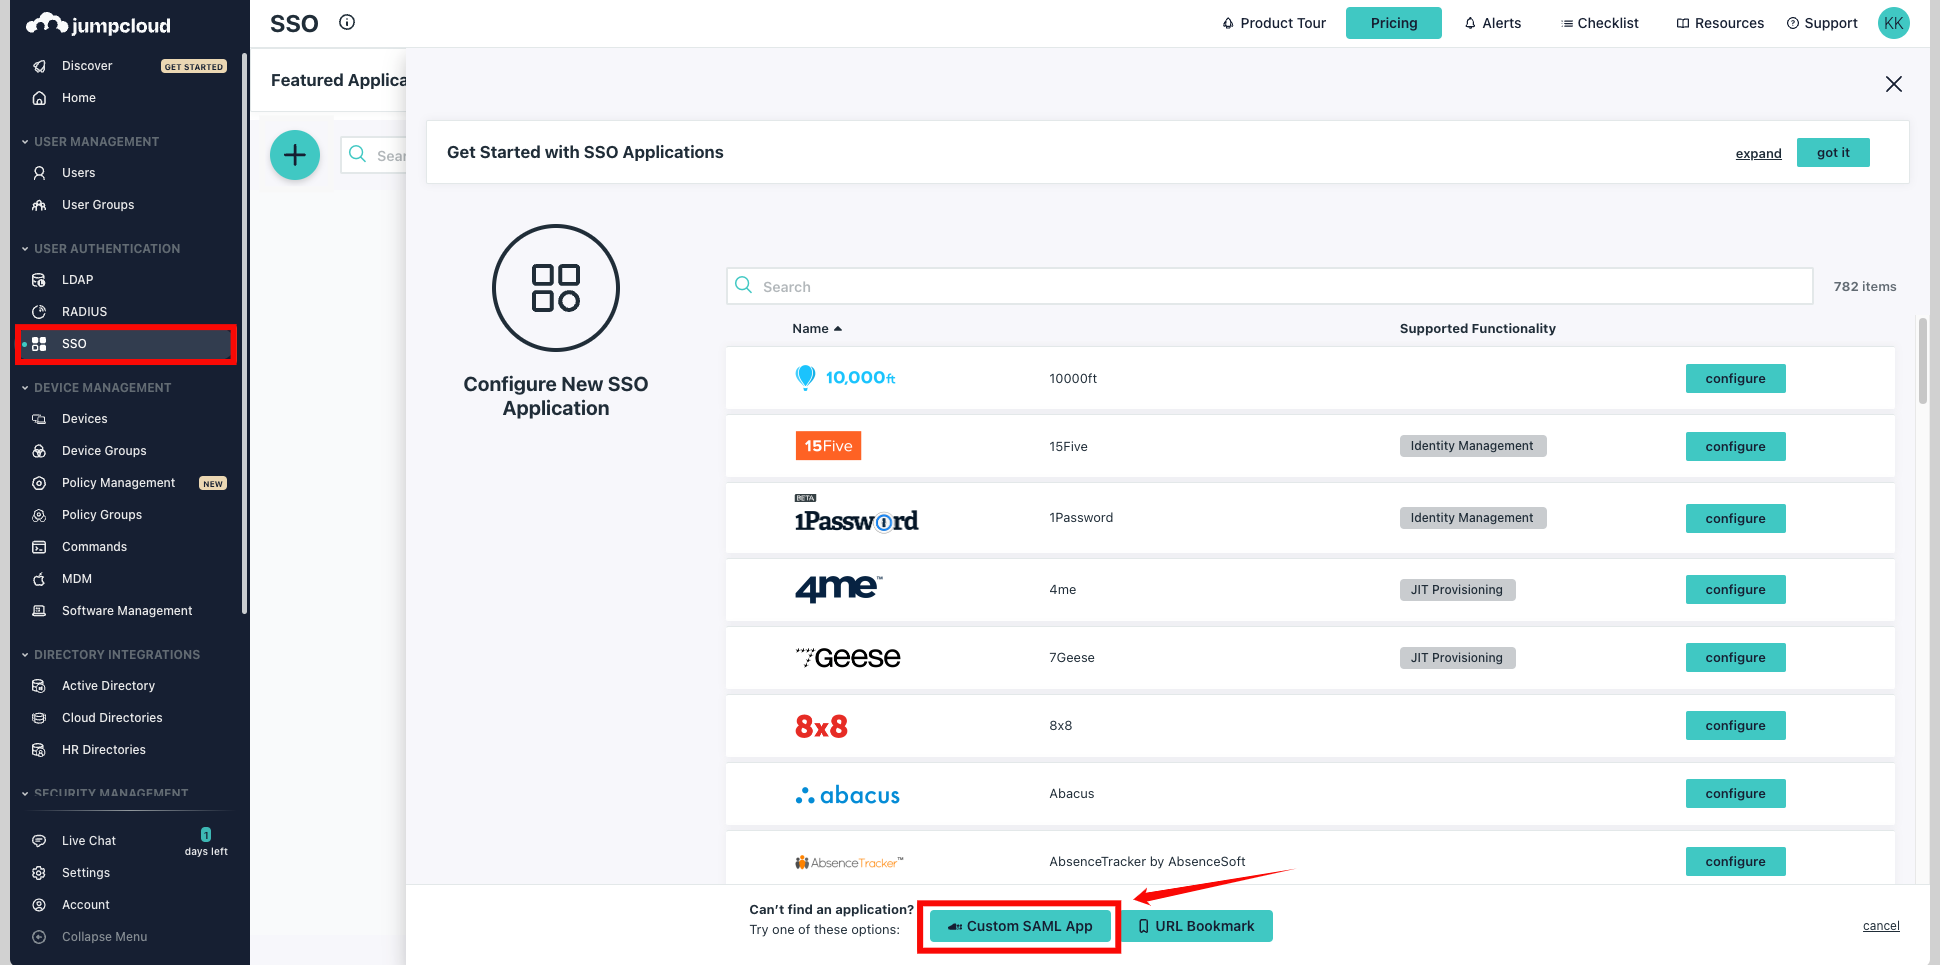
Step 1: Log in to JumpCloud and either choose an existing SAML application or create a new one. From the left navigation menu, click SSO and select your Custom SAML App.
Step 2: Click on the tab Identity Management within your SAML application.
Under the SCIM Version, choose SCIM 2.0 and enter the following information:
-
Base URL:
https://your-domain.qualytics.io/api/scim/v2 -
Token Key: Generate this token from the Qualytics UI when logged in as an admin user. For more information on how to generate tokens in Qualytics, refer to the documentation on Tokens.
-
Test User Email
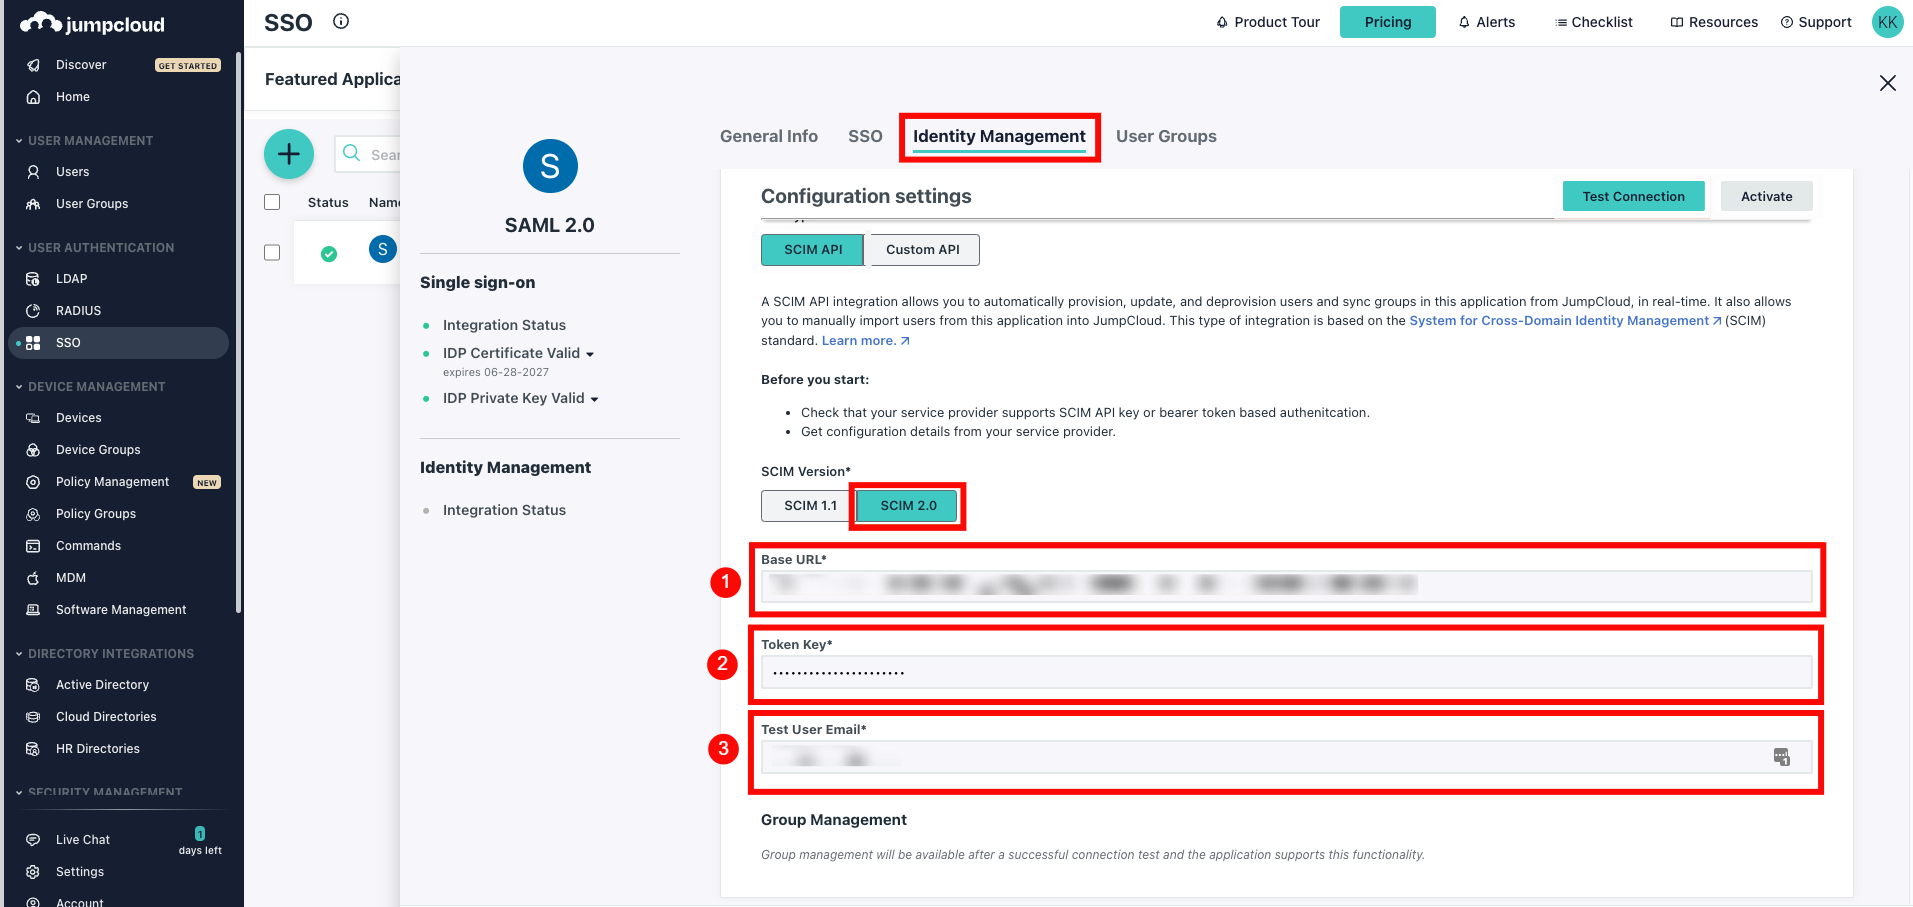
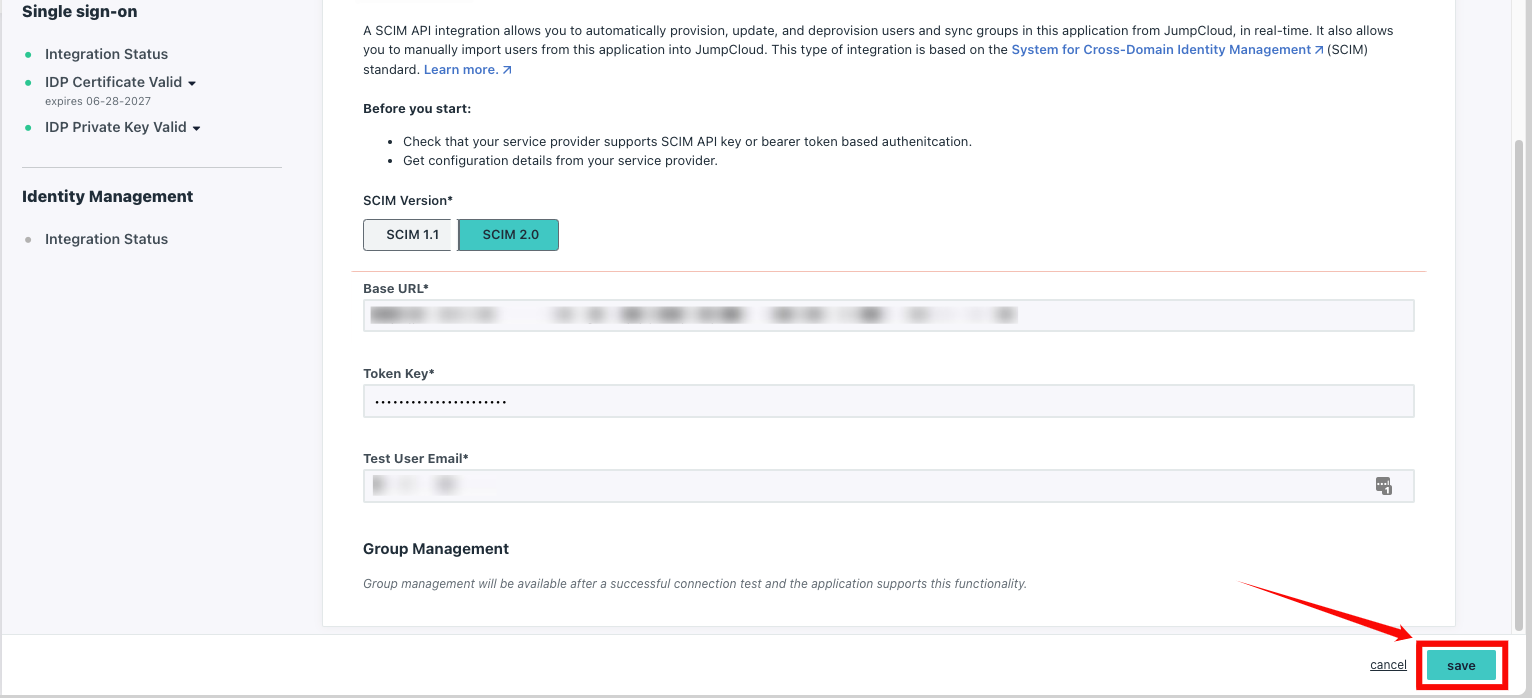
Step 3: Click Test Connection to ensure the credentials are correct, then click Activate to enable SCIM provisioning.

Step 4: Click Save to store your settings. Once saved, SCIM provisioning is successfully configured for your JumpCloud SAML application.
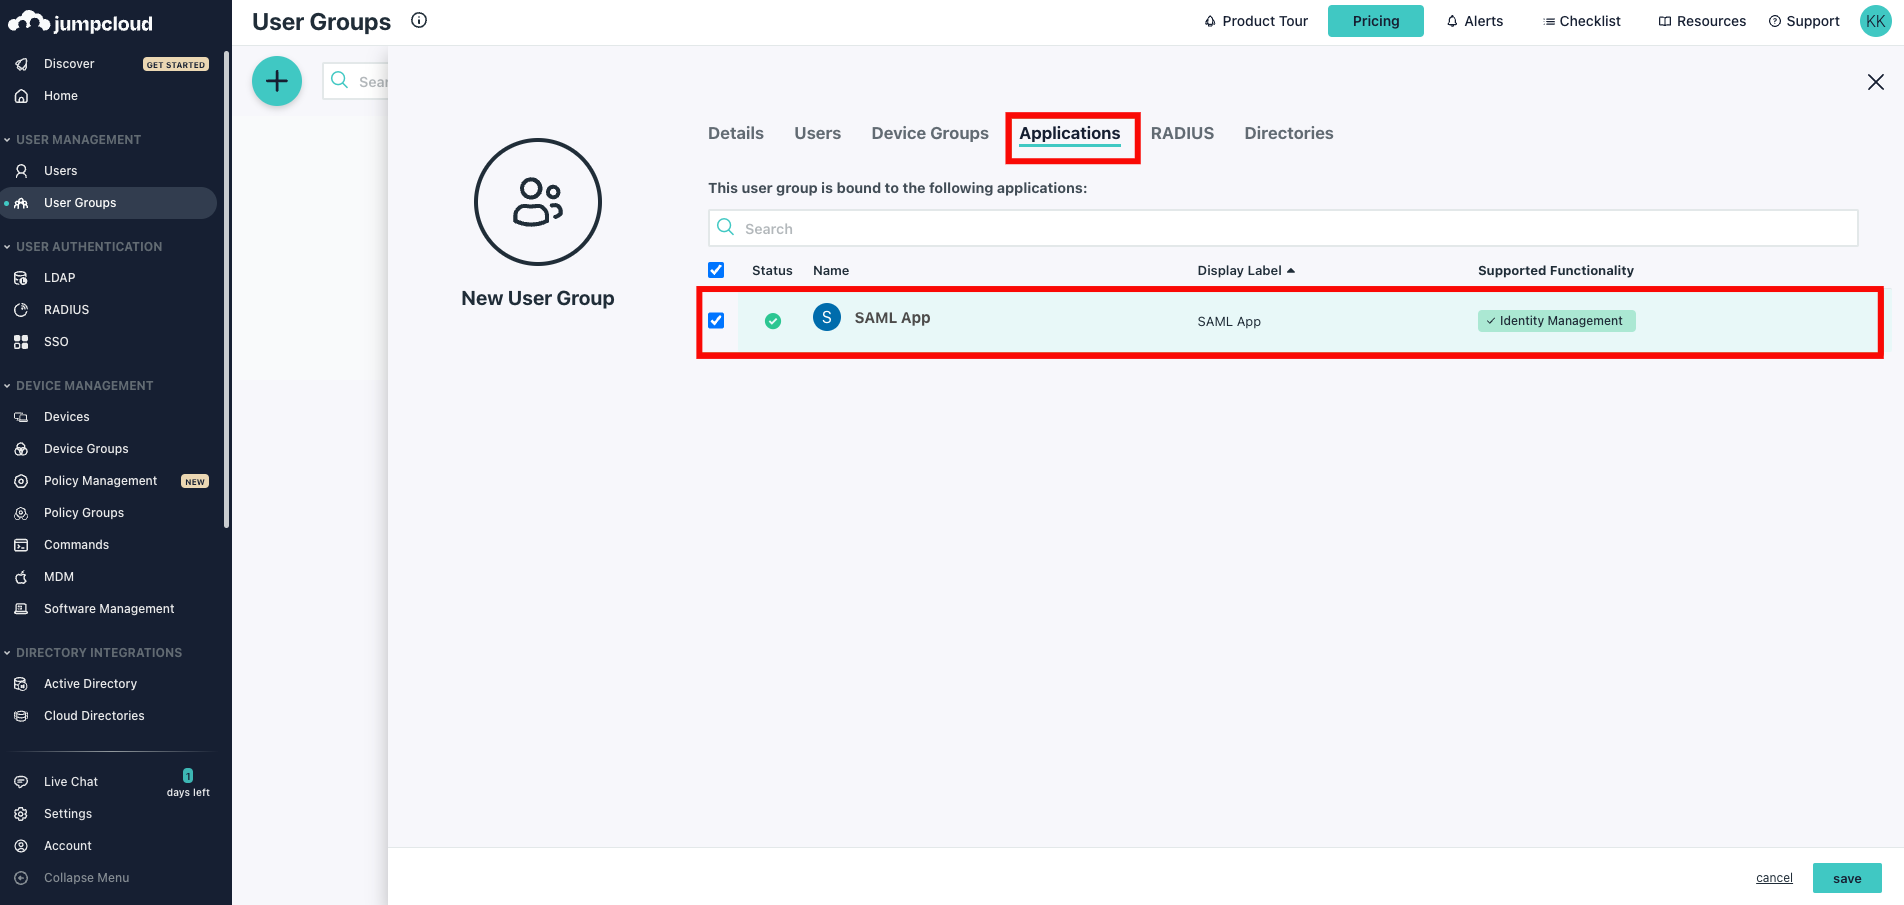
Assigning Users for Provisioning
Step 1: Click the tab User Groups within your SAML application. You can see all the available groups, select the groups you want to sync, and click Save.
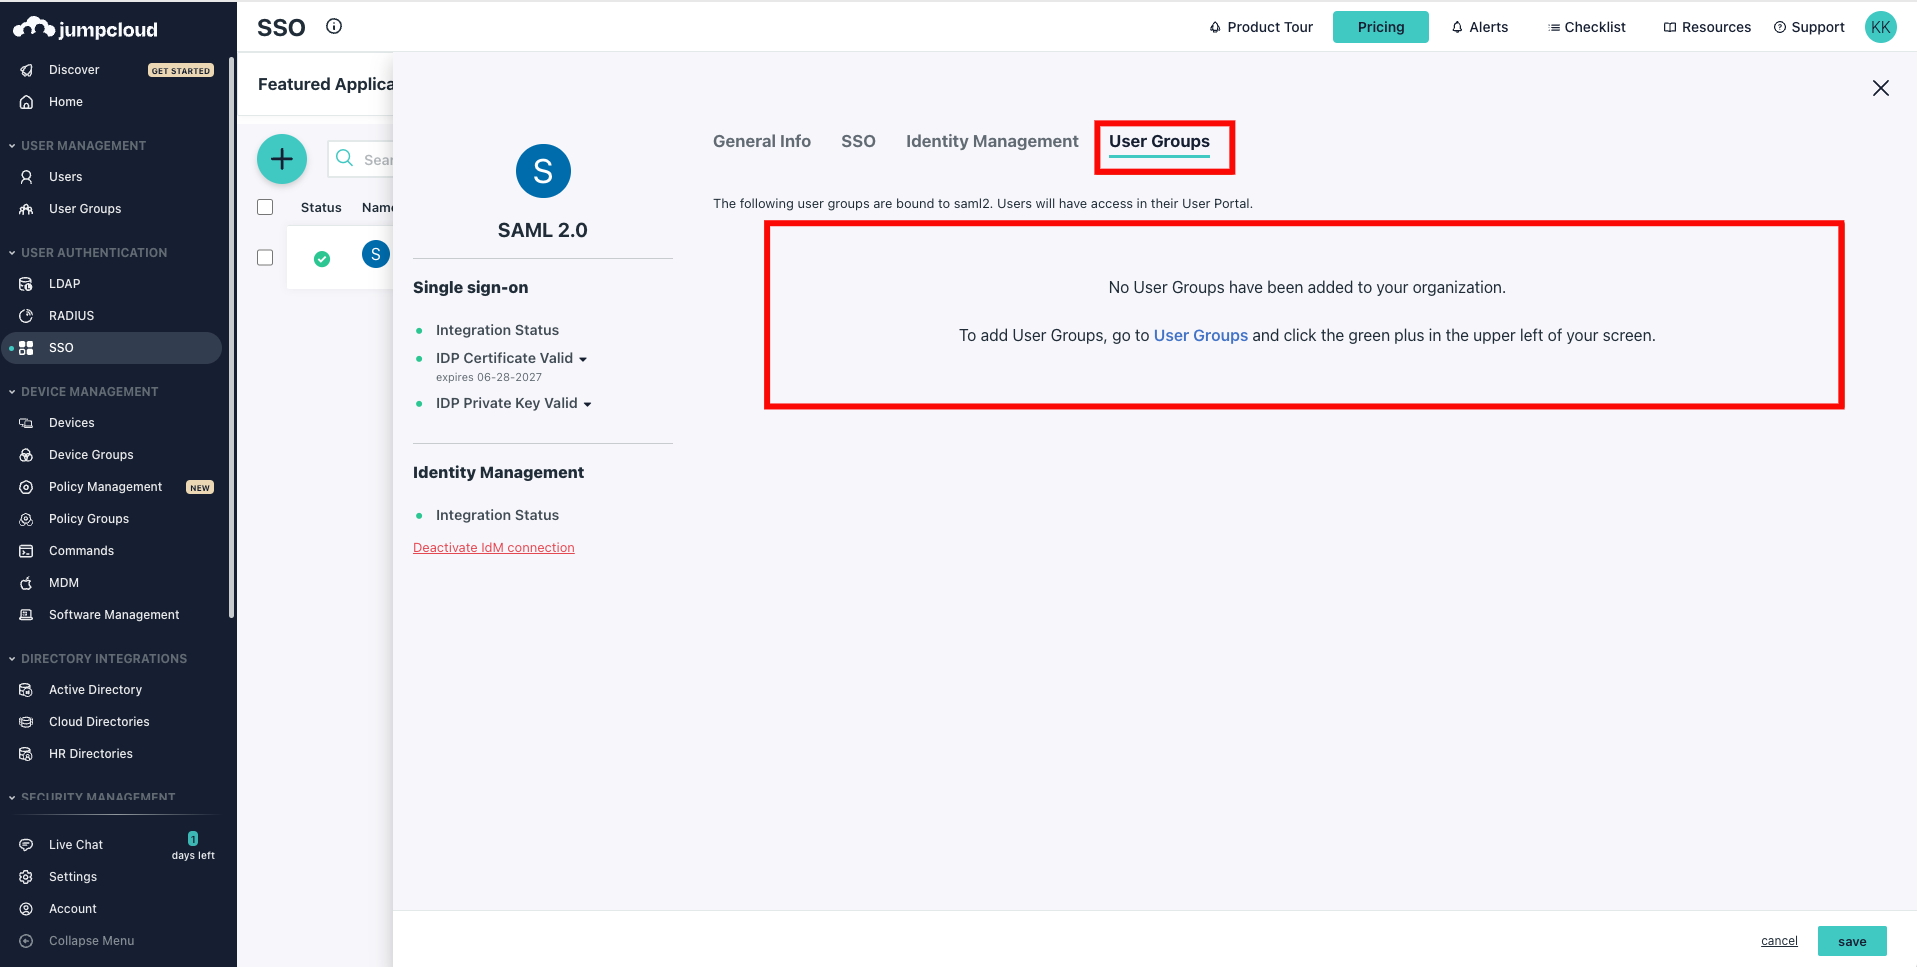
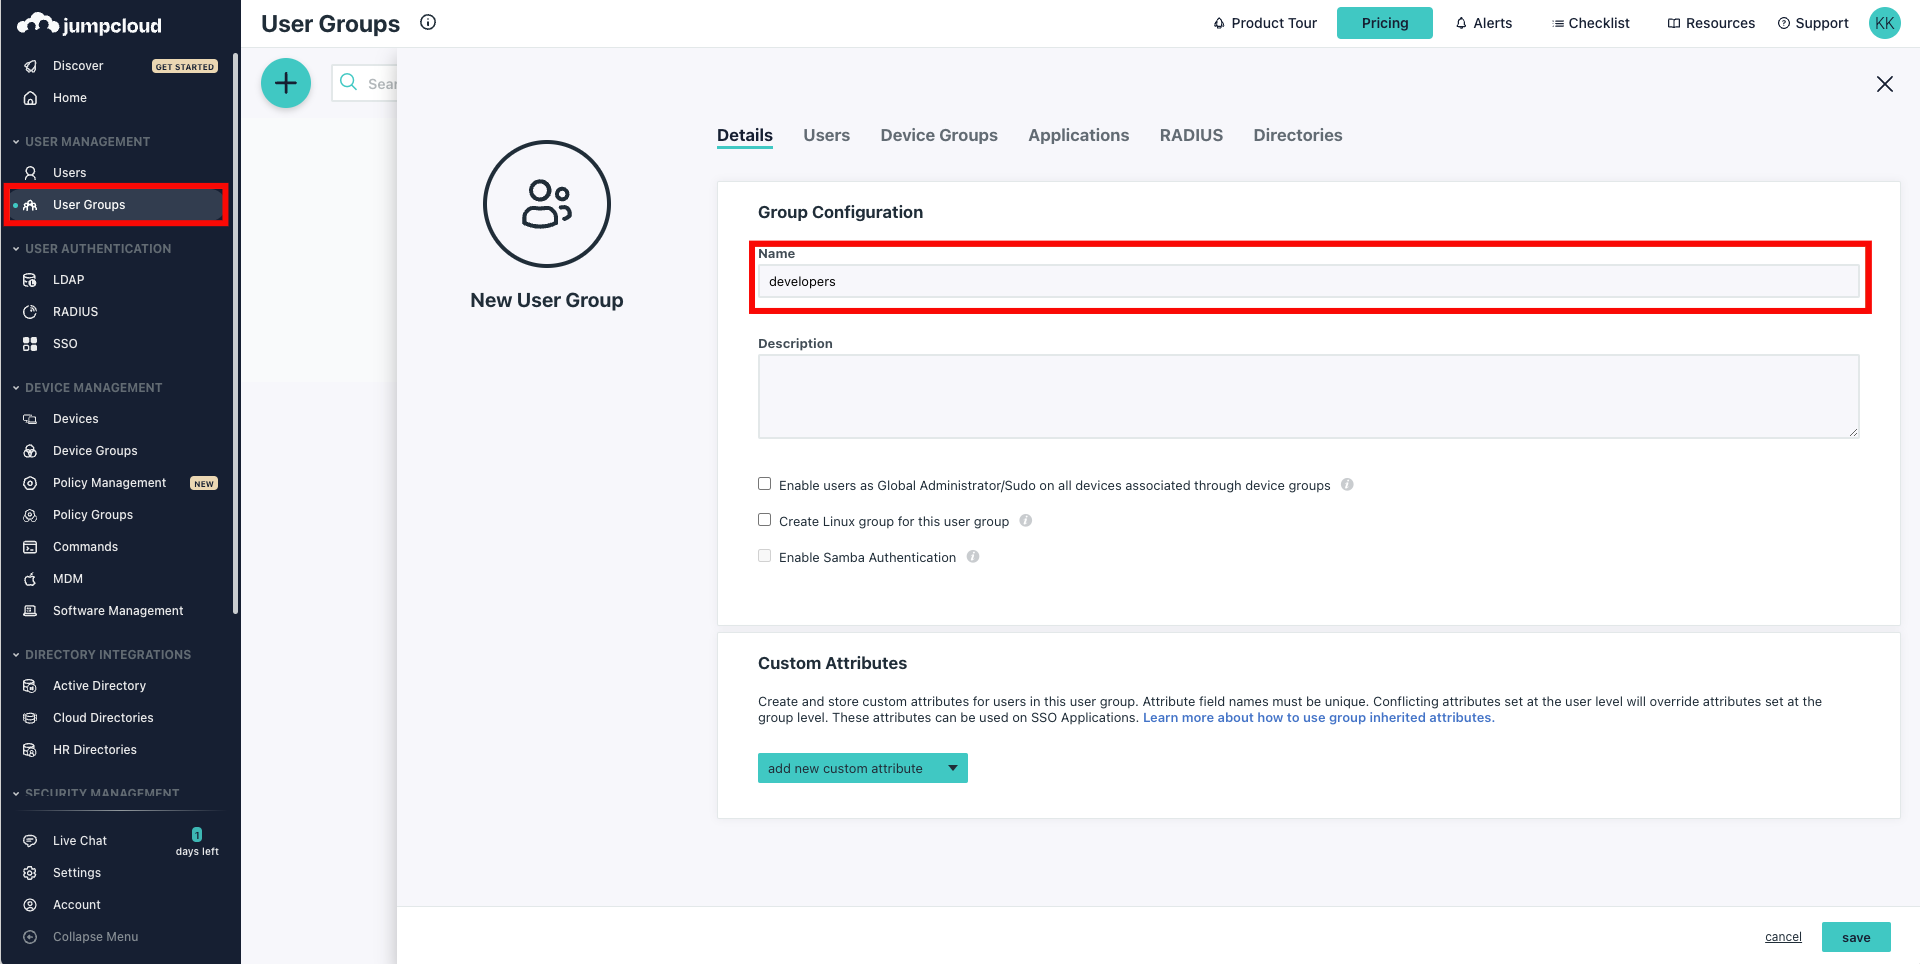
If no existing groups are available, click User Groups from the left navigation menu and click on the plus (+) icon to create a new group.
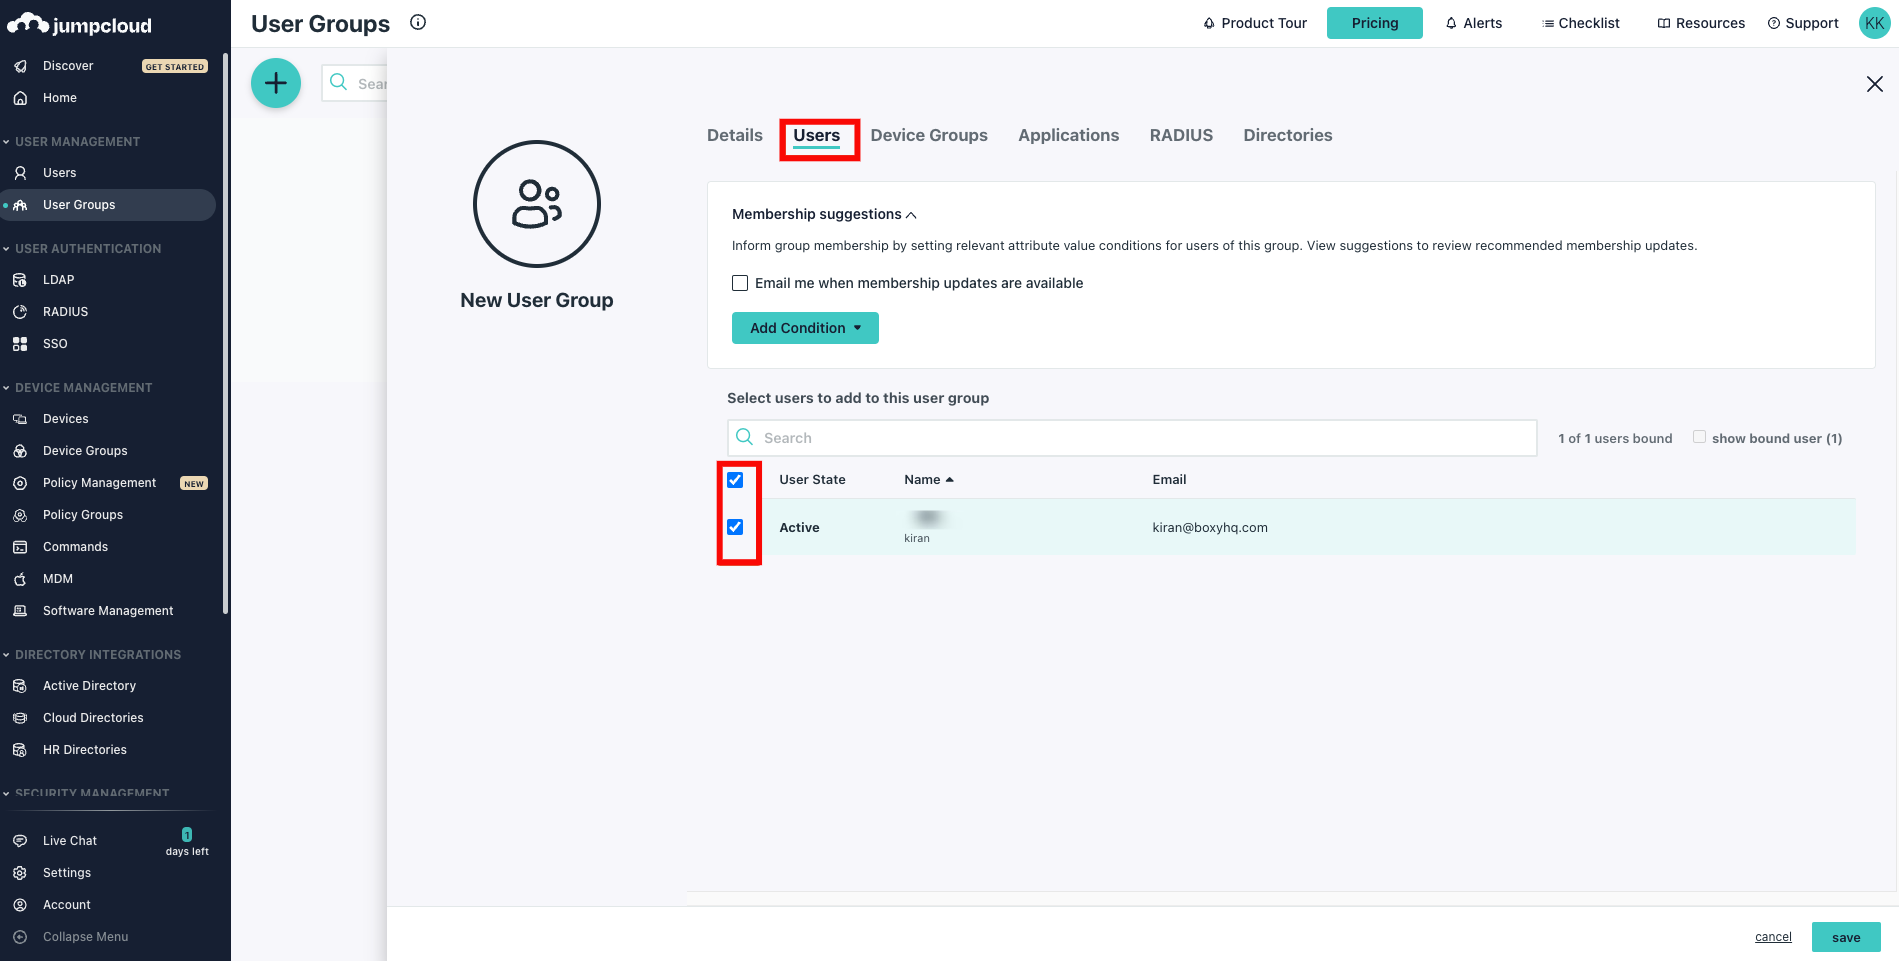
Step 2: Select the Users tab and choose the users you want to assign to the group.
Step 3: Select the Applications tab and choose the app you want to assign the group to.