Microsoft Entra
This guide walks you through setting up Directory Sync with Microsoft Entra (Azure Active Directory) using SCIM provisioning.
Creating an App Registration
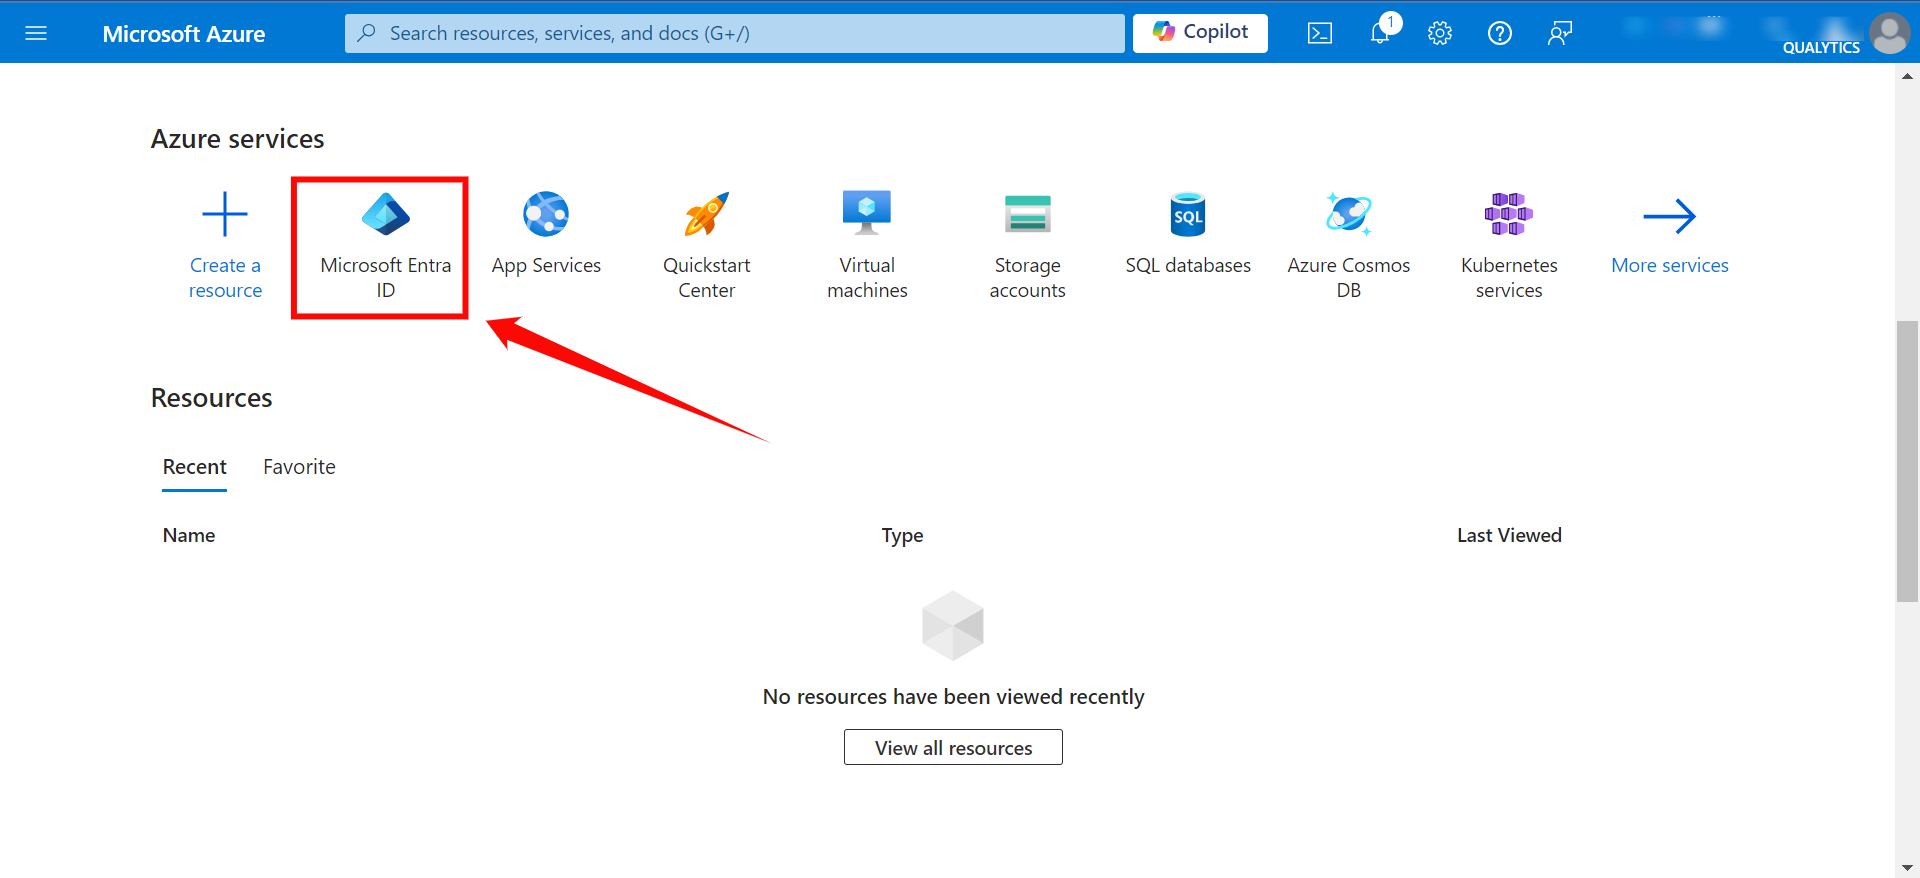
Step 1: Log in to the Microsoft Azure Portal, and select "Microsoft Entra ID" from the main menu.
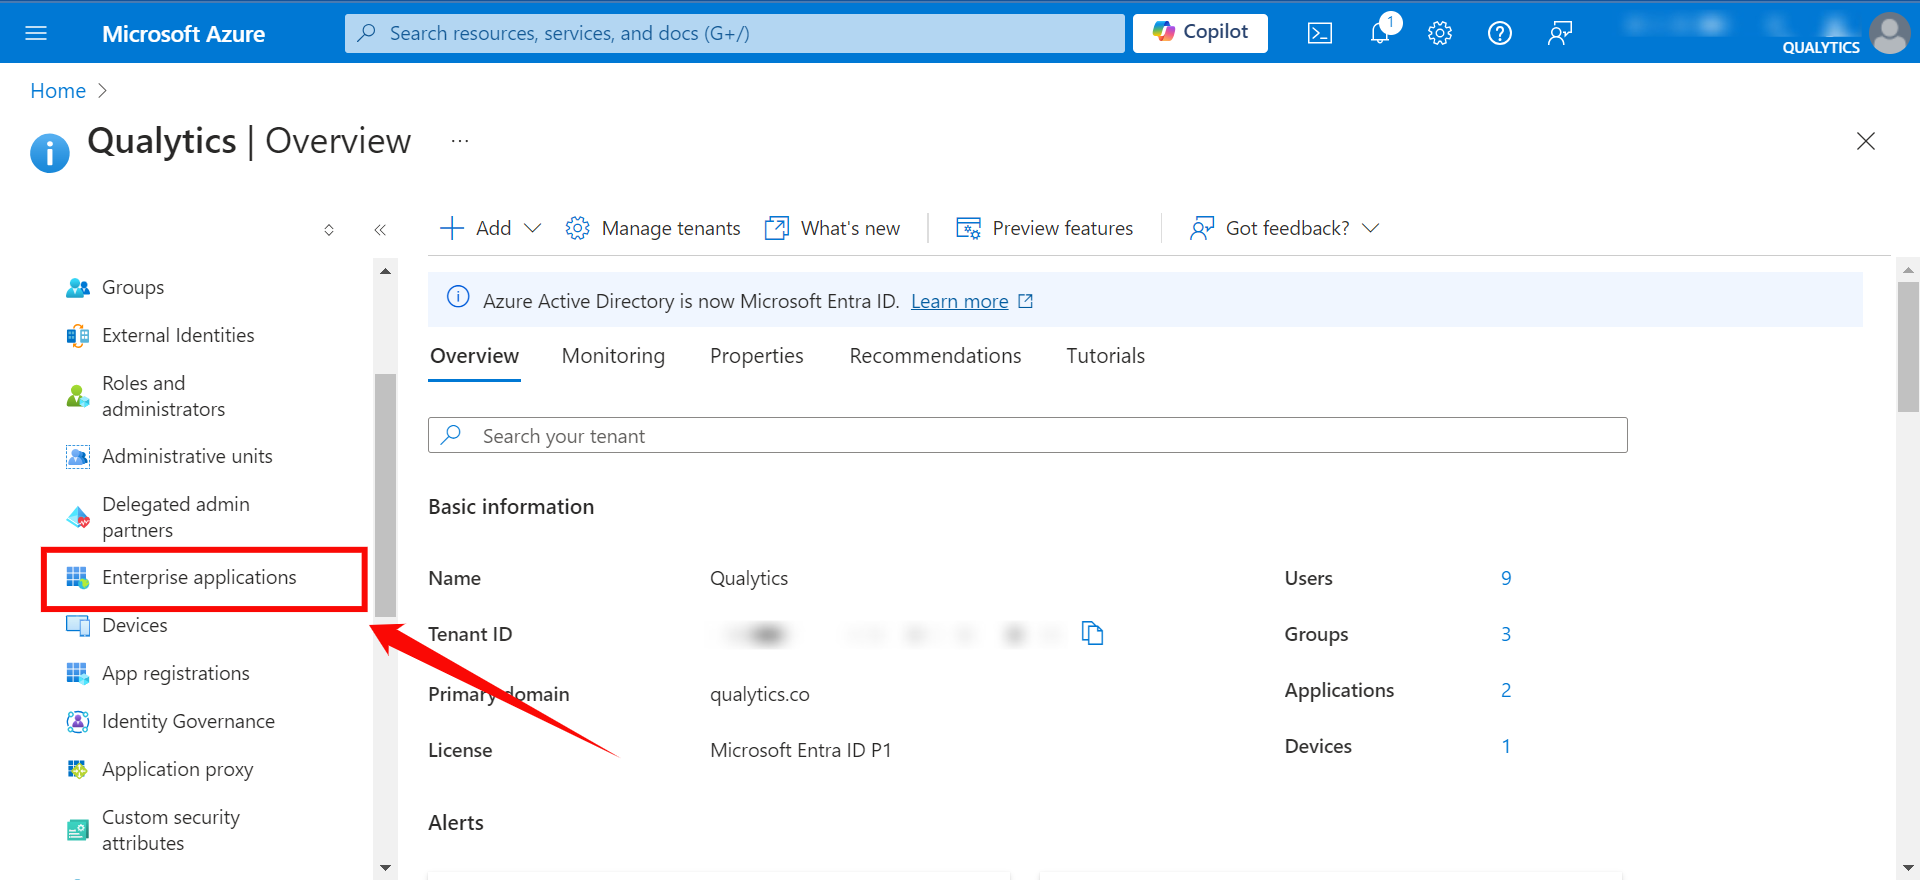
Step 2: Click on "Enterprise Applications" from the left navigation menu.
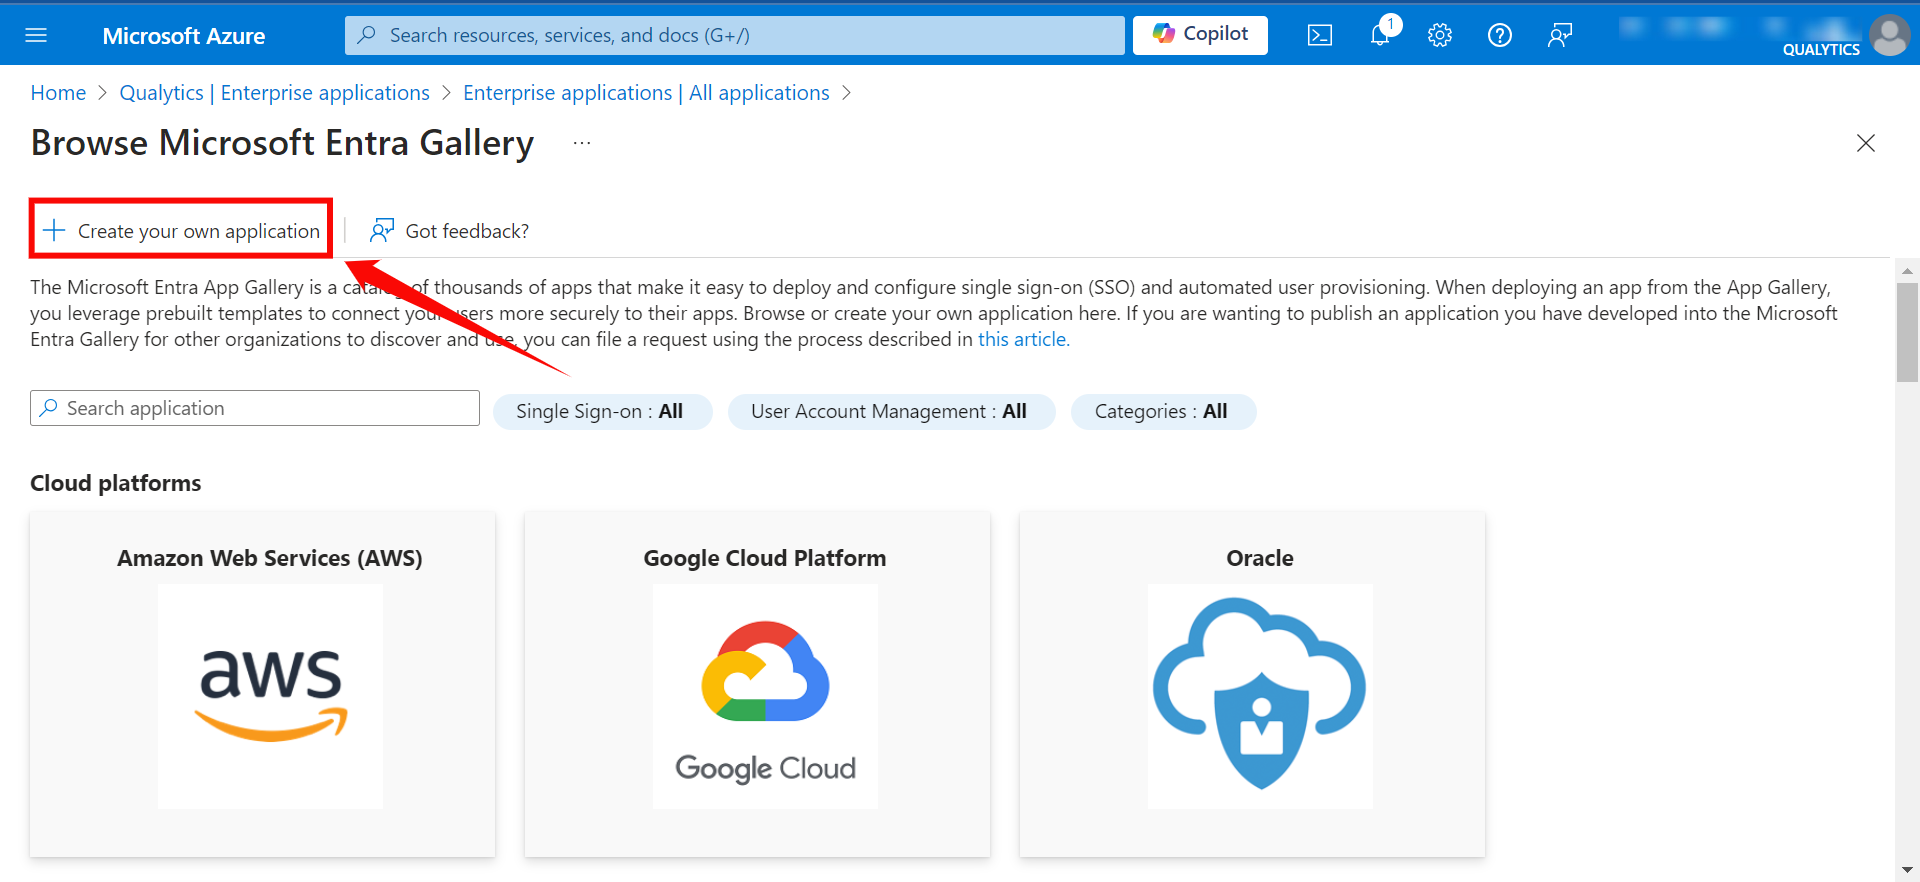
Step 3: If your application is already created, choose it from the list and move to the section Configuring SCIM Endpoints. If you haven't created your application yet, click on the New Application button.

Step 4: Click on the "Create your own application" button to create your application.
Step 5: Give your application a name (e.g., "Qualytics OAuth Client" or "Qualytics SCIM Client").
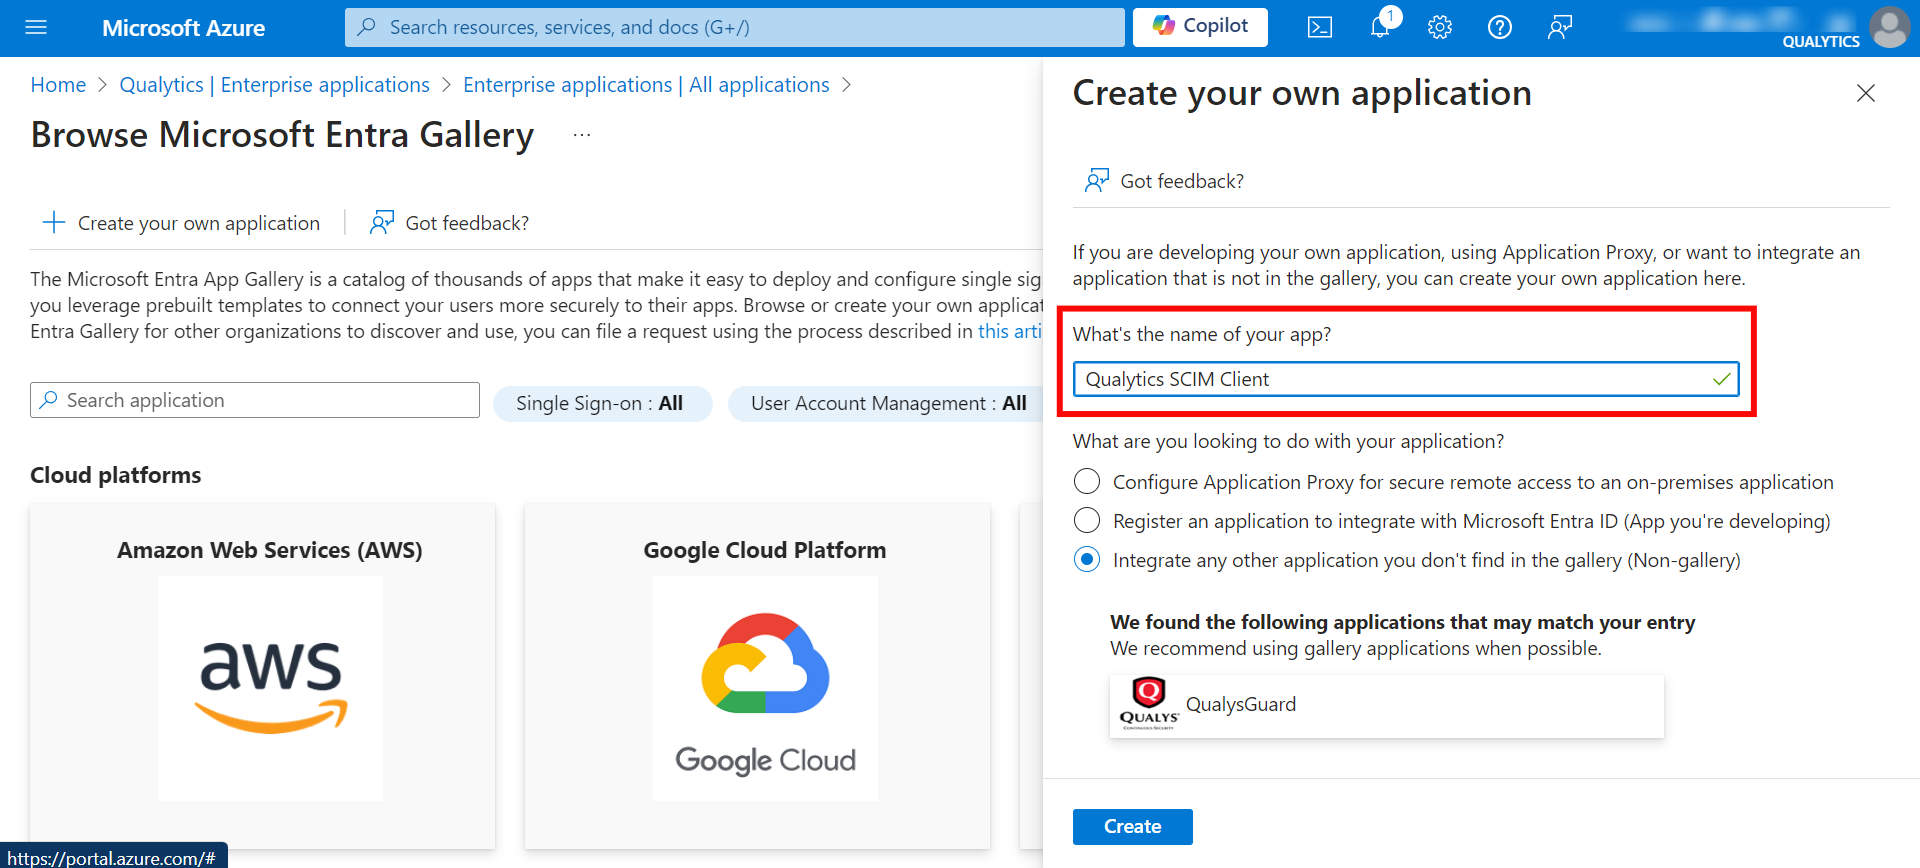
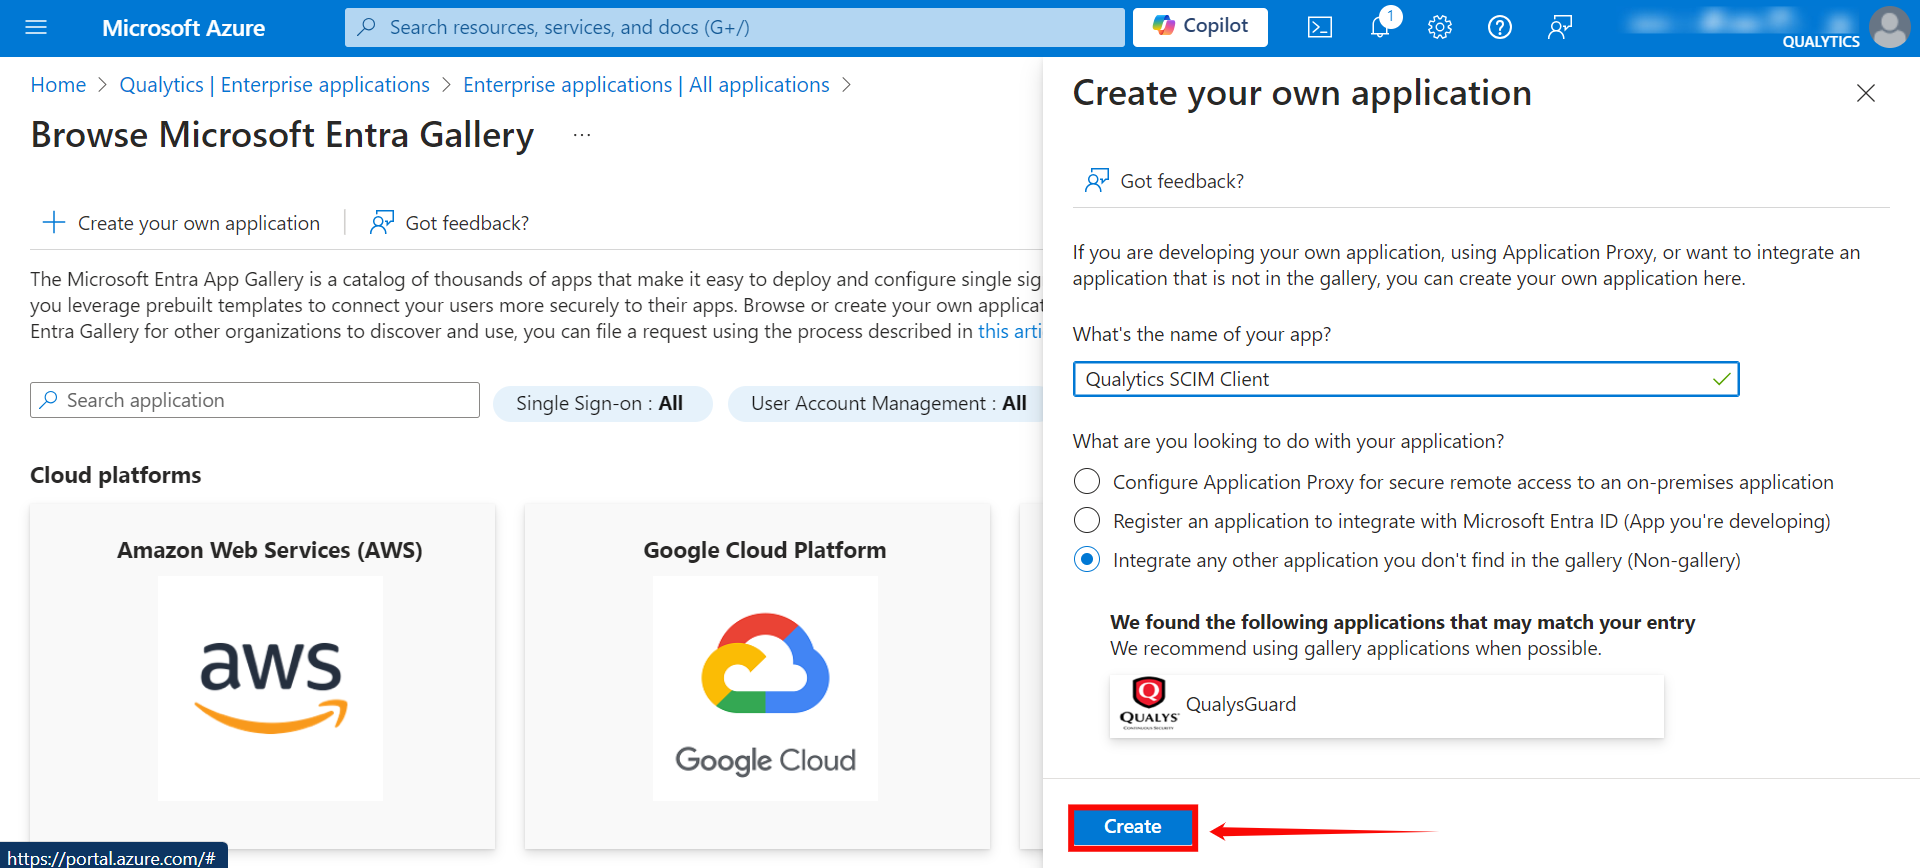
Step 6: After entering the name for your application, click the Create button to finalize the creation of your app.
Configuring SCIM Endpoints
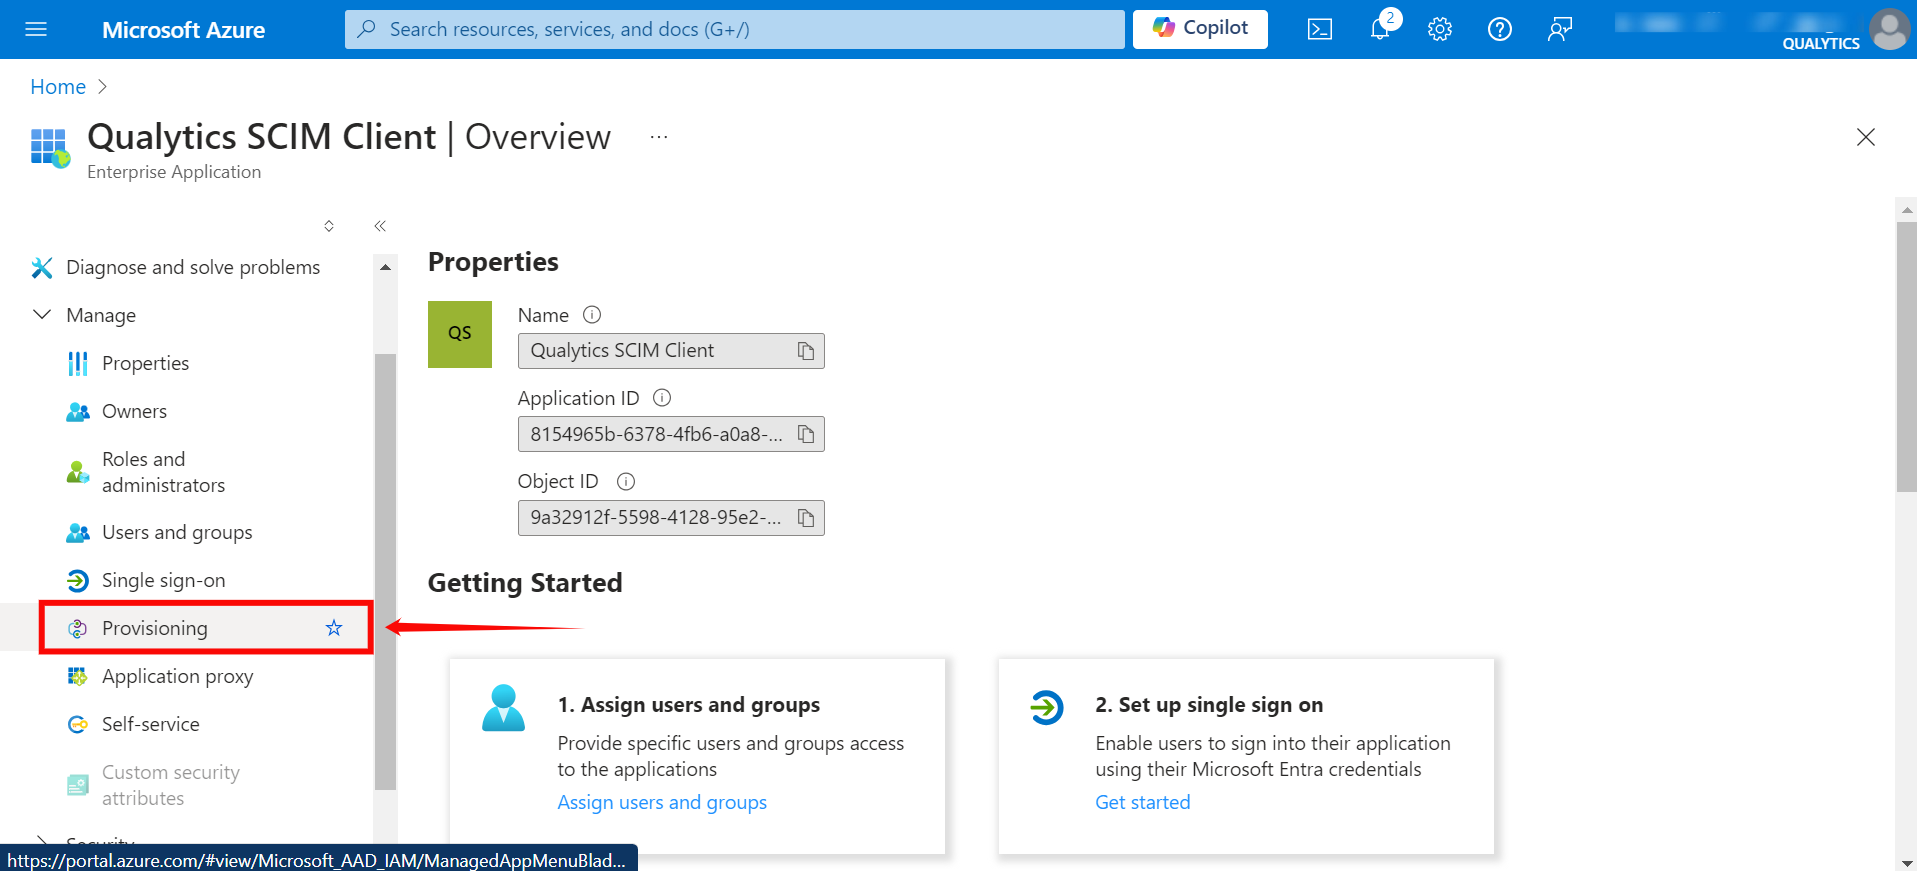
Step 1: Click on Provisioning from the left-hand menu.
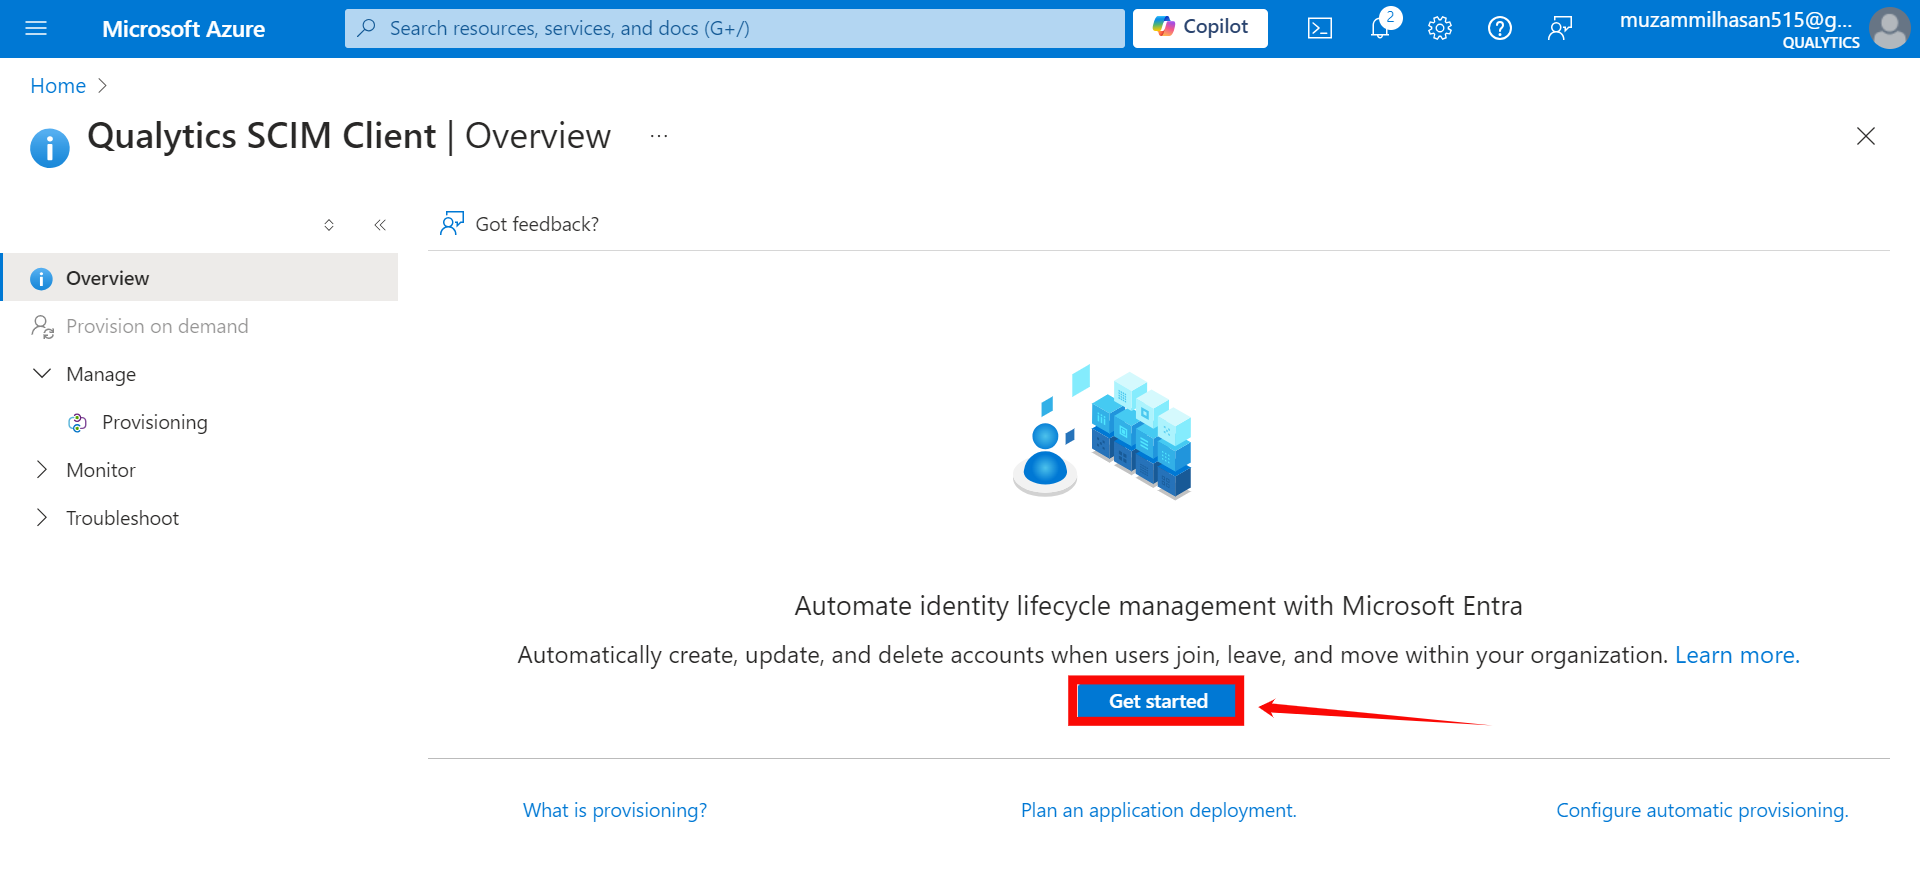
Step 2: A new window will appear, click on the Get Started button.
Step 3: In the Provisioning Mode dropdown, select "Automatic" and enter the following details in the Admin Credentials section:
-
Provisioning Mode: Select Automatic.
-
Tenant URL:
https://your-domain.qualytics.io/api/scim/v2 -
Secret Token: Generate this token from the Qualytics UI when logged in as an admin user. For more information on how to generate tokens in Qualytics, refer to the documentation on Tokens.
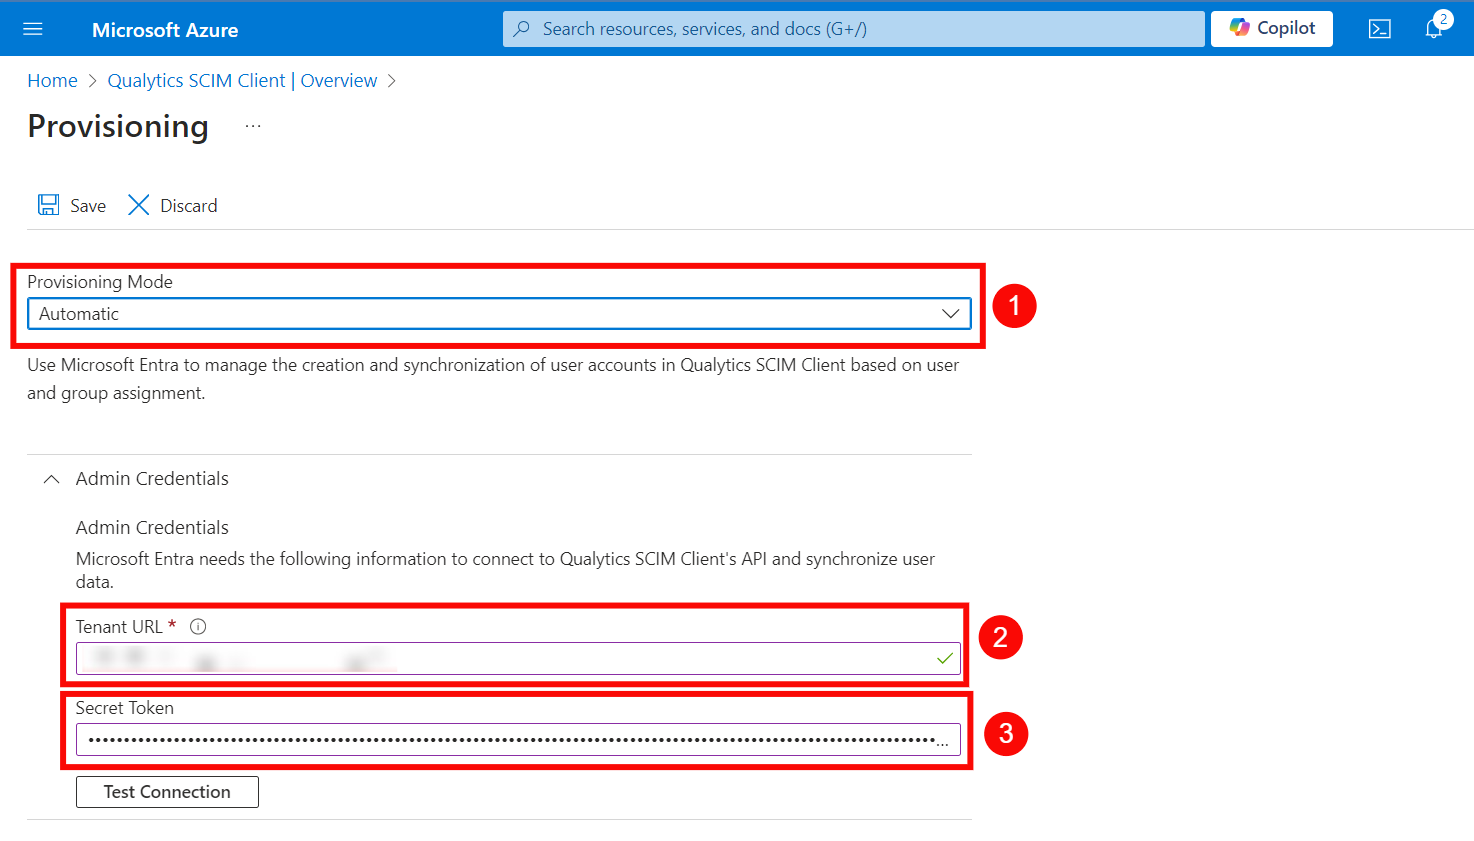
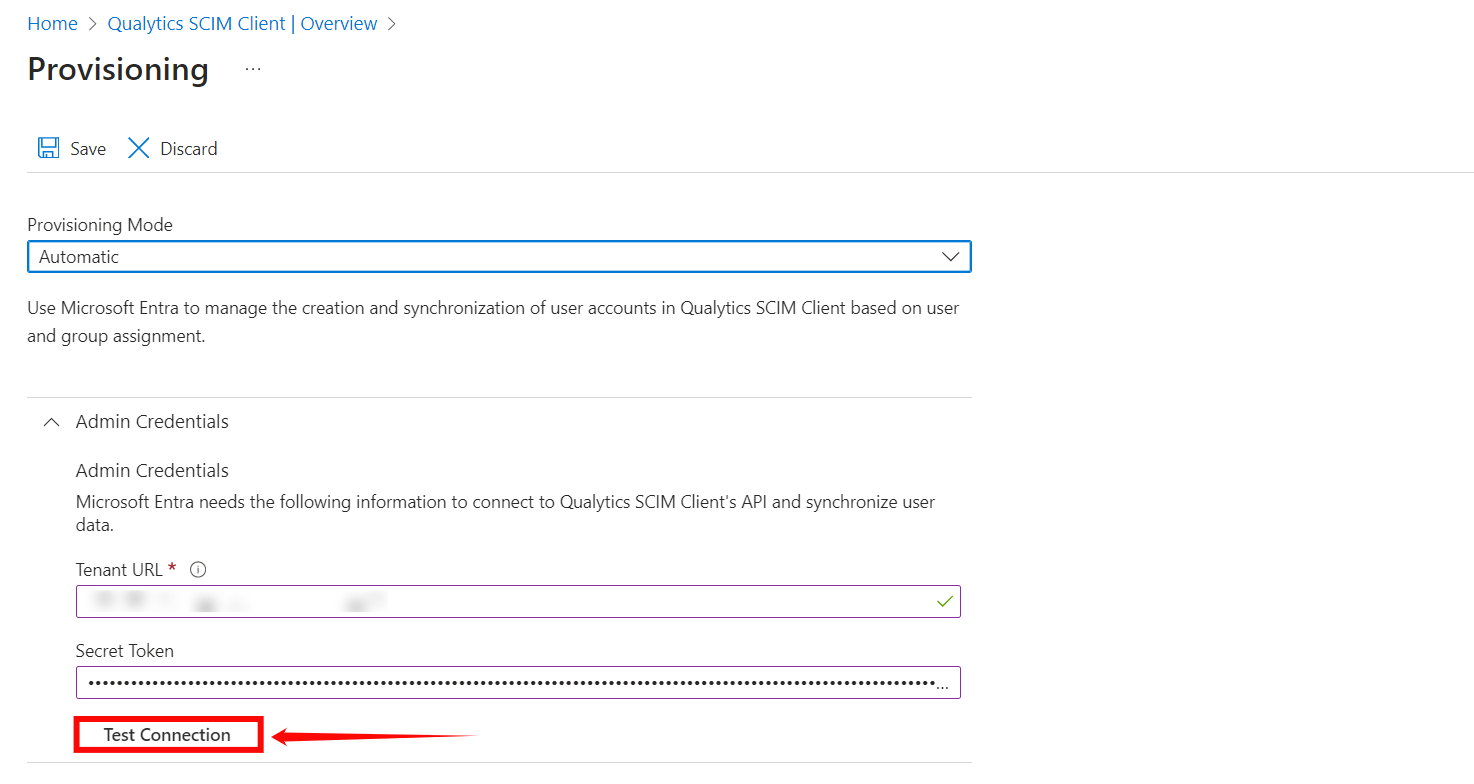
Step 4: Click on the Test Connection button to test the connection to see if the credentials are correct.
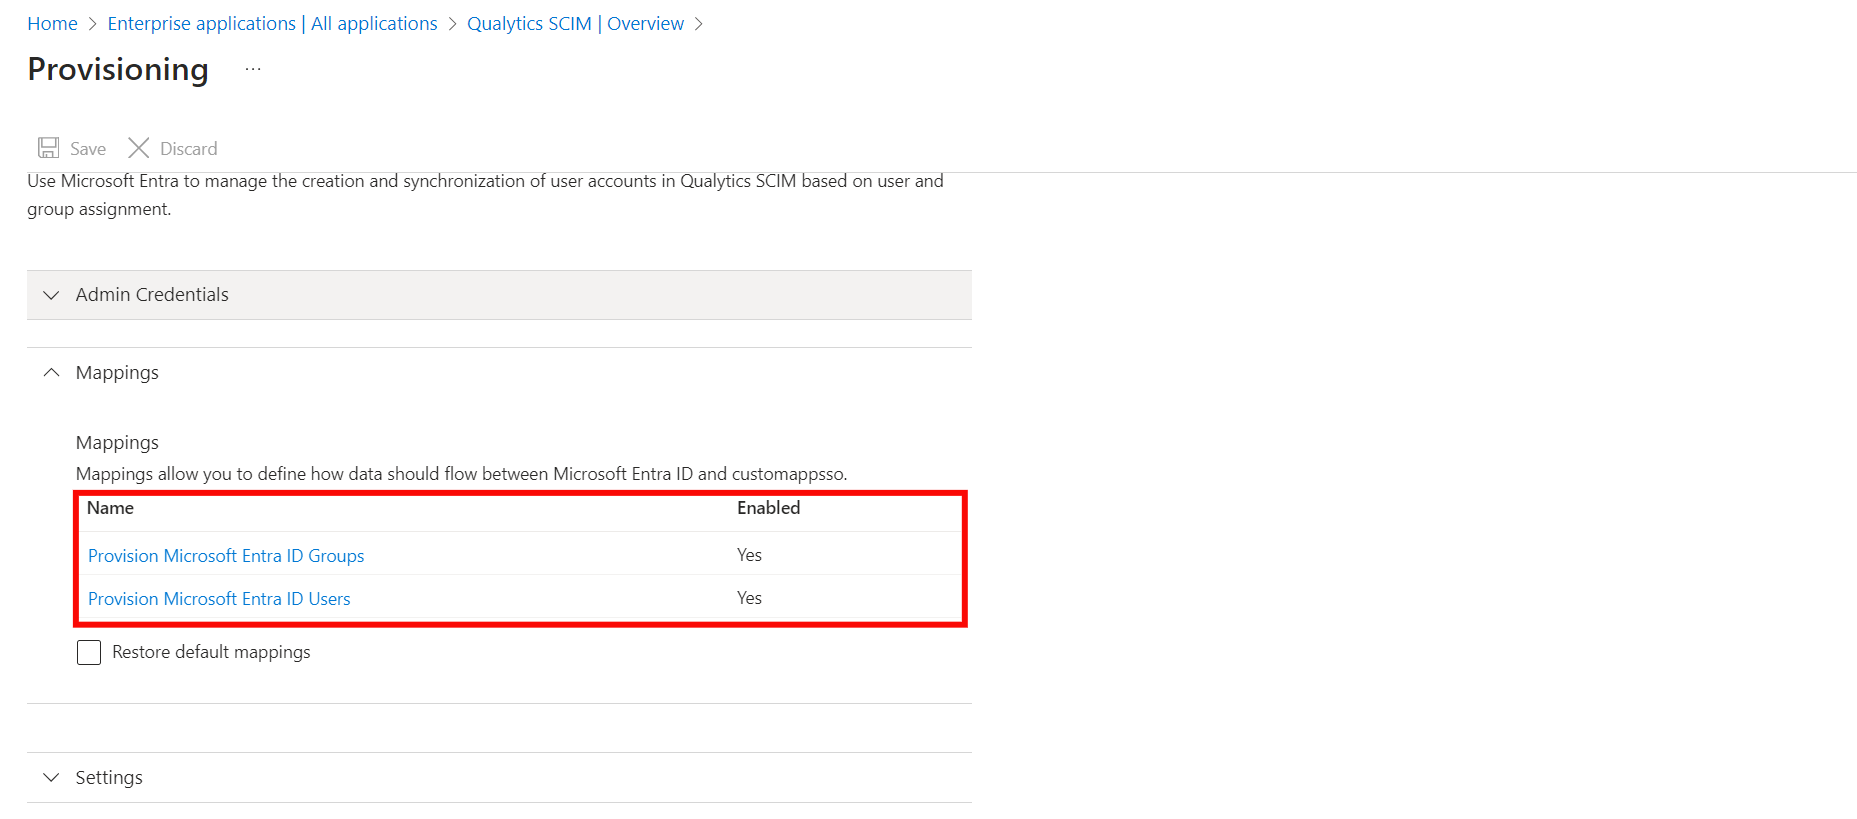
Step 5: Expand the Mappings section and enable your app to enable group and user attribute mappings. The default mapping should work.
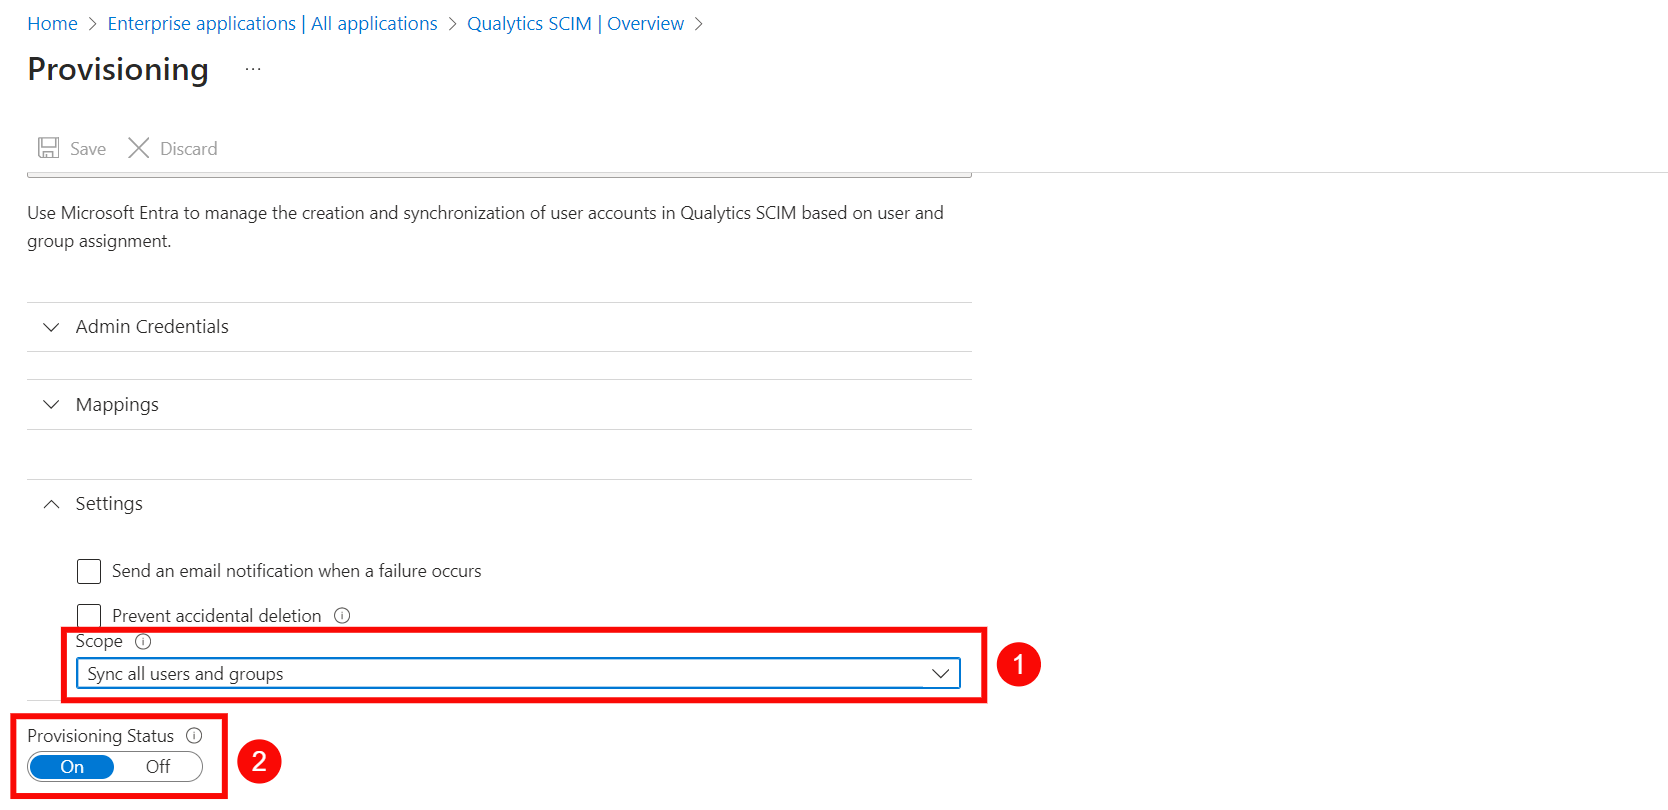
Step 6: Expand the Settings section and make the following changes:
- Select Sync only assigned users and groups from the Scope dropdown.
- Confirm the Provisioning Status is set to On.
Step 7: Click on the Save to save the credentials. Now you've successfully configured the Microsoft Entra ID SCIM API integration.

Assigning Users and Groups for Provisioning
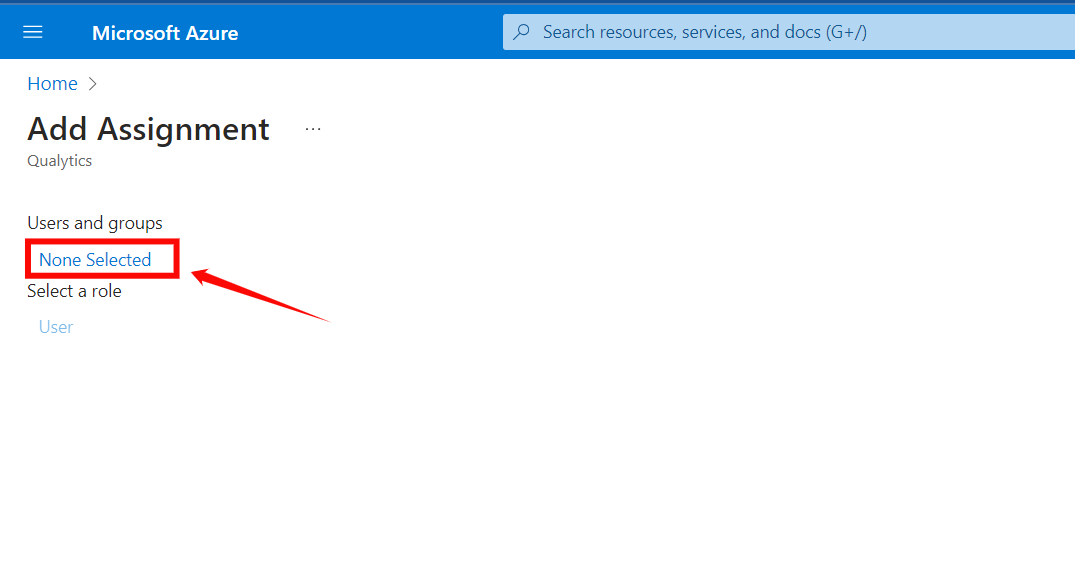
Step 1: Click on the Users and groups from the left navigation menu and then click Add user/group.

Step 2: Click on the None Selected under the Users and Groups.
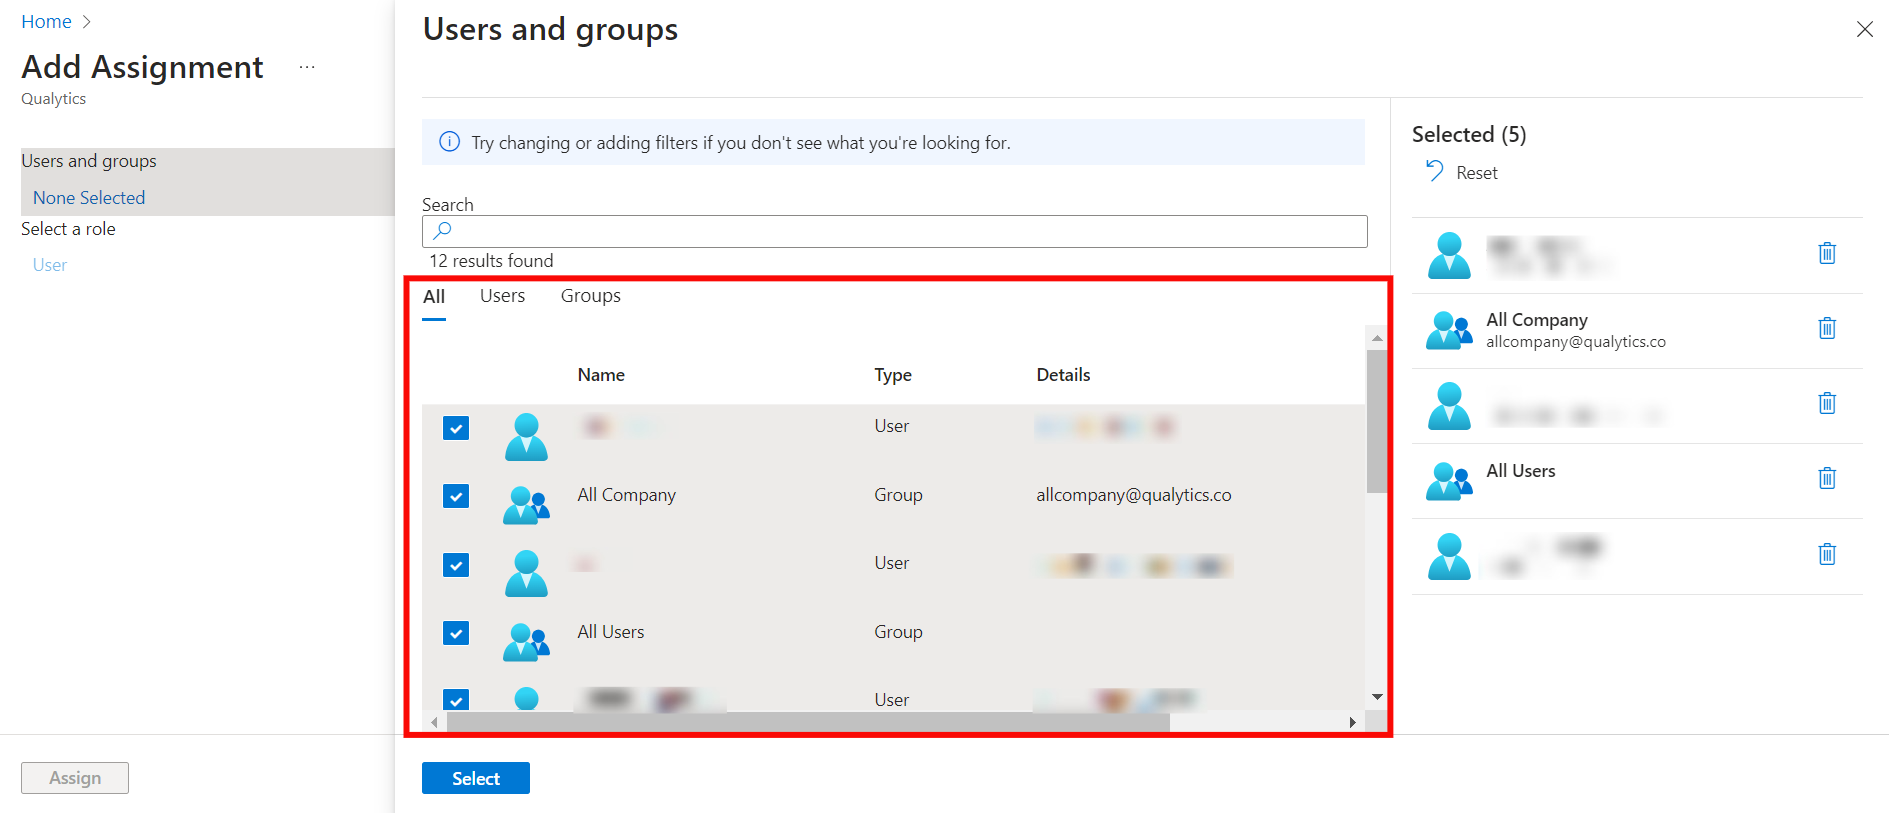
Step 3: From the right side of the screen, select the users and groups you want to assign to the app.
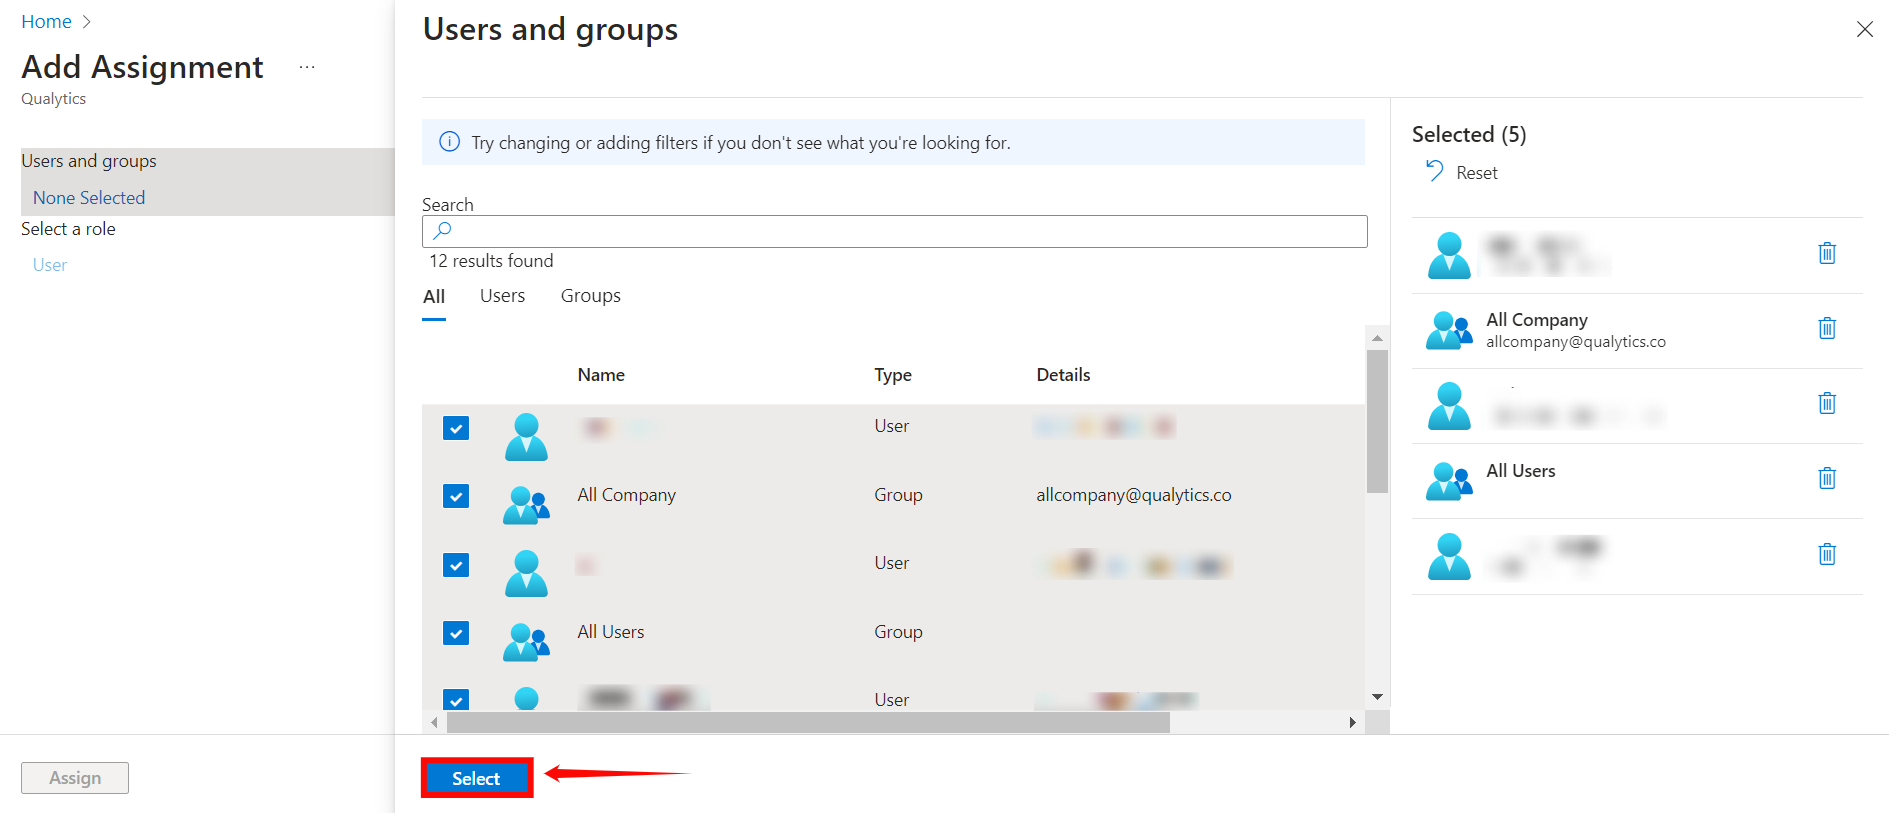
Step 4: Once you selected the group and users for your app, click the "Select" button.
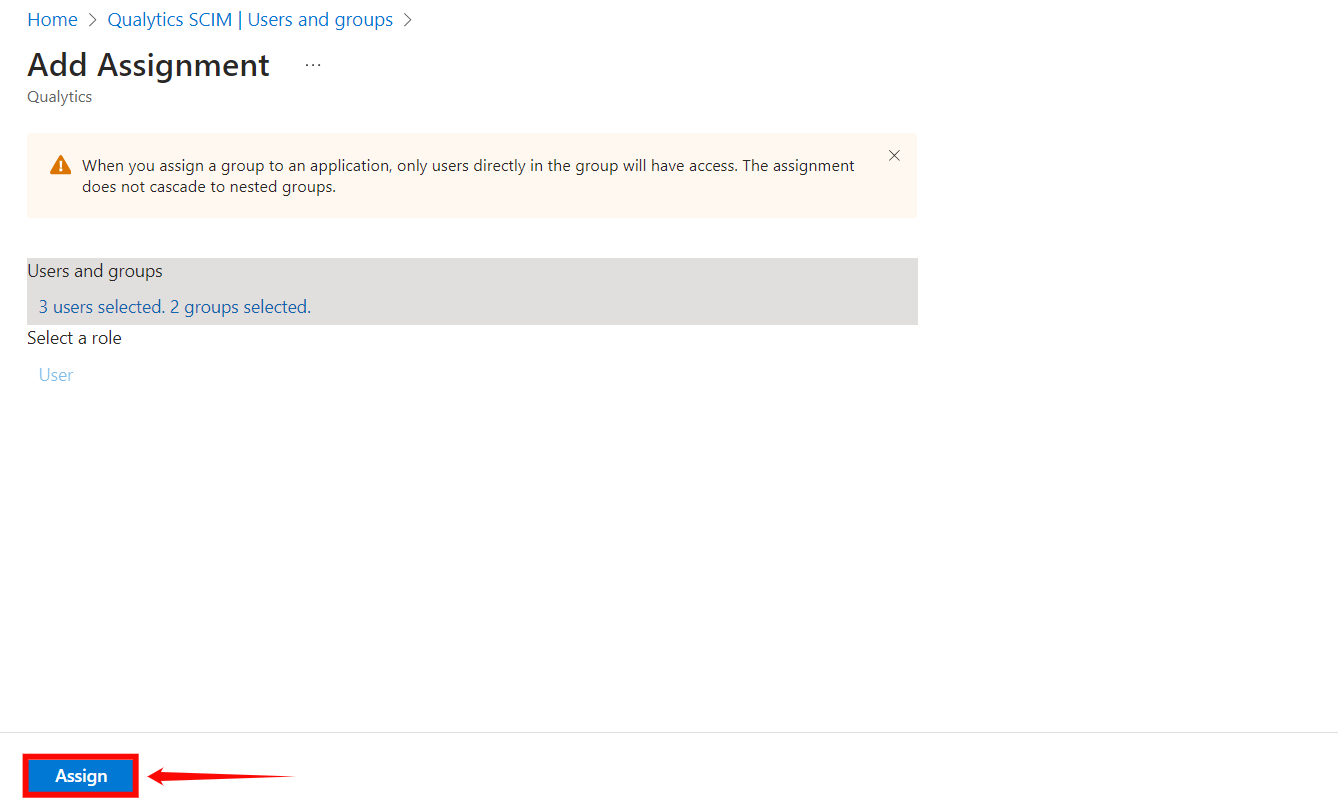
Step 5: Click on the Assign button to assign the users and groups to the application.
Warning
When you assign a group to an application, only users directly in the group will have access. The assignment does not cascade to nested groups.