Export Operation
Qualytics metadata export feature lets you capture the changing states of your data. You can export metadata for Quality Checks, Field Profiles, and Anomalies from selected profiles into an enrichment datastore so that you can perform deeper analysis, identify trends, detect issues, and make informed decisions based on your data.
To keep things organized, the exported files use specific naming patterns:
- Anomalies: Saved as
_<enrichment_prefix>_anomalies_export - Quality Checks: Saved as
_<enrichment_prefix>_checks_export - Field Profiles: Saved as
_<enrichment_prefix>_field_profiles_export
Note
Ensure that an enrichment datastore is already set up and properly configured to accommodate the exported data. This setup is essential for exporting anomalies, quality checks, and field profiles successfully.
Let’s get started 🚀
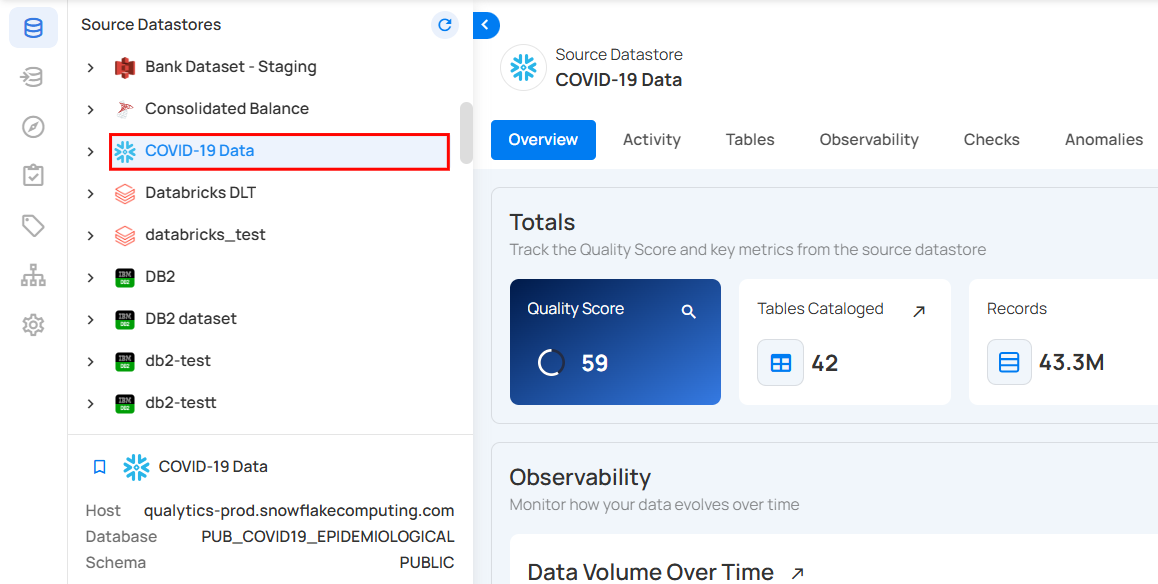
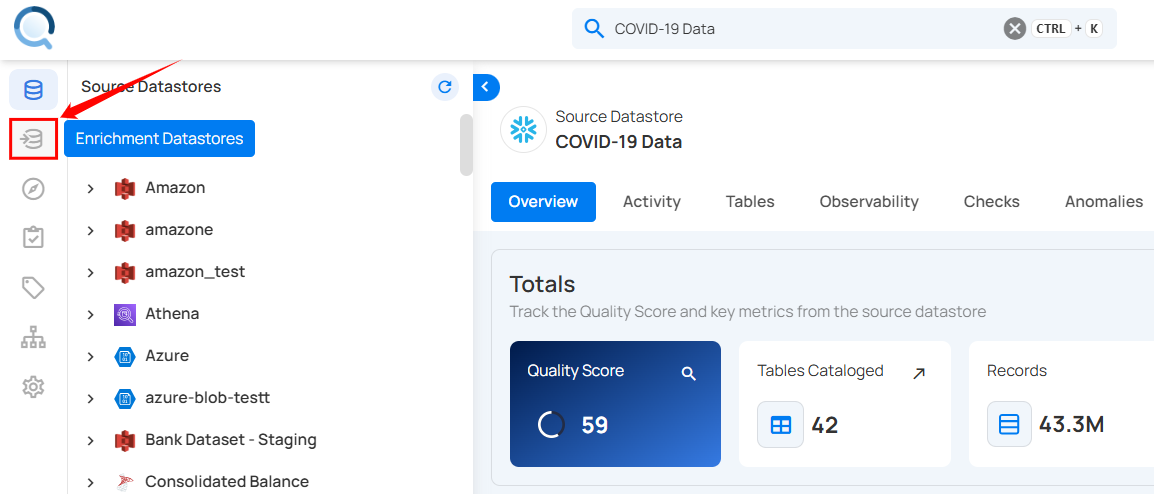
Step 1: Select a source datastore from the side menu from which you would like to export the metadata.
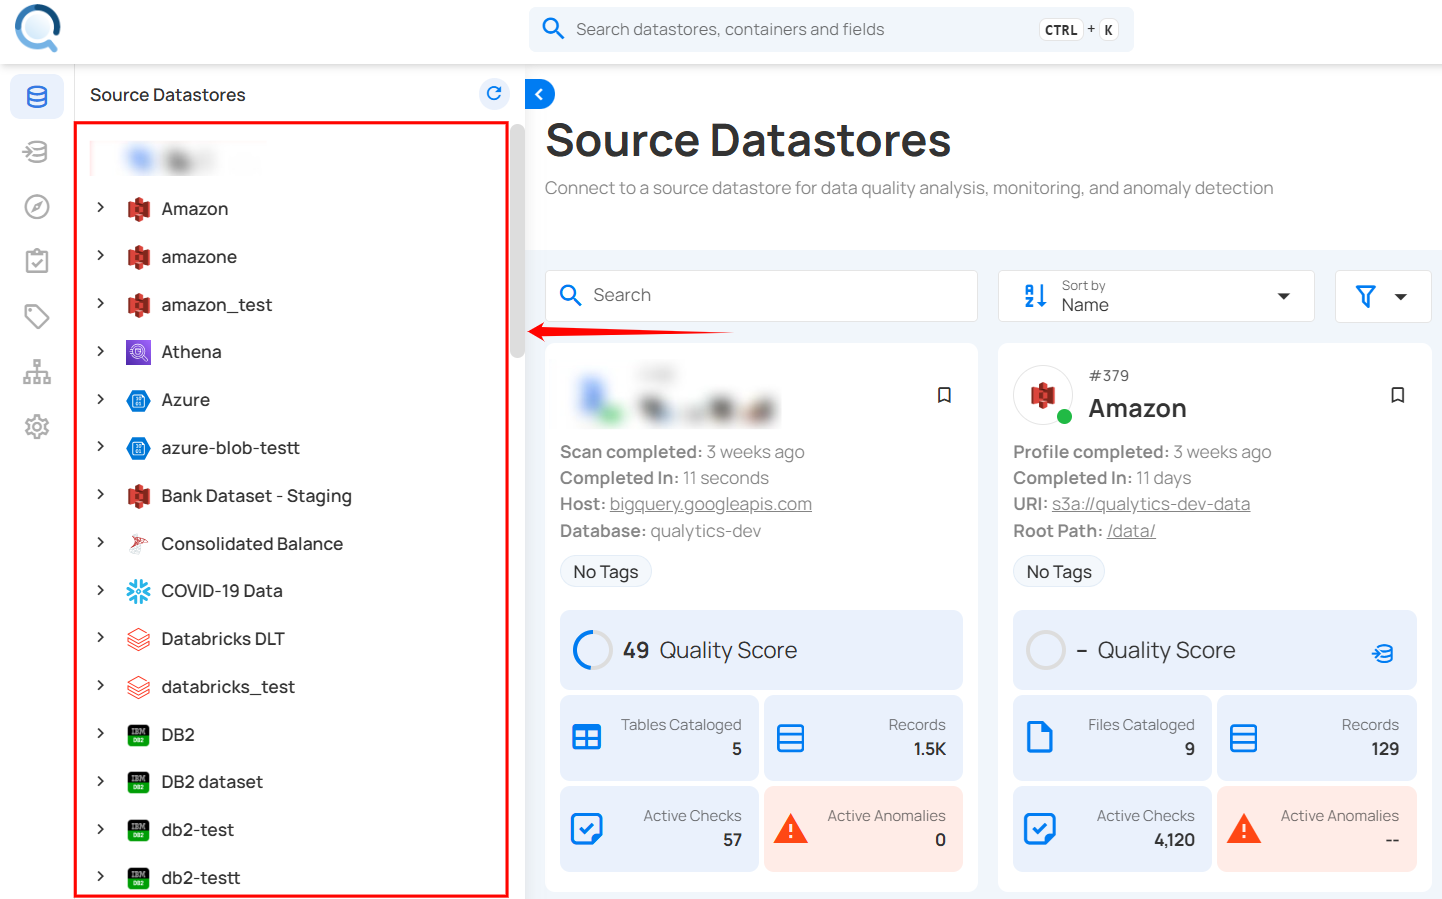
For demonstration purposes, we have selected the “COVID-19 Data” Snowflake source datastores.
Step 2: After selecting a datastore, a bottom-up menu appears on the right side of the interface. Click Enrichment Operations next to the Enrichment Datastore and select Export.
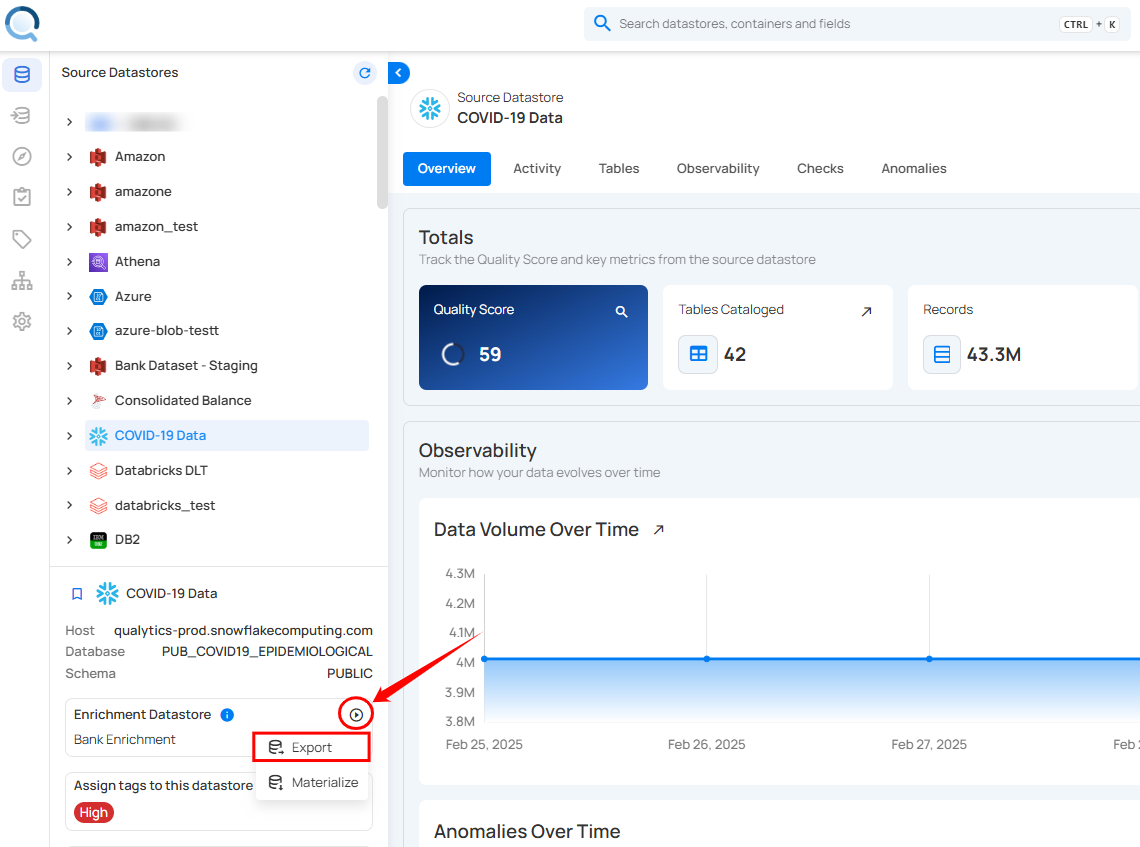
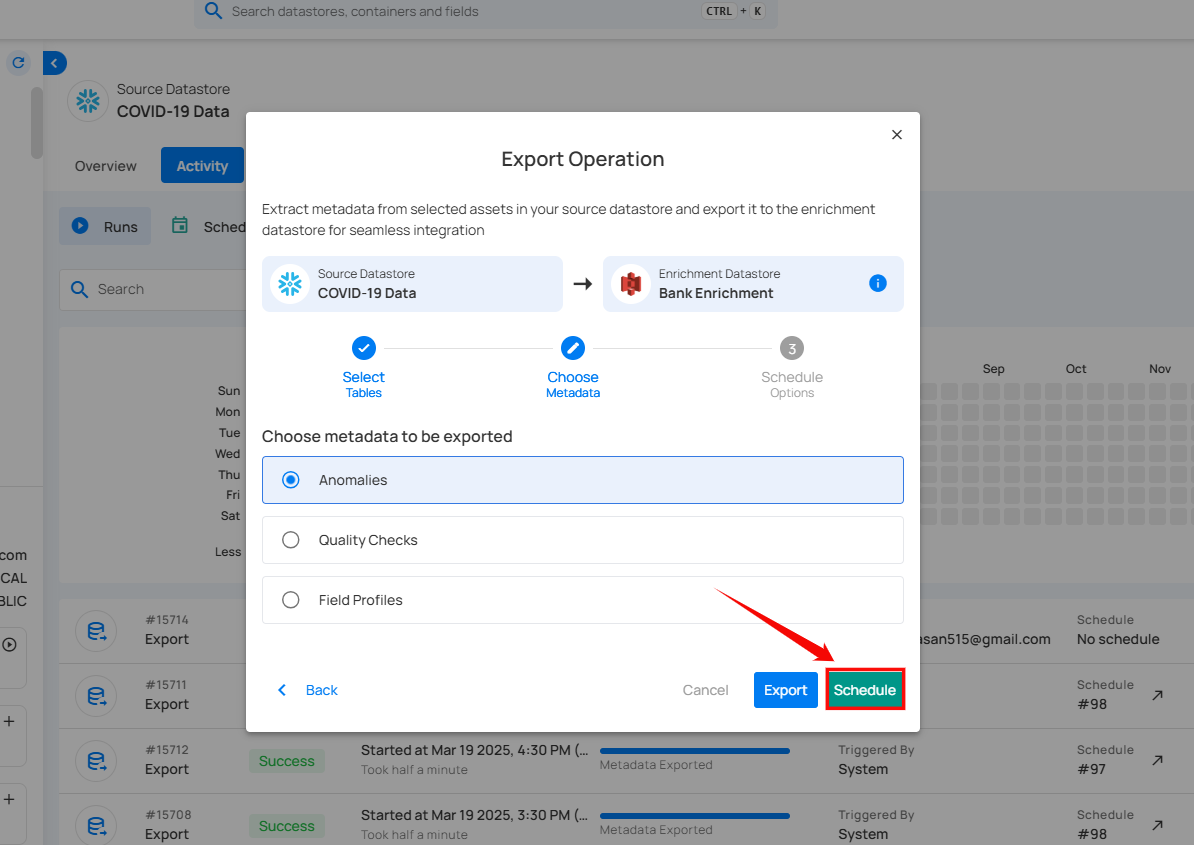
Step 3: After clicking Export, the Export Operation modal window appears, allowing you to extract metadata from the selected source datastore to the enrichment datastore.
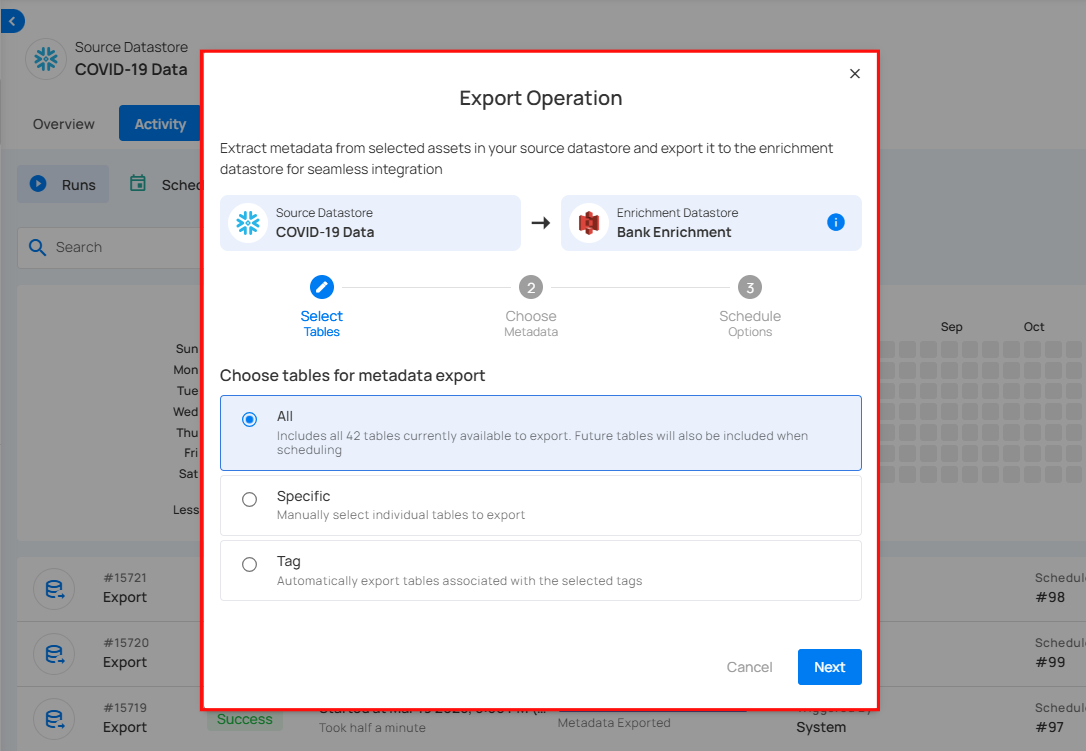
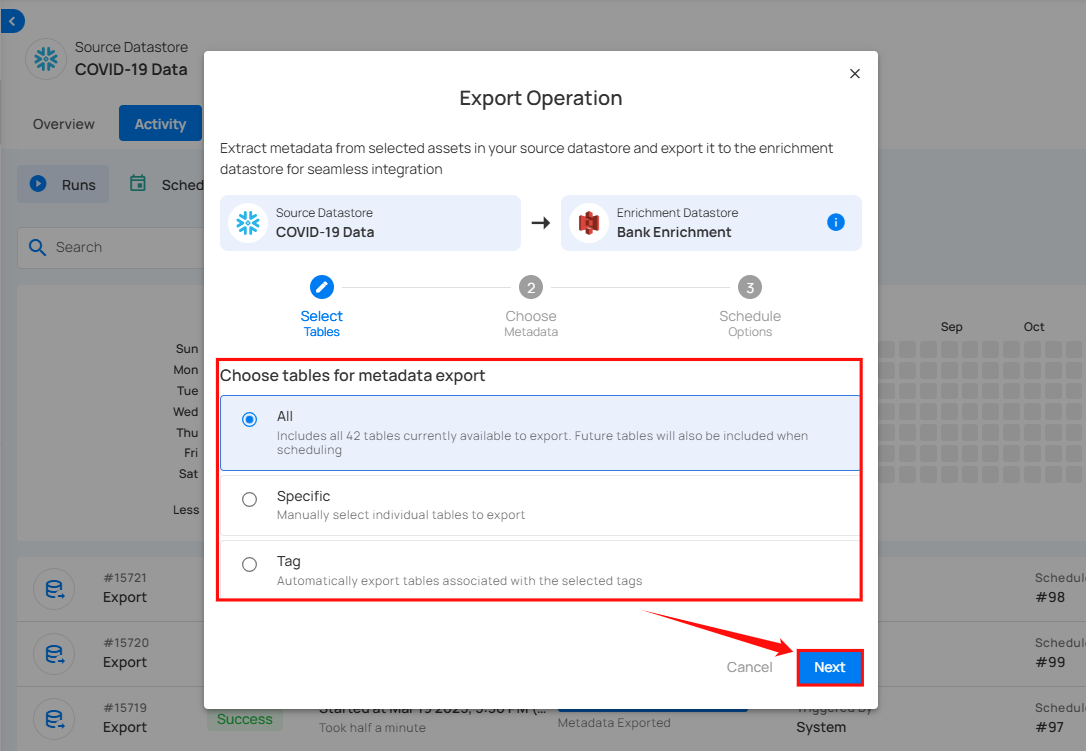
Step 4: Select the tables you wish to export: All, Specific, or Tag and click Next to proceed.
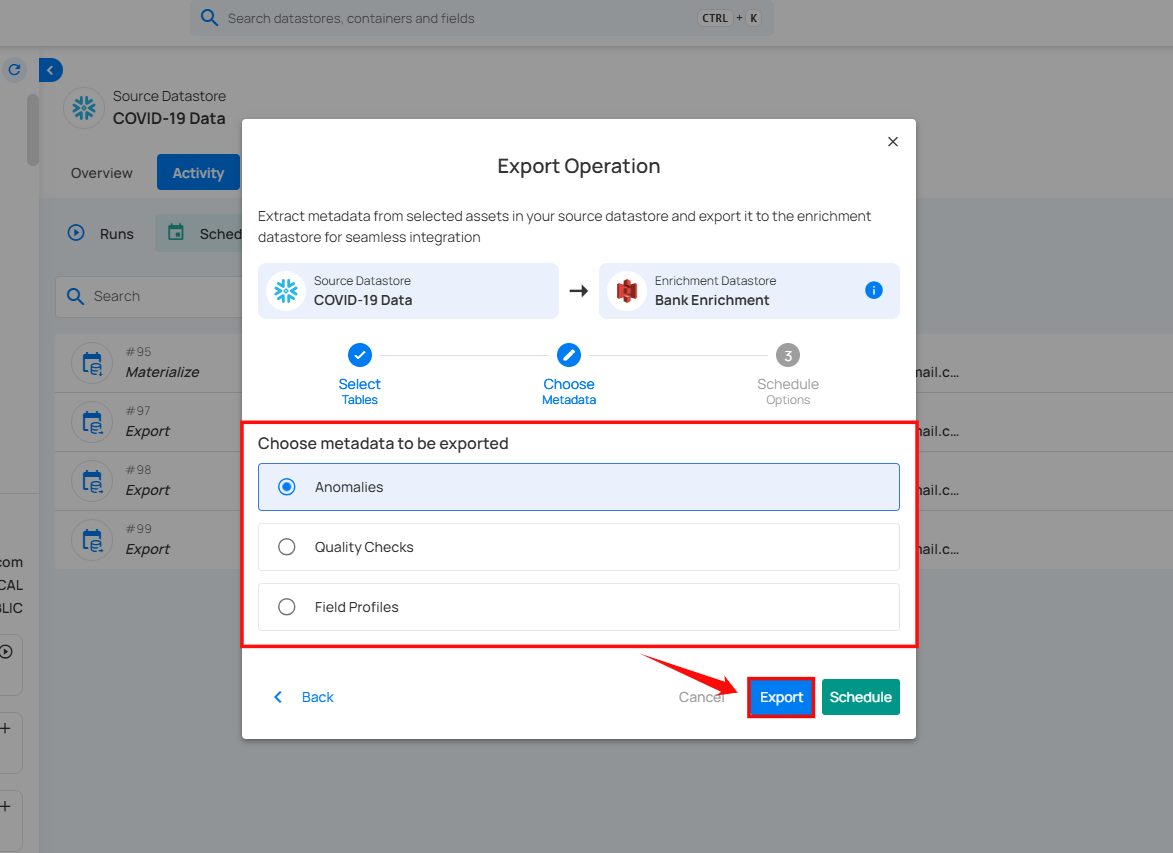
Step 5: After clicking Next, select the assets you want to export to your Enrichment Datastore: Anomalies, Quality Checks, or Field Profiles, and click Export to proceed with the export process.
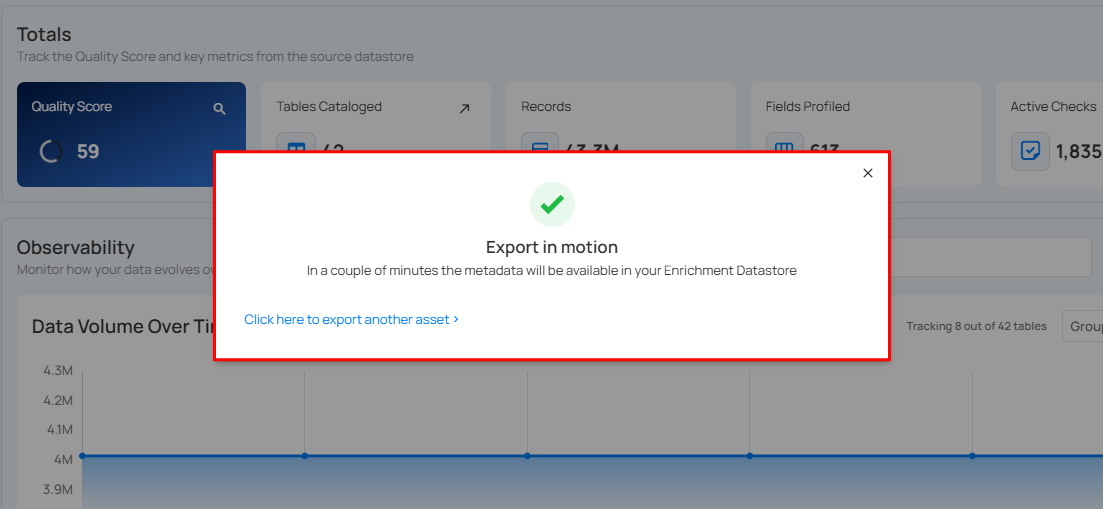
After clicking Export, a confirmation message appears stating "Export in motion." In a couple of minutes, the metadata will be available in your Enrichment Datastore.
Schedule Operation
Timezone-aware scheduling
Schedules can run in any IANA timezone (for example, America/New_York, Europe/Paris, Asia/Tokyo), and Daylight Saving Time transitions are handled automatically. UTC is the default for new and existing schedules. The configured timezone is shown on the schedule card as an abbreviation, such as Schedule (UTC) by default or Schedule (EST) after selecting another timezone.
Step 1: Click Schedule to configure scheduling options for the Export Operation.
Step 2: Choose the Timezone for this schedule. UTC is selected by default. To run in a different timezone, type to search by city, region, or abbreviation and pick an IANA timezone from the list. The selected timezone applies to every tab below, and the banner above the tabs shows the current time in that timezone.
Step 3: Configure the scheduling preferences for the Export Operation. Time inputs apply to the timezone selected in Step 2.
-
Hourly: Runs every set number of hours at a specified minute. (e.g., Every 1 hour at 00 minutes).
-
Daily: Runs once per day at a specific time. (e.g., Every day at 00:00 in the selected timezone).
-
Weekly: Runs on selected weekdays at a set time. (e.g., Every Sunday and Friday at 00:00 in the selected timezone).
-
Monthly: Runs on a specific day of the month at a set time. (e.g., 1st day of every month at 00:00 in the selected timezone).
-
Advanced: Use Cron expressions for custom scheduling (e.g.,
0 12 * * 1-5runs at 12 PM, Monday to Friday). The Custom Cron Schedule field label shows the abbreviation for the currently selected timezone (for example,Custom Cron Schedule (UTC)orCustom Cron Schedule (EST)).
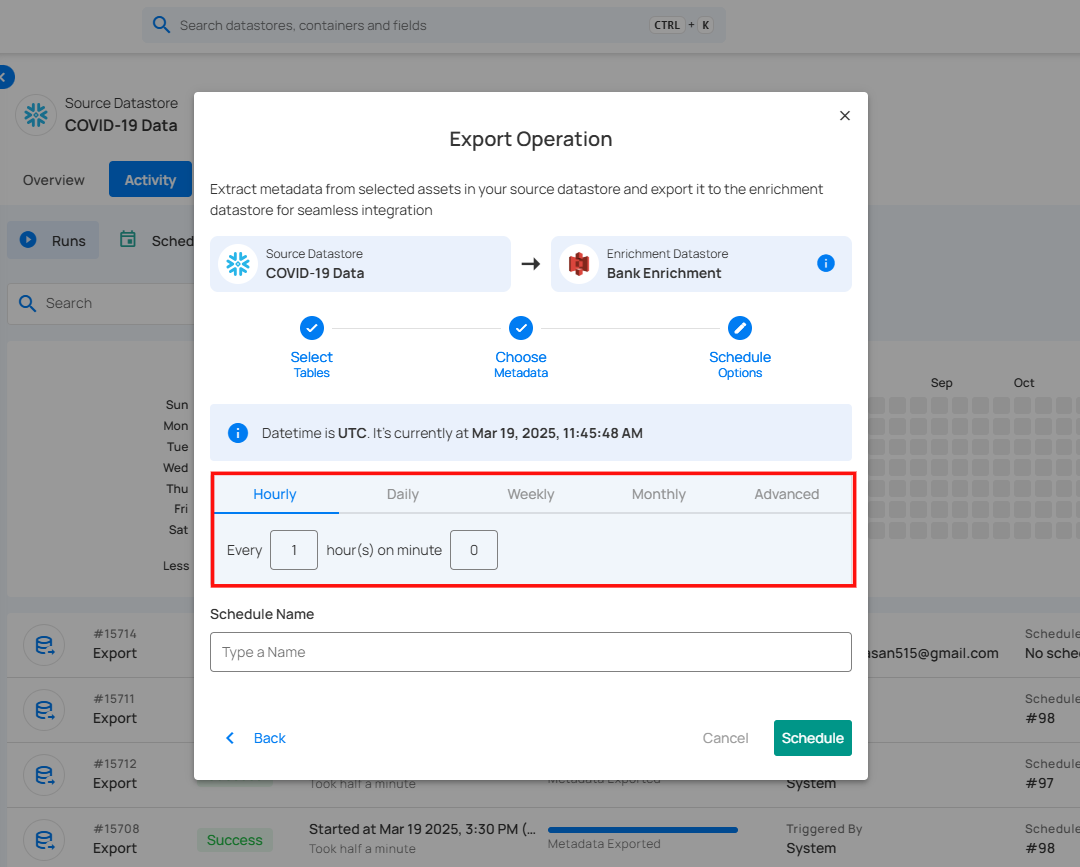
Step 4: Define the Schedule Name to identify the scheduled Export Operation when it runs.
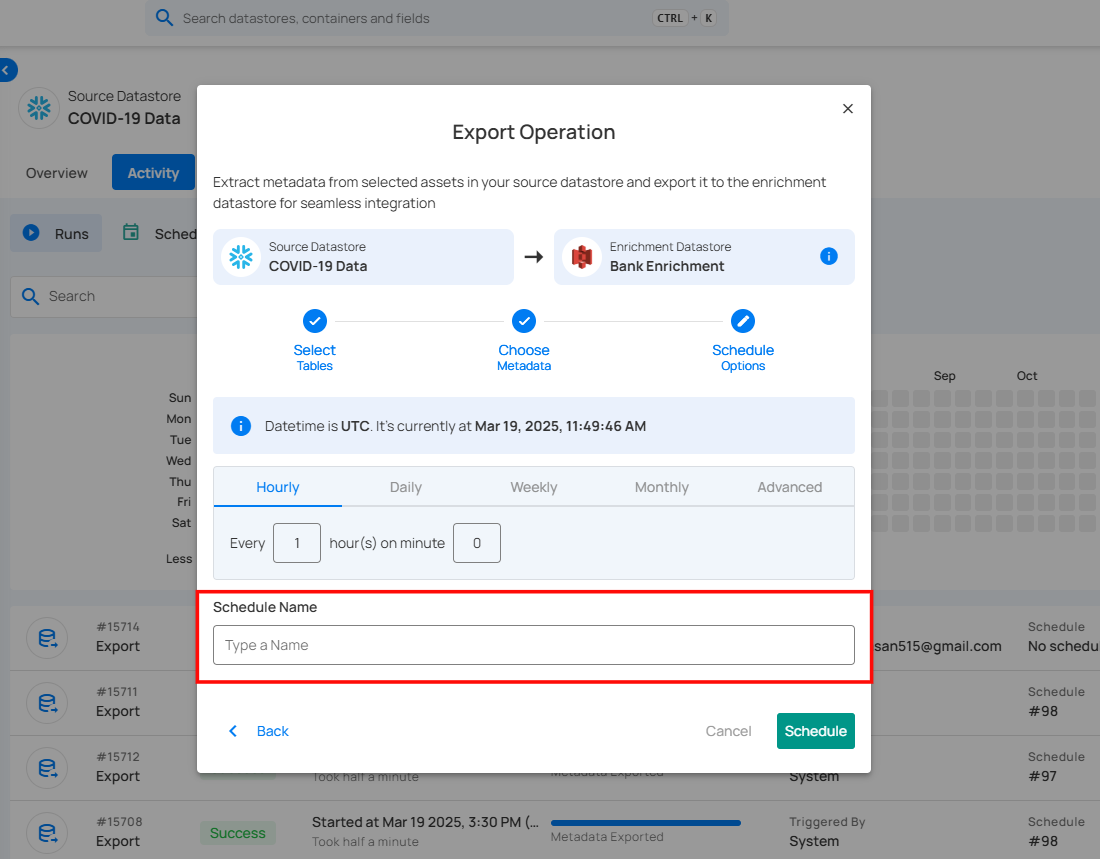
Step 5: Click Schedule to finalize and schedule the Export Operation.

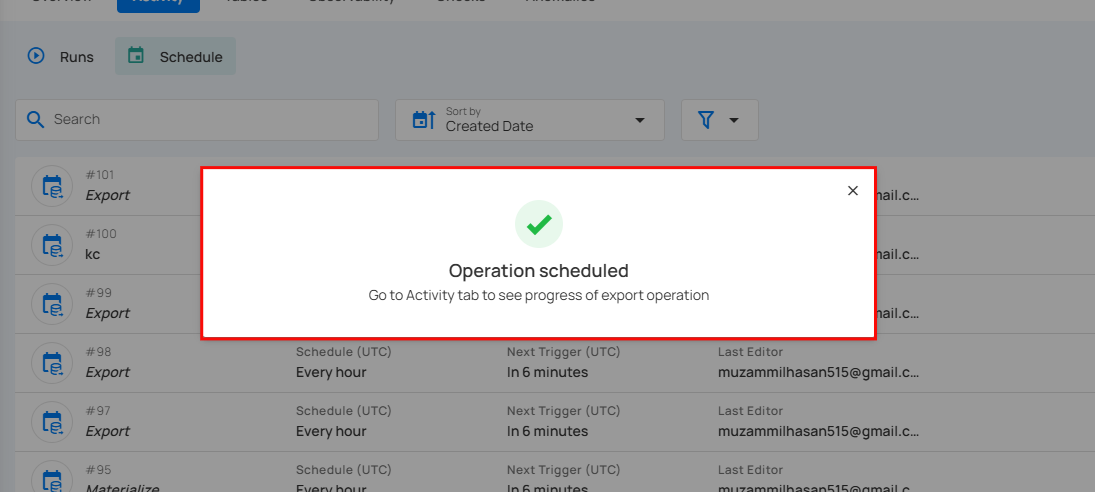
After clicking Schedule, a confirmation message appears stating "Operation Scheduled". Go to the Activity tab to see the progress of the export operation.
Daylight Saving Time
When you pick a timezone that observes DST (such as America/New_York or Europe/London), the schedule automatically shifts with each transition. A job set to run at 9:00 AM in America/New_York runs at 9:00 AM local time year-round, regardless of whether the zone is in EST or EDT at the time. No reconfiguration is required.
Field Masking and Export
If your datastore contains masked fields, masking is applied to Field Profile exports before the data is written to the enrichment datastore.
Specifically, histogram bucket values for masked fields are obfuscated in the _<enrichment_prefix>_field_profiles_export output file. This ensures that the statistical distribution of sensitive field values is not exposed in your enrichment datastore.
- Anomaly exports and Quality Check exports are not affected by field masking.
- To obtain revealed histogram data in the export file, enable the Reveal Masked Values toggle when triggering the Export operation, or pass
include_masked=truevia the API.
Note
Masking is applied by Qualytics before the export payload is sent for writing. The enrichment datastore always receives already-masked data for any fields designated as sensitive.
Review Exported Data
Step 1: Once the metadata has been exported, navigate to the “Enrichment Datastores” located on the left menu.
Step 2: In the “Enrichment Datastores” section, select the datastore where you exported the metadata. The exported metadata will now be visible in the selected datastore.
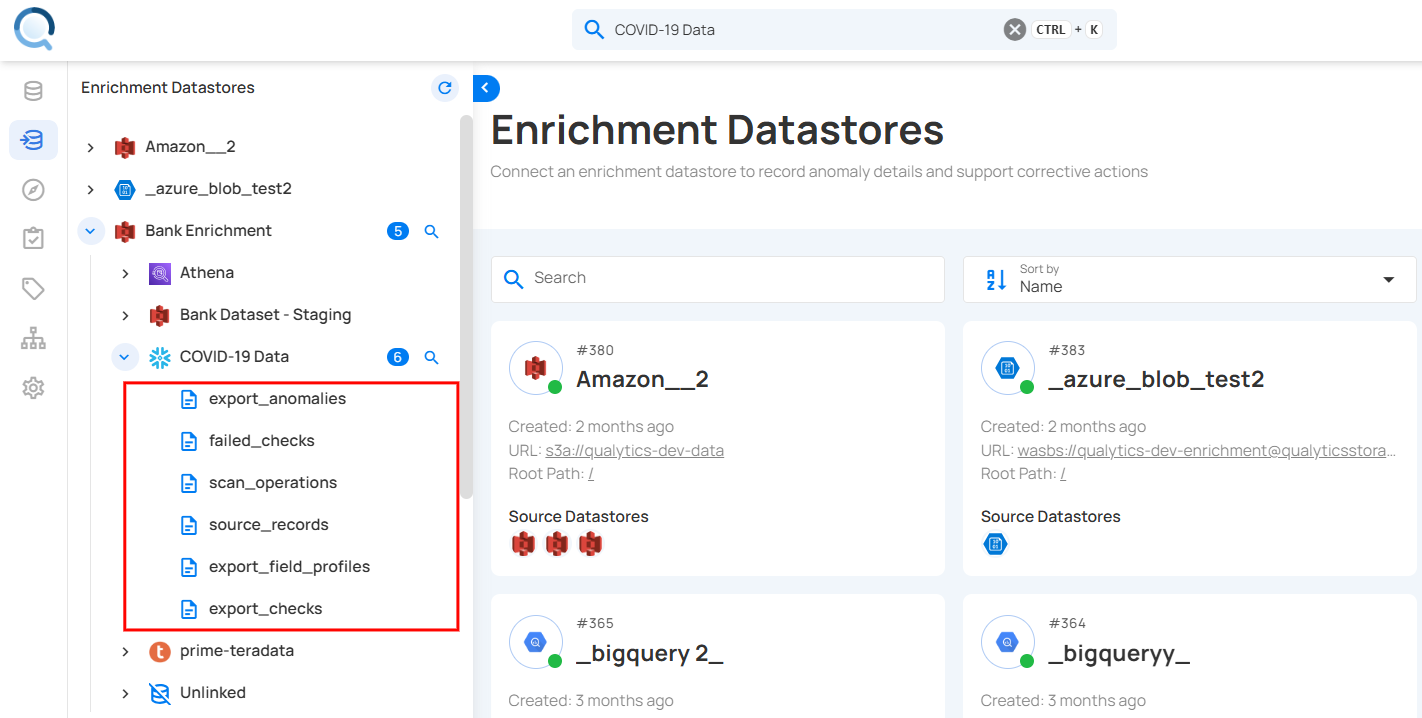
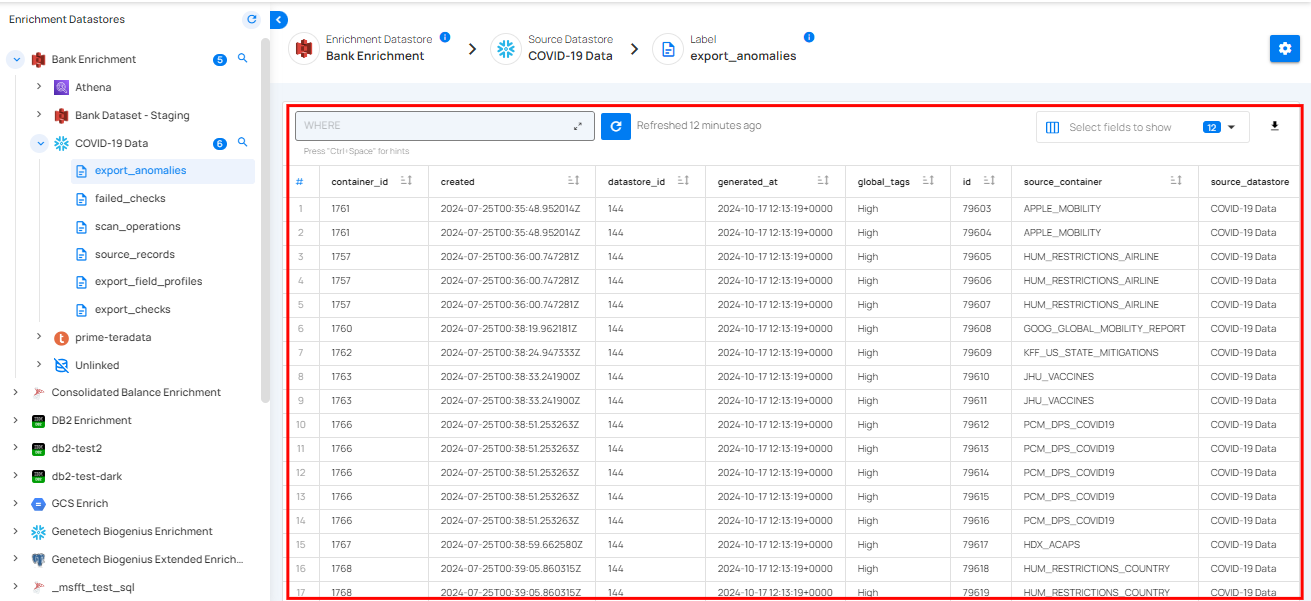
Step 3: Click on the exported files to view the metadata. For demonstration purposes, we have selected the “export_field_profiles” file to review the metadata.
The exported metadata is displayed in a table format, showing key details about the field profiles from the datastore. It typically includes columns that indicate the uniqueness of data, the completeness of the fields, and the data structure. You can use this metadata to check data quality, prepare for analysis, ensure compliance, and manage your data.