 Add an Athena Source Datastore
A source datastore is a storage location Qualytics connects to so it can profile, scan, and monitor data. Adding Athena as a source lets Qualytics query your AWS data lake through the Athena JDBC driver and run quality operations on the tables it discovers.
Before you start, review the Athena Permissions and the available Authentication methods.
Warning
Qualytics does not support Athena as an enrichment datastore. After you add Athena as a source, link a separate enrichment datastore (BigQuery, PostgreSQL, etc.) to store anomalies and metadata — either during creation via Link Enrichment on Datastore Creation, or afterwards via Link Enrichment Datastore.
This page covers two ways to add an Athena source datastore — using a new connection or reusing a saved one. Both flows share the same form fields. Use the tabs in Field reference and Steps below to pick the flow that matches your situation. If this is your first Athena datastore in Qualytics, use the New Connection tab.
Field reference
The Add Source Datastore form changes depending on whether you create a new connection or reuse a saved one. Pick the tab below that matches your flow.
When Add New Connection is toggled ON, the form shows five groups of fields: Connection Properties, Authentication, Secrets Management (optional Vault integration), Datastores Extraction, and Datastore Properties.
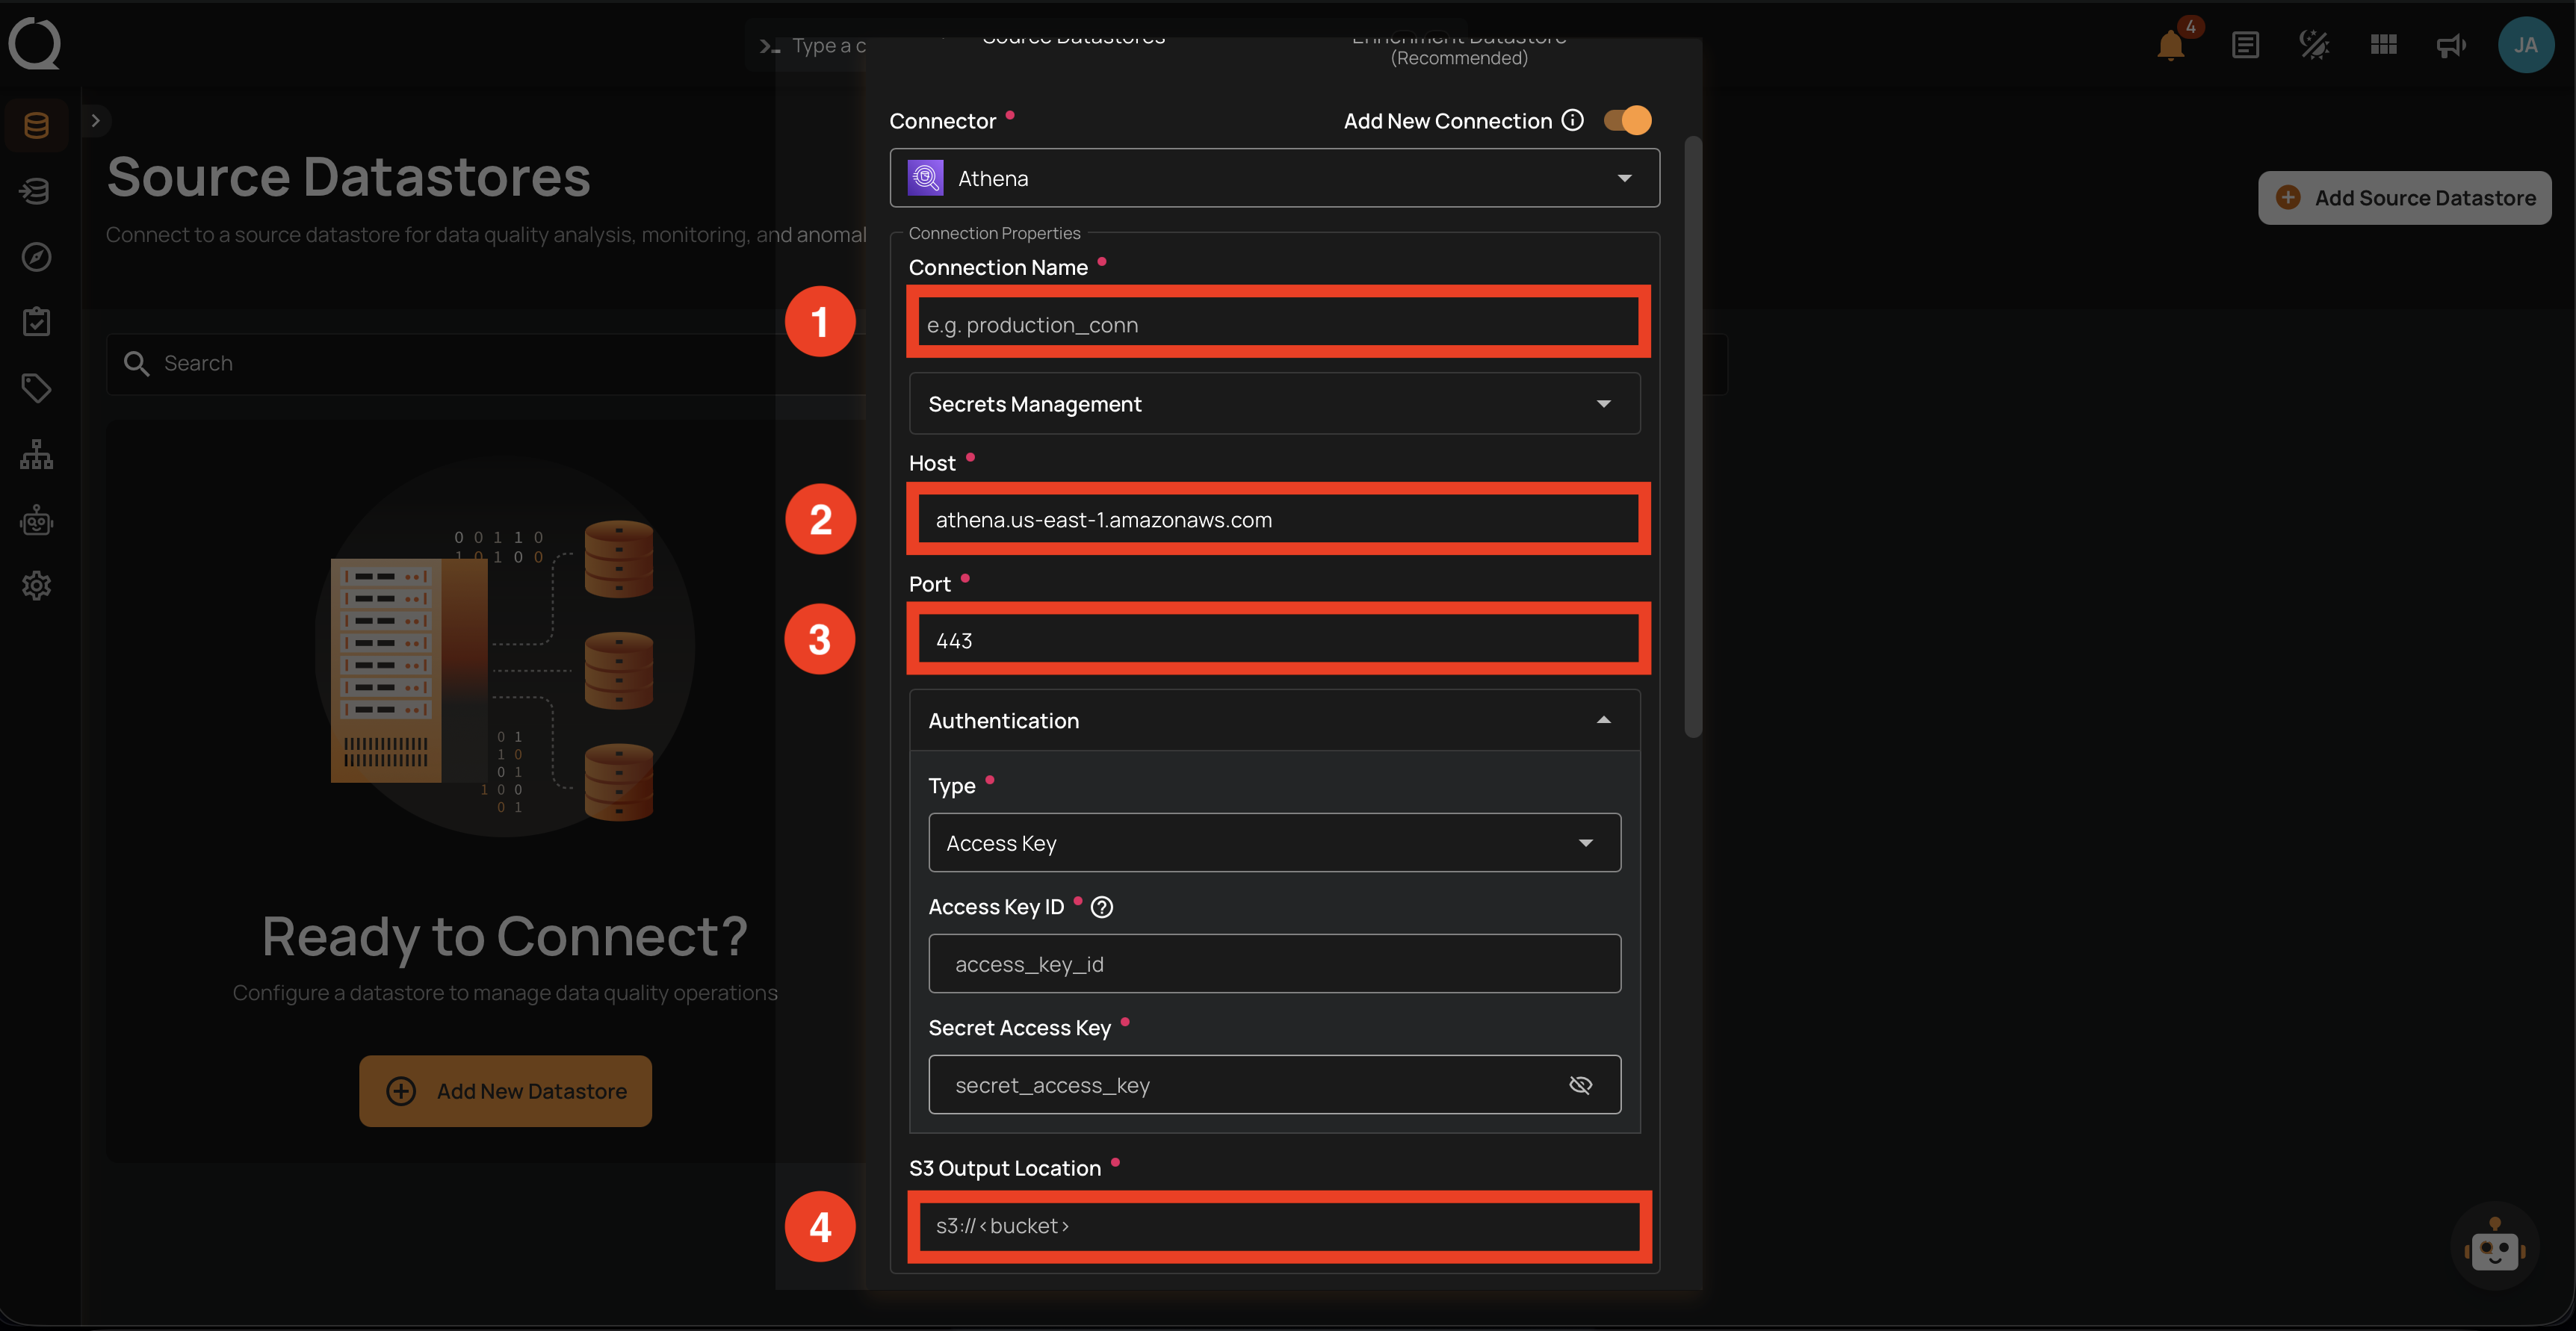
Connection Properties
These fields define the Athena endpoint and where Athena writes query results.
| REF. | FIELD | REQUIRED | DESCRIPTION |
|---|---|---|---|
| 1 | Connection Name | Yes | A label for the saved connection (e.g., acme_athena_warehouse). Appears in the Connection dropdown when you create future datastores. |
| 2 | Host | Yes | The canonical Athena endpoint for your region (e.g., athena.us-east-1.amazonaws.com). VPC endpoint URLs and private DNS aliases are not supported. |
| 3 | Port | Yes | The Athena HTTPS port. Defaults to 443. |
| 4 | S3 Output Location | Yes | The S3 path where Athena writes query results (e.g., s3://acme-athena-results/query-output/). The IAM identity used by Qualytics needs read and write access to this bucket. Equivalent to parameters.output in the API. |
Tip
For the IAM permissions Qualytics needs on Athena, Glue, and the S3 query-results bucket, see Athena Permissions.
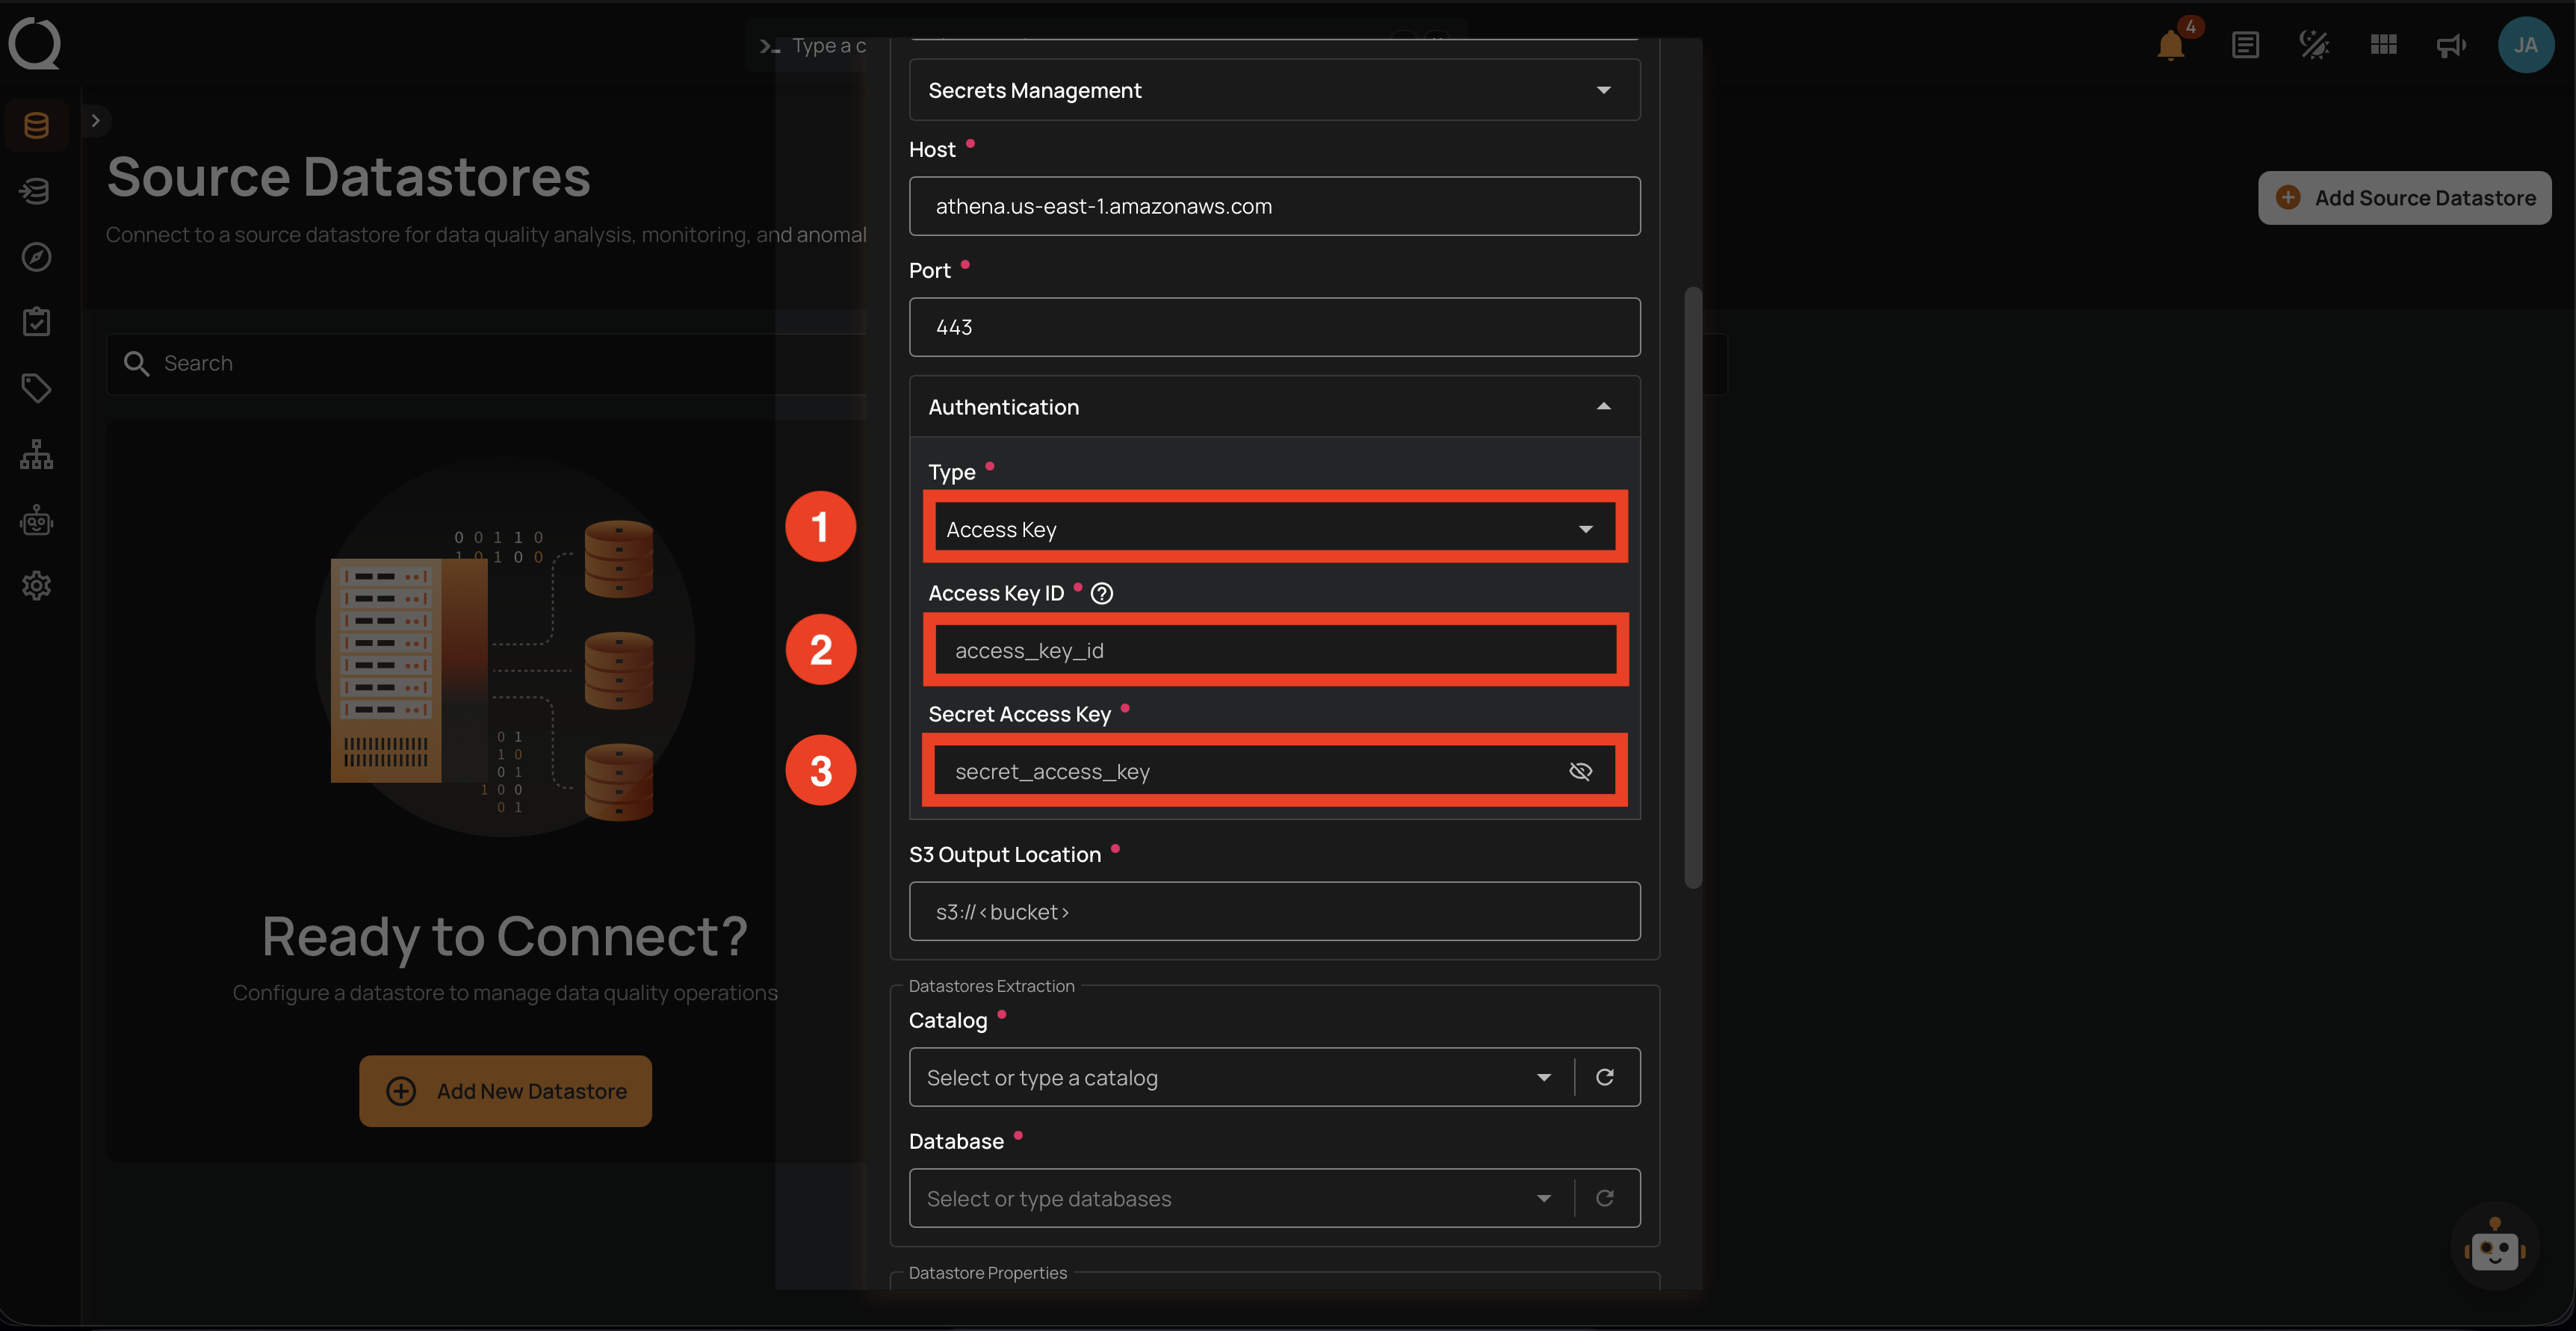
Authentication
Choose how Qualytics authenticates to AWS. Setting Type changes the credential fields shown below it.
| REF. | FIELD | REQUIRED | DESCRIPTION |
|---|---|---|---|
| 1 | Type | Yes | Authentication mode. Choose between Access Key (default) and IAM Role. |
| 2 | Access Key ID | Yes | The AWS Access Key ID for an IAM user with Athena, Glue, and S3 permissions. Shown when Type is Access Key. |
| 3 | Secret Access Key | Yes | The matching Secret Access Key. Shown when Type is Access Key. |
IAM Role variant
When you set Type to IAM Role, the Access Key ID and Secret Access Key fields are replaced by:
- Role ARN (required) — The IAM role ARN Qualytics will assume via AWS STS.
- External ID (optional) — Include only if your role's trust policy requires one.
See Athena Authentication for the assume-role flow walkthrough.
AWS-only: the IAM Role option in Type is shown only on AWS and local Qualytics deployments. On Azure and GCP deployments, only Access Key authentication is available.
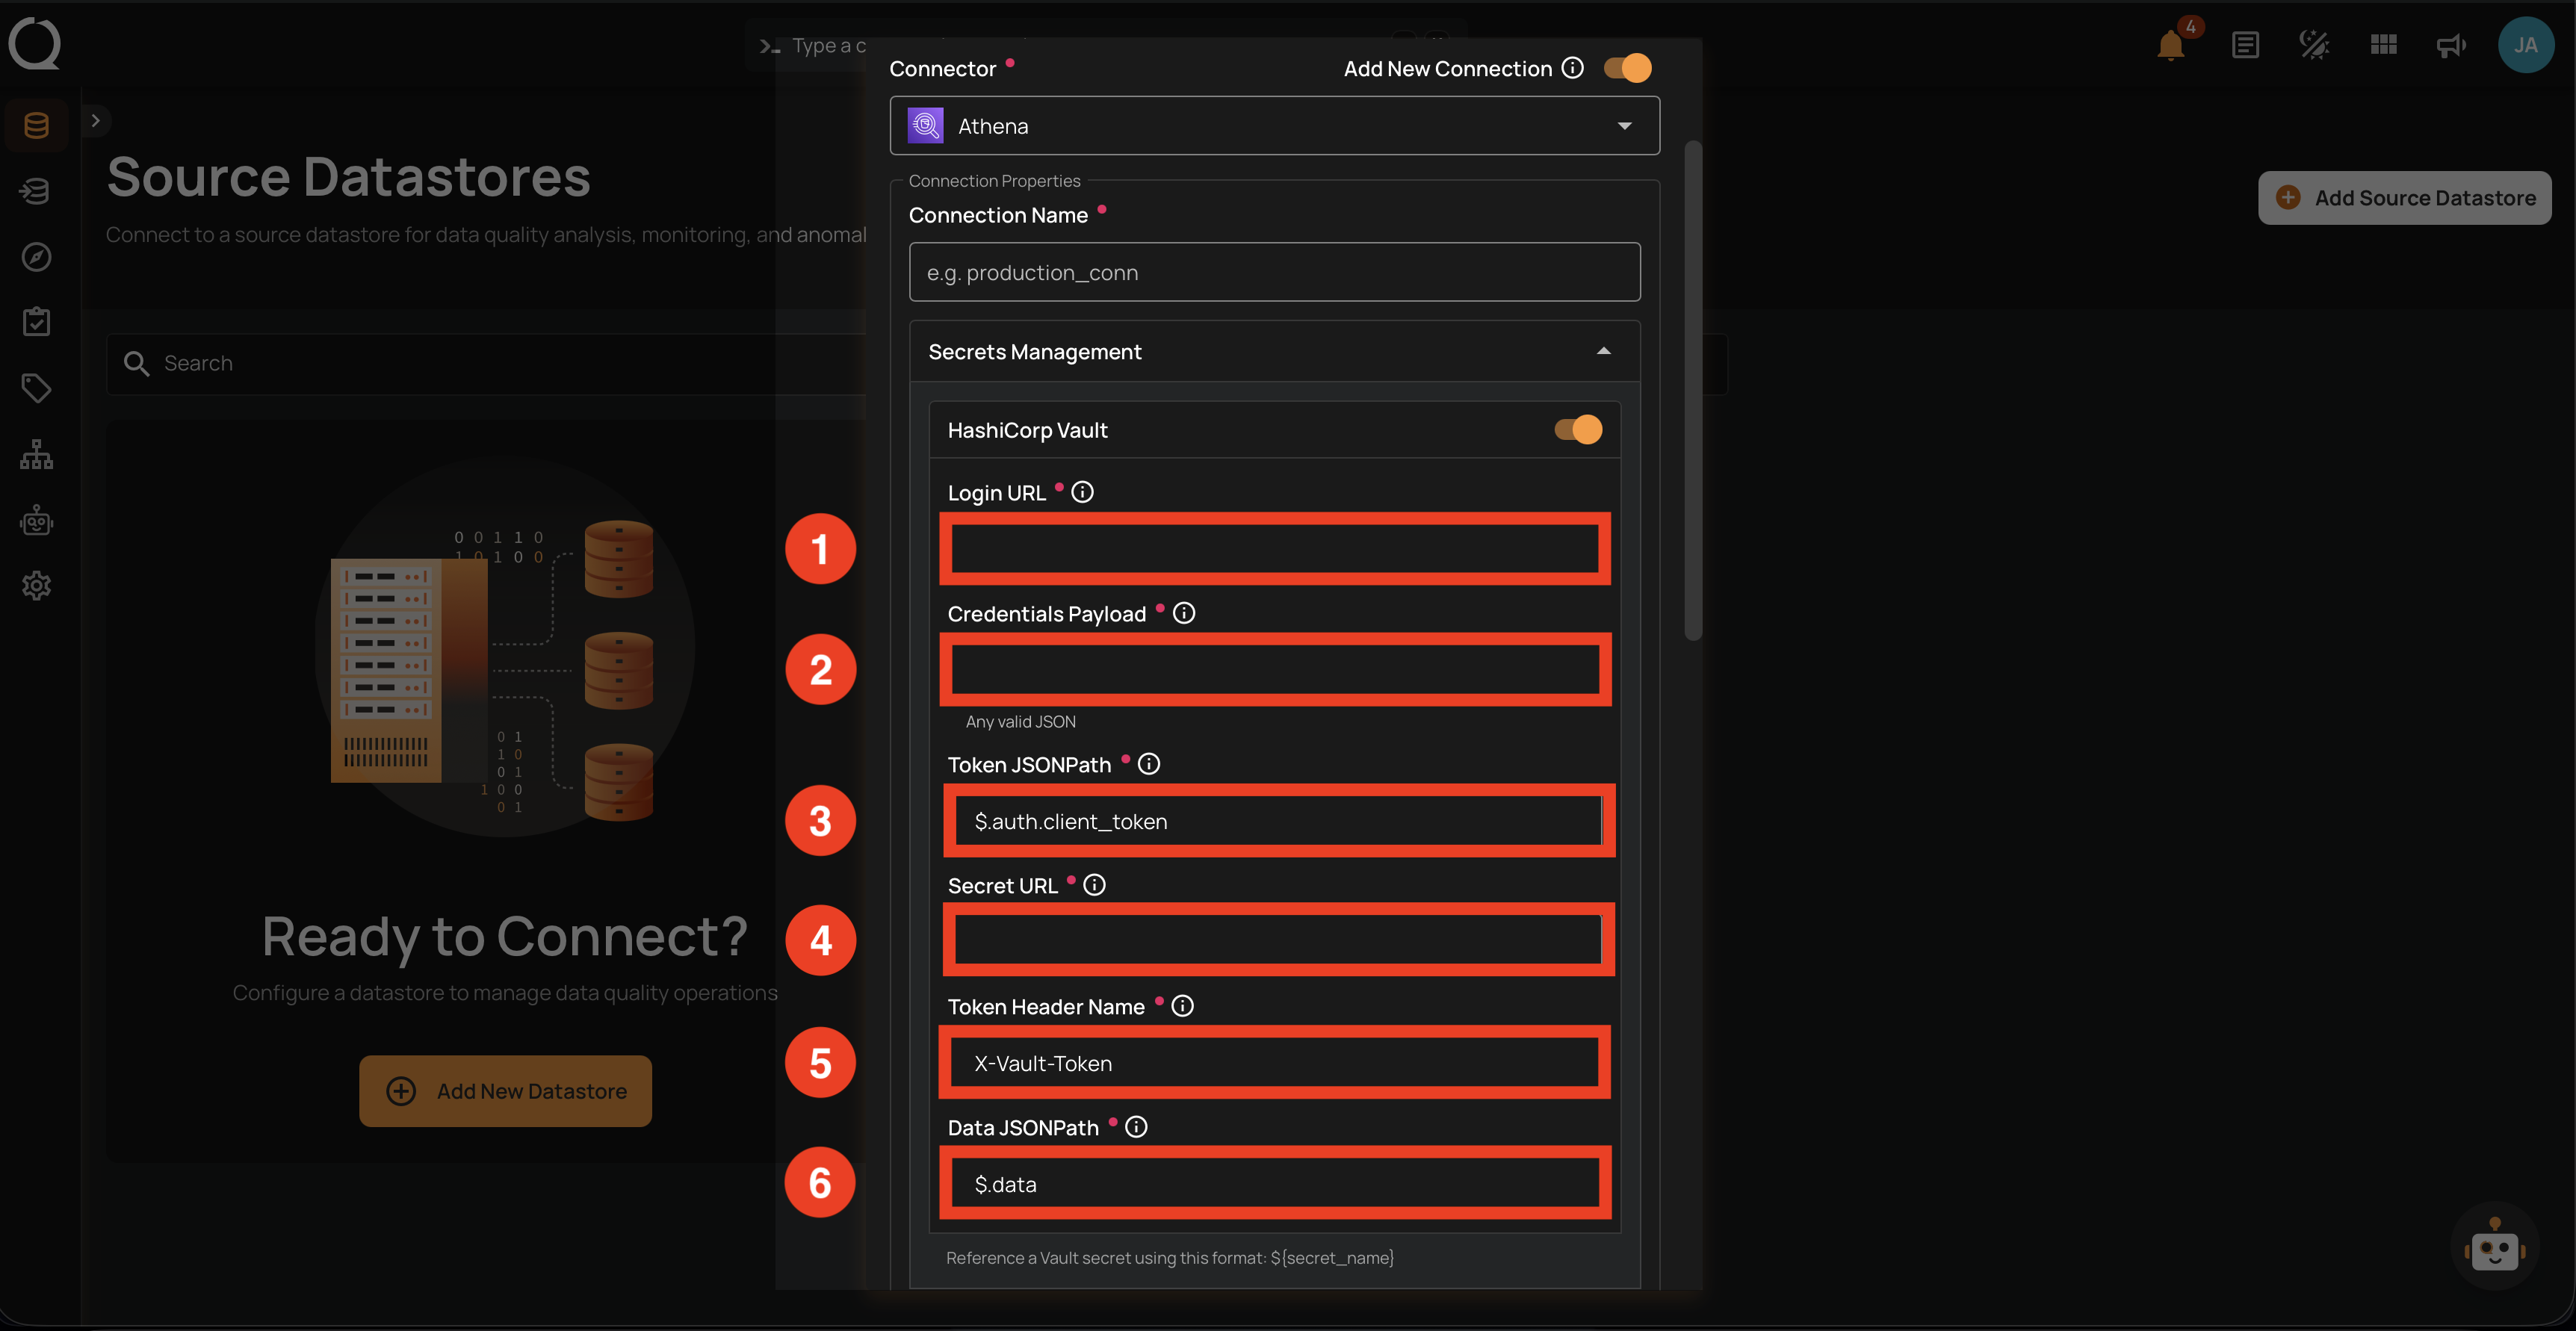
Secrets Management (optional)
Use this group only if you want Qualytics to pull credentials from HashiCorp Vault instead of typing them into the form. Toggle HashiCorp Vault ON to expose the fields below.
| REF. | FIELD | REQUIRED | DESCRIPTION |
|---|---|---|---|
| 1 | Login URL | Yes | The Vault endpoint Qualytics uses to authenticate (e.g., https://vault.example.com/v1/auth/approle/login). |
| 2 | Credentials Payload | Yes | A JSON body containing the credentials Vault expects (e.g., {"role_id":"...","secret_id":"..."}). |
| 3 | Token JSONPath | Yes | The JSONPath that extracts the client token from Vault's response. Defaults to $.auth.client_token. |
| 4 | Secret URL | Yes | The Vault path where the secret is stored (e.g., https://vault.example.com/v1/secret/data/athena). |
| 5 | Token Header Name | Yes | The HTTP header name used to send the token. Defaults to X-Vault-Token. |
| 6 | Data JSONPath | Yes | The JSONPath that extracts the secret payload from Vault's response. Defaults to $.data. |
Note
Once Vault is configured, reference any secret value in the Connection Properties or Authentication fields using ${key} (e.g., ${secret_access_key}). Qualytics resolves the secret at the moment the connection is opened, so rotated keys take effect on the next connection.
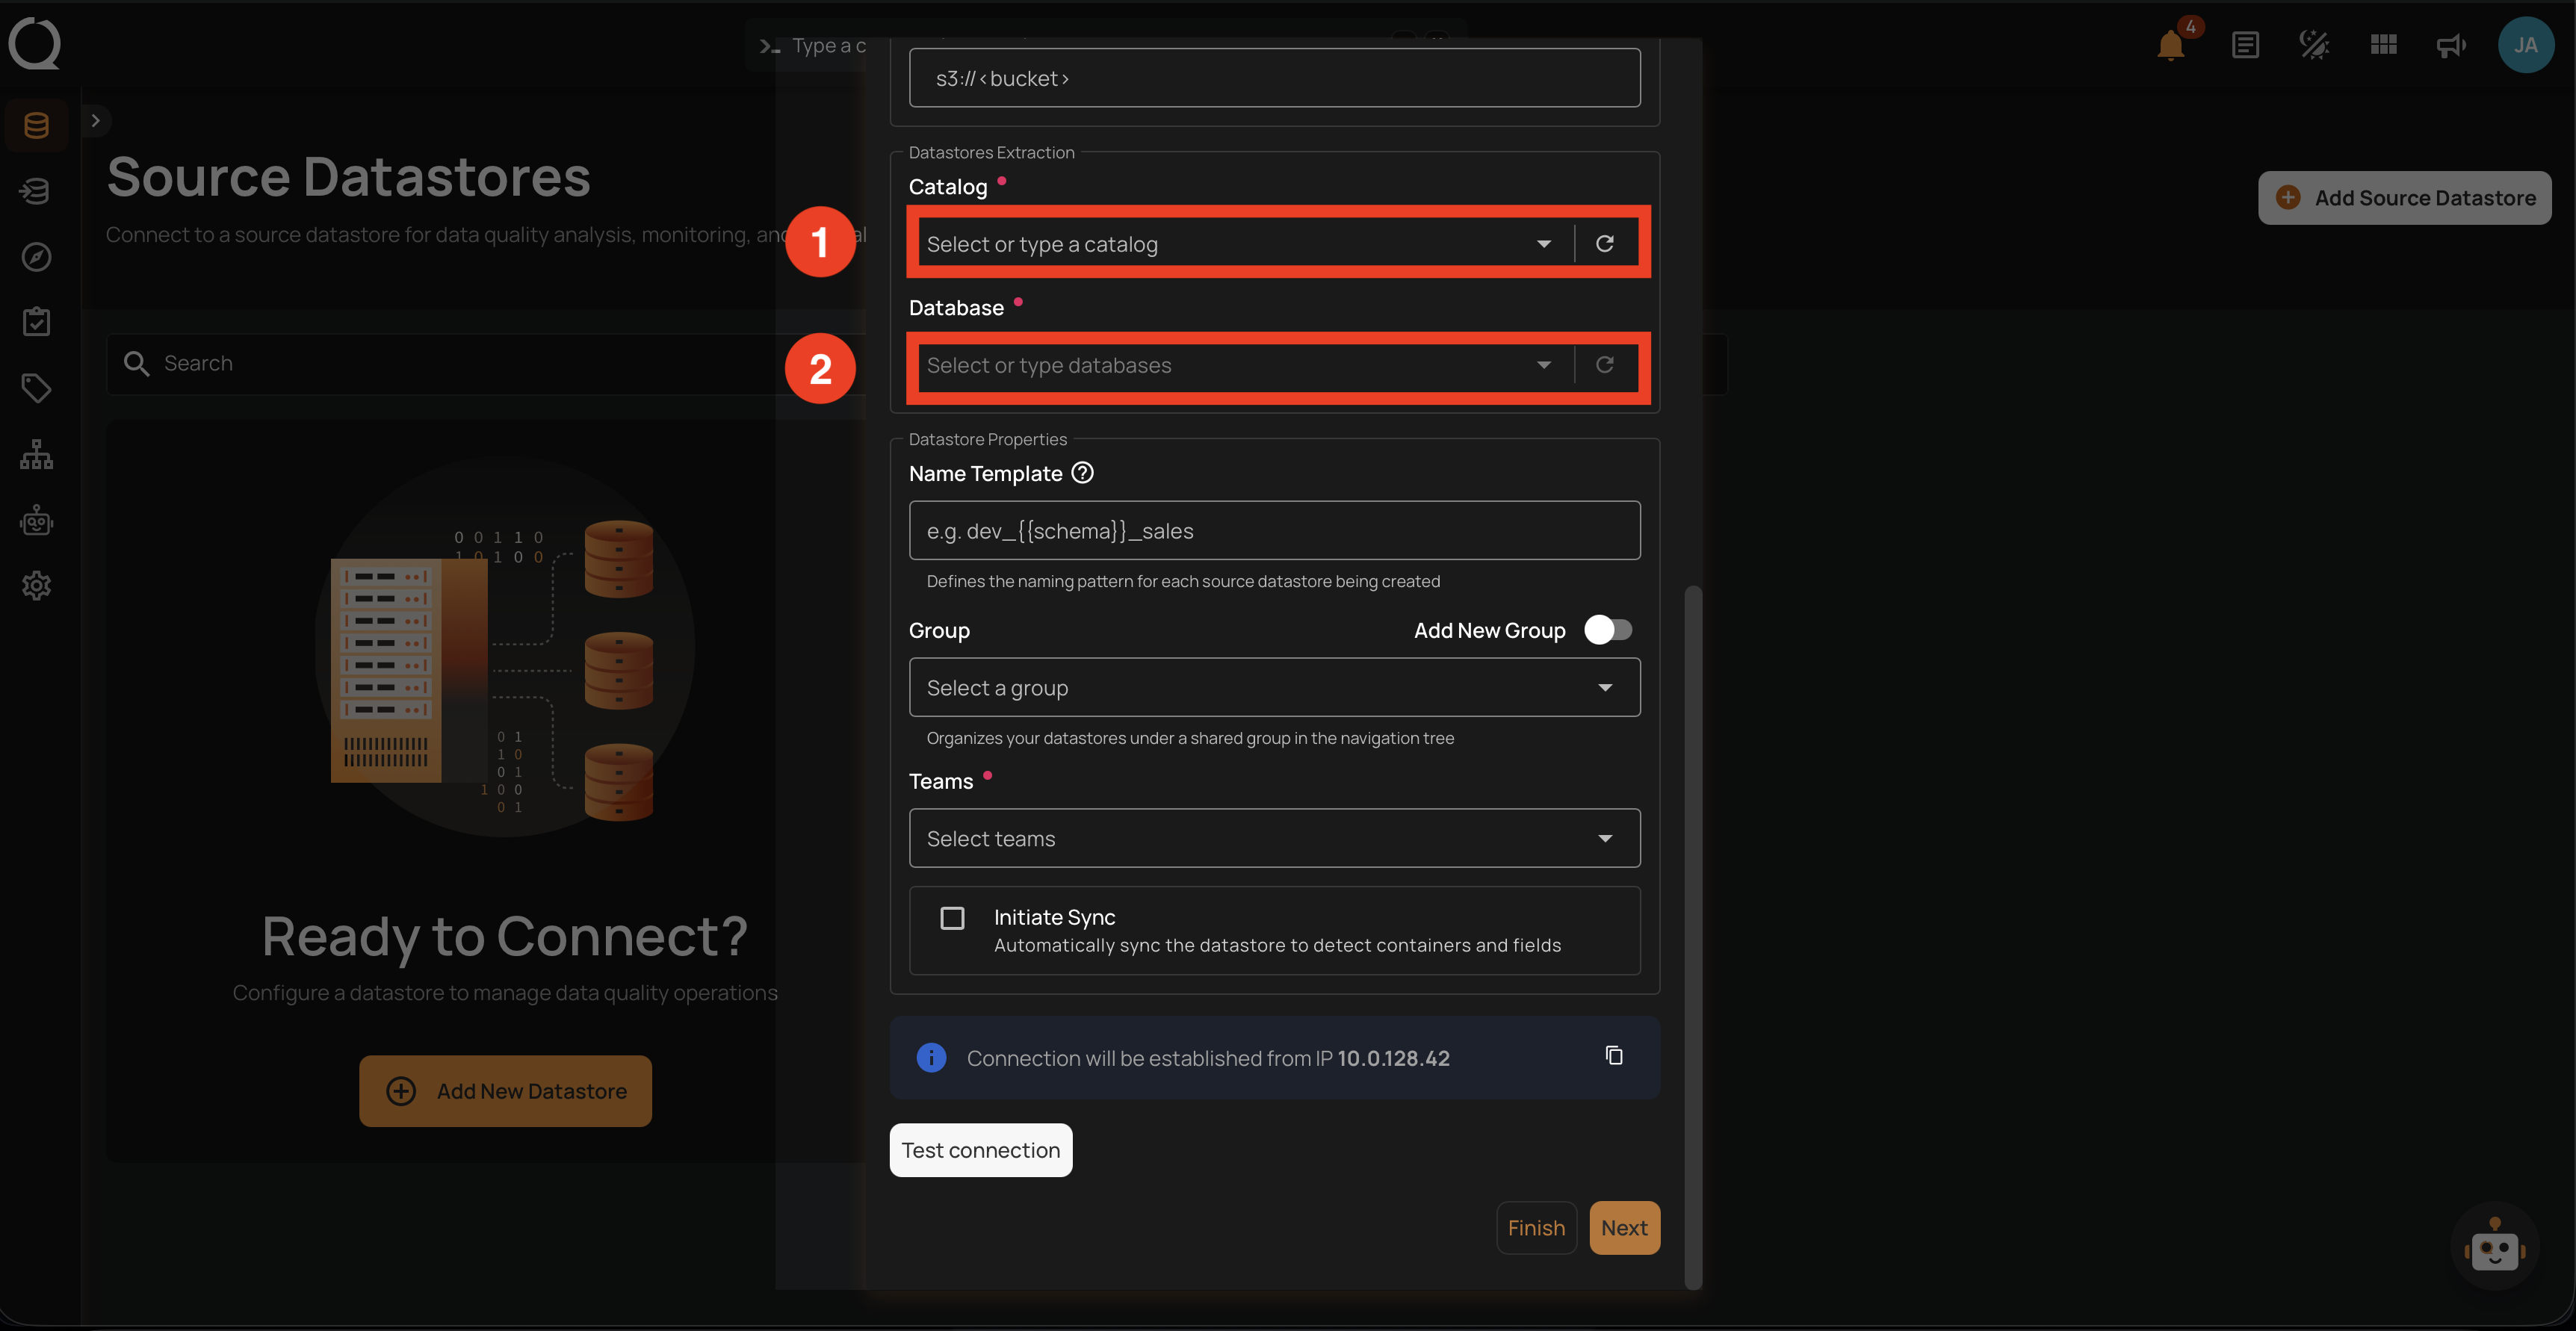
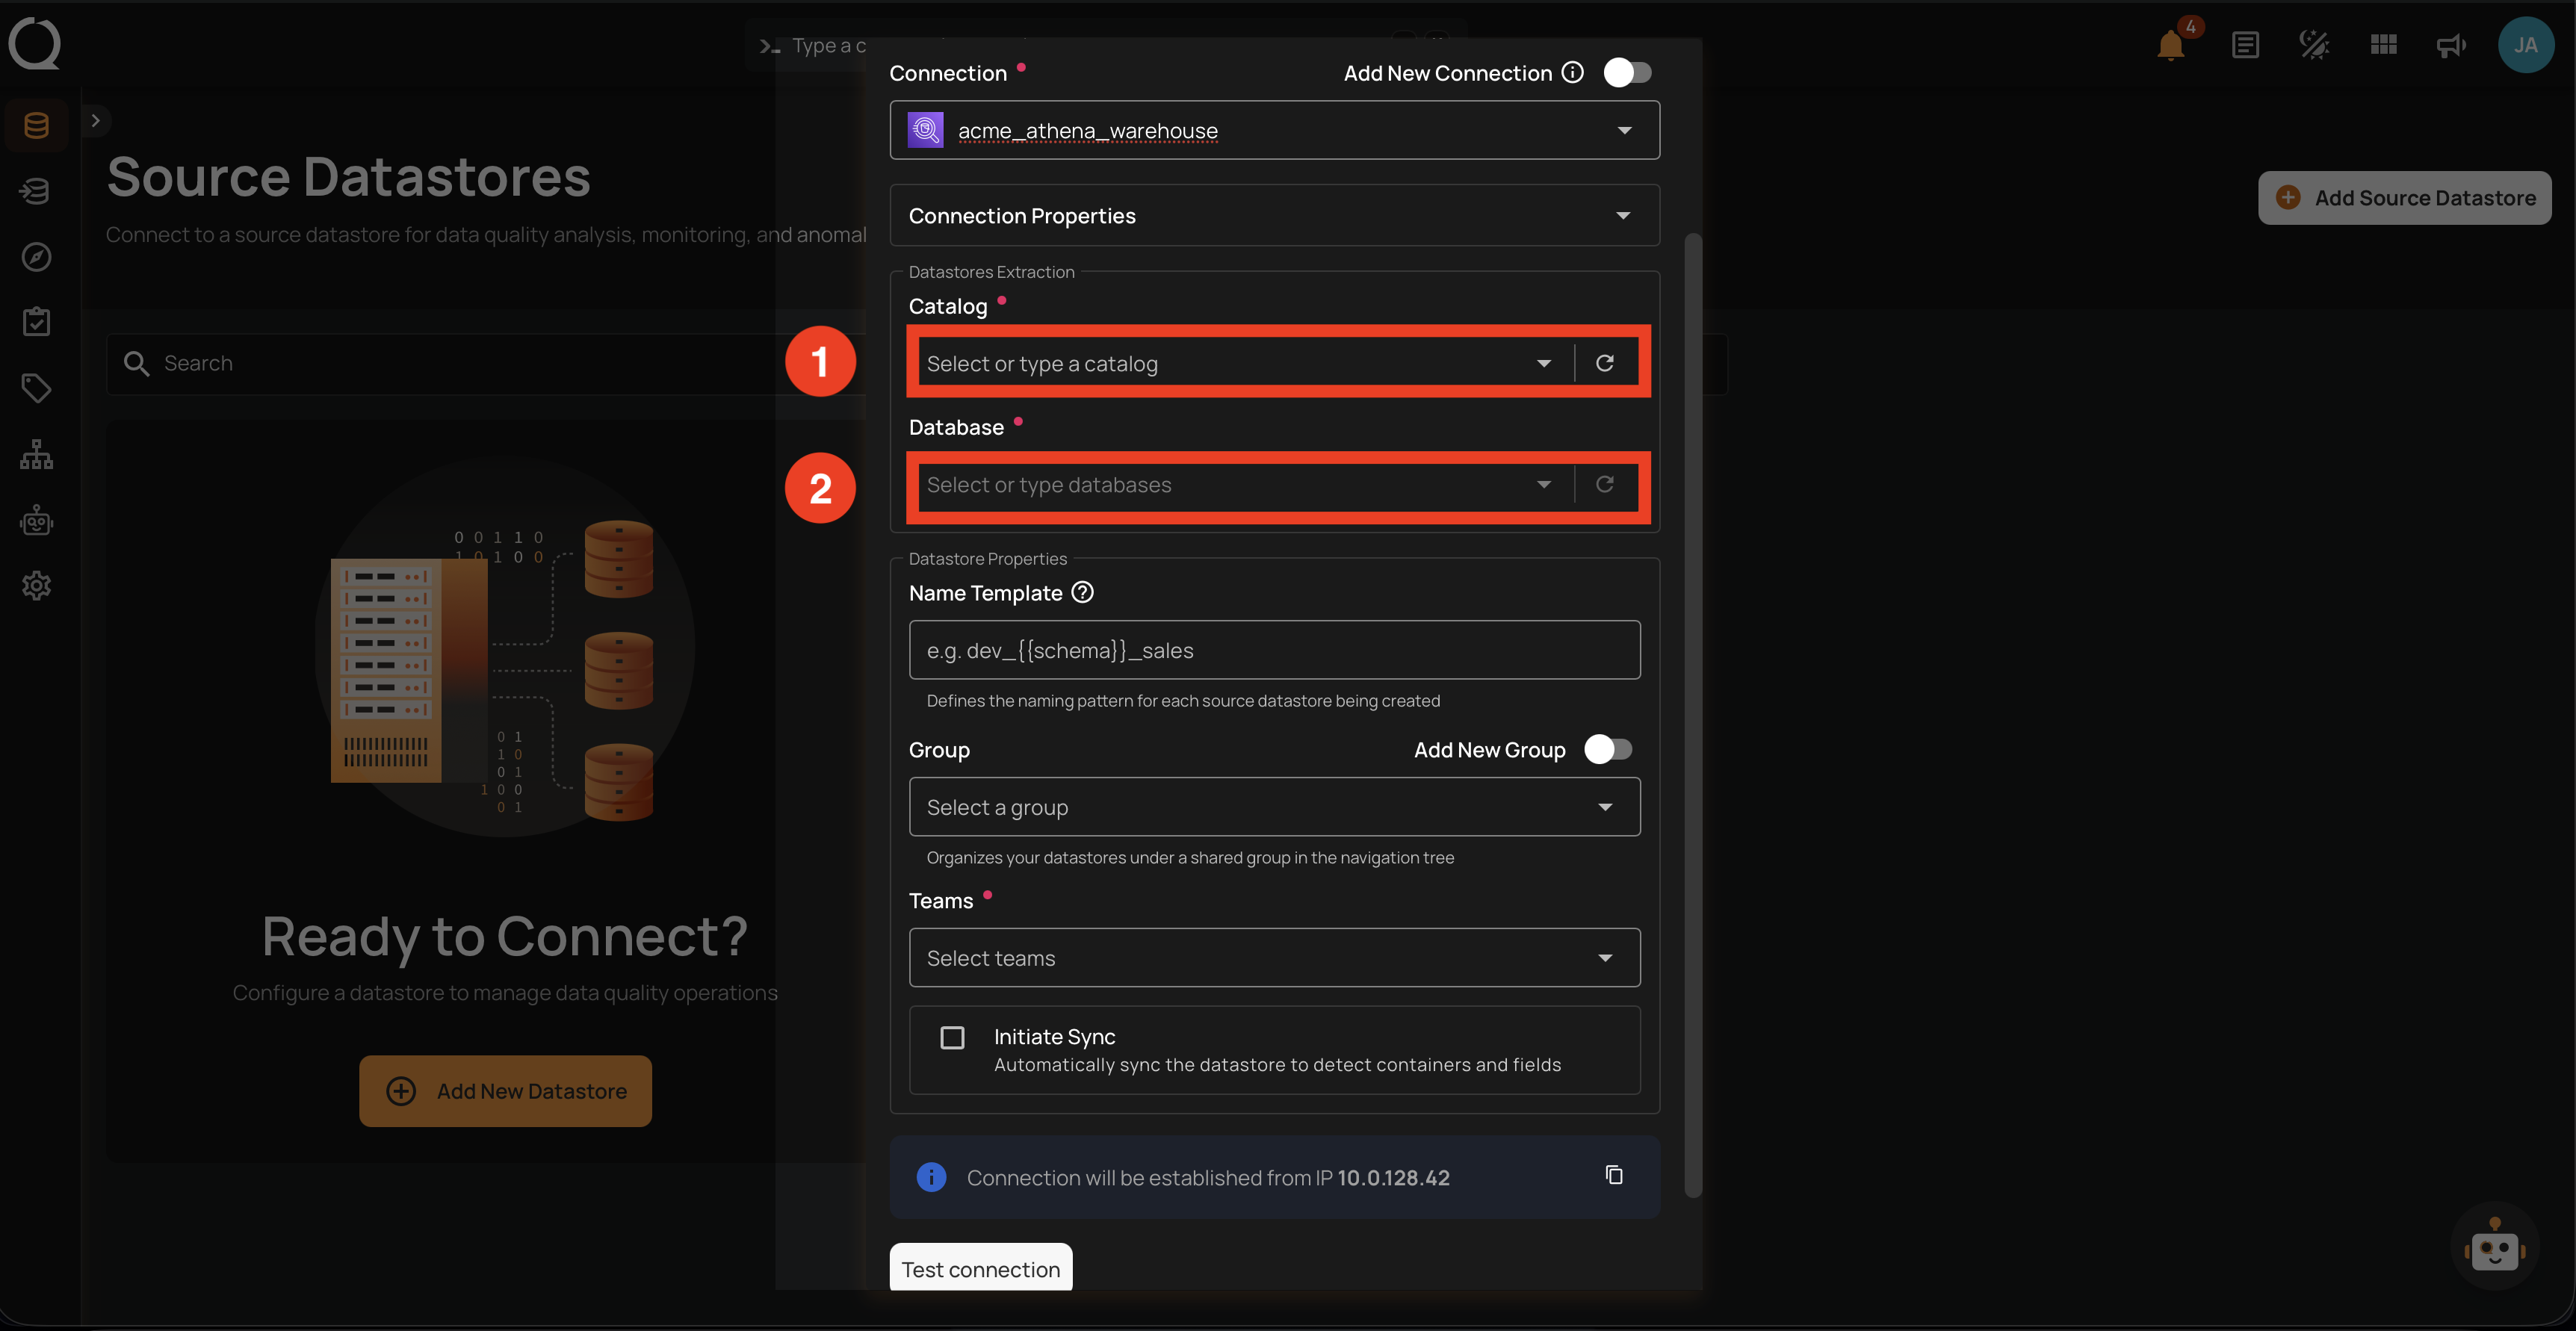
Datastores Extraction
Pick the catalog and database(s) Qualytics should read from.
| REF. | FIELD | REQUIRED | DESCRIPTION |
|---|---|---|---|
| 1 | Catalog | Yes | The Athena data catalog to read from. Defaults to AwsDataCatalog. Click the refresh icon to fetch the catalogs visible to the credentials. |
| 2 | Database | Yes | One or more databases inside the selected catalog. Each database you pick becomes its own Qualytics datastore. Click the refresh icon to load the available databases. |
Datastore Properties
Common fields for every source datastore, visible below the Datastores Extraction section in the same form.
| FIELD | REQUIRED | DESCRIPTION |
|---|---|---|
| Name Template | No | Defines the naming pattern for each source datastore being created. Use {{ schema }} as a placeholder that gets replaced with the actual schema name (e.g., athena_{{ schema }} becomes athena_data_lake_curated). |
| Group | No | Organizes your datastores under a shared group in the navigation tree. Select an existing group or create a new one with the Add New Group toggle. |
| Teams | Yes | Select one or more teams to associate with this source datastore. |
| Initiate Sync | No | Automatically sync the datastore to detect containers and fields after creation. |
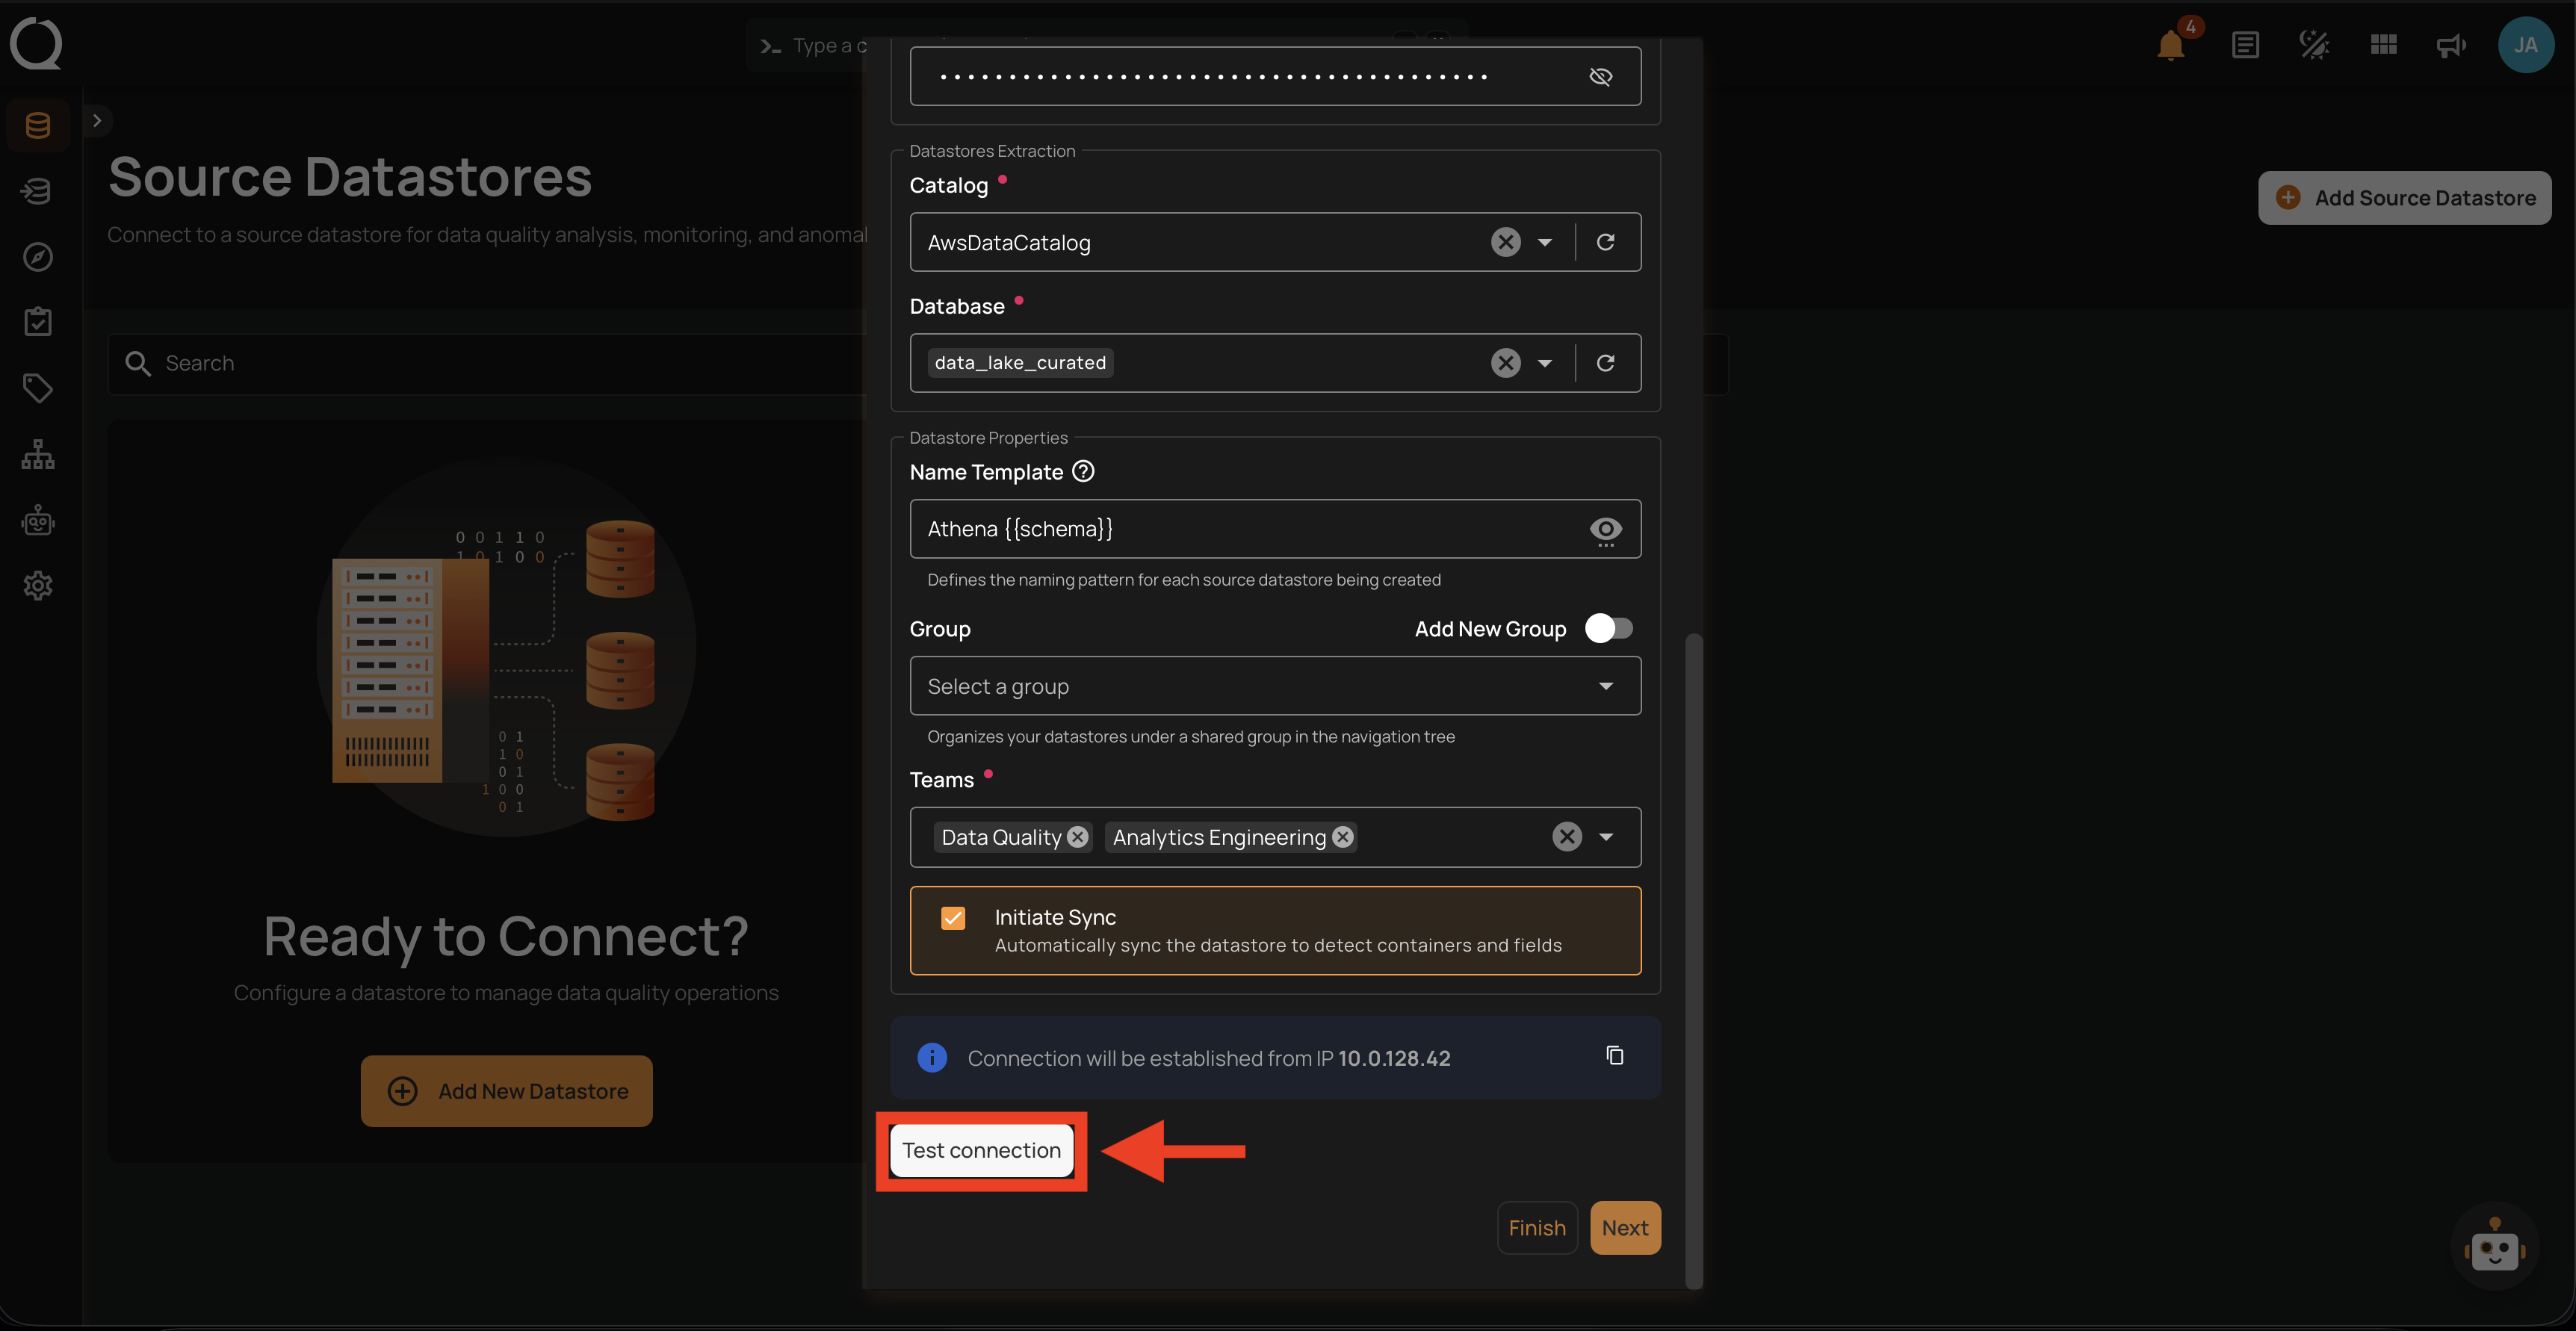
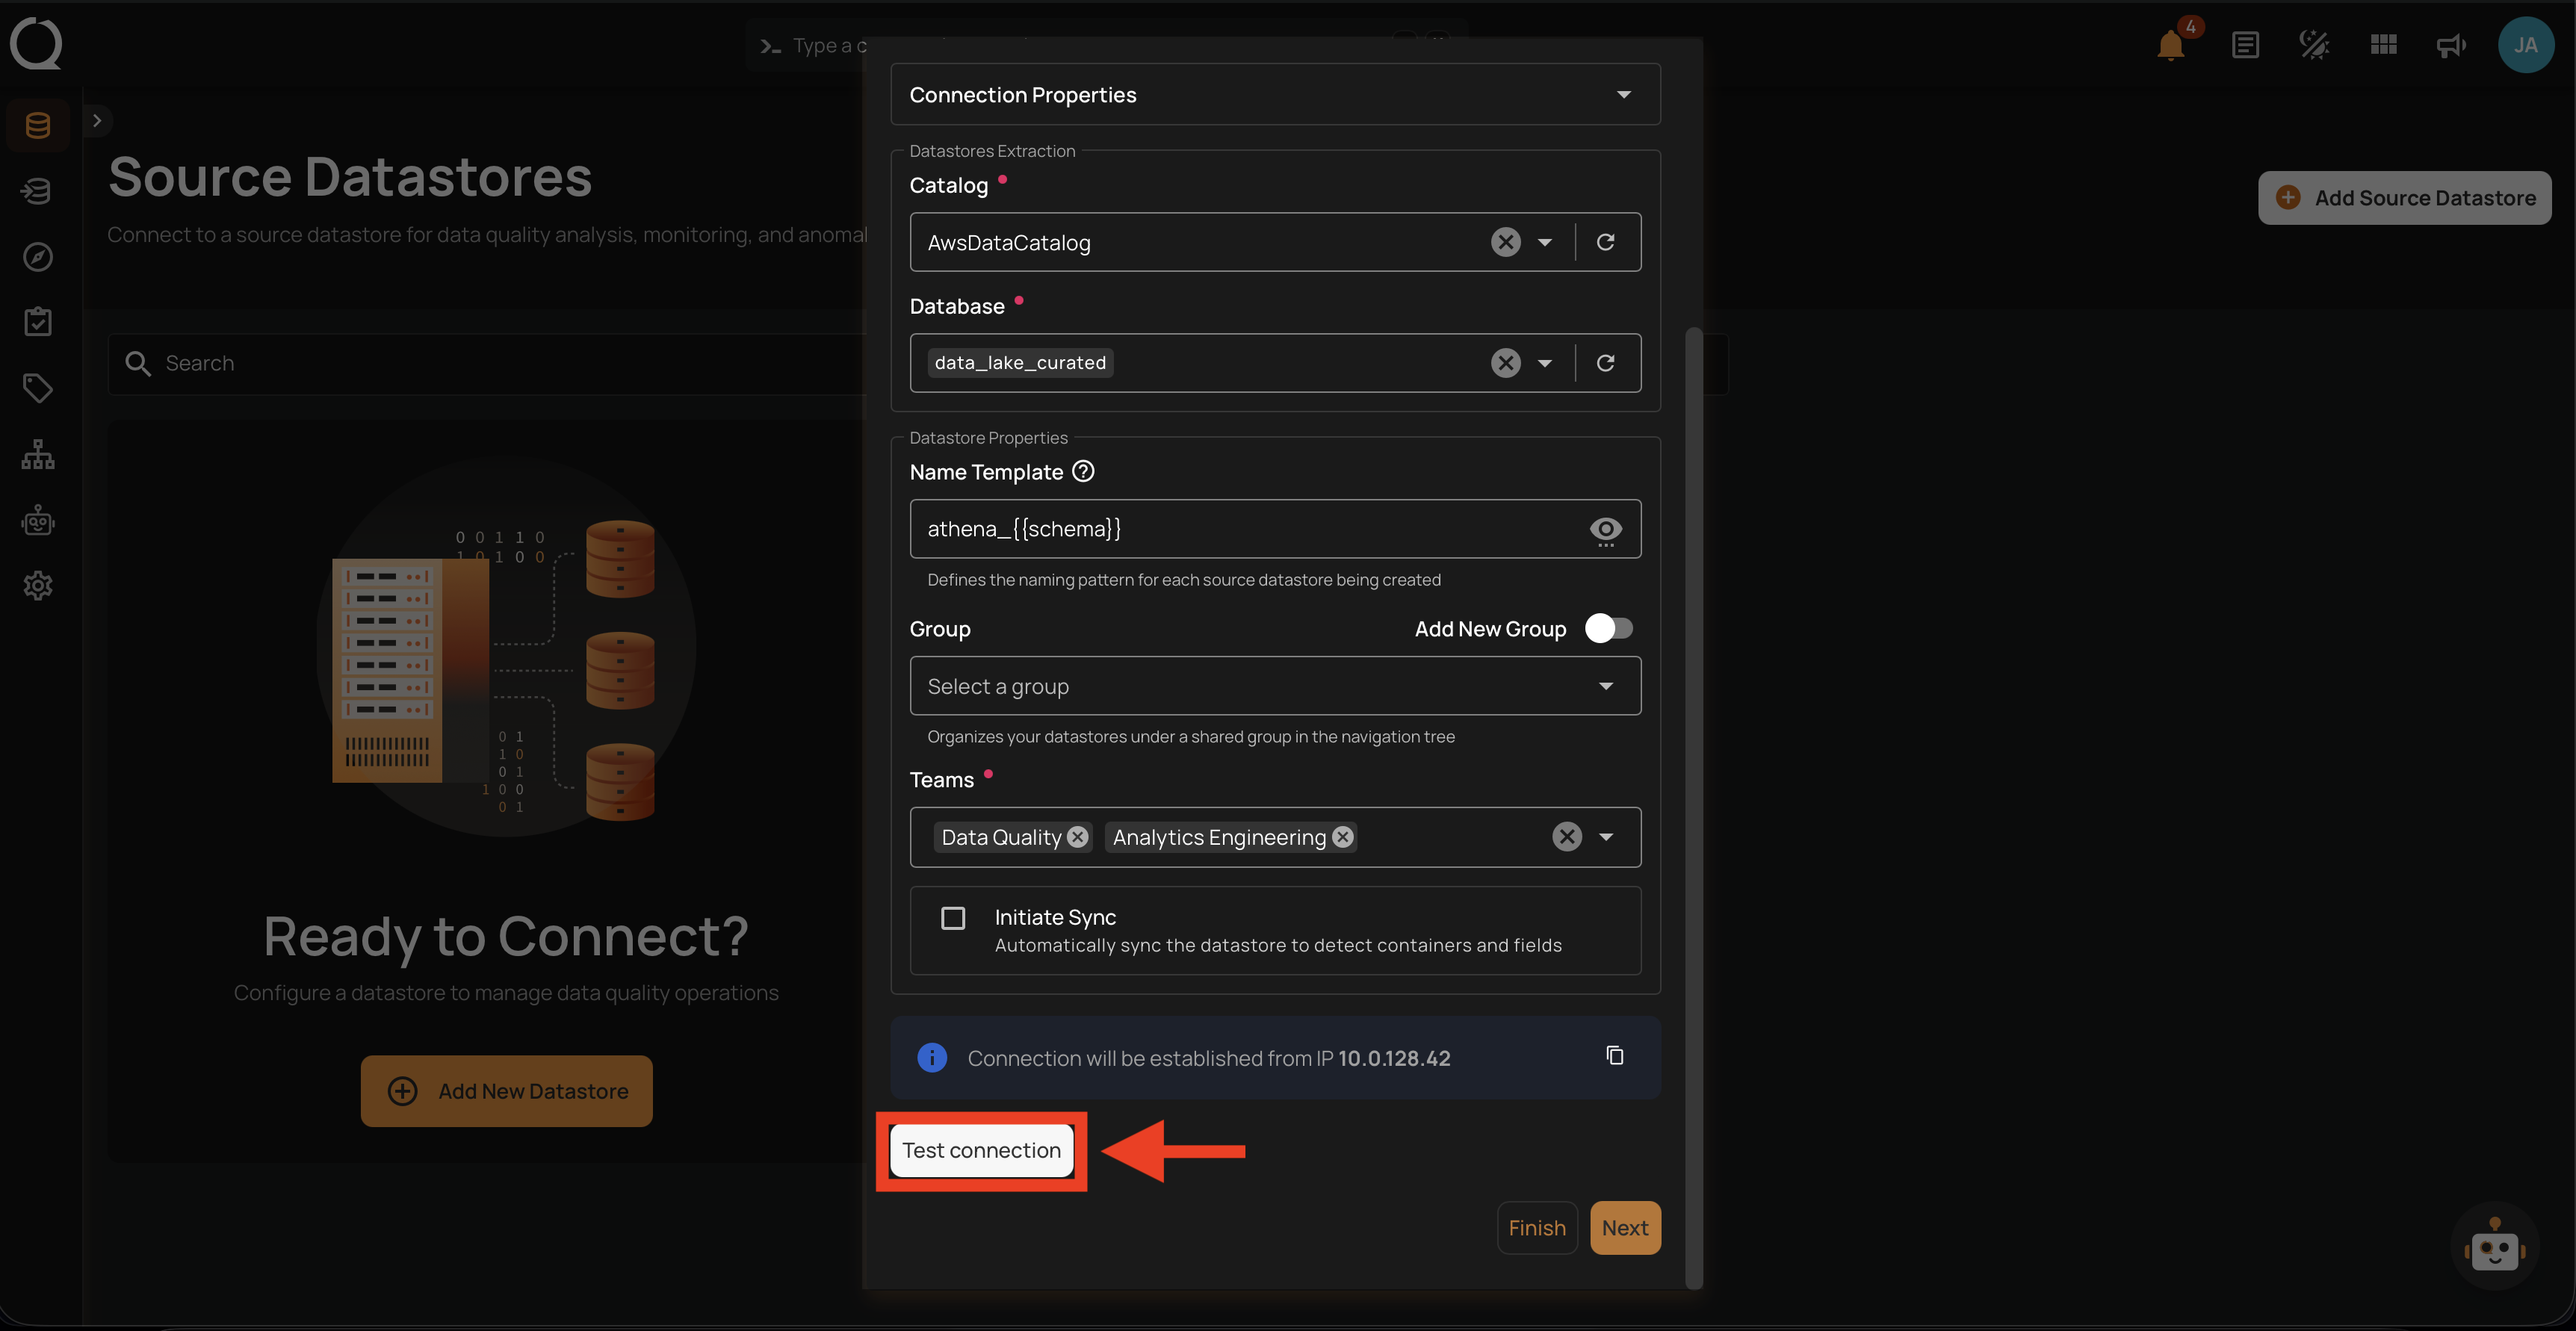
Below the form fields, the modal shows a Connection Info banner with the resolved IP address and a Test Connection button to verify credentials before clicking Finish or Next.
When Add New Connection is toggled OFF and you pick a saved Athena connection, the Connection Properties, Authentication, and Secrets Management sections are collapsed and read-only — Qualytics has already validated those credentials, so there is nothing for you to fill in. You only fill in the Datastores Extraction and Datastore Properties below.
To change a saved connection's credentials, edit the connection itself from Settings → Connections. Edits there apply to every datastore that reuses the connection.
Datastores Extraction
| REF. | FIELD | REQUIRED | DESCRIPTION |
|---|---|---|---|
| 1 | Catalog | Yes | The Athena data catalog to read from. Defaults to AwsDataCatalog. Click the refresh icon to fetch the catalogs visible to the saved connection's credentials. |
| 2 | Database | Yes | One or more databases inside the selected catalog. Each database becomes its own datastore. Click the refresh icon to load the available databases. |
The remaining fields (Name Template, Group, Teams, Initiate Sync, plus the Connection Info banner and Test Connection button) work the same as in the New Connection flow above — see the Datastore Properties table on the New Connection tab of the Field reference.
Steps
Use this flow when you are connecting Qualytics to Athena for the first time, or when you want a dedicated connection for this datastore.
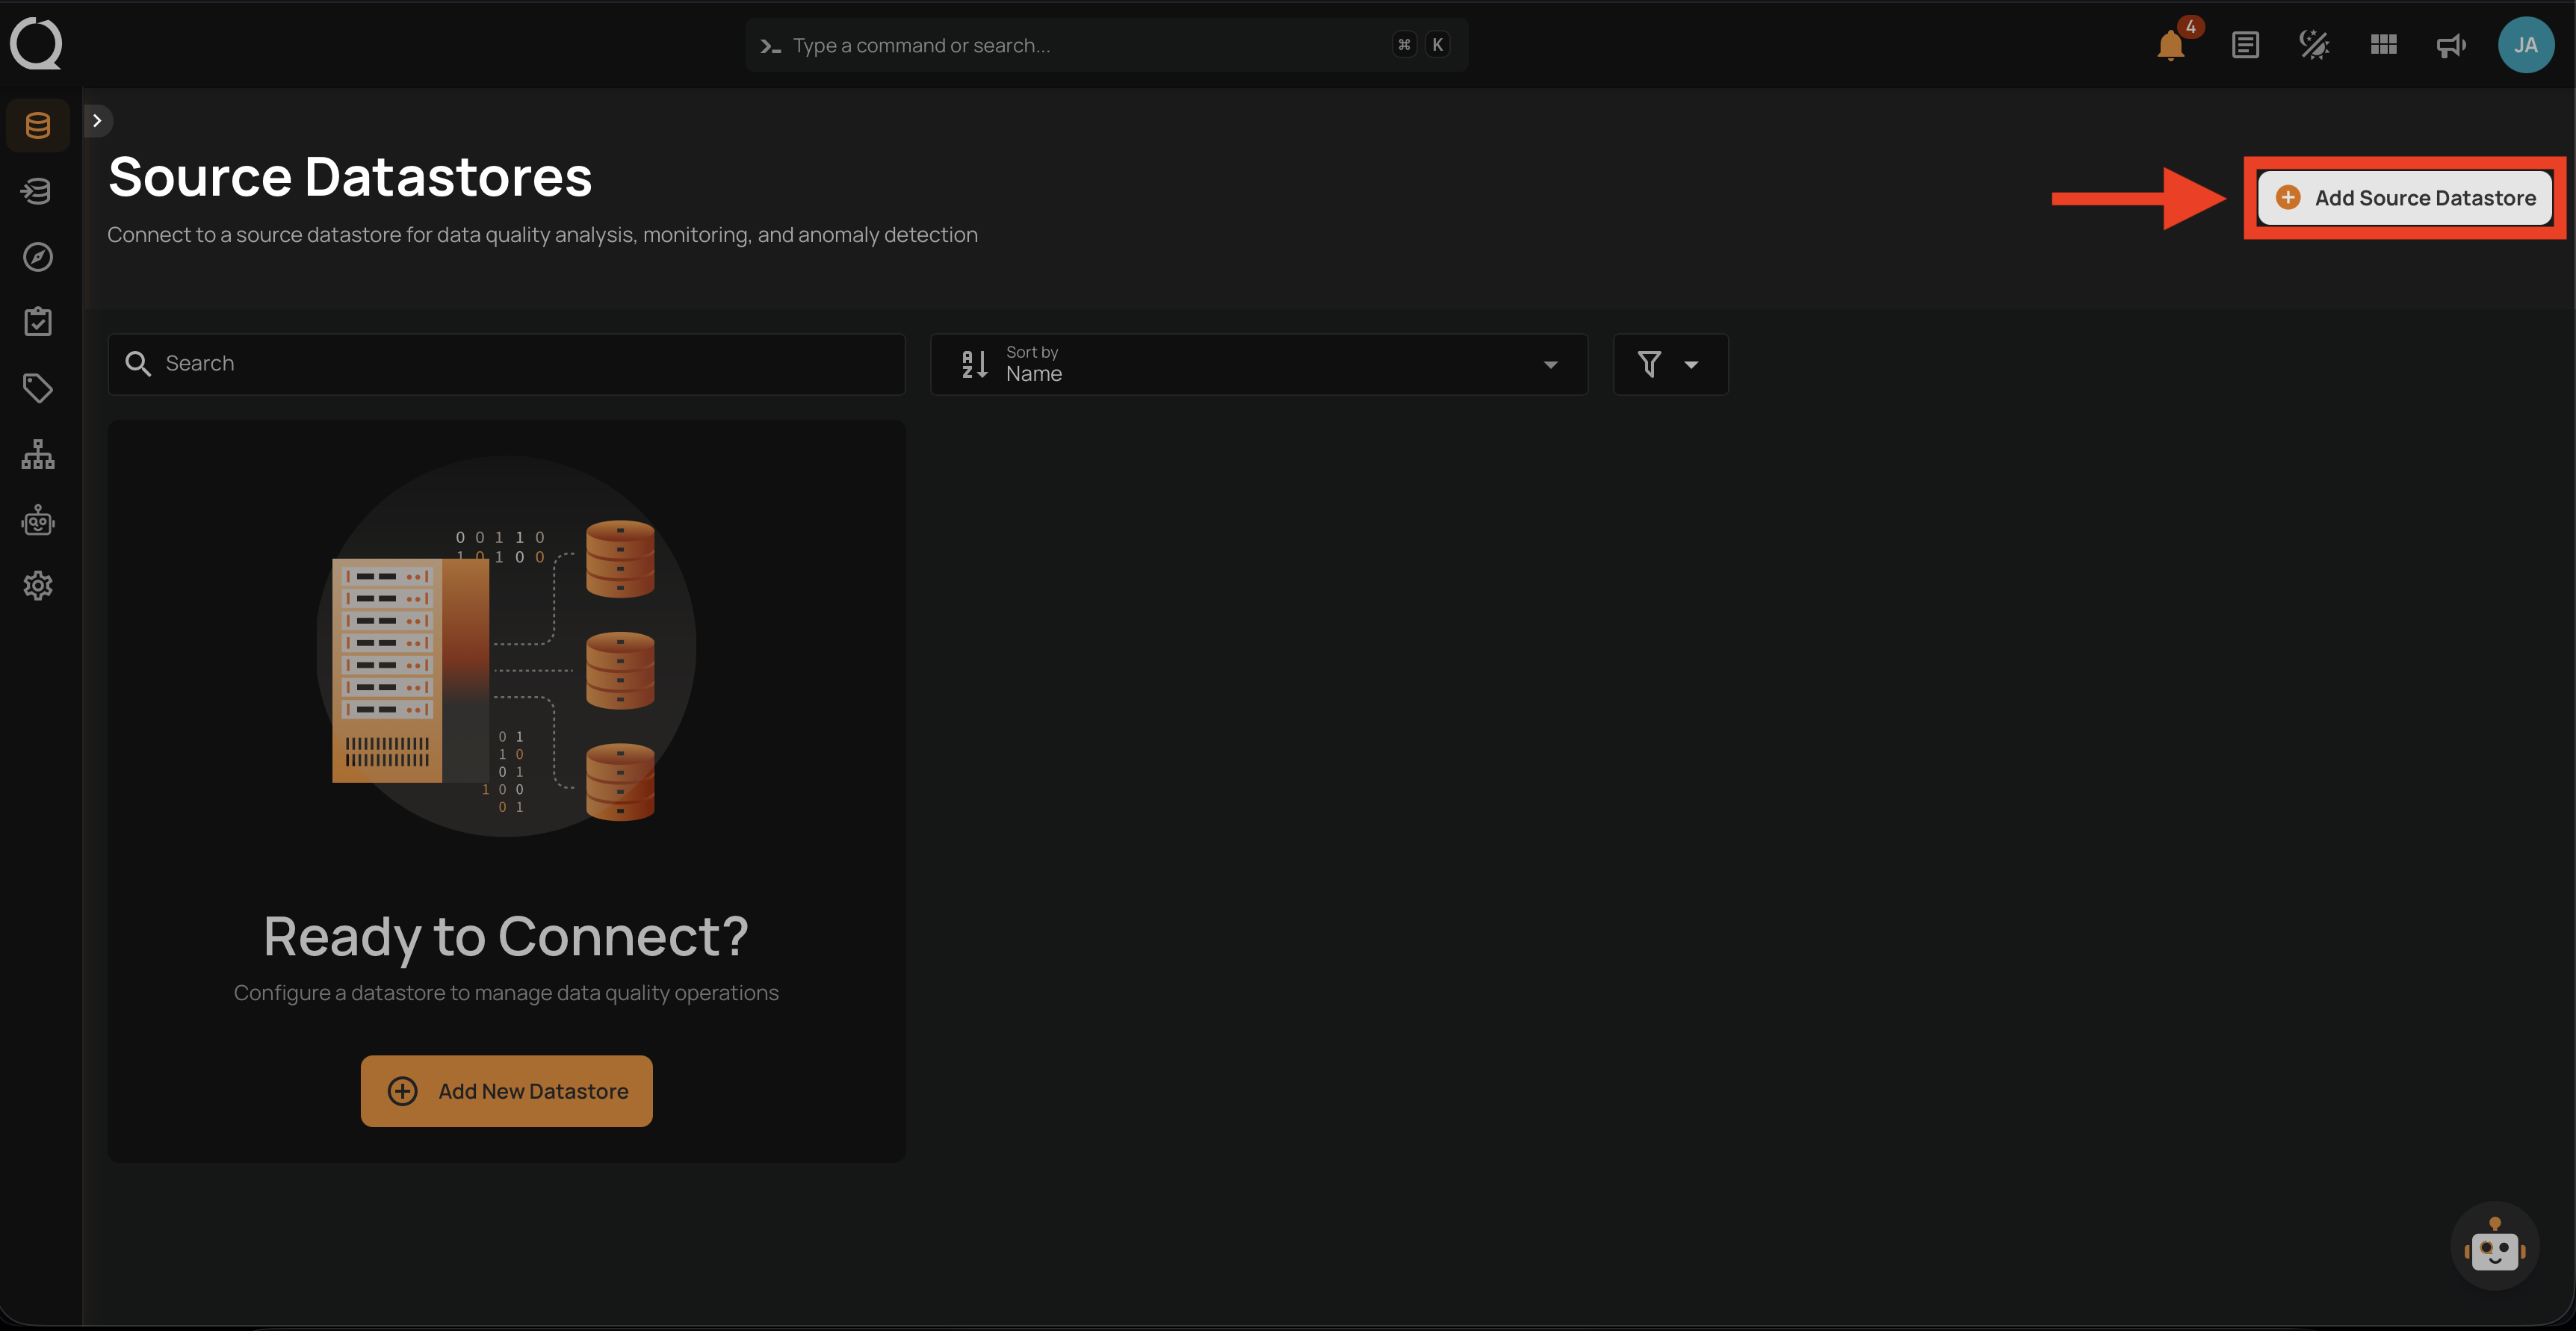
Step 1: Click Add Source Datastore at the top-right of the Source Datastores page.
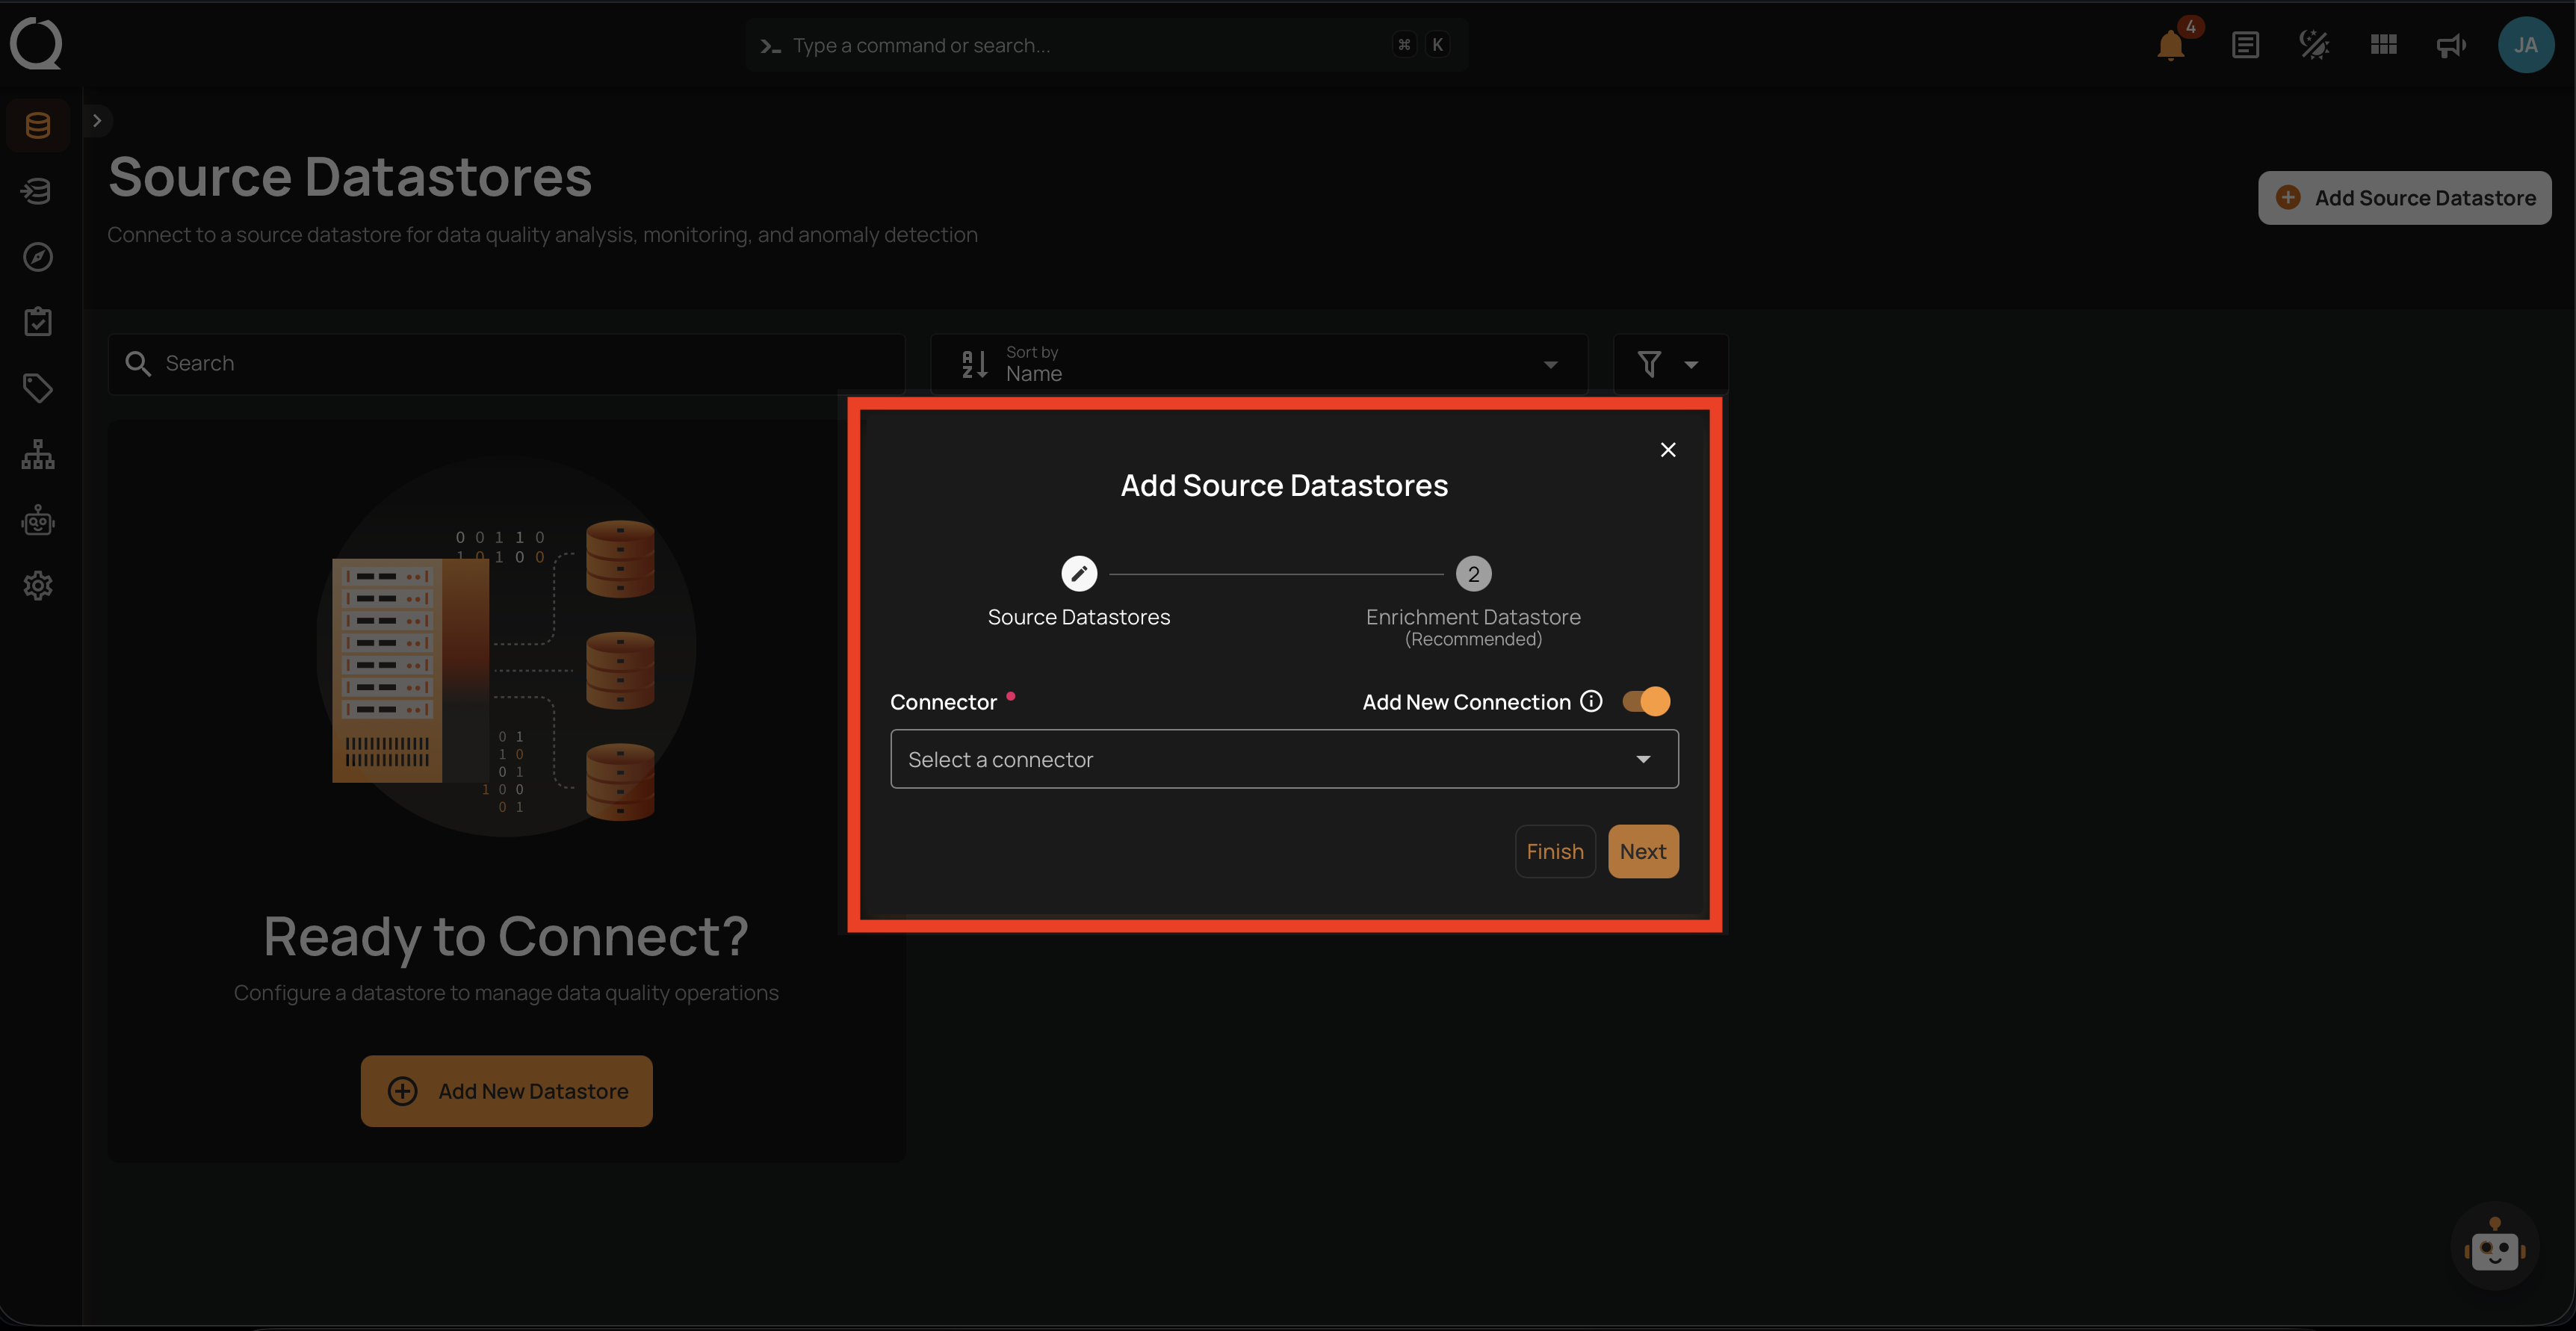
Step 2: In the Add Source Datastores modal, keep Add New Connection toggled ON and select Athena from the Connector dropdown.
Step 3: Fill in the Connection Properties, Authentication, Secrets Management (optional), Datastores Extraction, and Datastore Properties fields — see Field reference for what each field does — then click Test connection.
Info
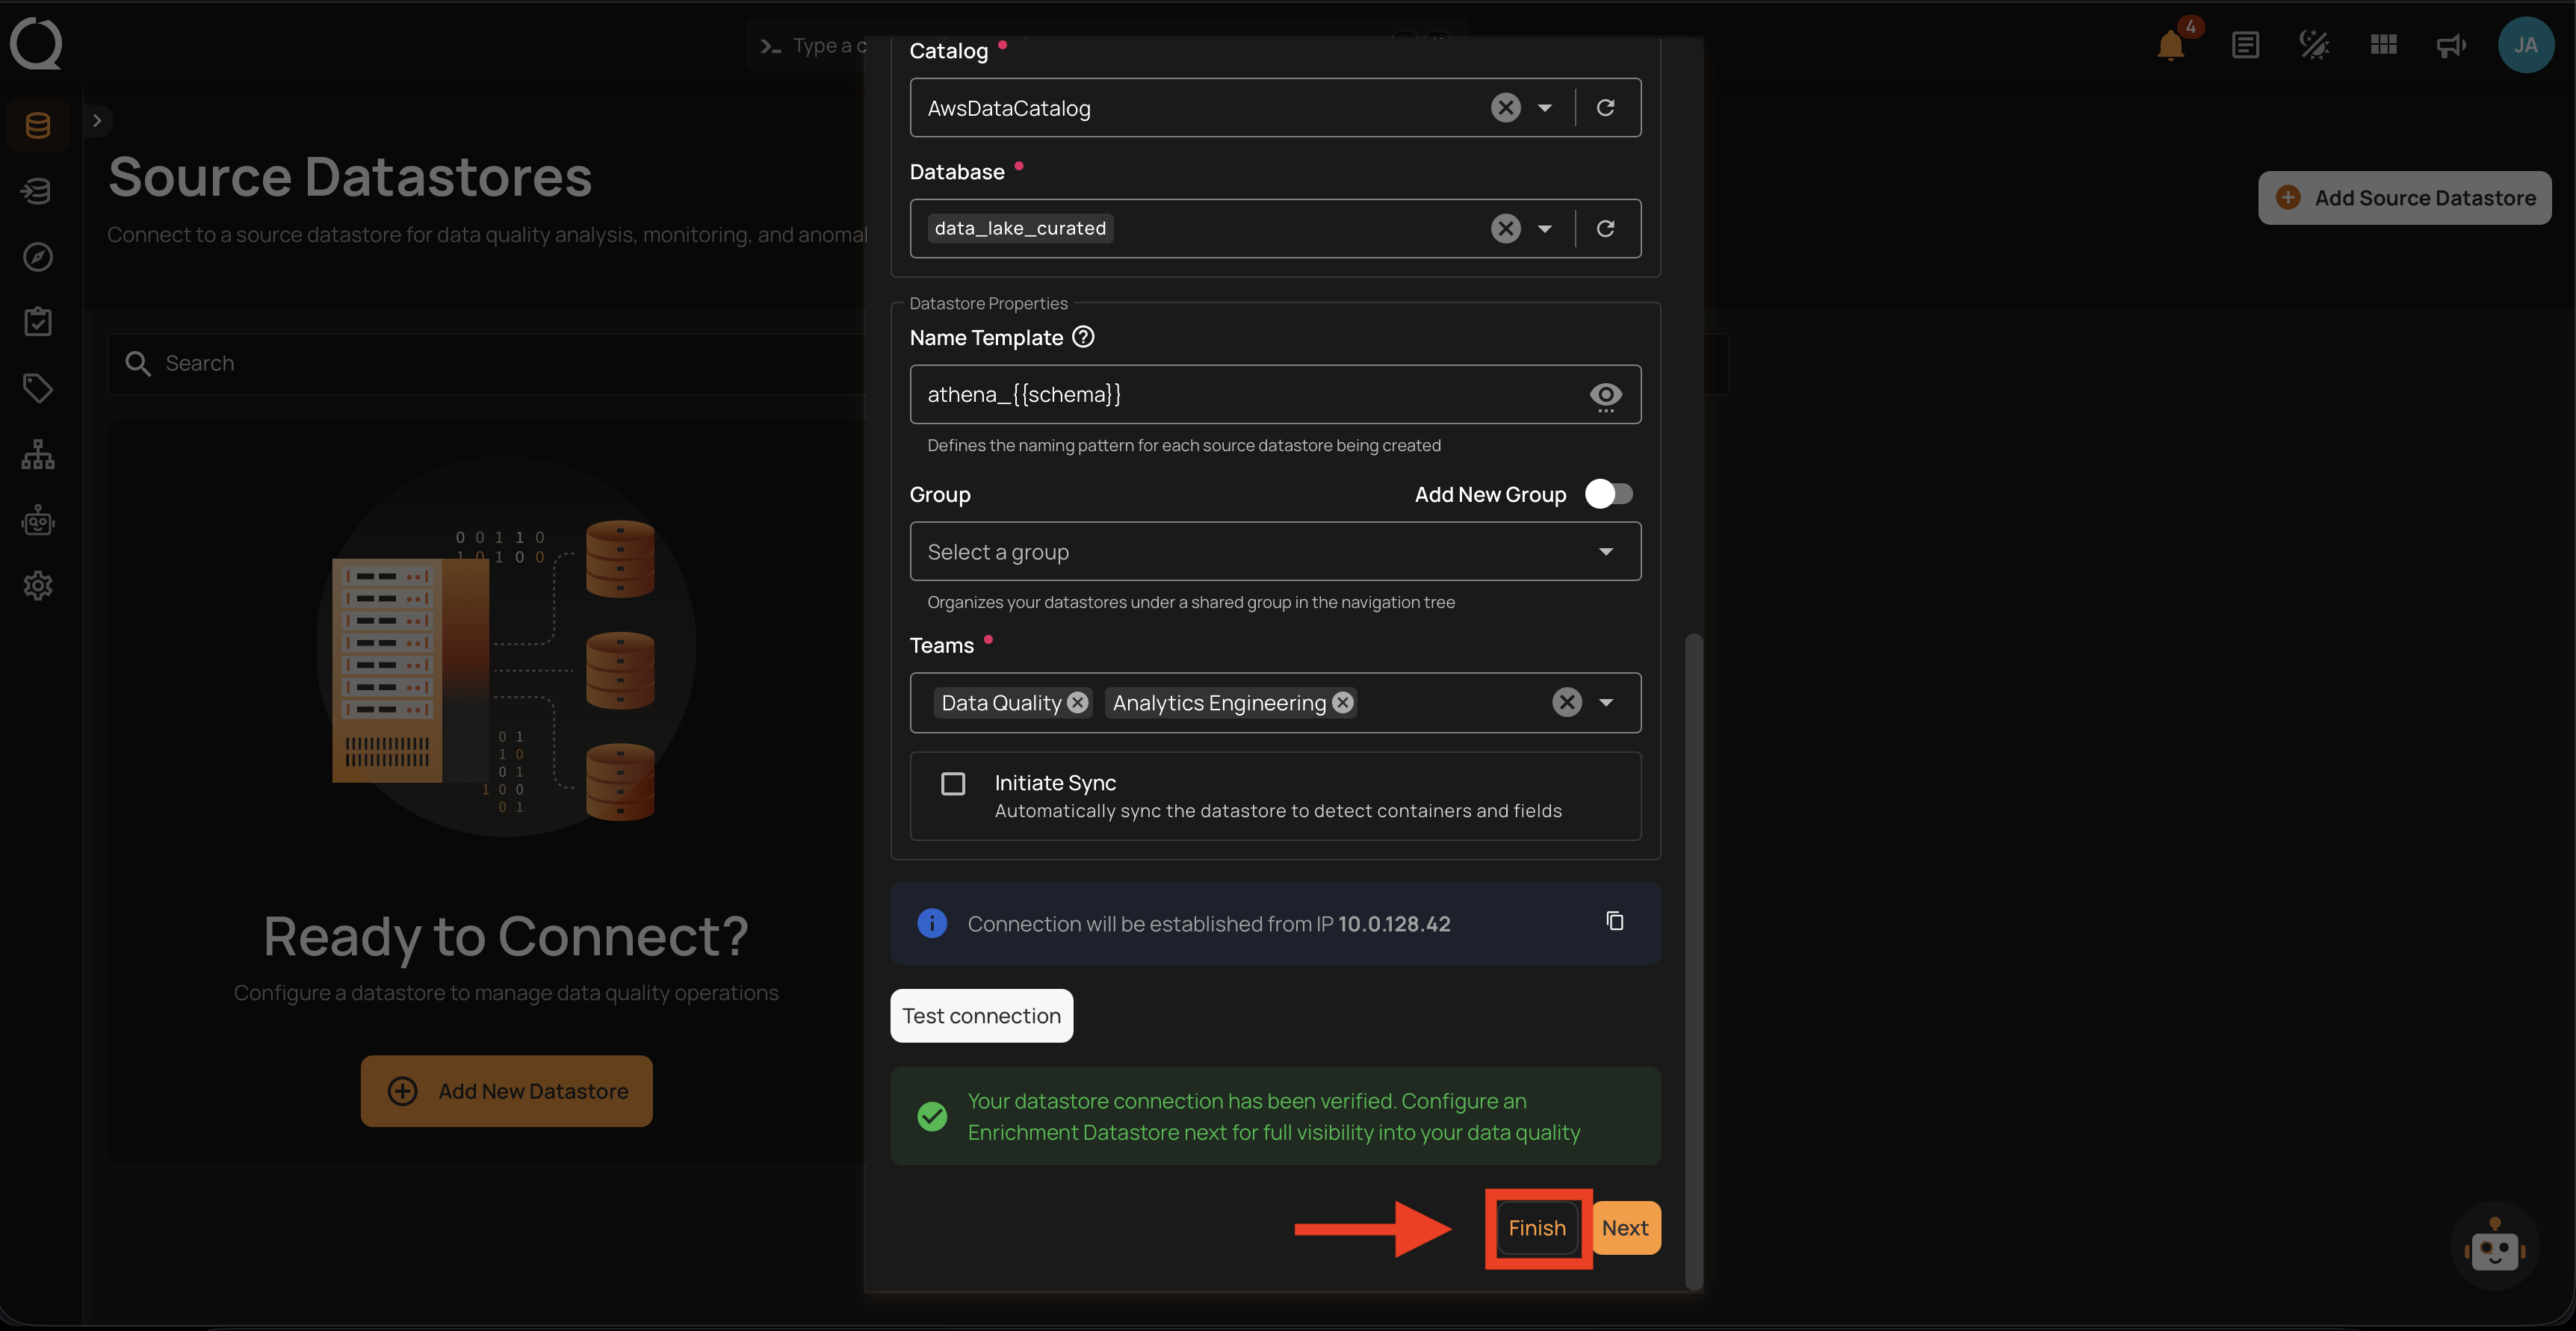
The Finish and Next buttons stay disabled until the connection test passes. If the test fails, see Athena Troubleshooting.
Step 4: Click Finish to create the datastore.

Tip
Athena cannot serve as an enrichment datastore. To link a separate enrichment datastore (BigQuery, PostgreSQL, etc.) where Qualytics will store anomalies and metadata, click Next instead of Finish — see Link Enrichment on Datastore Creation.
Use this flow when you already saved an Athena connection and want a new datastore that reuses its credentials and connection properties.
Step 1: Click Add Source Datastore at the top-right of the Source Datastores page.
Step 2: In the Add Source Datastores modal, leave Add New Connection toggled OFF and pick a saved Athena connection from the Connection dropdown.

Step 3: Fill in the Datastores Extraction and Datastore Properties fields — see Field reference for what each field does — then click Test connection.
Info
The Finish and Next buttons stay disabled until the connection test passes. If the test fails, see Athena Troubleshooting.
Step 4: Click Finish to create the datastore.
Tip
Athena cannot serve as an enrichment datastore. To link a separate enrichment datastore (BigQuery, PostgreSQL, etc.) where Qualytics will store anomalies and metadata, click Next instead of Finish — see Link Enrichment on Datastore Creation.