Link Enrichment Datastore
Linking an enrichment datastore to a source datastore gives Qualytics a dedicated place to persist scan results, anomalies, source record examples, and remediation data directly in your own infrastructure.
Permission Required
You need the Member user role and Editor team permission on the datastore to link an enrichment datastore. See the Permissions page for details.
Link During Datastore Creation
You can also link an enrichment datastore during the datastore creation wizard. See the Link on Datastore Creation documentation.
Enrichment Settings
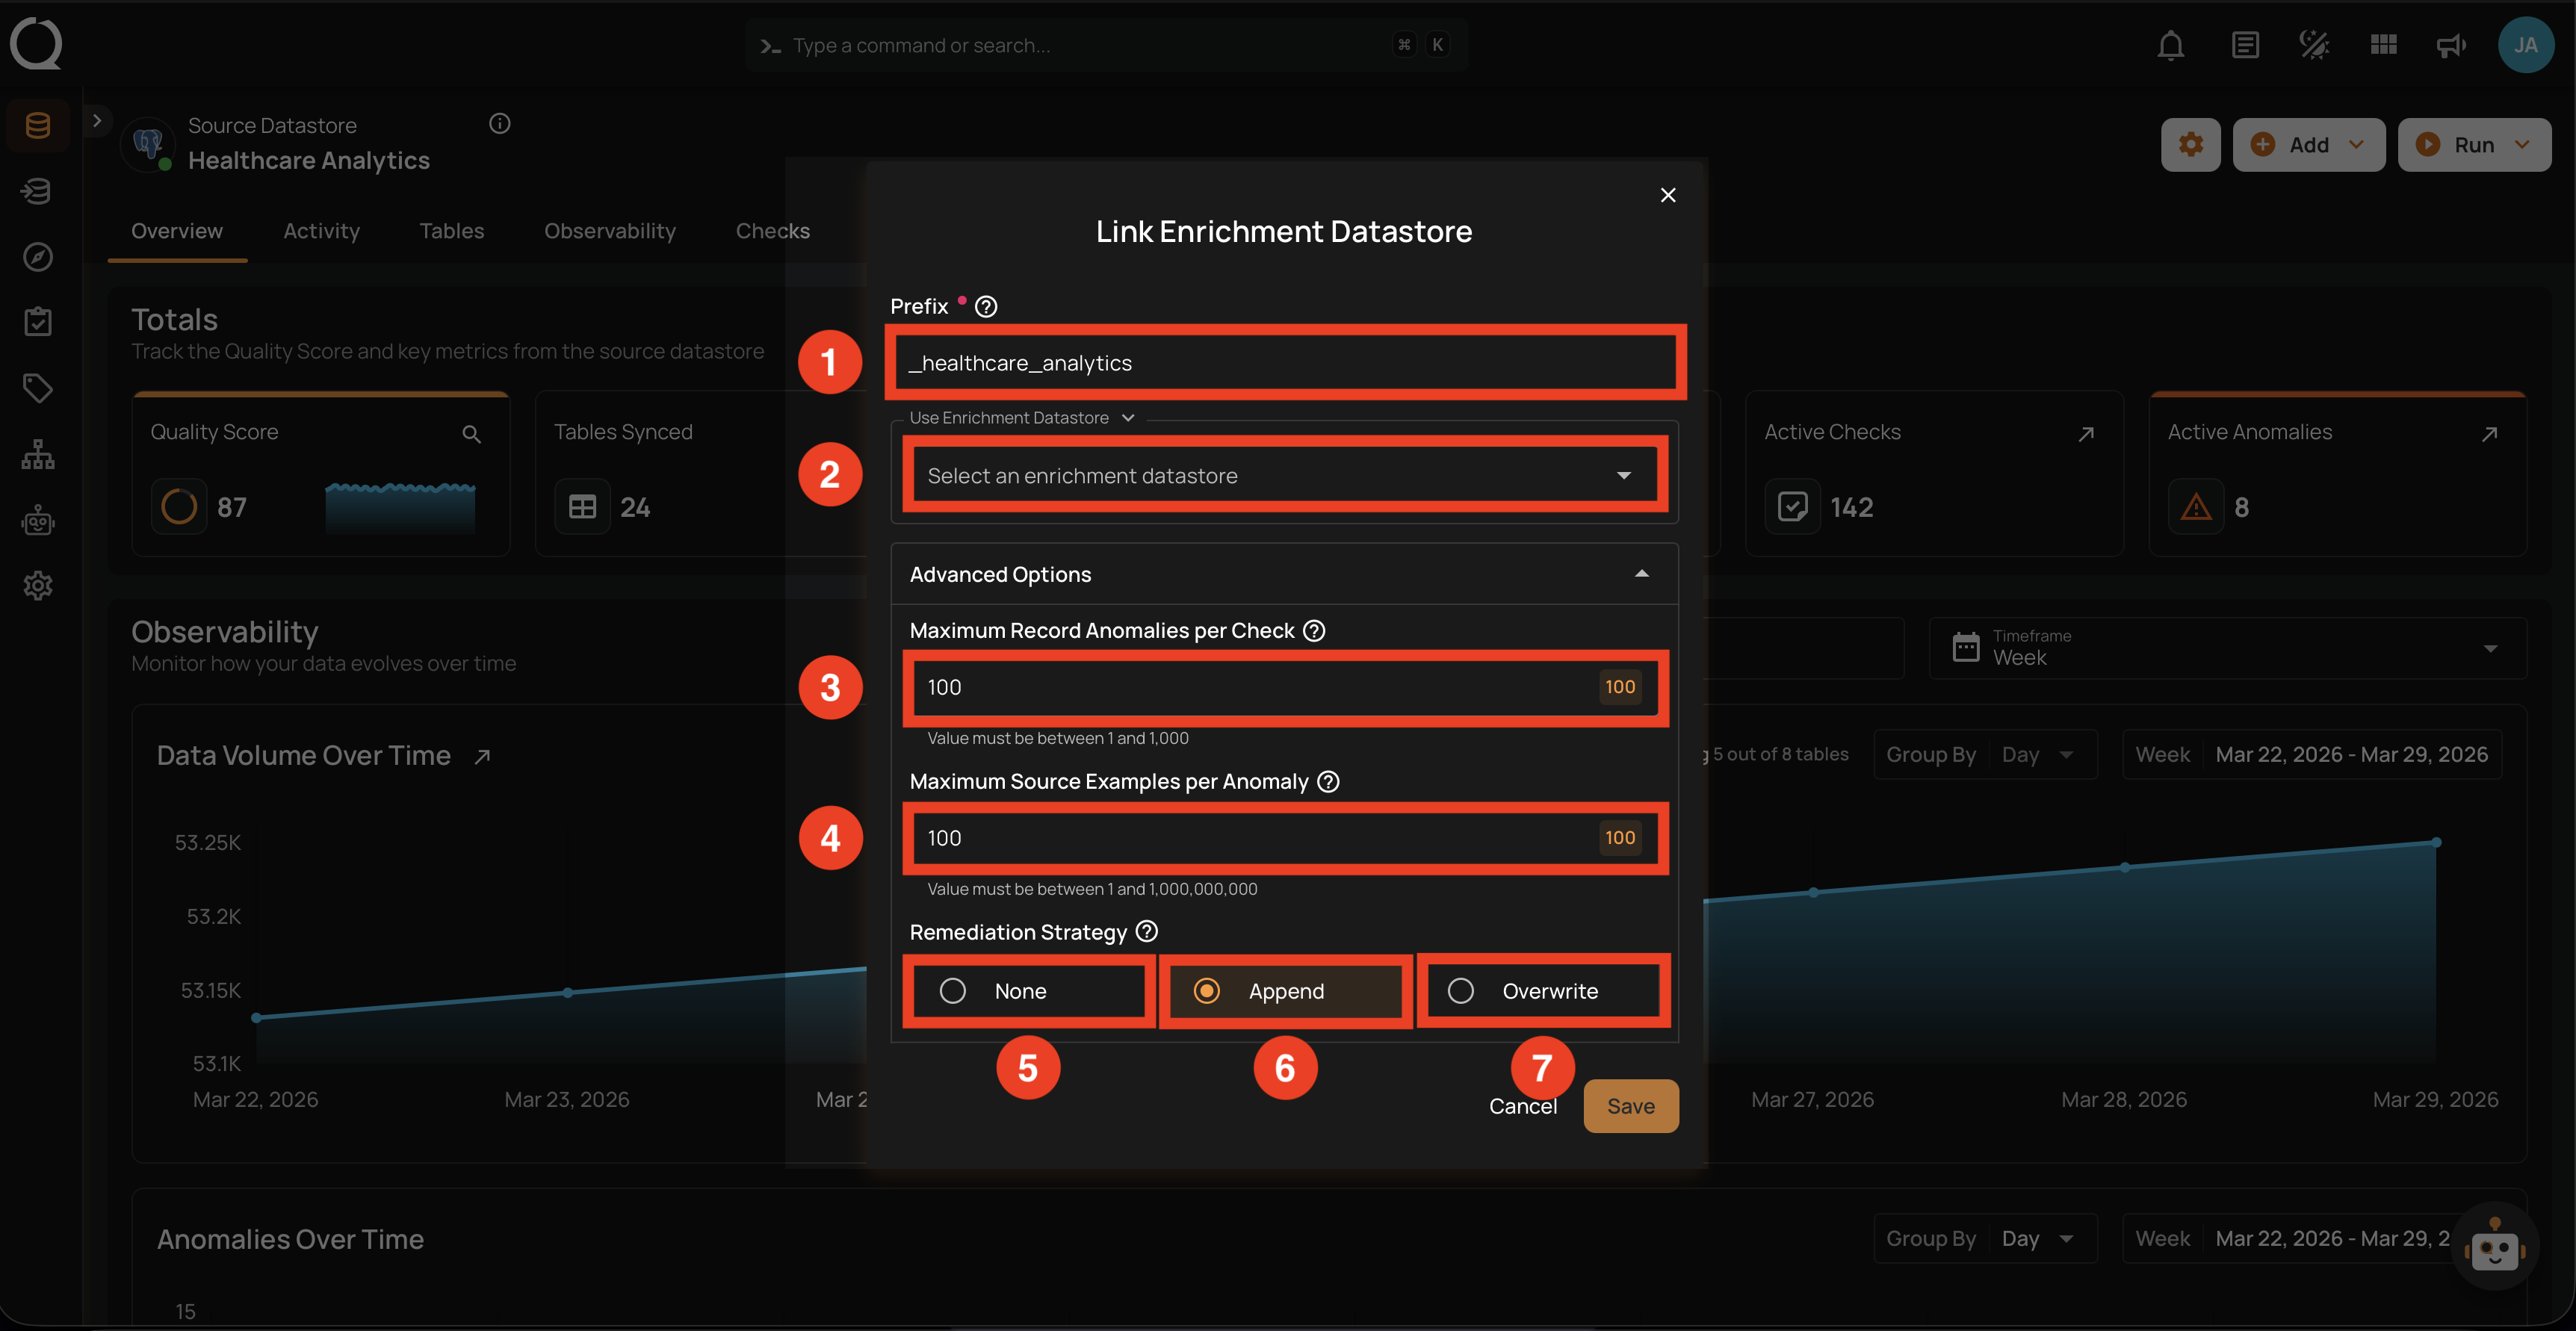
The Link Enrichment Datastore modal contains the following fields that you will configure during the linking process:
| REF. | FIELD | DEFAULT | RANGE | DESCRIPTION |
|---|---|---|---|---|
| 1 | Prefix | Auto-generated | Max 60 chars | A prefix added to all enrichment table names to distinguish them from source tables. Auto-generated from the datastore name, normalized to lowercase with underscores (e.g., _healthcare_analytics). Each source datastore linked to the same enrichment datastore must have a unique prefix to avoid table name conflicts. |
| 2 | Enrichment Datastore | — | — | Select an existing enrichment datastore from the dropdown. Only datastores created as enrichment-only with write capabilities are shown. See the Supported Enrichment Datastores page for the full list of connectors that support enrichment. |
| 3 | Maximum Record Anomalies per Check | 10 |
1–1,000 | How many individual anomalies can be created per quality check before they are grouped into one rolled-up anomaly. |
| 4 | Maximum Source Examples per Anomaly | 10 |
1–1,000,000,000 | How many source data rows are stored in the enrichment datastore as examples when a quality check fails. |
| 5 | Remediation Strategy | None |
— | Controls whether and how anomalous source tables are replicated to the enrichment datastore: None — do not replicate (default); Append — append anomalous records after each scan (builds audit trail); Overwrite — replace with latest anomalous records only. |
There are two ways to link an enrichment datastore:
Option I: Via Settings Menu
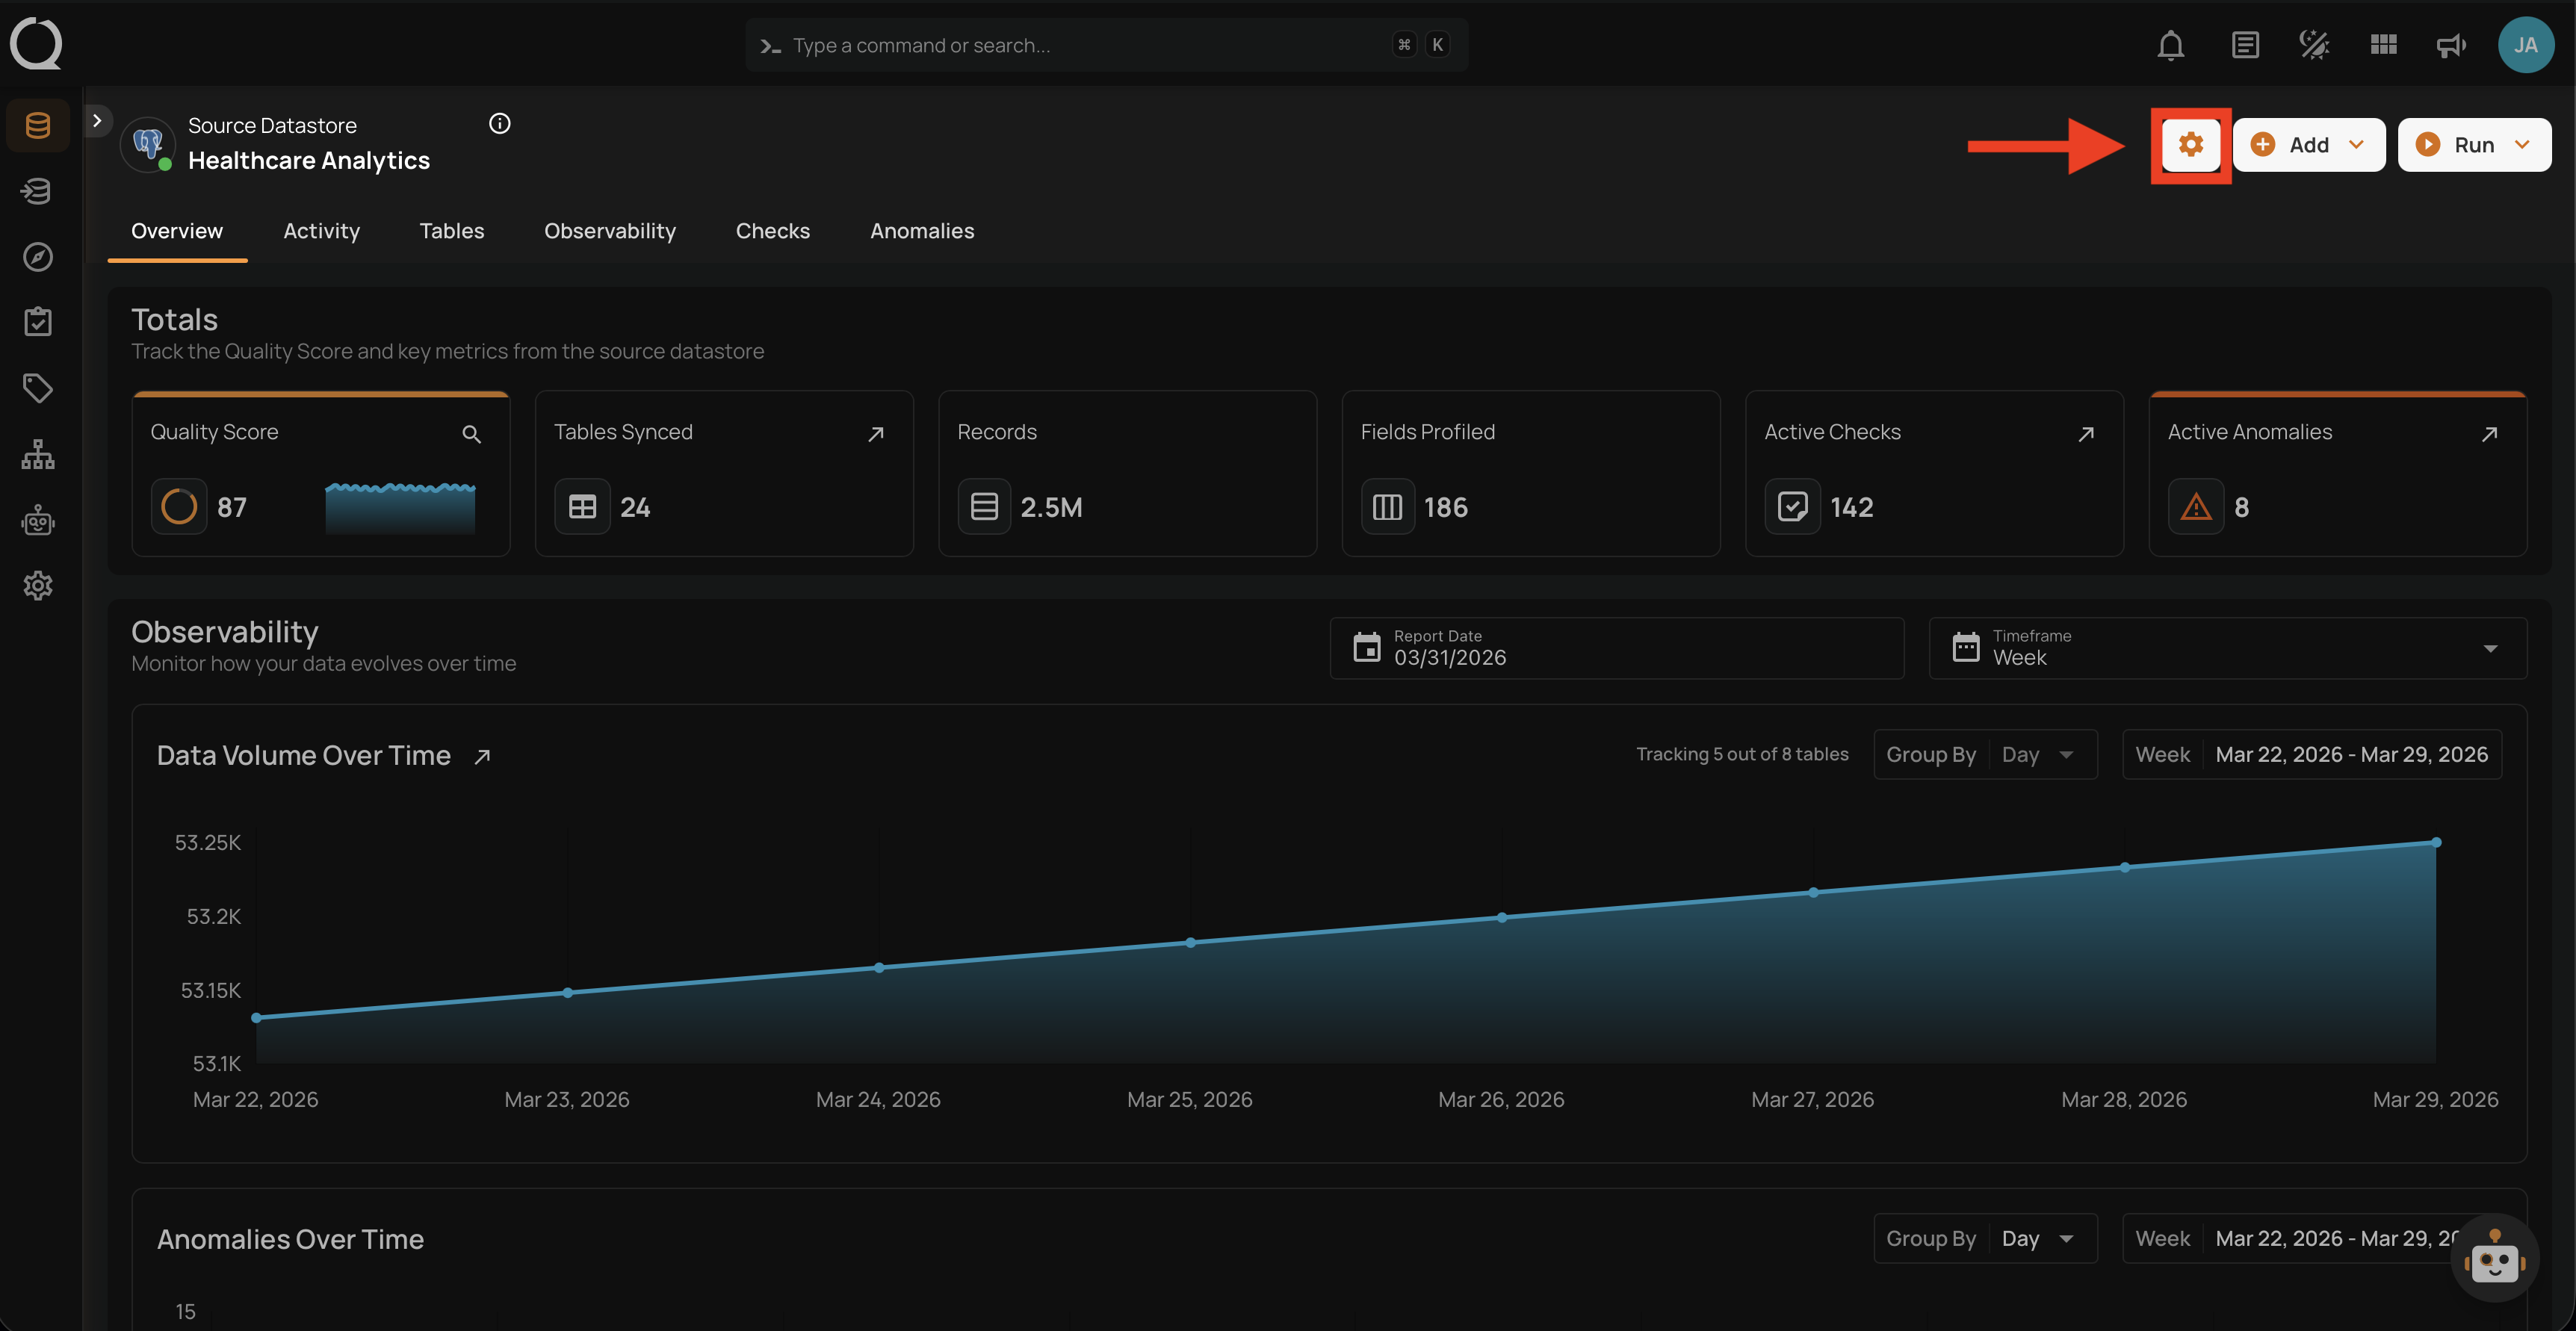
Step 1: Navigate to your datastore overview and click the Settings button located at the top-right corner of the interface.
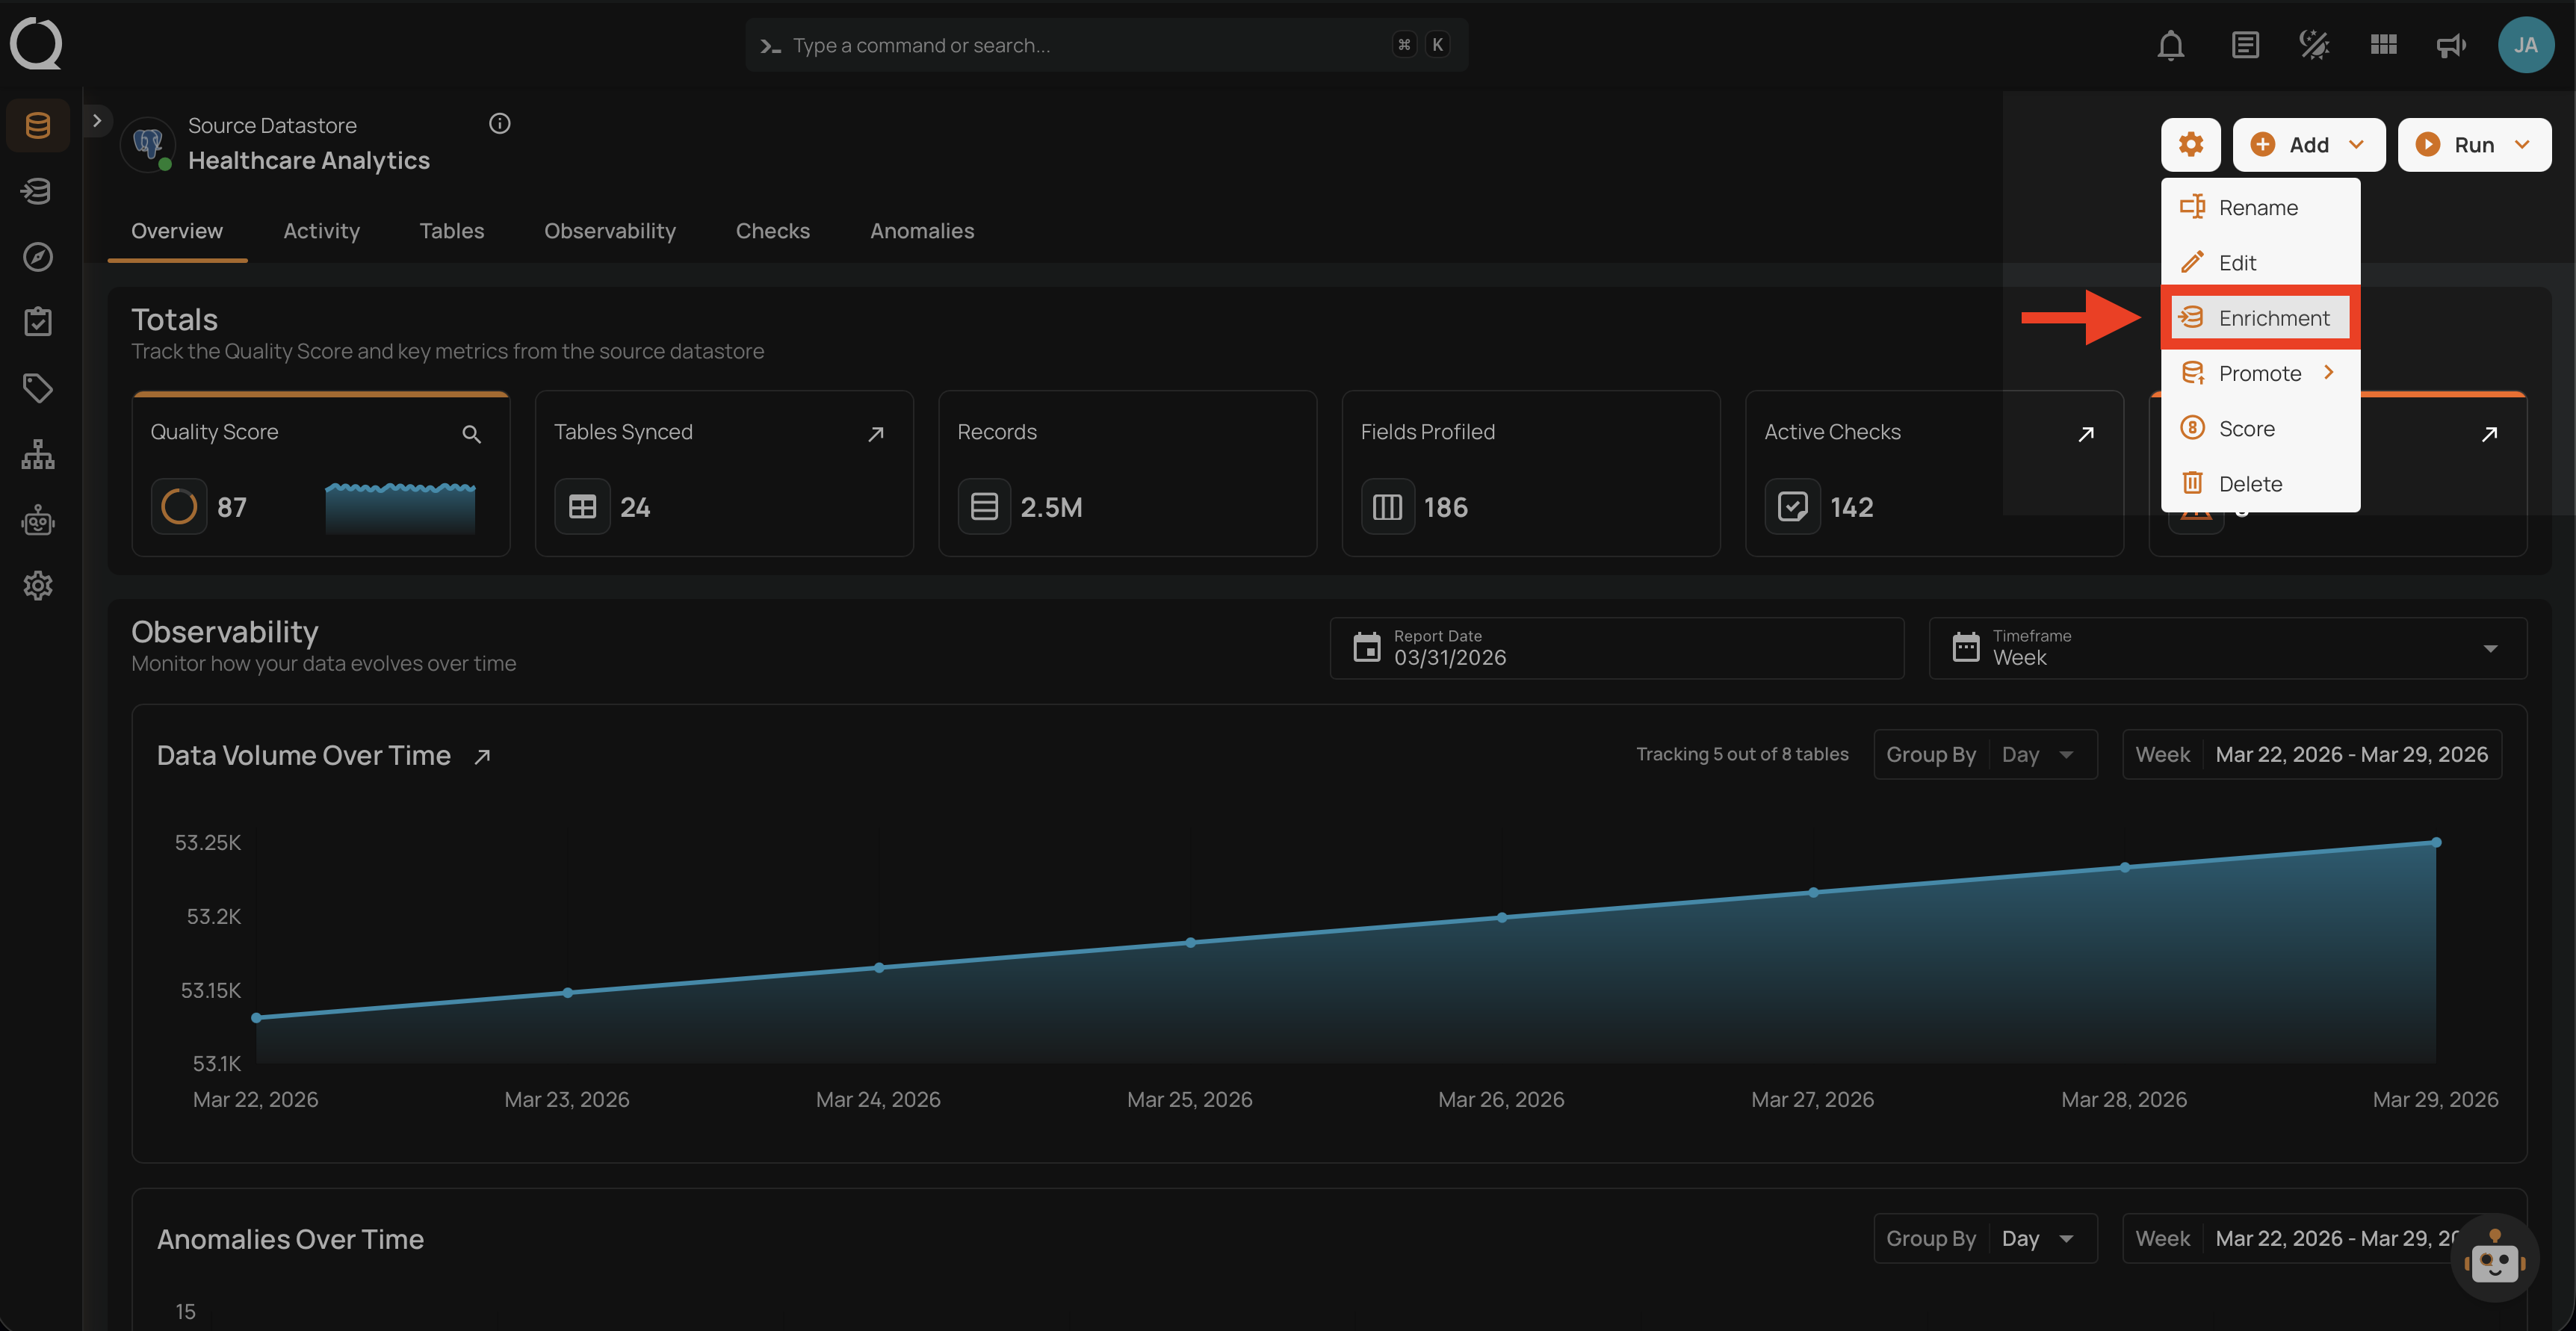
Step 2: A dropdown menu will appear. Click on Enrichment to open the Link Enrichment Datastore modal.
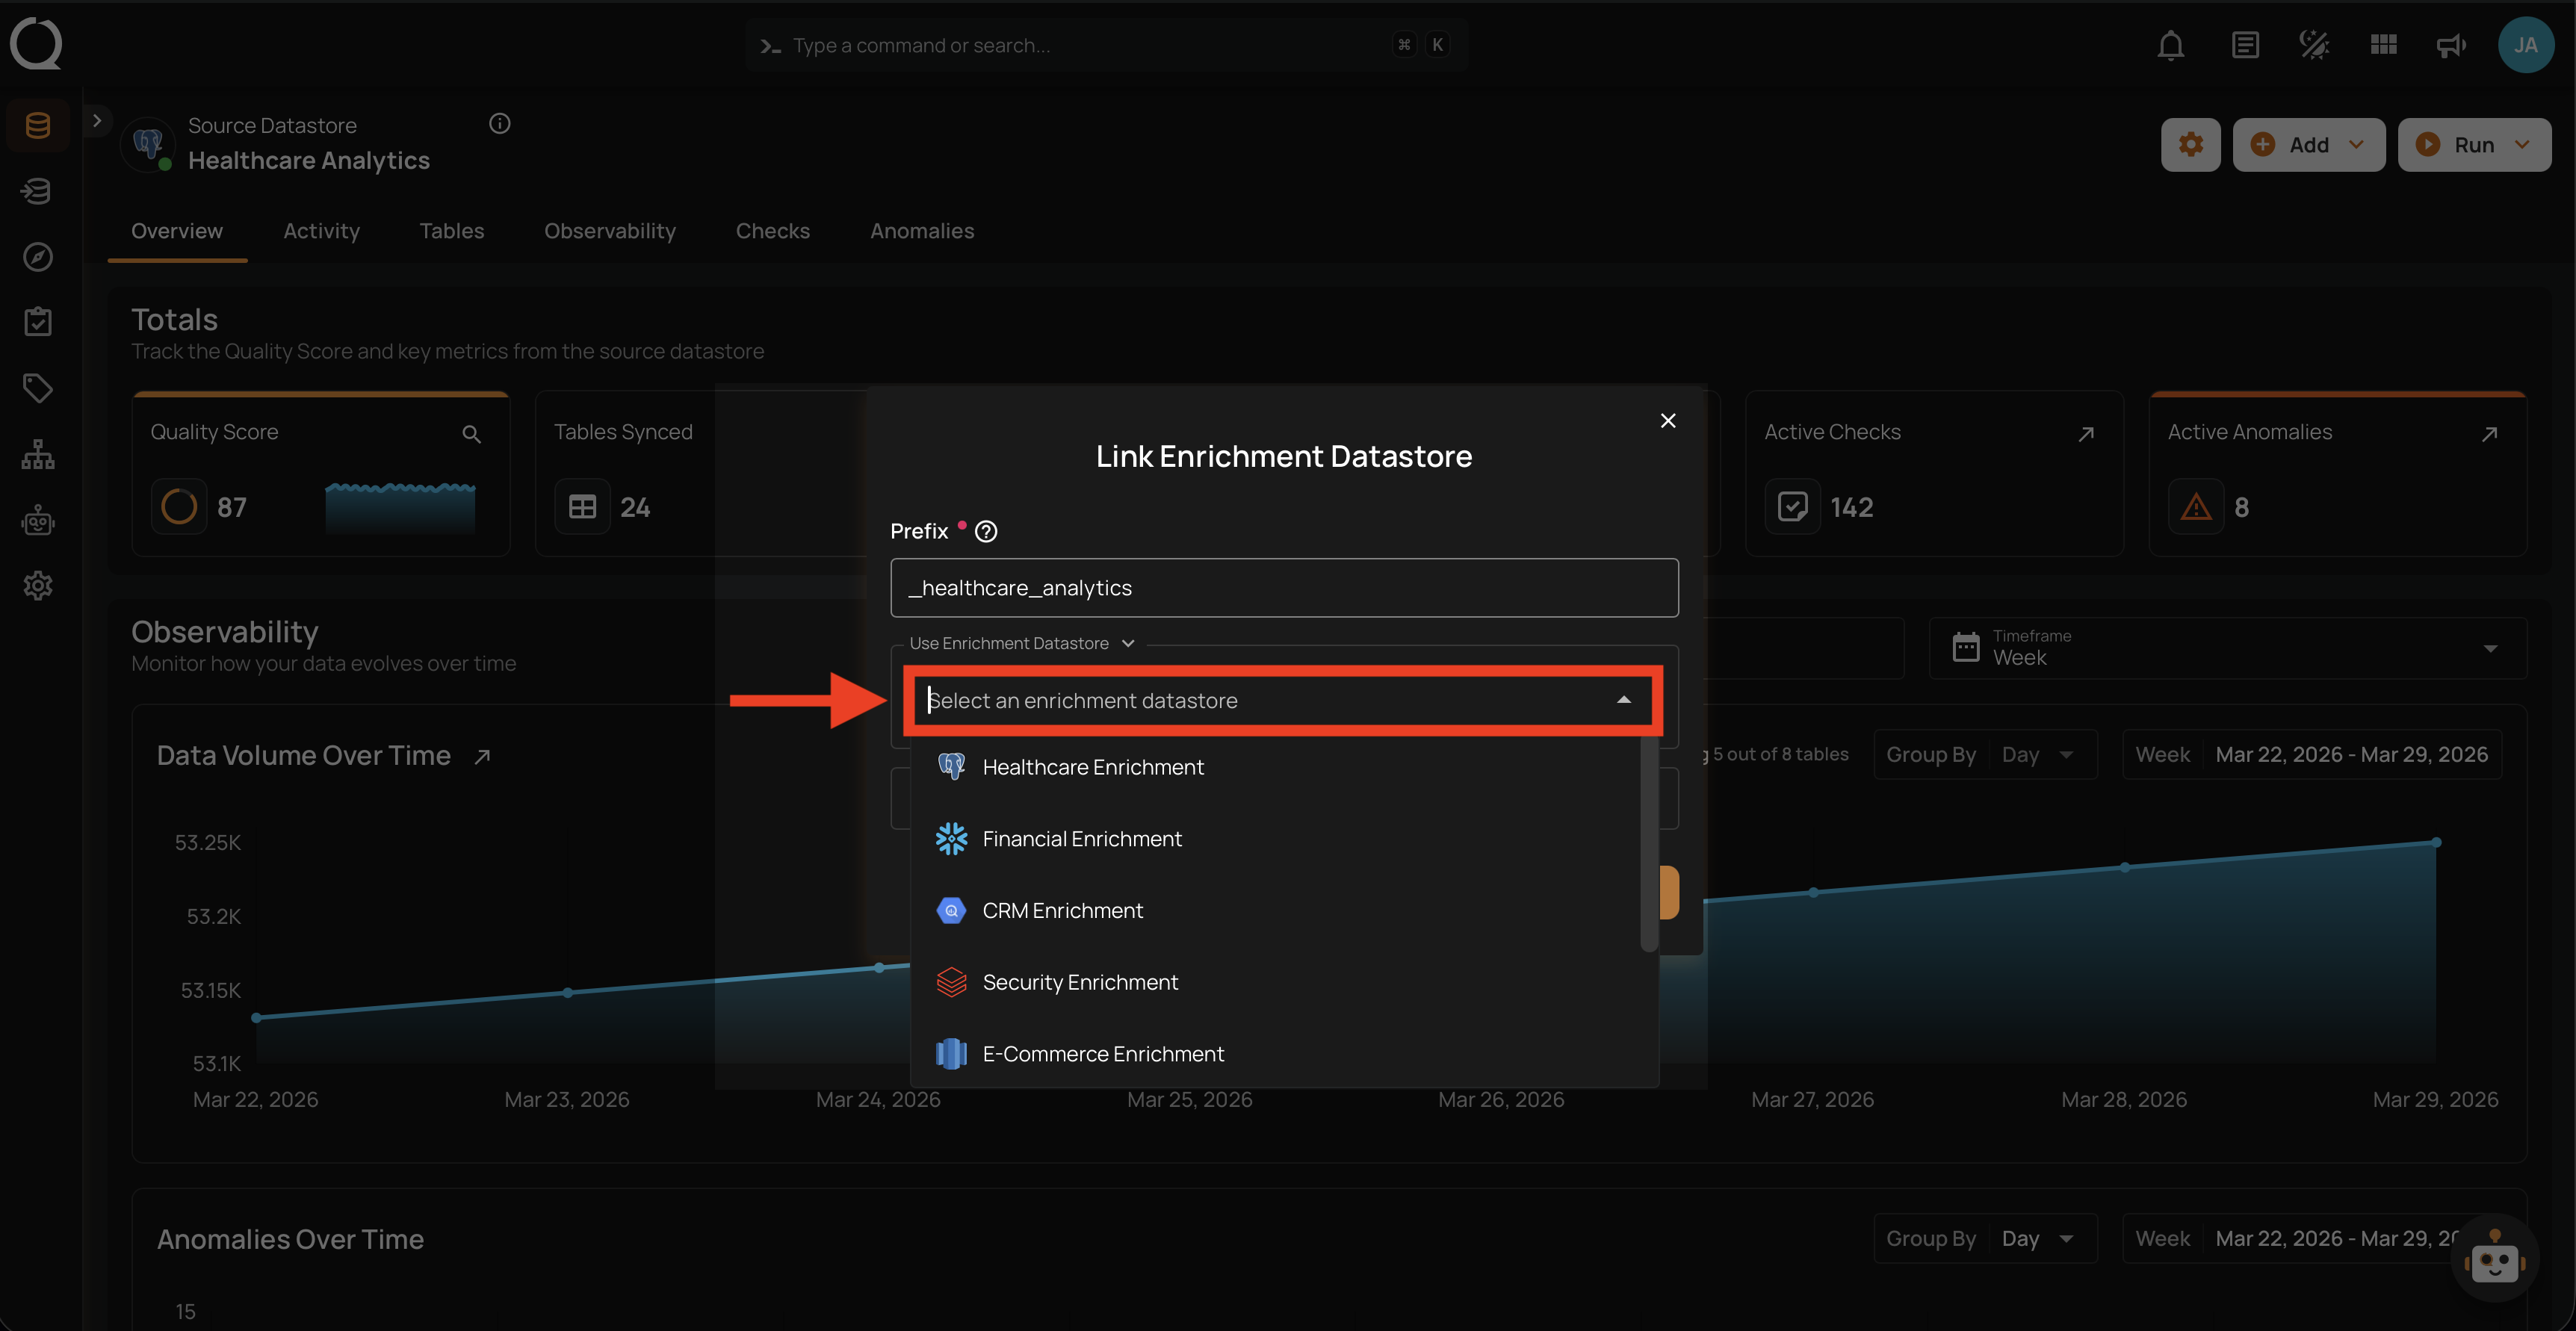
Step 3: The Link Enrichment Datastore modal will appear.
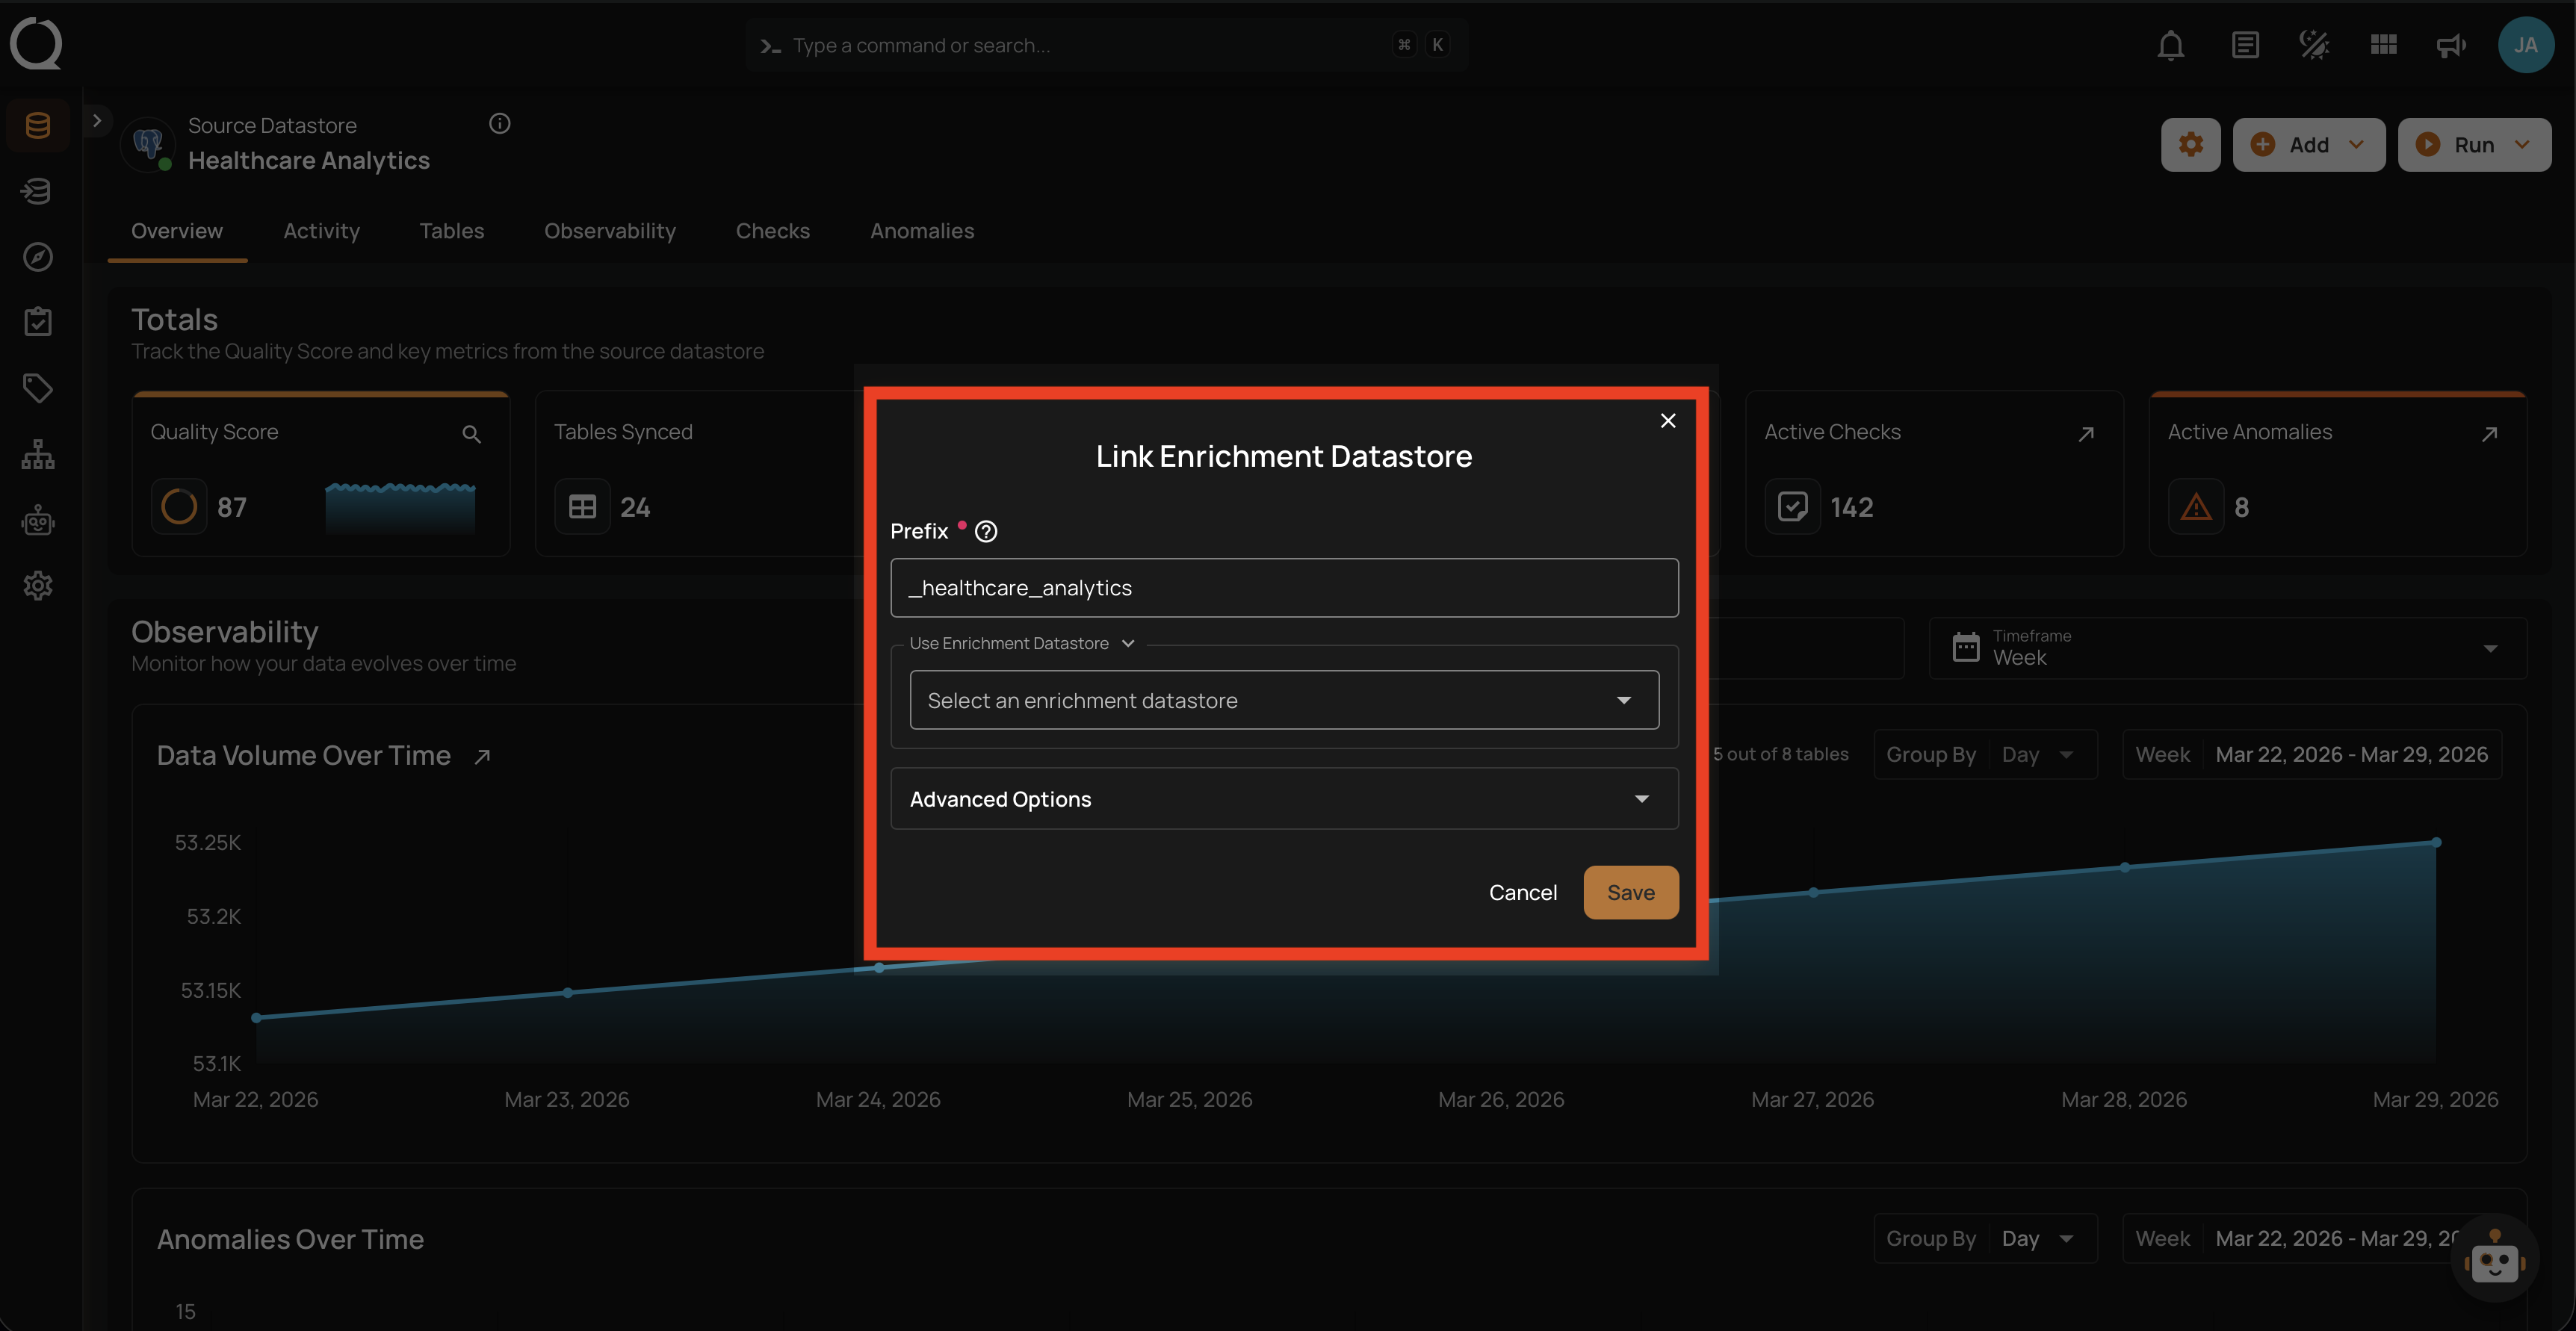
Step 4: Select an existing enrichment datastore from the Use Enrichment Datastore dropdown.
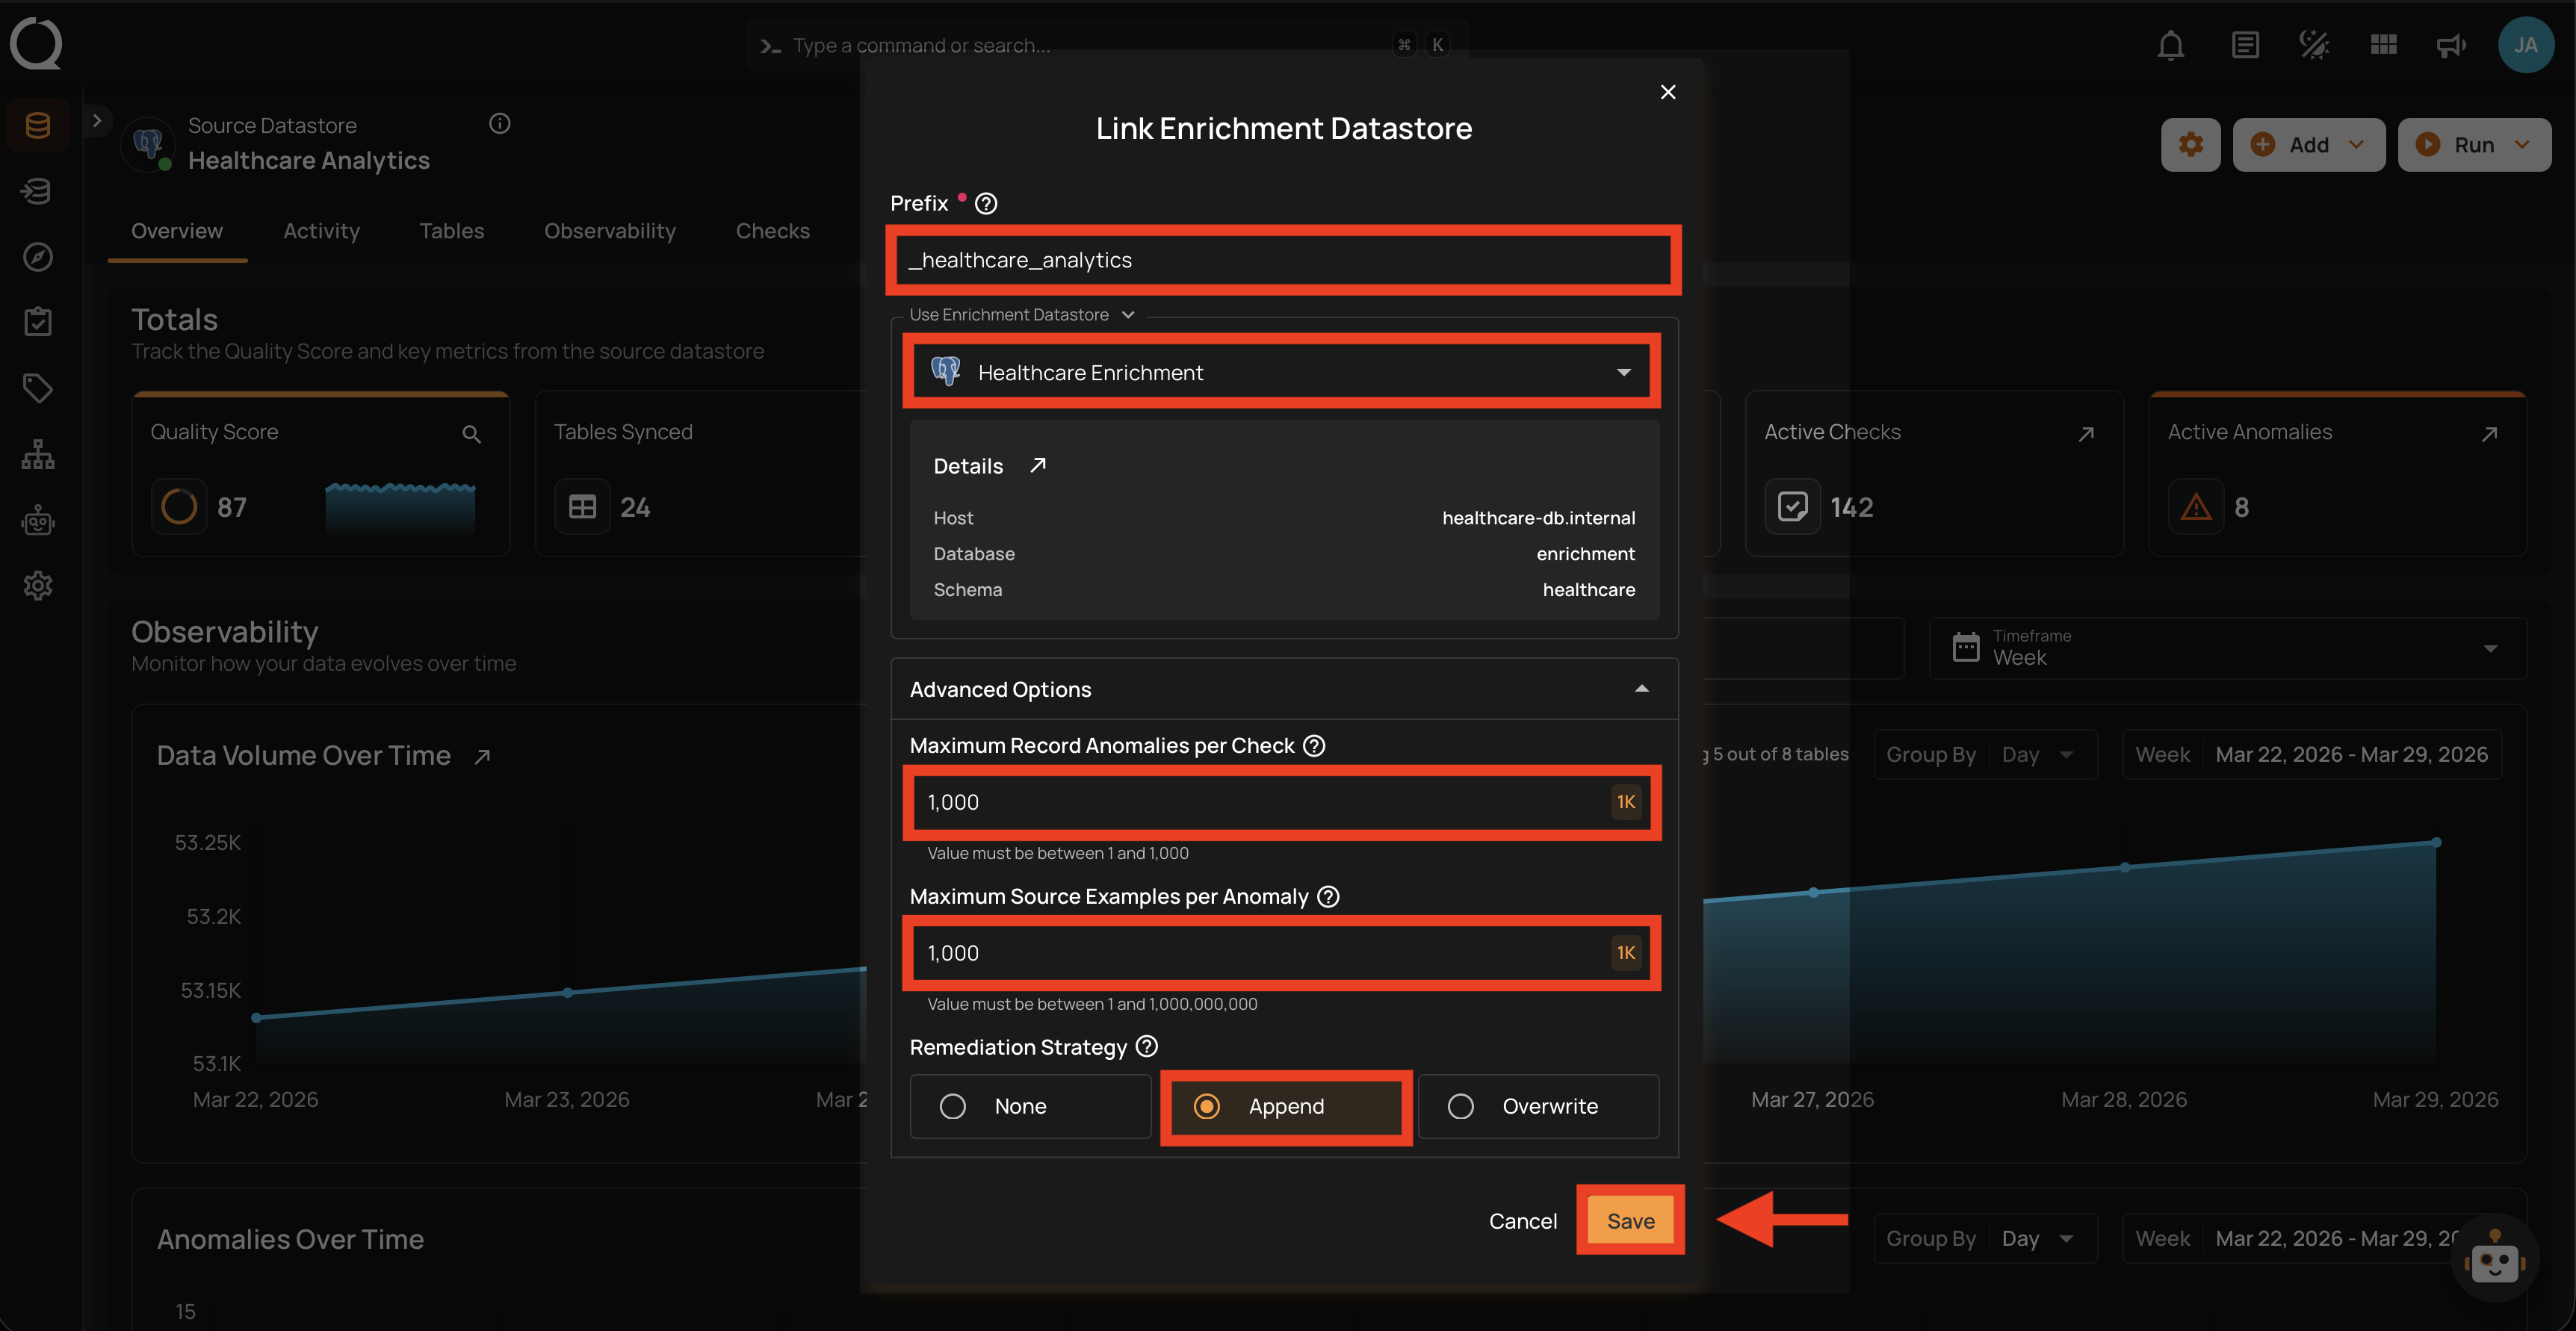
Step 5: Configure the enrichment settings (prefix, anomaly thresholds, remediation strategy) as described in the Enrichment Settings section above. After configuring all fields, click Save to link the enrichment datastore.
Side Effects
Once linked, all future Scan operations will write results to the enrichment datastore. For details on how enrichment works, storage impact, and remediation strategies, see the Enrichment Introduction page.
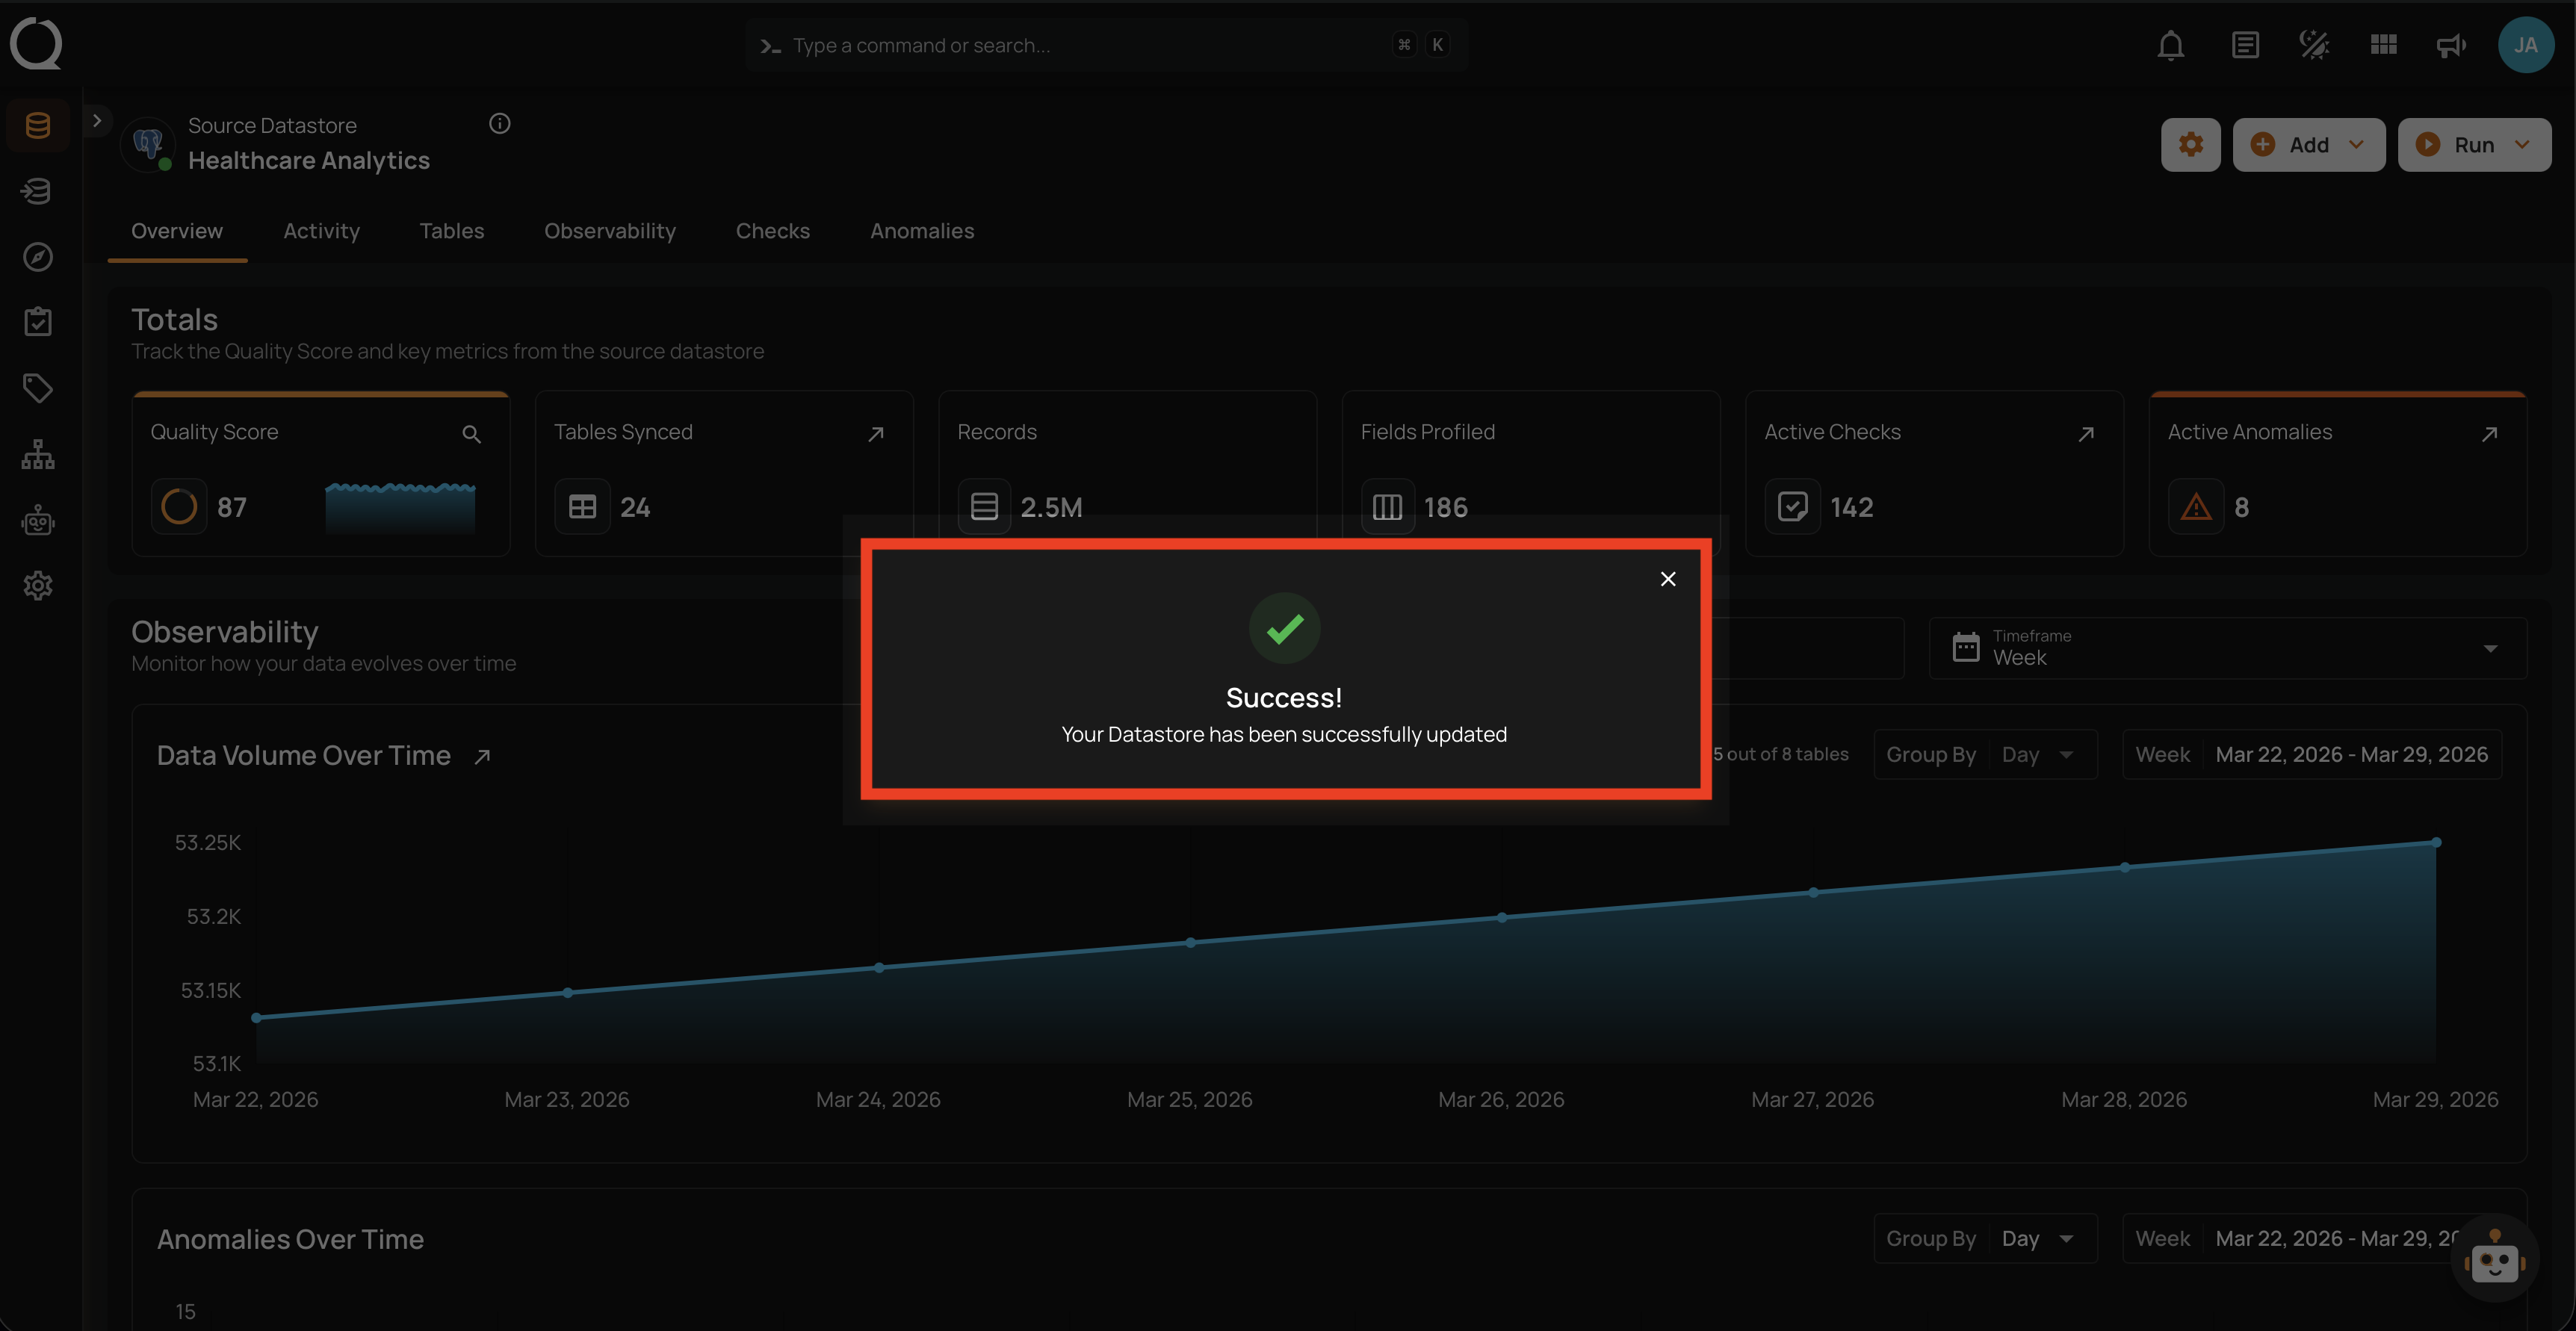
Step 6: A success message will confirm that the datastore has been updated successfully.
Option II: Via Tree Footer
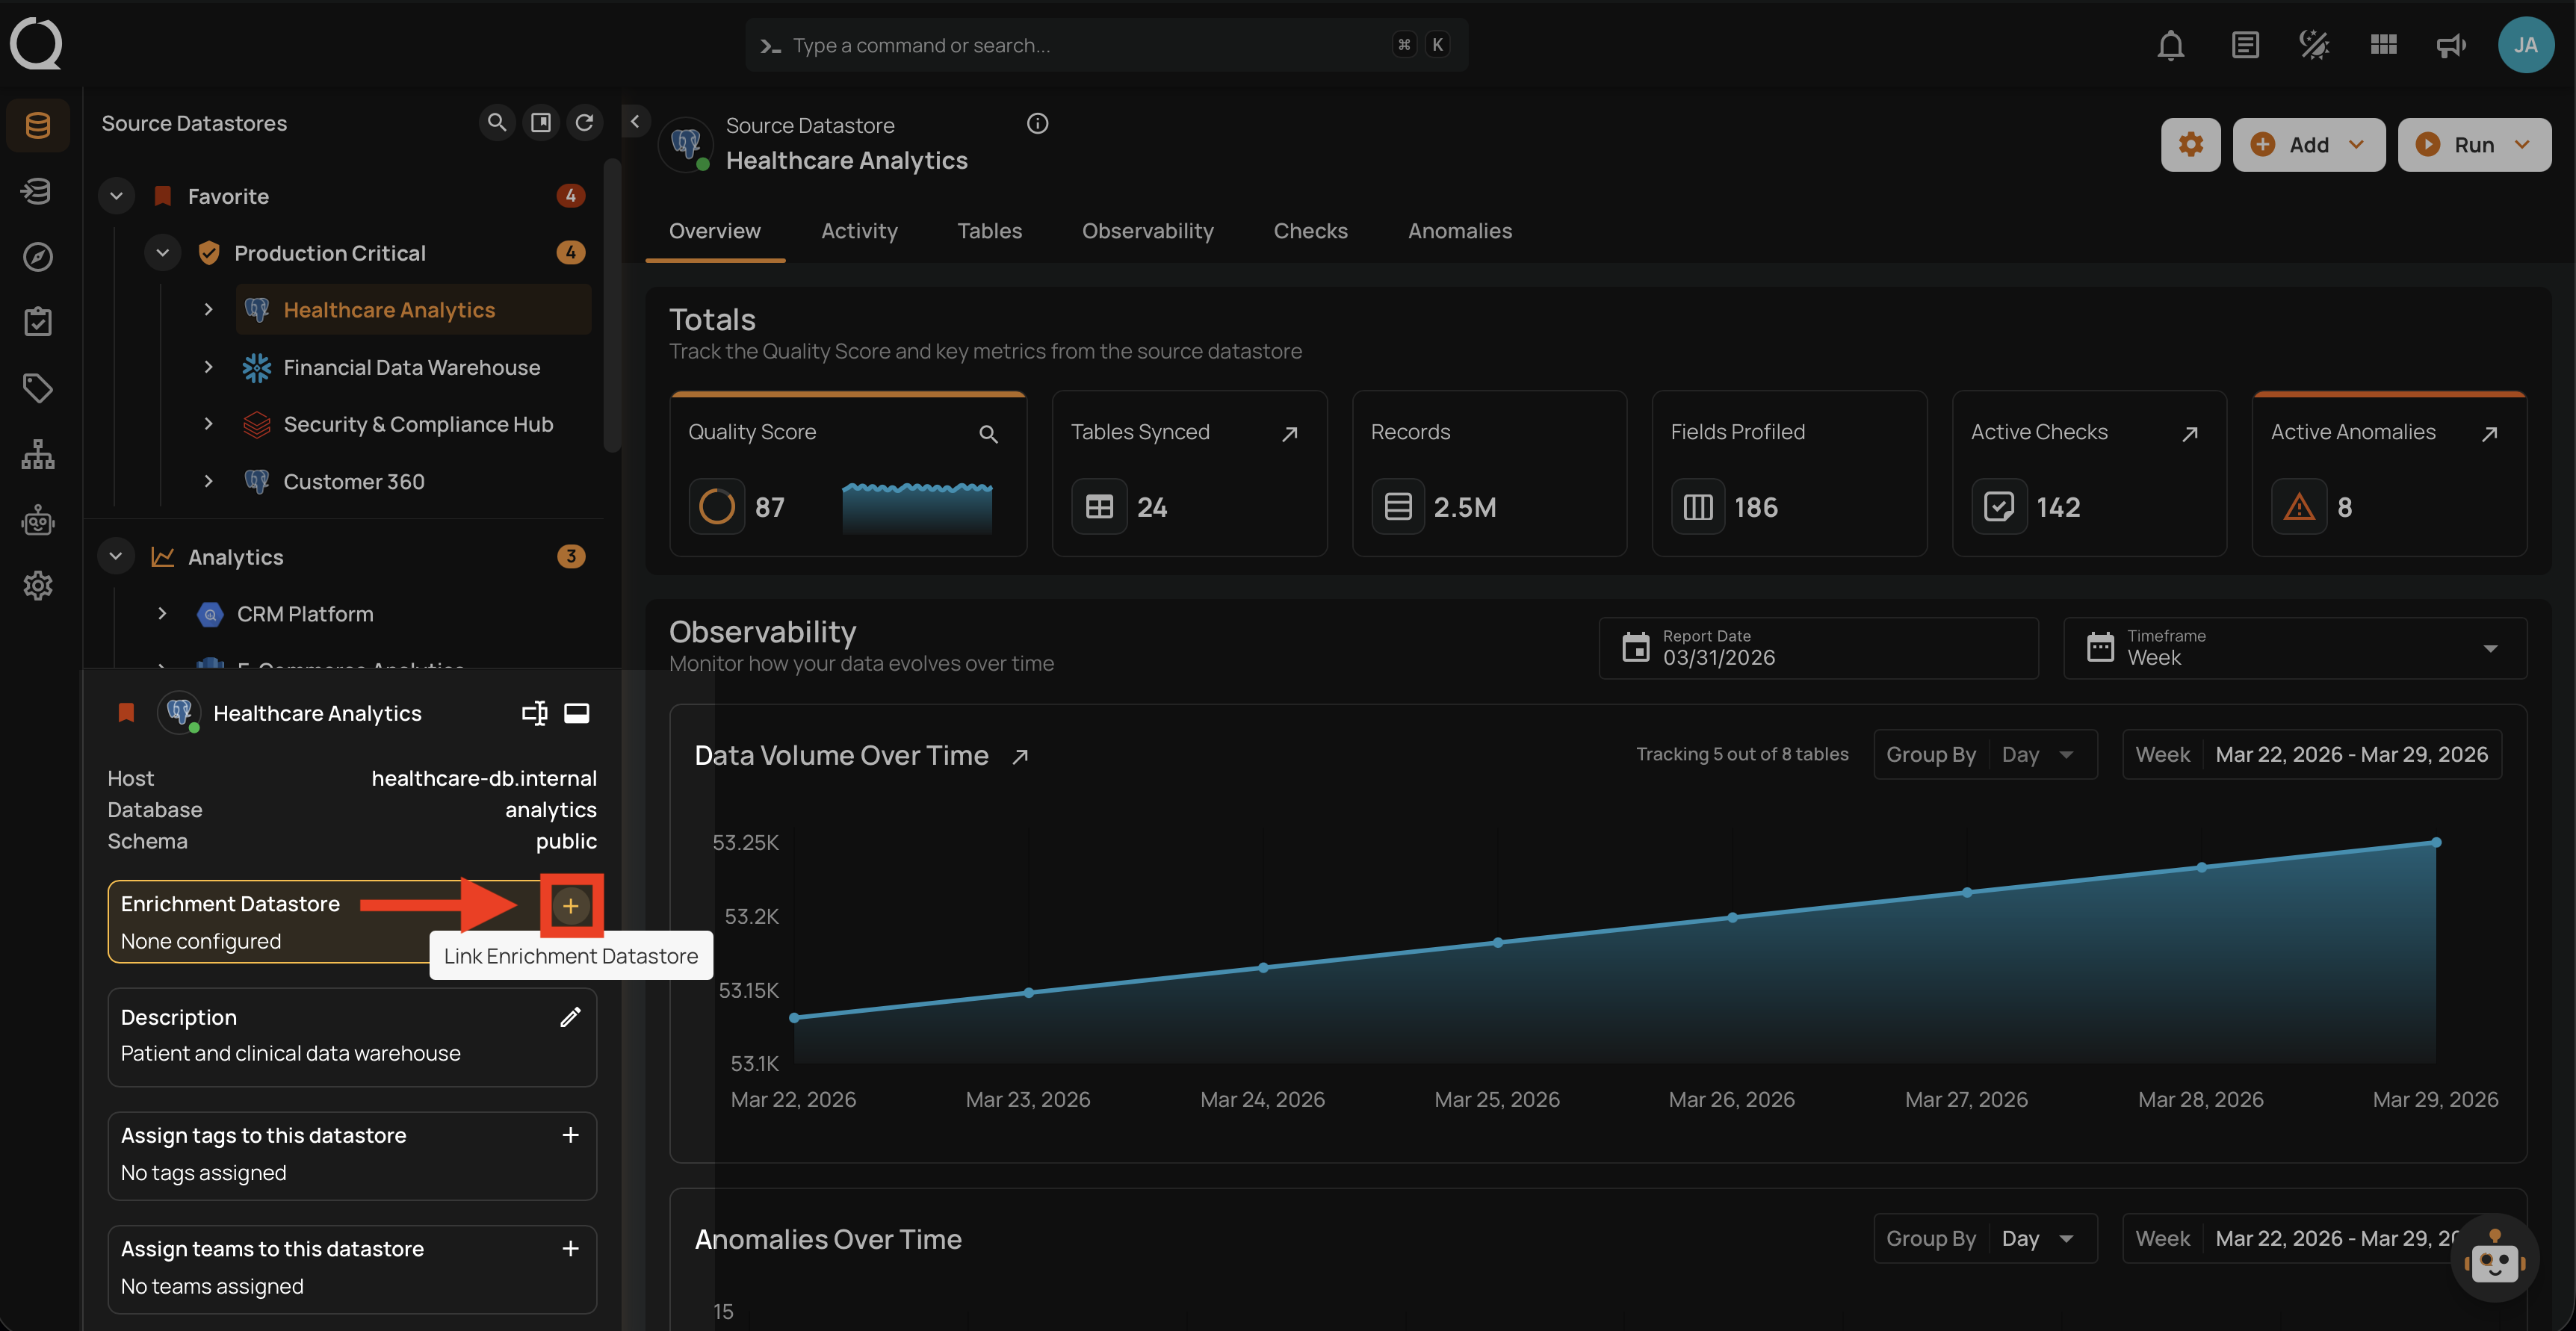
Step 1: Select the datastore from the tree view on the left side. In the footer panel, locate the Enrichment Datastore section showing "None configured".

Step 2: Click the Link Enrichment Datastore button to open the Link Enrichment Datastore modal.
Step 3: The Link Enrichment Datastore modal will appear.
Step 4: Select an existing enrichment datastore from the Use Enrichment Datastore dropdown.
Step 5: Configure the enrichment settings (prefix, anomaly thresholds, remediation strategy) as described in the Enrichment Settings section above. After configuring all fields, click Save to link the enrichment datastore.
Side Effects
Once linked, all future Scan operations will write results to the enrichment datastore. For details on how enrichment works, storage impact, and remediation strategies, see the Enrichment Introduction page.
Step 6: A success message will confirm that the datastore has been updated successfully.
Unlink Enrichment Datastore
To remove the enrichment link, see the Unlink Enrichment Datastore documentation.