Adding a New Datastore with a New Connection
This guide walks you through creating a new source datastore by setting up a new connection from scratch with your own credentials.
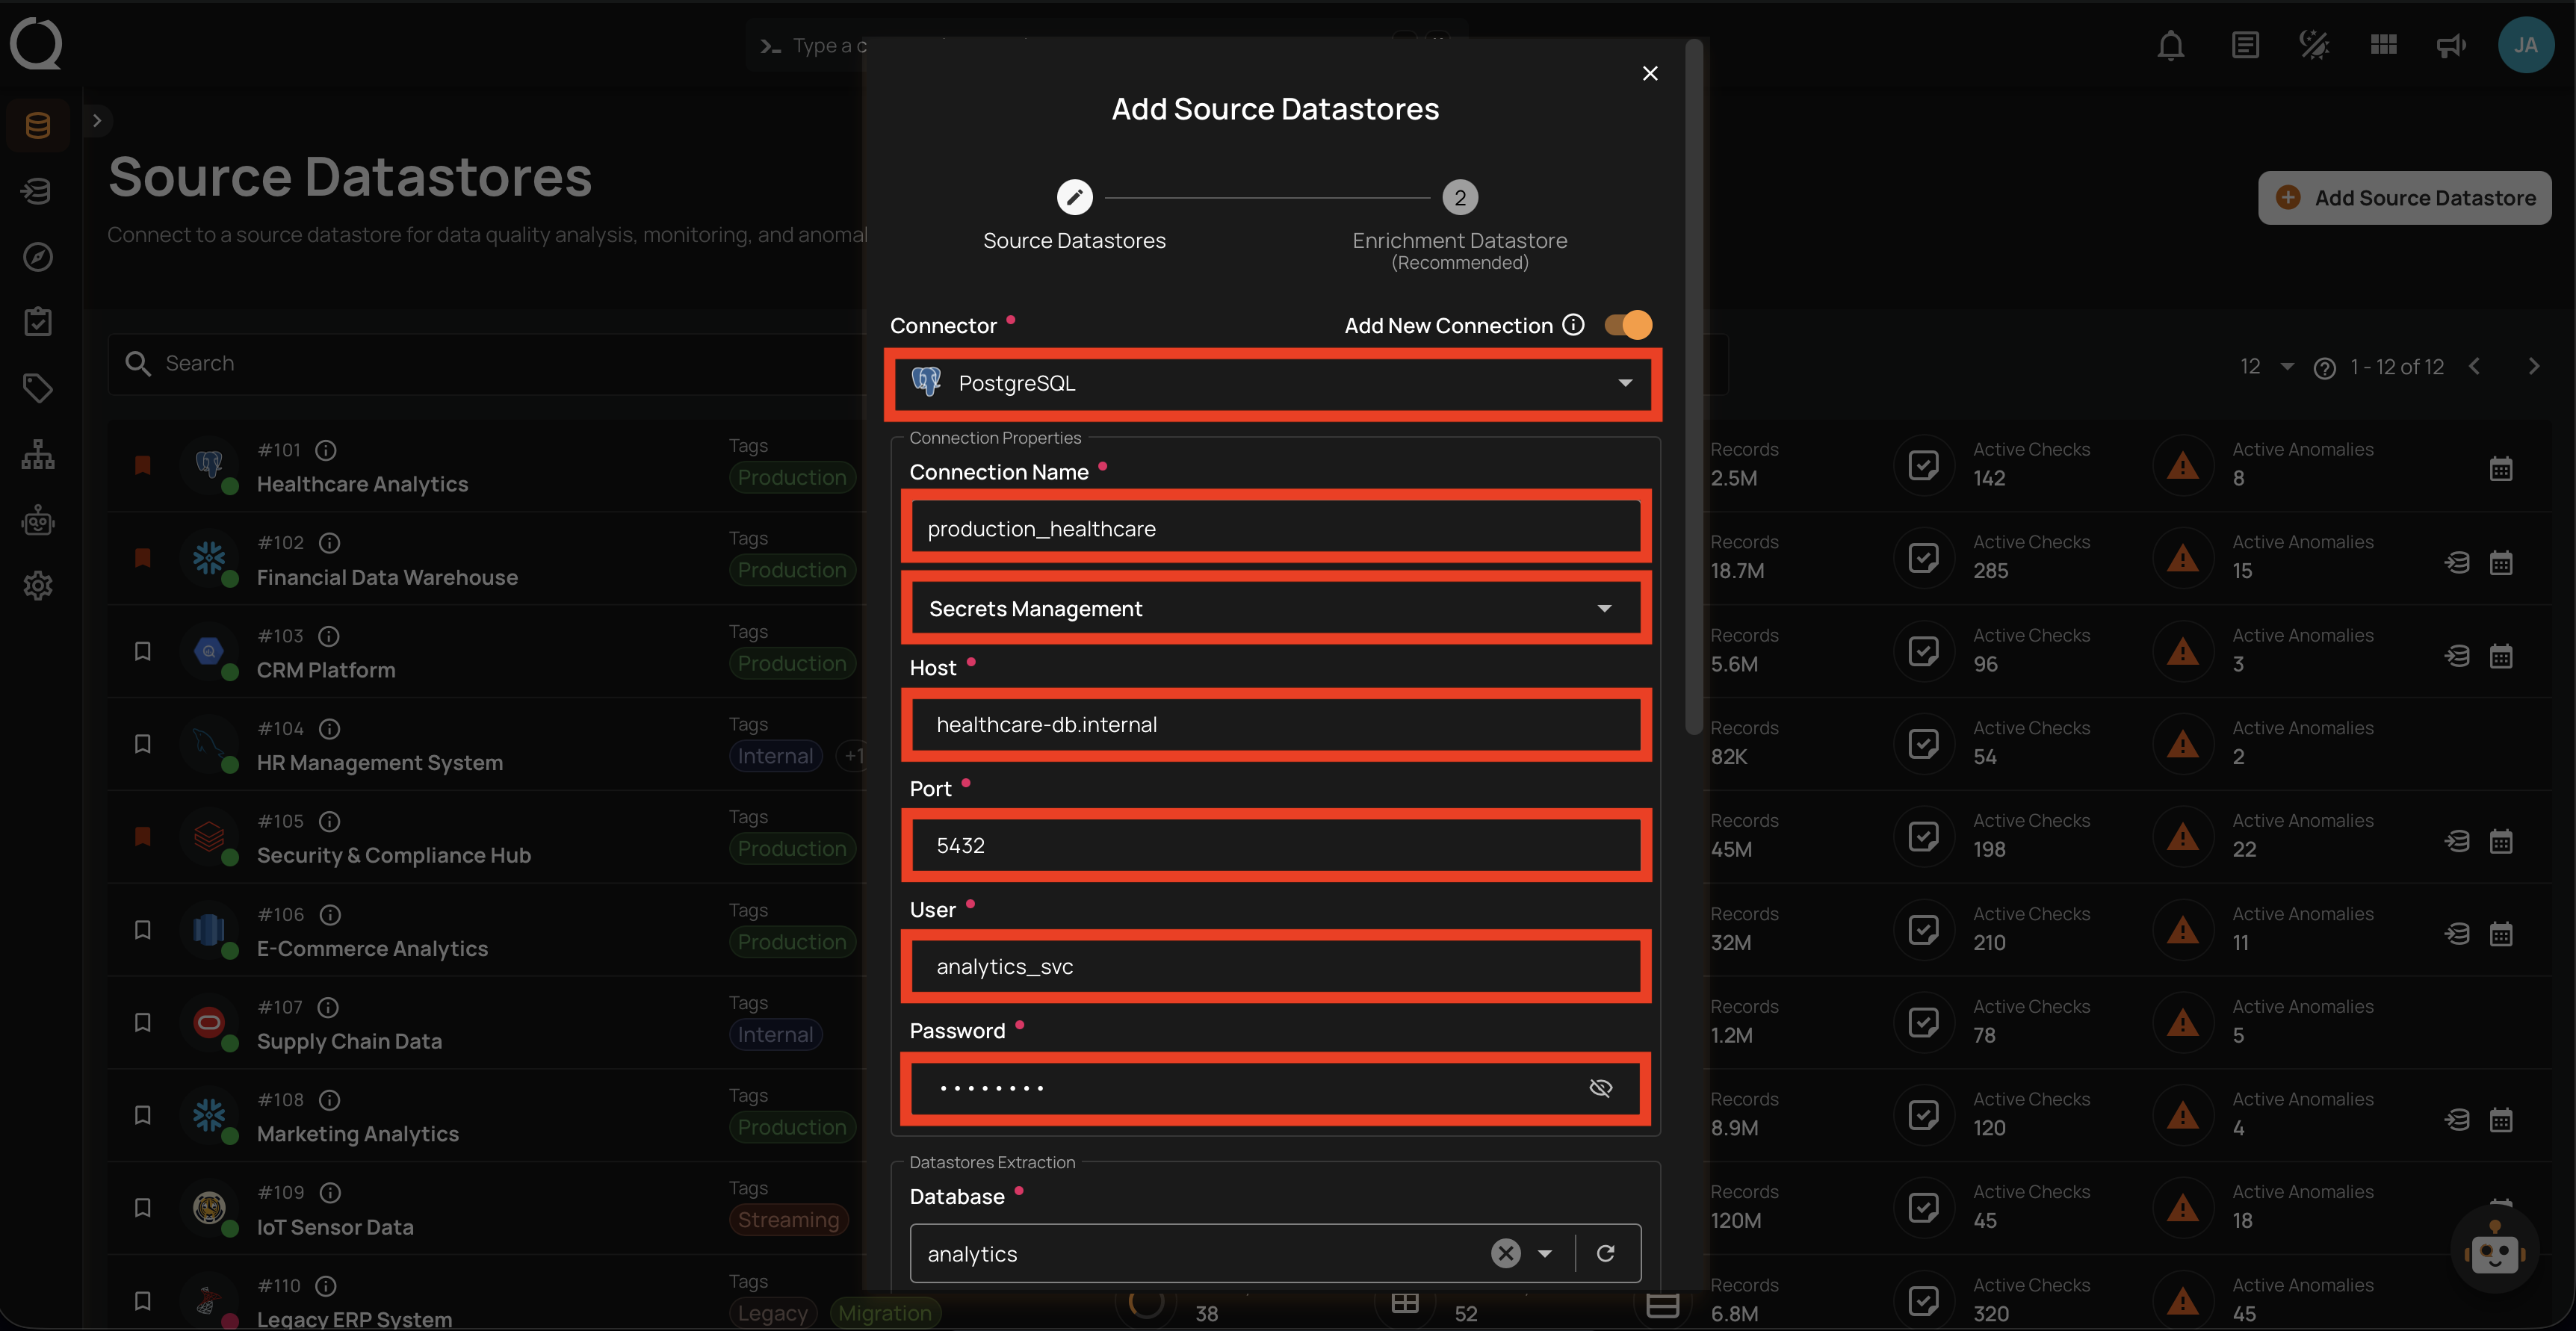
Connector-Specific Fields
The connection fields vary depending on the connector you select. This page covers the general flow that applies to all connectors. For connector-specific field details, refer to the individual connector page (e.g., PostgreSQL, Snowflake, BigQuery).
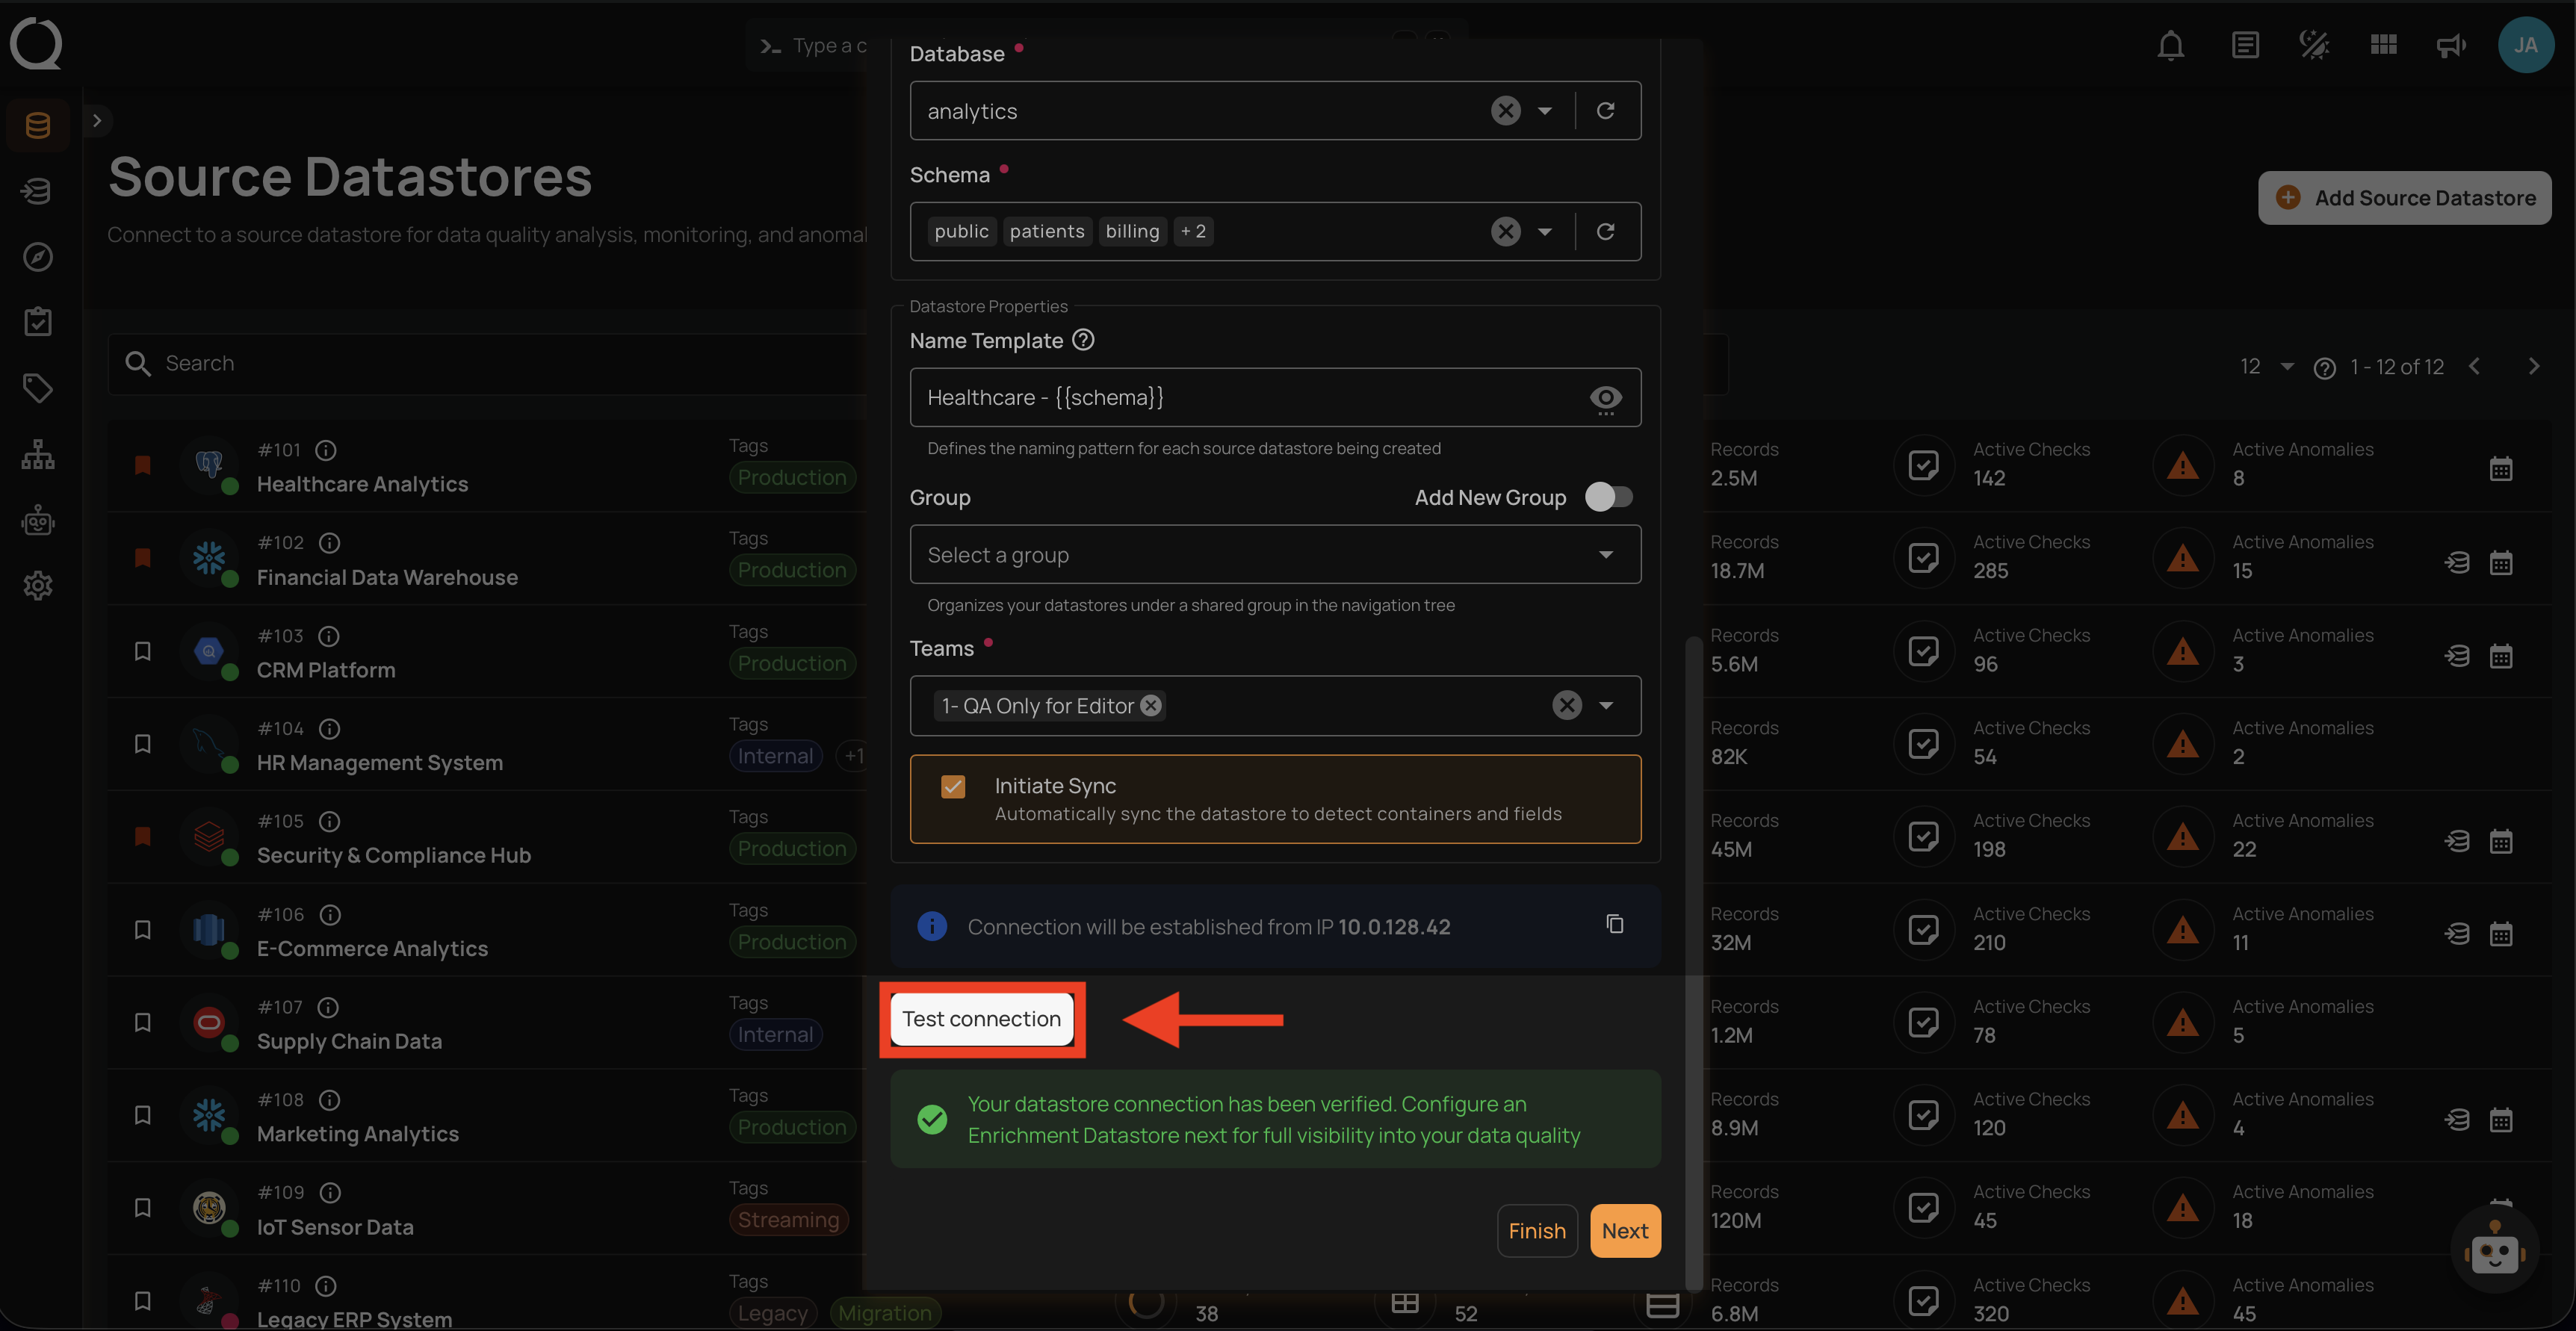
Datastore Properties
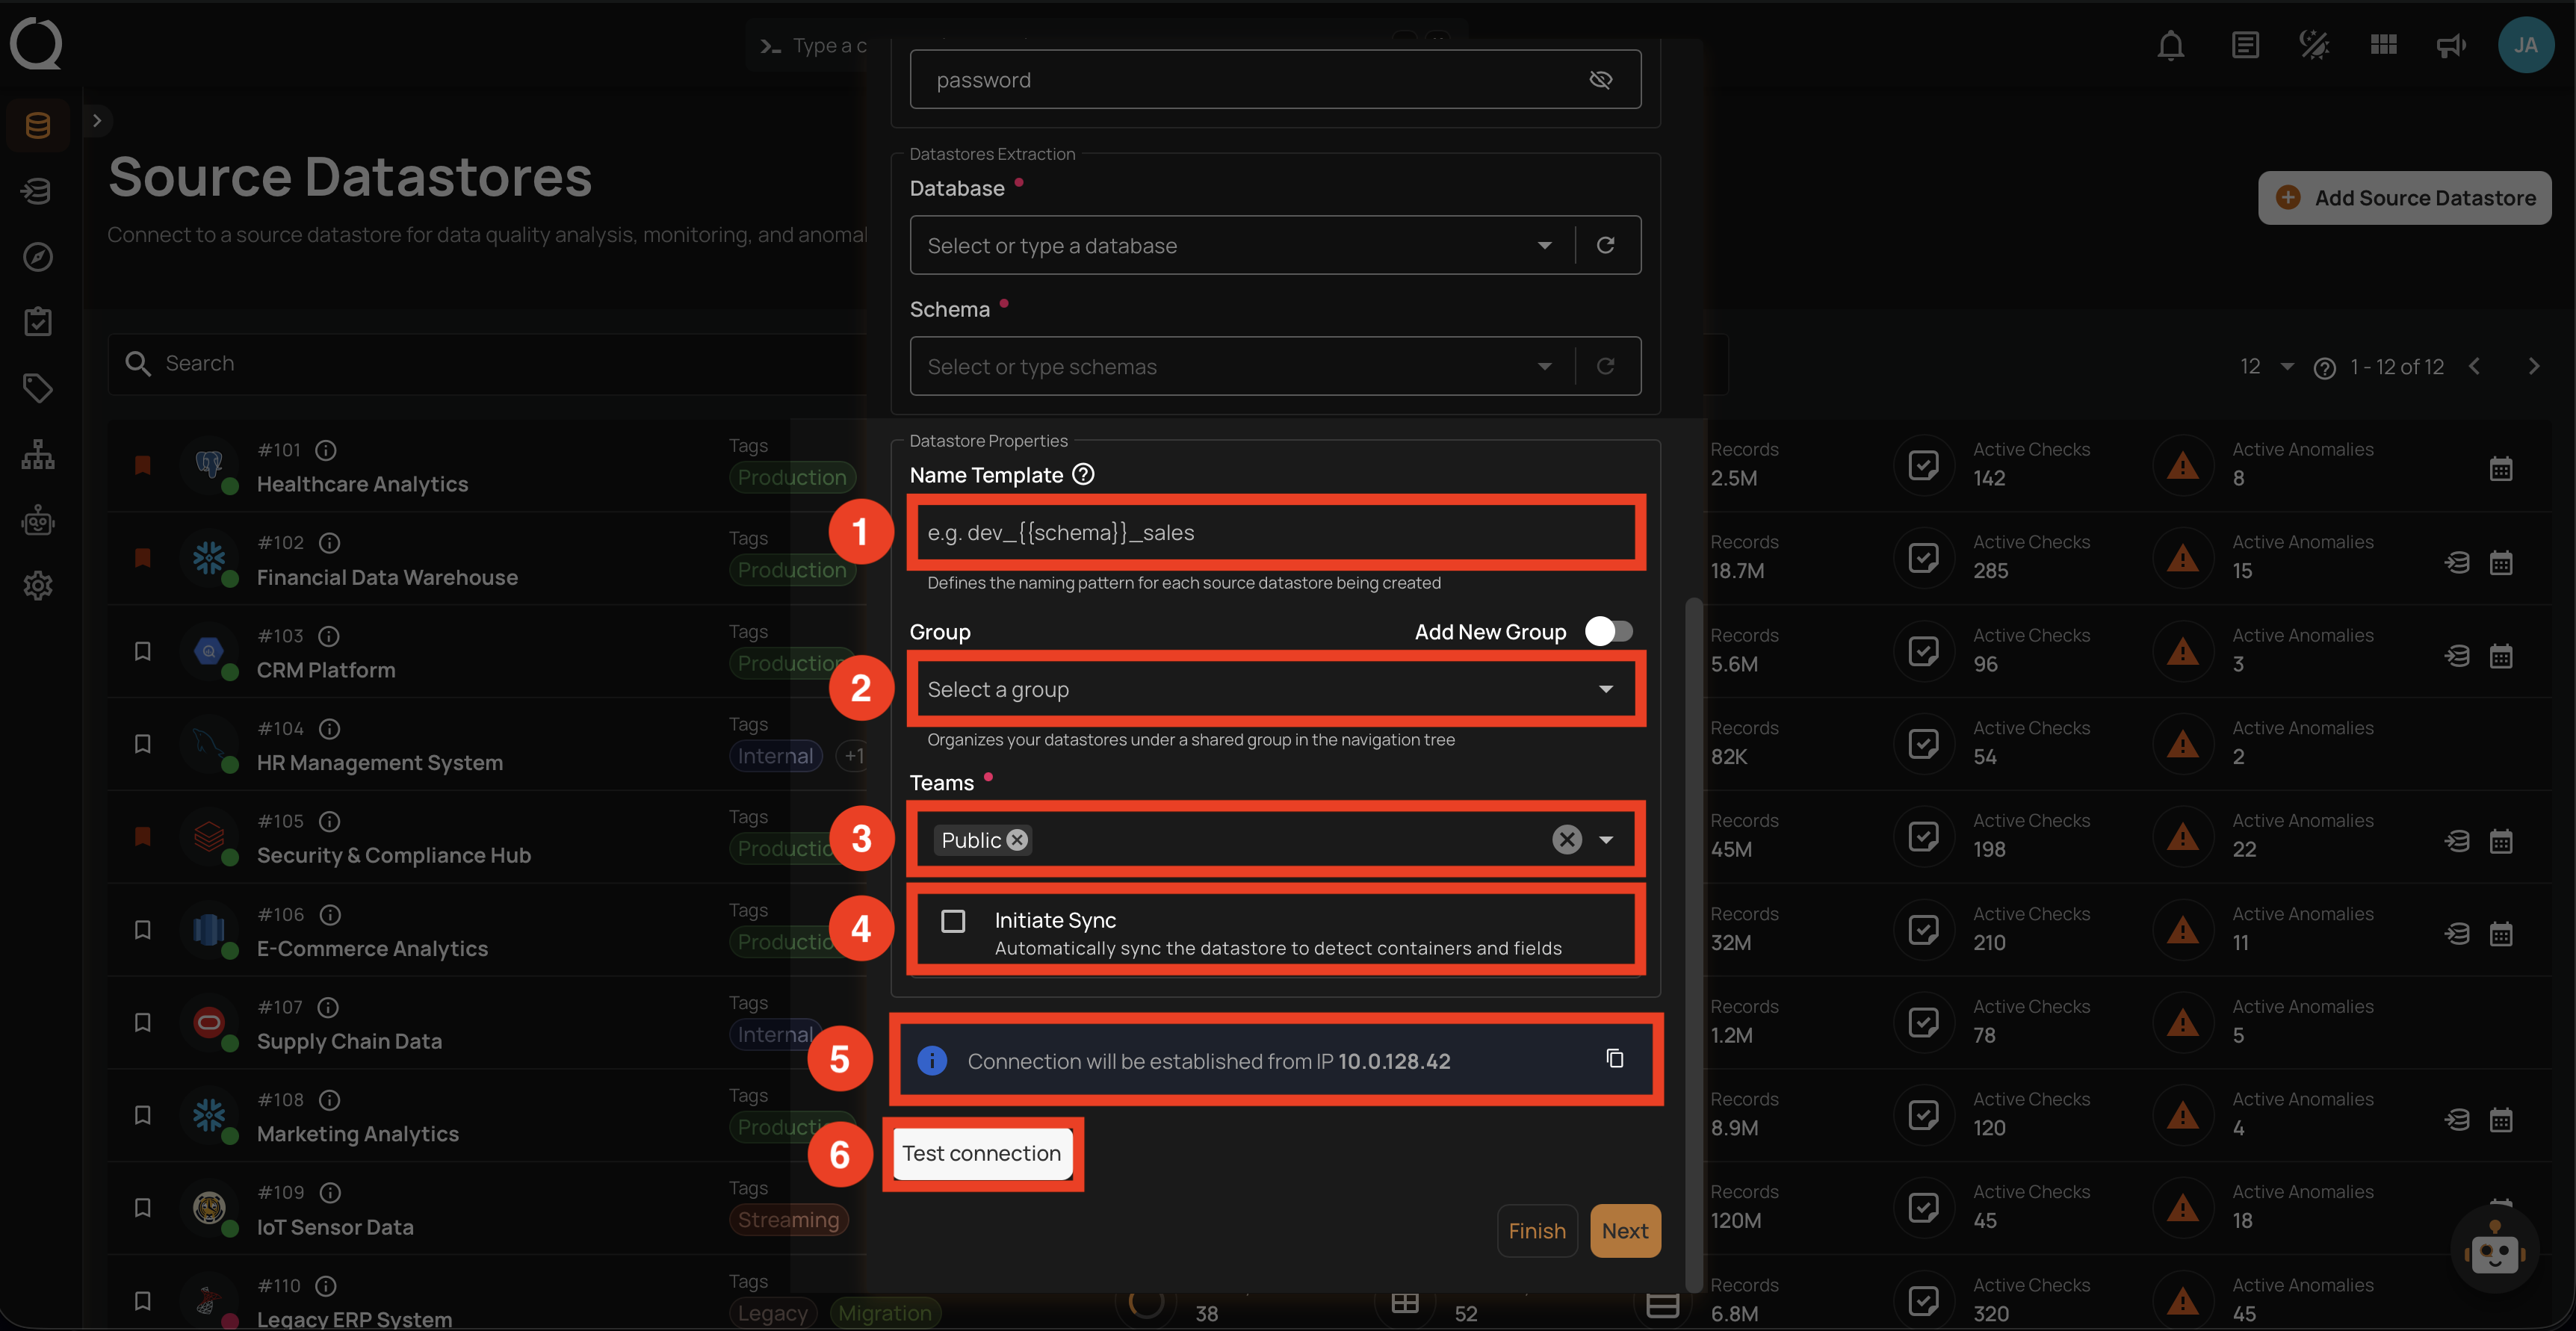
The lower section of the Add Source Datastores modal contains fields common to all datastores. The fields vary slightly depending on whether you are adding a JDBC or DFS datastore.
| REF. | FIELD | REQUIRED | DESCRIPTION |
|---|---|---|---|
| 1 | Name Template | No | Defines the naming pattern for each source datastore being created. Use {{ schema }} as a placeholder that gets replaced with the actual schema name (e.g., prod_{{ schema }} produces prod_public, prod_sales). |
| 2 | Group | No | Organizes your datastores under a shared group in the navigation tree. Select an existing group or create a new one with the Add New Group toggle. |
| 3 | Teams | Yes | Select one or more teams to associate with this source datastore. |
| 4 | Initiate Sync | No | Automatically sync the datastore to detect containers and fields after creation. |
| 5 | Connection Info | — | Displays the resolved connection host and IP for verification. |
| 6 | Test Connection | — | Click to verify the connection credentials before proceeding. |
| REF. | FIELD | REQUIRED | DESCRIPTION |
|---|---|---|---|
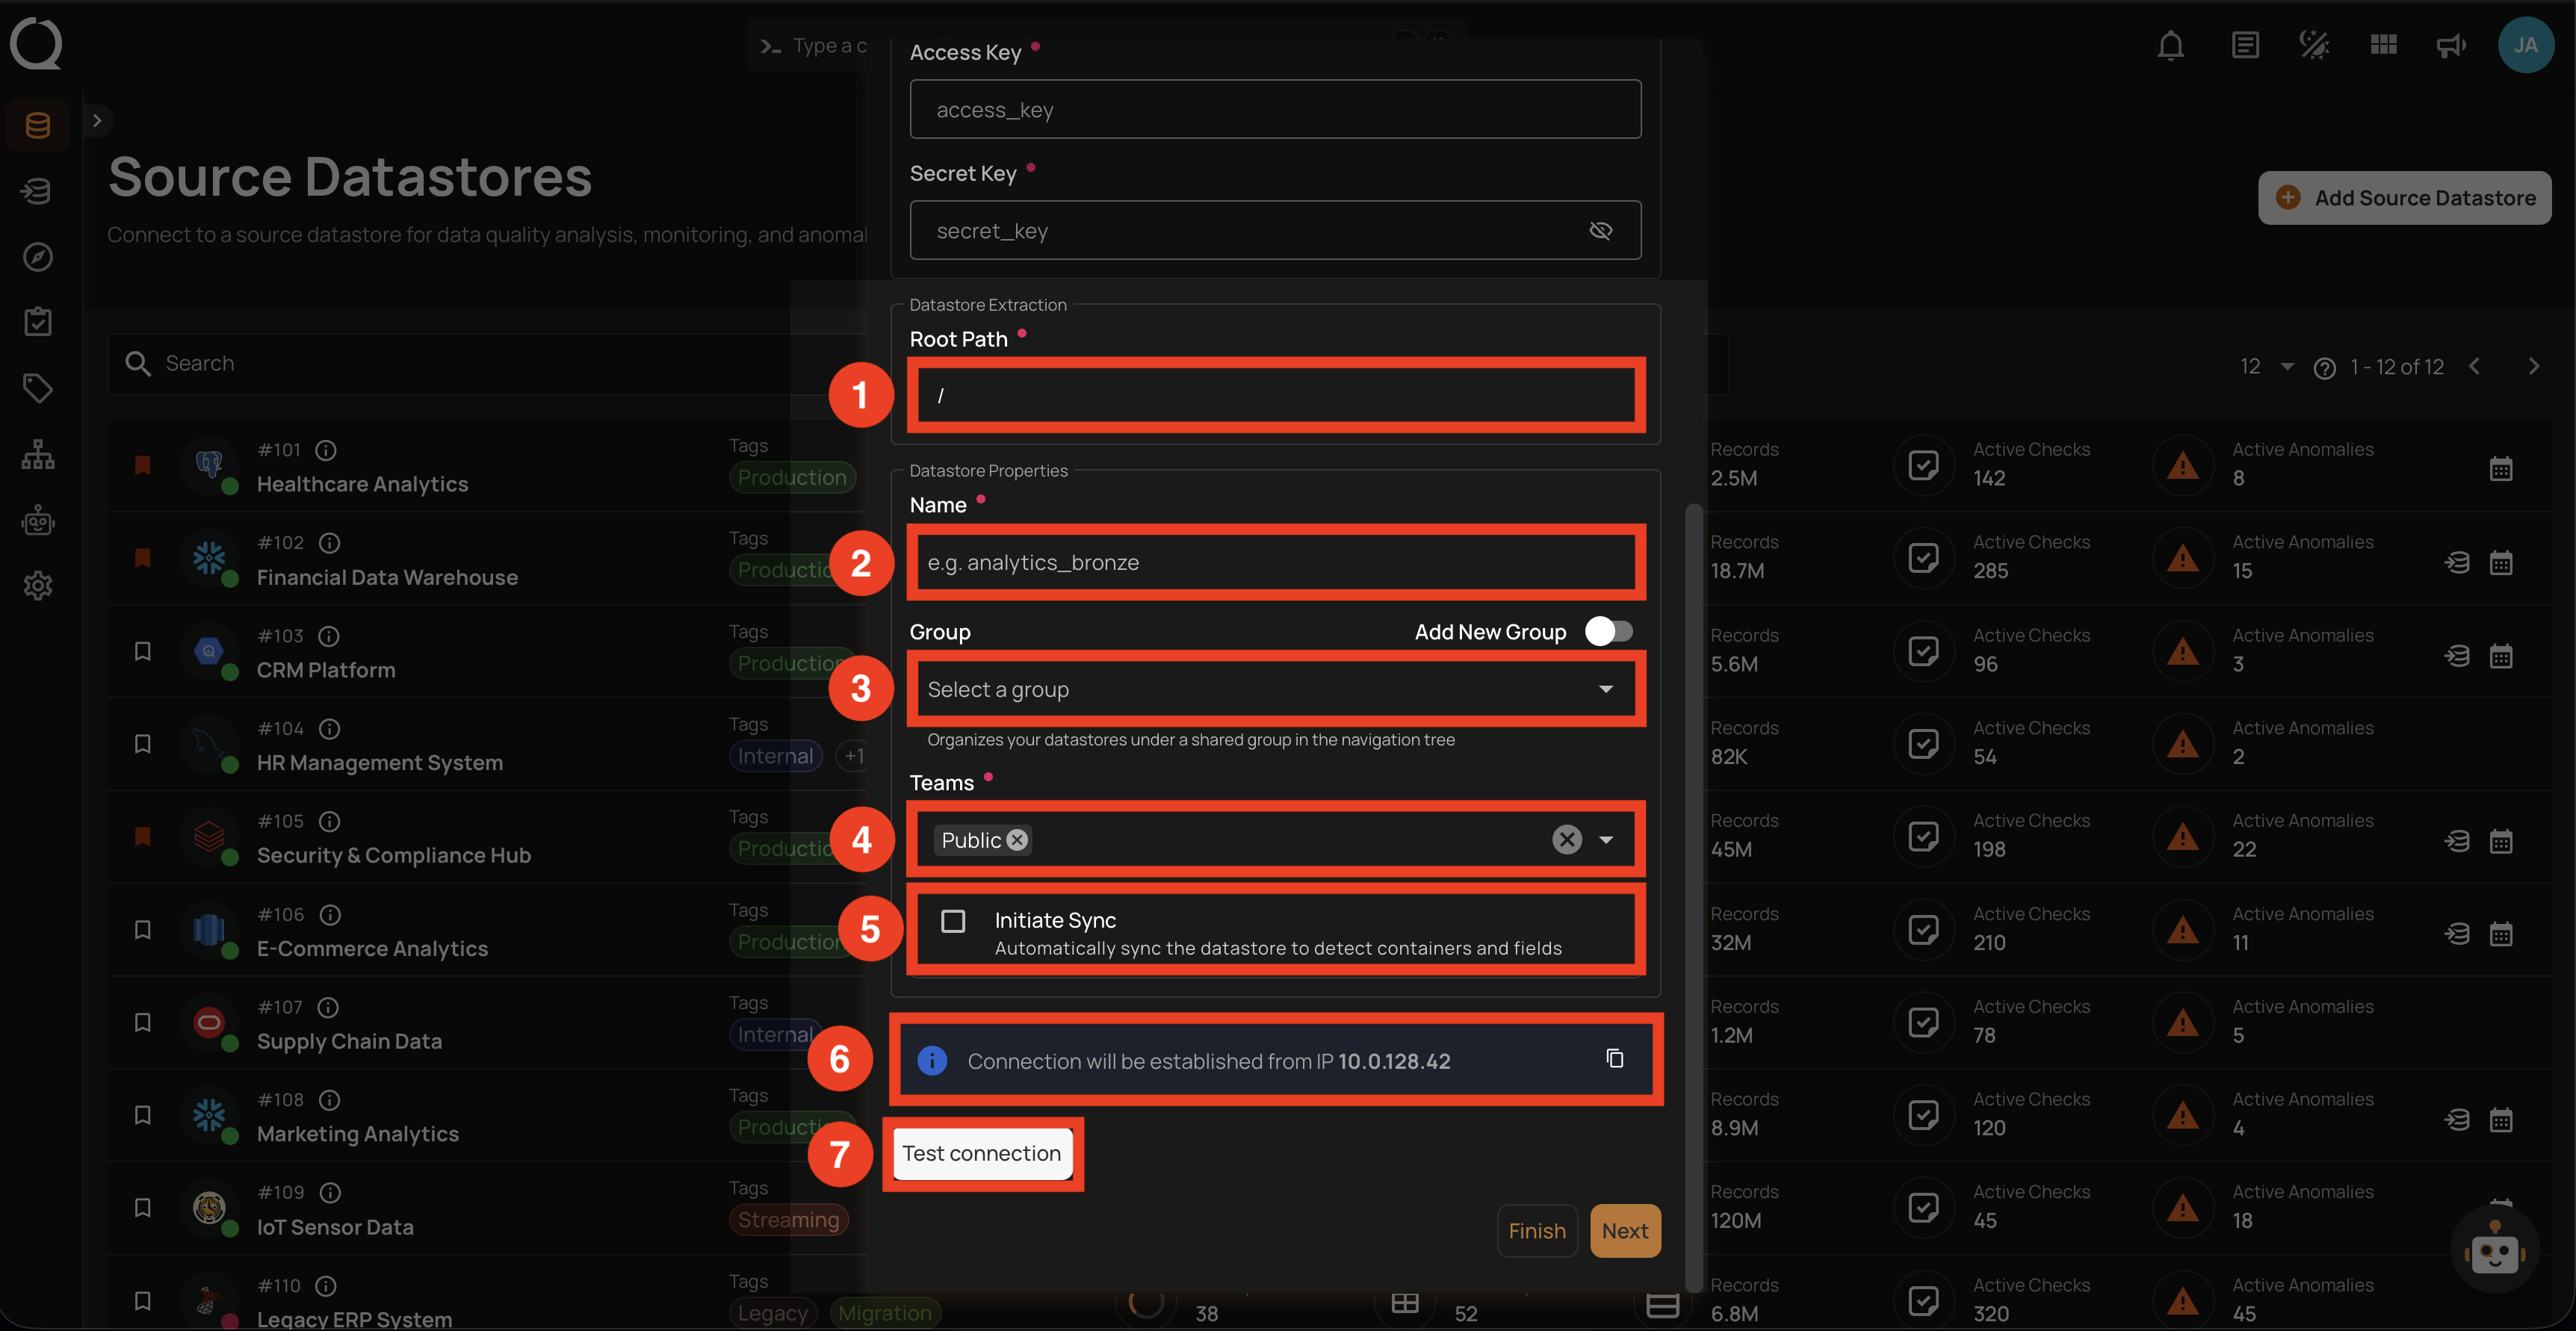
| 1 | Root Path | Yes | The base directory path in the file system where the datastore data resides. |
| 2 | Name | Yes | The display name for the datastore (e.g., analytics_bronze). |
| 3 | Group | No | Organizes your datastores under a shared group in the navigation tree. Select an existing group or create a new one with the Add New Group toggle. |
| 4 | Teams | Yes | Select one or more teams to associate with this source datastore. |
| 5 | Initiate Sync | No | Automatically sync the datastore to detect containers and fields after creation. |
| 6 | Connection Info | — | Displays the resolved connection host and IP for verification. |
| 7 | Test Connection | — | Click to verify the connection credentials before proceeding. |
Steps
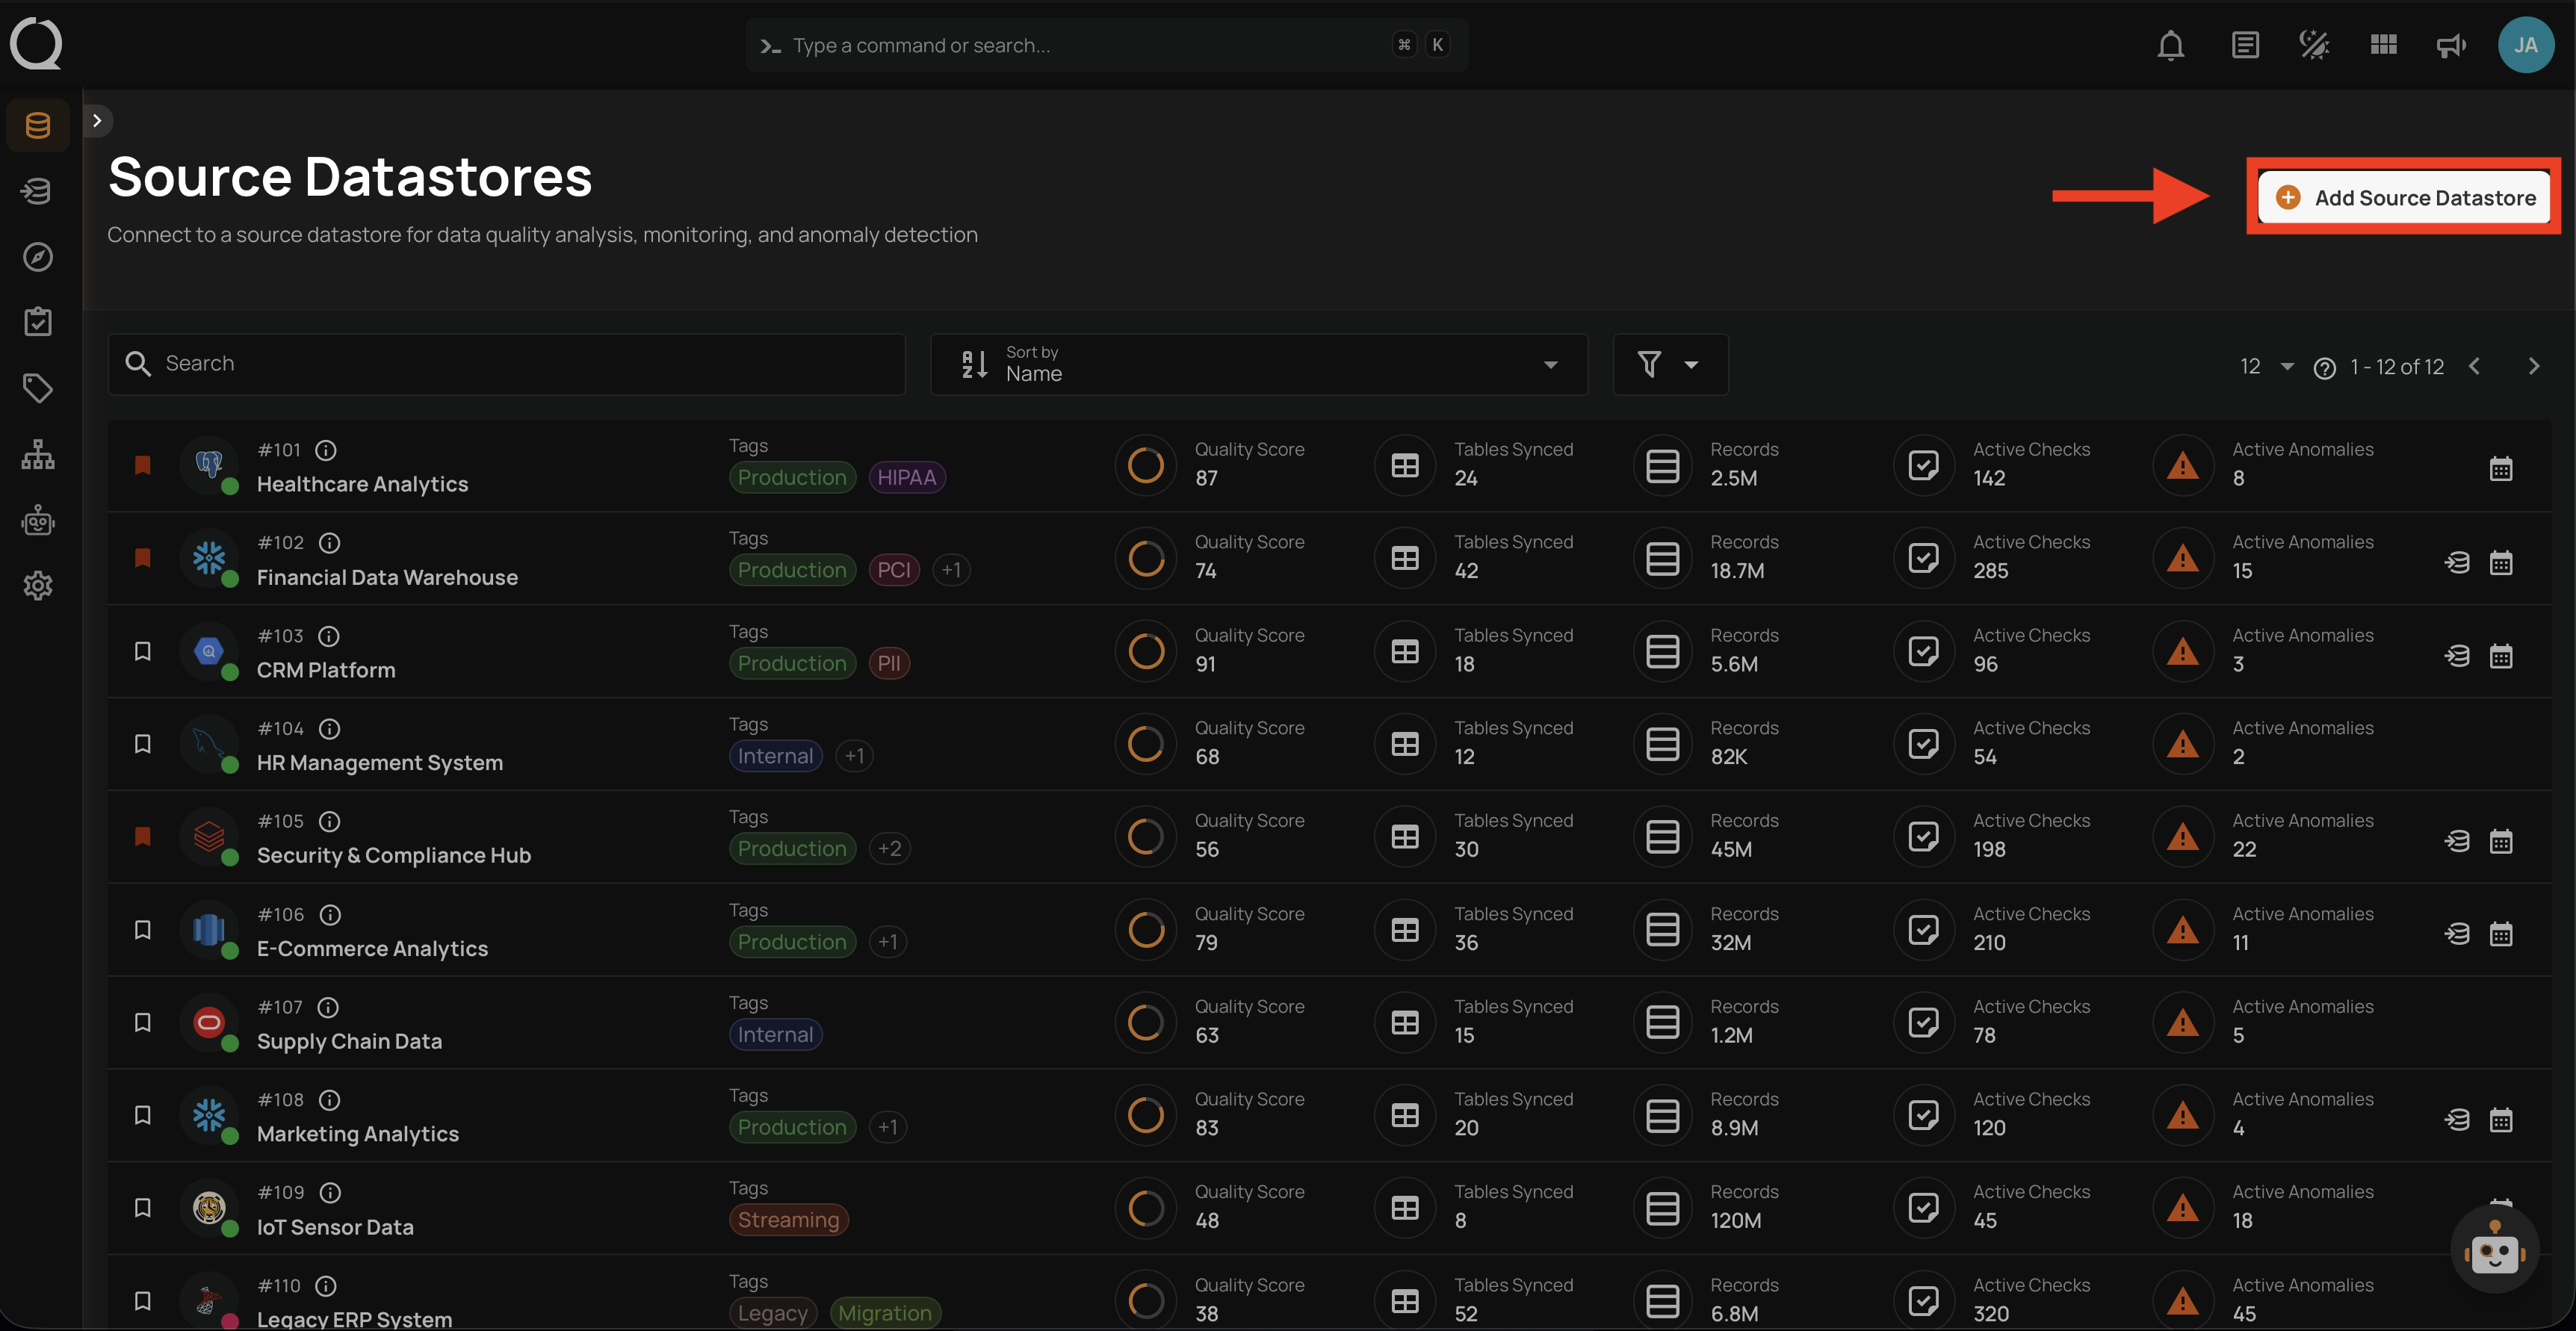
Step 1: Log in to your Qualytics account and click on the Add Source Datastore button located at the top-right corner of the interface.
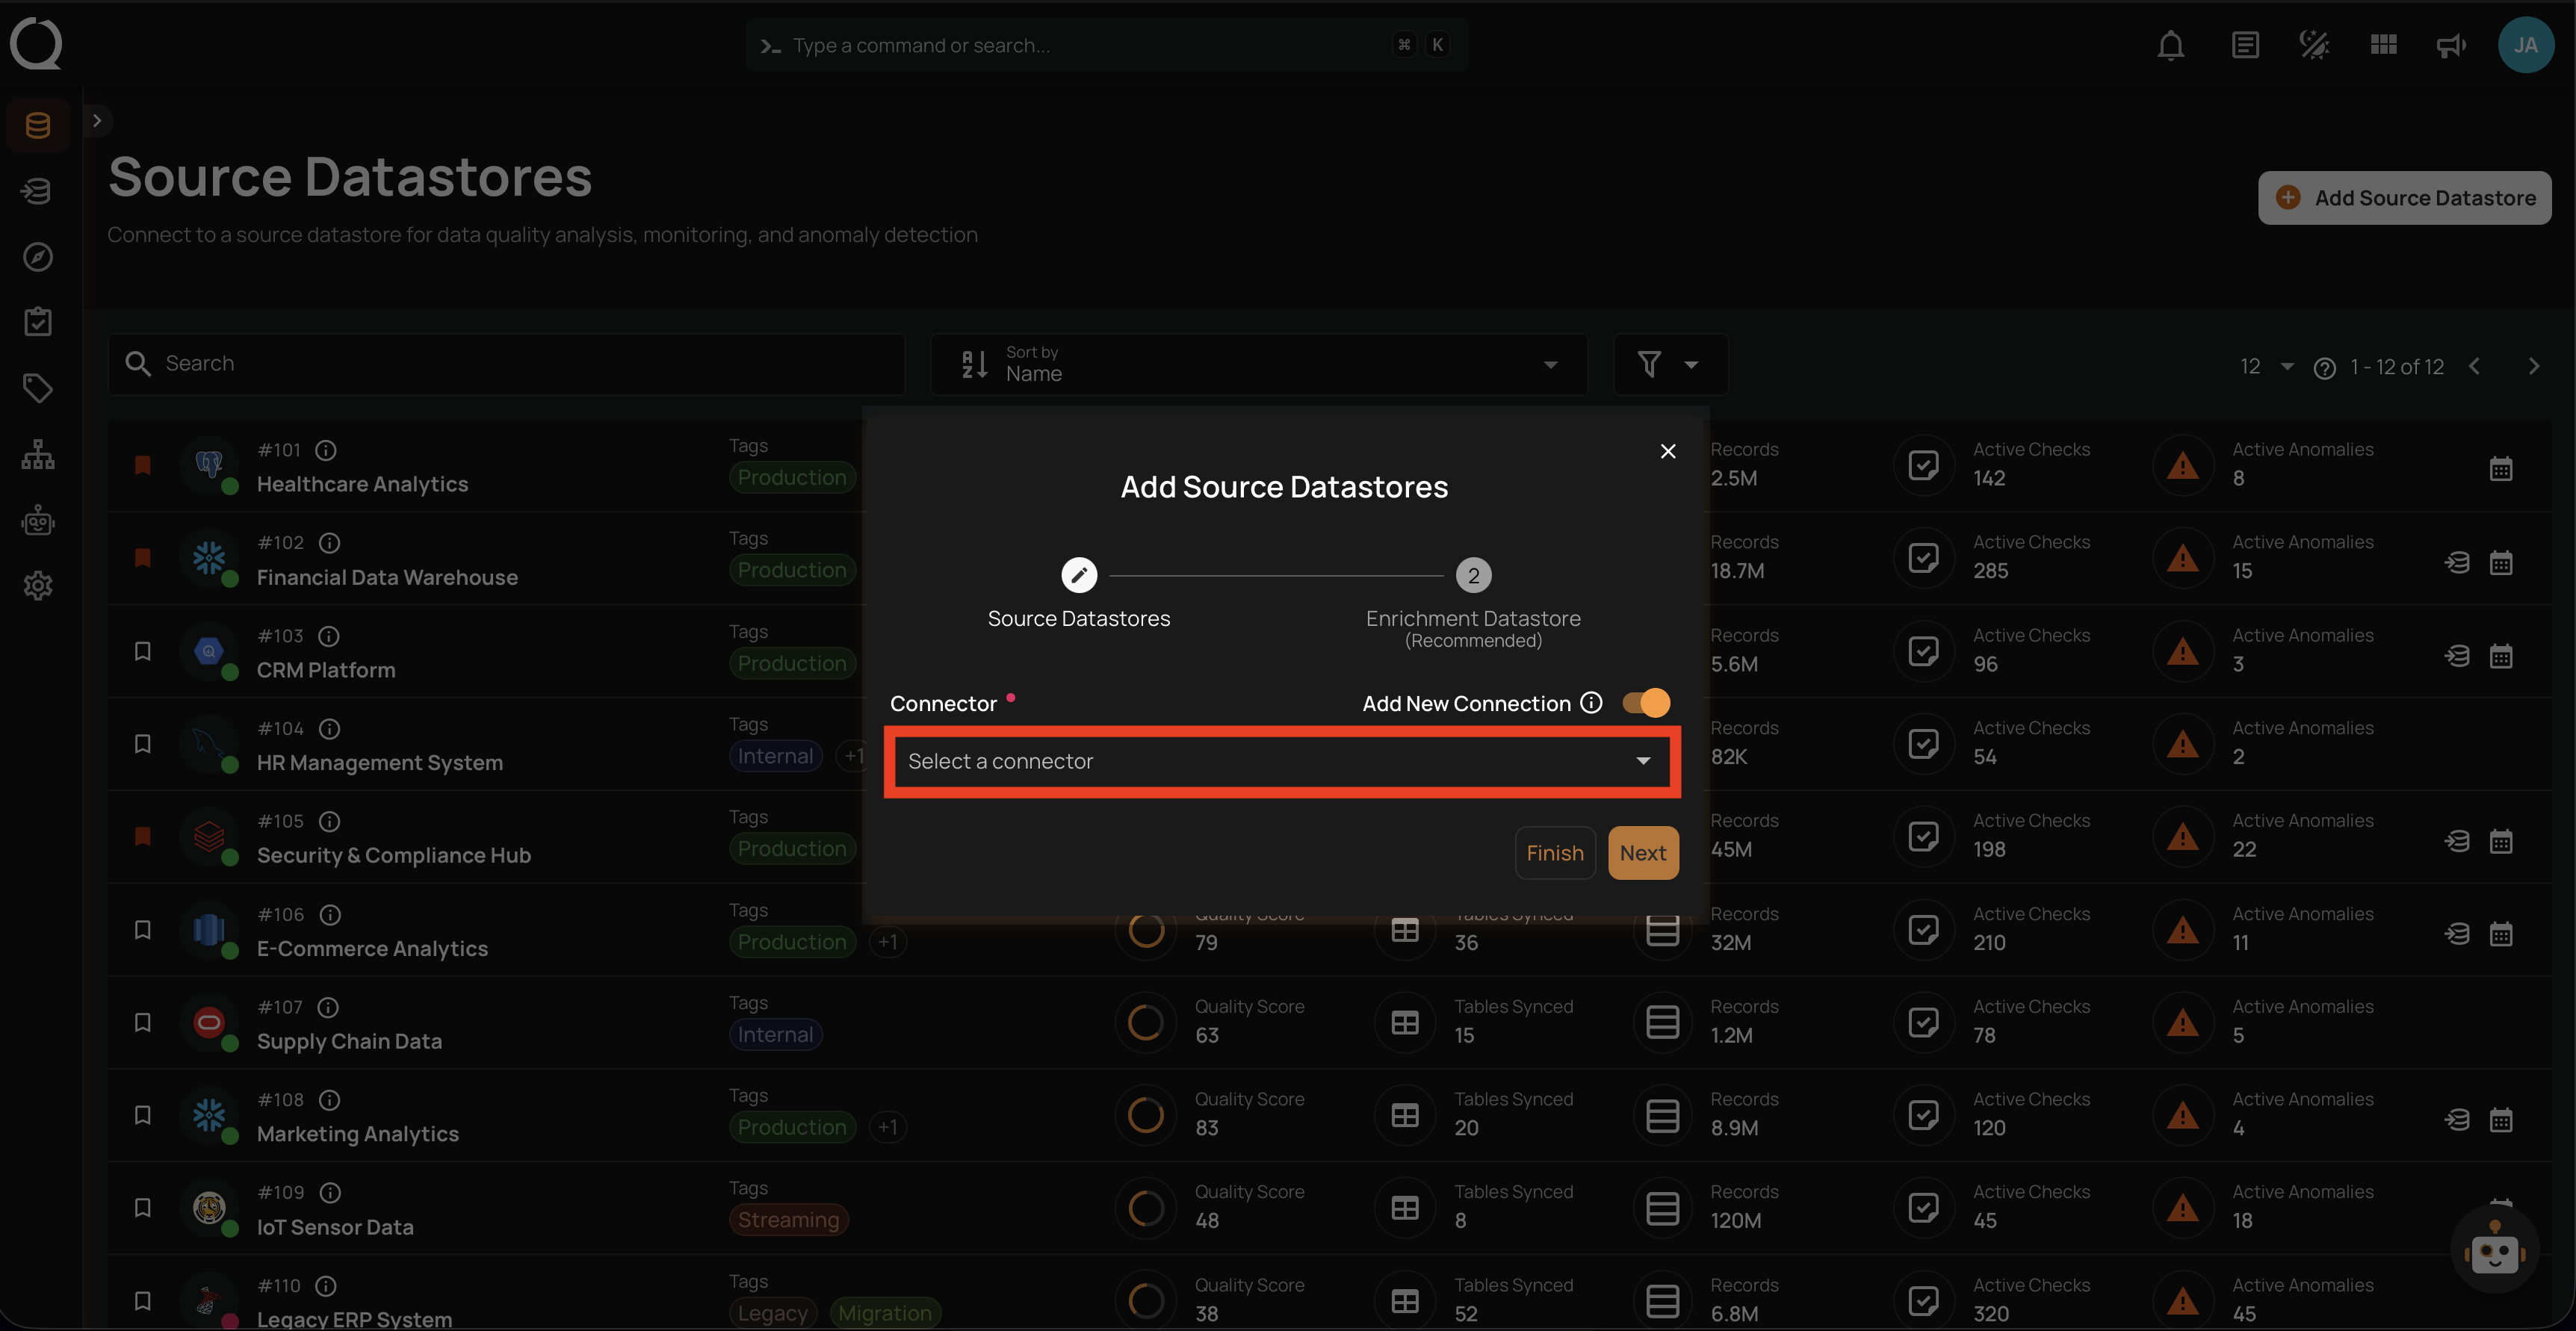
Step 2: A modal window — Add Source Datastores — will appear. Ensure the Add New Connection toggle is turned on and select a connector from the dropdown list.
Step 3: Fill in the connection details for your selected connector and configure the datastore properties as described in the Datastore Properties section above.
Step 4: Click the Test Connection button to verify the connection. If the credentials and provided details are verified, a success message will be displayed.
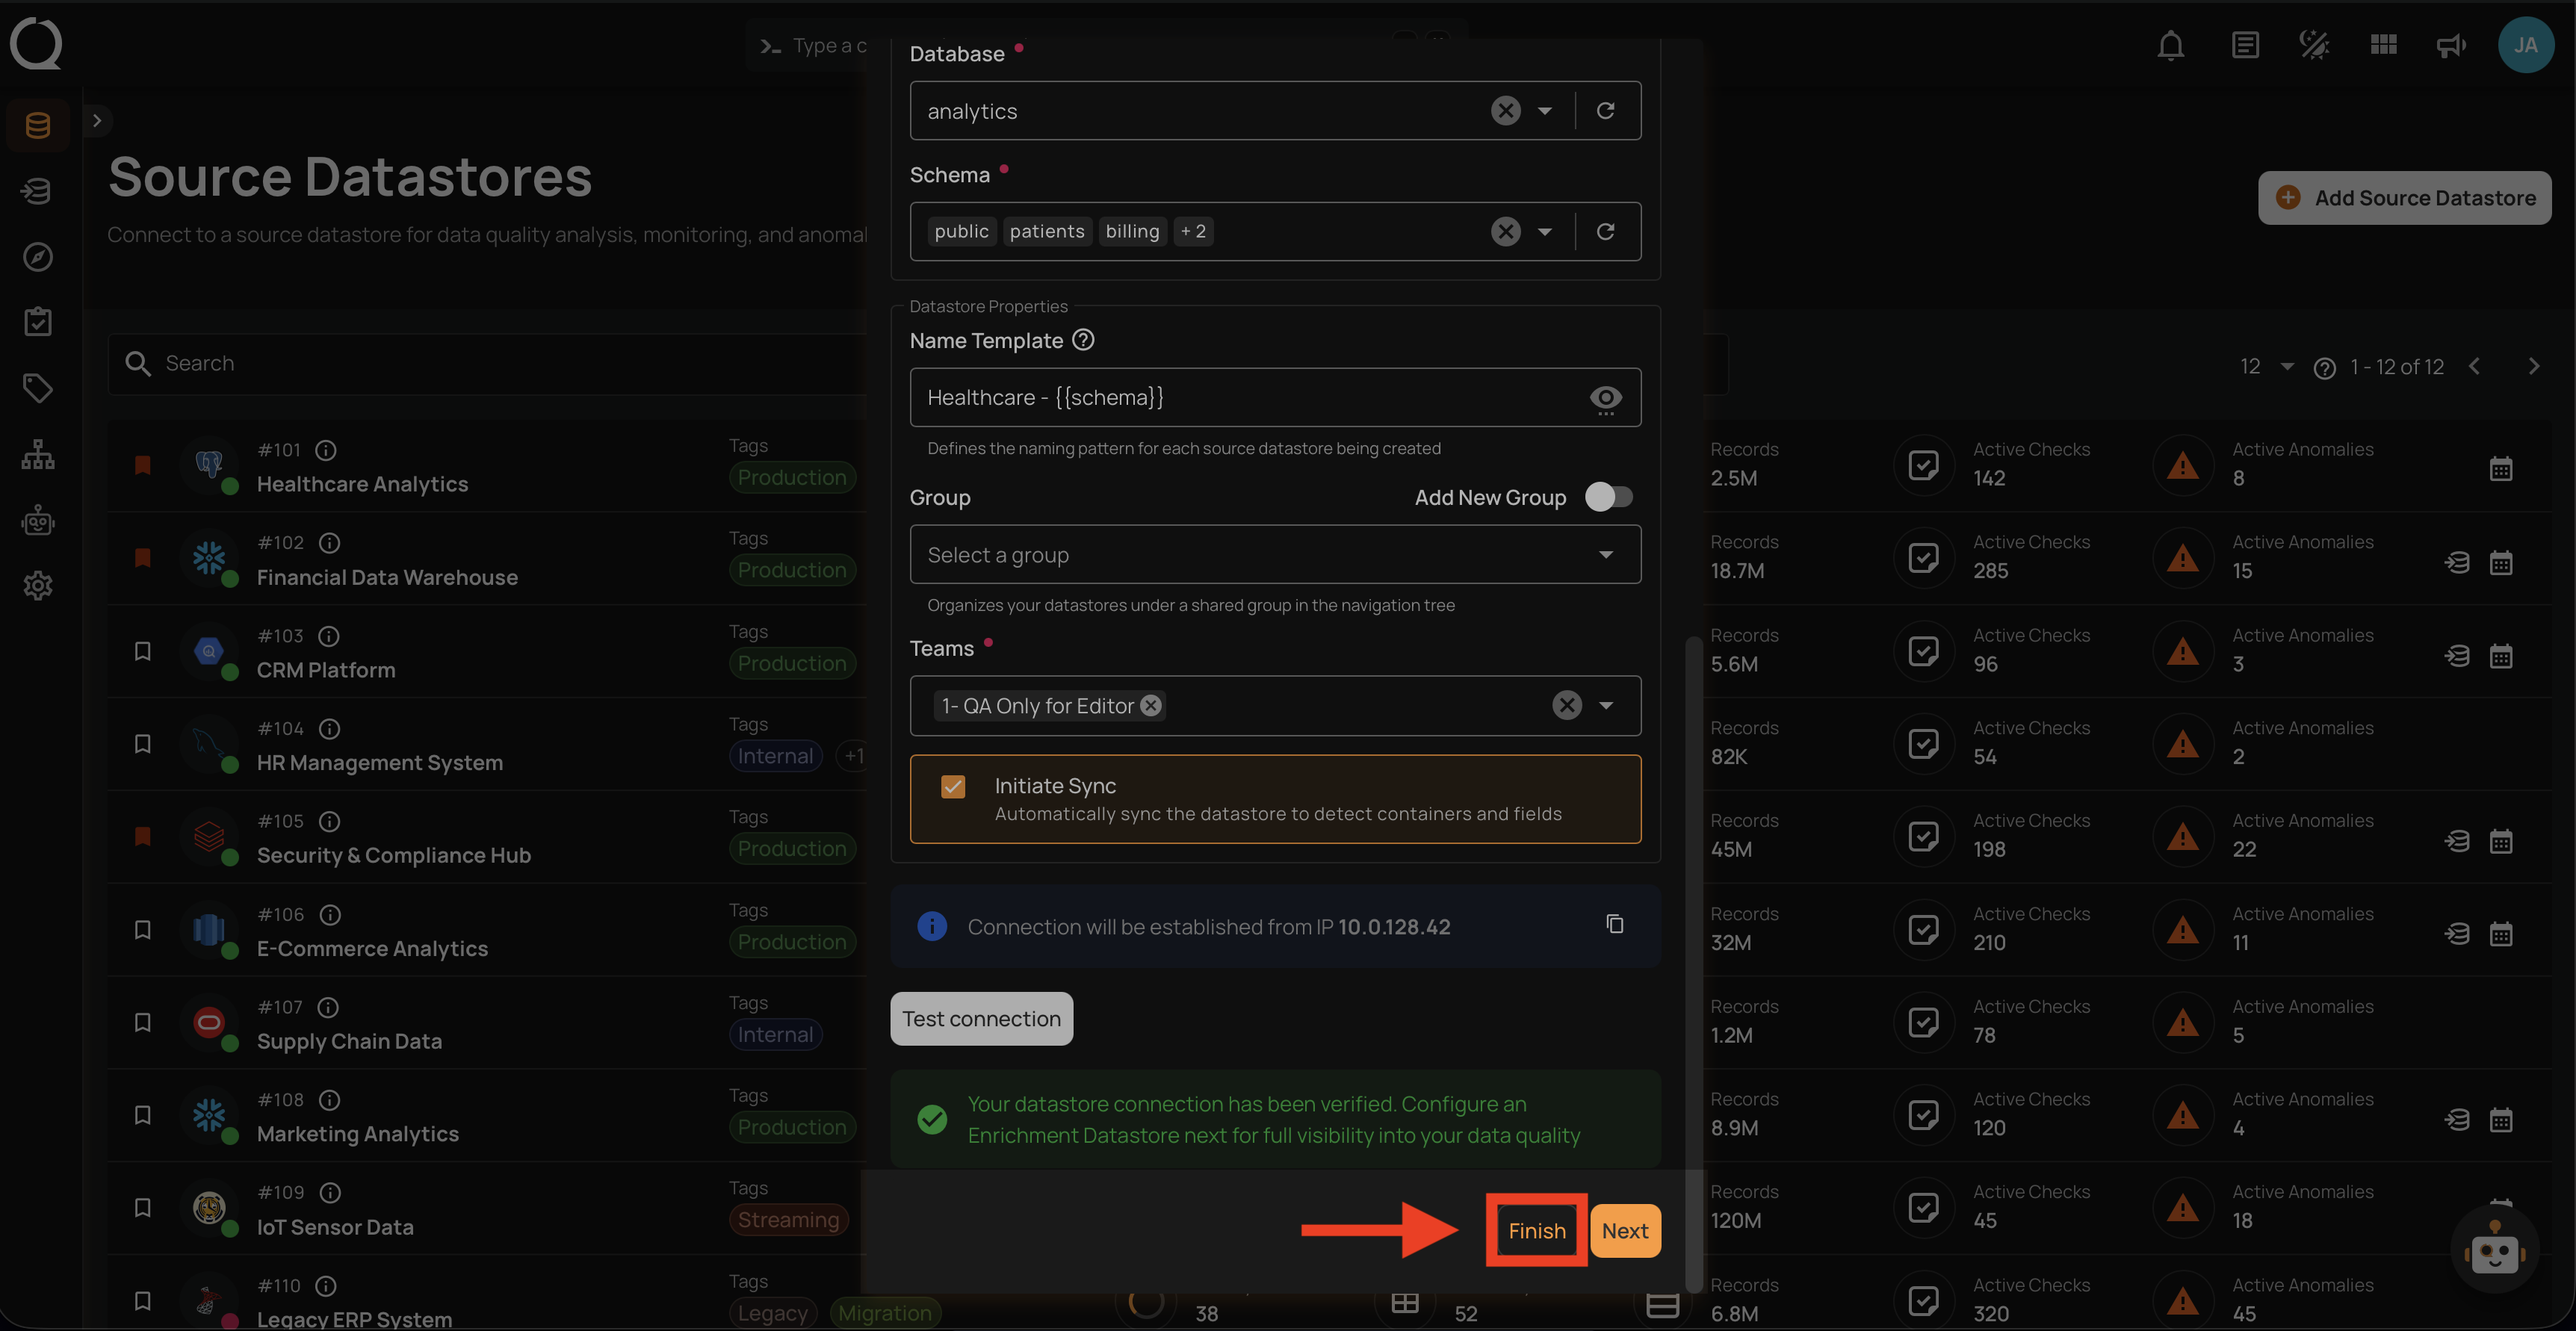
Step 5: Once the connection is verified, click the Finish button to complete the process.
Link an Enrichment Datastore
Before clicking Finish, you can optionally link an enrichment datastore to persist scan results and anomalies from the very first operation. See the Link Enrichment on Datastore Creation documentation.
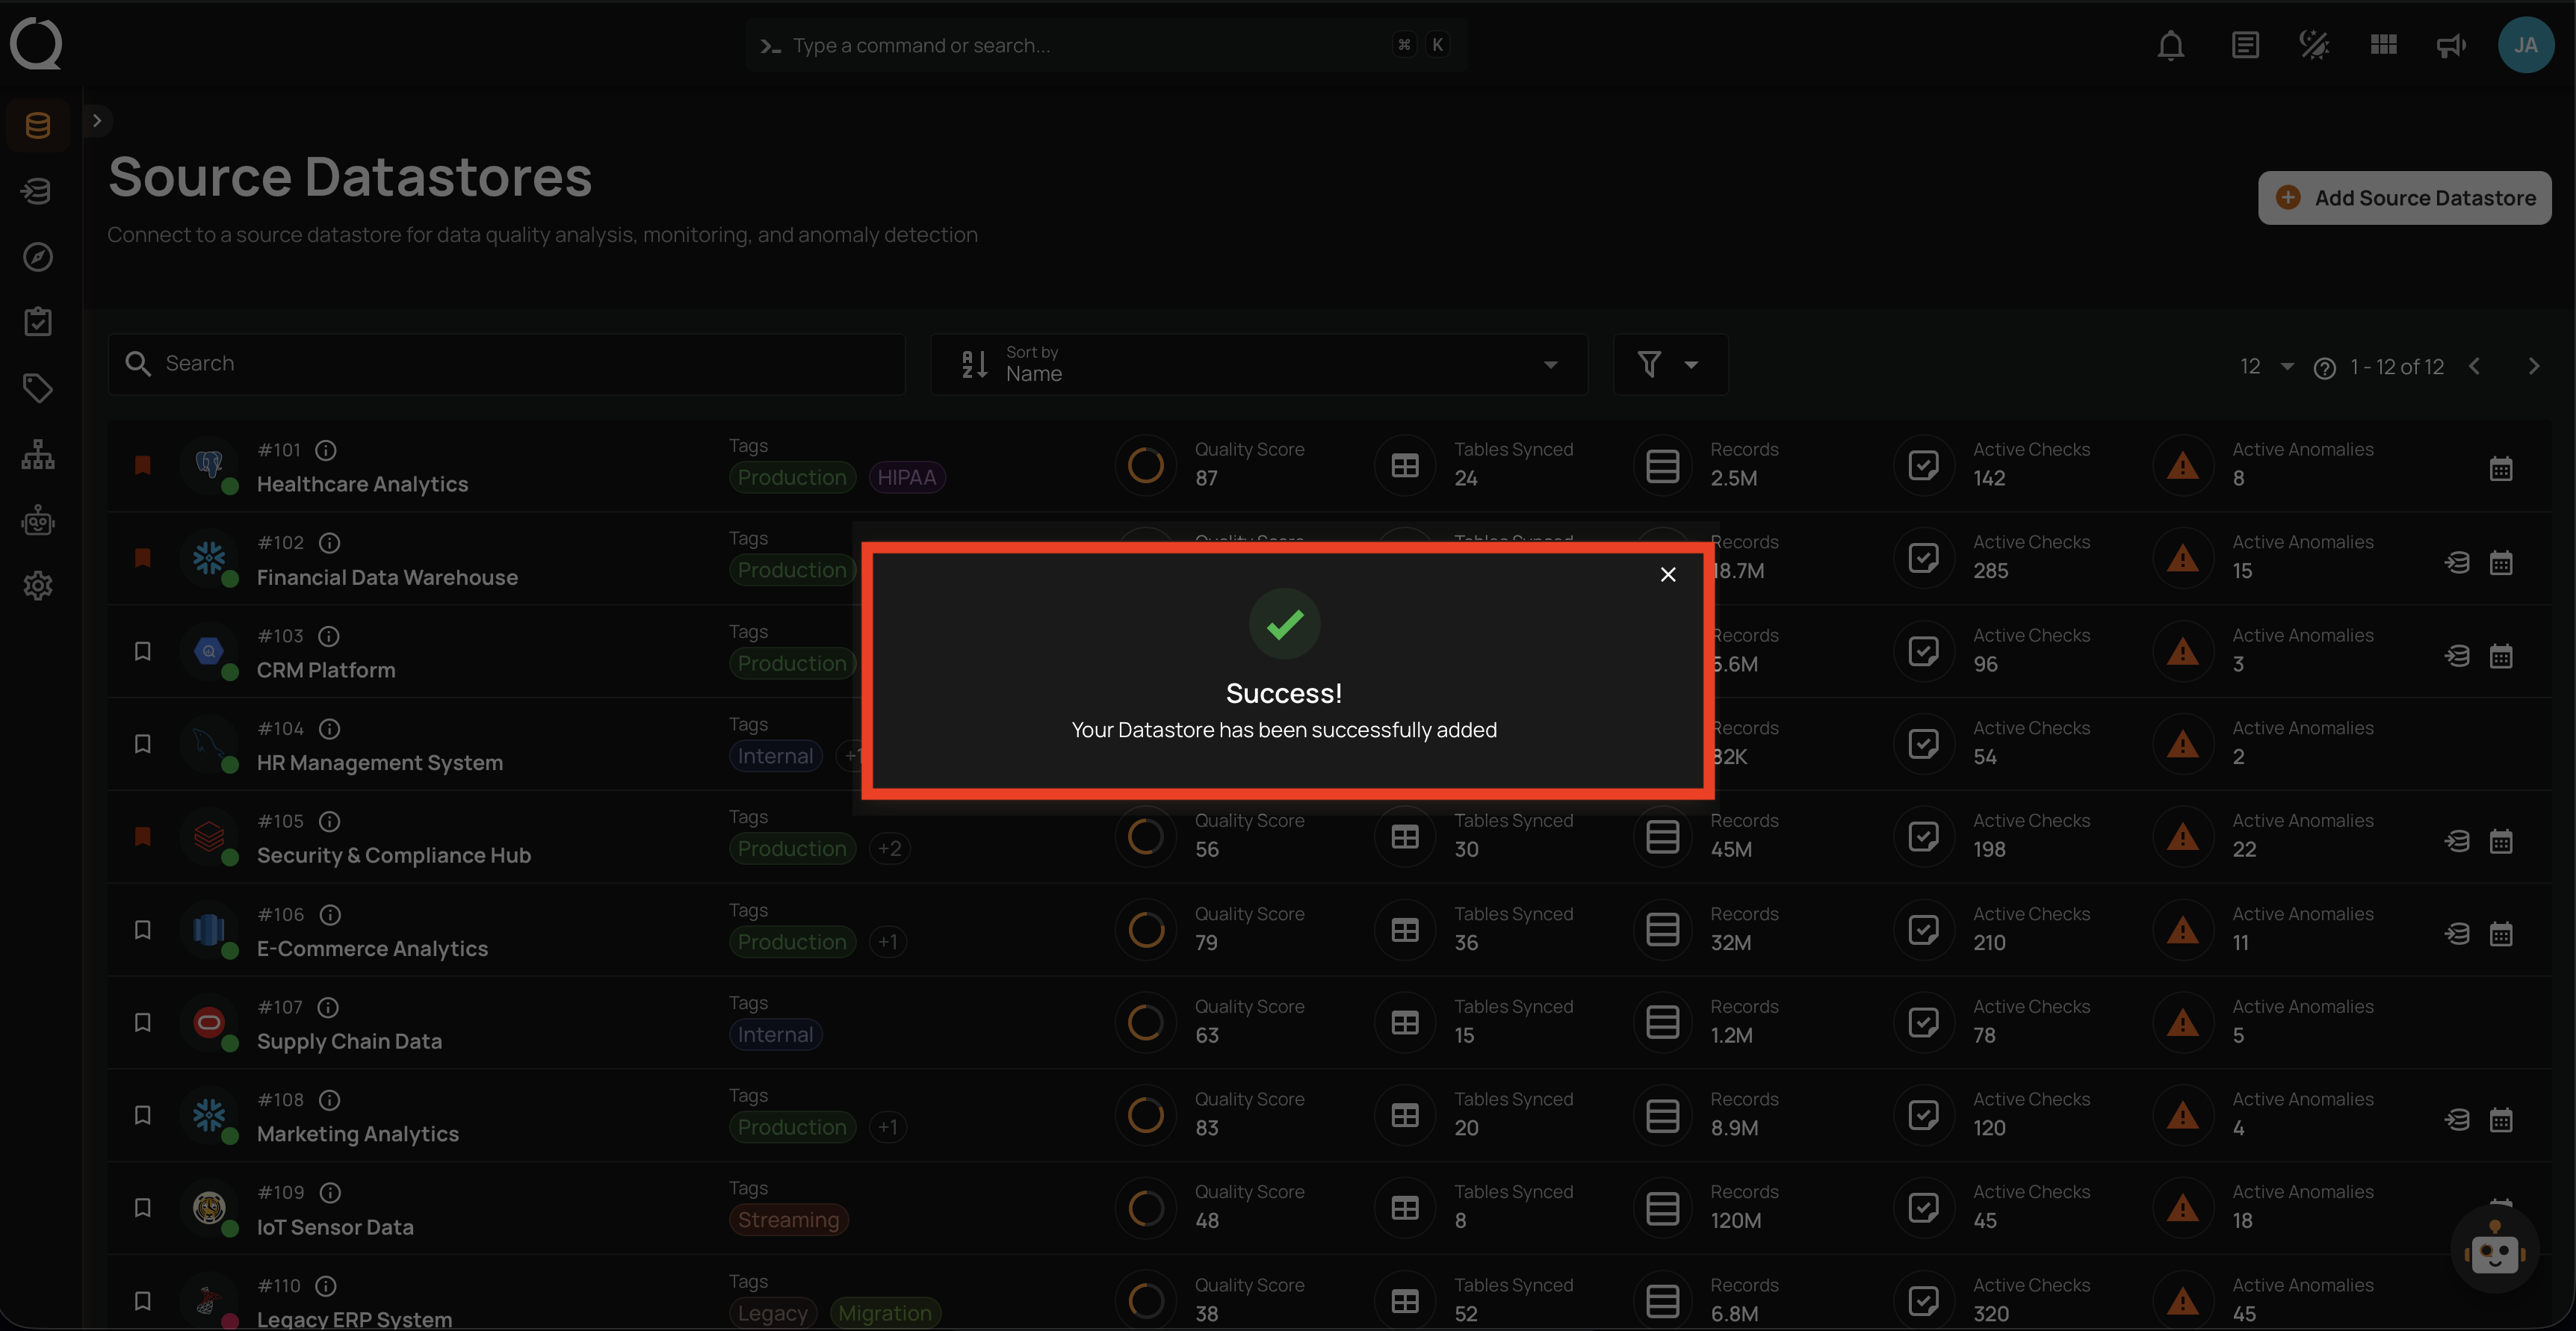
Step 6: A success message will appear indicating that your datastore has been successfully added.