Microsoft Purview Integration
Integrating Microsoft Purview with Qualytics enables seamless metadata synchronization between the two platforms. Once connected, Qualytics can push quality scores, anomaly data, and metadata to your Purview catalog, providing a unified view of data quality across your organization.
Let's get started 🚀
Prerequisites
Before you begin, ensure that:
-
You already have a Microsoft Purview account
-
You have permission to:
- Create App Registrations in Microsoft Entra ID
- Assign roles in the Purview governance portal (Collections)
Azure Setup
Before connecting Purview to Qualytics, you need to create a service principal in Azure and configure the necessary permissions.
Create a Service Principal
Qualytics uses a service principal to securely authenticate with Microsoft Purview APIs.
Step 1: Sign in to the Azure portal.

Step 2: Navigate to Microsoft Entra ID and select App registrations from the left sidebar.
Step 3: Click New registration.

Step 4: Fill in the registration form with the following details:
| Field | Value |
|---|---|
| Name | Qualytics-Purview-Integration (or any descriptive name) |
| Supported account types | Accounts in this organizational directory only (Single tenant) |
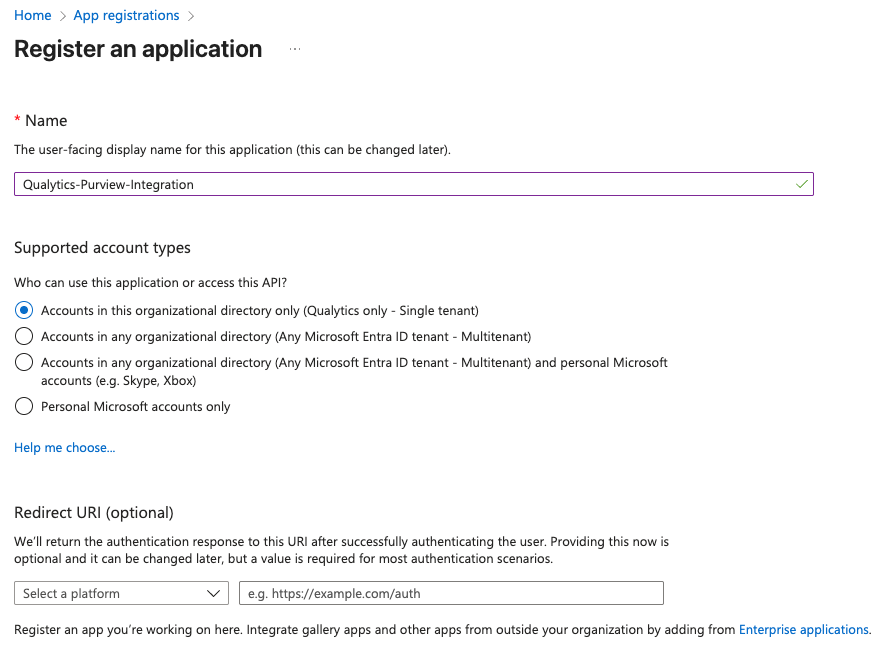
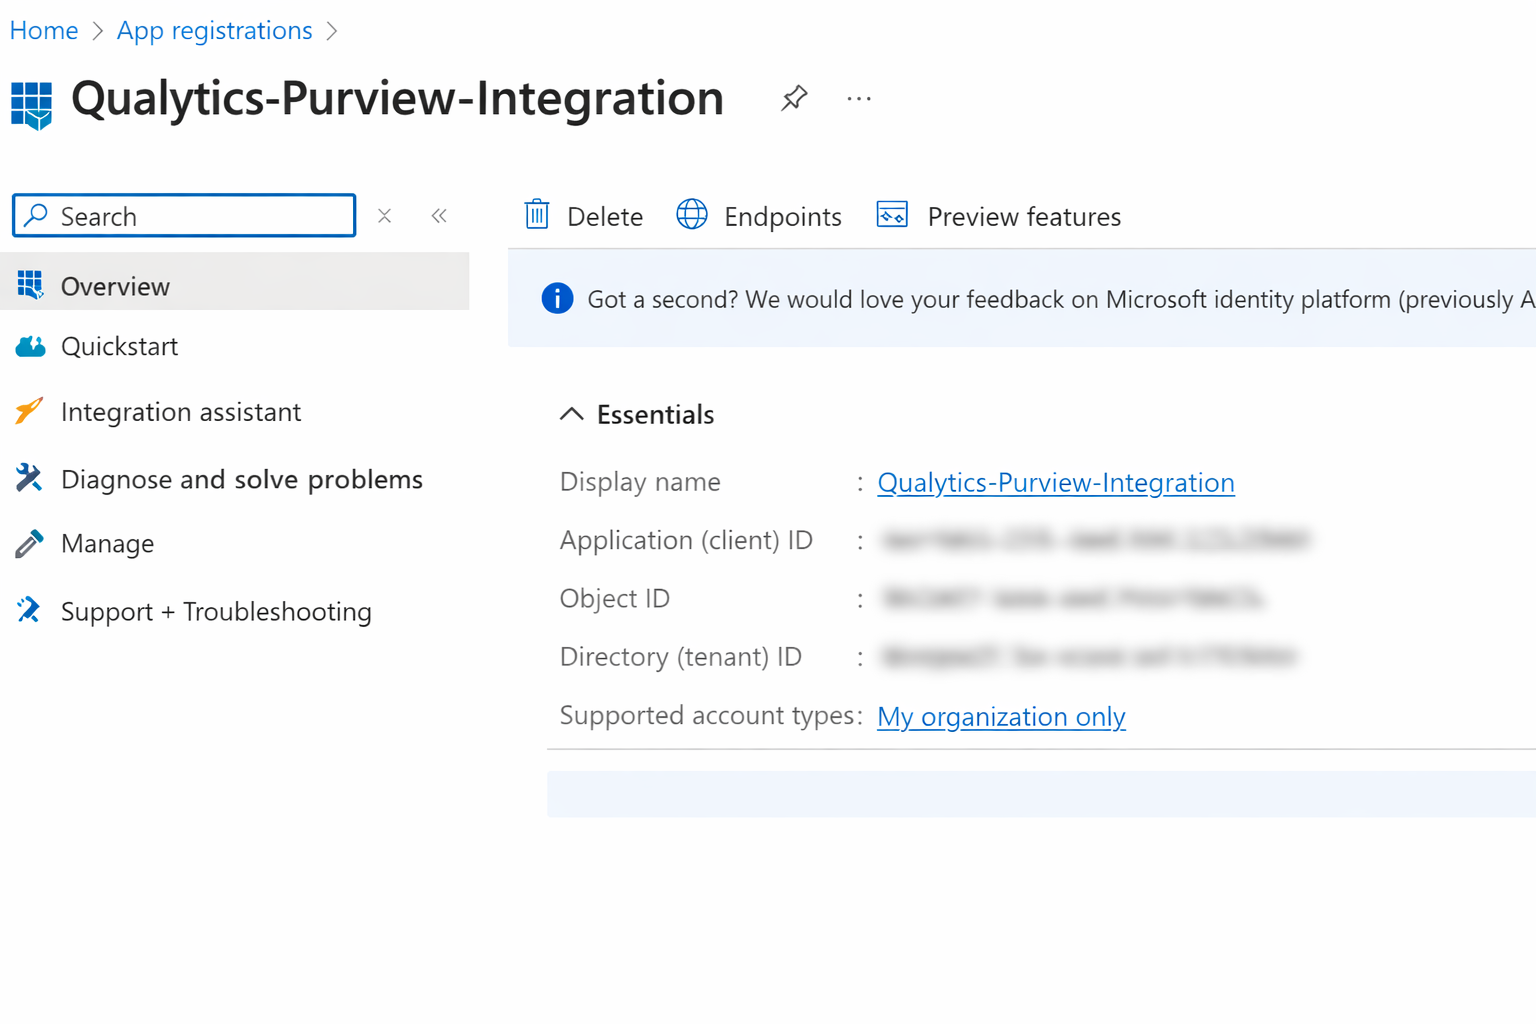
Step 5: Click Register. After registration, save the Application (client) ID — you will need this later.
Generate a Client Secret
Step 1: In the app registration, go to Certificates & secrets in the left sidebar.
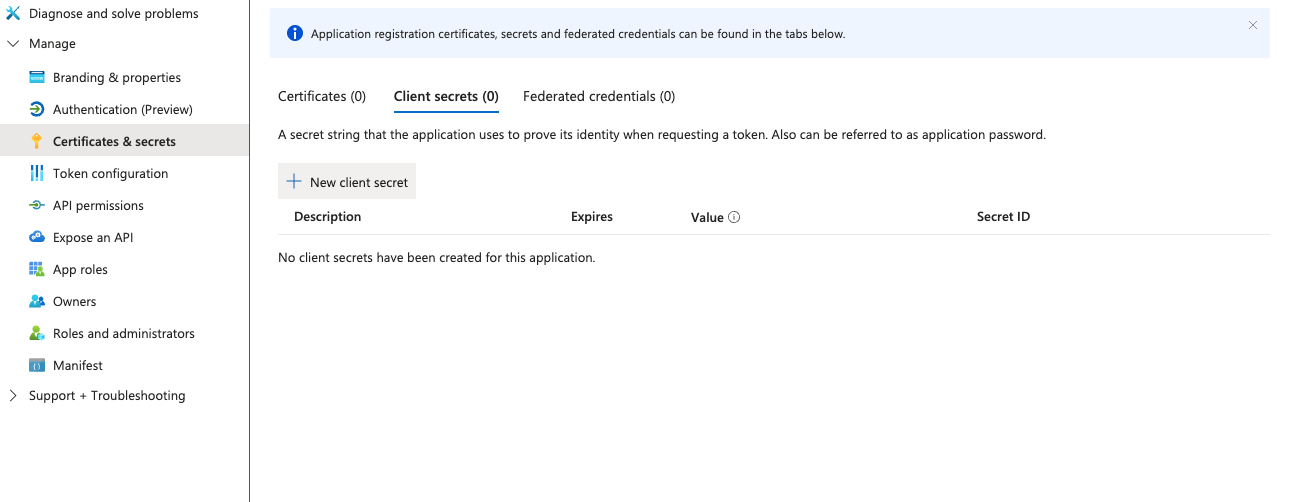
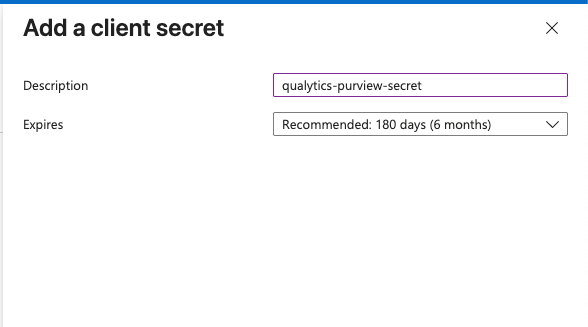
Step 2: Click New client secret, provide a description, select an expiration period, and click Add.
Step 3: Copy the Value immediately and store it securely.
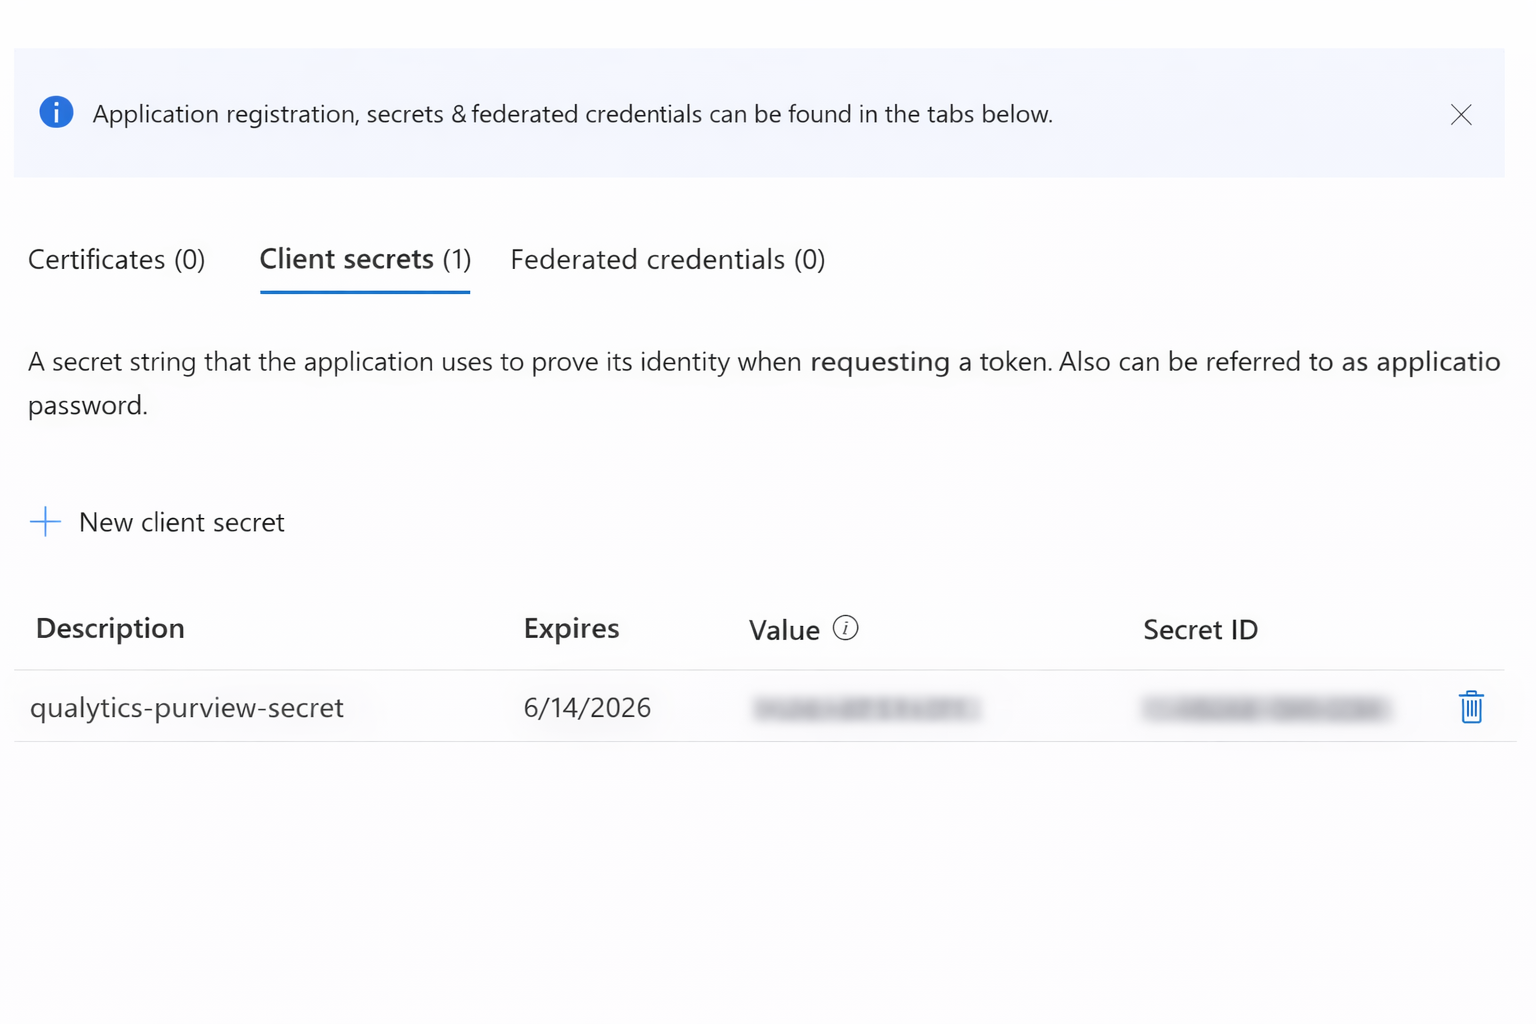
Important
The client secret value is shown only once. Store it securely. This value is your client_secret.
Configure API Permissions
Step 1: In the app registration, open API permissions from the left sidebar and click Add a permission.
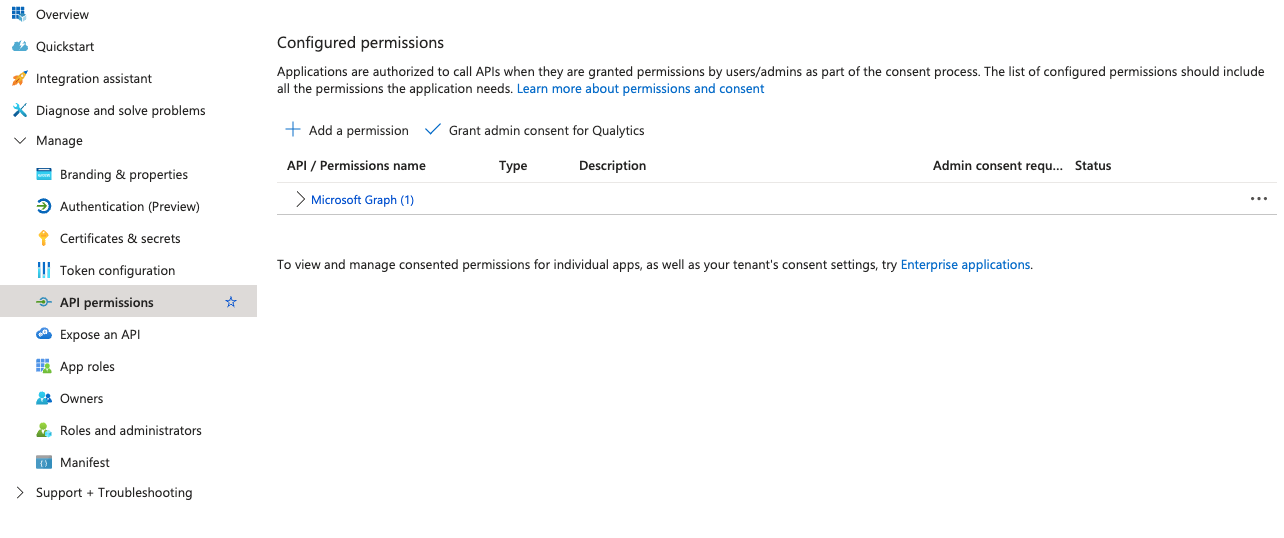
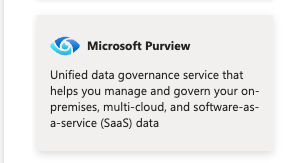
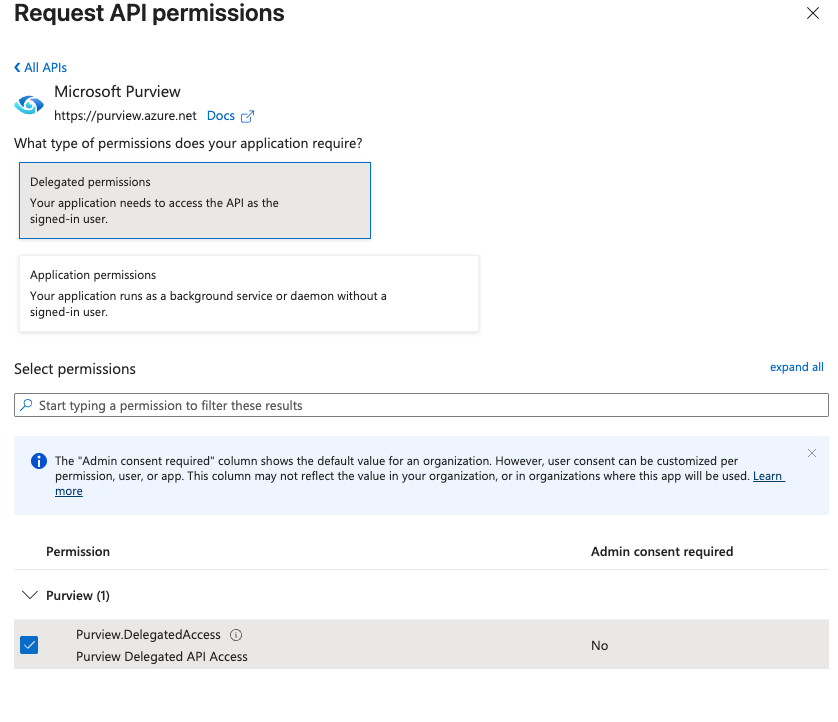
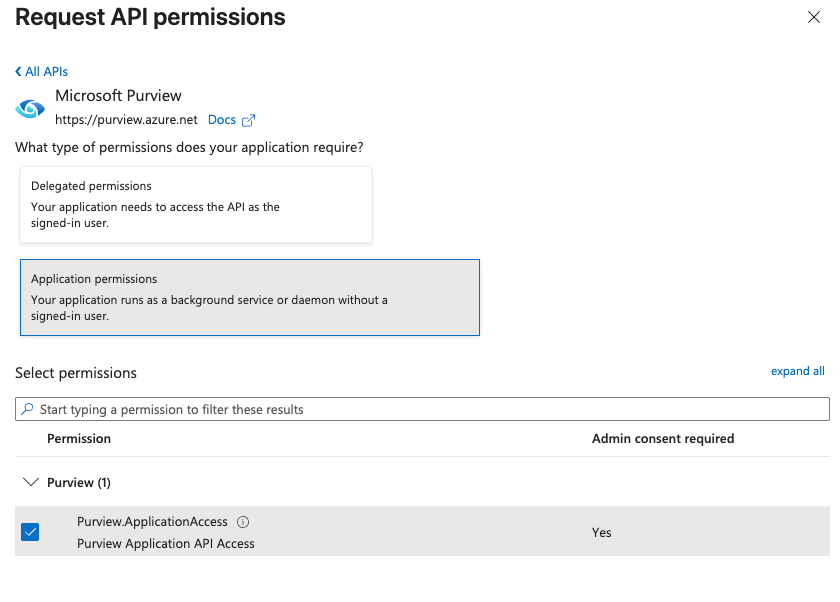
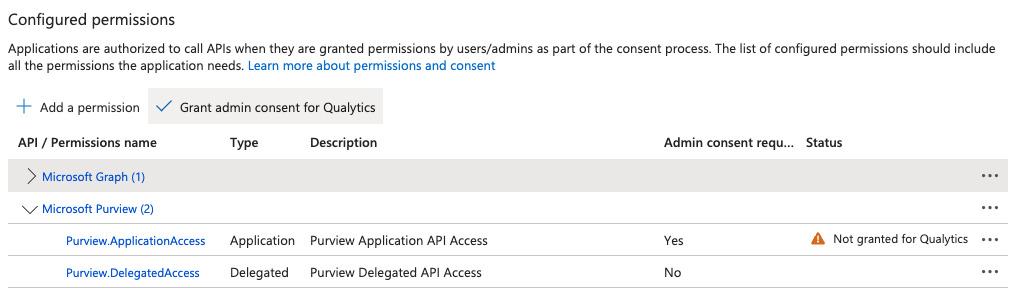
Step 2: Search for and select Microsoft Purview, then add the following permissions:
| Permission Type | Permission Name |
|---|---|
| Delegated permissions | Purview.DelegatedAccess |
| Application permissions | Purview.ApplicationAccess |
Step 3: Click Add permissions, then click Grant admin consent and confirm the action.

Purview Setup
After creating the service principal, you need to assign the appropriate roles in the Purview governance portal.
Assign Collection Roles
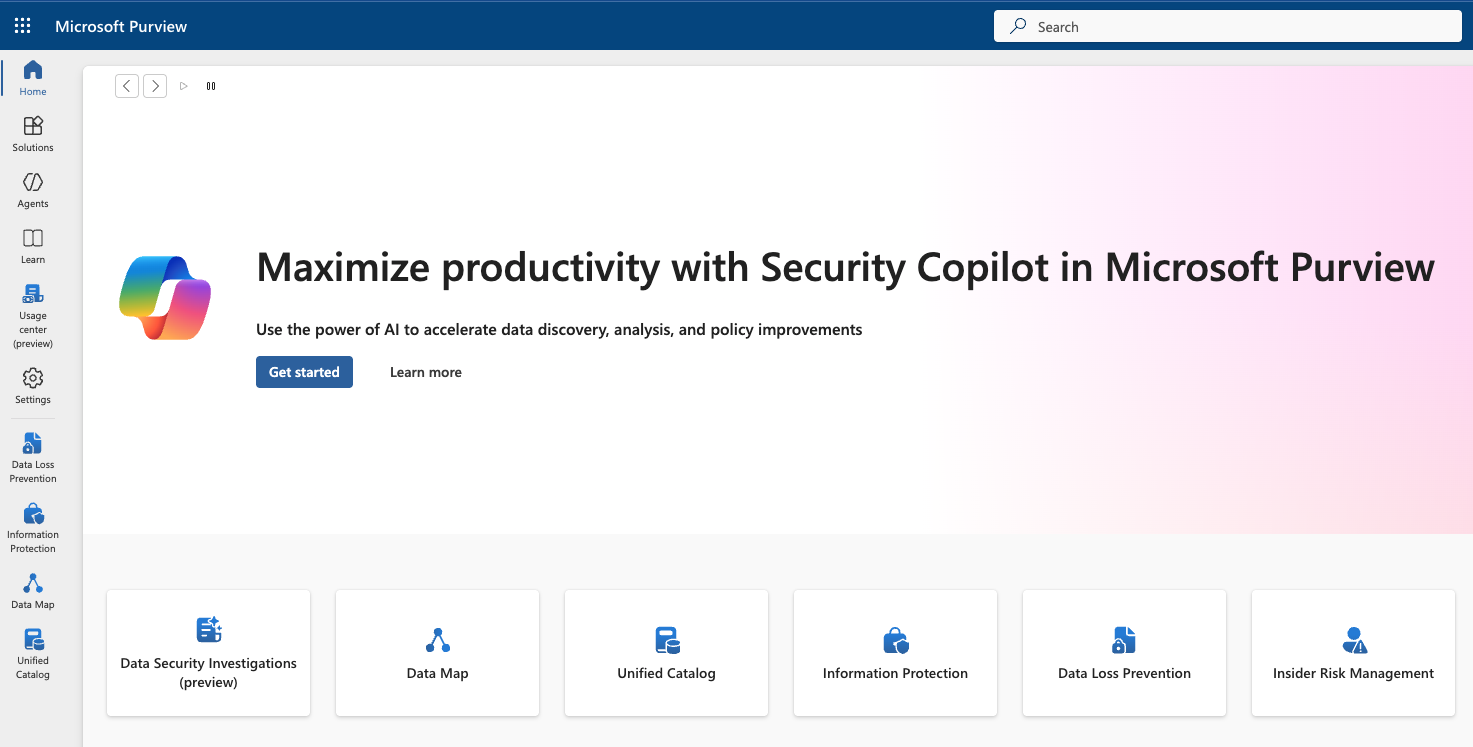
Step 1: Open the Microsoft Purview governance portal.
Step 2: Select Data Map from the navigation, then click Collections.
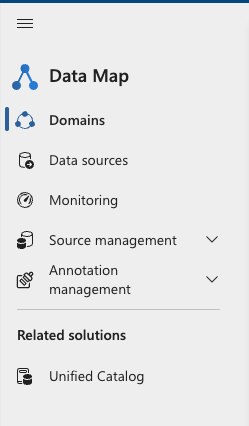
Step 3: Select the root collection (the top-level collection with the same name as your Purview account).
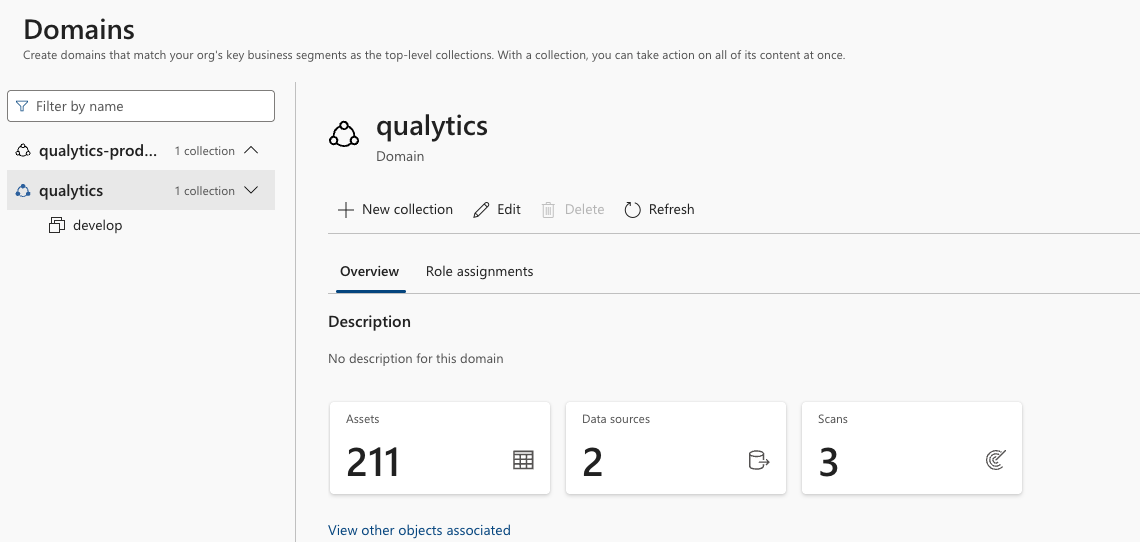
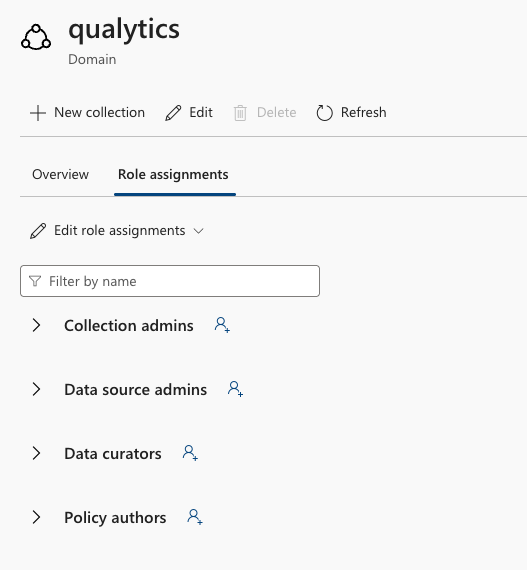
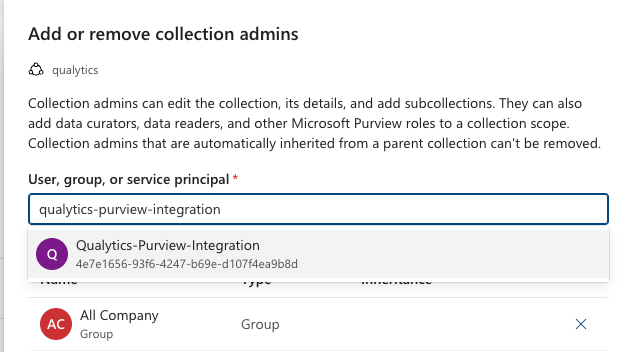
Step 4: Open the Role assignments tab and assign the following roles to the service principal:
| Role | Purpose |
|---|---|
| Data Curator | Access Catalog data plane |
| Data Source Administrator | Access Scanning data plane |
| Collection Admin | Access Account & Metadata policy data planes |
| Policy Author | Access DevOps policies API |
Note
You may assign roles to a sub-collection instead of the root collection, but API access will be limited to that scope.
Gather Connection Details
Step 1: In the Azure portal, open your Purview account and go to Settings and properties.
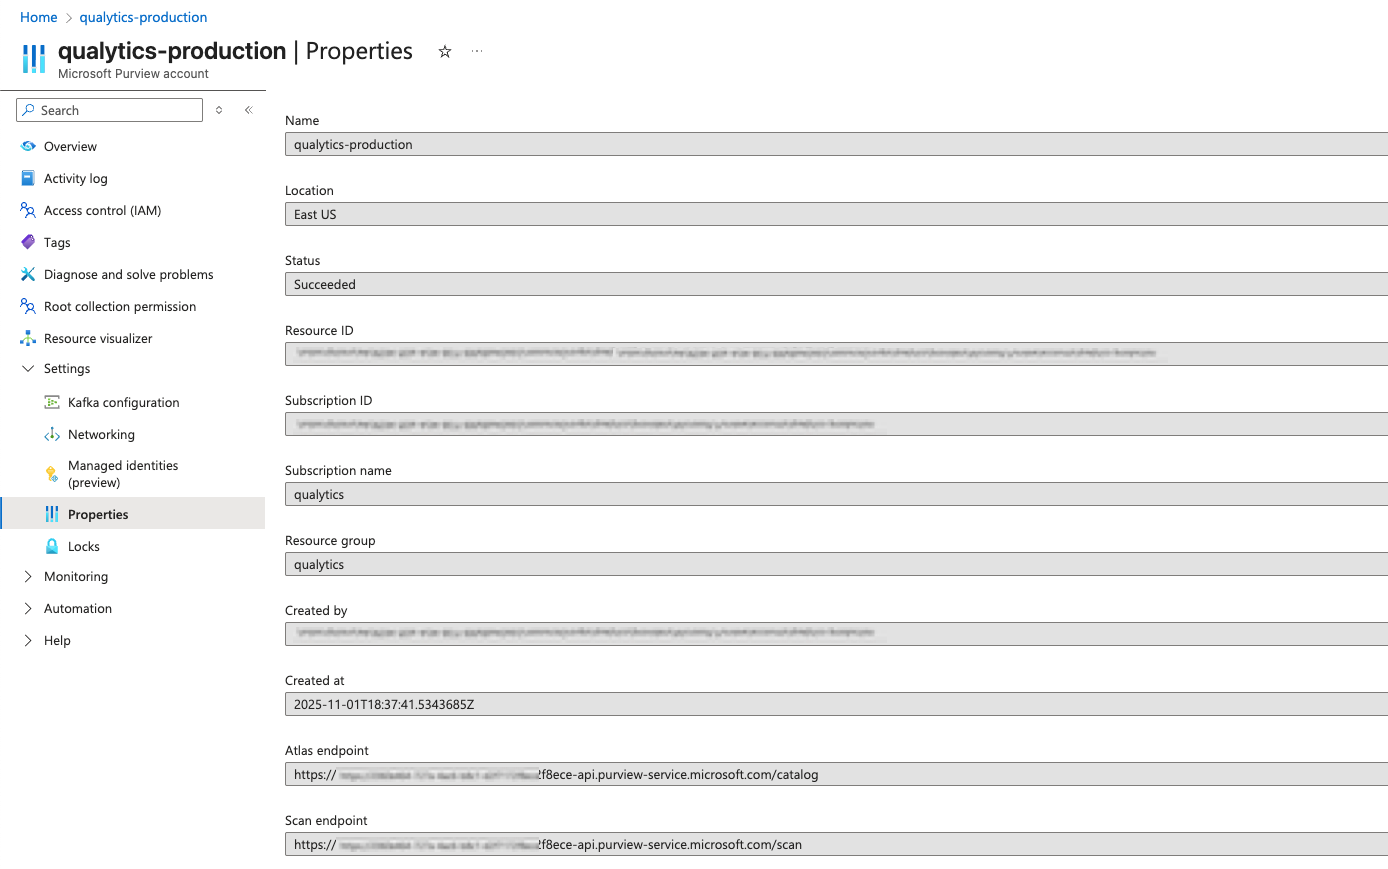
Step 2: Copy the Atlas endpoint and remove /catalog from the end of the URL.
Example:
Step 3: Copy the Managed Identity tenant ID from the same page.
Add Purview Integration
Now you can configure the integration in Qualytics using the credentials you gathered.
Step 1: Log in to your Qualytics account and click Settings on the left side panel.
Step 2: Click on the Integration tab.
Step 3: Click the Connect button next to Microsoft Purview.
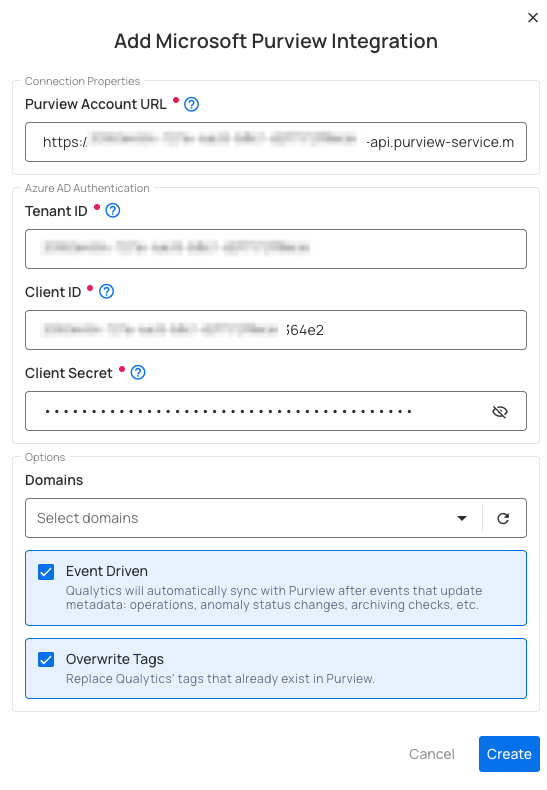
A modal window titled Add Purview Integration appears. Fill in the connection properties:
| REF. | Field | Description |
|---|---|---|
| 1. | Purview Account URL | The Atlas endpoint without /catalog (e.g., https://your-account.purview.azure.com) |
| 2. | Tenant ID | The Managed Identity tenant ID from your Purview account |
| 3. | Client ID | The Application (client) ID from your app registration |
| 4. | Client Secret | The client secret value you generated |
| 5. | Domains | Select specific collections or scopes to filter assets for synchronization. Only assets within the selected collections will be matched with your Qualytics resources. If no domains are selected, all collections are searched. |
| 6. | Event Driven | When turned on, Qualytics will automatically send updates to Purview whenever scans complete, anomalies are detected, or checks are archived (default: on). For more details, see Event Driven. |
| 7. | Overwrite Tags | When turned on, existing Qualytics tags with the same name are converted into external tags managed by the Purview integration. When turned off, the existing Qualytics tag is left unchanged and the Purview tag is skipped (default: off). For more details, see Overwrite Tags. |
Step 4: Click Save to create the integration.

Step 5: Once the integration is set up, it will appear in your integrations list.
Integration Complete
Your Microsoft Purview account is now successfully connected to Qualytics and ready for catalog, scanning, and governance operations.
Domain Filters
Domain filters control which Purview assets Qualytics will look at during synchronization. Understanding how they work is key to getting the sync configured correctly.
How Domain Filters Work
In Microsoft Purview, assets are organized under Collections and can be scoped by classification. When you set up the Purview integration in Qualytics, you select one or more collections. During sync, Qualytics will only search for matching assets within those selected collections — everything outside them is ignored.
When to Use Domain Filters
Use domain filters when you want to:
- Focus on specific areas — For example, if your Purview account has many collections but you only care about syncing quality data for your production databases, select just the collections that contain those data sources.
- Avoid noise — Filtering prevents Qualytics from trying to match assets in collections that are unrelated to your data quality workflows (e.g., sandbox or development collections).
- Speed up sync — A narrower collection scope means fewer assets to search through, which makes the sync faster.
When to Remove or Broaden Domain Filters
Remove or expand your domain filter if:
- Nothing is syncing — This is the most common issue. If you selected a collection that has no data sources, tables, or columns in it, Qualytics won't find any assets to match and the sync will complete with no results. Check your selected collections in Purview and make sure they actually contain the assets you expect.
- Only some datastores are syncing — Your assets may be spread across multiple collections. Add the missing collections to your filter to pick up the rest.
- You're unsure which collections to pick — You can temporarily select all available collections to let Qualytics find every possible match, then narrow it down later once you know which collections contain your target assets.
Common Pitfall
If you select a collection that is empty or contains no data assets (data sources, tables, or columns), the sync will complete successfully but no resources will be matched or updated. Always verify that your selected collections contain the assets that correspond to your Qualytics datastores.
How to Change Your Domain Filter
Step 1: Go to Settings > Integrations and click the Edit button (pencil icon) on your Purview integration.
Step 2: In the Domains field, add or remove collections as needed. You can search by collection name to find the right ones.
Step 3: Click Save, then run a manual sync to verify the updated filter is working as expected.
Finding the Right Collections
If you're not sure which Purview collections contain your assets, open the Purview governance portal and browse the Data Map. Look for the collections that hold the data sources, tables, and columns that match the datastores you've set up in Qualytics.
Synchronization
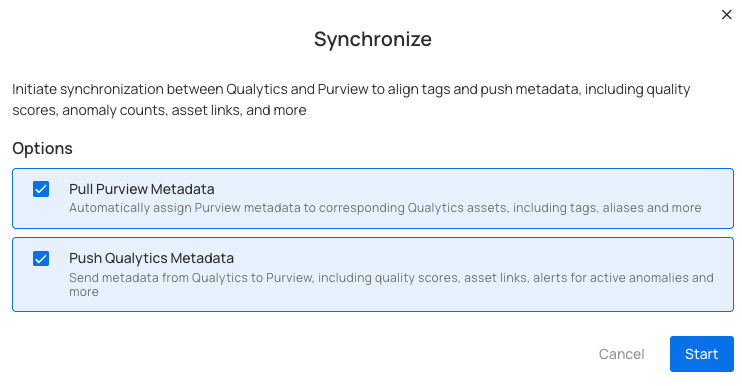
Once connected, you can sync data between Qualytics and Purview in two directions:
- Pull brings information from Purview into Qualytics (like tags and classifications)
- Push sends Qualytics quality results to Purview (like scores and anomaly counts)
What Gets Synced
| Direction | What | Description |
|---|---|---|
| Pull (Purview → Qualytics) | Tags | Classifications and labels on Purview assets are imported into Qualytics as external tags, keeping your governance labels visible in both platforms. |
| Push (Qualytics → Purview) | Quality Score | An overall data quality score (0-100) for the asset. |
| Push (Qualytics → Purview) | Anomaly Count | How many active data quality issues exist for the asset. |
| Push (Qualytics → Purview) | Check Count | How many quality checks are actively monitoring the asset. |
| Push (Qualytics → Purview) | Qualytics Link | A direct link back to the asset in Qualytics so users can jump straight to the details. |
How Qualytics Matches Assets
During sync, Qualytics automatically matches your resources to the corresponding assets in Purview based on their names:
| Your Qualytics Resource | Matches These Purview Assets |
|---|---|
| Datastore | Data Source |
| Container (table) | Entity (Table, View) |
| Field (column) | Column |
The matching works by comparing names in a database.schema.table.column pattern. For example, if you have a Qualytics datastore connected to finance_db.dbo, it will look for a Purview entity with the same naming structure in your selected collections.
Note
Currently, only database-type datastores are supported for catalog sync. File-based datastores are not yet included.
Manual Sync
You can trigger a sync at any time to pull the latest information from Purview or push your quality results.
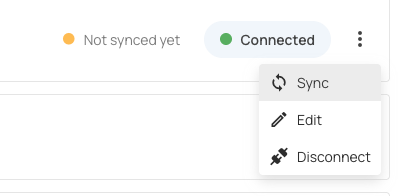
Step 1: Click the vertical ellipsis next to the Purview integration and select Sync from the dropdown.
Step 2: Select the synchronization options and click Start.
Note
Pulling tags from Purview requires a manual sync. Even with Event Driven turned on, tag imports only happen when you manually trigger a sync.
Cancel Sync
If a sync is taking longer than expected, you can stop it at any time.
Click the vertical ellipsis (three dots) next to the Purview integration and select Cancel Sync. The process will stop gracefully after finishing the current datastore.
Metadata in Purview
When Qualytics pushes quality results to Purview, it adds custom attributes to your Purview assets. These are created automatically during the first sync if they don't already exist.
Attributes Added to Purview Assets
| Attribute | Description |
|---|---|
| Qualytics Quality Score | The overall quality score (0-100) calculated by Qualytics |
| Qualytics Anomaly Count | The number of active data quality issues detected |
| Qualytics Check Count | The number of active quality checks monitoring the asset |
| Qualytics URL | A clickable link to view the asset directly in Qualytics |
These attributes appear at every level of your data:
- Datastores - Overall quality score and totals across all tables
- Tables - Quality score and counts specific to each table
- Columns - Quality score and counts specific to each column
External Tags
When you pull metadata from Purview, any classifications and labels on Purview assets are imported into Qualytics as external tags. These are visually distinct from regular Qualytics tags, so you can easily tell which labels came from your data catalog.
How external tags work:
- Classifications from Purview are automatically linked to the matching Qualytics resource (datastore, table, or column)
- If a classification is removed from a Purview asset, it will also be removed from Qualytics on the next sync
- Classifications that no longer exist in Purview are automatically cleaned up
- External tags on tables do not automatically carry over to their columns
Tip
Use the Overwrite Tags setting to control what happens when both platforms have tags with the same name. When off, the existing Qualytics tag is kept and the Purview classification is skipped. When on, the existing tag is converted into an external tag managed by Purview. For more details, see Overwrite Tags.
Known Limitations
| Limitation | Details |
|---|---|
| Database-type datastores only | Only database datastores (e.g., Azure SQL, Synapse, SQL Server) are supported for sync. File-based datastores are not yet included. |
| Push-only for event-driven sync | When Event Driven is turned on, Qualytics only pushes data to Purview. Pulling classifications from Purview still requires a manual sync. |
| Name-based asset matching | Qualytics matches assets by comparing names (database, schema, table, column). If naming conventions differ between Purview and your datastores, some assets may not match automatically. |
| No column-level tag pull for all catalogs | Tags are pulled at the datastore, table, and column level, but the depth of tag coverage depends on how your Purview assets are classified. |
| Single sync at a time | Only one sync can run at a time per integration. If a sync is already in progress, you'll need to wait for it to finish or cancel it before starting a new one. |
| No custom attribute mapping | The attributes pushed to Purview (Quality Score, Anomaly Count, Check Count, URL) are fixed. Custom attribute mapping is not yet supported. |
Troubleshooting
Common Issues
| Issue | Possible Cause | What to Do |
|---|---|---|
| Authentication Failed | Incorrect credentials or expired secret | Verify that the Client ID and Client Secret are correct and the secret has not expired. Generate a new secret in the Azure portal if needed. |
| Insufficient Permissions | Missing role assignments | Ensure all required roles (Data Curator, Data Source Administrator, Collection Admin, Policy Author) are assigned to the service principal in Purview. |
| Invalid Endpoint | Wrong Purview URL format | Confirm the Purview Account URL does not include /catalog at the end. |
| Tenant Mismatch | Wrong Tenant ID | Verify the Tenant ID matches your Azure Active Directory tenant. |
| Sync Completes but Nothing Appears in Purview | Wrong collections selected | Make sure the collections you selected actually contain the assets that correspond to your Qualytics datastores. |
| Some Assets Not Updated | No matching assets found | Check that the asset names in Purview (data sources, tables, columns) match the names used in your Qualytics datastores. |
| Sync Takes Too Long | Too many assets in scope | Narrow your collection selection to focus on the most important assets. You can always cancel and retry with a smaller scope. |
Tip
You can view detailed sync logs by clicking on the Purview integration card. The logs show a summary for each datastore, including how many tables, columns, and tags were synced, along with any errors. If you encounter persistent issues, check the Azure portal for any error messages in the app registration's sign-in logs.
Examples
Asset Matching Example
The following example shows how Qualytics maps an Azure SQL database to Purview assets during synchronization.
Source database: Azure SQL datastore finance_db.dbo containing a table transactions with a column amount.
During sync, Qualytics matches resources using the naming hierarchy:
| Qualytics Resource | Name | Matched Purview Asset | Purview Asset Type |
|---|---|---|---|
| Datastore | finance_db.dbo |
finance_db → dbo |
Data Source → Schema |
| Container | transactions |
transactions |
Entity (Table) |
| Field | amount |
amount |
Column |
Qualytics walks through each level of the hierarchy — Data Source, Schema, Entity, Column — and matches by name within the selected collections.
End-to-End Sync Scenario
This example walks through a complete synchronization workflow between Qualytics and Microsoft Purview.
Step 1: Connect the integration
Set up the Purview integration with your Client ID, Client Secret, and Tenant ID. Select the relevant collections (e.g., the "Finance" collection containing your production database assets).
Step 2: Run a manual pull sync
Trigger a pull sync from Purview. Qualytics scans the selected collections and matches Purview assets to your datastores. Classifications assigned to Purview assets (e.g., Confidential, Financial Data) appear in Qualytics as external tags on the matched datastores, tables, and columns.
Step 3: Run a scan in Qualytics
Execute a scan operation on your datastores. Qualytics evaluates your quality checks and generates quality scores, anomaly counts, and check counts for each table and column.
Step 4: Run a push sync
Trigger a push sync (or let Event Driven handle it automatically). Qualytics sends the following metadata to the matched Purview assets:
- Quality Score (0-100) at the datastore, table, and column level
- Anomaly Count per asset
- Check Count per asset
- Qualytics URL linking back to the asset in Qualytics
Step 5: View results in Purview
In the Purview governance portal, navigate to the matched entity (e.g., transactions). Under the asset details, you will see the Qualytics quality score, anomaly count, check count, and a direct link to view the asset in Qualytics.