Add Tag
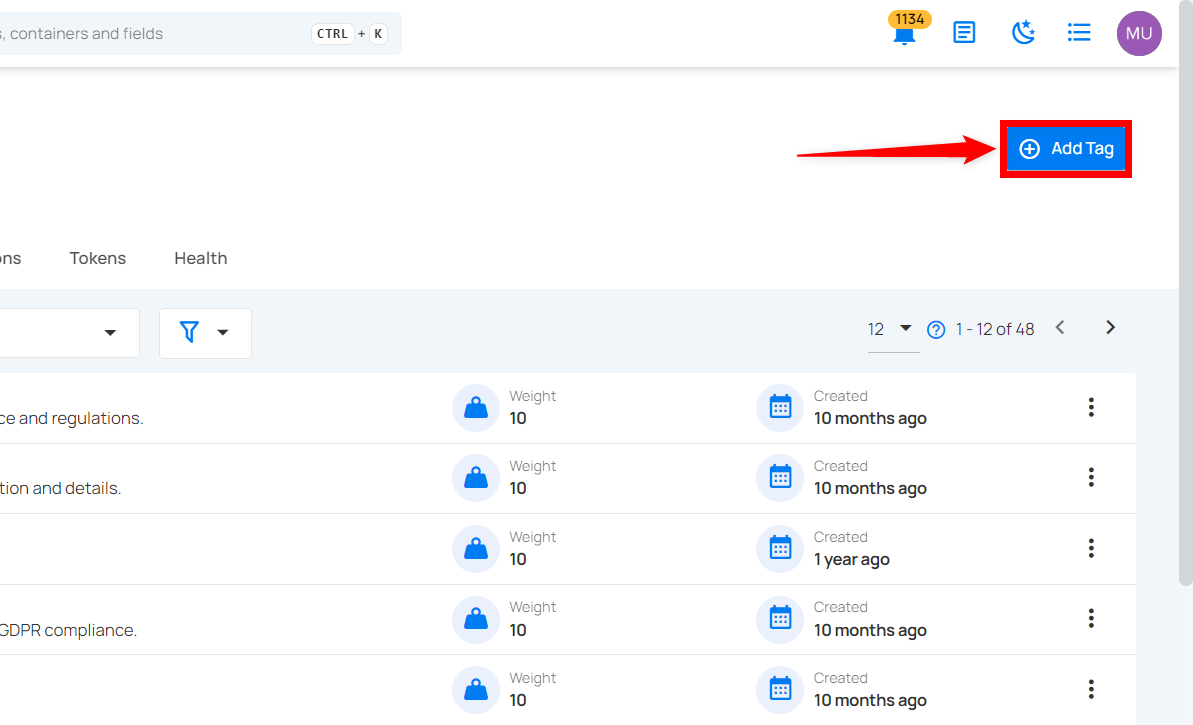
Step 1: Click on the Add Tag button from the top right corner.
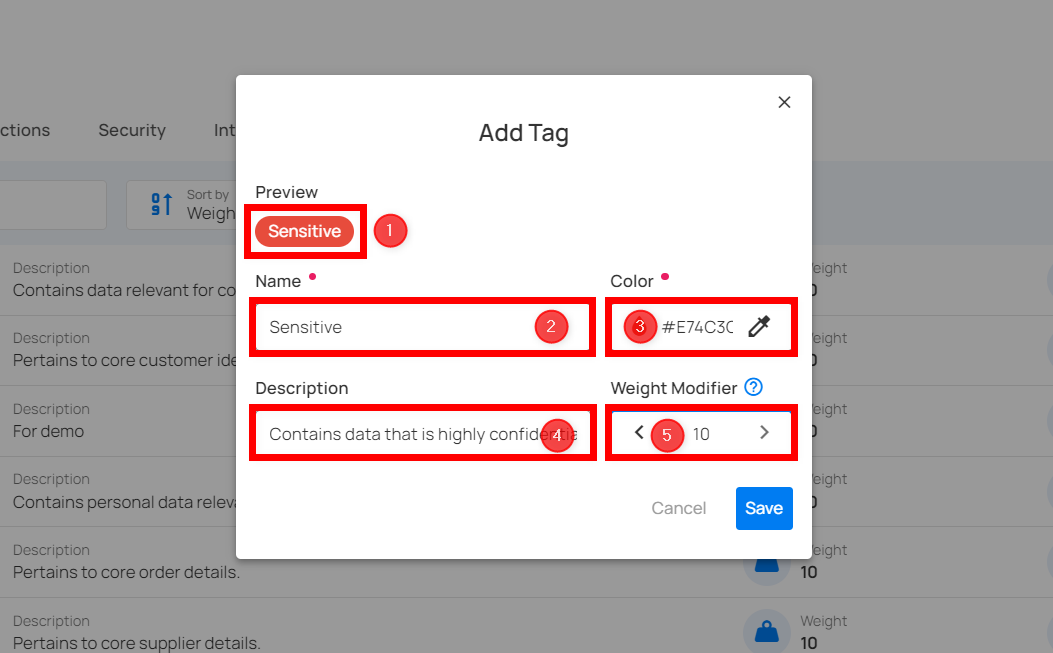
Step 2: A modal window will appear, providing the options to create the tag. Enter the required values to get started.
| REF. | FIELD | ACTION | EXAMPLE |
|---|---|---|---|
| 1. | Preview | This shows how the tag will appear to users. | Preview |
| 2. | Name | Assign a name to your tag. | Sensitive |
| 3. | Color | A color picker feature is provided, allowing you to select a color using its hex code. | #E74C3C |
| 4. | Description | Explain the nature of your tag. | Maintain data that is highly confidential and requires strict access controls. |
| 5. | Category | Choose an existing category or create a new one to group related tags for easier organization. | Demo2 |
| 6. | Weight Modifier | Adjust the tag's weight for prioritization, where a higher value represents greater significance. The range is between -10 and 10. 💡 Tip: Increasing the value boosts the weight of a recipient and its children by the same amount, while negative values decrease it. |
10 |
Step 3: Click on the Save button to save your tag.
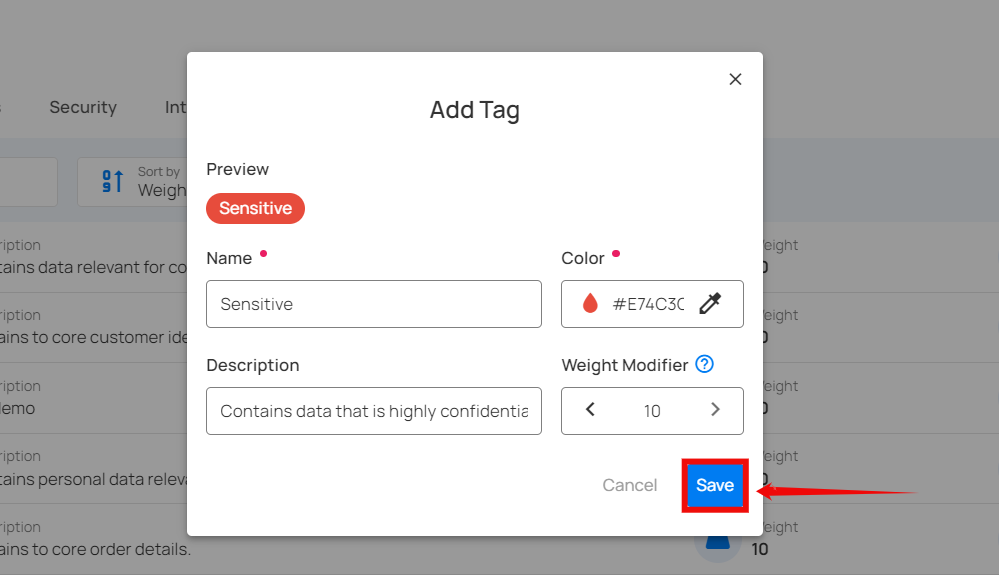
After clicking the Save button, the tag will be added to the system and a success message will appear.
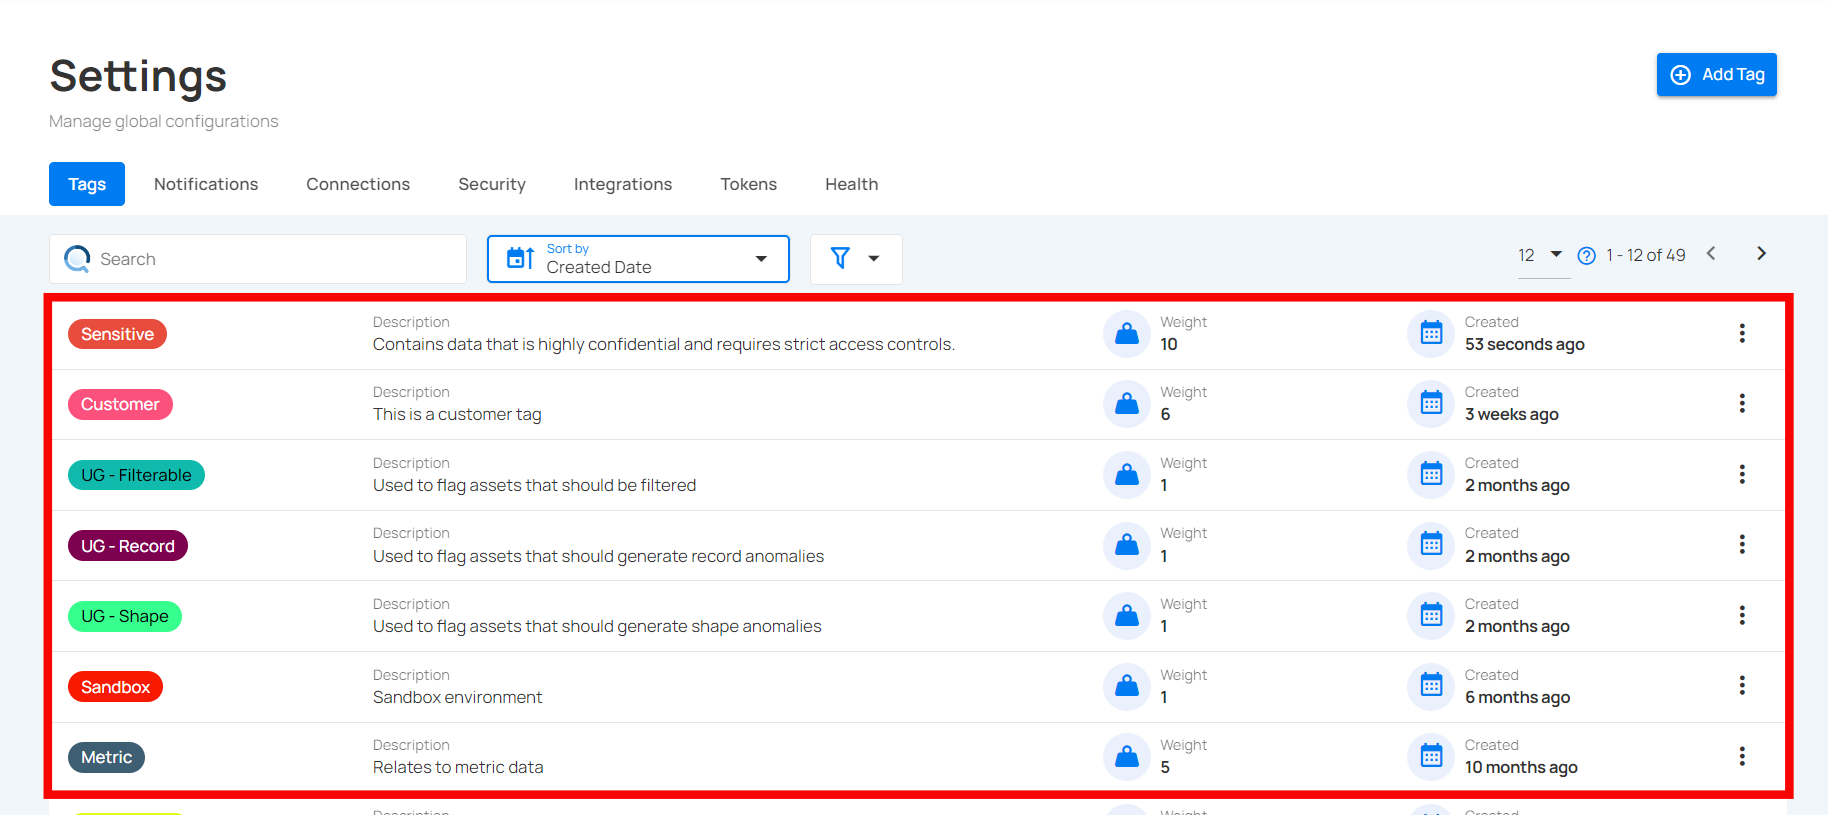
View Created Tags
Once you have created a tag, you can view it in the tags list.