Create a New Flow
Flows allow you to automate actions based on data operations, anomaly detection, or manual execution. When you create a new Flow, Qualytics automatically adds the base nodes you need to begin configuring the automation.
Note
To create a Flow, you must have Manager role. For more details, see the Team Permissions guide.
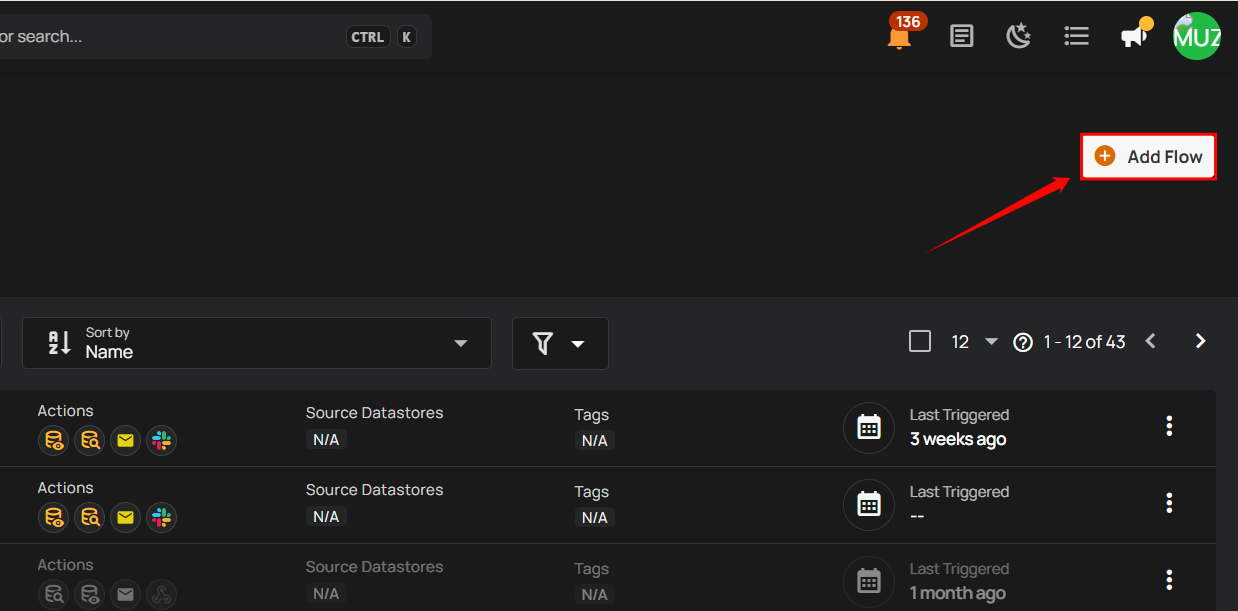
Step 1: Click on the Add Flow button from the top right corner.
A modal window will appear, allowing you to create a new Flow.
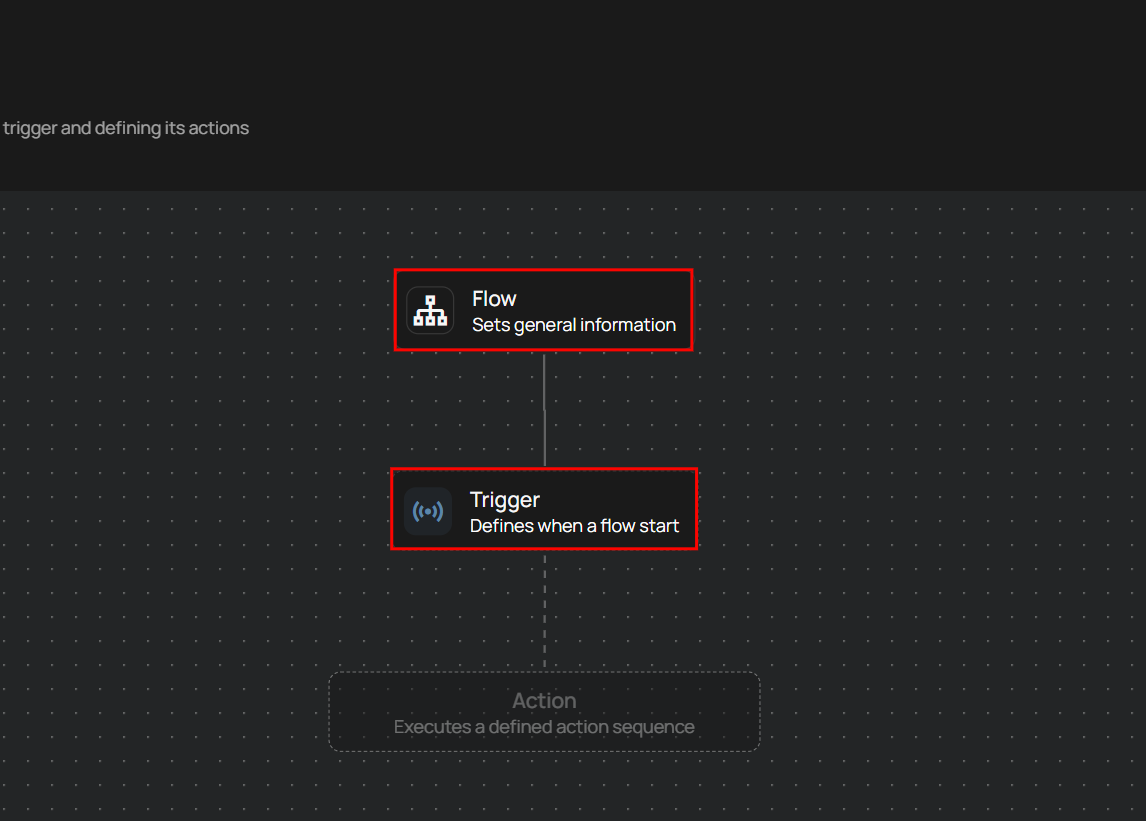
Every Flow begins with two default nodes:
- Flow Node – Defines the Flow’s name, description, and activation state
- Trigger Node – Defines when the Flow will start
What You Configure Next
A Flow consists of three main node types. After creating a new Flow, you will configure each one:
1. Flow Entry
Defines the Flow’s general information such as its name and description.
Info
If you want to learn more about flow entry, check out the Flow Entry guide.
2. Trigger Node
Controls when the Flow starts (operation completes, anomaly detected, manual, etc.).
Info
For more detailed steps, you can review the Trigger Node Documentation.
3. Actions Node
Defines what happens after the Flow is triggered (operations, notifications, HTTP calls, etc.).
Info
To explore this in more depth, take a look at the Actions Node Documentation.