Anomalies
Anomalies tab provides a quick overview of all detected anomalies across your source datastores. In Qualytics, An Anomaly refers to a dataset (record or column) that fails to meet specified data quality checks, indicating a deviation from expected standards or norms. These anomalies are identified when the data does not satisfy the applied validation criteria. You can filter and sort anomalies based on your preferences, making it easy to see which anomalies are active, acknowledged, or archived. This section is designed to help you quickly identify and address any issues.
Let’s get started 🚀
Navigation
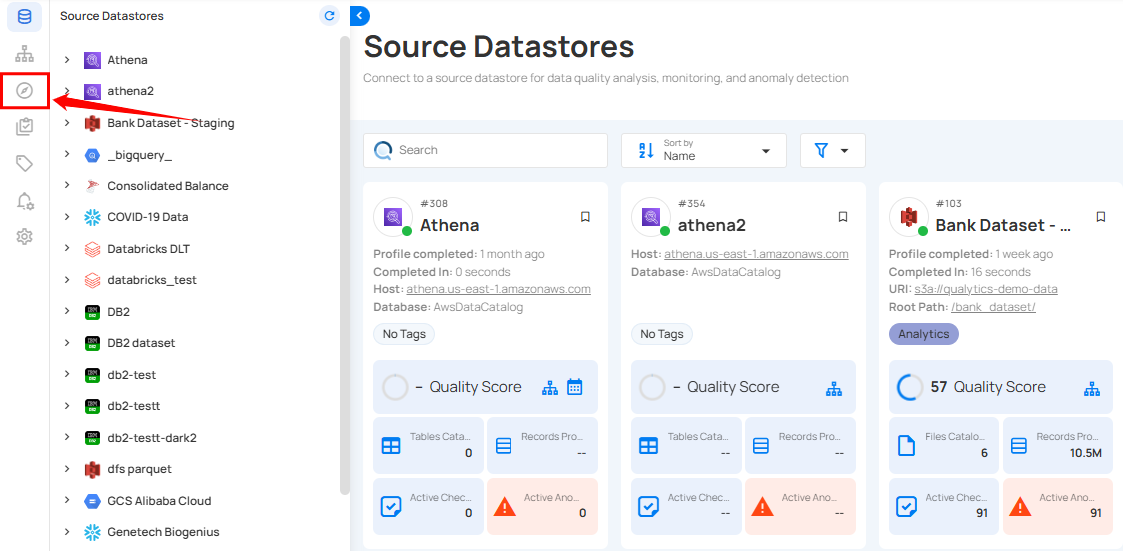
Step 1: Log in to your Qualytics account and click the Explore button on the left side panel of the interface.
Step 2: Click on the "Anomalies" from the Navigation Tab.
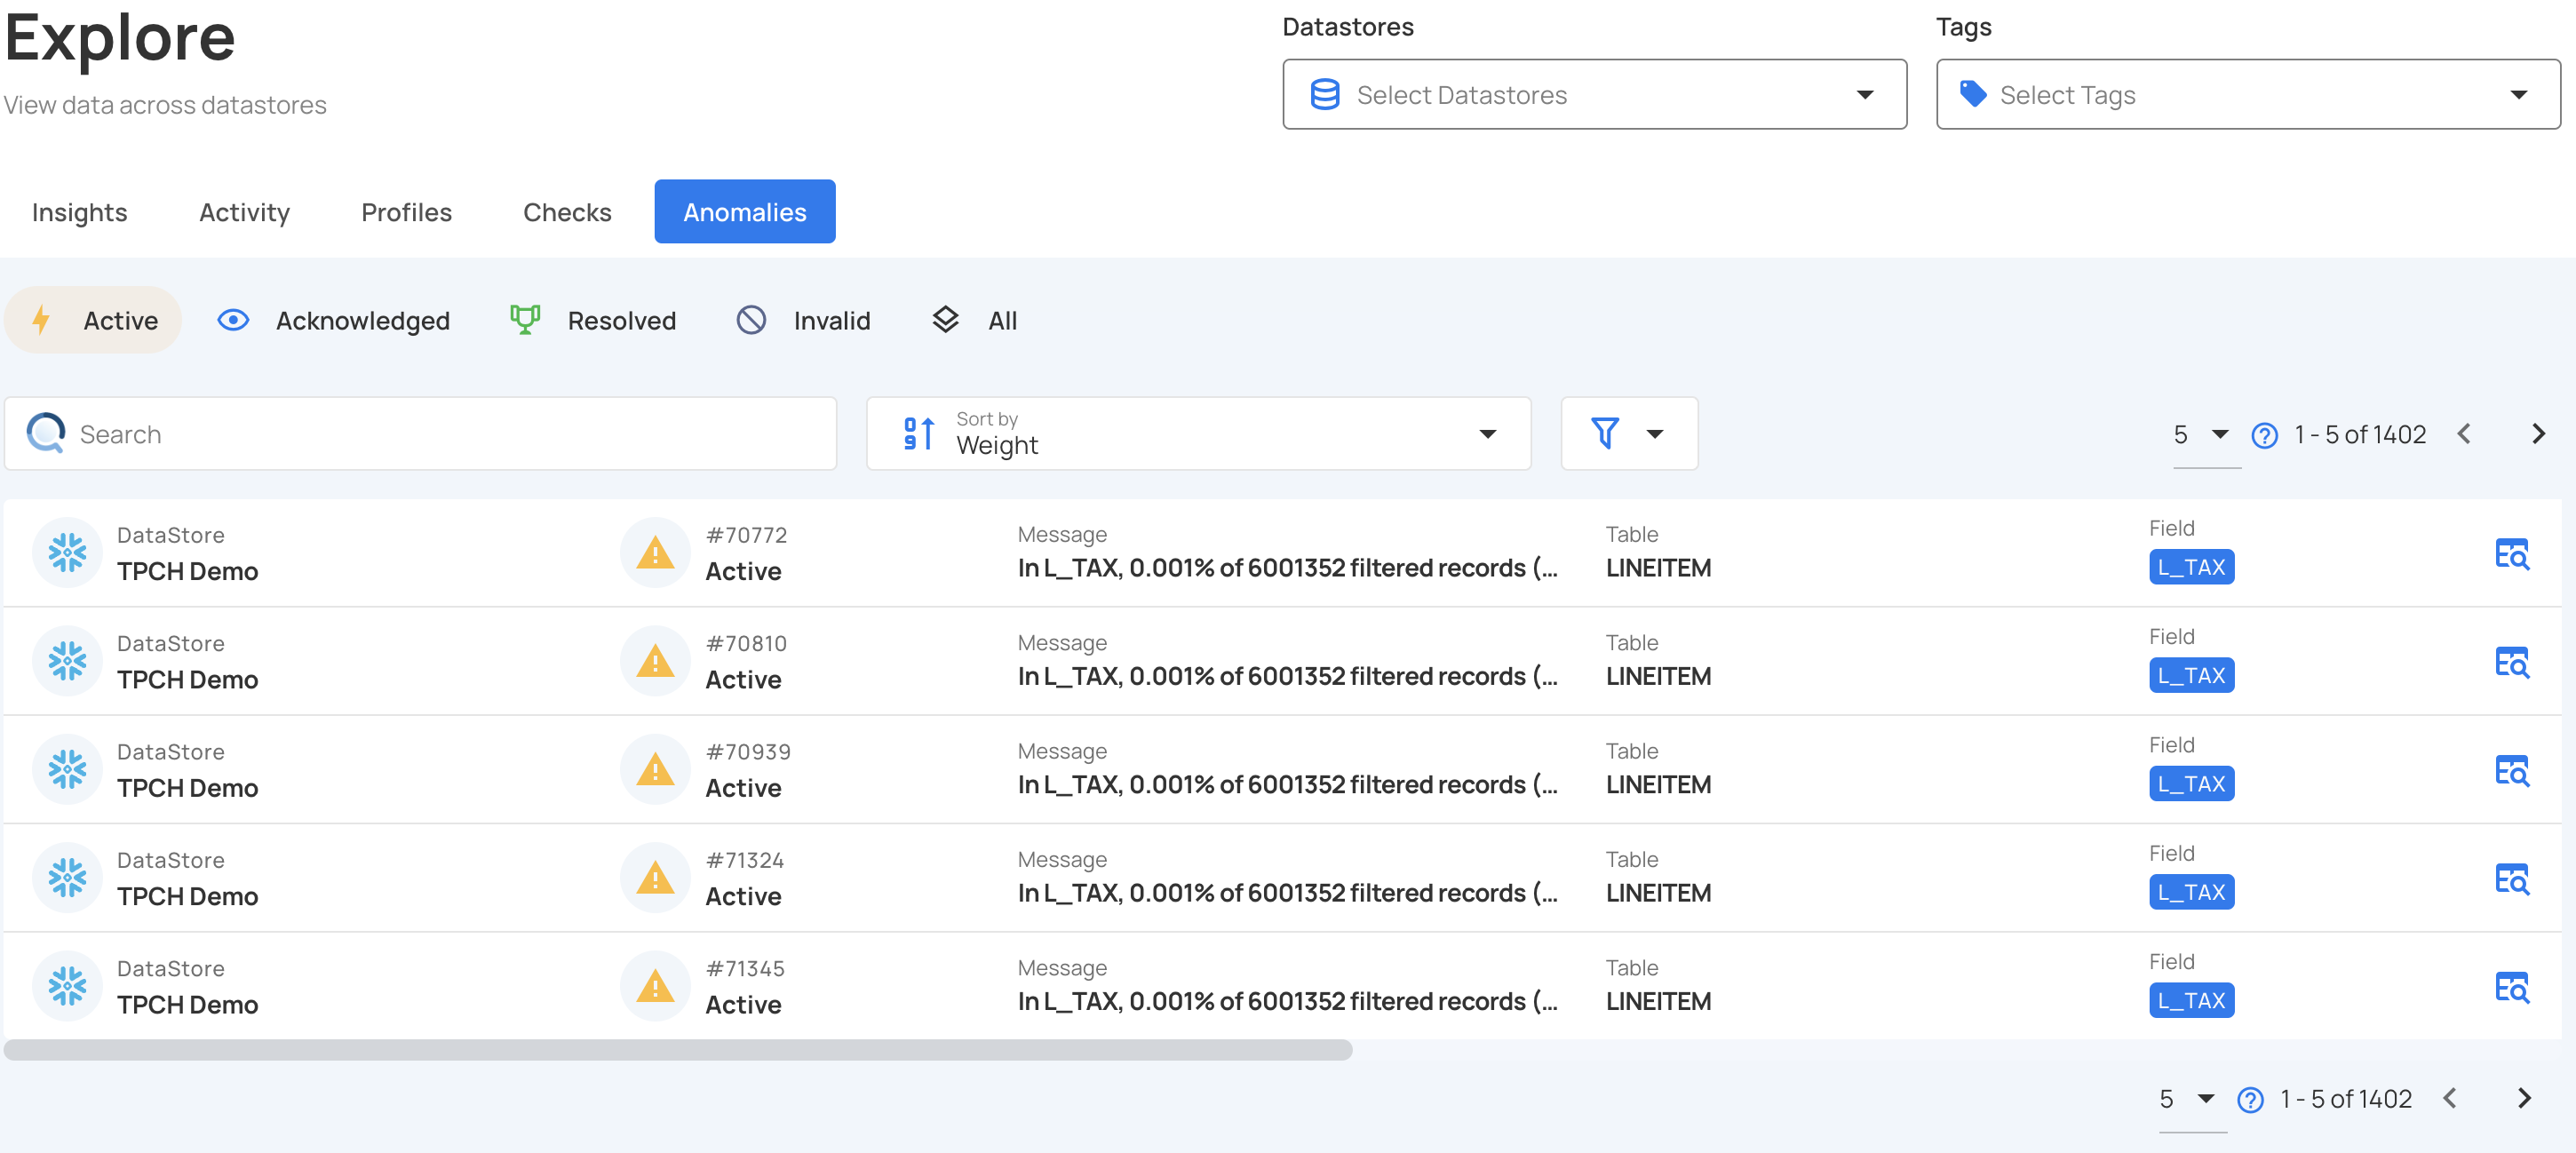
You will be navigated to the Anomalies tab, where you'll see a list of all the detected anomalies across various tables and fields from different source datastores, based on the applied data quality checks.
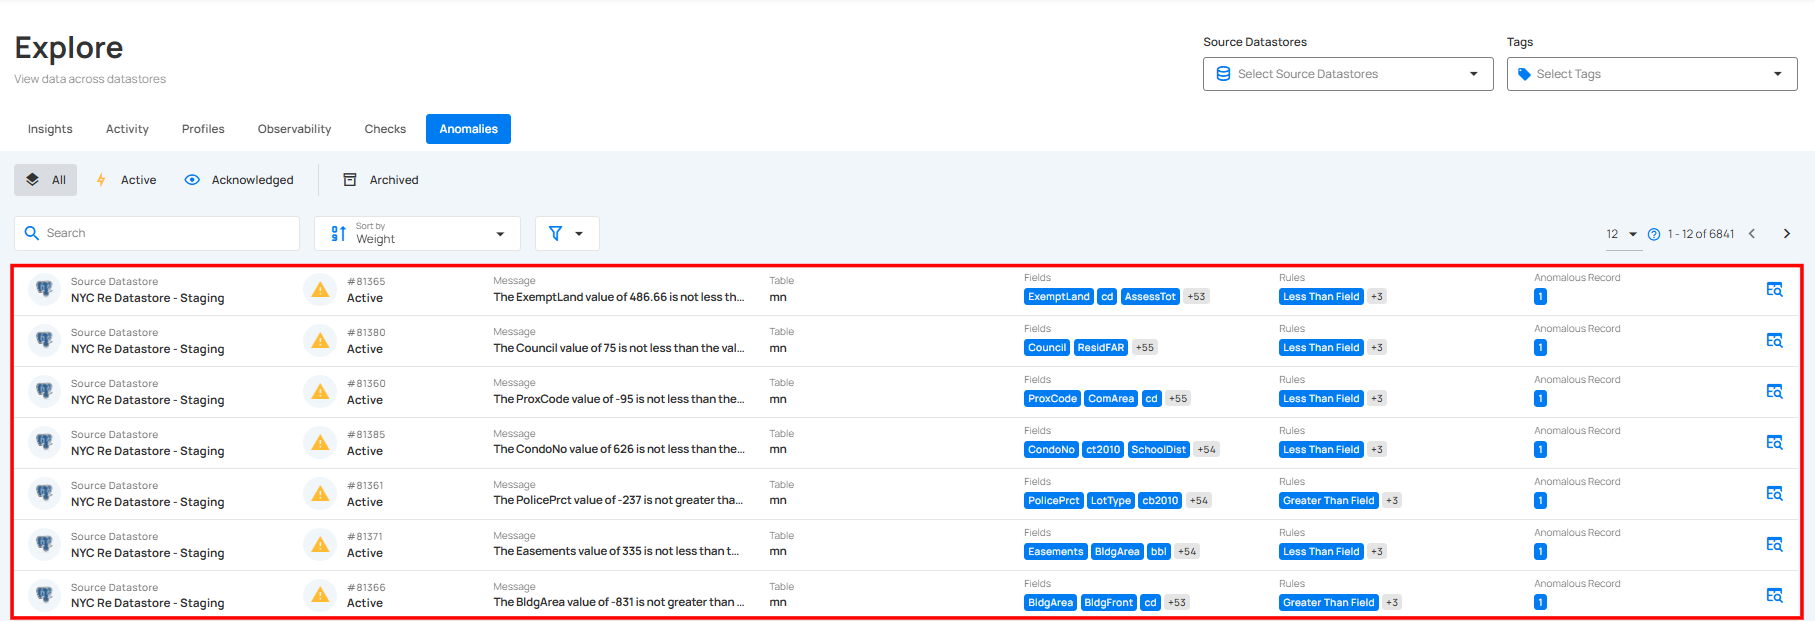
Categories Anomalies
Anomalies can be classified into different categories based on their status and actions taken. These categories include Open and Archived anomalies. Managing anomalies effectively helps in maintaining data integrity and ensuring quick response to issues.
Open
By selecting Open Anomalies, you can view anomalies that have been detected but remain unacknowledged or unresolved. These anomalies require attention and may need further investigation or corrective action.
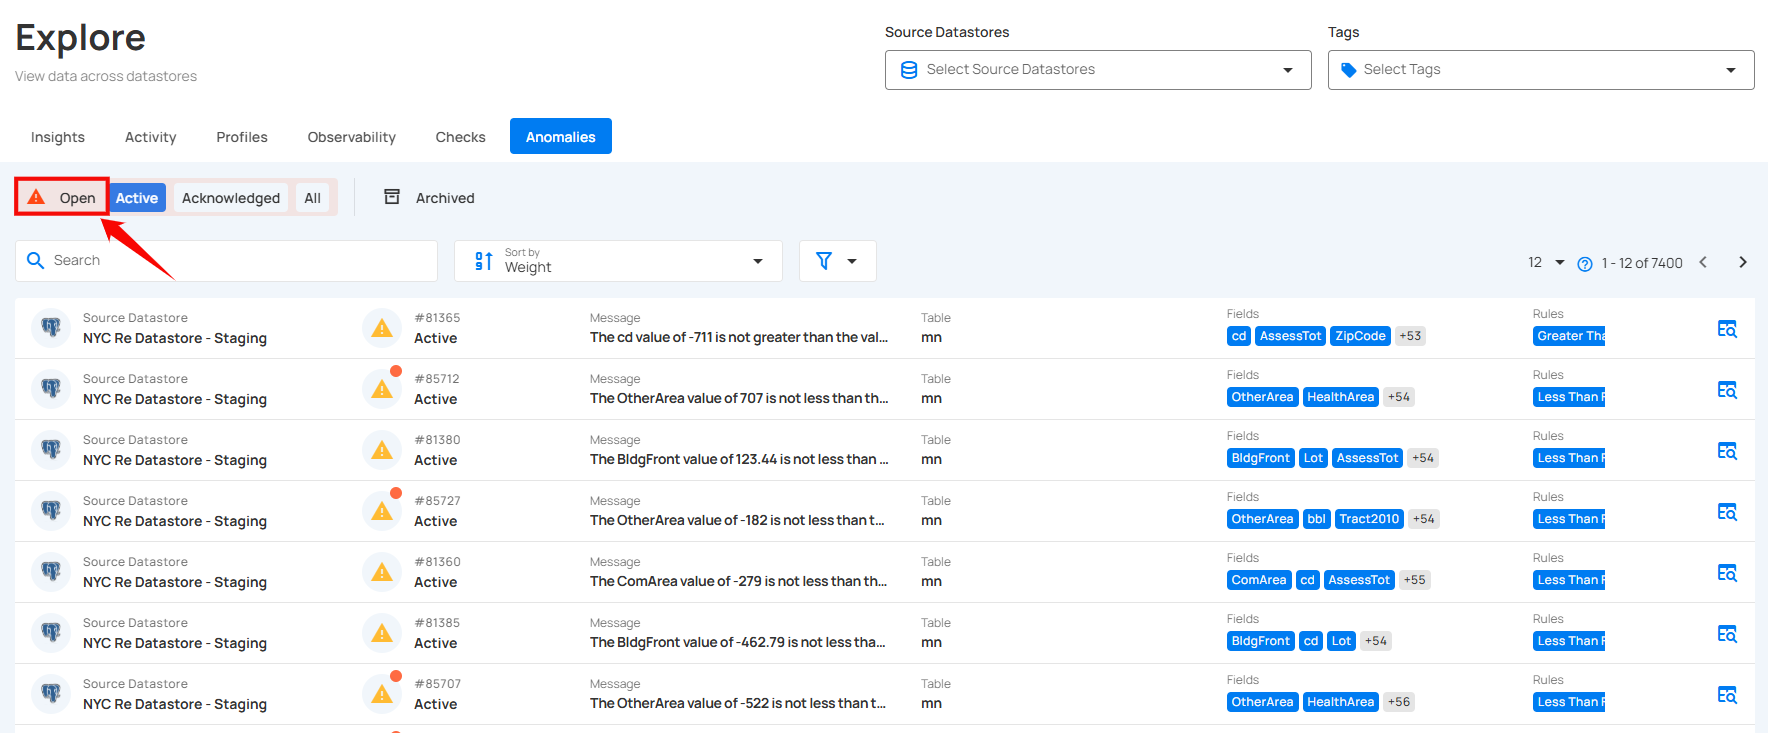
This option helps focus on unaddressed issues while allowing seamless navigation to All, Active, or Acknowledged anomalies as needed.
1. Active: By selecting Active Anomalies, you can focus on anomalies that are currently unresolved or require immediate attention. These are the anomalies that are still in play and have not yet been acknowledged, archived, or resolved.
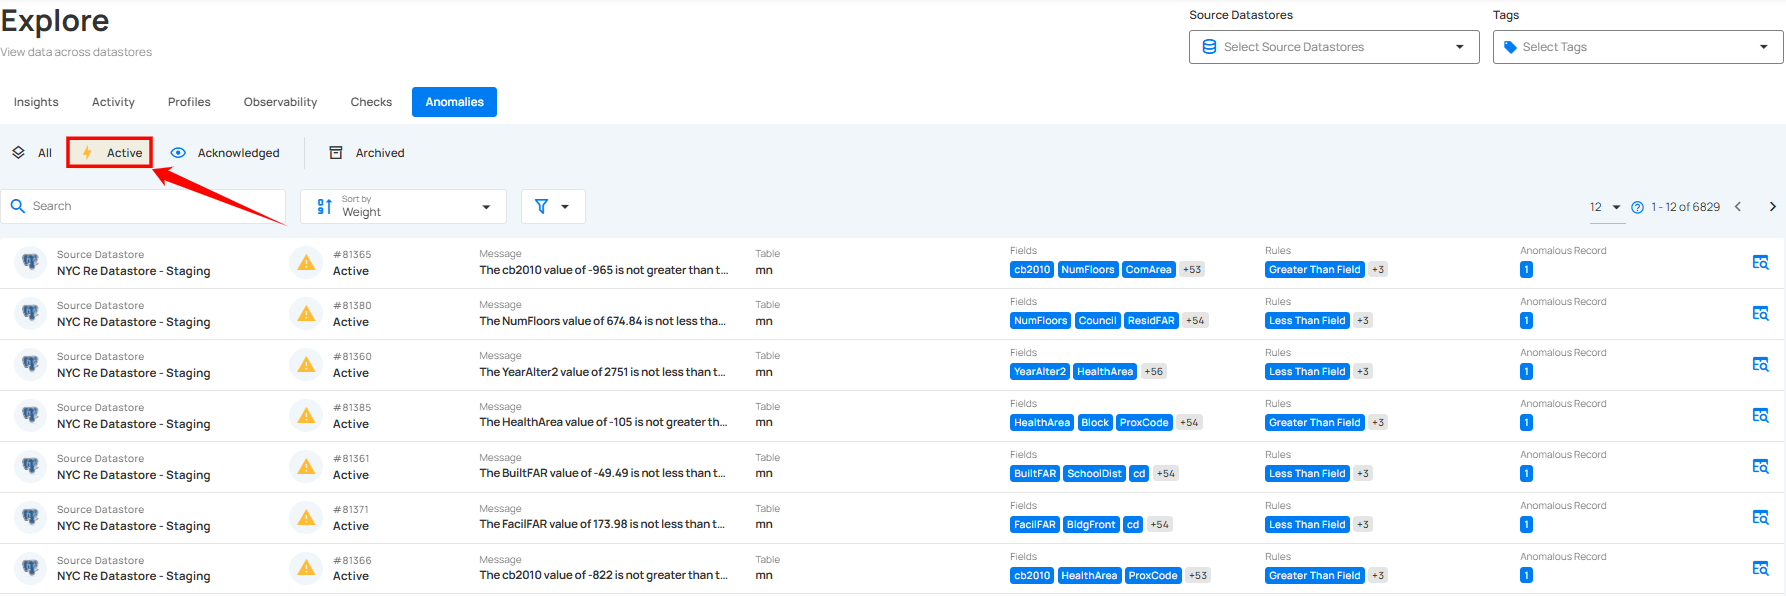
2. Acknowledge: By selecting Acknowledged Anomalies, you can see all anomalies that have been reviewed and marked as acknowledged. This status indicates that the anomalies have been noted, though they may still require further action.

3. All: By selecting All Anomalies, you can view the complete list of anomalies, regardless of their status. This option helps you get a comprehensive overview of all issues that have been detected, whether they are currently active, acknowledged, or archived.

Archived
By selecting Archived Anomalies, you can view anomalies that have been resolved or moved out of active consideration. Archiving anomalies allows you to keep a record of past issues without cluttering the active list.

You can also categorize the archived anomalies based on their status as Resolved, Duplicate, Invalid, Discarded, and All to review them effectively.
1. Resolved: This indicates that the anomaly was a legitimate data quality concern and has been addressed.

2. Duplicate: This indicates that the anomaly is a duplicate of an existing record and has already been addressed.

3. Invalid: This indicates that the anomaly is not a legitimate data quality concern and does not require further action.

4. Discarded: This indicates that the anomaly is no longer relevant or under review and has been intentionally dismissed without further action.
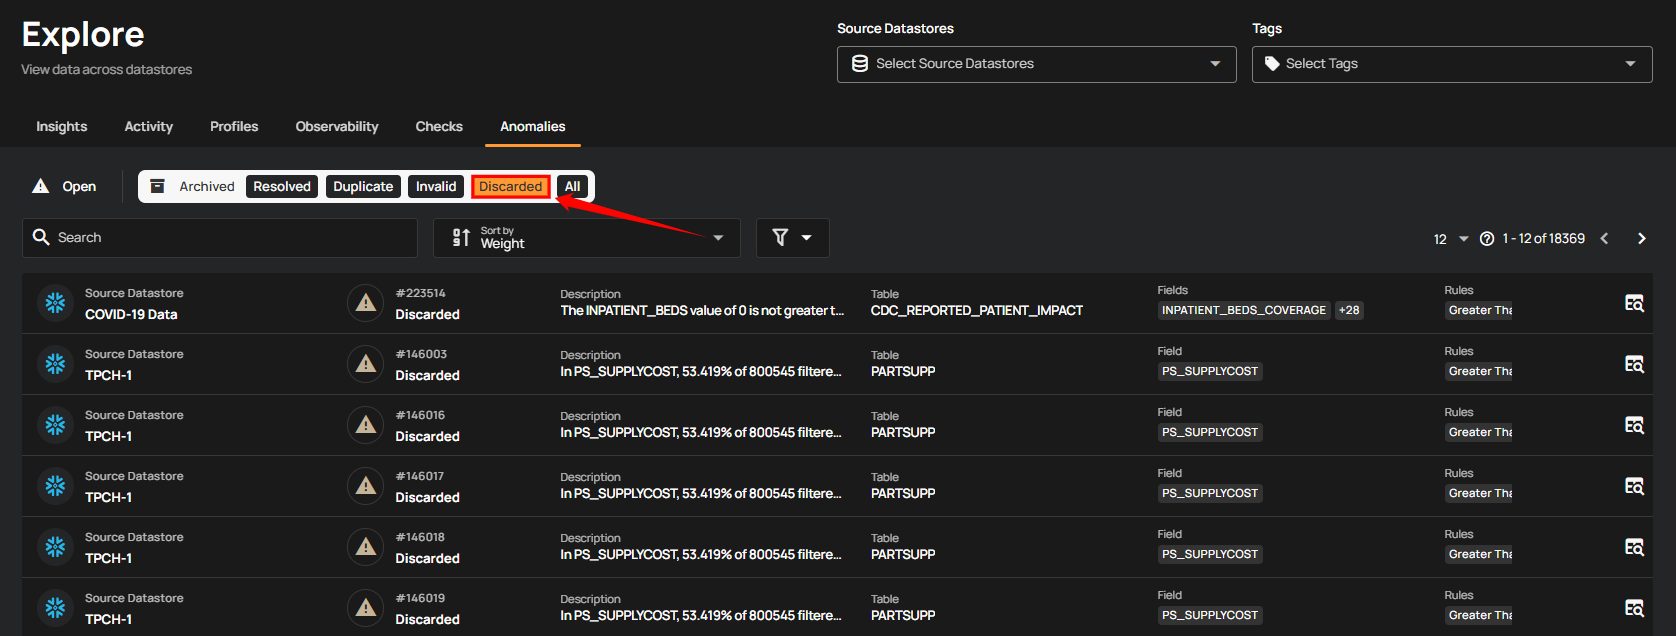
5. All: Displays all archived anomalies, including those marked as Resolved, Duplicate, Invalid, and Discarded giving a comprehensive view of all past issues.

Anomaly Details
Anomaly Details window provides information about anomalies identified during scan operations. It displays details such as the anomaly ID, status, type, detection time, and where it is in the data, such as the datastore and table. Additionally, it offers options to explore datasets, share details, and collaborate, making it easier to resolve data issues.
Step 1: Click on the anomaly from the list of available (whether Active, Acknowledged or Archived) anomalies to view its details.

A modal window titled “Anomaly Details” will appear, displaying all the details of the selected anomaly.
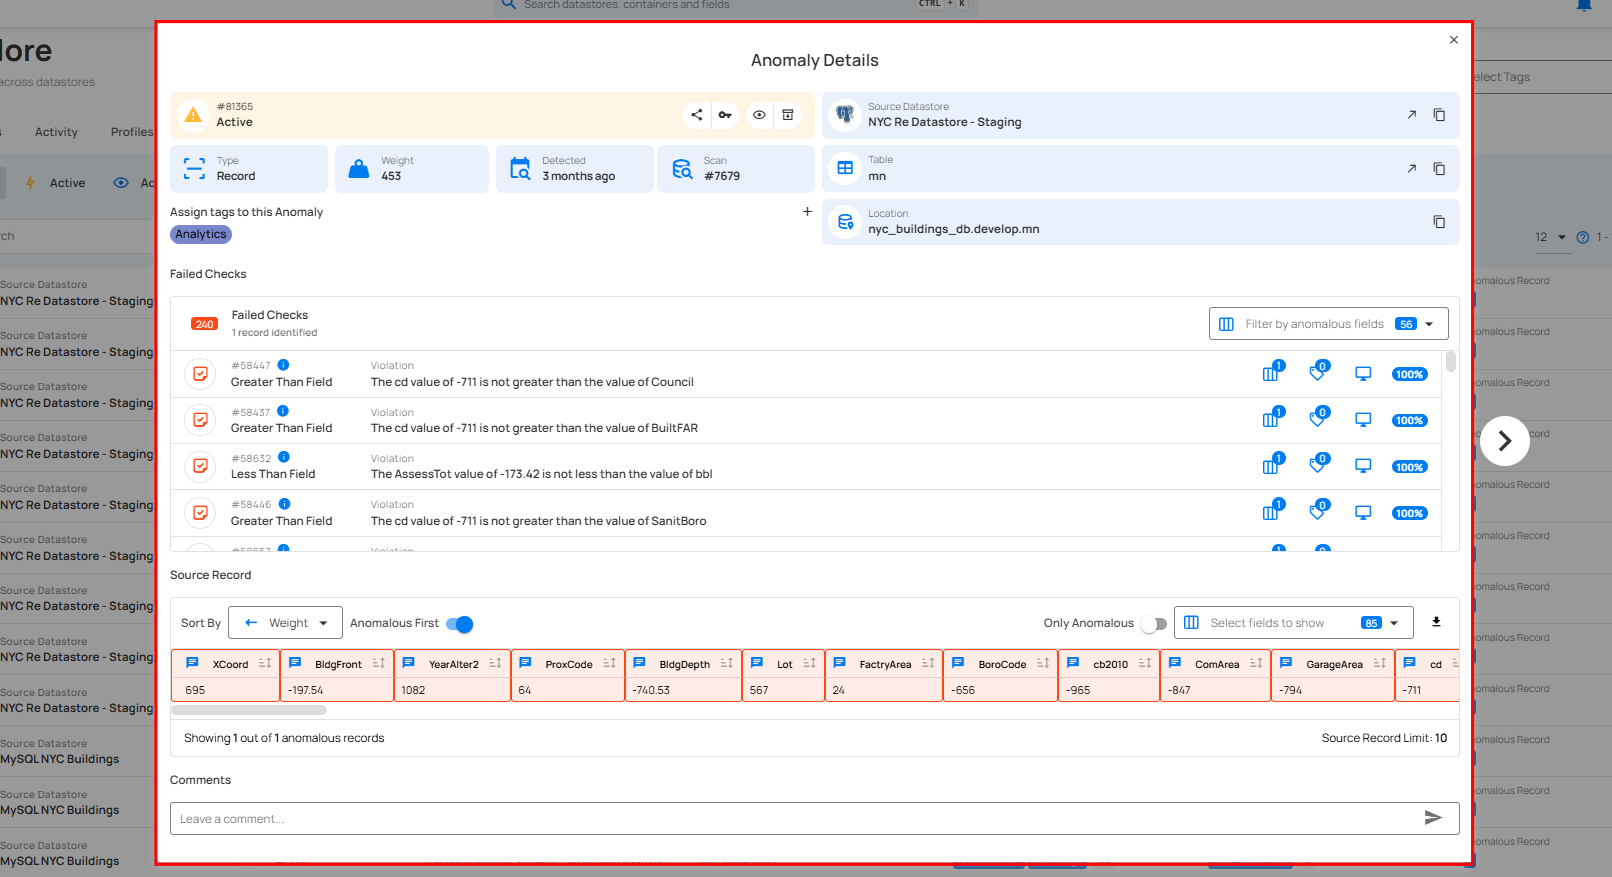
For more details on Anomaly Details, please refer to the Anomaly Insights section in the documentation.
Acknowledged Anomalies
By acknowledging anomalies, you indicate that they have been reviewed or recognized. Acknowledging anomalies helps you keep track of issues that have been addressed, even if further action is still required.
Warning
Once an anomaly is acknowledged, it remains acknowledged and never reverts to the active state.
Step 1: Click on the active anomaly from the list of available anomalies that you want to acknowledge.

Step 2: A modal window will appear displaying the anomaly details. Click on the acknowledge (👁) icon located in the upper-right corner of the modal window.
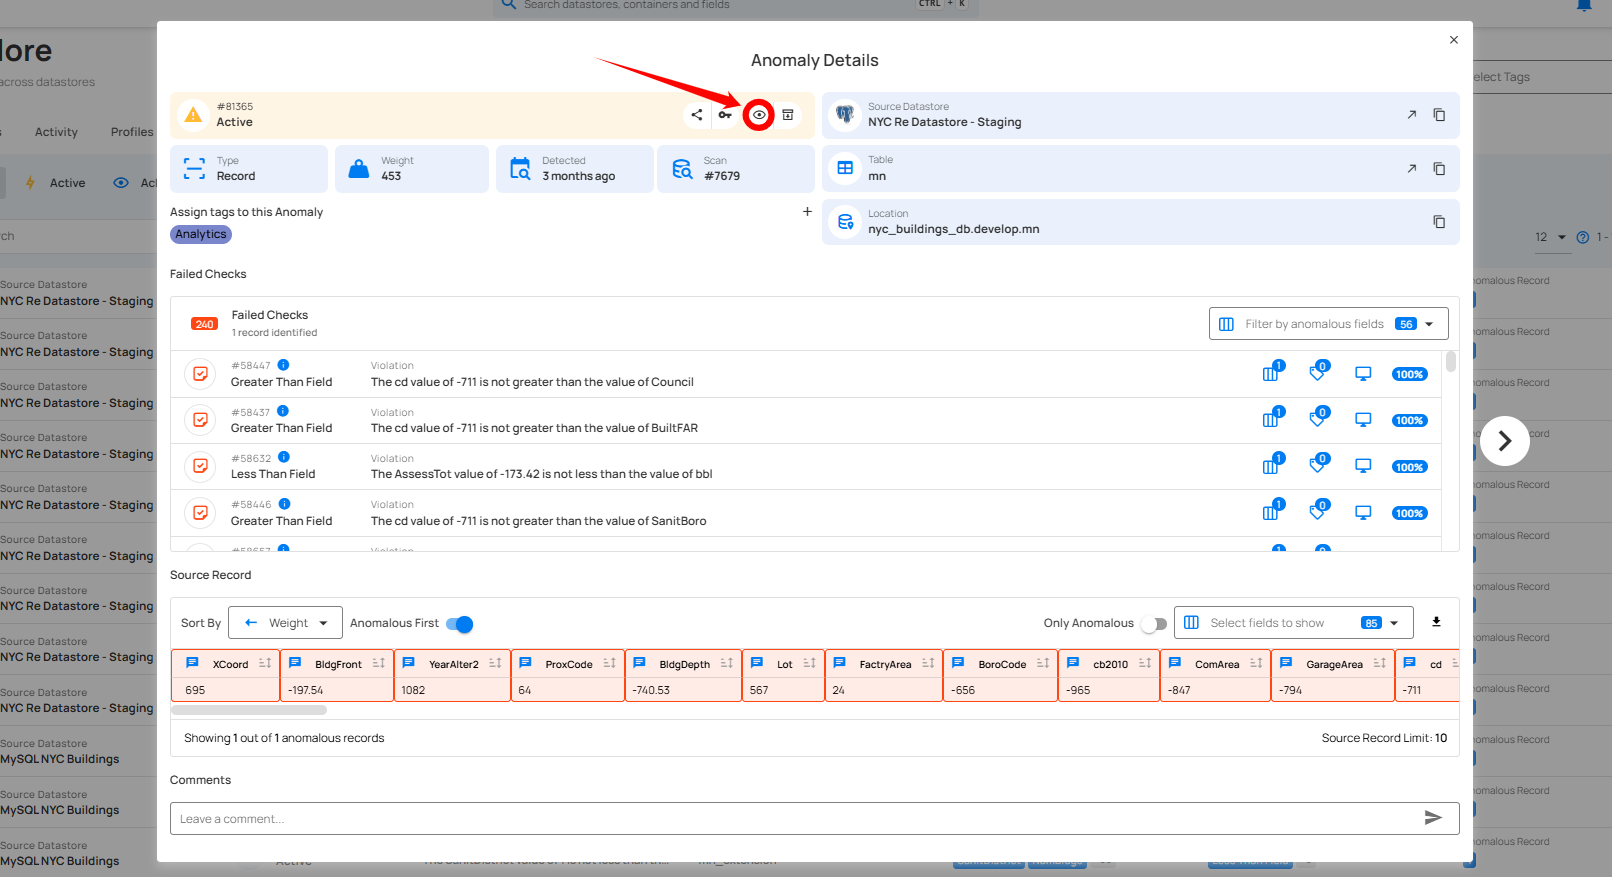
Step 3: After clicking on the Acknowledge icon your anomaly is successfully moved to the acknowledge and a flash message will appear saying “The Anomaly has been successfully acknowledged”.

Archive Anomalies
By archiving anomalies, you move them to an inactive state, while still keeping them available for future reference or analysis. Archiving helps keep your active anomaly list clean without permanently deleting the records.
Step 1: Click on the anomaly from the list of available (whether Active or Acknowledged) anomalies that you want to archive.

Step 2: A modal window will appear displaying the anomaly details. Click on the archive (🗑) icon located in the upper-right corner of the modal window.
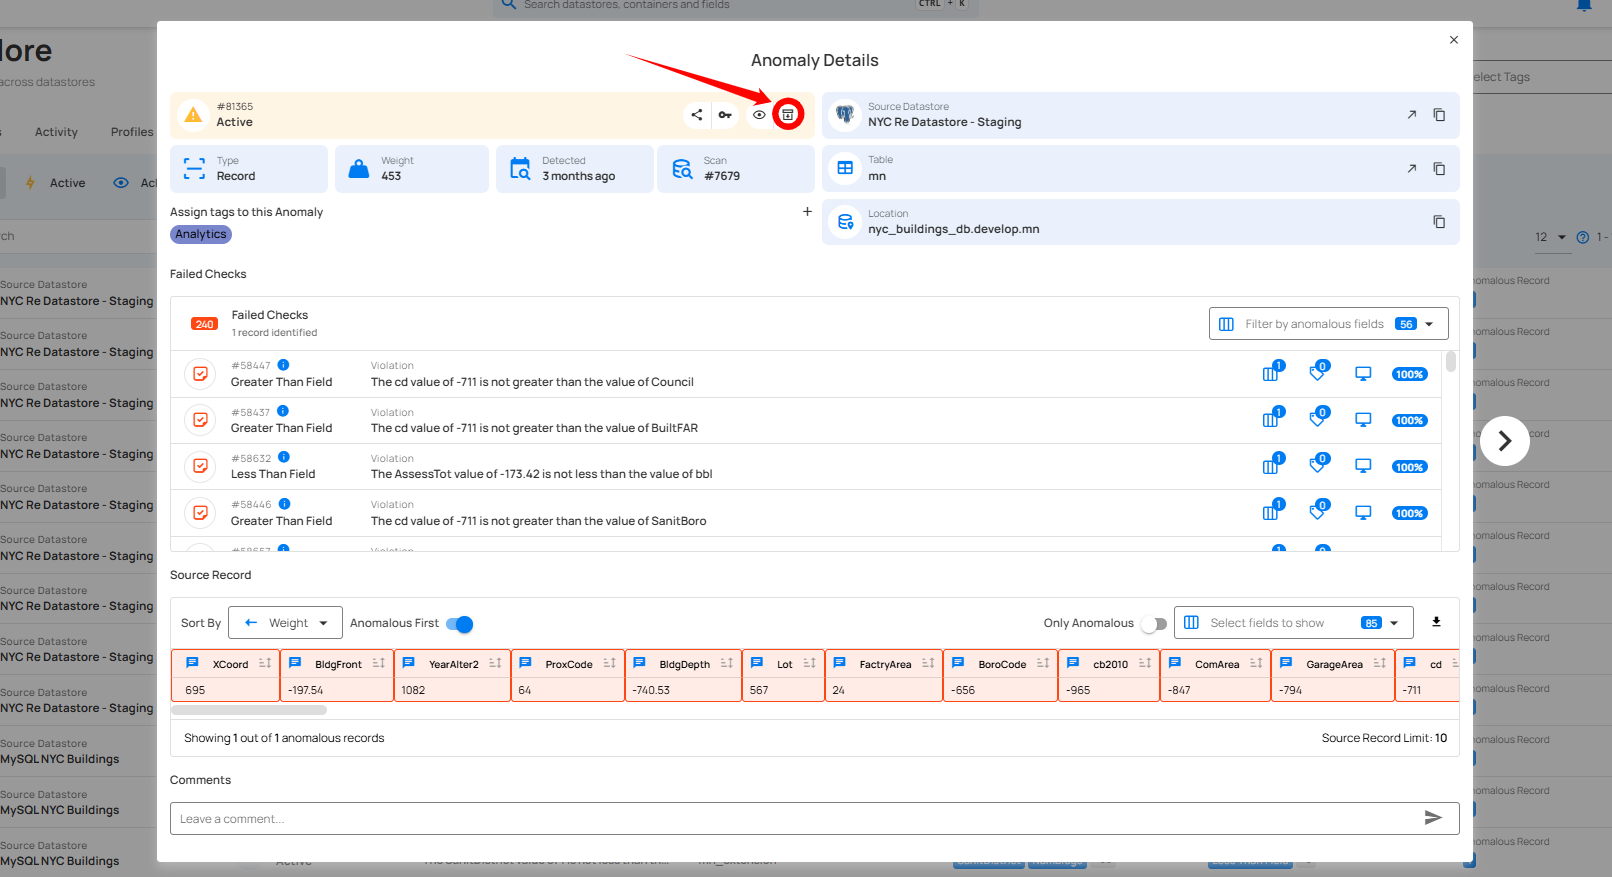
Step 3: A modal window titled “Archive Anomaly” will appear, providing you with the following archive options:
-
Resolved: Choose this option if the anomaly was a legitimate data quality concern and has been addressed. This helps maintain a record of resolved issues while ensuring that they are no longer active.
-
Invalid: Select this option if the anomaly is not a legitimate data quality concern and does not require further action. Archiving anomalies as invalid helps differentiate between real issues and those that can be dismissed, improving overall data quality management.
-
Duplicate: Choose this option if the anomaly is a duplicate of an existing record and has already been addressed. No further action is required as the issue has been previously resolved.
-
Discarded: Select this option if the anomaly is no longer important or needs no further review. Discarded anomalies are simply ignored because they don’t require any action, helping keep the anomaly list clean and easy to manage.
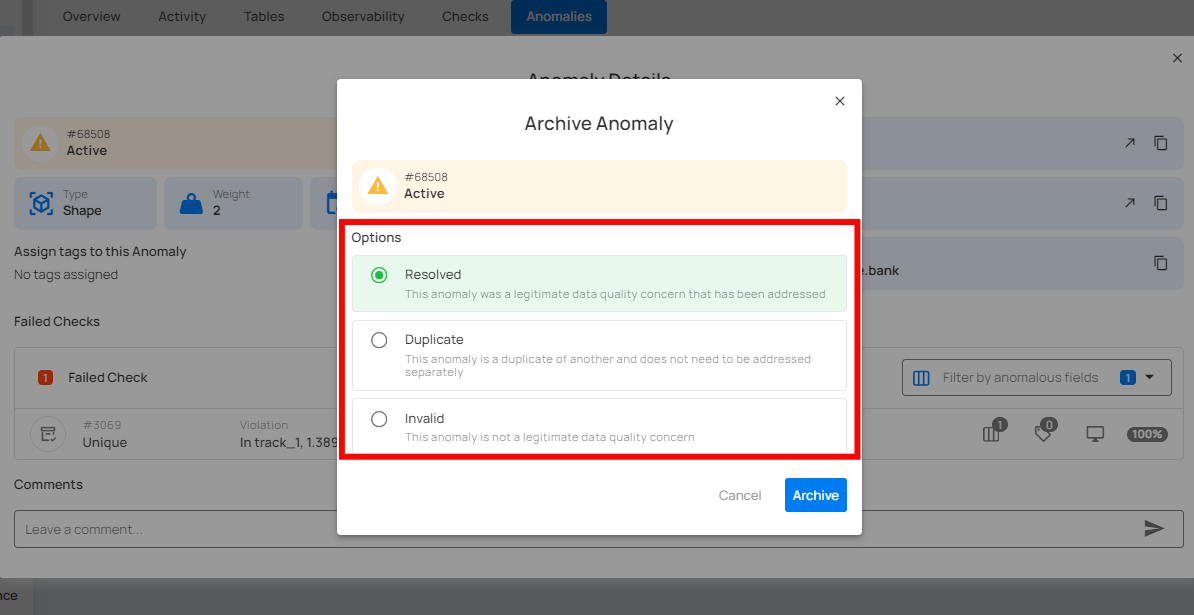
Step 4: Once you've made your selection, click the Archive button to proceed.
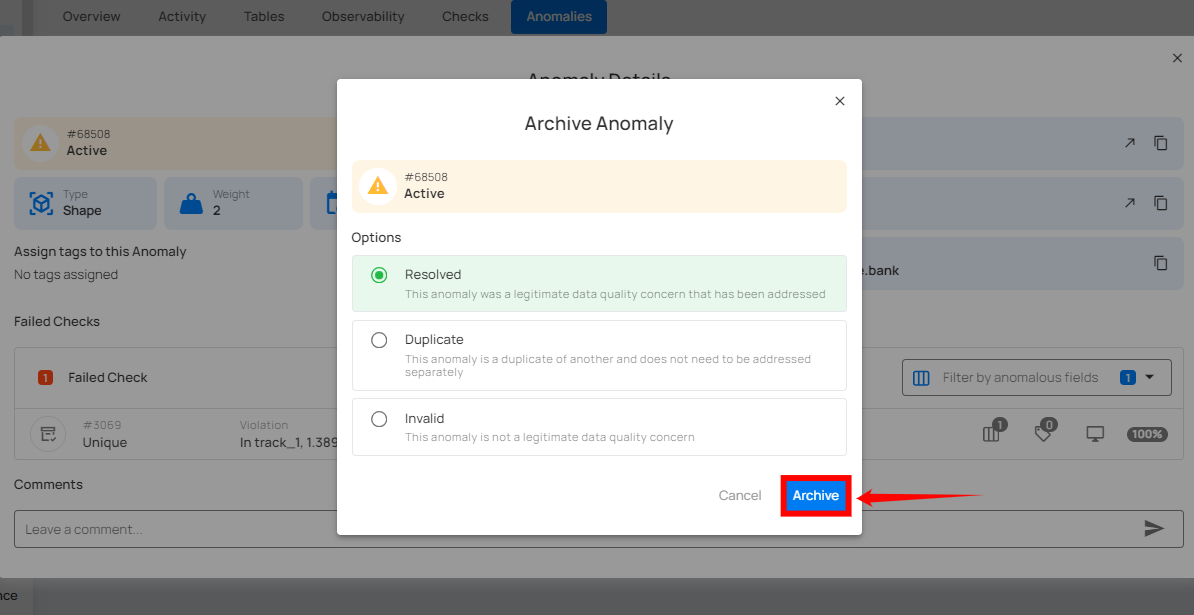
Step 5: After clicking on the Archive button your anomaly is moved to the archive and a flash message will appear saying “Anomaly has been successfully archived”.

Restore Archived Anomalies
By restoring archived anomalies, you can bring them back into the acknowledged state for further investigation or review. These anomalies will not return to the active state once they have been acknowledged.
Step 1: Click on the anomaly that you want to restore from the list of archived anomalies.

Step 2: A modal window will appear displaying the anomaly details. Click on the vertical ellipsis (⋮) located in the upper-right corner of the modal window, and click on “Restore” from the drop-down menu.
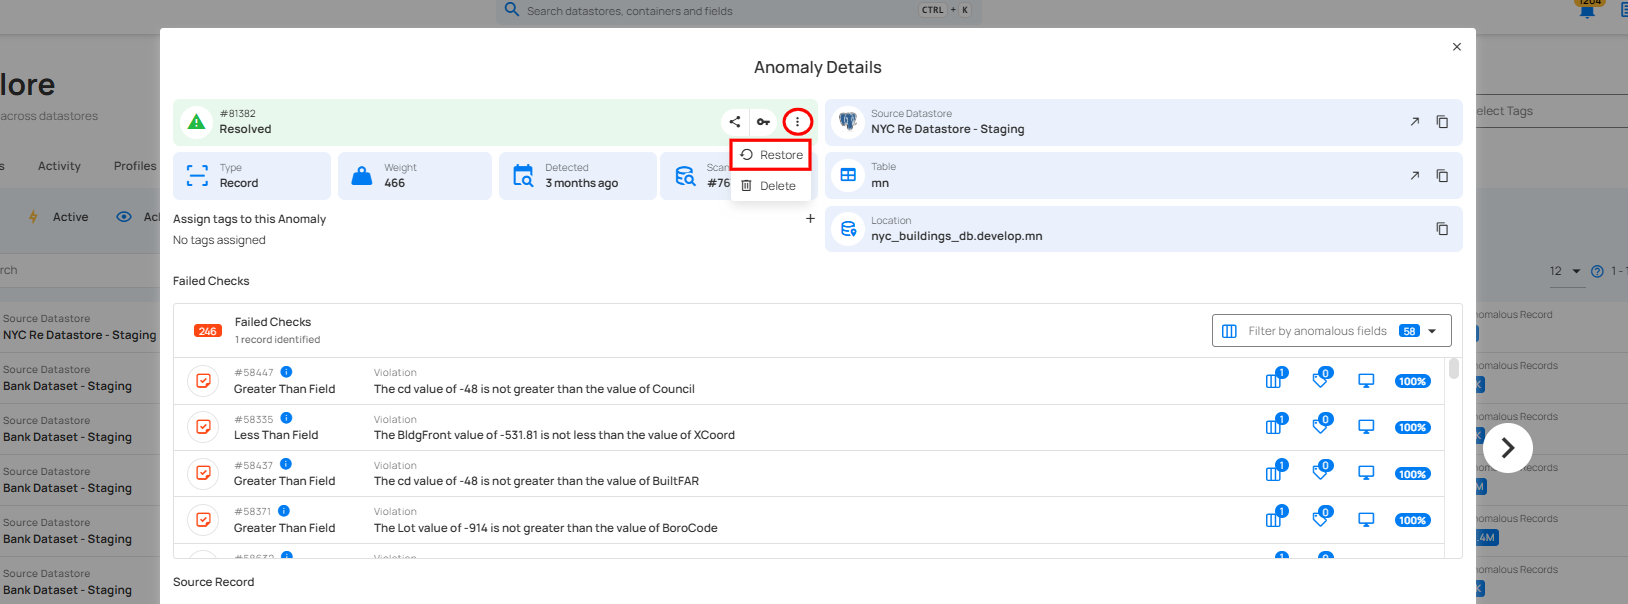
Step 3: After clicking on the “Restore” button, the selected anomaly is now restored as in acknowledged state.

Assign Tags
Assigning tags to an anomaly serves the purpose of labeling and grouping anomalies and driving downstream workflows.
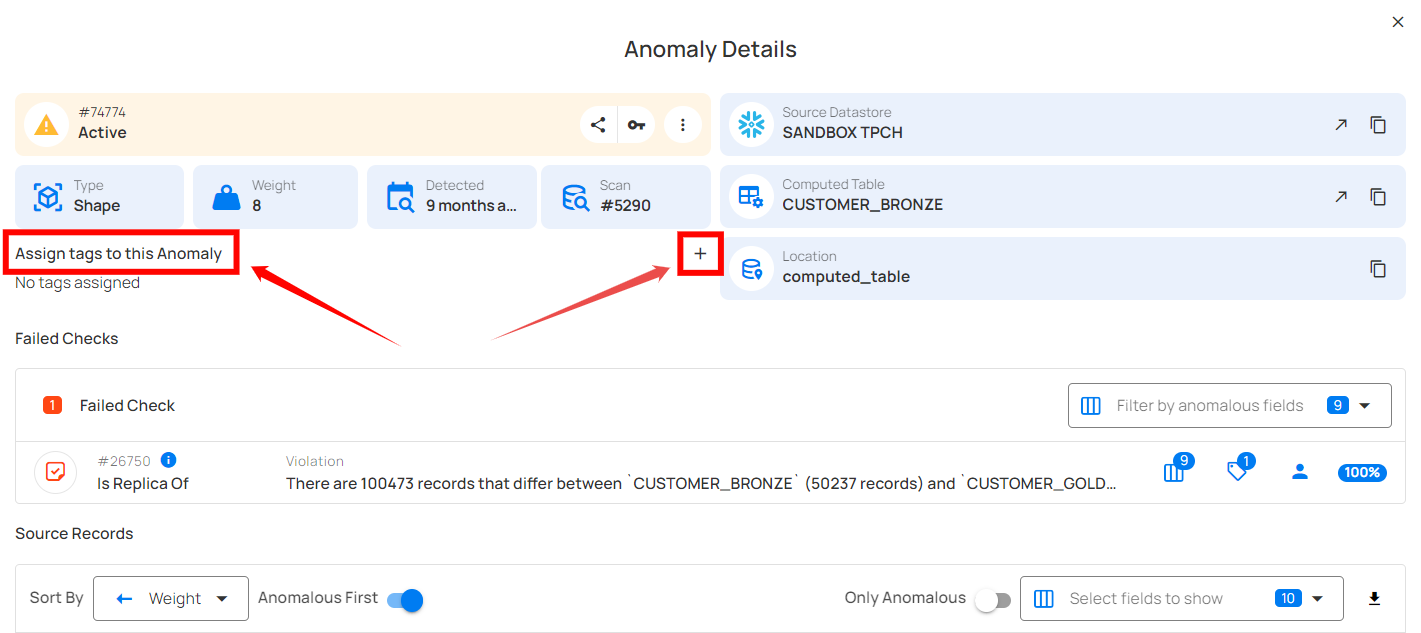
Step 1: Click on the Assign tags to this Anomaly or + button.
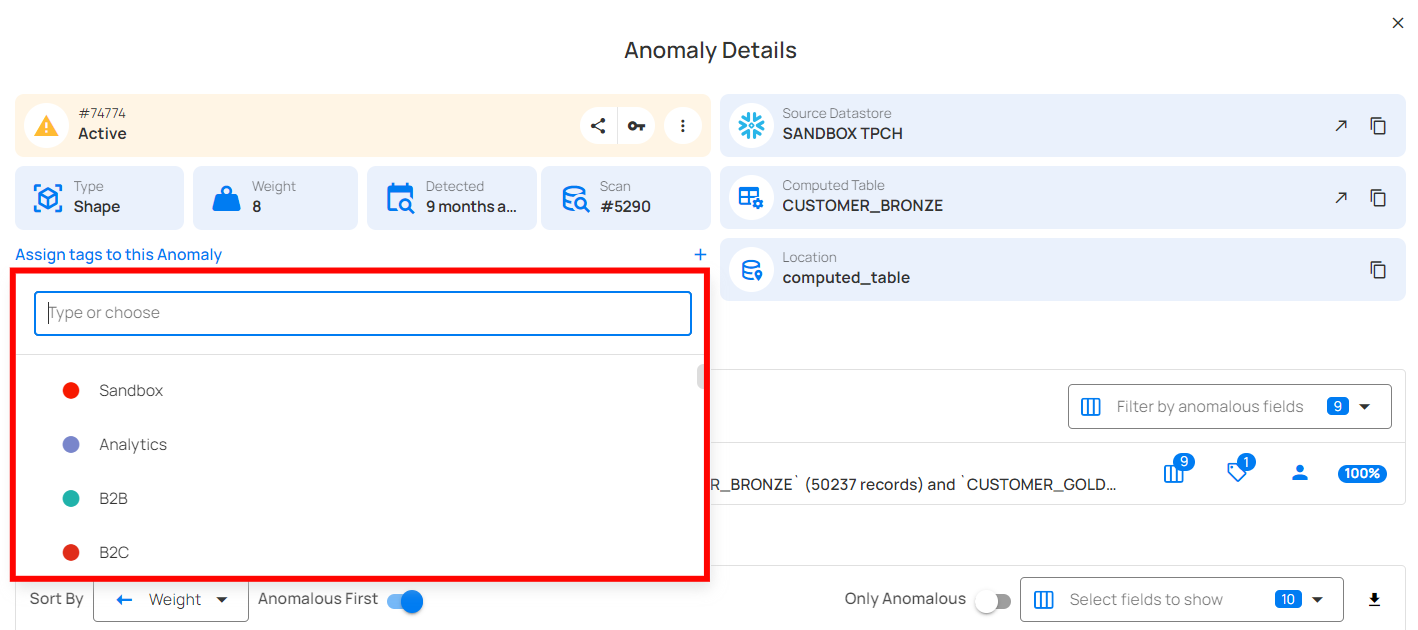
Step 2: A dropdown menu will appear with existing tags. Scroll through the list and click on the tag you wish to assign.
Delete Anomalies
Deleting an anomaly allows you to permanently remove a record that is no longer relevant or was logged in error. This action is done individually, ensuring that your anomaly records remain clean and up to date.
Note
You can only delete archived anomalies, not active or acknowledged checks. If you want to delete an active or acknowledged anomaly, you must first move it to the archive, and then you can delete it.
Step 1: Click on Archived from the navigation bar in the Anomalies section to view all archived anomalies.

Step 2: Click on the archive anomaly from the list of archived anomalies that you want to delete.

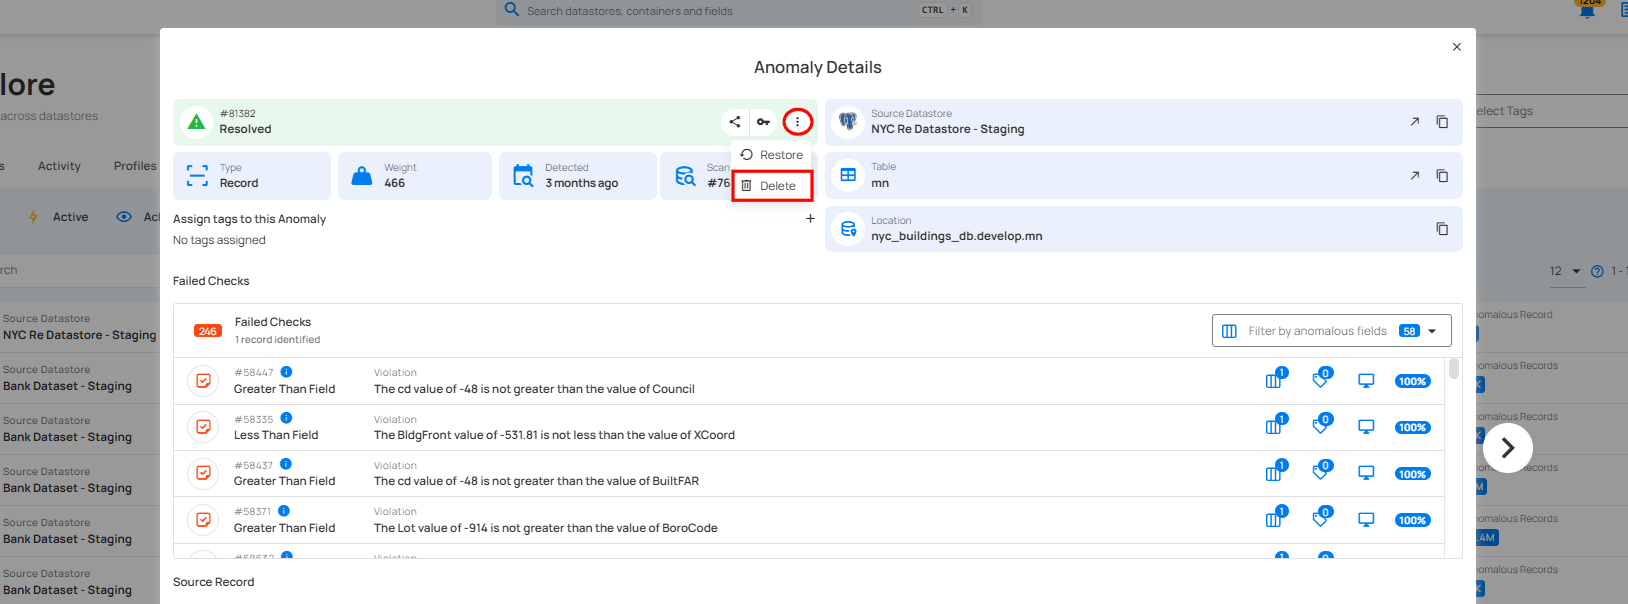
Step 3: A modal window will appear displaying the anomaly details. Click on the vertical ellipsis (⋮) located in the upper-right corner of the modal window, and click on “Delete” from the drop-down menu.
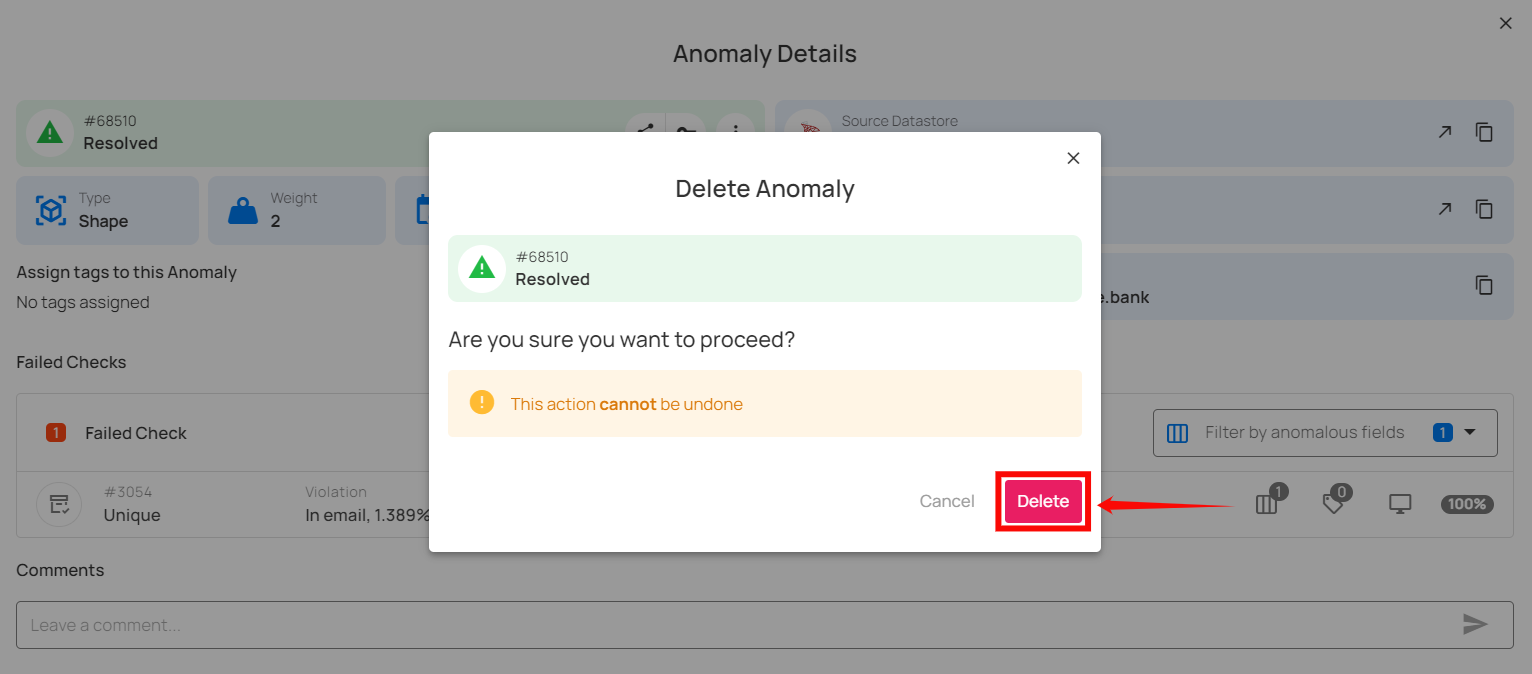
Step 4: A confirmation modal window will appear, click on the Delete button to permanently remove the anomaly from the system.
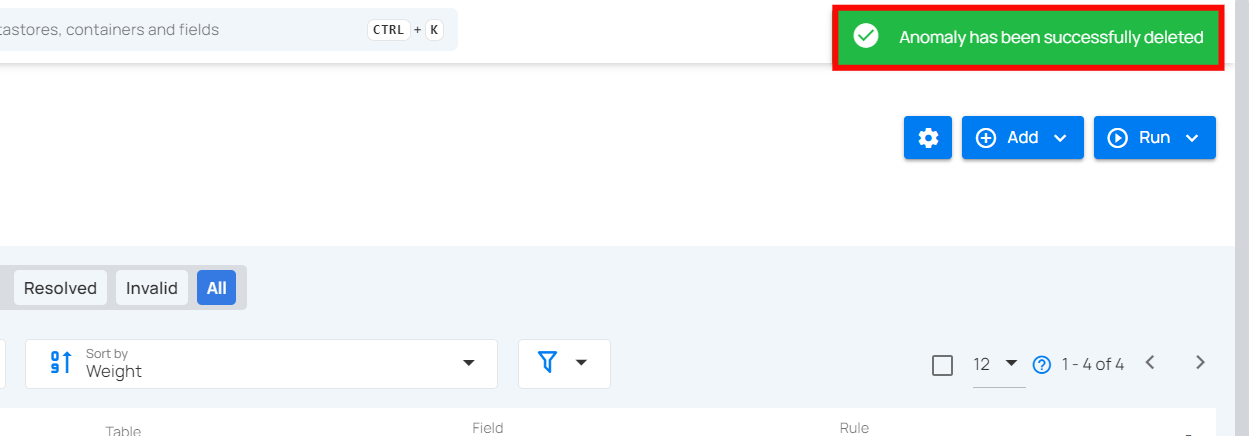
Step 5: After clicking on the delete button, your anomaly is successfully deleted and a success flash message will appear saying “Anomaly has been successfully deleted”.
Filter and Sort
Filter and Sort options allow you to organize your anomaly by various criteria, such as Weight, Anomalous Record, Created Date. You can also apply filters to refine your list of anomaly based on Selected Source Datastores, Selected Tag, Timeframe, Type and Rule .
Sort
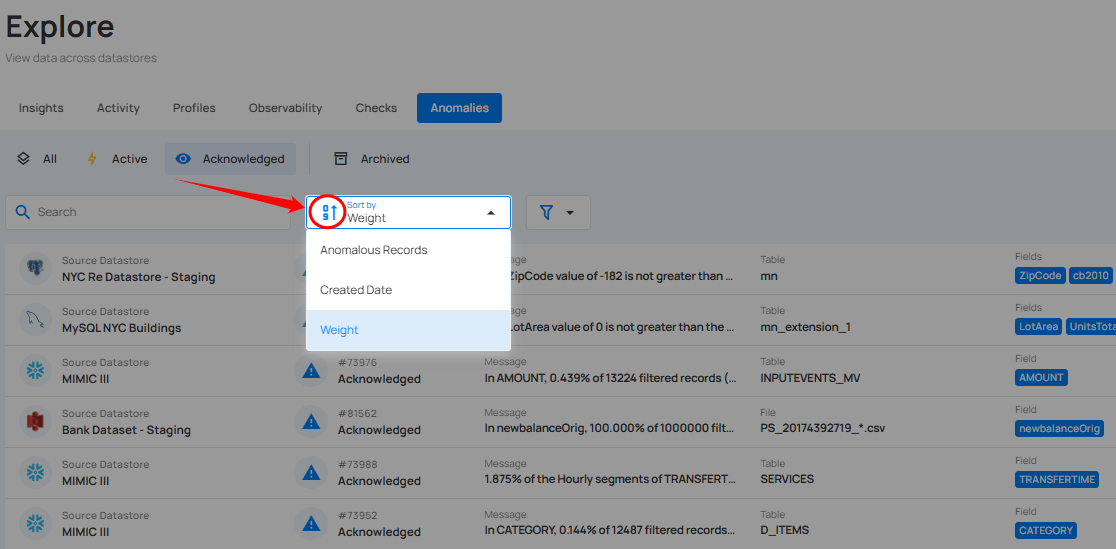
You can sort your anomalies by Anomalous Record, Created Date, and Weight to easily organize and prioritize them according to your needs.
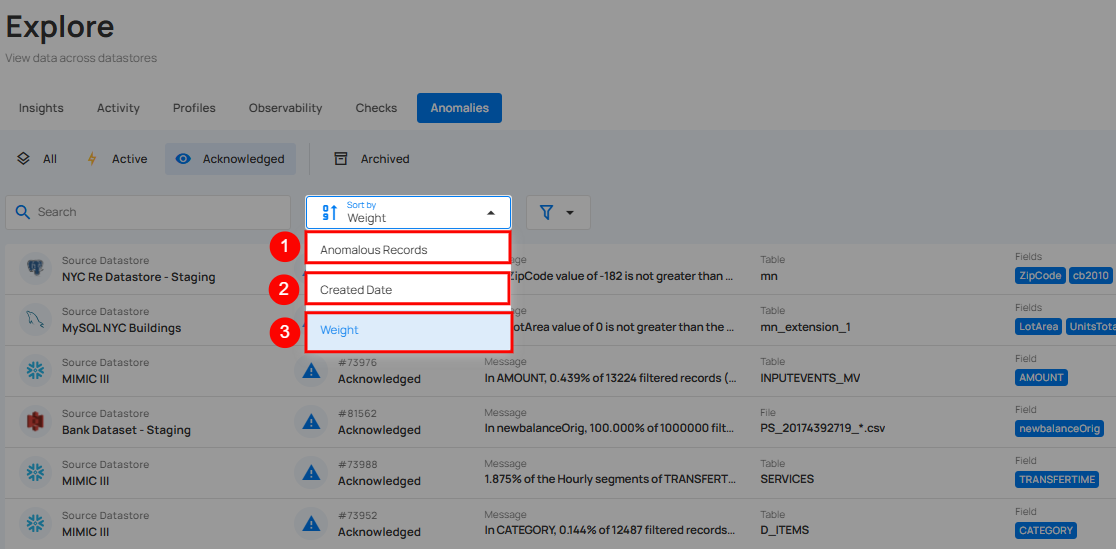
| No | Sort By Option | Description |
|---|---|---|
| 1 | Anomalous Record | Sorts anomalies based on the number of anomalous records identified. |
| 2 | Created Date | Sorts anomalies according to the date they were detected. |
| 3 | Weight | Sort anomalies by their assigned weight or importance level. |
Whatever sorting option is selected, you can arrange the data either in ascending or descending order by clicking the caret button next to the selected sorting criteria.
Filter
You can filter your anomalies based on values like Source Datastores, Timeframe, Type, Rule, and Tags.

Info
Users can search across all filter inputs using typos, partial terms, or abbreviations.
The system intelligently matches relevant results, making it easier to find what they need without exact inputs.
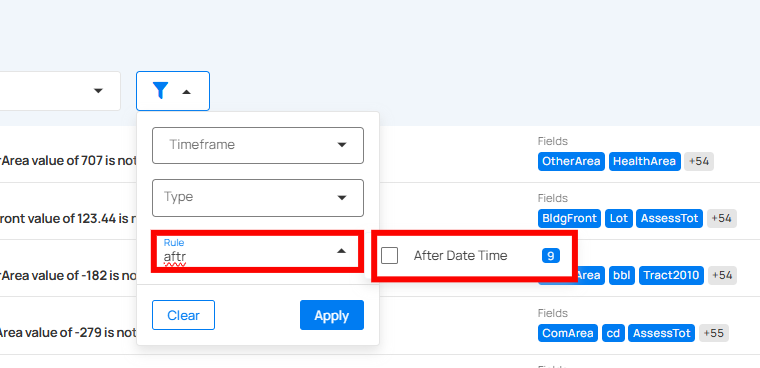
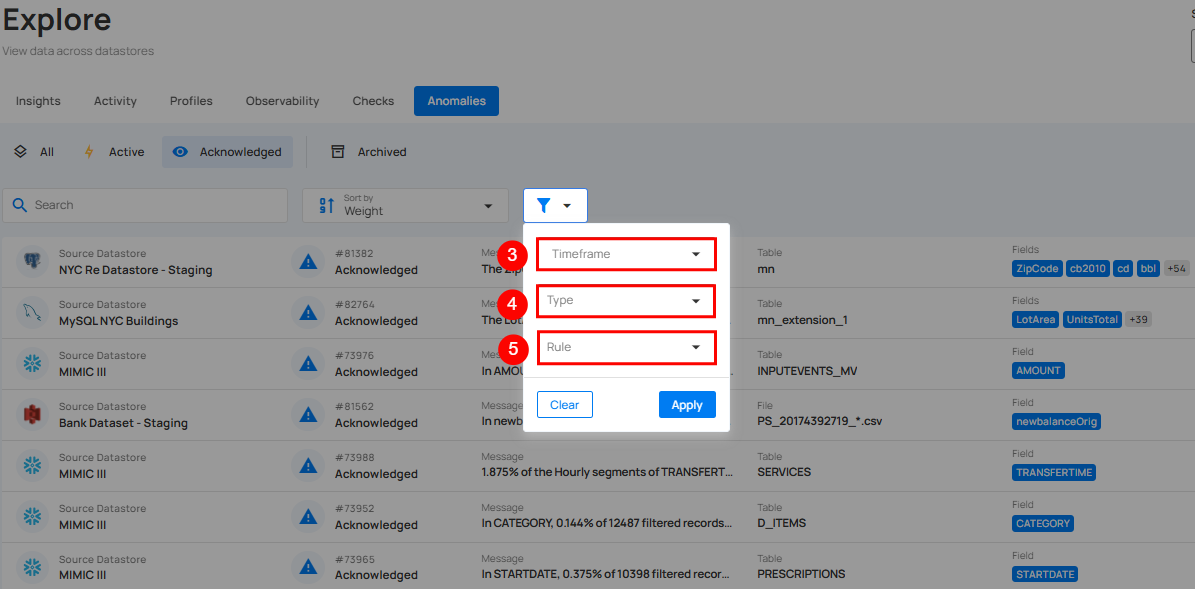
| No. | Filter | Description |
|---|---|---|
| 1 | Selected Source Datastore | Select specific source datastores to focus on their anomalies. |
| 2 | Select Tags | Filter anomalies by specific tags to categorize and prioritize issues effectively. |
| 3 | Timeframe | Filtering anomalies detected within specific time ranges (e.g., anomalies detected in the last week or year). |
| 4 | Type | Filter anomalies based on anomaly type (Record or Shape). |
| 5 | Rule | Filter anomalies based on specific rules applied to the anomaly. By clicking on the caret down button next to the Rule field, the available rule types will be dynamically populated based on the rule types present in the results. The rules displayed are based on the current dataset and provide more granular control over filtering. Each rule type will show a counter next to it, displaying the total number of occurrences for that rule in the dataset. For example, the rule type After Date Time is displayed with a total of 514 occurrences. |